3.2. Starting work with the controller
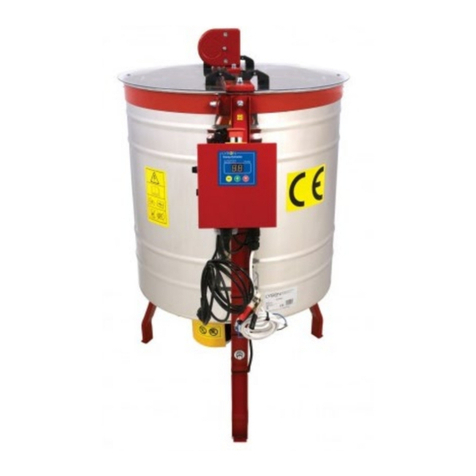
1 – state indicator
If the indicator light is on – the temperature regulator is active.
If the indicator light is off – the temperature regulator is
inactive (the controller works as a thermometer). If the
indicator blinking – the temperature regulator is on and the
pre-heating process is in progress
2 – heating relay status
If the indicator light is on – the relay is engaged (heating on),
if the indicator is not lit – the relay is disengaged (heating off)
3 – display
Operation mode – default mode, automatically selected
when the controller is powered on. The display indicates the
measured temperature. The indications are given in oC.
Setting mode – selected by pressing the + or – button. The
display indicates the set temperature. The value is displayed
in °C. The value displayed flashes and after a while returns to
the measured temperature display mode.
Run time setting mode (Pro.) - activated by pressing the
"ON/OFF" button. The display indicates the operating time,
counting from the moment of switching on, after which the
thermostat will automatically switch off. The indication is given
in hours.
Display brightness setting mode (d.br.) - activated by
holding down the "ON/OFF" button. The display, with all
segments lit, shows the currently set brightness. Reaching
the setting limit is signalled by flashing.
The following modes are available after entering the
appropriate code.
Calibration mode (CAL.) code L-1 – activated by holding
down the "ON/OFF" button. The display shows the calibrated
temperature (temperature measured taking calibration into
account). The indication is given in oC.
Pre-heating time setting mode (P.tI.) code L-2 – activated
by holding down the "ON/OFF" button. The display indicates
the operating time, counting from the moment of switching on,
for which the controller performs the preheating, maintaining
the preheating temperature programmed by the
manufacturer. The message "OFF" indicates that the
preheating function is deactivated. The indication is given in
minutes. If preheating is activated, the controller will display
"HC2" at start-up.
Preheat temperature setting mode (P.tE.) code L-3 –
activated by holding down the "ON/OFF". The display shows
the preheating set temperature value. P... indicated in oC.
Preset temperature limit setting mode (L.t.h.) code L-4 –
activated by holding down the "ON/OFF" button. The display
shows the maximum value of the preset temperature that can
be set. The L... indication is given in oC.
4 – button "-" decrease value
Operating mode – Pressing the button will decrease the set
temperature value. During pre-heating the possibility of
changing the set temperature is blocked.
Run time setting mode – pressing the button will decrease
the time after which the thermostat automatically switches off.
Display brightness setting mode – pressing the button will
decrease the brightness of the display.
Calibration mode – pressing the button will decrease the
value of the indicated temperature, and thus calibrating the
measurement.
Pre-heating time setting mode – pressing the button will
decrease the time after which the thermostat automatically
switches from the preheating phase to the heating phase.
Preheat temperature setting mode – pressing the button
will decrease the value of the desired temperature to be
maintained during preheating.
Preset temperature limit setting mode – pressing the
button will decrease the value of the maximum preset
temperature value that can be set.
5 - "+" increase value
Operating mode – Pressing the button will increase the set
temperature value. During pre-heating the possibility of
changing the set temperature is blocked.
Run time setting mode – pressing the button will increase
the time after which the thermostat will automatically switch
off.
Display brightness setting mode – pressing the button will
increase the brightness of the display.
Calibration mode – pressing the button will increase the
value of the indicated temperature and thus calibrating the
measurement.
Pre-heating time setting mode – pressing the button will
increase the time after which the thermostat automatically
switches from the preheating phase to the heating phase.
Preheat temperature setting mode – pressing the button
will increase the preset temperature to be maintained during
preheating.
Preset temperature limit setting mode – pressing the
button will increase the value of the maximum preset
temperature value that can be set
6 - "ON/OFF" button
Briefly pressing the button alternately turns the regulator on
(ON) and off (OFF). In the OFF state, the regulator acts as a
thermometer. In the ON state, the controller will turn the
heater control output on and off to maintain the temperature
set by the user.
Longer pressing and holding the button will activate the run
time setting mode, indicated by the displayed message (Pro.).
In this mode, using the "+" and "-" buttons, the user can
define the time after which the controller will automatically
switch off, i.e. go into the OFF state. Exiting this mode and
confirming the settings is done by short pressing the
"ON/OFF" button.
Longer pressing and holding the button starts the display
brightness setting mode – indicated by the message (d.br.).
In this mode, using the "+" and "-" buttons, the user can set
the brightness of the display segments. Exiting this mode and
confirming the settings is done by short pressing the
"ON/OFF" button.
Longer pressing and holding the button activates the
calibration mode which is indicated by a displayed message
(CAL.). In this mode, using the "+" and "- " buttons, the user
can adjust the temperature readings to the actual
temperature value. Exiting this mode and confirming the
calibration settings is done by short pressing the "ON/OFF"
button.
Note – the controllers supplied are already calibrated.
Longer pressing and holding the button will activate the mode
of preheating time setting indicated by the displayed message
(P.tI.). In this mode, using the "+" and "- " buttons, the user
can define the time after which the controller will
automatically switch from the preheating phase to the actual
heating phase. Switching off the preheating is indicated with


