7
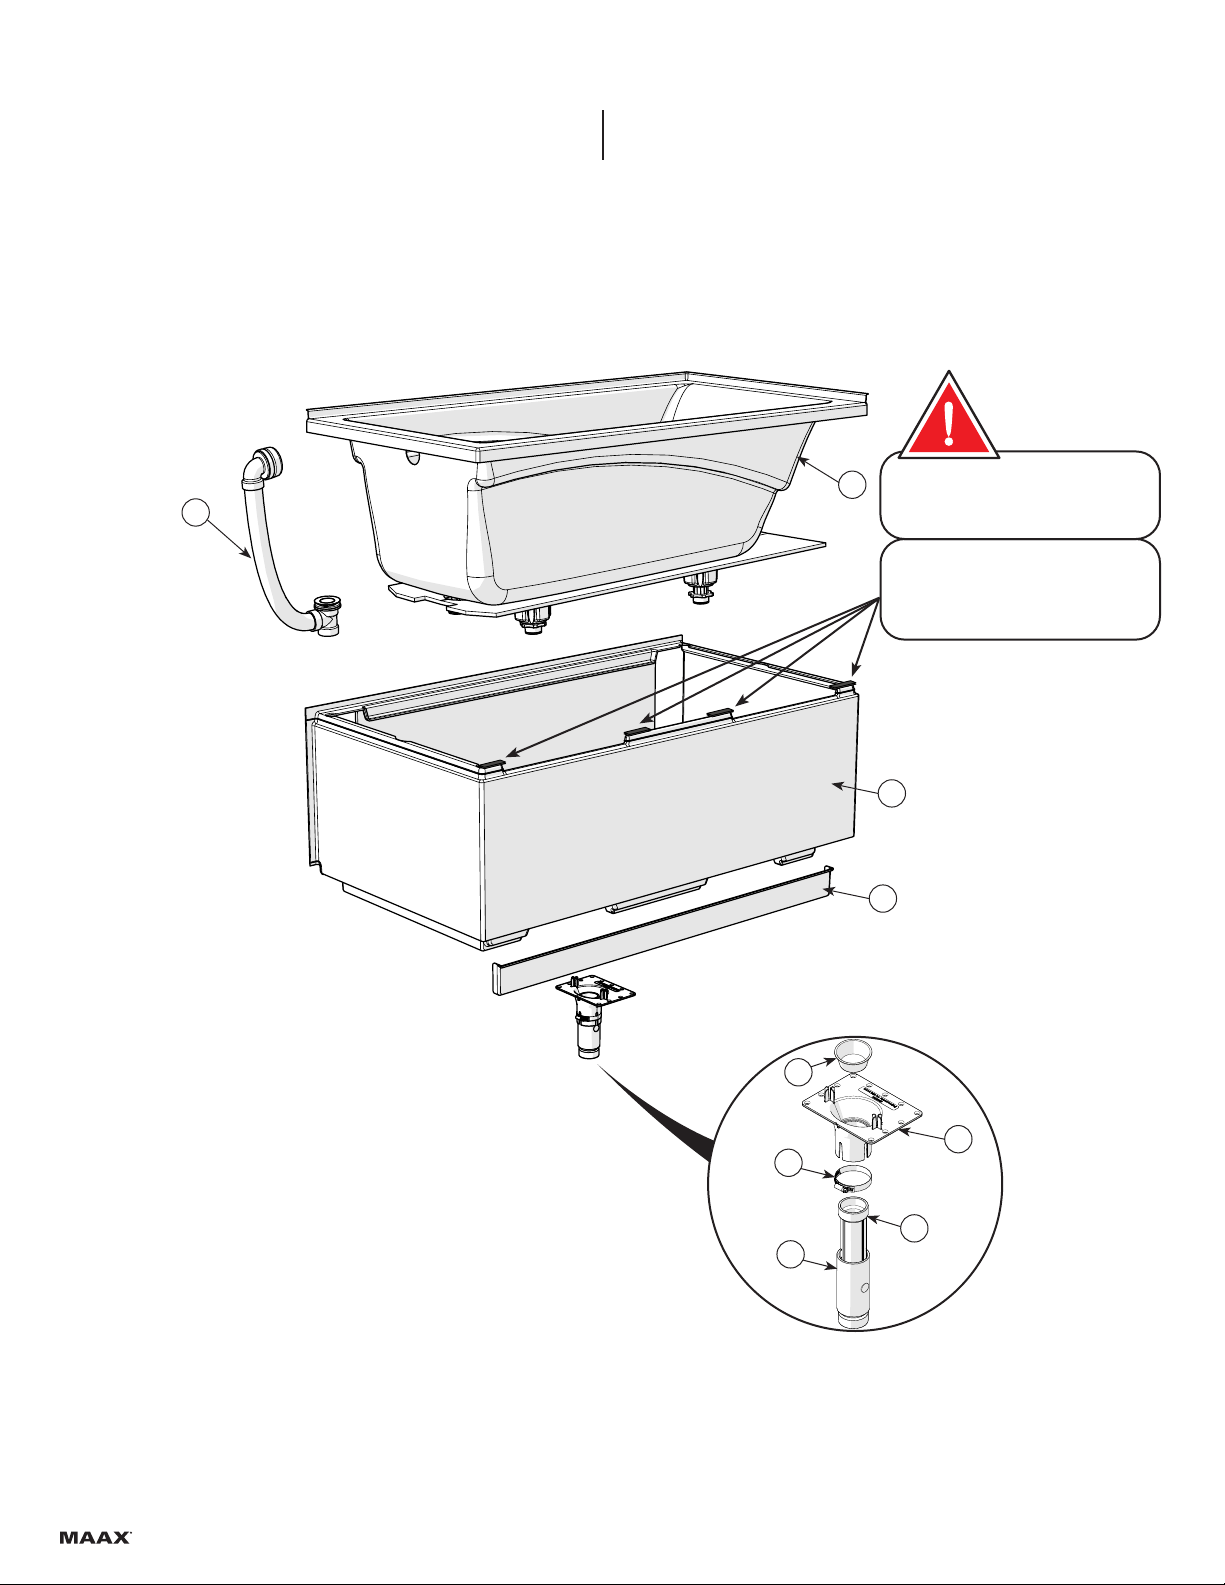
Bathtub
Baignoire No A B C D
Corner right
Coin droite
410007
410010 59 7/8" 31 7/8" 16" 12"
Corner left
Coin gauche
410008
410011 59 7/8" 31 7/8" 16" 12"
Wall-mounted
Murale
410009
410012 59 7/8" 31 7/8" 16" 12"
A
B
CD
C
D
6"
6"
A
B
CD
1
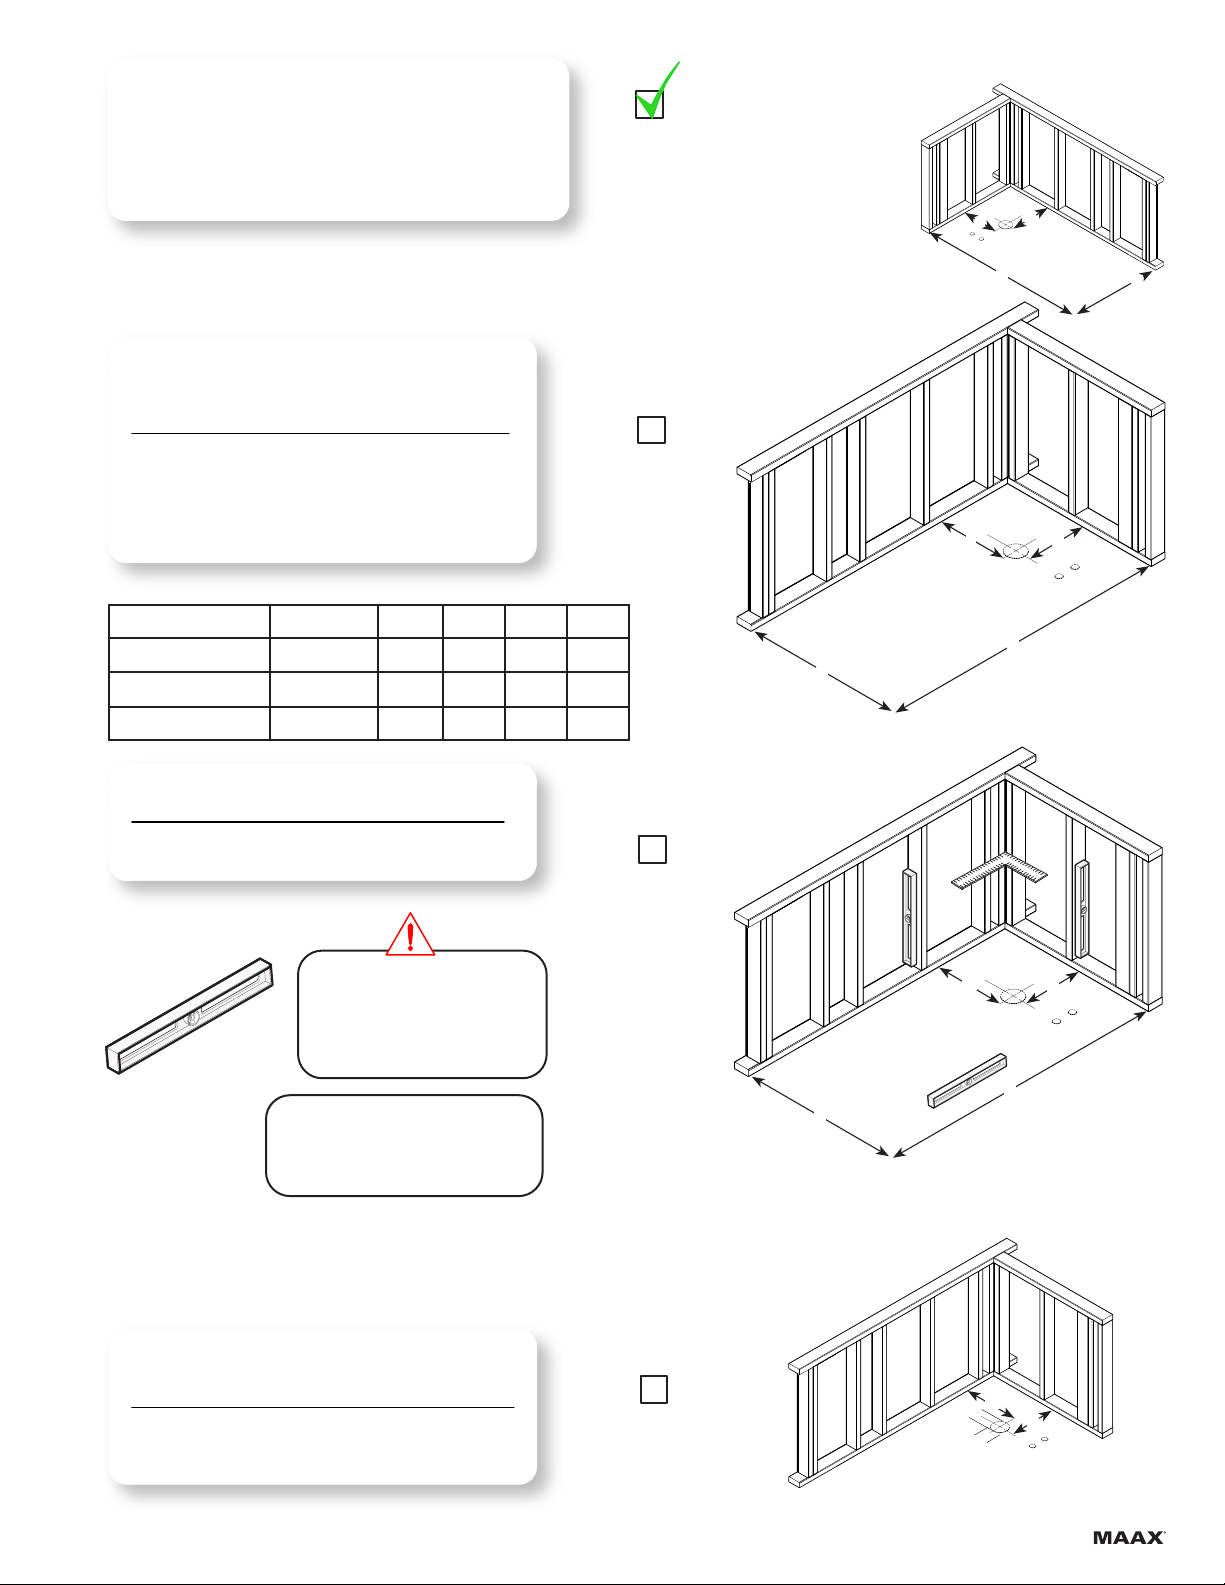
STEP Building the structure; drain position
ÉTAPE Construction de la structure; position
du drain
Follow all instructions and check
them o as you go.
Suivre toutes les instructions et les
cocher lorsqu'elles sont terminées.
1.1
Check me!
Cochez-moi!
Conseil
éclair
Quick tip
1.2
Check me!
Cochez-moi!
1.3
Check me!
Cochez-moi!
Verify that the walls are square and the oor is per-
fectly level.
Vérier que les murs sont perpendiculaires et que le
plancher est parfaitement de niveau.
Build a structure based on the dimensions in the chart
below.
IF THE STRUCTURE IS ALREADY BUILT CHECK
THAT IT RESPECTS THE DIMENSIONS BELOW
Construire la structure en respectant les dimensions
gurant dans le tableau ci-dessous.
SI LA STRUCTURE EST DÉJÀ CONSTRUITE,
VÉRIFIER QUE SES DIMENSIONS RESPECTENT
CELLES DU TABLEAU CI-DESSOUS:
Use self-leveling mortar to level the
oor.
Pour mettre le plancher de niveau,
utiliser du mortier auto-nivelant.
Cut out an opening approximately 6" x 6" around the
drain centre outlined by measurements C - D. See
image to the right and the chart above.
Couper une ouverture d'environ 6 po x 6 po autour du
centre du drain à l'aide des dimensions C-D. Consul-
ter les images de droite et le tableau plus haut.
Leveling the oor is critical for a
properly aligned bathtub.
Il est important de mettre le plan-
cher de niveau pour assurer un
bon alignement du bain.
A
B
C
D