7
g) Use the power tool, accessories and tool bits etc., in
accordance with these instructions and in the
manner intended for the particular type of power
tool, taking into account the working conditions and
the work to be performed. Use of the power tool for
operations different from those intended could result in
a hazardous situation.
5) SERVICE
a) Have your power tool serviced by a qualified repair
person using only identical replacement parts. This
will ensure that the safety of the power tool is
maintained.
SAFETY INSTRUCTIONS FOR TACKERS
• Secure the workpiece (a workpiece clamped with
clamping devices or in a vice is held more securely than
by hand)
• Never push in the tacker head manually
4(there is
danger of injury when at the same time the trigger
is activated unintentionally)
• Never use the tool for fastening electrical wiring
(contact with electrical wires can lead to fire and electric
shock)
• Avoid damage that can be caused by screws, nails and
other elements in your workpiece; remove them before
you start working
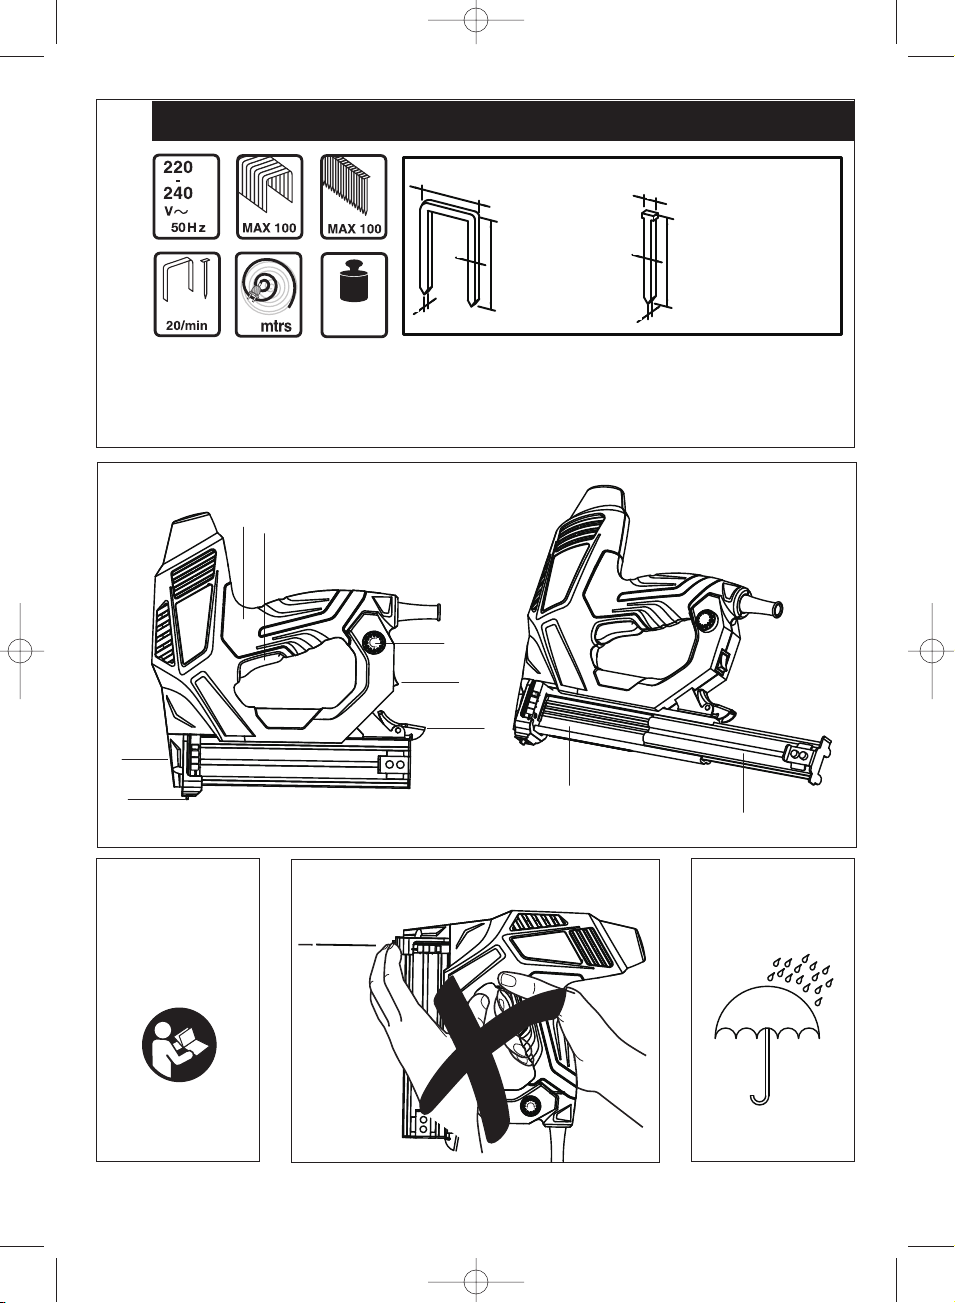
• Always check that the supply voltage is the same as the
voltage indicated on the nameplate of the tacker
(tackers with a rating of 230V or 240V can also be
connected to a 220V supply)
• In case of electrical or mechanical malfunction,
immediately switch off the tool.
• We can assure flawless functioning of the tool only
when original accessories are used
• This tool should not be used by people under the age of
16 years
USE
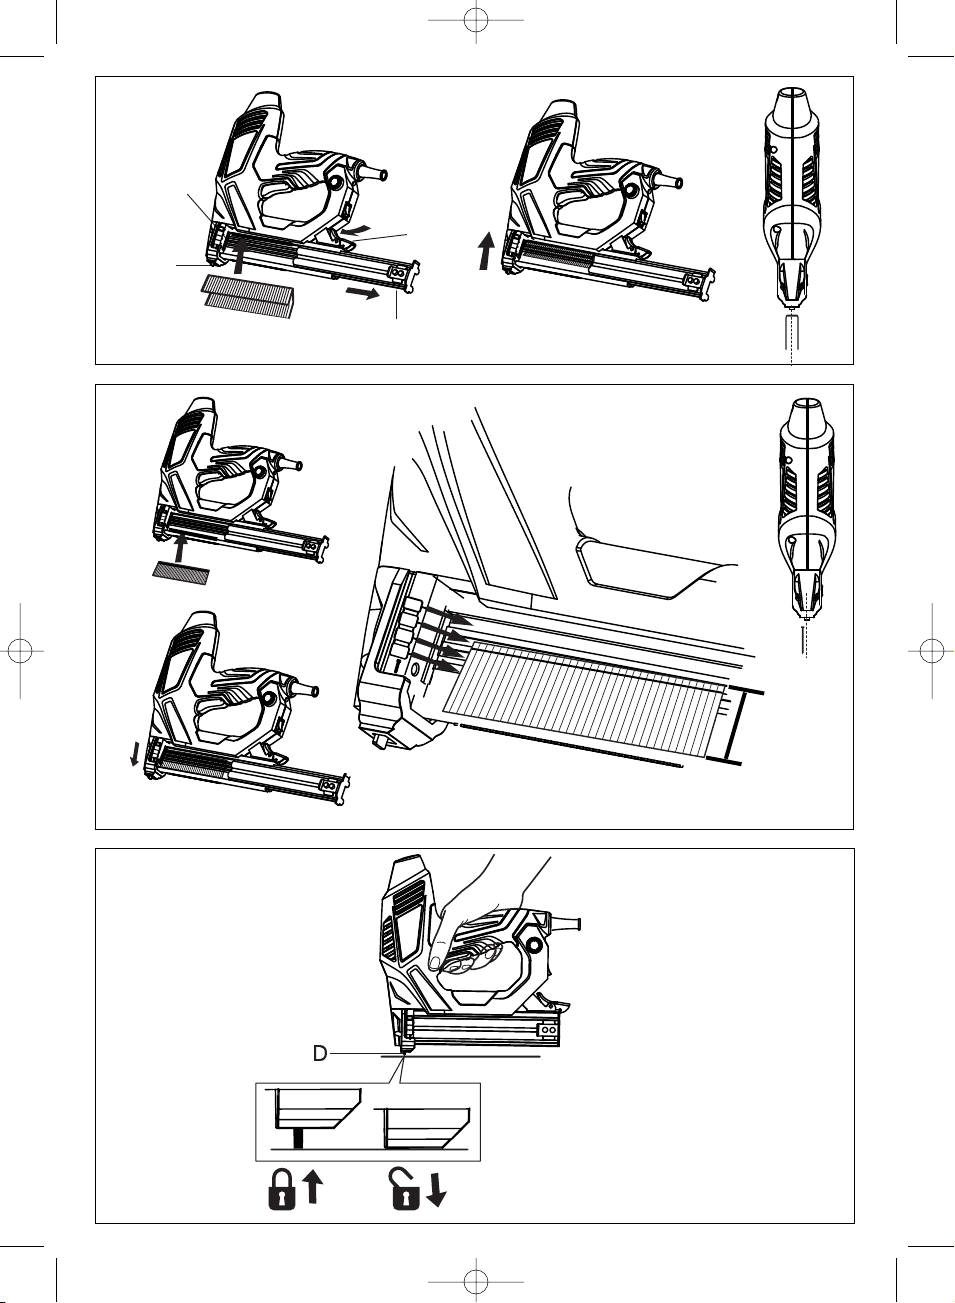
• Loading staples/nails
6
• Operating the tool 8
- firmly press tacker head D against the workpiece until
it is pushed in a few millimeters
- briefly press trigger F and then release again
- Trigger F is locked as long as you do not press tacker
head D against the workpiece,
thus preventing accidental operation
! remove all staples/nails from the magazine after
each use
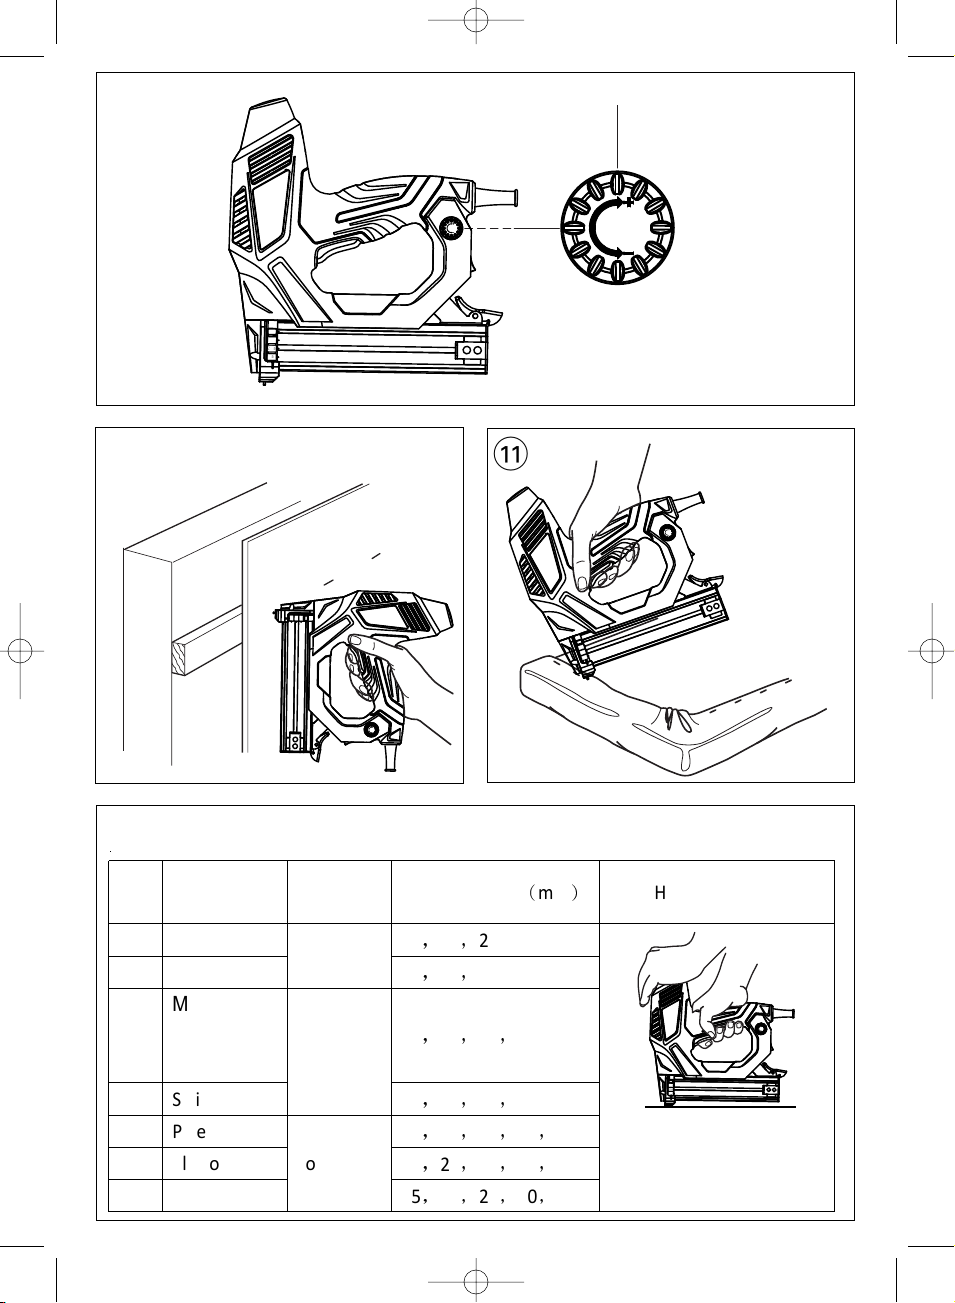
• Impact control
9
With knob G the required impact level can be adjusted
- indicator G shows the selected impact level
- “-” for thin and light materials such as foils and
fabrics
- “+” for thick and tough materials such as hard
woods and walls
- before starting a job, find the optimal impact level by
testing out on spare material
IB2100db.indd 7 06-06-2006 15:03:45
APPLICATION ADVICE
• Fastening panels
0
• Do not use the tool for fastening ceiling panelling on
profiled wood or grooves
• Fixing textiles
!
• Avoid blank shots in order to reduce the wear of the
impact strike
GUARANTEE / ENVIRONMENT
• Keep tool clean
! unplug power cord from power source before
cleaning
• This product is guaranteed in accordance with
statutory/country-specific regulations; damage due to
normal wear and tear, overload or improper handling will
be excluded from the guarantee
• In case of a complaint, send the tool or charger
undismantled together with proof of purchase to your
dealer or the nearest authorized service station
• Do not dispose of electric tools,
accessories and packaging together with household
waste material (only for EU countries)
- in observance of European Directive 2006/95/EC on
waste of electric and electronic equipment and its
implementation in accordance with national law,
electric tools that have reached the end of their life
must be collected separately and returned to an
environmentally compatible recycling facility
- symbol will remind you of this when the need for
disposing occurs
• Do not expose tool to rain. 5
- At 20 shots/min,tacker should be allowed to cool down
after 30 minutes as it is only rated for short-time duty.
• Rougly, the hardness of wood is divided into 3 levels:
NAIL INSTRUCTIONS FOR TACKERS
• Nails of different length are applicable for different wood hardness
• The tool has a recoil when firing, so two hands operation is
- High
- Medium
- Low
suggested, to have a better control of the operation
UNBLOCKING JAMMED FASTENERS
• In the unlikely event that nails become jammed, follow these
instructions to remove them
- Remove the nose tip I
- Remove the plate retaining bolts C1
- Remove the safety mechanism retaining plate C2
- Remove the firing pin retaining plate C3
! Note the location as well as the order in which parts are
removed from the tacker, this will make it easier to rebuild it
1313
14
14
14
! unplug power cord from power source before removing
15
- tilt the tool or lay the tool flat, so the staples or nails will
- press lever A while pulling slider B backwards
- place the nail strip into magazine C (maximal capacity
100 nails)
- push slider B against tacker head D until it snaplocks
7
not drop out while loading
! Attention
Make sure that
- the nail strip is loaded with the tapered end aligning
with the bottom line of the magazine C, so the brad
nail head rest right into the grooves which corresponds
with the symbol of nail length on tacker head D
- the staple strip is loaded with the crown aligning
with the top line of the magazine C 6