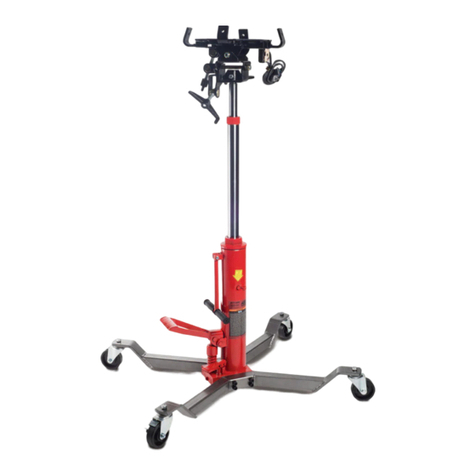
MAC TOOLS JSTT1000 User manual

JSTT1000 6/3/15
Maximum Capacity........................................................ 1000-Lbs.
Minimum Height ................................................................ 35-1/2"
Maximum Height ...................................................................... 74"
Saddle Tilt Fore and Aft................................................ 37° by 26°
Saddle Tilt Side to Side ................................................ +12°, -12°
Base Size................................................................30-1/4" square
Weight ............................................................................. 143-Lbs.
SPECIFICATIONS
OWNER'S MANUAL
JSTT1000
1000-LBS. CAPACIT Y
TRANSMISSION JACK - 2 STAGE
S
A
F
E
T
Y
S
T
A
N
D
A
R
D
C
O
M
P
L
I
E
S
W
I
T
H
ASME PASE-2014
© 2015 Mac Tools

JSTT1000 2 6/3/15
WARNINg INFORMATION
This is the safety alert symbol. It is used to alert you to
potential personal injury hazards. Obey all safety messages
that follow this symbol to avoid possible injury or death.
IMPORTANT: READ THESE INSTRUCTIONS BEFORE OPERATING
BEFORE USING THIS DEVICE, READ THIS MANUAL COMPLETELY AND THOROUGHLY, UNDERSTAND ITS OPERATING PROCEDURES, SAFETY WARNINGS
AND MAINTENANCE REQUIREMENTS. SAVE THESE INSTRUCTIONS.
It is the responsibility of the owner to make sure all personnel read this manual prior to using this jack. It is also the responsibility of the jack owner to keep this
manual intact and in a convenient location for all to see and read. If the manual or product labels are lost or not legible, contact Mac Tools for replacements. If
the operator is not fluent in English, the product and safety instructions shall be read to and discussed with the operator in the operator's native language by
the purchaser/owner or his designee, making sure that the operator comprehends its contents.
This product is intended only for use in the removal, repair, and installation of vehicle transmissions. Do not use or modify this product for any other purpose
than that for which it was designed without consulting the manufacturer's authorized representative. The use of portable automotive lifting devices are subject
to certain hazards that cannot be prevented by mechanical means, but only by the exercise of intelligence, care, and common sense. It is therefore essential
to have owners and personnel involved in the use and operation of the equipment who are careful, competent, trained, and qualified in the safe operation of
the equipment and its proper use. Examples of hazards are dropping, tipping or slipping of loads caused primarily by improperly securing loads, overloading,
off-centered loads, use on other than hard level surfaces, and using equipment for a purpose for which it was not designed.
METHODS TO AVOID HAZARDOUS SITUATIONS
• Read,study,understandandfollowallinstructionsbeforeoperatingthisdevice
• Inspectthejackbeforeeachuse.Donotusejackifdamaged,altered,modied,inpoorcondition,leakinghydraulicuid,orunstableduetolooseormissing
components. Make corrections before using
• Consultthevehiclemanufacturerforthetransmission’scenterofbalance
• Securethetransmissiontothejack’ssaddlewiththeanchoragerestraintsystemprovidedbeforeraisingorloweringthetransmission
• Centerloadonsaddle.Besuresetupisstablebeforeworkingonvehicle
• Supporttheenginewithastandbeforeunboltingthetransmissionfromtheengine
• WeareyeprotectionthatmeetsANSIZ87.1andOSHAstandards(usersandbystanders)
• Donotusejackbeyonditsratedcapacity.Donotshockload
• Useonlyonahardlevelsurface
• Adequatelysupportthevehiclebeforestartingrepairs
• Useofthisproductislimitedtotheremoval,installationandtransportationintheloweredposition,oftransmissions,transfercasesandtransaxles
• DonotuseanyadaptersunlessapprovedorsuppliedbyMacTools
• Alwayslowerthejackslowlyandcarefully
• Donotuseormodifytheproductforanyotherpurposethanthatforwhichitwasdesignedwithoutconsultingthemanufacturer’sauthorizedrepresentative
• ThisproductmaycontainoneormorechemicalsknowntotheStateofCaliforniatocausecancerandbirthdefectsorotherreproductiveharm.Wash hands
thoroughly after handling
• Failuretoheedthesewarningsmayresultinseriousorfatalpersonalinjuryand/orpropertydamage
CONSEQUENCES OF NOT AVOIDING HAZARDOUS SITUATIONS
Failuretoreadthismanualcompletelyandthoroughly,failuretounderstanditsOPERATINGINSTRUCTIONS,SAFETYWARNINGS,MAINTENANCEINSTRUCTIONS
andcomplywiththem,andfailuretocomplywiththeMETHODSTOAVOIDHAZARDOUSSITUATIONScouldcauseaccidentsresultinginseriousorfatalpersonal
injury and/or property damage.
WARNING: Indicates a hazardous situation
which, if not avoided, could result in death
or serious injury.
WARNING
WARNING
WARNING
WARNING
THIS INSTRUCTION MANUAL USES THE FOLLOWING SYMBOLS AND DEFINITIONS TO ALERT YOU TO HAZARDOUS CONDITIONS WHICH MAY CREATE A RISK
OF PERSONAL INJURY AND/OR PROPERTY DAMAGE.
JSTT1000 3 6/3/15
SETUP INSTRUCTIONS
OPERATINg INSTRUCTIONS
JSTT1000
1000-LBS. CAPACITY
TRANSMISSION JACK - 2 STAGE
1. Placethehydraulicpowerunitinanuprightposition.Securethelegs(#2-5)tothecylinder(#1-1)withthebolts(#2-3)andwashers(#2-4).Donottighten.
2. Secureswivelcasters(#2-1and#2-2)tolegcasterbracketsasshownintheexplodedviewdrawingonpage5.
3. Tightenthehardwarethatsecuresthelegs(#2-5)tothecylinder(#1-1).
4. Placethesaddleassembly(RS1000SA)onthestudprotrudingfromthetopofthehydraulicunitassembly.Aligntheholeinthesaddlewiththeholein
thestud,andsecurewiththebolt(#3-26)andnut(#3-27).
5. Thehydraulicpowerunitisequippedwithtworeservoirllscrews(#1-37and#1-38).Theclosedllerscrewisinstalledinthereservoiratthefactory
so the jack will not leak during shipment.
IMPORTANT: REPLACE THE RESERVOIR FILLER SCREW WITH THE VENTED RESERVOIR SCREW BEFORE USING THE JACK.
6. Sometimes air gets trapped in the hydraulic system during shipping and/or handling. Evidence of an air bound system is when pumping the foot pedal feels
spongy and/or the jack will not pump full incremental strokes.
PURGING AIR FROM THE HYDRAULIC SYSTEM:
a. Depress the release foot pedal while simultaneously pumping the jack about
15 incremental pump strokes.
b. Removeyourfootfromthereleasepedalandpumpthejacktomaximumextension.
c. If the secondary ram seems to be spongy or does not pump up normally, insert an
Allen wrench in the small Allen socket set screw in the side of the secondary cylinder
nut.(SeeFigure1)Slightlyturnthesetscrewinacounterclockwisedirectionwhile
lightly depressing the pump pedal. This procedure is similar to bleeding air out of
anautomotivebrakeline.Repeattheprocedureuntiltherearenobubblesintheoil
that escapes from behind the Allen socket set screw.
d. Close the Allen socket set screw by turning it in a clockwise direction until tight.
Repeatsteps"a"and"b".
e. If the condition seems better, repeat steps "a" through "d" until air is purged from the system.
1. Lift the vehicle to the desired work height and support the vehicle in accordance with the lift manufacturer's recommended support procedure and all the
instructions and warnings in this manual.
2. Useanunderhoiststandratedgreaterthantheweightoftheenginetosupporttheenginebeforeunboltingthetransmissionfromtheengineorboltingthe
transmission to the engine.
3. Position the transmission jack directly under the transmission. Depress the large foot pedal up and down in order to raise the saddle to a height very close
to the center of balance point of the transmission oil pan but do not touch the transmission.
4. Adjust the ratchet arms on the saddle so that the bent up section of the arms will fit in the mounting flange around the perimeter of the transmission oil
pan. Slowly and gently pump the jack so the connection is made and then secure the transmission to the jack's saddle with the tie down strap provided.
Sometimes it is necessary to turn the fore and aft and side to side tilt knobs so the saddle is in the proper alignment with the transmission pan before
securing the load to the saddle.
5. Make sure the tie down strap is very tight when securing the transmission to the saddle and before raising or lowering the transmission.
6. Removethetransmissionfromtheengineaccordingtoinstructionsinthevehicleservicemanual.
7. Once the transmission has been disconnected from the engine, very slowly depress the release pedal to make sure the jack's saddle and transmission do
not hang up on any undercar components, wiring, fuel lines, etc. Continue to lower the jack all the way down.
8. Wheninstallingatransmission,followtheaboveinstructionsbutintheapplicableorderandaccordingtothevehiclemanufacturer'sinstallationprocedure.
Location of Allen
socket set screw
in secondary
cylinder nut
Figure 1
Failure to follow these Setup Instructions may result in serious injury or death, and/or property damage.
Failure to follow these Operating Instructions may result in serious injury or death, and/or property damage.
WARNING
WARNING

JSTT1000 4 6/3/15
PREVENTATIVE MAINTENANCE
TROUBLESHOOTINg
1. Always store the jack in a well protected area where it will not be exposed to inclement weather, corrosive vapors, abrasive dust, or any other harmful
elements. The jack must be cleaned of water, snow, sand, grit, oil, grease or other foreign matter before using.
2. Lubricate moving parts, excluding the telescopic rams, monthly with a general purpose grease.
IMPORTANT: Any jack found to be defective as a result of worn parts due to insufficient or lack of lubrication is not eligible for warranty consideration.
3. It should not be necessary to refill or top off the reservoir with hydraulic fluid unless there is an external leak. An external leak requires immediate repair
which must be performed in a dirt-free environment by qualified hydraulic repair personnel who are familiar with this equipment.
In order to prevent seal damage and jack failure, never use alcohol, hydraulic brake fluid or transmission oil in the jack.
Use Chevron Hydraulic Oil ISO 32 or its equivalent Unocal Unax AW150, or hydraulic jack oil.
4. Everyjackownerisresponsibleforkeepingthejacklabelscleanandreadable.Useamildsoapsolutiontowashexternalsurfacesofthejackbutnot
any moving hydraulic components.
5. Donotattempttomakeanyhydraulicrepairsunlessyouareaqualiedhydraulicrepairpersonthatisfamiliarwiththisequipment.Repairsmustbe
performed by an authorized service center.
JSTT1000
1000-LBS. CAPACITY
TRANSMISSION JACK - 2 STAGE
PROBLEM ACTION
1.Unitwillnotliftratedload. PurgeairfromhydraulicsystembyfollowingprocedureunderSETUP.
2.Unitwillnotsustainratedloadorfeels“spongy”underratedload. Purge air from hydraulic system as above.
3.Unitwillnotlifttofullheight. Purge air from hydraulic system as above.
4. Handle tends to raise up while the unit is under rated load. Pump the handle rapidly several times to push oil past ball valves in power unit.
5.Unitstilldoesnotoperate. Contact your Mac Tools Distributor.
Failure to follow these Preventative Maintenance instructions may result in serious injury or death, and/or property damage.
WARNING
WARNING

JSTT1000 5 6/3/15
PARTS DIAgRAM
JSTT1000
1000-LBS. CAPACITY
TRANSMISSION JACK - 2 STAGE
1-55
1-52
1-51
1-50
1-56
1-57
1-58
3-30
3-18
3-17
3-15 3-18
3-22
3-11
3-13
B
A
3-12
3-10
3-15
3-16 3-17
3-4
3-14
3-14
3-20
3-16
3-26
3-9
3-21
3-19
3-8
3-3
3-1
3-2
3-23
3-24
3-25
3-7
3-6
3-5
3-5A
3-5B
3-5C
3-21
3-2
3-27
3-31
3-29
3-28
1-59
1-60
1-61A
1-62
1-63
1-49
1-48
1-47
1-46
1-45
1-44
1-41
1-40
1-38
1-37
1-39
1-36
1-1
1-64
1-65
1-66
1-67
1-68
1-69
1-68
1-69
1-7
1-6
1-5
1-4
1-3 1-11
1-13
1-14
1-15
1-16
1-17
1-18
1-19A
1-20
1-21
1-22
1-25 1-24
1-23
1-26
1-27
1-28
1-29
1-30
1-31
1-32
1-35
1-34
1-33
1-10
1-9
1-8
1-2
1-12
1-71
1-70
1-43
1-42
2-6
2-5
2-4
2-1
2-3
2-2
2-1
2-2
1-54A
1-53A
RS1000HUA
Complete Replacement
Hydraulic Unit Assembly RS1000SA
Complete Saddle
Assembly

JSTT1000 6 6/3/15
PARTS LIST
JSTT1000
1000-LBS. CAPACITY
TRANSMISSION JACK - 2 STAGE
1-1 Oil Cylinder Assembly 1
1-2 * Steel Ball 2
1-3 Ball Seat 1
1-4 Spring 1
1-5 Screw 1
1-6 * Washer 1
1-7 Bolt 1
1-8 * SteelBall 3
1-9 Spring 1
1-10 * Copper Washer 2
1-11 Bolt 2
1-12 Spring 1
1-13 Rod 1
1-14 Ball Seat 1
1-15 * Copper Washer 1
1-16 Nut 2
1-17 Spring 1
1-18 OilReleaseValve 1
1-19A * O-Ring 1
1-20 * Washer 1
1-21 SnapRing 1
1-22 RS7140C122 ReleaseValve 1
1-23 ReleaseValvePedal 1
1-24 Pin 2
1-25 Pin 2
1-26 Spring 1
1-27 * Y-Seal 1
1-28 * O-Ring 1
1-29 RS7140C129 PumpPlunger(incl.#1-29,#1-31) 1
1-30 Spring Cover 1
1-31 SnapRing 1
1-32 Bushing 1
1-33 Pin 1
1-34 Foot Pedal 1
1-35 SnapRing 2
1-36 Pin 1
1-37 ReservoirFillScrew(forshippingonly) 1
1-38 RS7140C138 VentedReservoirScrew 1
1-39 SealingGasket 1
3-1 Bracket 1
3-2 RS7140C32BK Bracket C 2
3-3 RS7140C33BK Bracket B 1
3-4 RS7140C34BK Bracket A 1
3-5 Retainer Plate Assembly 4
3-5A Retainer Plate 4
3-5B RS7140CSABK Spring Assembly 4
(incl. 3-5A, 3-5B, 3-5C, 3-6, 3-7)
3-5C Rivet 4
3-6 Pin 4
3-7 Retainer Plate A 3
3-8 Adjusting Bracket 1
3-9 Adjusting Bracket A 1
3-10 RS7140C310ABK Screw B (incl. 3-10, 3-12, 3-18) 1
3-11 RS7140C311ABK Screw A (incl. 3-11, 3-13, 3-18) 1
3-12 Handle B 1
3-13 Handle A 1
3-14 *** Shaft 2
1-40 Nut 1
1-41 Bolt 1
1-42 Handle Sleeve 2
1-43 Draw Bar 1
1-44 * NylonGasket 1
1-45 * O-Ring 1
1-46 * O-Ring 1
1-47 Bushing 1
1-48 SnapRing 2
1-49 Bushing 1
1-50 Inner Cylinder 1
1-51 Bushing 1
1-52 Bushing 1
1-53A * Dust Seal 1
1-54A RS100054 ScrewCap 1
1-55 * Dust Seal 1
1-56 Bushing 1
1-57 PistonRod 1
1-58 * O-Ring 1
1-59 Bushing 1
1-60 Screw Cap 1
1-61A * Dust Seal 1
1-62 * Dust Seal 1
1-63 Air Bleed Screw 1
1-64 SnapRing 1
1-65 Heel Block 1
1-66 Valve Plug 1
1-67 Spring 1
1-68 O-Ring 2
1-69 SnapRing 2
1-70 Flow Valve 1
1-71 Screw 1
2-1 RS7140C21 SwivelCaster(Non-Locking,incl.#2-6) 2
2-2 RS7140C22 SwivelCaster(Locking,incl.#2-6) 2
2-3 ** Bolt 8
2-4 ** Lock Washer 12
2-5 Leg 2
2-6 ** NutandWasher 4
RSJSTT1000PLK LabelKit(notshown) 1
Index No. Part No. Description Qty.
Index No. Part No. Description Qty. Index No. Part No. Description Qty.
Index No. Part No. Description Qty.
PARTS LIST FOR SADDLE ASSEMBLY
3-15 *** Shaft 2
3-16 *** Bushing 4
3-17 *** Pin 4
3-18 Pin 2
3-19 Bolt 1
3-20 Bolt 1
3-21 Lock Nut 2
3-22 RS7140C322 Strap 1
3-23 Bolt 1
3-24 Lock Washer 1
3-25 Washer 1
3-26 ** Bolt 1
3-27 ** Lock Nut 1
3-28 Grip 1
3-29 Washer 2
3-30 Bolt 2
3-31 RS1000331 Snap Ring 4
Only index numbers identified by Part Number are available separately.
* Only available in Seal Kit, RS1000SK, ** Only available in Bolt Kit, RS7140CBK, *** Only available in Saddle Bearing Kit, RS7140SBK. (2 each of #3-14, #3-15, 4 each of #3-16, #3-17)

JSTT1000 7 6/3/15
MAC TOOLS WARRANTS TO ITS CUSTOMERS THAT THE COMPANY’S MAC TOOLS BRANDED PRODUCTS ARE FREE FROM DEFECTS IN WORKMANSHIP
AND MATERIALS.
Mac Tools will repair or replace its Mac Tools branded products which fail to give satisfactory service due to defective workmanship or materials, based upon
thetermsandconditionsofthefollowingdescribedwarrantyplansattributedtothatspecicproduct.ThisproductcarriesaONE-YEARwarranty.Duringthis
warranty period, Mac Tools will repair or replace at our option any part or unit which proves to be defective in material or workmanship.
Other important warranty information:
This warranty does not cover damage to equipment or tools arising from alteration, abuse, misuse, damage and does not cover any repairs or replacement
made by anyone other than Mac Tools. The foregoing obligation is Mac Tools sole liability under this or any implied warranty and under no circumstances shall
we be liable for any incidental or consequential damages.
Note: Some states do not allow the exclusion or limitation of incidental or consequential damages, so the above limitation or exclusion may not apply to you.
If you have any questions about warranty service, please contact Mac Tools. This warranty gives you specific legal rights and you may also have other rights
which vary from state to state.
LIMITED WARRANTY
JSTT1000
1000-LBS. CAPACITY
TRANSMISSION JACK - 2 STAGE
Table of contents
Other MAC TOOLS Jack manuals

MAC TOOLS
MAC TOOLS JSA350LR User manual

MAC TOOLS
MAC TOOLS JSA350LR-LE User manual

MAC TOOLS
MAC TOOLS JSA300AJ User manual

MAC TOOLS
MAC TOOLS JSTLP1100 User manual

MAC TOOLS
MAC TOOLS JS22T User manual

MAC TOOLS
MAC TOOLS JSA350LR-LG User manual

MAC TOOLS
MAC TOOLS JB12 Instructions for use

MAC TOOLS
MAC TOOLS JT1000 Instructions for use
Popular Jack manuals by other brands

MARTINS Industries
MARTINS Industries MFJ-30T manual

Westward
Westward 5ML74A manual

AirApp
AirApp A Series Operating Instructions / Safety Instructions

Beta
Beta 3029L/2T Instructions for use

AW Tools
AW Tools AUTOMOTIVE Series Operating and safety instructions

K Tool International
K Tool International KTI-63095 owner's manual