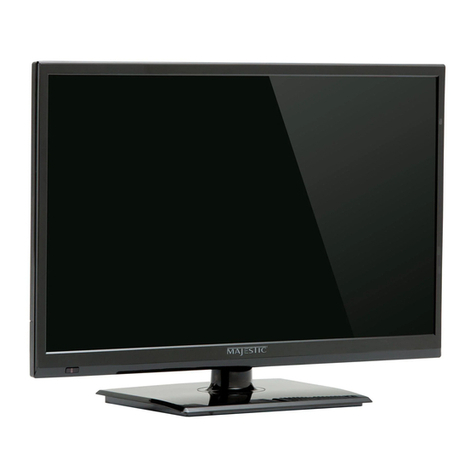
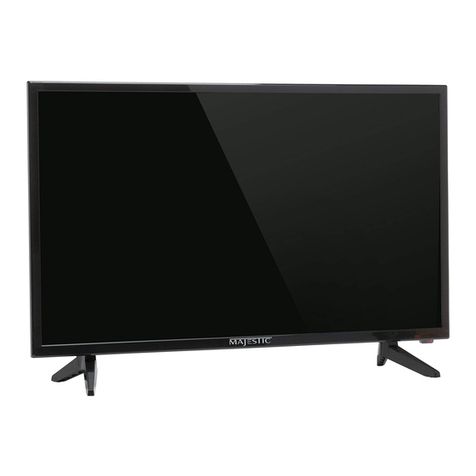
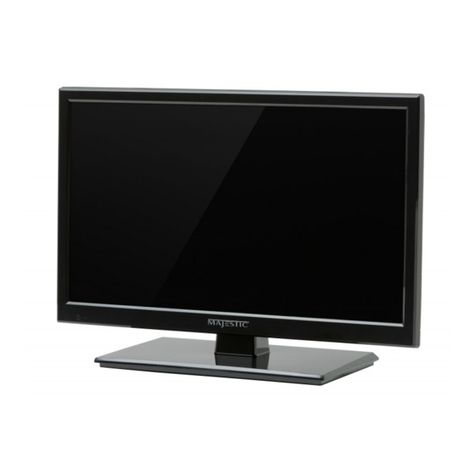
Majestic TVD 224/S2 LED User manual

1
Please read this manual carefully before using,
and keep it for future reference.
SAFETY INSTRUCTIONS
For safe use and maximum performance, please read this manual carefully before use.
CAUTION: TO REDUCE THE RISK OF ELECTRIC SHOCK, DO NOT DISASSEMBLE THE
APPLIANCE. THERE ARE NO USER SERVICEABLE PARTS. FOR REPAIRS CONTACT
QUALIFIED TECHNICAL STAFF.
To avoid the danger of electric shock or fire, do not expose to rain or moisture.
DANGEROUS VOLTAGE!
The symbol to the side warns the user of the presence of voltage that could not
isolated and may cause electric shock .
This symbol warns the user that before using the unit, it is necessary
to carefully read the instruction booklet.
IMPORTANT NOTES
The use must be allowed only to adults and responsible persons, adequately educated
on the damages deriving from incorrect use.
This appliance can be used by children aged 8 and over if they are under supervision or
if they have received instructions regarding the safe use of the appliance and if they
understand the dangers.
involved. Cleaning and maintenance operations by the user must not be carried out by
children unless they are over 8 years of age and operate under supervision. Keep the
appliance and its cord out of the reach of children under the age of 8.
The devices can be used by people with reduced physical, sensory or mental abilities or
with a lack of experience and knowledge if they are supervised or if they have received
SAFETY WARNING

2
instructions regarding the safe use of the appliance and understand the dangers
involved.
Children must not use the appliance as a game.
Do not allow the appliance to be used by children or the disabled without supervision
Keep away from pets
Never use the appliance in places where the cord, plug and the product itself may come
into contact with water or wet surfaces. Do not use the appliance outdoors, as rain could
create short circuits. Do not touch the appliance with wet hands.
Avoid installing the unit in the locations listed below:
-Places exposed to direct sunlight or close to equipment that generate heat, such as
radiators;
-Above other stereo equipment that may radiate excessive heat;
-Places that block ventilation or are humid or dusty;
-Environments subject to constant vibration;
Do not place accessories with naked flames, such as lighted candles, on the appliance.
Do not try to repair or intervene on the appliance yourself. Incorrect interventions or
tampering can void the guarantee. In the event of any damaged parts or suspected
malfunction, discontinue use immediately and consult qualified personnel. Never
immerse the appliance in water or other liquids. Do not place items containing liquids
(such as vases) on top of the appliance.
Do not touch the appliance with wet hands and do not place it near sinks, tubs or
containers of liquids.
Use the product only if it is in perfect condition. If the appliance has been immersed in
water or is damaged, contact qualified personnel.
The product should not be used if it has been dropped or if there are any visible signs of
damage.
Exposure to high volume levels can cause hearing problems, including permanent
damage. The predisposition to hearing loss varies from person to person, however
constant exposure to high volume levels is harmful to anyone. Moderate the volume
level.
3
CAUTION- TO REDUCE THE RISK OR PERSONAL INJURY OR
PRODUCT/PROPERTY DAMAGE:
●This product is intended solely for non-commercial, non-industrial, personal use as
a television. Do not use this product for any other purpose.
●Do not subject the product to violent shocks, extreme temperatures, or lengthy
periods under direct sunlight.
●Keep the product away from magnetic objects, motors, and transformers.
●Do not use outdoors in inclement weather.
●Do not use the TV while driving; this is dangerous and is illegal in some areas.
BATTERY HANDLING AND USAGE:
●Keep batteries away from children and pets. Only adults should handle batteries.
●Never throw batteries into a fire or expose them to fire or other heat sources.
●Follow the battery satiety and usage instructions provided by the manufacturer.
User Manual…………………………………………………………………………………………1
Remote Control……………..………………………………………………………………………1
All the pictures in this manual are just for your reference, appearance and display should
subject to the final product.
ACCESSORIES

4
TABLE OF CONTENTS
GETTING STARTED
IMPORTANT INSTRUCTIONS...................................................................................1-2
ACCESSORIES……….......................................................................................................3
FEATURES....................................................................................................................4
GENERAL PARTS..............................................................................................................6-7
REMOTE CONTROL.....................................................................................................8
REMOTE CONTROL PREPARATION.................................................................................9
BASIC CONNECTION....................................................................................................10-14
OPERATIONS
BASIC OPERATIONS.............................................................................................15-19
MAIN MENU...........................................................................................................20-31
FIRST TIME INSTALLATION……..………………….………………………………..………20
DTV MODE.................................................................................................................21-29
ATV AND OTHER MODES..............................................................................................29
SATELLITE MODE……………………………………………………………………………..30
PC MODE……...............................................................................................................31
FOR REFERENCE
MAINTENANCE..................................................................................................................32
WALL MOUNTING…………………………………………………………………………..........32
STAND INSTALLATION…………………………………………………………………………..33
SPECIFICATIONS..........................................................................................................34-35
TROUBLESHOOTING........................................................................................................36

5
23.6" LED HD READY Display
With Hotel Lock
Support Auto TV Scanning
Analogue tuner and DVB-T
DVB-S tuner
Support EPG (Electric Program Guide) Function
Support TELETEXT (Europe) Function
Support USB Multimedia Playback
Support Multi-languages On Screen Display
Support Full Function Remote Control
Support HDMI, SCART, YPBPR, VGA, PC AUDIO, AV Input
CI+ (high definition contents playback supported)
Support EARPHONE and COAXIAL Output
With Detachable Stand Holder
With External Antenna Jack (DVB-T/DVB-S)
With Built-in Speakers
FEATURES

6
MAIN UNIT
1. LED display screen
2. Remote control sensor. In standby mode the indicator light will display red
color; when switching on the unit the indicator light will display blue color.
3. Stand holder
4. SOURCE button- To select the input source.
5. MENU button- To enter menu setting page.
6. CH +/- button- To select next/previous channel or move up/down.
7. VOL+/- button- To increase/decrease the volume level or move left/right.
8. STANDBY button- To turn ON/OFF the TV.
GENERAL PARTS
Front View
Back View

7
1. Power input
2. EARPHONE output terminal
3. VGA input terminal
4. PC AUDIO input terminal
5. SCART input terminal
6. RF input terminal- To connect the external Satellite TV Antenna (DVB-S2).
7. RF input terminal- To connect the external TV antenna (DTV \ ATV).
8. USB input terminal
9. CI input terminal (CI+ compatible)
10. Mini YPbPr input terminal (Component)
11. Mini AV input terminal
12. HDMI input terminal
13. COAXIAL output terminal
GENERAL PARTS
Back View

8
REMOTE CONTROL
STANDBY: Turn the TV ON/OFF.
TV/RAD: Switch to TV or Radio channel.
FAV: Display the favorite channels list.
TEXT: Display the available Teletext.
HOLD: Hold the Teletext.
EPG: Display electronic program guide.
SUBTITLE: Select available subtitles.
SIZE: Switch Teletext size.
ASPECT: Press it repeatedly to select desired screen size.
SUBPAGE: Enter Teletext sub-page.
MEDIA: Enter Media (USB) mode directly.
: Start/pause playing.
: Move fast backward.
: Move fast forward.
●:Function not available
: Stop playing.
: Play the previous file.
: Play the next file.
MENU: Call out the main menu or return to previous menu.
AUDIO: Select available soundtrack or language.
OK: Confirm selection.
▲/▼/◄/►: Navigation buttons.
SLEEP: Set desired sleep time.
EXIT: Exit the menu page.
VOL+/-: Increase/decrease the volume level.
CH+/-: Play the next/previous program.
MUTE: Mute the sound.
DISPLAY: Display the available program information.
0-9: Number selection key.
-/--: Switch the digit when watching TV programs.
: Return to previous channel.
SOURCE: Select desired input source.
P-MODE: Switch the picture mode.
S-MODE: Switch the sound mode.
Note: The marks and positions of remote control may vary depending on the model.

9
REMOTE CONTROL PREPARATION
BATTERY INSTALLATION
Install the batteries as the following pictures. Be sure + and –terminals are positioned
as indicated in the battery compartment (Fig1).
SERVICE LIFE OF BATTERIES
- The batteries normally last for one year although this depends on how often the
remote control is used.
- If the remote control fails to work even when it is operated near the player, replace the
batteries.
- Use two size AAA dry batteries.
NOTE:
●Do not drop, step on or otherwise impact the remote control. This may damage the
parts or lead to malfunction.
●If the remote control is not going to be used for a long time, remove the batteries.
REMOTE CONTROL
OPERATION
Point the remote control from no more
than about 6m from the remote control
sensor and within about 60°of the
front of the player (Fig2).
NOTES:
- The operating distance may vary
according to the brightness of the
room.
- Do not point bright light at remote
control sensor.
- Do not place objects between the
remote control and the remote control
sensor.
- Do not use this remote control while
simultaneously operating the remote
control of any other equipments.
Fig1 Fig2
Remote Control
Sensor
Push
Open
Press

10
●Ensure all the cables are disconnected from the main unit before connecting to AC
power source.
●Read through the instructions before connecting other equipments.
CONNECTING TO AC POWER SOURCE
CONNECT EXTERNAL ANTENNA TO UNIT
Install external antenna into antenna jack for best picture.
BASIC CONNECTION
Antenna
Outdoor
antenna
amplifier
Indoor
antenna
amplifier
Power plug
of antenna
amplifier
75 OHM
antenna
plug
To power outlet
To power outlet

11
HDMI CONNECTION
PC/VGA CONNECTION
HDMI cable
(Not included)
Use HDMI cable to connect the unit with
other devices to receive high-definition
multimedia signal.
Back of DVD/VCR
Back of PC
Use VGA cable andAudio cable to
connect the unit with TV or PC, and
use this product as a monitor.
VGA cable
(Not included)
Audio cable
(Not included)

12
SCART CONNECTION
AV (COMPOSITE VIDEO) CONNECTION
Back of DVD/VCR
Back of DVD/VCR
For basic connection, use the compositeAudio
L/R (white/red) and CVBS (yellow) cable to
connect the unit with other devices.
SCART cable
(Not included)
AV cable
(Not included)

13
YPBPR CONNECTION
COAXIAL CONNECTION
Back of DVD/VCR
AUDIO cable
(Not included)
YPbPr cable
(Not included)
Use coaxial cable (not included) to connect the unit with amplifier
or other audio decoding devices for coaxial audio signal output.

14
USB CONNECTION
INSERT A CI CARD (CI+ or standard)
EARPHONE CONNECTION
Insert your CI card (Conditional
Access Module) to watch special
digital channels in your area.
(Not included)
Earphone cable
(Not included)
USB Memory Device
(Not included)

15
MAKE SURE ALL THE EQUIPMENTS AND POWER CORD ARE
CONNECTED PROPERLY AND THE UNIT IS SET IN CORRECT MODE
BEFORE KINDS OF OPERATIONS.
- Press POWER (STANDBY) button on the unit or remote control to power ON the
unit (indicator will glow blue); press it again to power OFF (standby mode) the
unit (indicator will glow red).
- Press SOURCE button on the unit or remote control to switch the unit to DTV or
ATV mode.
SELECT DESIRED PROGRAM
1. Press CH+ button to play next channel.
2. Press CH- button to play previous channel.
3. Press number buttons on remote control directly to select desired program.
NOTE: Press -/-- button repeatedly to switch the digit.
VOLUME CONTROL
- Press VOL+ or VOL- to adjust the level of current volume.
Available range: 0-100.
MUTE CONTROL
- Press MUTE button to mute the sound, press it again to turn on the sound.
SOURCE SETTING
- Press SOURCE button on the unit or remote control to display the sources list.
- Press UP or DOWN navigation button to select desired input source, and then press OK
button to confirm selection.
Available options: Satellite, DTV, ATV, AV, SCART, YPbPr, HDMI, PC, USB.
MULTIAUDIO SETTING
- Press AUDIO button on remote control and use navigation buttons to select desired audio
language.
NOTE: To enable this function, make sure that the channel you are viewing supports
multi-audio languages.
INFORMATION DISPLAY
- Press DISPLAY button on remote control to display information of current program.
BASIC OPERATIONS

16
EPG TV GUIDE (FOR DTV MODE ONLY)
- Press EPG button on remote control to display program guide.
- Press UP/DOWN navigation button to select preferred program
- Press LEFT/RIGHT navigation button to switch between left column and right column.
When a program is highlighted (cursor moved to Right column):
- Press YELLOW button to display program guide of previous day.
- Press BLUE button to display program guide of next day.
FAVORITE LIST
When viewing an available channel, press FAV button on
remote control to enter Favorite List menu page.
- Press UP or DOWN navigation button to select preferred
channel.
- Press OK button to confirm selection.
Note: To add a favorite channel, please refer to the operations
of “Channel>Program Edit”.

17
QUICK SELECT
When viewing an available channel, press OK button on remote
control to enter Channel List menu page.
- Press UP or DOWN navigation button to select preferred
channel.
- Press LEFT/RIGHT navigation button to select a channel
group.
- Press OK button to confirm selection.
TELETEXT
- Press TEXT button on remote control to display the available
teletext information and press it again to exit the teletext.
TV/RADIO (FOR DTV MODE ONLY)
- Press TV/RADIO button on remote control to switch the unit between TV and radio mode.(DTV
only)
SUBTITLE
- Press SUBTITLE button on remote control repeatedly to select desired subtitle.
NOTE: To enable this function, make sure that the channel you are viewing supports
multi-subtitle.
MEDIA PLAYBACK(USB INPUT)
- Insert a USB memory device into USB slot before following operations.
- Press SOURCE button on the unit or remote control to switch the unit to USB mode or
press MEDIA button on remote control.
- Press UP/DOWN/LEFT/RIGHT navigation button to select the file, press OK button to
confirm the selection then press PLAY to start the selected file. Repeat the procedure to
select/unselect new files.
- Press EXIT button to return to previous menu page.

18
1. PHOTO
- Press LEFT/RIGHT navigation button to select Photo in the main menu and press OK
button to enter it.
- Use navigation buttons to select desired folder or file.
- When selecting files, press RED button to enter submenu and you can delete a file
accordingly.
- Use navigation buttons to select a file and press OK button to add to play list.
- Press button to start playback.
- Press DISPLAY button to call out the tool bar. Use navigation buttons to select desired
option and press OK to confirm it.
- Press EXIT button to dismiss the tool bar.
2. MUSIC
- Press LEFT/RIGHT navigation button to select Music in the main menu and press OK
button to enter it.
- Use navigation buttons to select desired folder or file.
- When selecting files, press RED button to enter submenu and you can delete a file
accordingly.
- Use navigation buttons to select a file and press OK button to add to play list.
- Press button to start playback.

19
- Use navigation buttons to select desired option and press OK to confirm it.
- Press EXIT button to return.
3. MOVIE
- Press LEFT/RIGHT navigation button to select Movie in the main menu and press OK
button to enter it.
- Use navigation buttons to select desired folder or file.
- When selecting files, press RED button to enter submenu and you can delete a file
accordingly.
- Use navigation buttons to select a file and press OK button to add to play list.
- Press button to start playback.
- Press DISPLAY button to call out the tool bar. Use navigation buttons to select desired
option and press OK to confirm it.
- Press EXIT button to return.
Table of contents
Other Majestic LED TV manuals

Majestic
Majestic GTV2400DA User manual

Majestic
Majestic L195DA User manual

Majestic
Majestic GTV2700DA User manual

Majestic
Majestic SLT241 User manual

Majestic
Majestic TVD232/S2 LED User manual

Majestic
Majestic TVD240/S2 User manual

Majestic
Majestic LED222GS User manual

Majestic
Majestic MJL324D User manual

Majestic
Majestic L194DA User manual

Majestic
Majestic TVD 227 S2 UHD User manual