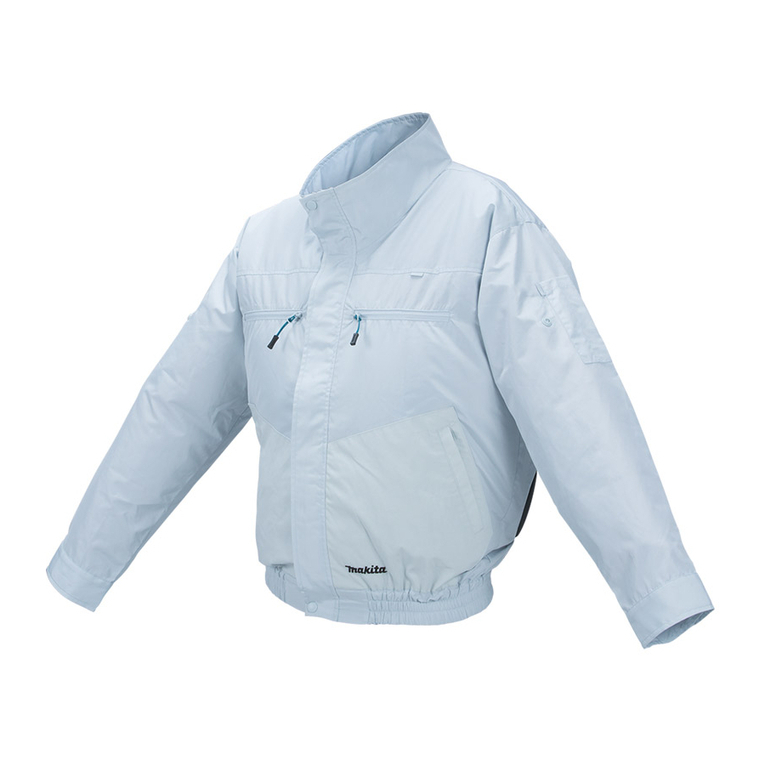
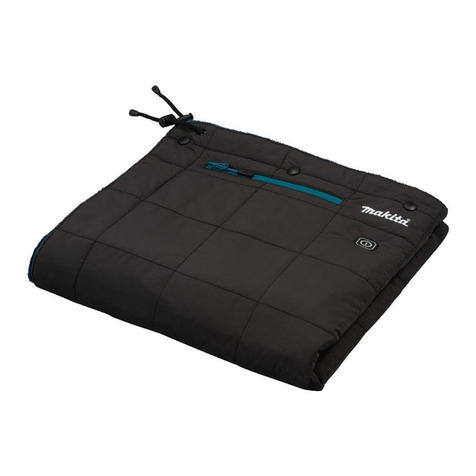
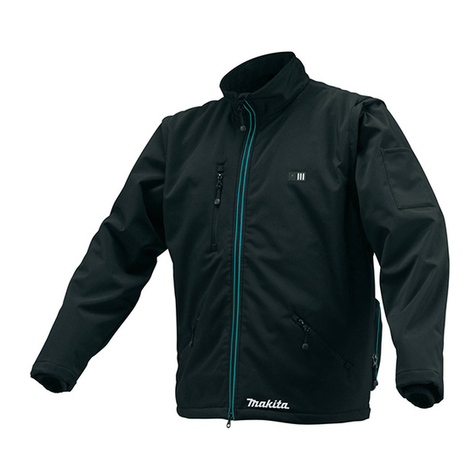
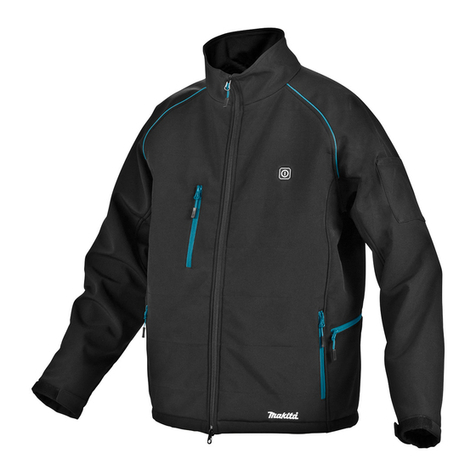
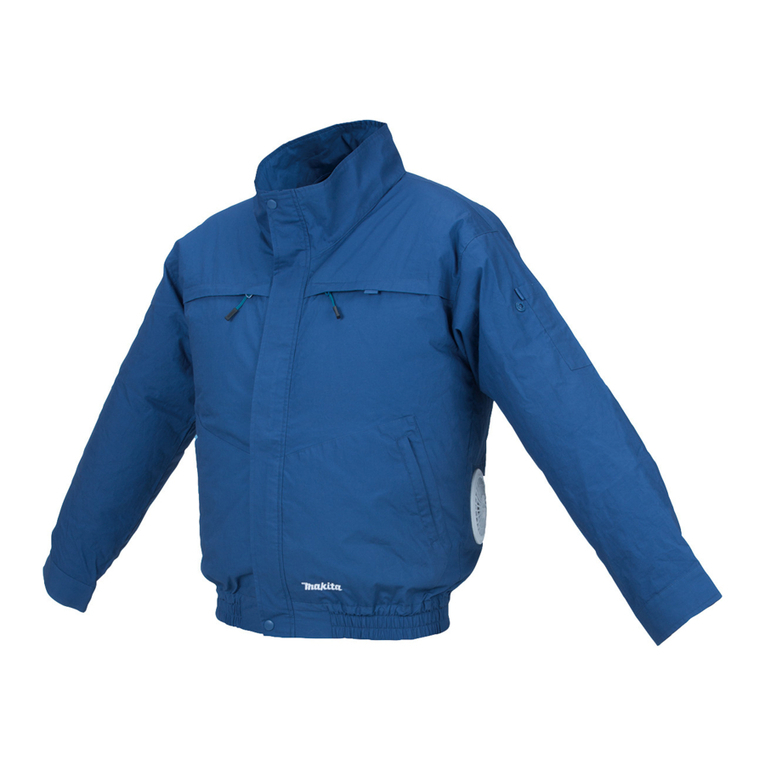
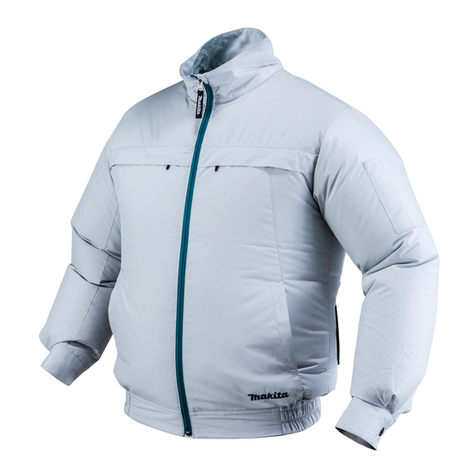
Makita DFJ206 User manual

DFJ206
DFJ207
DFJ304
DFJ305
DFJ405
DFJ407
EN Cordless Fan Jacket INSTRUCTION MANUAL 6
PL Kurtka wentylowana z
zasilaniem akumulatorowym INSTRUKCJA OBSŁUGI 12
HU Akkumulátoros hűthető kabát HASZNÁLATI KÉZIKÖNYV 18
SK Bunda s ventilátorom na
akumulátor NÁVOD NA OBSLUHU 24
CS Aku pracovní bunda s
ventilátorem NÁVOD K OBSLUZE 30
UK Бездротова вентиляційна
куртка
ІНСТРУКЦІЯ З
ЕКСПЛУАТАЦІЇ 36
RO Geacă cu ventilator fără cablu MANUAL DE INSTRUCŢIUNI 43
DE Akku-Klima-Jacke BETRIEBSANLEITUNG 49

3
4
5
6
7
8
9
11
10
3
4
5
7
8
9
11
10
DFJ206, DFJ207, DFJ304, DFJ305
DFJ405, DFJ407
6
12
Fig.1
1
2
4
3
Fig.2
18 V / 14.4 V 10.8 V
1
Fig.3
2

1
Fig.4
1
2
3
5
4
Fig.5
1
2
3
Fig.6
1
Fig.7
2
1
Fig.8
3

1
Fig.9
1
2 3
4 5
Fig.10
1
2
Fig.11
21
Fig.12
1
2
Fig.13
1
Fig.14
1
Fig.15
Fig.16
4

Fig.17
Fig.18
1
Fig.19
1
2
Fig.20
5

6ENGLISH
ENGLISH (Original instructions)
WARNING
This appliance can be used by children aged from 8 years and
above and persons with reduced physical, sensory or mental capa-
bilities or lack of experience and knowledge if they have been given
supervision or instruction concerning use of the appliance in a safe
way and understand the hazards involved. Children shall not play
with the appliance. Cleaning and user maintenance shall not be
made by children without supervision.
SPECIFICATIONS
Model: DFJ206 DFJ207 DFJ304 DFJ305 DFJ405 DFJ407
USB power supply port
(optional accessory)
DC 5V, 2.1A, Type A
Rated voltage DC 10.8 V - 12V max
DC 14.4 V
DC 18 V
Battery cartridge 10.8 V BL1015, BL1020B, BL1040B
10.8 V - 12V max BL1016, BL1021B, BL1041B
14.4 V
BL1415, BL1415N, BL1430, BL1430B, BL1440, BL1450, BL1460B
18 V BL1815, BL1815N, BL1820, BL1820B, BL1830, BL1830B,
BL1840, BL1840B, BL1850, BL1850B, BL1860B
Material Outer Polyester 100% Cotton 100% Polyester (100%)
+ titanium pearly
coating
Pocket Cotton 100%
Shoulder pad -Polyester 65% +
Cotton 35%
• Duetoourcontinuingprogramofresearchanddevelopment,thespecicationshereinaresubjecttochange
without notice.
• Specicationsandbatterycartridgemaydifferfromcountrytocountry.
Operating time
Air speed Battery
BL1040B
BL1041B
BL1460B BL1860B
HIGH 6.0 hours 10.5 hours 18.5 hours
MEDIUM 11.5 hours 18.5 hours 26.5 hours
LOW 17.0 hours 27.5 hours 40.0 hours
• Theoperatingtimesintheabovetablearearoughguideline.Theymaydifferfromactualoperatingtimes.
• Operatingtimesmaydifferdependingonbatterytype,chargingstatus,andusagecondition.

7ENGLISH
Symbols
The following show the symbols used for the equip-
ment. Be sure that you understand their meaning before
use.
Read the instruction manual.
Machine wash at below 30°C on the gentle
cycle.
Machine wash at below 40°C on the gentle
cycle.
Machine wash in domestic or commercial
machines on normal settings.
Do not bleach.
Line dry in the shade.
Do not wring.
Iron at low temperatures (not exceeding
110°C).
Iron at medium temperatures (not exceed-
ing 150°C).
Do not iron.
Do not dry clean.
Cd
Ni-MH
Li-ion
Only for EU countries
Do not dispose of electric equipment or
battery pack together with household
waste material! In observance of the
European Directives, on Waste Electric
and Electronic Equipment and Batteries
and Accumulators and Waste Batteries and
Accumulators and their implementation
in accordance with national laws, electric
equipment and batteries and battery
pack(s) that have reached the end of
their life must be collected separately and
returned to an environmentally compatible
recycling facility.
Intended use
Thefanjacketisintendedforcoolingyourbody
temperature.
SAFETY WARNINGS
WARNING: Read all safety warnings and
all instructions. Failure to follow the warnings and
instructionsmayresultinelectricshock,reand/or
seriousinjury.
Save all warnings and instruc-
tions for future reference.
1. Never use the fan jacket when temperature
reach more than 50°C (122°F). Also avoid use
in high humidity. Doing so may cause burns.
2. Do not wear the jacket over bare skin.
3. Do not use the jacket while you are under the
inuence of drugs, alcohol or medication.
4.
Do not sleep while wearing the fan jacket. A steep
decline of body temperature may harm your health.
5. Children, handicapped persons, or anyone
who is insensitive to temperature, for example,
someone with poor blood circulation, should
refrain from using the jacket.
6. This appliance is not intended for medical use
in hospitals.
7. Do not use the jacket other than for its
intended purpose.
8. If you sense anything unusual, switch off
the jacket and remove the battery holder
immediately.
9. If any abnormality is found, contact your local
service center for repair.
10. Do not stamp on, throw or otherwise abuse the
fan jacket.
11. Do not put your nger or a foreign object into
the fan unit.
12. Do not blow compressed air toward the fan. Do
not put small sticks into the fan unit. Doing so
may damage the fan and motor.
13. Do not turn on the fan jacket unless you are
wearing it.
14. Do not use the fan jacket in places where a re
or spark could be generated. The fan unit may
catchreorsparkandcauseareorburns.
15. Choose the appropriate fan speed in accor-
dance with the usage environment for continu-
ous use.
16. Do not wear any clothing over the fan jacket.
17. Keep the nameplate on the fan unit. If it
becomes unreadable or goes missing, contact
your local service center for repair.
18. Before washing, detach the fan unit and bat-
tery holder, remove the battery cartridge. Wash
the jacket part only.
19. Do not leave the fan jacket in a place subject
to high heat, such as a car sitting in the sun.
Doing so may cause plastic parts to melt and
become damaged.
20. For long time storage, remove the battery
holder and battery cartridge from the jacket,
and remove the battery cartridge from the
battery holder.
21. When storing, keep the fan jacket, fan units,
battery holder, and battery cartridge out of
reach of children.
Electrical safety
1. Do not expose the jacket to rain or wet condi-
tions. Keep water away from electrical parts.
Waterenteringthejacketmayincreasetheriskof
an electric shock.

8ENGLISH
2. Recharge only with the charger specied by
the manufacturer. A charger that is suitable for
one type of battery pack may create a risk of
re when used with another battery pack.
3. Only use with specically designated batter-
ies. Use of any other battery may create a risk
of injury and re.
4. When the battery pack is not in use, keep it
away from other metal objects, such as paper
clips, coins, keys, nails, screws or other small
metal objects that can make a connection from
one terminal to another.
5. Under abusive conditions, liquid may be
ejected from the battery; avoid contact. If
contact accidentally occurs, ush the affected
area with water.
6. Do not handle the cord and battery with wet or
greasy hands.
7. Do not use the fan jacket when the cord or
plug is damaged.
8. Do not abuse the cord. Do not use the cord
for carrying, pulling or unplugging the jacket.
Keep the cord away from heat, oil, and sharp
edges.
9. Do not leave any cord disconnected while the
battery power is supplied. Small children may
puttheliveplugintheirmouthandcauseinjury.
10. Do not use the supplied cord with appliances
other than the fan unit.
11. Do not insert nails, wires, or other items. into
the USB power supply port. Doing so may cause
shortcircuit,whichcancausesmokeorare.
12. Do not connect the power source to the
USB port. The USB port is only intended for
charging lower voltage devices. Always place
the cover over the USB port when not charging
a lower voltage device. Otherwise there is risk of
re.
Important safety instructions for
battery cartridge
1. Before using battery cartridge, read all instruc-
tions and cautionary markings on (1) battery
charger, (2) battery, and (3) product using
battery.
2. Do not disassemble battery cartridge.
3. If operating time has become excessively
shorter, stop operating immediately. It may
result in a risk of overheating, possible burns
and even an explosion.
4. If electrolyte gets into your eyes, rinse them
out with clear water and seek medical atten-
tion right away. It may result in loss of your
eyesight.
5. Do not short the battery cartridge:
(1) Do not touch the terminals with any
conductive material.
(2) Avoid storing battery cartridge in a con-
tainer with other metal objects such as
nails, coins, etc.
(3) Do not expose battery cartridge to water
or rain.
A battery short can cause a large current
ow, overheating, possible burns and even a
breakdown.
6. Do not store the tool and battery cartridge in
locations where the temperature may reach or
exceed 50 °C (122 °F).
7. Do not incinerate the battery cartridge even if
it is severely damaged or is completely worn
out. The battery cartridge can explode in a re.
8. Be careful not to drop or strike battery.
9. Do not use a damaged battery.
10. The contained lithium-ion batteries are subject
to the Dangerous Goods Legislation require-
ments.
For commercial transports e.g. by third parties,
forwarding agents, special requirement on pack-
aging and labeling must be observed.
For preparation of the item being shipped, consult-
ing an expert for hazardous material is required.
Please also observe possibly more detailed
national regulations.
Tape or mask off open contacts and pack up the
battery in such a manner that it cannot move
around in the packaging.
11. Follow your local regulations relating to dis-
posal of battery.
SAVE THESE INSTRUCTIONS.
CAUTION: Only use genuine Makita batteries.
Use of non-genuine Makita batteries, or batteries that
have been altered, may result in the battery bursting
causingres,personalinjuryanddamage.Itwill
also void the Makita warranty for the Makita tool and
charger.
Tips for maintaining maximum
battery life
1. Charge the battery cartridge before completely
discharged. Always stop tool operation and
charge the battery cartridge when you notice
less tool power.
2. Never recharge a fully charged battery car-
tridge. Overcharging shortens the battery
service life.
3. Charge the battery cartridge with room tem-
perature at 10 °C - 40 °C (50 °F - 104 °F). Let
a hot battery cartridge cool down before
charging it.
4. Charge the battery cartridge if you do not use
it for a long period (more than six months).
9ENGLISH
PARTS DESCRIPTION
►Fig.1
1Batteryholder(10.8V/
10.8 V - 12 V max)
(optional accessory)
2Battery holder (14.4 V
/18V)
(optional accessory)
3Loop for name badge 4Loop for arm badge
5Sleeve holder 6Battery pocket 7Mesh pocket for ice pack 8Fan unit
9Power cable 10 Anti-slip rubber
(DFJ207, DFJ305 and
DFJ407 only)
11 Hood
(DFJ207, DFJ305 and
DFJ407 only)
- -
INSTALLATION
Installing or removing the battery
cartridge
CAUTION: Always switch off the device
before installing or removing the battery
cartridge.
CAUTION: Hold the battery holder and the
battery cartridge rmly when installing or remov-
ing the battery cartridge. Failure to hold the battery
holderandthebatterycartridgermlymaycause
them to slip out of your hands and result in damage
tothebatteryholderandbatterycartridgeand/ora
personalinjury.
►Fig.2: 1. Red indicator 2. Button 3. Battery cartridge
4. Battery holder (optional accessory)
To install the battery cartridge, align the tongue on the
battery cartridge with the groove in the housing and slip
it into place. Insert the battery cartridge all the way until
it locks in place with a small click. If you can see the red
indicator on the upper side of the button, it is not locked
completely.
To remove the battery cartridge, slide it from the battery
holder while pressing the button on the front of the
cartridge.
CAUTION: Always install the battery car-
tridge fully until the red indicator cannot be seen.
Otherwise the battery cartridge may accidentally
falloutofthebatteryholder,causinginjurytoyouor
someone around you.
CAUTION: Do not forcibly install the battery
cartridge. If the battery cartridge does not slide in
easily, it is not being inserted correctly.
Attaching the battery holder
You can hang the battery holder on your waist belt.
To prevent the battery holder from dropping acciden-
tally, attach a strap using the strap hole and secure it.
►Fig.3: 1. Strap hole
For 18V and 14.4V battery holders
The battery holder has an anti-drop function. When
removing the battery holder from the belt, pull up the
battery holder while pressing the unlock button.
►Fig.4: 1. Unlock button
Installing or removing the fan unit
1. Turn the ring counterclockwise while lifting the
hook on it. Remove the ring when the mark on the ring
aligns with the slot on the fan unit.
►Fig.5: 1. Fan unit 2. Ring 3. Hook 4. Slot 5. Mark
2. Pass the head of the fan unit into the hole on the
jacket.Settheringontothefanunitandturnitclock-
wise until the mark on the ring aligns with the mark
further from the slot.
►Fig.6: 1. Mark 2. Ring 3. Fan unit
3. Pass the strip through the loop on the fan unit and
fasten the snap button.
►Fig.7: 1. Strip
4. Attachtheotherfanunittothejacketinthesame
way.
5. Connect the cable to the fan units. Support the
cable using the cable holder.
►Fig.8: 1. Cable 2. Cable holder
6. Connect the other end of the cable to the battery
holder.
►Fig.9: 1. Battery holder
CAUTION: Always use the strip and snap
button to secure the fan unit to the jacket. If the
fanunitfalls,itmaycauseaninjury,ordamagetothe
fan unit.
Follow the installation procedure in reverse when
removing it.
Attaching the lter set
Optional accessory
Theltersetprotectsthefanunitfromdustandpowder.
Werecommendthatyouusetheltersetinadustyor
powdery work place.
Insertthelterattachmentbetweenthejacketandfan
unitasshowninthegure.
►Fig.10: 1. Ring 2.Holeinthejacket3. Filter attach-
ment 4. Fan unit 5. Filter
When tightening the ring, stop it at the mark near the
slot on the fan unit. After attaching the fan units, cover
thelterattachmentswithlters.
►Fig.11: 1. Mark 2. Slot

10 ENGLISH
NOTICE: Make sure that the lter fully covers
the lter attachment. For better protection against
dust and powder, tuck the skirt of the lter
between the jacket and lter attachment.
FUNCTIONAL
DESCRIPTION
NOTICE: The fan jacket is effective when the
humidity and temperature of intake air are lower
than those of the body surface. The fan jacket
may not be effective if the air temperature and/or
humidity are higher than those inside the jacket.
Power button
Toturnonthejacket,pressandholdthepowerbutton
onthebatteryholder(optionalaccessory).Thejacket
starts at high air speed. Each time you tap the power
button, the air speed changes from high to medium,
medium to low, and low to high. The air speed indicator
shows the current air speed.
►Fig.12: 1. Air speed indicator 2. Power button
To turn off, press and hold the power button again.
Indicating the remaining battery
capacity
Only for battery cartridges with the indicator
►Fig.13: 1. Indicator lamps 2. Check button
Press the check button on the battery cartridge to indi-
cate the remaining battery capacity. The indicator lamps
light up for few seconds.
Indicator lamps Remaining
capacity
Lighted Off Blinking
75% to 100%
50% to 75%
25% to 50%
0% to 25%
(For 14.4 V and 18 V batteries only)
Charge the
battery.
(For 14.4 V and 18 V batteries only)
The battery
may have
malfunctioned.
NOTE: Depending on the conditions of use and the
ambient temperature, the indication may differ slightly
from the actual capacity.
Battery protection system
The device is equipped with a battery protection sys-
tem. This system automatically cuts off power to the
motor to extend battery life.
If the remaining battery capacity is too low, the device
will not operate. When you turn the device on, the motor
will run again, but stops soon. In this situation, remove
and recharge the battery cartridge.
Turbo button
By pressing turbo button on the battery holder, the
jacketworksinturbomodeforquickcooling.Turbo
mode lasts for a minute and then air speed returns to
normal.
►Fig.14: 1. Turbo button
Air ow
Tomaintainastableairow,closethebuttonatthe
neckofthejacket.Fastenthebuttonontheribbonfor
betterairowintheback.
►Fig.15: 1. Ribbon
Airowinsidethejacketisshownbelow.
►Fig.16
Forajacketwithahood,wearthehoodoverahelmet.
The air from the fan goes through the helmet and cools
your head.
►Fig.17
Battery pocket
Apocketisprovidedforstoringthe10.8V/10.8V-12
Vmaxbatteryholder(withbattery)insidethejacket.
Connect the power cable to the battery holder, and then
put it into the pocket and fasten the snap buttons.
►Fig.18
Mesh pocket
Meshpocketsareprovidedonthebackofthejacketfor
storing ice packs.
►Fig.19: 1. Mesh pocket
Connecting USB devices
CAUTION: Connect only devices that are
compatible with the USB power supply port. Not
doing so may cause a malfunction of the battery
holder.
NOTICE: Before connecting a USB device to
the battery holder (with the battery), always back
up the data on the USB device. Not doing so may
cause a loss of your data.
The battery holder (with the battery) can work as an
external power supply for USB devices.
Open the cover and connect a USB cable (not included)
to the power supply port of the battery holder. Then con-
nect the other end of the cable to the device and turn on
the switch next to the USB port.
►Fig.20: 1. Cover 2. Switch

11 ENGLISH
The battery holder (with the battery) supplies DC5V, 2.1A.
TheUSBcablecanbeplacedinsidethejacketforconve-
nience using the hole in the pocket and the cable holder.
NOTE: The battery holder may not supply power to
some USB devices.
NOTE: When not using or after charging, remove the
USB cable and close the cover.
NOTE: Battery power is consumed while the switch is
turned on. Always turn off the switch when not in use.
MAINTENANCE
CAUTION: Always be sure that the jacket is
switched off and the battery cartridge is removed
before attempting to perform inspections or
maintenance.
CAUTION: If the jacket does not switch on
or any fault is found with a fully charged battery
cartridge, clean the terminals of the battery holder
and the battery cartridge. If the jacket still does
not work properly, stop using the jacket and con-
tact our authorized service center.
NOTICE: Never use gasoline, benzine, thinner,
alcohol or the like. Discoloration, deformation or
cracks may result.
Cleaning the jacket
Detachthefanunit(s)andbatteryholderfromthejacket
before washing. Follow the instructions on the tag.
For DFJ304 and DFJ305
Cotton products may shrink when washed.
Donotwashthejacketwithotherclothes.Doingsomay
cause color fading or color transfer.
For DFJ405 and DFJ407
Use a laundry net when using a washing machine.
OPTIONAL
ACCESSORIES
CAUTION: These accessories or attachments
are recommended for use with your Makita tool
specied in this manual. The use of any other
accessories or attachments might present a risk of
injurytopersons.Onlyuseaccessoryorattachment
for its stated purpose.
If you need any assistance for more details regarding
these accessories, ask your local Makita Service Center.
• Batteryholder
• Filterset
• Makitagenuinebatteryandcharger
NOTE: Some items in the list may be included in the
tool package as standard accessories. They may
differ from country to country.

12 POLSKI
POLSKI (Instrukcja oryginalna)
OSTRZEŻENIE
Niniejszeurządzeniemożebyćużytkowaneprzezdzieciwwieku
powyżej8latorazprzezosobyniebędącewpełniwładzzycznych,
poznawczychiumysłowychlubnieposiadającedoświadczeniaani
wiedzy,oileosobaodpowiedzialnazaichbezpieczeństwozapewni
odpowiedninadzóriprzekażewskazówkidotycząceużytkowania
urządzeniaorazzagrożeńznimizwiązanych.Urządzenieniejest
przeznaczone do zabawy nim przez dzieci. Czyszczenie oraz kon-
serwacjaniemogąbyćprzeprowadzaneprzezdziecibeznadzoru.
DANE TECHNICZNE
Model: DFJ206 DFJ207 DFJ304 DFJ305 DFJ405 DFJ407
Gniazdo zasilania USB
(osprzętdodatkowy)
Prądstały5V,2,1A,typA
Napięcieznamionowe Prądstały10,8V—maks.12V
Prądstały14,4V
Prądstały18V
Akumulator 10,8 V BL1015, BL1020B, BL1040B
10,8V—maks.12V BL1016, BL1021B, BL1041B
14,4 V
BL1415, BL1415N, BL1430, BL1430B, BL1440, BL1450, BL1460B
18 V BL1815, BL1815N, BL1820, BL1820B, BL1830, BL1830B,
BL1840, BL1840B, BL1850, BL1850B, BL1860B
Materiał Zewnętrzny Poliester 100% Bawełna100% Poliester (100%)
+powłoka
tytanowo-perłowa
Kieszeń Bawełna100%
Poduszka naramienna -Poliester 65% +
bawełna35%
• Wzwiązkuzestaleprowadzonymprzeznasząrmęprogramembadawczo-rozwojowymniniejszedanetech-
nicznemogąuleczmianombezwcześniejszegopowiadomienia.
• Winnychkrajachurządzeniemożemiećodmiennedanetechniczneimożebyćwyposażonewinny
akumulator.
Czas pracy
Prędkośćpowietrza Akumulator
BL1040B
BL1041B
BL1460B BL1860B
Prędkośćwysoka(HIGH) 6,0 godz. 10,5 godz. 18,5 godz.
Prędkośćśrednia(MEDIUM) 11,5 godz. 18,5 godz. 26,5 godz.
Prędkośćniska(LOW) 17,0 godz. 27,5 godz. 40,0 godz.
• Czasypracypodanewpowyższejtabelisąprzybliżone.Mogąoneróżnićsięodrzeczywistychczasówpracy.
• Czasypracymogąróżnićsięwzależnościodrodzajuakumulatora,stanunaładowanieorazwarunków
korzystania.

13 POLSKI
Symbole
Poniżejpokazanosymbolezastosowanenaurządze-
niu.Przedrozpoczęciemużytkowanianależyzapoznać
sięzichznaczeniem.
Przeczytaćinstrukcjęobsługi.
Praćwpralcewtemperaturzeponiżej30°C
na trybie delikatnym.
Praćwpralcewtemperaturzeponiżej40°C
na trybie delikatnym.
Praćwpralcedomowejlubprzemysłowej
na normalnych ustawieniach.
Niewybielać.
Suszyćwcieniu.
Niewyżymać.
Prasowaćwniskiejtemperaturze(poniżej
110°C).
Prasowaćwśredniejtemperaturze(poniżej
150°C).
Nieprasować.
Niepraćchemicznie.
Cd
Ni-MH
Li-ion
DotyczytylkopaństwUE
Niewyrzucaćurządzeńelektrycznychani
akumulatorów wraz z odpadami z gospo-
darstwa domowego! Zgodnie z dyrekty-
wamieuropejskimiwsprawiezużytego
sprzętuelektrycznegoielektronicznego
orazbateriiiakumulatoróworazzużytych
bateriiiakumulatorów,atakżedostoso-
waniemichdoprawakrajowego,zużyte
urządzeniaelektryczne,baterieiakumu-
latorynależyskładowaćosobnoiprzeka-
zywaćdozakładurecyklingudziałającego
zgodniezprzepisamidotyczącymiochrony
środowiska.
Przeznaczenie
Kurtkawentylowanasłużydoobniżaniatemperatury
ciała.
OSTRZEŻENIA
DOTYCZĄCE
BEZPIECZEŃSTWA
OSTRZEŻENIE: Przeczytać wszystkie ostrze-
żenia bezpieczeństwa i wszystkie instrukcje.
Niezastosowaniesiędowspomnianychostrzeżeńi
instrukcjimożedoprowadzićdoporażeniaprądem
elektrycznym,pożarui/lubpoważnychobrażeńciała.
Wszystkie ostrzeżenia i instruk-
cje należy zachować do wykorzy-
stania w przyszłości.
1. Nie korzystać z kurtki wentylowanej w tempe-
raturze wyższej niż 50°C (122°F). Unikać wyso-
kiej wilgotności.Niezastosowaniesiędotych
zaleceńmożespowodowaćoparzenia.
2. Nie nosić kurtki na gołej skórze.
3. Nie korzystać z kurtki pod wpływem substancji
odurzających, alkoholu ani lekarstw.
4.
Nie spać w kurtce wentylowanej.Gwałtownyspadek
temperaturymożenegatywniewpłynąćnazdrowie.
5. Dzieci, osoby niepełnosprawne oraz osoby
wrażliwe na temperaturę, na przykład ze
względu na słabe krążenie krwi, nie powinny
korzystać z kurtki.
6. Urządzenie nie służy do użytku medycznego w
szpitalach.
7. Używać kurtki wyłącznie do celów, do których
jest przeznaczona.
8. W przypadku wyczucia czegoś nieoczekiwa-
nego natychmiast wyłączyć kurtkę i wyjąć
akumulator z uchwytu.
9. W przypadku wykrycia nieprawidłowości skon-
taktować się z lokalnym centrum serwisowym
w celu umówienia naprawy.
10. Nie należy rzucać kurtki ani na niej stawać,
ani w żaden inny sposób nieprawidłowo jej
wykorzystywać.
11. Nie wkładać palców ani przedmiotów obcych w
wentylator.
12. Nie kierować sprężonego powietrza na wen-
tylator. Nie umieszczać małych patyków w
wentylatorze.Możetospowodowaćuszkodzenie
wentylatora i silnika.
13. Nie włączać kurtki, jeśli nie jest ona ubrana.
14. Nie korzystać z kurtki wentylowanej w miej-
scach, w których istnieje ryzyko wystąpienia
pożaru i wytworzenia iskry.Wentylatormożesię
zapalić,aiskramożespowodowaćwybuchpożaru
lubdoprowadzićdopoparzenia.
15. Wybrać odpowiednią prędkość wentylatora
zgodnie ze środowiskiem korzystania do dłu-
gotrwałego używania.
16. Nie zakładać ubrań na kurtkę wentylowaną.
17. Umieścić plakietkę z imieniem na wentylato-
rze. Jeśli stanie się ona nieczytelna lub zgubi
się, skontaktować się z lokalnym centrum
serwisowym w celu umówienia naprawy.

14 POLSKI
18. Przed praniem wymontować wentylator i
uchwyt akumulatora oraz akumulator. Prać
samą kurtkę.
19. Nie pozostawiać kurtki wentylowanej w miej-
scach narażonych na działanie wysokich tem-
peratur, na przykład w samochodzie zaparko-
wanym w słońcu.Możetospowodowaćstopienie
iuszkodzenieplastikowychczęści.
20. Na czas długiego przechowywania należy
wymontować uchwyt akumulatora wraz z
akumulatorem z kurtki i wyjąć akumulator z
uchwytu.
21. Kurtkę wentylowaną, wentylatory, uchwyt aku-
mulatora i akumulator należy przechowywać
poza zasięgiem dzieci.
Bezpieczeństwo elektryczne
1. Nie narażać kurtki na działanie deszczu ani wil-
goci. Nie narażać części elektrycznych na dzia-
łanie wody.Woda,któradostaniesiędokurtki,
zwiększaryzykoporażeniaprądemelektrycznym.
2. Akumulator należy ładować wyłącznie przy
użyciu określonej przez producenta ładowarki.
Ładowarka przeznaczona do jednego typu
akumulatora może stwarzać zagrożenie poża-
rem, gdy będzie używana do ładowania innego
akumulatora.
3. Należy stosować wyłącznie specjalnie prze-
znaczone do tego celu akumulatory. Używanie
innych akumulatorów może stwarzać ryzyko
wystąpienia obrażeń ciała lub pożaru.
4. Gdy akumulator nie jest używany, należy
zabezpieczyć go przed kontaktem z metalo-
wymi przedmiotami, typu spinacze, monety,
klucze, gwoździe, wkręty lub innymi metalo-
wymi drobiazgami, które mogą powodować
zwarcie styków akumulatora.
5. W niewłaściwych warunkach eksploatacji
może dojść do wycieku elektrolitu z akumu-
latora. Nie należy go dotykać. W razie przy-
padkowego kontaktu należy przemyć skażony
obszar wodą.
6. Nie dotykać przewodu ani akumulatora
mokrymi lub tłustymi rękami.
7. Nie używać kurtki wentylowanej z uszkodzo-
nym przewodem lub wtyczką.
8. Obchodzić się z przewodem zasilającym w
prawidłowy sposób. Nie używać przewodu
do noszenia, ciągnięcia ani odłączania kurtki.
Trzymać przewód z dala od źródeł ciepła, oleju
i ostrych krawędzi.
9. Nie zostawiać przewodu odłączonego, kiedy
dostarczane jest zasilanie z akumulatora.Małe
dziecimogąwłożyćwtyczkędoustiodnieść
obrażenia.
10. Nie używać dostarczonego przewodu z urzą-
dzeniami innymi niż wentylator.
11. Nie wkładać gwoździ, drutów ani innych przed-
miotów do gniazda zasilania USB.Możeto
spowodowaćzwarcieidoprowadzićdopowstania
dymulubpożaru.
12. Nie podłączać źródła zasilania do gniazda
USB. Gniazdo USB służy wyłącznie do łado-
wania urządzeń o niskim napięciu. Zawsze
należy zakładać osłonę na gniazdo USB, gdy
żadne urządzenie o niskim napięciu nie jest
ładowane. Wprzeciwnymrazieistniejeryzyko
wystąpieniapożaru.
Ważne zasady bezpieczeństwa
dotyczące akumulatora
1.
Przed użyciem akumulatora zapoznać się ze
wszystkimi instrukcjami i znakami ostrzegaw-
czymi na (1) ładowarce, (2) akumulatorze i (3)
produkcie, w którym będzie używany akumulator.
2. Akumulatora nie wolno rozbierać.
3. Jeśli czas działania uległ znacznemu skróce-
niu, należy natychmiast przerwać pracę. Może
bowiem dojść do przegrzania, ewentualnych
poparzeń, a nawet eksplozji.
4. W przypadku przedostania się elektrolitu do
oczu, przemyć je czystą wodą i niezwłocznie
uzyskać pomoc lekarską. Może on bowiem
spowodować utratę wzroku.
5. Nie doprowadzać do zwarcia akumulatora:
(1) Nie dotykać styków materiałami przewo-
dzącymi prąd.
(2) Unikać przechowywania akumulatora w
pojemniku z metalowymi przedmiotami,
takimi jak gwoździe, monety itp.
(3) Chronić akumulator przed deszczem lub
wodą.
Zwarcie prowadzi do przepływu prądu elek-
trycznego o dużym natężeniu i przegrzania
akumulatora, co w konsekwencji może grozić
poparzeniami a nawet awarią urządzenia.
6. Narzędzia i akumulatora nie wolno przecho-
wywać w miejscach, w których temperatura
osiąga bądź przekracza 50°C (122°F).
7. Akumulatorów nie wolno spalać, również tych
poważnie uszkodzonych lub całkowicie zuży-
tych. Akumulator może eksplodować w ogniu.
8. Chronić akumulator przed upadkiem i
uderzeniami.
9. Nie wolno używać uszkodzonego akumulatora.
10. Stanowiące wyposażenie akumulatory lito-
wo-jonowe podlegają przepisom dotyczącym
produktów niebezpiecznych.
Napotrzebytransportukomercyjnego,np.świad-
czonegoprzezrmytrzecieczyspedycyjne,
należyprzestrzegaćspecjalnychwymagańw
zakresie pakowania i oznaczania etykietami.
Przygotowanieproduktudowysyłkiwymaga
skonsultowaniasięzespecjalistąds.materiałów
niebezpiecznych.Należytakżeprzestrzegać
przepisówkrajowych,któremogąbyćbardziej
szczegółowe.
Zakleićtaśmąlubzaślepićotwartestykiakumula-
toraorazzabezpieczyćgo,abyniemógłsięprze-
suwaćwopakowaniu.
11. Postępować zgodnie z przepisami lokalnymi
dotyczącymi usuwania akumulatorów.
ZACHOWAĆ NINIEJSZE
INSTRUKCJE.

15 POLSKI
PRZESTROGA: Używać wyłącznie oryginal-
nych akumulatorów rmy Makita.Używanienie-
oryginalnychakumulatorówrminnychniżMakitalub
akumulatorów,którezostałyzmodykowane,może
spowodowaćwybuchakumulatoraipożar,obrażenia
ciałaorazzniszczeniemienia.Stanowitorównież
naruszeniewarunkówgwarancjirmyMakitadoty-
czącychnarzędziaiładowarki.
Wskazówki dotyczące zacho-
wania maksymalnej trwałości
akumulatora
1. Akumulator należy naładować zanim zostanie
do końca rozładowany. Po zauważeniu spadek
mocy narzędzia należy przerwać pracę i nała-
dować akumulator.
2. Nie wolno ładować powtórnie w pełni nałado-
wanego akumulatora. Przeładowanie akumula-
tora skraca jego trwałość.
3. Akumulator należy ładować w temperaturze
pokojowej w przedziale 10–40°C (50–104°F). W
przypadku gorącego akumulatora przed przy-
stąpieniem do ładowania należy poczekać, aż
ostygnie.
4. Akumulatory niklowo-wodorkowe należy nała-
dować po okresie długiego nieużytkowania
(dłuższego niż sześć miesięcy).
OPIS CZĘŚCI
►Rys.1
1Uchwyt akumulatora
(10,8V/10,8V—maks.
12 V)
(osprzętdodatkowy)
2Uchwyt akumulatora
(14,4V/18V)
(osprzętdodatkowy)
3Pętlanaplakietkęz
imieniem
4Pętlanaplakietkęna
ramię
5Uchwytrękawa 6Kieszeńnaakumulator 7Siatkanasaszetkęz
lodem
8Wentylator
9Przewódzasilający 10 Gumaprzeciwpośli-
zgowa
(tylkoDFJ207, DFJ305 i
DFJ407 )
11 Kaptur
(tylkoDFJ207, DFJ305 i
DFJ407 )
- -
INSTALACJA
Wkładanie i wyjmowanie
akumulatora
PRZESTROGA: Przed włożeniem lub wyjęciem
akumulatora należy zawsze wyłączyć urządzenie.
PRZESTROGA: Podczas wkładania i wyjmowa-
nia akumulatora należy mocno trzymać uchwyt
akumulatora i akumulator.Zbytsłabetrzymanie
uchwytuakumulatoraiakumulatoramożespowo-
dowaćichwyślizgnięciesięiuszkodzenie,anawet
odniesienieobrażeńciała.
►Rys.2: 1.Czerwonywskaźnik2. Przycisk
3. Akumulator 4. Uchwyt akumulatora
(wyposażeniedodatkowe)
Abywłożyćakumulator,wyrównaćwystępnaakumu-
latorzezrowkiemwobudowieiwsunąćgonaswoje
miejsce.Wsunąćakumulatordooporu,ażwskoczy
naswojemiejsceisłyszalnebędziedelikatnekliknię-
cie.Jeślijestwidocznyczerwonywskaźnikwgórnej
częściprzycisku,akumulatorniezostałcałkowicie
zatrzaśnięty.
Abywyciągnąćakumulator,wysunąćgozuchwytu,
naciskającprzyciskznajdującysięwprzedniejjego
części.
PRZESTROGA: Akumulator należy włożyć
do końca, tak aby czerwony wskaźnik nie był
widoczny.Wprzeciwnymrazieakumulatormoże
przypadkowowypaśćzuchwytu,powodującobraże-
nia operatora lub osób postronnych.
PRZESTROGA: Nie wkładać akumulatora na
siłę.Jeśliakumulatorniedajesięswobodniewsunąć,
oznaczato,żezostałwłożonynieprawidłowo.
Mocowanie uchwytu akumulatora
Możliwejestzawieszenieuchwytuakumulatorana
pasku spodni.
Aby zapobiec przypadkowemu upuszczeniu akumula-
tora,umieścićpasekwotworzeizabezpieczyćgo.
►Rys.3: 1. Otwór paska
Dla uchwytów akumulatorów 18 V i 14,4 V
Uchwytakumulatorajestwyposażonywfunkcjęzapo-
biegającąupuszczeniu.Ściągającuchwytakumulatora
zpaska,należypociągnąćzauchwyt,naciskającprzy-
cisk odblokowania.
►Rys.4: 1. Przycisk odblokowywania

16 POLSKI
Montaż i demontaż wentylatora
1. Przekręcićpierścieńwlewopodczaspodnoszenia
zaczepu.Zdjąćpierścień,kiedyoznaczenienanim
zrównasięzzagłębieniemnawentylatorze.
►Rys.5: 1. Wentylator 2.Pierścień3. Zaczep
4. Otwór 5. Znak
2. Przełożyćgłowicęwentylatoraprzezotwórw
kurtce.Ułożyćpierścieńnawentylatorzeiobrócićgow
prawo,ażoznaczenienapierścieniuzrównasięzozna-
czeniemoddalonymodzagłębienia.
►Rys.6: 1. Znak 2.Pierścień3. Wentylator
3. Przełożyćpasekprzezpętlęnawentylatorzei
zapiąćguzikzatrzaskowy.
►Rys.7: 1. Pasek
4. Zamontowaćdrugiwentylatorwkurtcewtensam
sposób.
5. Podłączyćkabeldowentylatorów.Przełożyćkabel
przez uchwyt na kabel.
►Rys.8: 1. Kabel 2. Uchwyt na kabel
6. Podłączyćdrugikonieckabladouchwytu
akumulatora.
►Rys.9: 1. Uchwyt akumulatora
PRZESTROGA: Zawsze należy używać paska
i guzika zatrzaskowego, aby przymocować wen-
tylator do kurtki.Jeśliwentylatorspadnie,możeon
zostaćuszkodzonylubspowodowaćobrażeniaciała.
Podczasdemontażunależywykonaćczynnościproce-
durymontażuwodwrotnejkolejności.
Mocowanie zestawu ltra
Akcesoria opcjonalne
Zestawltrachroniwentylatorprzedpyłemikurzem.
Zalecamystosowaniezestawultrawzapylonychlub
zakurzonychmiejscachpracy.
Umieścićnasadkęltrapomiędzykurtkąawentylato-
remwsposóbprzedstawionynailustracji.
►Rys.10: 1.Pierścień2. Otwór w kurtce 3. Nasadka
ltra4. Wentylator 5. Filtr
Dokręcającpierścień,należyzatrzymaćgowpobliżu
zagłębieniawwentylatorze.Pozamontowaniuwentyla-
torówzakryćnasadkiltrówltrami.
►Rys.11: 1. Znak 2. Otwór
UWAGA: Sprawdzić, czy ltr całkowicie zakrywa
nasadkę ltra. Aby zapewnić lepszą ochronę
przed pyłem i kurzem, włożyć krawędzie ltra
pomiędzy kurtkę a nasadkę ltra.
OPIS DZIAŁANIA
UWAGA:
Kurtka wentylowana jest skuteczna, kiedy
wilgotność i temperatura powietrza dolotowego są
niższe od tych samych wartości na powierzchni
ciała. Kurta wentylowana może nie być skuteczna,
kiedy temperatura i/lub wilgotność powietrza są
wyższe od tych samych wartości wewnątrz kurtki.
Przycisk zasilania
Abywłączyćkurtkę,nacisnąćiprzytrzymaćprzyciskzasilania
nauchwycieakumulatora(wyposażeniedodatkowe).Kurtka
uruchamiasięzwysokąprędkościąpowietrza.Każdenaciśnięcie
przyciskuzasilaniapowodujezmianęprędkościkolejnozwysokiej
naśrednią,ześredniejnaniskąizniskiejnawysoką.Wskaźnik
prędkościpowietrzapokazujeaktualnąprędkośćpowietrza.
►Rys.12: 1.Wskaźnikprędkościpowietrza
2. Przycisk zasilania
Abywyłączyć,należyponownienacisnąćiprzytrzymać
przycisk zasilania.
Wskazanie stanu naładowania
akumulatora
Tylko w przypadku akumulatorów ze wskaźnikiem
►Rys.13: 1.Lampkiwskaźnika2. Przycisk kontrolny
Nacisnąćprzyciskkontrolnynaakumulatorzewcelu
wyświetleniastanunaładowaniaakumulatora.Lampki
wskaźnikazaświecąsięprzezkilkasekund.
Lampki wskaźnika Pozostała
energia
akumulatora
Świeci się Wyłączony Miga
75–100%
50–75%
25–50%
0–25%
(Tylko dla akumulatorów 14,4 V i 18 V).
Naładować
akumulator.
(Tylko dla akumulatorów 14,4 V i 18 V).
Akumulator
możenie
działać
poprawnie.
WSKAZÓWKA:Zależnieodwarunkówużytkowania
itemperaturyotoczenia,wskazywanypoziommoże
nieznaczniesięróżnićodrzeczywistegostanunała-
dowania akumulatora.
Układ zabezpieczenia akumulatora
Urządzeniejestwyposażonewukładzabezpieczenia
akumulatora.Układautomatycznieodcinazasilanie
silnikawceluwydłużeniatrwałościakumulatora.

17 POLSKI
Jeślistannaładowaniaakumulatorajestzbytniski,urządze-
nieniebędziepracować.Wprzypadkuwłączeniaurządze-
niasilnikuruchomisięponownieipochwilisięzatrzyma.W
takiejsytuacjinależywyjąćakumulatorigonaładować.
Przycisk turbo
Naciśnięcieprzyciskuturbonauchwycieakumulatora
powodujeprzejściekurtkiwtrybturbowceluszybkiego
chłodzenia.Trybturbodziałaprzezminutę,poczym
prędkośćpowietrzapowracadonormalnego.
►Rys.14: 1. Przycisk turbo
Przepływ powietrza
Abyutrzymaćstabilnyprzepływpowietrza,należy
zapiąćguzikwokolicachszyi.Zapiąćguziknataśmie,
abyzapewnićlepszyprzepływpowietrzaztyłu.
►Rys.15: 1.Taśma
Przepływpowietrzawkurtcejestprzedstawionyponiżej.
►Rys.16
Jeślikurtkajestwyposażonawkaptur,należynałożyć
go na kask. Powietrze z wentylatora przechodzi przez
kaskichłodzigłowę.
►Rys.17
Kieszeń na akumulator
Kieszeńsłużydoprzechowywaniauchwytuakumulatora
(zakumulatorem)10,8V/10,8V—maks.12Vwkurtce.
Podłączyćprzewódzasilającydouchwytuakumulatora,a
następnieumieścićgowkieszeniizapiąćguzikzatrzaskowy.
►Rys.18
Siatka
Siatkisądostępnenaplecachkurtkiisłużądoprzecho-
wywania saszetek z lodem.
►Rys.19: 1. Siatka
Podłączanie urządzeń USB
PRZESTROGA: Należy podłączać wyłącznie
urządzenia, które są zgodne z gniazdem zasilania
USB.Wprzeciwnymraziemożewystąpićusterka
uchwytu akumulatora.
UWAGA: Przed podłączeniem urządzenia USB do
uchwytu akumulatora (z akumulatorem) zawsze
należy wykonać kopię zapasową danych na urzą-
dzeniu USB.Wprzeciwnymraziemożedojśćdo
utraty danych.
Uchwytakumulatora(zakumulatorem)możepracować
jakzewnętrzneźródłozasilaniaurządzeńUSB.
OtworzyćpokrywęipodłączyćprzewódUSB(niejest
dołączony)dogniazdazasilaniauchwytuakumulatora.
Następniepodłączyćdrugikoniecprzewodudourzą-
dzeniaiwłączyćprzełącznikobokgniazdaUSB.
►Rys.20: 1. Pokrywa 2.Przełącznik
Uchwyt akumulatora (z akumulatorem) zapewnia zasila-
nieprądemstałym5V,2,1A.PrzewódUSBmożnadla
wygodyumieścićwkurtcedziękiotworowiwkieszenii
uchwytowi na przewód.
WSKAZÓWKA:Uchwytakumulatoramożeniezasi-
laćniektórychurządzeńUSB.
WSKAZÓWKA:
WyjąćprzewódUSBizamknąćpokrywę,
jeśliniejestonużywanylubładowaniezostałozakończone.
WSKAZÓWKA:
Mocakumulatorajestzużywana
zawsze,gdyprzełącznikjestwłączony.Zawszenależy
wyłączaćprzełącznik,kiedyakumulatorniejestużywany.
KONSERWACJA
PRZESTROGA: Przed przystąpieniem do prze-
glądu kurtki lub jej konserwacji upewnić się, że
jest ona wyłączona, a akumulator wyjęty.
PRZESTROGA: Jeśli kurtka nie włącza się lub
zauważono inną usterkę przy całkowicie nałado-
wanym akumulatorze, należy wyczyścić zaciski
uchwytu akumulatora i akumulatora. Jeśli kurtka
nadal nie działa prawidłowo, zaprzestać jej używa-
nia i skontaktować się z autoryzowanym centrum
serwisowym.
UWAGA: Nie stosować benzyny, rozpuszczalni-
ków, alkoholu itp. środków. Mogą one powodo-
wać odbarwienia, odkształcenia lub pęknięcia.
Czyszczenie kurtki
Wymontowaćwentylatoryiuchwytakumulatorazkurtkiprzed
praniem.Postępowaćzgodniezinstrukcjaminametce.
Dla DFJ304 i DFJ305
Produktybawełnianemogąskurczyćsięwpraniu.
Niepraćkurtkizinnymiubraniami.Możetospowodo-
waćwyblaknięciekolorówlubzafarbowanie.
Dla DFJ405 i DFJ407
Wprzypadkukorzystaniazpralkistosowaćsiatkędoprania.
AKCESORIA
OPCJONALNE
PRZESTROGA: Zaleca się stosowanie wymie-
nionych akcesoriów i przystawek razem z narzę-
dziem Makita opisanym w niniejszej instrukcji.
Stosowanie innych akcesoriów lub przystawek
możebyćprzyczynąobrażeńciała.Akcesorialub
przystawkinależywykorzystywaćtylkozgodniezich
przeznaczeniem.
Wraziepotrzebywszelkiejpomocyiszczegółowych
informacjinatematniniejszychakcesoriówudzielą
PaństwulokalnepunktyserwisoweMakita.
• Uchwytakumulatora
• Zestawltra
• OryginalnyakumulatoriładowarkarmyMakita
WSKAZÓWKA:Niektórepozycjeznajdującesięna
liściemogąbyćdołączonedopakietunarzędziowego
jakoakcesoriastandardowe.Mogątobyćróżne
pozycje,wzależnościodkraju.

18 MAGYAR
MAGYAR (Eredeti utasítások)
FIGYELMEZTETÉS
Akészüléketnemhasználhatják8évnélatalabbgyermekek,vala-
mintcsökkentzikai,érzékelésivagyértelmiképességűszemé-
lyek, illetve olyanok, akiknek nincs meg a tapasztalatuk és tudásuk
ehhez,kivéve,havalakiabiztonságoshasználatramegtanítjaőket,
ismerteti velük a lehetséges veszélyeket, és a használat közben
felügyeliőket.Gyermekeknejátsszanakakészülékkel.Akészü-
lék tisztítását és karbantartását felügyelet nélküli gyermekek ne
végezzék.
RÉSZLETES LEÍRÁS
Típus: DFJ206 DFJ207 DFJ304 DFJ305 DFJ405 DFJ407
USB tápellátó port
(opcionális tartozék)
5 V, 2,1 A egyenáram, A típus
Névleges feszültség 10,8 V – max. 12 V egyenáram
14,4 V egyenáram
18 V egyenáram
Akkumulátor 10,8 V BL1015, BL1020B, BL1040B
10,8 V – max. 12 V BL1016, BL1021B, BL1041B
14,4 V
BL1415, BL1415N, BL1430, BL1430B, BL1440, BL1450, BL1460B
18 V BL1815, BL1815N, BL1820, BL1820B, BL1830, BL1830B,
BL1840, BL1840B, BL1850, BL1850B, BL1860B
Anyag Külsőréteg 100% poliészter 100% pamut Poliészter (100%)
+ titán gyöngy-
házfényűborítás
Zseb 100% pamut
Válltömés -65% poliészter +
35% pamut
• Folyamatoskutató-ésfejlesztőprogramunkeredményekéntazittfelsoroltműszakiadatokgyelmeztetés
nélkül megváltozhatnak.
• Aműszakiadatokésazakkumulátorországonkéntváltozhatnak.
Üzemidő
Ventilátor sebessége Akkumulátor
BL1040B
BL1041B
BL1460B BL1860B
MAGAS 6,0 óra 10,5 óra 18,5 óra
KÖZEPES 11,5 óra 18,5 óra 26,5 óra
ALACSONY 17,0 óra 27,5 óra 40,0 óra
• Afentitáblázatbanjelzettüzemidőkcsakiránymutatókéntszolgálóbecslések.Eltérhetnekavalósüzemidőtől.
• Azüzemidőkazakkumulátortípusától,atöltöttségszintjétőlésahasználatikörülményektőlfüggően
eltérhetnek.

19 MAGYAR
Szimbólumok
Akövetkezőkbenaberendezésenhasználtjelképek
láthatók.Aszerszámhasználataelőttbizonyosodjon
megarrólhogyhelyesenértelmeziajelentésüket.
Olvassa el a használati utasítást.
Amosógépben30°Calattihőmérsékleten,
kímélőprogrambanmossa.
Amosógépben40°Calattihőmérsékleten,
kímélőprogrambanmossa.
Otthoni vagy ipari mosógépben, normál
beállítások mellett mossa.
Fehéríteni tilos.
Naptól védve, kötélen szárítandó.
Necsavarjaki.
Alacsonyhőmérsékletenvasalja(legfeljebb
110 °C-on).
Közepeshőmérsékletenvasalja(legfeljebb
150°C-on).
Nem vasalható.
Nem vegytisztítható.
Cd
Ni-MH
Li-ion
Csak az Európai Unió tagállamai számára
Az elektromos berendezéseket és az
akkumulátorukatnedobjaaháztartási
szemétbe! Az Európai Unió használt
elektromos és elektronikus berendezé-
sekre vonatkozó irányelvei, illetve az
elemekrőlésakkumulátorokról,valamint
ahulladékelemekrőlésakkumulátorokról
szóló irányelv, továbbá azoknak a nemzeti
jogbavalóátültetéseszerintazelhasznált
elektromos berendezéseket, elemeket és
akkumulátorokatkülönkellgyűjteni,és
környezetbarát módon kell gondoskodni
újrahasznosításukról.
Rendeltetés
Ahűthetőkabátcélja,hogycsökkentseatest
hőmérsékletét.
BIZTONSÁGI
FIGYELMEZTETÉS
FIGYELMEZTETÉS: Olvassa el az összes
biztonsági gyelmeztetést és utasítást. Ha nem
tartjabeagyelmeztetéseketésutasításokat,akkor
áramütés,tűzés/vagysúlyossérüléskövetkezhetbe.
Őrizzen meg minden gyelmez-
tetést és utasítást a későbbi tájé-
kozódás érdekében.
1. Soha ne használja a hűthető kabátot, ha a
hőmérséklet meghaladja az 50 °C-ot (122 °F).
Ne használja nagy páratartalmú helyen. Ha így
tesz, a kabát égési sérüléseket okozhat.
2. Ne viselje a kabátot közvetlenül a bőrén.
3. Ne használja a kabátot, ha drog, alkohol vagy
gyógyszerek hatása alatt áll.
4.
Ne aludjon a hűthető kabátban.Atesthőmérséklet
gyors csökkenése egészségügyi problémákat okozhat.
5. Gyermekek, korlátozott testi képességű sze-
mélyek, illetve a hőmérsékletváltozásra érzé-
kenyek, például rossz vérkeringéssel rendel-
kező személyek ne használják a kabátot.
6. A készüléket nem orvosi használatra tervezték.
7.
A kabátot csak arra a célra használja, amire azt tervezték.
8. Ha bármilyen szokatlan jelenséget észlel, kap-
csolja ki a kabátot, majd azonnal távolítsa el az
akkumulátortartót.
9. Ha azt tapasztalja, hogy a termék bármilyen
módon eltér a normálistól, javításért forduljon
a helyi szervizközponthoz.
10. Ne taposson rá a hűthető kabátra, ne dobja el,
és más módon se rongálja meg.
11. Ne dugja az ujját vagy más idegen tárgyat a
ventilátoregységbe.
12.
Ne fújjon sűrített levegőt a ventilátorba. Ne dug-
jon kis botokat a ventilátoregységbe. Ha így tesz,
azzalaventilátorésamotorkárosodásátokozhatja.
13. Csak akkor kapcsolja be a hűthető kabátot,
amikor viseli azt.
14.
Ne használja a hűthető kabátot olyan helyen, ahol
tűz vagy szikra keletkezhet. A ventilátoregység
kigyulladhat, ami tüzet vagy égési sérüléseket okozhat.
15.
A ventilátor sebességét folyamatos használathoz, a
felhasználási környezetnek megfelelően válassza ki.
16.
Ne viseljen semmilyen ruhát a hűthető kabát felett.
17. Ne vegye le az adattáblát a ventilátoregység-
ről. Ha olvashatatlanná válik vagy elvész,
javításért forduljon a helyi szervizközponthoz.
18. Mosás előtt szerelje le a ventilátoregységet
és az akkumulátortartót, majd távolítsa el az
akkumulátort. Csak a kabátot mossa ki.
19. Ne hagyja a hűthető kabátot olyan helyen, ahol
az magas hőmérsékletnek van kitéve, például
egy autóban a napon.Haígytesz,aműanyag
alkatrészek megolvadhatnak és károsodhatnak.
20.
Hosszú távú tárolás előtt távolítsa el a kabátról
az akkumulátortartót és az akkumulátort, majd
vegye ki az akkumulátort az akkumulátortartóból.
21. A tárolás során ügyeljen rá, hogy a hűthető
kabáthoz, a ventilátoregységekhez, az akku-
mulátortartóhoz és az akkumulátorhoz gyer-
mekek ne férhessenek hozzá.
Elektromos biztonság
1. Ne tegye ki a kabátot esőnek vagy nedves
körülményeknek. Ügyeljen rá, hogy az elekt-
romos alkatrészeket ne érhesse víz. A kabátba
kerülővíznöveliazáramütéskockázatát.

20 MAGYAR
2. Az akkumulátort csak a gyártó által meghatá-
rozott töltővel töltse. Egy adott típusú akkumu-
látorhoz használható töltő más akkumuláto-
rokkal való használata tüzet okozhat.
3. Csak a meghatározott akkumulátorokkal hasz-
nálja. Egyéb akkumulátorok használata sérü-
lést vagy tüzet okozhat.
4. Amikor nem használja az akkumulátort, irat-
kapcsoktól, érméktől, kulcsoktól, szögektől,
csavaroktól és egyéb apró fémtárgyaktól távol
tárolja, mert ezek összeköttetést hozhatnak
létre a pólusok között.
5. Helytelen működtetés esetén az akkumulá-
torból folyadék folyhat ki; kerülje az ezzel
való érintkezést. Ha véletlenül érintkezésbe
kerül a folyadékkal, öblítse le vízzel az érintett
területet.
6. Ne fogja meg a kábelt vagy az akkumulátort
nedves vagy zsíros kézzel.
7. Ha a kábel vagy a dugó meghibásodott, ne
használja a hűthető kabátot.
8. Ne rongálja meg a kábelt. Ne használja a kábelt
a kabát hordozásához, vontatásához vagy a
csatlakozóból való kihúzásához. Tartsa távol a
kábelt a hőtől, az olajtól és az éles felületektől.
9. Ha az akkumulátorból áram folyik a kábelbe,
ne hagyja azt szétcsatlakoztatva. A kisgyerekek
aszájukbavehetikazáramalattlévődugót,ami
személyi sérüléseket okozhat.
10. A mellékelt kábelt ne használja más berende-
zésekhez, csak a ventilátoregységhez.
11. Ne dugjon szögeket, drótokat vagy egyéb
tárgyakat az USB tápellátó portba. Ha így tesz,
azzal rövidzárlatot okozhat, ami füstöt vagy tüzet
eredményezhet.
12. Ne csatlakoztassa az áramforrást az USB-
porthoz. Az USB-port csak alacsonyabb
feszültségű készülékek töltésére alkalmas.
Ha éppen nem egy alacsonyabb feszültségű
készüléket tölt, tegye fel a fedelet az USB-
portra. Hanemígytesz,aztűzveszélyeslehet.
Fontos biztonsági utasítások az
akkumulátorra vonatkozóan
1. Az akkumulátor használata előtt tanulmá-
nyozza át az akkumulátortöltőn (1), az akkumu-
látoron (2) és az akkumulátorral működtetett
terméken (3) olvasható összes utasítást és
gyelmeztető jelzést.
2. Ne szerelje szét az akkumulátort.
3. Ha a működési idő nagyon lerövidült, azonnal
hagyja abba a használatot. Ez a túlmelegedés,
esetleges égések és akár robbanás veszélyé-
vel is járhat.
4. Ha elektrolit kerül a szemébe, mossa ki azt
tiszta vízzel és azonnal kérjen orvosi segítsé-
get. Ez a látásának elvesztését okozhatja.
5. Ne zárja rövidre az akkumulátort:
(1) Ne érjen az érintkezőkhöz elektromosan
vezető anyagokkal.
(2) Ne tárolja az akkumulátort más fémtár-
gyakkal, mint pl. szegekkel, érmékkel,
stb. egy helyen.
(3) Ne tegye ki az akkumulátort víznek vagy
esőnek.
Az akkumulátor rövidzárlata nagy áramerőssé-
get, túlmelegedést, égéseket, sőt akár meghi-
básodást is okozhat.
6. Ne tárolja a szerszámot vagy az akkumulátort
olyan helyen, ahol a hőmérséklet elérheti vagy
meghaladhatja az 50 °C-ot (122 °F).
7. Ne égesse el az akkumulátort még akkor
sem, ha az komolyan megsérült vagy teljesen
elhasználódott. Az akkumulátor a tűzben
felrobbanhat.
8. Vigyázzon, nehogy leejtse vagy megüsse az
akkumulátort.
9. Ne használjon sérült akkumulátort.
10. A készülékben található lítium-ion akkumuláto-
rokra a veszélyes árukkal kapcsolatos előírá-
sok vonatkoznak.
A termék pl. harmadik felek, fuvarozó cégek stb.
általtörténőszállításaeseténmindenesetben
tartsaszemelőttacsomagolásonésacímkén
található speciális követelményeket.
Atermékszállításratörténőfelkészítéseesetén
vegye fel a kapcsolatot egy veszélyes anyagokkal
foglalkozószakemberrel.Kérjük,hogyazeset-
legesenszigorúbbnemzetielőírásokatisvegye
gyelembe.
Ragasszaleakiállóérintkezőket,illetveoly
módoncsomagoljabeazakkumulátort,hogyaz
netudjonelmozdulniacsomagolásban.
11. Az akkumulátor ártalmatlanításakor tartsa be a
helyi előírásokat.
ŐRIZZE MEG EZEKET AZ
UTASÍTÁSOKAT.
VIGYÁZAT: Csak eredeti Makita akkumuláto-
rokat használjon. A nem eredeti Makita akkumu-
látorok vagy módosított akkumulátorok használata
esetén az akkumulátor felrobbanhat, ami tüzet,
személyi sérülést és anyagi kárt okozhat. A Makita
szerszámraéstöltőrevonatkozóMakitagaranciátis
érvénytelenítheti.
Tippek az akkumulátor maximá-
lis élettartamának eléréséhez
1. Töltse fel az akkumulátort, mielőtt teljesen
lemerülne. Állítsa le a gépet, és töltse fel az
akkumulátort, ha a gép erejének csökkenését
észleli.
2. Soha ne töltse újra a teljesen feltöltött akku-
mulátort. A túltöltés csökkenti az akkumulátor
élettartamát.
3. Töltse az akkumulátort szobahőmérsékleten,
10 °C - 40 °C (50 °F - 104 °F) között. Töltés előtt
hagyja lehűlni a fölforrósodott akkumulátort.
4. Töltse fel az akkumulátort, ha hosszabb ideje
(több mint hat hónapja) nem használta azt.
Other manuals for DFJ206
3
This manual suits for next models
5
Table of contents
Languages:
Other Makita Accessories manuals

Makita
Makita DCW180 User manual

Makita
Makita CW002G User manual

Makita
Makita CJ105D User manual

Makita
Makita CB100D User manual

Makita
Makita CJ102D User manual

Makita
Makita DCJ200 User manual

Makita
Makita DFJ210 User manual

Makita
Makita DFJ212A User manual

Makita
Makita CB100D User manual

Makita
Makita CJ101D User manual

Makita
Makita CB100D User manual

Makita
Makita CW001G User manual

Makita
Makita DFJ206 User manual

Makita
Makita DFJ210 User manual

Makita
Makita DFJ210 User manual

Makita
Makita DFJ206 User manual

Makita
Makita CW003GZ User manual

Makita
Makita DFJ202 User manual

Makita
Makita DFJ206 User manual

Makita
Makita CJ102DZ User manual