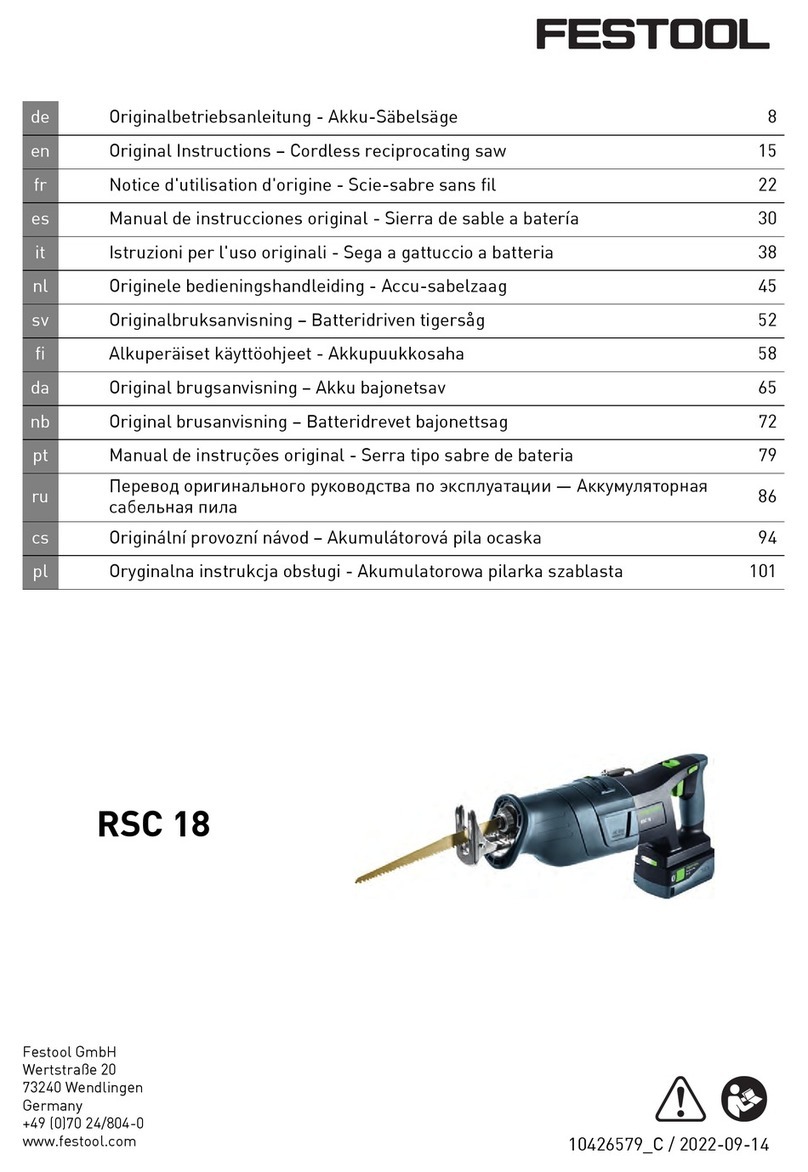
Makita DHS661RGJ User manual

DHS660
DHS661
EN Cordless Circular Saw INSTRUCTION MANUAL 9
ZHCN 充电式电圆锯 使用说明书 25
ID Gergaji Bundar Nirkabel PETUNJUK PENGGUNAAN 42
VI Máy Cưa Đĩa Cầm Tay Hoạt
Động Bằng Pin TÀI LIỆU HƯỚNG DẪN 59
TH 75

Fig.1
Fig.2
Fig.3
Fig.4
Fig.5
Fig.6
1
2
3
Fig.7
2

1
Fig.8
1
2
Fig.9
1
2
Fig.10
1
Fig.11
1
2
Fig.12
3
2
1
Fig.13
1
2
Fig.14
1
0° - 45°
0° - 50°
Fig.15
3

12
Fig.16
1
Fig.17
Fig.18
1
2
Fig.19
1
2
Fig.20
1
Fig.21
1
2
4
3
Fig.22
4

1
2
3
4
Fig.23
1
2
3
5
4
Fig.24
12
3
4
5
Fig.25
12
3
4
5
Fig.26
12
3
4
5
6
15.88
15.88
15.88
Fig.27
1
2
Fig.28
1
2
Fig.29
5

Fig.30
1
2
Fig.31
1
Fig.32
Fig.33
1
Fig.34
1
2
3
4
Fig.35
3
2
1
Fig.36
6

1
Fig.37
1
2
1
2
Fig.38
Fig.39
1
Fig.40
1
2
Fig.41
1
Fig.42
7

1
Fig.43
1
2
1
2
Fig.44
1
Fig.45
11
Fig.46
1
2
Fig.47
1
2
A
B
Fig.48
8

9ENGLISH
ENGLISH (Original instructions)
SPECIFICATIONS
Model: DHS660 DHS661
Blade diameter 165 mm
Max. Cutting
depth
at 0° 57 mm
at 45° bevel 41 mm
at 50° bevel 37 mm
No load speed 5,000 min-1
Overall length 270 mm
Rated voltage D.C. 18 V
Net weight 2.9 - 3.2 kg
• Duetoourcontinuingprogramofresearchanddevelopment,thespecicationshereinaresubjecttochange
withoutnotice.
• Specicationsandbatterycartridgemaydierfromcountrytocountry.
• Theweightmaydierdependingontheattachment(s),includingthebatterycartridge.Thelightestandheavi-
estcombinations,accordingtoEPTA-Procedure01/2014,areshowninthetable.
Applicable battery cartridge and charger
Batterycartridge BL1815N/BL1820/BL1820B/BL1830/BL1830B/BL1840/
BL1840B/BL1850/BL1850B/BL1860B
Charger DC18RC/DC18RD/DC18RE/DC18SD/DC18SE/DC18SF/
DC18SH
• Someofthebatterycartridgesandchargerslistedabovemaynotbeavailabledependingonyourregionof
residence.
WARNING: Only use the battery cartridges and chargers listed above.Useofanyotherbatterycartridges
andchargersmaycauseinjuryand/orre.
Symbols
Thefollowingsshowthesymbolswhichmaybeused
fortheequipment.Besurethatyouunderstandtheir
meaningbeforeuse.
Readinstructionmanual.
Ni-MH
Li-ion
OnlyforEUcountries
Donotdisposeofelectricequipmentor
batterypacktogetherwithhouseholdwaste
material!
InobservanceoftheEuropeanDirectives,
onWasteElectricandElectronic
EquipmentandBatteriesandAccumulators
andWasteBatteriesandAccumulators
andtheirimplementationinaccordance
withnationallaws,electricequipmentand
batteriesandbatterypack(s)thathave
reachedtheendoftheirlifemustbecol-
lectedseparatelyandreturnedtoanenvi-
ronmentallycompatiblerecyclingfacility.
Intended use
Thetoolisintendedforperforminglengthwaysand
crosswaysstraightcutsandmitrecutswithanglesin
woodwhileinrmcontactwiththeworkpiece.
SAFETY WARNINGS
General power tool safety warnings
WARNING: Read all safety warnings, instruc-
tions, illustrations and specications provided
with this power tool.Failuretofollowallinstructions
listedbelowmayresultinelectricshock,reand/or
seriousinjury.
Save all warnings and instruc-
tions for future reference.
Theterm“powertool”inthewarningsreferstoyour
mains-operated(corded)powertoolorbattery-operated
(cordless)powertool.
Work area safety
1. Keep work area clean and well lit. Cluttered or
darkareasinviteaccidents.
2. Do not operate power tools in explosive atmo-
spheres, such as in the presence of ammable
liquids, gases or dust.Powertoolscreatesparks
whichmayignitethedustorfumes.
3. Keep children and bystanders away while
operating a power tool.Distractionscancause
youtolosecontrol.

10 ENGLISH
Electrical safety
1. Power tool plugs must match the outlet. Never
modify the plug in any way. Do not use any
adapter plugs with earthed (grounded) power
tools. Unmodiedplugsandmatchingoutletswill
reduceriskofelectricshock.
2. Avoid body contact with earthed or grounded
surfaces, such as pipes, radiators, ranges and
refrigerators.Thereisanincreasedriskofelec-
tricshockifyourbodyisearthedorgrounded.
3. Do not expose power tools to rain or wet con-
ditions.Waterenteringapowertoolwillincrease
theriskofelectricshock.
4. Do not abuse the cord. Never use the cord for
carrying, pulling or unplugging the power tool.
Keep cord away from heat, oil, sharp edges
or moving parts.Damagedorentangledcords
increasetheriskofelectricshock.
5. When operating a power tool outdoors, use an
extension cord suitable for outdoor use.Useof
acordsuitableforoutdoorusereducestheriskof
electricshock.
6. If operating a power tool in a damp location
is unavoidable, use a residual current device
(RCD) protected supply.UseofanRCDreduces
theriskofelectricshock.
7. Power tools can produce electromagnetic
elds (EMF) that are not harmful to the user.
However,usersofpacemakersandothersimilar
medicaldevicesshouldcontactthemakeroftheir
deviceand/ordoctorforadvicebeforeoperating
this power tool.
Personal safety
1. Stay alert, watch what you are doing and use
common sense when operating a power tool.
Do not use a power tool while you are tired or
under the inuence of drugs, alcohol or med-
ication.Amomentofinattentionwhileoperating
powertoolsmayresultinseriouspersonalinjury.
2. Use personal protective equipment. Always
wear eye protection.Protectiveequipmentsuch
asadustmask,non-skidsafetyshoes,hardhator
hearingprotectionusedforappropriateconditions
willreducepersonalinjuries.
3. Prevent unintentional starting. Ensure the
switch is in the o-position before connecting
to power source and/or battery pack, picking
up or carrying the tool.Carryingpowertoolswith
yourngerontheswitchorenergisingpowertools
thathavetheswitchoninvitesaccidents.
4. Remove any adjusting key or wrench before
turning the power tool on.Awrenchorakeyleft
attachedtoarotatingpartofthepowertoolmay
resultinpersonalinjury.
5. Do not overreach. Keep proper footing and
balance at all times.Thisenablesbettercontrol
ofthepowertoolinunexpectedsituations.
6. Dress properly. Do not wear loose clothing or
jewellery. Keep your hair and clothing away
from moving parts.Looseclothes,jewelleryor
longhaircanbecaughtinmovingparts.
7. If devices are provided for the connection of
dust extraction and collection facilities, ensure
these are connected and properly used.Useof
dustcollectioncanreducedust-relatedhazards.
8. Do not let familiarity gained from frequent use
of tools allow you to become complacent and
ignore tool safety principles.Acarelessaction
cancausesevereinjurywithinafractionofa
second.
9. Always wear protective goggles to protect
your eyes from injury when using power tools.
The goggles must comply with ANSI Z87.1 in
the USA, EN 166 in Europe, or AS/NZS 1336
in Australia/New Zealand. In Australia/New
Zealand, it is legally required to wear a face
shield to protect your face, too.
It is an employer's responsibility to enforce
the use of appropriate safety protective equip-
ments by the tool operators and by other per-
sons in the immediate working area.
Power tool use and care
1. Do not force the power tool. Use the correct
power tool for your application.Thecorrect
powertoolwilldothejobbetterandsaferatthe
rateforwhichitwasdesigned.
2. Do not use the power tool if the switch does
not turn it on and o.Anypowertoolthatcannot
becontrolledwiththeswitchisdangerousand
must be repaired.
3. Disconnect the plug from the power source
and/or remove the battery pack, if detachable,
from the power tool before making any adjust-
ments, changing accessories, or storing power
tools.Suchpreventivesafetymeasuresreduce
theriskofstartingthepowertoolaccidentally.
4. Store idle power tools out of the reach of chil-
dren and do not allow persons unfamiliar with
the power tool or these instructions to operate
the power tool.Powertoolsaredangerousinthe
handsofuntrainedusers.
5. Maintain power tools and accessories. Check
for misalignment or binding of moving parts,
breakage of parts and any other condition that
may aect the power tool’s operation. If dam-
aged, have the power tool repaired before use.
Manyaccidentsarecausedbypoorlymaintained
power tools.
6. Keep cutting tools sharp and clean.Properly
maintainedcuttingtoolswithsharpcuttingedges
arelesslikelytobindandareeasiertocontrol.

11 ENGLISH
7. Use the power tool, accessories and tool bits
etc. in accordance with these instructions, tak-
ing into account the working conditions and
the work to be performed.Useofthepowertool
foroperationsdierentfromthoseintendedcould
resultinahazardoussituation.
8. Keep handles and grasping surfaces dry,
clean and free from oil and grease.Slippery
handlesandgraspingsurfacesdonotallowfor
safehandlingandcontrolofthetoolinunexpected
situations.
9. When using the tool, do not wear cloth work
gloves which may be entangled.Theentangle-
mentofclothworkglovesinthemovingpartsmay
resultinpersonalinjury.
Battery tool use and care
1. Recharge only with the charger specied by
the manufacturer.Achargerthatissuitablefor
onetypeofbatterypackmaycreateariskofre
whenusedwithanotherbatterypack.
2. Use power tools only with specically desig-
nated battery packs.Useofanyotherbattery
packsmaycreateariskofinjuryandre.
3. When battery pack is not in use, keep it away
from other metal objects, like paper clips,
coins, keys, nails, screws or other small metal
objects, that can make a connection from one
terminal to another.Shortingthebatterytermi-
nalstogethermaycauseburnsorare.
4. Under abusive conditions, liquid may be
ejected from the battery; avoid contact. If con-
tact accidentally occurs, ush with water. If
liquid contacts eyes, additionally seek medical
help.Liquidejectedfromthebatterymaycause
irritation or burns.
5. Do not use a battery pack or tool that is dam-
aged or modied.Damagedormodiedbatteries
mayexhibitunpredictablebehaviourresultingin
re,explosionorriskofinjury.
6. Do not expose a battery pack or tool to re or
excessive temperature.Exposuretoreortem-
peratureabove130°Cmaycauseexplosion.
7. Follow all charging instructions and do not
charge the battery pack or tool outside the
temperature range specied in the instruc-
tions.Chargingimproperlyorattemperatures
outsidethespeciedrangemaydamagethe
batteryandincreasetheriskofre.
Service
1. Have your power tool serviced by a qualied
repair person using only identical replacement
parts.Thiswillensurethatthesafetyofthepower
tool is maintained.
2. Never service damaged battery packs.Service
ofbatterypacksshouldonlybeperformedbythe
manufacturerorauthorizedserviceproviders.
3. Follow instruction for lubricating and chang-
ing accessories.
Cordless circular saw safety
warnings
Cutting procedures
1. DANGER: Keep hands away from cutting
area and the blade. Keep your second hand
on auxiliary handle, or motor housing.Ifboth
handsareholdingthesaw,theycannotbecutby
the blade.
2. Do not reach underneath the workpiece.The
guardcannotprotectyoufromthebladebelowthe
workpiece.
3. Adjust the cutting depth to the thickness of
the workpiece.Lessthanafulltoothoftheblade
teethshouldbevisiblebelowtheworkpiece.
4. Never hold the workpiece in your hands or
across your leg while cutting. Secure the
workpiece to a stable platform. It is important to
supporttheworkproperlytominimisebodyexpo-
sure,bladebinding,orlossofcontrol.
►Fig.1
5. Hold the power tool by insulated gripping
surfaces, when performing an operation where
the cutting tool may contact hidden wiring.
Contactwitha“live”wirewillalsomakeexposed
metalpartsofthepowertool“live”andcouldgive
theoperatoranelectricshock.
6. When ripping, always use a rip fence or
straight edge guide.Thisimprovestheaccuracy
ofcutandreducesthechanceofbladebinding.
7. Always use blades with correct size and shape
(diamond versus round) of arbour holes.
Bladesthatdonotmatchthemountinghardware
ofthesawwillruno-centre,causinglossof
control.
8. Never use damaged or incorrect blade wash-
ers or bolt.Thebladewashersandboltwere
speciallydesignedforyoursaw,foroptimum
performanceandsafetyofoperation.
Kickback causes and related warnings
— kickbackisasuddenreactiontoapinched,
jammedormisalignedsawblade,causingan
uncontrolledsawtoliftupandoutoftheworkpiece
toward the operator;
— whenthebladeispinchedorjammedtightlybythe
kerfclosingdown,thebladestallsandthemotor
reactiondrivestheunitrapidlybacktowardthe
operator;
— ifthebladebecomestwistedormisalignedinthe
cut,theteethatthebackedgeofthebladecandig
intothetopsurfaceofthewoodcausingtheblade
toclimboutofthekerfandjumpbacktowardthe
operator.
Kickbackistheresultofsawmisuseand/orincorrect
operatingproceduresorconditionsandcanbeavoided
bytakingproperprecautionsasgivenbelow.
1. Maintain a rm grip with both hands on the
saw and position your arms to resist kickback
forces. Position your body to either side of the
blade, but not in line with the blade.Kickback
couldcausethesawtojumpbackwards,but
kickbackforcescanbecontrolledbytheoperator,
ifproperprecautionsaretaken.

12 ENGLISH
2. When blade is binding, or when interrupting a
cut for any reason, release the trigger and hold
the saw motionless in the material until the
blade comes to a complete stop. Never attempt
to remove the saw from the work or pull the
saw backward while the blade is in motion
or kickback may occur. Investigate and take
correctiveactionstoeliminatethecauseofblade
binding.
3. When restarting a saw in the workpiece, centre
the saw blade in the kerf so that the saw teeth
are not engaged into the material.Ifasawblade
binds,itmaywalkuporkickbackfromthework-
pieceasthesawisrestarted.
4. Support large panels to minimise the risk of
blade pinching and kickback. Large panels tend
tosagundertheirownweight.Supportsmustbe
placedunderthepanelonbothsides,neartheline
ofcutandneartheedgeofthepanel.
►Fig.2
►Fig.3
5. Do not use dull or damaged blades.
Unsharpenedorimproperlysetbladesproduce
narrowkerfcausingexcessivefriction,blade
bindingandkickback.
6. Blade depth and bevel adjusting locking levers
must be tight and secure before making the
cut.Ifbladeadjustmentshiftswhilecutting,itmay
causebindingandkickback.
7. Use extra caution when sawing into existing
walls or other blind areas.Theprotrudingblade
maycutobjectsthatcancausekickback.
8. ALWAYS hold the tool rmly with both hands.
NEVER place your hand, leg or any part of your
body under the tool base or behind the saw,
especially when making cross-cuts.Ifkickback
occurs,thesawcouldeasilyjumpbackwardsover
yourhand,leadingtoseriouspersonalinjury.
►Fig.4
9. Never force the saw. Push the saw forward at a
speed so that the blade cuts without slowing.
Forcingthesawcancauseunevencuts,lossof
accuracy,andpossiblekickback.
Lower guard function
1. Check the lower guard for proper closing
before each use. Do not operate the saw if the
lower guard does not move freely and close
instantly. Never clamp or tie the lower guard
into the open position.Ifthesawisaccidentally
dropped,thelowerguardmaybebent.Raisethe
lowerguardwiththeretractinghandleandmake
sureitmovesfreelyanddoesnottouchtheblade
oranyotherpart,inallanglesanddepthsofcut.
2. Check the operation of the lower guard spring.
If the guard and the spring are not operating
properly, they must be serviced before use.
Lowerguardmayoperatesluggishlydueto
damagedparts,gummydeposits,orabuild-upof
debris.
3. The lower guard may be retracted manually
only for special cuts such as “plunge cuts”
and “compound cuts”. Raise the lower guard
by the retracting handle and as soon as the
blade enters the material, the lower guard
must be released.Forallothersawing,thelower
guardshouldoperateautomatically.
4. Always observe that the lower guard is cover-
ing the blade before placing the saw down on
bench or oor.Anunprotected,coastingblade
willcausethesawtowalkbackwards,cutting
whateverisinitspath.Beawareofthetimeit
takesforthebladetostopafterswitchisreleased.
5. To check lower guard, open lower guard by
hand, then release and watch guard closure.
Also check to see that retracting handle does
not touch tool housing. Leaving blade exposed
isVERYDANGEROUSandcanleadtoserious
personalinjury.
Additional safety warnings
1. Use extra caution when cutting damp wood,
pressure treated lumber, or wood containing
knots.Maintainsmoothadvancementoftoolwith-
outdecreaseinbladespeedtoavoidoverheating
the blade tips.
2. Do not attempt to remove cut material when
blade is moving. Wait until blade stops before
grasping cut material.Bladescoastafterturno.
3. Avoid cutting nails. Inspect for and remove all
nails from lumber before cutting.
4. Place the wider portion of the saw base on
that part of the workpiece which is solidly
supported, not on the section that will fall o
when the cut is made. If the workpiece is short
or small, clamp it down. DO NOT TRY TO HOLD
SHORT PIECES BY HAND!
►Fig.5
5. Before setting the tool down after completing a
cut, be sure that the guard has closed and the
blade has come to a complete stop.
6. Never attempt to saw with the circular saw
held upside down in a vise. This is extremely
dangerous and can lead to serious accidents.
►Fig.6
7. Some material contains chemicals which may
be toxic. Take caution to prevent dust inhala-
tion and skin contact. Follow material supplier
safety data.
8. Do not stop the blades by lateral pressure on
the saw blade.
9. Do not use any abrasive wheels.
10. Only use the saw blade with the diameter that
is marked on the tool or specied in the man-
ual.Useofanincorrectlysizedblademayaect
theproperguardingofthebladeorguardopera-
tionwhichcouldresultinseriouspersonalinjury.
11. Keep blade sharp and clean.Gumandwood
pitchhardenedonbladesslowssawand
increasespotentialforkickback.Keepbladeclean
byrstremovingitfromtool,thencleaningitwith
gumandpitchremover,hotwaterorkerosene.
Never use gasoline.
12. Wear a dust mask and hearing protection when
use the tool.
13 ENGLISH
13. Always use the saw blade intended for cutting
the material that you are going to cut.
14. Only use the saw blades that are marked with
a speed equal or higher than the speed marked
on the tool.

15. (For European countries only)

Always use the blade which conforms to
EN847-1.
16. Place the tool and the parts on a at and stable
surface.Otherwisethetoolorthepartsmayfall
andcauseaninjury.
SAVE THESE INSTRUCTIONS.
WARNING: DO NOT let comfort or familiarity
with product (gained from repeated use) replace
strict adherence to safety rules for the subject
product. MISUSE or failure to follow the safety
rules stated in this instruction manual may cause
serious personal injury.
Important safety instructions for
battery cartridge
1. Before using battery cartridge, read all instruc-
tions and cautionary markings on (1) battery
charger, (2) battery, and (3) product using
battery.
2. Do not disassemble or tamper the battery
cartridge.Itmayresultinare,excessiveheat,
or explosion.
3. If operating time has become excessively
shorter, stop operating immediately. It may
result in a risk of overheating, possible burns
and even an explosion.
4. If electrolyte gets into your eyes, rinse them
out with clear water and seek medical atten-
tion right away. It may result in loss of your
eyesight.
5. Do not short the battery cartridge:
(1) Do not touch the terminals with any con-
ductive material.
(2) Avoid storing battery cartridge in a con-
tainer with other metal objects such as
nails, coins, etc.
(3) Do not expose battery cartridge to water
or rain.
A battery short can cause a large current
ow, overheating, possible burns and even a
breakdown.
6. Do not store and use the tool and battery car-
tridge in locations where the temperature may
reach or exceed 50 °C (122 °F).
7. Do not incinerate the battery cartridge even if
it is severely damaged or is completely worn
out. The battery cartridge can explode in a re.
8. Do not nail, cut, crush, throw, drop the battery
cartridge, or hit against a hard object to the
battery cartridge.Suchconductmayresultina
re,excessiveheat,orexplosion.
9. Do not use a damaged battery.
10. The contained lithium-ion batteries are subject
to the Dangerous Goods Legislation require-
ments.
Forcommercialtransportse.g.bythirdparties,
forwardingagents,specialrequirementonpack-
aging and labeling must be observed.
Forpreparationoftheitembeingshipped,consult-
inganexpertforhazardousmaterialisrequired.
Pleasealsoobservepossiblymoredetailed
national regulations.
Tapeormaskoopencontactsandpackupthe
batteryinsuchamannerthatitcannotmove
aroundinthepackaging.
11. When disposing the battery cartridge, remove
it from the tool and dispose of it in a safe
place. Follow your local regulations relating to
disposal of battery.
12. Use the batteries only with the products
specied by Makita. Installing the batteries to
non-compliantproductsmayresultinare,exces-
siveheat,explosion,orleakofelectrolyte.
13. If the tool is not used for a long period of time,
the battery must be removed from the tool.
14. During and after use, the battery cartridge may
take on heat which can cause burns or low
temperature burns. Pay attention to the han-
dling of hot battery cartridges.
15. Do not touch the terminal of the tool imme-
diately after use as it may get hot enough to
cause burns.
16. Do not allow chips, dust, or soil stuck into the
terminals, holes, and grooves of the battery
cartridge.Itmayresultinpoorperformanceor
breakdownofthetoolorbatterycartridge.
17. Unless the tool supports the use near
high-voltage electrical power lines, do not use
the battery cartridge near high-voltage electri-
cal power lines.Itmayresultinamalfunctionor
breakdownofthetoolorbatterycartridge.
18. Keep the battery away from children.
SAVE THESE INSTRUCTIONS.
CAUTION: Only use genuine Makita batteries.
Useofnon-genuineMakitabatteries,orbatteriesthat
havebeenaltered,mayresultinthebatterybursting
causingres,personalinjuryanddamage.Itwill
alsovoidtheMakitawarrantyfortheMakitatooland
charger.
Tips for maintaining maximum
battery life
1. Charge the battery cartridge before completely
discharged. Always stop tool operation and
charge the battery cartridge when you notice
less tool power.
2. Never recharge a fully charged battery car-
tridge. Overcharging shortens the battery
service life.
3. Charge the battery cartridge with room tem-
perature at 10 °C - 40 °C (50 °F - 104 °F). Let
a hot battery cartridge cool down before
charging it.
4. When not using the battery cartridge, remove
it from the tool or the charger.

14 ENGLISH
5. Charge the battery cartridge if you do not use
it for a long period (more than six months).
Important safety instructions for
wireless unit
1. Do not disassemble or tamper with the wire-
less unit.
2. Keep the wireless unit away from young chil-
dren. If accidentally swallowed, seek medical
attention immediately.
3. Use the wireless unit only with Makita tools.
4. Do not expose the wireless unit to rain or wet
conditions.
5. Do not use the wireless unit in places where
the temperature exceeds 50°C (122°F).
6. Do not operate the wireless unit in places
where medical instruments, such as heart
pace makers are nearby.
7. Do not operate the wireless unit in places
where automated devices are nearby.Ifoper-
ated,automateddevicesmaydevelopmalfunction
or error.
8. Do not operate the wireless unit in places
under high temperature or places where
static electricity or electrical noise could be
generated.
9. The wireless unit can produce electromagnetic
elds (EMF) but they are not harmful to the
user.
10. The wireless unit is an accurate instrument. Be
careful not to drop or strike the wireless unit.
11. Avoid touching the terminal of the wireless
unit with bare hands or metallic materials.
12. Always remove the battery on the product
when installing the wireless unit into it.
13. When opening the lid of the slot, avoid the
place where dust and water may come into the
slot. Always keep the inlet of the slot clean.
14. Always insert the wireless unit in the correct
direction.
15. Do not press the wireless activation button
on the wireless unit too hard and/or press the
button with an object with a sharp edge.
16. Always close the lid of the slot when
operating.
17. Do not remove the wireless unit from the slot
while the power is being supplied to the tool.
Doingsomaycauseamalfunctionofthewireless
unit.
18. Do not remove the sticker on the wireless unit.
19. Do not put any sticker on the wireless unit.
20. Do not leave the wireless unit in a place where
static electricity or electrical noise could be
generated.
21. Do not leave the wireless unit in a place sub-
ject to high heat, such as a car sitting in the
sun.
22. Do not leave the wireless unit in a dusty or
powdery place or in a place corrosive gas
could be generated.
23. Sudden change of the temperature may bedew
the wireless unit. Do not use the wireless unit
until the dew is completely dried.
24. When cleaning the wireless unit, gently wipe
with a dry soft cloth. Do not use benzine, thin-
ner, conductive grease or the like.
25. When storing the wireless unit, keep it in the
supplied case or a static-free container.
26. Do not insert any devices other than Makita
wireless unit into the slot on the tool.
27. Do not use the tool with the lid of the slot dam-
aged.Water,dust,anddirtcomeintotheslotmay
causemalfunction.
28. Do not pull and/or twist the lid of the slot more
than necessary.Restorethelidifitcomeso
fromthetool.
29. Replace the lid of the slot if it is lost or
damaged.
SAVE THESE INSTRUCTIONS.
FUNCTIONAL
DESCRIPTION
CAUTION: Always be sure that the tool is
switched o and the battery cartridge is removed
before adjusting or checking function on the tool.
Installing or removing battery
cartridge
CAUTION: Always switch o the tool before
installing or removing of the battery cartridge.
CAUTION: Hold the tool and the battery car-
tridge rmly when installing or removing battery
cartridge.Failuretoholdthetoolandthebattery
cartridgermlymaycausethemtoslipoyourhands
andresultindamagetothetoolandbatterycartridge
andapersonalinjury.
►Fig.7: 1.Redindicator2. Button 3.Batterycartridge
Toremovethebatterycartridge,slideitfromthetool
whileslidingthebuttononthefrontofthecartridge.
Toinstallthebatterycartridge,alignthetongueonthe
batterycartridgewiththegrooveinthehousingandslip
itintoplace.Insertitallthewayuntilitlocksinplace
withalittleclick.Ifyoucanseetheredindicatoronthe
uppersideofthebutton,itisnotlockedcompletely.
CAUTION: Always install the battery cartridge
fully until the red indicator cannot be seen.Ifnot,
itmayaccidentallyfalloutofthetool,causinginjuryto
youorsomeonearoundyou.
CAUTION: Do not install the battery cartridge
forcibly.Ifthecartridgedoesnotslideineasily,itis
notbeinginsertedcorrectly.

15 ENGLISH
Tool / battery protection system
Thetoolisequippedwithatool/batteryprotectionsys-
tem.Thissystemautomaticallycutsopowertothe
motortoextendtoolandbatterylife.Thetoolwillauto-
maticallystopduringoperationifthetoolorbatteryis
placedunderoneofthefollowingconditions.
Overload protection
Whenthetool/batteryisoperatedinamannerthat
causesittodrawanabnormallyhighcurrent,thetool
automaticallystops.Inthissituation,turnthetoolo
andstoptheapplicationthatcausedthetooltobecome
overloaded.Thenturnthetoolontorestart.
Overheat protection
Whenthetool/batteryisoverheated,thetoolstops
automatically,andthebatteryindicatorblinkabout60
seconds.Inthissituation,letthetoolcooldownbefore
turning the tool on again.
On Blinking
Overdischarge protection
Whenthebatterycapacitybecomeslow,thetoolstops
automatically.Iftheproductdoesnotoperateeven
whentheswitchesareoperated,removethebatteries
fromthetoolandchargethebatteries.
Releasing protection lock
Whentheprotectionsystemworksrepeatedly,thetool
islockedandthebatteryindicatorshowsthefollowing
state.
Blinking O
Inthissituation,thetooldoesnotstartevenifturning
thetooloandon.Toreleasetheprotectionlock,
removethebattery,setittothebatterychargerandwait
untilthechargingnishes.
Indicating the remaining battery
capacity
Whenyoupulltheswitchtrigger,thebatteryindicator
showstheremainingbatterycapacity.
►Fig.8: 1.Batteryindicator
Theremainingbatterycapacityisshownasthefollow-
ing table.
Battery indicator status Remaining
battery
capacity
On O Blinking
50% to 100%
20% to 50%
0% to 20%
Charge the
battery
Indicating the remaining battery
capacity
Only for battery cartridges with the indicator
►Fig.9: 1.Indicatorlamps2.Checkbutton
Pressthecheckbuttononthebatterycartridgetoindi-
catetheremainingbatterycapacity.Theindicatorlamps
lightupforafewseconds.
Indicator lamps Remaining
capacity
Lighted O Blinking
75% to 100%
50% to 75%
25% to 50%
0% to 25%
Charge the
battery.
Thebattery
mayhave
malfunctioned.
NOTE:Dependingontheconditionsofuseandthe
ambienttemperature,theindicationmaydierslightly
fromtheactualcapacity.
NOTE:Therst(farleft)indicatorlampwillblinkwhen
thebatteryprotectionsystemworks.

16 ENGLISH
Switch action
WARNING: Before installing the battery car-
tridge into the tool, always check to see that the
switch trigger actuates properly and returns to
the “OFF” position when released.
WARNING: NEVER defeat the lock-o button
by taping down or some other means.Aswitchwith
anegatedlock-obuttonmayresultinunintentional
operationandseriouspersonalinjury.
WARNING: NEVER use the tool if it runs when
you simply pull the switch trigger without press-
ing the lock-o button.Aswitchinneedofrepair
mayresultinunintentionaloperationandserious
personalinjury.ReturntooltoaMakitaservicecenter
forproperrepairsBEFOREfurtherusage.
Topreventtheswitchtriggerfrombeingaccidentally
pulled,alock-obuttonisprovided.Tostartthetool,
depressthelock-obuttonandpulltheswitchtrigger.
Releasetheswitchtriggertostop.
►Fig.10: 1.Switchtrigger2.Lock-obutton
NOTICE: Do not pull the switch trigger hard
without pressing in the lock-o button.Thiscan
causeswitchbreakage.
CAUTION: The tool starts to brake the cir-
cular saw blade rotation immediately after you
release the switch trigger. Hold the tool rmly to
respond the reaction of the brake when releasing
the switch trigger.Suddenreactioncandropthetool
oyourhandandcancauseapersonalinjury.
Automatic speed change function
Thistoolhas“highspeedmode”and“hightorque
mode”.
Thetoolautomaticallychangestheoperationmode
depending on the work load. When the work load is low,
thetoolwillruninthe“highspeedmode”forquicker
cuttingoperation.Whentheworkloadishigh,thetool
willruninthe“hightorquemode”forpowerfulcutting
operation.
►Fig.11: 1.Modeindicator
Themodeindicatorlightsupingreenwhenthetoolis
runningin“hightorquemode”.
Ifthetoolisoperatedwithexcessiveload,themode
indicatorwillblinkingreen.Themodeindicatorstops
blinkingandthenlightsuporturnsoifyoureducethe
load on the tool.
Mode indicator status Operation
mode
On O Blinking
Highspeed
mode
Hightorque
mode
Overload
alert
Adjusting depth of cut
CAUTION: After adjusting the depth of cut,
always tighten the lever securely.
Loosen the lever and move the base up or down to align
thepointerwithyourdesireddepthonthedepthguide.
Atthedesireddepthofcut,securethebasebytighten-
ing the lever.
Forcleaner,safercuts,setcutdepthsothatnomore
thanonebladetoothprojectsbelowworkpiece.Using
propercutdepthhelpstoreducepotentialfordanger-
ousKICKBACKSwhichcancausepersonalinjury.
►Fig.12: 1.Pointer2. Lever
Youcanreadthecutdepthwiththescaleonthelower
guard.
►Fig.13: 1. Lower guard 2.Bottomofthetoolbase
3.Scale
Bevel cutting
CAUTION: After adjusting the bevel angle,
always tighten the lever and clamping screw
securely.
Loosentheleverandclampingscrew.Setforthe
desiredanglebytiltingaccordingly,thentightenthe
leverandclampingscrewsecurely.
►Fig.14: 1. Lever 2.Clampingscrew
Usethestopperwhenyoudoprecise45°anglecutting.
Fullyturnthestopperasillustrateddependingon0°-
45°bevelcutor0°-50°bevelcut.
►Fig.15: 1.Stopper
Sighting
Forstraightcuts,alignthe0°positiononthefrontofthe
basewithyourcuttingline.For45°bevelcuts,alignthe
45° position with it.
►Fig.16: 1.Cuttingline(0°position)2. Cutting line
(45°position)

17 ENGLISH
Lighting the lamp
CAUTION: Do not look in the light or see the
source of light directly.
Toturnonthelampwithoutrunningthetool,pullthe
switchtriggerwithoutpressingthelock-obutton.
Toturnonthelampwiththetoolrunning,pressandhold
thelock-obuttonandpulltheswitchtrigger.
Thelampgoesout10secondsafterreleasingthe
switchtrigger.
►Fig.17: 1. Lamp
NOTE:Useadryclothtowipethedirtothelensof
thelamp.Becarefulnottoscratchthelensoflamp,or
itmaylowertheillumination.
Hook
Optional accessory
CAUTION: Always remove the battery when
hanging the tool with the hook.
CAUTION: Never hook the tool at high loca-
tions or on the surfaces where the tool may lose
the balance and fall.Otherwisefallingaccidentmay
occurandcauseseriousinjury.
CAUTION: Do not pull the tool downward
when it is hooked.
Thehookisconvenientforhangingthetooltemporarily.
►Fig.18
Attachthehookwiththescrewsasillustrated.
►Fig.19: 1.Hook2.Screw
Tousethehook,simplyturnthehookuntilitsnapsinto
the open position.
Whennotinuse,alwaysturnthehookuntilitsnapsinto
theclosedposition.
►Fig.20: 1. Open position 2. Closed position
Electronic function
Thetoolsequippedwithelectronicfunctionareeasyto
operatebecauseofthefollowingfeature(s).
Soft start feature
Softstartbecauseofsuppressedstartingshock.
ASSEMBLY
CAUTION: Always be sure that the tool is
switched o and the battery cartridge is removed
before carrying out any work on the tool.
Hex wrench storage
Whennotinuse,storethehexwrenchasshowninthe
guretokeepitfrombeinglost.
►Fig.21: 1.Hexwrench
Removing or installing circular saw
blade
CAUTION: Be sure the circular saw blade is
installed with teeth pointing up at the front of the
tool.
CAUTION: Use only the Makita wrench to
install or remove the circular saw blade.
Toremovethecircularsawblade,presstheshaftlock
fullysothatthecircularsawbladecannotrevolveand
usethehexwrenchtoloosenthehexbolt.Thenremove
thehexbolt,outerange,circularsawbladeandring
(countryspecic).
►Fig.22: 1.Shaftlock2.Hexwrench3. Loosen
4.Tighten
For tool without the ring
►Fig.23: 1.Hexbolt2.Outerange3.Circularsaw
blade 4.Innerange
For tool with the ring
►Fig.24: 1.Hexbolt2.Outerange3.Circularsaw
blade 4. Ring 5.Innerange
Toinstallthecircularsawblade,followtheremoval
procedureinreverse.
For tool with the inner ange for
other than 15.88 mm hole-diameter
saw blade
Theinnerangehasacertaindiameterprotrusionon
onesideofitandadierentdiameterprotrusiononthe
otherside.Chooseacorrectsideonwhichprotrusion
tsintothesawbladeholeperfectly.Mounttheinner
angeontothemountingshaftsothatthecorrectside
ofprotrusionontheinnerangefacesoutwardandthen
placesawbladeandouterange.
►Fig.25: 1.Mountingshaft2.Innerange3.Circular
saw blade 4.Outerange5.Hexbolt
WARNING: BE SURE TO TIGHTEN THE HEX
BOLT CLOCKWISE SECURELY. Also be careful
not to tighten the bolt forcibly. Slipping your hand
from the hex wrench can cause a personal injury.
WARNING: Make sure that the protrusion “a”
on the inner ange that is positioned outside ts
into the saw blade hole “a” perfectly. Mounting the
bladeonthewrongsidecanresultinthedangerous
vibration.
For tool with the inner ange for a
15.88 mm hole-diameter saw blade
(country specic)
Mounttheinnerangewithitsrecessedsidefacing
outwardontothemountingshaftandthenplacecircu-
larsawblade(withtheringattachedifneeded),outer
angeandhexbolt.
For tool without the ring
►Fig.26: 1.Mountingshaft2.Innerange3.Circular
saw blade 4.Outerange5.Hexbolt

18 ENGLISH
For tool with the ring
►Fig.27: 1.Mountingshaft2.Innerange3.Circular
saw blade 4.Outerange5.Hexbolt
6. Ring
WARNING: BE SURE TO TIGHTEN THE HEX
BOLT CLOCKWISE SECURELY. Also be careful
not to tighten the bolt forcibly. Slipping your hand
from the hex wrench can cause a personal injury.
WARNING: If the ring is needed to mount the
blade onto the spindle, always be sure that the
correct ring for the blade's arbor hole you intend
to use is installed between the inner and the outer
anges.Useoftheincorrectarborholeringmay
resultintheimpropermountingofthebladecausing
blade movement and severe vibration resulting in
possiblelossofcontrolduringoperationandinseri-
ouspersonalinjury.
Blade guard cleaning
Whenchangingthecircularsawblade,makesureto
alsocleantheupperandlowerbladeguardsofaccu-
mulatedsawdustasdiscussedintheMaintenance
section.Sucheortsdonotreplacetheneedtocheck
lowerguardoperationbeforeeachuse.
Connecting a vacuum cleaner
Whenyouwishtoperformcleancuttingoperation,
connectaMakitavacuumcleanertoyourtool.Connect
ahoseofthevacuumcleanertothedustnozzleas
showninthegure.
►Fig.28: 1.Dustnozzle2.Screw
►Fig.29: 1.Hose2.Vacuumcleaner
OPERATION
CAUTION: Wear dust mask when performing
cutting operation.
CAUTION: Be sure to move the tool forward
in a straight line gently.Forcingortwistingthetool
will result in overheating the motor and dangerous
kickback,possiblycausingsevereinjury.
NOTE:Whenthebatterycartridgetemperatureis
low,thetoolmaynotworktoitsfullcapacity.Atthis
time,forexample,usethetoolforalight-dutycutfor
awhileuntilthebatterycartridgewarmsupashigh
asroomtemperature.Then,thetoolcanworktoits
fullcapacity.
►Fig.30
Holdthetoolrmly.Thetoolisprovidedwithbothafront
grip and rear handle. Use both to best grasp the tool.
Ifbothhandsareholdingsaw,theycannotbecutby
thecircularsawblade.Setthebaseontheworkpiece
tobecutwithoutthecircularsawblademakingany
contact.Thenturnthetoolonandwaituntilthecircular
sawbladeattainsfullspeed.Nowsimplymovethetool
forwardovertheworkpiecesurface,keepingitatand
advancingsmoothlyuntilthesawingiscompleted.
Togetcleancuts,keepyoursawinglinestraightand
yourspeedofadvanceuniform.Ifthecutfailstoprop-
erlyfollowyourintendedcutline,donotattempttoturn
orforcethetoolbacktothecutline.Doingsomaybind
thecircularsawbladeandleadtodangerouskickback
andpossibleseriousinjury.Releaseswitch,waitforcir-
cularsawbladetostopandthenwithdrawtool.Realign
toolonnewcutline,andstartcutagain.Attemptto
avoidpositioningwhichexposesoperatortochipsand
wooddustbeingejectedfromsaw.Useeyeprotection
tohelpavoidinjury.
Rip fence (Guide rule)
Optional accessory
►Fig.31: 1.Ripfence(Guiderule)2.Clampingscrew
Thehandyripfenceallowsyoutodoextra-accurate
straightcuts.Simplyslidetheripfenceupsnugly
againstthesideoftheworkpieceandsecureitinposi-
tionwiththeclampingscrewonthefrontofthebase.It
alsomakesrepeatedcutsofuniformwidthpossible.
Lanyard (tether strap) connection
Safety warnings specic for use at height
Read all safety warnings and instructions.Failure
tofollowthewarningsandinstructionsmayresultin
seriousinjury.
1. Always keep the tool tethered when working
“at height”. Maximum lanyard length is 2 m
(6.5 ft).
The maximum permissible fall height for lan-
yard (tether strap) must not exceed 2 m (6.5 ft).
2. Use only with lanyards appropriate for this tool
type and rated for at least 4.0 kg (8.8 lbs).
3. Do not anchor the tool lanyard to anything on
your body or on movable components. Anchor
the tool lanyard to a rigid structure that can
withstand the forces of a dropped tool.
4. Make sure the lanyard is properly secured at
each end prior to use.
5. Inspect the tool and lanyard before each use
for damage and proper function (including
fabric and stitching). Do not use if damaged or
not functioning properly.
6. Do not wrap lanyards around or allow them to
come in contact with sharp or rough edges.
7. Fasten the other end of the lanyard outside
the working area so that a falling tool is held
securely.
8. Attach the lanyard so that the tool will move
away from the operator if it falls. Dropped tools
willswingonthelanyard,whichcouldcauseinjury
orlossofbalance.
9. Do not use near moving parts or running
machinery.Failuretodosomayresultinacrush
orentanglementhazard.
10. Do not carry the tool by the attachment device
or the lanyard.
11. Only transfer the tool between your hands
while you are properly balanced.
12. Do not attach lanyards to the tool in a way that
keeps guards, switches or lock-os from oper-
ating properly.

19 ENGLISH
13. Avoid getting tangled in the lanyard.
14. Keep lanyard away from the cutting area of the
tool.
15. Use multi-action and screw gate type cara-
bineers. Do not use single action spring clip
carabineers.
16. In the event the tool is dropped, it must be
tagged and removed from service, and should
be inspected by a Makita Factory or Authorized
Service Center.
►Fig.32: 1.Holeforlanyard(tetherstrap)
WIRELESS ACTIVATION
FUNCTION
For DHS661 only
What you can do with the wireless
activation function
Thewirelessactivationfunctionenablescleanandcom-
fortableoperation.Byconnectingasupportedvacuum
cleanertothetool,youcanrunthevacuumcleaner
automaticallyalongwiththeswitchoperationofthetool.
►Fig.33
Tousethewirelessactivationfunction,preparefollow-
ing items:
• Awirelessunit(optionalaccessory)
• Avacuumcleanerwhichsupportsthewireless
activationfunction
Theoverviewofthewirelessactivationfunction
settingisasfollows.Refertoeachsectionfordetail
procedures.
1. Installing the wireless unit
2. Toolregistrationforthevacuumcleaner
3. Startingthewirelessactivationfunction
Installing the wireless unit
Optional accessory
CAUTION: Place the tool on a at and stable
surface when installing the wireless unit.
NOTICE: Clean the dust and dirt on the tool
before installing the wireless unit. Dust or dirt
maycausemalfunctionifitcomesintotheslotofthe
wireless unit.
NOTICE: To prevent the malfunction caused by
static, touch a static discharging material, such
as a metal part of the tool, before picking up the
wireless unit.
NOTICE: When installing the wireless unit,
always be sure that the wireless unit is inserted
in the correct direction and the lid is completely
closed.
1. Openthelidonthetoolasshowninthegure.
►Fig.34: 1. Lid
2. Insertthewirelessunittotheslotandthenclose
the lid.
Wheninsertingthewirelessunit,aligntheprojections
withtherecessedportionsontheslot.
►Fig.35: 1. Wireless unit 2.Projection3. Lid
4.Recessedportion
Whenremovingthewirelessunit,openthelidslowly.
Thehooksonthebackofthelidwillliftthewirelessunit
asyoupullupthelid.
►Fig.36: 1. Wireless unit 2.Hook3. Lid
Afterremovingthewirelessunit,keepitinthesupplied
caseorastatic-freecontainer.
NOTICE: Always use the hooks on the back of
the lid when removing the wireless unit.Ifthe
hooksdonotcatchthewirelessunit,closethelid
completelyandopenitslowlyagain.
Tool registration for the vacuum
cleaner
NOTE:AMakitavacuumcleanersupportingthe
wirelessactivationfunctionisrequiredforthetool
registration.
NOTE:Finishinstallingthewirelessunittothetool
beforestartingthetoolregistration.
NOTE: During the tool registration, do not pull the
switchtriggerorturnonthepowerswitchonthe
vacuumcleaner.
NOTE:Refertotheinstructionmanualofthevacuum
cleaner,too.
Ifyouwishtoactivatethevacuumcleaneralongwith
theswitchoperationofthetool,nishthetoolregistra-
tionbeforehand.
1. Installthebatteriestothevacuumcleanerandthe
tool.
2. Setthestand-byswitchonthevacuumcleanerto
“AUTO”.
►Fig.37: 1.Stand-byswitch
3. Pressthewirelessactivationbuttononthevac-
uumcleanerfor3secondsuntilthewirelessactivation
lampblinksingreen.Andthenpressthewirelessacti-
vationbuttononthetoolinthesameway.
►Fig.38: 1.Wirelessactivationbutton2. Wireless
activationlamp
Ifthevacuumcleanerandthetoolarelinkedsuccess-
fully,thewirelessactivationlampswilllightupingreen
for2secondsandstartblinkinginblue.
NOTE:Thewirelessactivationlampsnishblinking
ingreenafter20secondselapsed.Pressthewireless
activationbuttononthetoolwhilethewirelessacti-
vationlamponthecleanerisblinking.Ifthewireless
activationlampdoesnotblinkingreen,pushthewire-
lessactivationbuttonbrieyandholditdownagain.
NOTE:Whenperformingtwoormoretoolregistra-
tionsforonevacuumcleaner,nishthetoolregistra-
tiononebyone.

20 ENGLISH
Starting the wireless activation
function
NOTE:Finishthetoolregistrationforthevacuum
cleanerpriortothewirelessactivation.
NOTE:Refertotheinstructionmanualofthevacuum
cleaner,too.
Afterregisteringatooltothevacuumcleaner,the
vacuumcleanerwillautomaticallyrunsalongwiththe
switchoperationofthetool.
1. Install the wireless unit to the tool.
2. Connectthehoseofthevacuumcleanerwiththe
tool.
►Fig.39
3. Setthestand-byswitchonthevacuumcleanerto
“AUTO”.
►Fig.40: 1.Stand-byswitch
4. Pushthewirelessactivationbuttononthetool
briey.Thewirelessactivationlampwillblinkinblue.
►Fig.41: 1.Wirelessactivationbutton2. Wireless
activationlamp
5. Pulltheswitchtriggerofthetool.Checkifthe
vacuumcleanerrunswhiletheswitchtriggerisbeing
pulled.
Tostopthewirelessactivationofthevacuumcleaner,
pushthewirelessactivationbuttononthetool.
NOTE:Thewirelessactivationlamponthetoolwill
stopblinkinginbluewhenthereisnooperationfor
2hours.Inthiscase,setthestand-byswitchonthe
vacuumcleanerto“AUTO”andpushthewireless
activationbuttononthetoolagain.
NOTE:Thevacuumcleanerstarts/stopswithadelay.
Thereisatimelagwhenthevacuumcleanerdetects
aswitchoperationofthetool.
NOTE:Thetransmissiondistanceofthewirelessunit
mayvarydependingonthelocationandsurrounding
circumstances.
NOTE: When two or more tools are registered to one
vacuumcleaner,thevacuumcleanermaystartrun-
ningevenifyoudonotpulltheswitchtriggerbecause
anotheruserisusingthewirelessactivationfunction.
Description of the wireless activation lamp status
►Fig.42: 1.Wirelessactivationlamp
Thewirelessactivationlampshowsthestatusofthewirelessactivationfunction.Refertothetablebelowforthe
meaningofthelampstatus.
Status Wireless activation lamp Description
Color
On
Blinking
Duration
Standby Blue 2 hours Thewirelessactivationofthevacuumcleanerisavailable.The
lampwillautomaticallyturnowhennooperationisperformed
for2hours.
When
the tool is
running.
Thewirelessactivationofthevacuumcleanerisavailableandthe
tool is running.
Tool
registration
Green 20seconds Readyforthetoolregistration.Waitingfortheregistrationbythe
vacuumcleaner.
2seconds Thetoolregistrationhasbeennished.Thewirelessactivation
lamp will start blinking in blue.
Cancelling
tool
registration
Red 20seconds Readyforthecancellationofthetoolregistration.Waitingforthe
cancellationbythevacuumcleaner.
2seconds Thecancellationofthetoolregistrationhasbeennished.The
wirelessactivationlampwillstartblinkinginblue.
Others Red 3seconds Thepowerissuppliedtothewirelessunitandthewirelessactiva-
tionfunctionisstartingup.
O - - Thewirelessactivationofthevacuumcleanerisstopped.
This manual suits for next models
2
Table of contents
Languages:
Other Makita Cordless Saw manuals

Makita
Makita DJV185Z User manual

Makita
Makita HS009GT201 User manual

Makita
Makita BJV180 Quick start guide

Makita
Makita DJV185 User manual

Makita
Makita DHS710 User manual

Makita
Makita JR180D User manual

Makita
Makita JV103D User manual

Makita
Makita DJR188 User manual

Makita
Makita DSS610 User manual

Makita
Makita DJV185 User manual

Makita
Makita DHS900Z User manual

Makita
Makita JR103DWAE User manual

Makita
Makita JV143D User manual

Makita
Makita DJR186 User manual

Makita
Makita JV002G User manual

Makita
Makita DUC121 User manual

Makita
Makita DSD180 User manual

Makita
Makita HS011G User manual

Makita
Makita DJR360 User manual

Makita
Makita BSS611 Manual