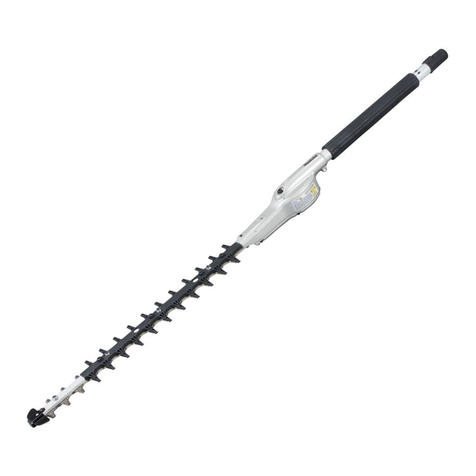
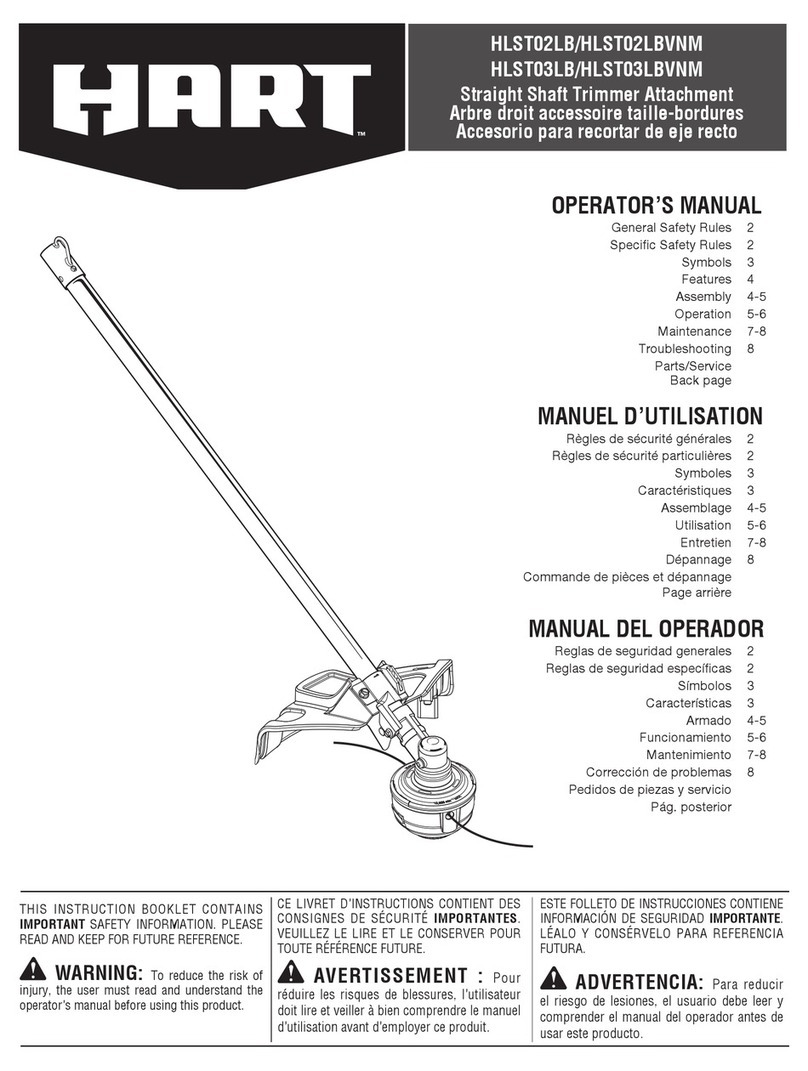
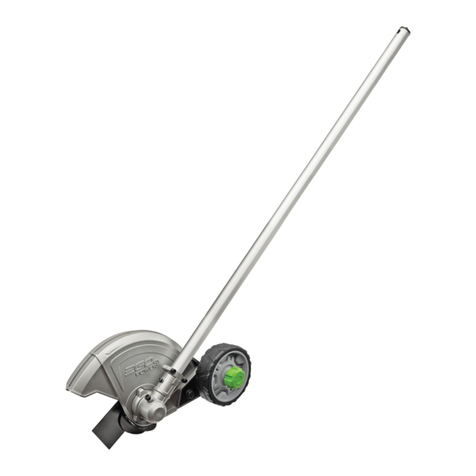
Makita EN424MP User manual

EN424MP
EN Ground Trimmer Attachment INSTRUCTION MANUAL 8
ESMX Accesorio de Corte a Ras de
Piso
MANUAL DE
INSTRUCCIONES 15
PTBR Implemento Aparador de
Grama MANUAL DE INSTRUÇÕES 22
ES Accesorio de Corte a Ras de
Piso
MANUAL DE
INSTRUCCIONES 29
ZHCN 剪草/绿篱总成 使用说明书 36
ZHTW 樹籬割草配件 使用說明書 43
KO 예초기 취급 설명서 50
ID Perangkat Tambahan Mesin
Pemotong PETUNJUK PENGGUNAAN 56
MS Alat Tambahan Pemangkas
Tanaman Tanah MANUAL ARAHAN 63
VI
Hàng Rào 70
TH 77
AR 89
FA 95

2
2
3
4
1
Fig.1
2
1
Fig.2
1
Fig.3
3
2
1
4
Fig.4
1
Fig.5
1
2
3
Fig.6

3
2
1
Fig.7
1
Fig.8
1
2
3
4
5
Fig.9
1
Fig.10
Fig.12
3
1
2
Fig.11
1
Fig.12
1
Fig.13

4
1
Fig.14
1
2
Fig.15
Fig.16
1
Fig.17
1
Fig.18

5
1
Fig.19
Fig.20
1
2
Fig.21
1
Fig.22
Fig.23
1
2
Fig.24

6
Fig.25
Fig.26
Fig.27
Fig.28
Fig.29
1
Fig.30
Fig.31
2
1
Fig.32

7
1
Fig.33

8ENGLISH
ENGLISH (Original instructions)
SPECIFICATIONS
Model: EN424MP
Cutting width 330 mm
Dimensions
(L x W x H)
820 mm x 350 mm x 191 mm
Net weight 2.3 kg
• Duetoourcontinuingprogramofresearchanddevelopment,thespecicationshereinaresubjecttochange
withoutnotice.
• Specicationsmaydierfromcountrytocountry.
Approved power unit
Thisattachmentisapprovedtouseonlywiththefollow-
ingpowerunit(s):
• DUX60Cordlessmultifunctionpowerhead
• DUX18Cordlessmultifunctionpowerhead
• UX01GCordlessmultifunctionpowerhead
WARNING: Never use the attachment with
non-approved power unit. Non-approved combi-
nation may cause serious injury.
Symbols
Thefollowingsshowthesymbolswhichmaybeused
fortheequipment.Besurethatyouunderstandtheir
meaningbeforeuse.
Readandfollowtheinstructionmanual.
DANGER-Keephandsawayfromblade.
Wearprotectivehelmet,eyeandear
protection.
Wearprotectivegloves.
Wearsturdybootswithnon-slipsoles.
Keepbystandersandanimalsatleast15m
(50ft)awayfromthepowertool.
Guaranteedsoundpowerlevelaccording
toEUOutdoorNoiseDirective.
SoundpowerlevelaccordingtoAustralia
NSWNoiseControlRegulation.
Intended use
Thisattachmentisdesignedforonlythepurposeof
trimminggrassesandweedsonthegroundinconjunc-
tionwithanapprovedpowerunit.Neverusetheattach-
mentfortheotherpurpose.Abusingtheattachment
maycauseseriousinjury.
SAFETY WARNINGS
Cordless Grass Shear Safety
Warnings
1. Do not use the grass shear in bad weather
conditions, especially when there is a risk of
lightning.Thisdecreasestheriskofbeingstruck
bylightning.
2. Keep all power cords and cables away from
cutting area.Powercordsorcablesmaybe
hiddenandcanbeaccidentallycutbytheblade.
3. Wear ear protection.Adequateprotectiveequip-
mentwillreducetheriskofhearingloss.
4. Hold the grass shear by insulated gripping
surfaces only, because the blade may contact
hidden wiring.Bladescontactinga“live”wire
maymakeexposedmetalpartsofthegrassshear
“live”andcouldgivetheoperatoranelectric
shock.
5. Keep all parts of the body away from the blade.
Do not remove cut material or hold material
to be cut when blades are moving.Blades
continuetomoveaftertheswitchisturnedo.A
momentofinattentionwhileoperatingthegrass
shearmayresultinseriouspersonalinjury.
6. When clearing jammed material or servicing
the grass shear, make sure the power switch is
-
nected.Unexpectedactuationofthegrassshear
whileclearingjammedmaterialorservicingmay
resultinseriouspersonalinjury.
7. Carry the grass shear by the handle with the
blade stopped and taking care not to operate
the power switch.Propercarryingofthegrass
shearwilldecreasetheriskofinadvertentstarting
andresultantpersonalinjuryfromtheblades.

9ENGLISH
8. When transporting or storing the grass shear,
always use the blade cover.Properhandlingof
thegrassshearwilldecreasetheriskofpersonal
injuryfromtheblades.
Additional Safety Instructions
General instructions
1. To ensure correct operation, user has to read
this instruction manual to make himself famil-
iar with the handling of the equipment.Users
insucientlyinformedwillriskdangertothem-
selvesaswellasothersduetoimproperhandling.
2. Never allow children, persons with reduced
physical, sensory or mental capabilities or
lack of experience and knowledge or people
unfamiliar with these instructions to use the
machine, local regulations may restrict the age
of the operator.
3. Use the equipment with the utmost care and
attention.
4. Operate the equipment only if you are in good
physical condition. Perform all work calmly
and carefully. Use common sense and keep in
mind that the operator or user is responsible
for accidents or hazards occurring to other
people or their property.
5. Never operate the machine while people, espe-
cially children, or pets are nearby.
6.
case that the equipment shows any problem or
abnormal sign.
7.
when resting and when leaving the equipment
unattended, and place it in a safe location to
prevent danger to others or damage to the
equipment.
8. Avoid using the machine in bad weather
conditions especially when there is a risk of
lightning.
Personal protective equipment
1. Wear eye protection and stout shoes at all
times while operating the machine.
2. Always wear substantial footwear and long
trousers while operating the machine.
Starting up the equipment
1. Make sure that there are no children or other
people nearby, also pay attention to any ani-
mals in the working vicinity.Otherwisestop
usingtheequipment.
2. During operation, keep bystanders or animals
at least 15 m away from the tool. Stop the tool
as soon as someone approaches.
3. Before use always check that the equipment
is safe for operation. Check the security of the
cutting tool and the guard and the switch trig-
ger/lever for easy and proper action. Check for
clean and dry handles and test the function of
the start/stop.
4. Check damaged parts before further use of
the equipment. A guard or other part that is
damaged should be carefully checked to deter-
mine that it will operate properly and perform
its intended function. Check for alignment of
moving parts, binding of moving parts, break-
age of parts, mounting, and any other condi-
other part that is damaged should be properly
repaired or replaced by our authorized ser-
vice center unless indicated elsewhere in this
manual.
5. Switch on the motor only when the hands and
feet are away from the cutting tool.
6. Before starting make sure that the cutting tool
has no contact with any objects.
7.
8. Avoid unintentional starting. Do not carry the
tool when the battery cartridge is installed
cartridge.
9. Before operation, examine the work area for
wire fences, stones, or other solid objects.
They can damage the blades.
10. Check the hedges and bushes for foreign
objects, such as wire fences or hidden wiring
before operating the tool.
Method of operation
1. Only use the equipment in good light and
visibility. During the winter season beware
of slippery or wet areas, ice and snow (risk
of slipping). Always ensure a safe footing on
slopes and be sure to walk and never run.
2. Take care against injury to feet and hands from
the cutting tool.
3. Never stand on a ladder and run the
equipment.
4. Never climb up into trees to perform cutting
operation with the equipment.
5. Never work on unstable surfaces.
6. Remove sand, stones, nails etc. found within
the working range.Foreignparticlesmaydam-
agethecuttingtoolandcancausedangerous
kick-backs.
7. Should the cutting tool hit stones or other hard
inspect the cutting tool.
8. Inspect the cutting tool at short regular inter-
vals for damage (detection of hairline cracks
by means of tapping-noise test).
9. Before commencing cutting, the cutting tool
must have reached full working speed.
10. The cutting tool has to be equipped with the
appropriate guard. Never run the equipment
with damaged guards or without guards in
place!
11. All protective installations and guards sup-
plied with the equipment must be used during
operation.
12. Always remove the battery cartridge from the
equipment:
— whenever leaving the equipment
unattended;
10 ENGLISH
— before clearing a blockage;
— before checking, cleaning or working on
the equipment;
— after striking a foreign object;
— whenever the equipment starts vibrating
abnormally.
13. Always ensure that the ventilation openings
are kept clear of debris.
14. Cutting means continues to run after the motor
15. If the blades stop moving due to the stuck of
foreign objects between the blades during
battery cartridge, and then remove the foreign
objects using tools such as pliers.Removing
theforeignobjectsbyhandmaycauseaninjury
forthereasonthatthebladesmaymoveinreac-
tiontoremovingtheforeignobjects.
16. When attaching or removing the blade cover,
be careful not to injure your hands.
Cutting Tools
Employ only the correct cutting tool for the job
in hand.
Maintenance instructions
1. The condition of the equipment, in particular of
the cutting tool of the protective devices must
be checked before commencing work.
2.
cartridge before carrying out maintenance,
replacing cutting tools or cleaning the equip-
ment or cutting tool.
3. When not in use, attach the blade cover to the
tool and store the tool indoors in dry, and high
locked-up place, out of reach of children.
SAVE THESE INSTRUCTIONS.
WARNING: DO NOT let comfort or familiarity
with product (gained from repeated use) replace
strict adherence to safety rules for the subject
product. MISUSE or failure to follow the safety
rules stated in this instruction manual may cause
serious personal injury.
PARTS DESCRIPTION
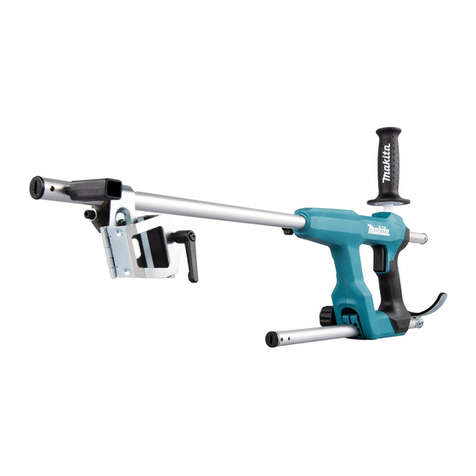
►Fig.1: 1.Bladecover2.Cap3.Shearblades
4.Wheel
ASSEMBLY
WARNING: Before assembling or adjusting
the battery cartridge.Otherwise,themachinemay
startunintentionallyandresultinaninjury.
WARNING: When assembling or adjusting
the equipment, always put it down. Assemblingor
adjustingtheequipmentinanuprightpositionmay
resultinseriousinjury.
WARNING: Follow the warnings and precau-
tions in the chapter “SAFETY WARNINGS” and
the instruction manual of the power unit.
Assembling the attachment
1. Removethecapfromoneendofthepipeonthe
sidewiththeplate.
►Fig.2: 1.Cap2.Plate
2. Loosentheboltofthewheelswiththehexwrench.
►Fig.3: 1.Hexwrench
3. Aligntheplateonthepipewiththegroovein
thewheels,andthenattachthewheelstothepipeas
showninthegure.Securelytightenthebolttoxthe
wheels.
►Fig.4: 1.Pipe2.Wheel3.Plate4.Bolt
NOTICE: Be sure to attach the wheels so that the
plate is engaged with the wheels.
4. Removethecapfromtheattachment.
►Fig.5: 1.Cap
5. Attachtheattachmenttothepipesothatthehole
onthepipeisalignedwiththeholeontheattachment.
Securelytightentheshortboltrst,andthentightenthe
longbolttoxthepipe.
►Fig.6: 1.Pipe2.Bolt(short)3.Bolt(long)
NOTE:Whentighteningthebolts,apply4.0-6.0N•m
astighteningtorque.
Mounting the attachment pipe
CAUTION: Always check that the attachment
pipe is secured after installation.Improperinstal-
lationmaycausetheattachmentfallingofromthe
powerunitandcausepersonalinjury.
Mounttheattachmentpipetothepowerunit.
1. Removethecapfromtheendofthepipe.
►Fig.7: 1.Pipe2.Cap
NOTICE: Do not dispose of the cap since the cap
is necessary for storing the attachment.
2. Turnthelevertowardtheattachment.
►Fig.8: 1.Lever

11 ENGLISH
3. Alignthepinwiththearrowmarkonthepower
unit.Insertthepipeuntilthereleasebuttonpopsup.
Makesurethatthepositionlineisonthetipofthearrow
markonthepowerunit,andthearrowmarkonthe
powerunitandthearrowmarkonthepipearefacing
eachother.
►Fig.9: 1.Releasebutton2.Arrowmarkonthe
powerunit3. Pin 4.Positionline5.Arrow
markonthepipe
4. Turnthelevertowardthepowerunit.
►Fig.10: 1.Lever
Makesurethatthesurfaceoftheleverisparalleltothe
pipe.
NOTICE: Do not tighten the lever without the
attachment pipe inserted.Otherwisethelevermay
tightentheentranceofthedriveshafttoomuchand
damageit.
Toremovethepipe,turnthelevertowardtheattach-
mentandpullthepipeoutwhilepressingdownthe
releasebutton.
►Fig.11: 1.Releasebutton2.Lever3.Pipe
Removing or attaching the blade
cover
Releasethelatchesofthebladecoverbypullingthem,
andthenopenthebladecover.
►Fig.12: 1.Latch
Whenattachingthebladecovertotheshearblades,
makesurethatthebladecoverisclosedandboth
latchesarexedsecurely.
Installing or removing the shear
blades
CAUTION: When replacing the shear blades,
always wear gloves so that your hands do not
directly contact the blades.
CAUTION: Attach the blade cover before
removing or installing the shear blades.
NOTICE: When replacing the shear blades, do
1. Placetheshearbladesonthebladecover.
►Fig.13: 1.Bladecover
2. Turntheshaftsothattheupperbladeandlower
bladearepositionedalternately.
►Fig.14: 1.Shaft
3. Closethebladecover,andthenplacetheattach-
mentupsidedown.
4. Remove4boltswiththehexwrenchandremove
thecover.
►Fig.15: 1.Bolt2.Cover
5. Removetheshearblades.
►Fig.16
6. Turnthecrankwiththeslottedscrewdriversothat
thecrankispositionedinthedirectionasshowninthe
gure.
►Fig.17: 1.Crank
7. Removethebladecoverfromtheshearblades,
andthenplacethenewshearbladesontheblade
cover.
8. Aligntheholesoftheuppershearbladeandlower
shearbladeasshowninthegure.
►Fig.18: 1.Hole
9. Closethebladecover,andtheninsertthebolt
removedinstep4intotheholeofthebladecoverto
temporarilyxtheshearblades.
►Fig.19: 1.Bolt
10. Applyasmallamountofgreasetotheperipheryof
thecrank.
11. Attachtheshearbladestotheattachment.
►Fig.20
12. Attachthecover,andthentighten3bolts.Remove
theboltinsertedintothebladecoverinstep9,andthen
tightenthebolt.
►Fig.21: 1.Bolt2.Cover
NOTICE: If the shear blades do not operate prop-
erly, the blades are not engaging the crank prop-
erly. Remove the blades and install them again.
NOTICE: If the parts other than the shear blades
such as the crank are worn out, ask Makita
Authorized Service Centers for parts replacement
or repairs.
FUNCTIONAL
DESCRIPTION
CAUTION: Always be sure that the tool is
before adjusting or checking function on the tool.
Adjusting the cutting angle
CAUTION: Always be sure that the tool is
Theangleoftheattachmentcanbeadjustedbychang-
ingthepositionofthewheels.Loosentheboltonthe
wheels,thenmovethewheelstothedesiredposition,
andthensecurelytightenthebolttoxthewheels.
►Fig.22: 1.Wheel
NOTICE: Make sure that the plate on the pipe is
engaged with the wheels.

12 ENGLISH
OPERATION
WARNING: Follow the warnings and precau-
tions in the chapter “SAFETY WARNINGS” and
the instruction manual of the power unit.
Operating the tool
WARNING: Keep hands away from shear
blades.
WARNING: Be extremely careful to maintain
control of the tool at all times. Do not allow the
work vicinity.Failuretokeepcontrolofthetool
couldresultinseriousinjurytothebystanderandthe
operator.
WARNING: Before shearing, clear away sticks
and stones from the shearing area.
►Fig.23
CAUTION: Avoid operating the tool in very
hot weather as much as practicable. When operat-
ing the tool, be careful of your physical condition.
CAUTION: Be careful not to accidentally
contact a metal fence or other hard objects while
trimming.Theshearbladesmaybreakandcause
aninjury.
CAUTION: Overreaching with the tool, partic-
ularly from a ladder, is extremely dangerous. Do
notworkwhilestandingonanythingwobblyorinrm.
NOTICE: Do not cut down dead trees or similar
hard objects.Doingsomaydamagethetool.
NOTICE: Do not use the tool in a way that causes
the motor to stop or to rotate extremely slowly.
NOTICE: Do not attempt to cut thick branches.
NOTICE: Do not allow the shear blades to con-
tact the ground during operation. The blades will
be dulled, causing poor performance.
NOTICE: Do not trim the wet grass or foliage of
small trees.
Holdthetoolwithbothhandsbyholdingthefronthan-
dleandthereargripofthepowerunit.
►Fig.24: 1.Fronthandle2.Reargrip
Withthewheelsincontactwiththeground,pullthe
switchtriggerwhilepressingthelock-olever,andthen
movethetoolforward.
►Fig.25
Whentrimmingaroundcurbs,fencesortrees,movethe
toolalongthem.Becarefulthatthebladesdonotcome
intocontactwiththem.
MAINTENANCE
WARNING: Before inspecting or maintaining
the battery cartridge.Otherwise,themachinemay
startunintentionallyandresultinseriousinjury.
WARNING: When inspecting or maintaining
the equipment, always put it down.Assemblingor
adjustingtheequipmentinanuprightpositionmay
resultinseriousinjury.
WARNING: Follow the warnings and precau-
tions in the chapter “SAFETY WARNINGS” and
the instruction manual of the power unit.
CAUTION: Wear gloves when performing the
inspection or maintenance.
NOTICE: Never use gasoline, benzine, thinner,
alcohol or the like. Discoloration, deformation or
cracks may result.
TomaintainproductSAFETYandRELIABILITY,
repairs,anyothermaintenanceoradjustmentshould
beperformedbyMakitaAuthorizedorFactoryService
Centers,alwaysusingMakitareplacementparts.
Cleaning the tool
Cleanthetoolbywipingodustwithadryclothorone
dippedinsoapywaterandwrungout.
NOTICE: Never use gasoline, benzine, thinner,
alcohol or the like. Discoloration, deformation or
cracks may result.
Shear blade maintenance
Beforetheoperationoronceperhourduringoperation,
applylow-viscosityoil(machineoil,orspray-typelubri-
catingoil)totheshearblades.
►Fig.26
Afteroperation,removedustfrombothsidesofthe
shearbladeswithawiredbrush,wipeitowithacloth
andthenapplylow-viscosityoil(machineoil,orspray-
typelubricatingoil)totheshearblades.
►Fig.27
NOTICE: Do not wash the shear blades in water.
Doingsomaycauserustordamagetothetool.
NOTICE: Dirt and corrosion cause excessive
blade friction and shorten the operating time per
battery charge.
Storage
Attachthebladecovertotheshearbladessothatthe
bladesarenotexposed.Storethetooloutofthereach
ofchildren.Storethetoolinaplacenotexposedto
moistureorrain.
Whenstoringtheattachmentseparatedfromthepower
unit,putthecapontotheendofthepipe.
►Fig.28

13 ENGLISH
Lubricating moving parts
NOTICE: Follow the instruction of the frequency
and amount of grease supplied.Otherwiseinsu-
cientlubricationmaydamagemovingparts.
Drive axle:
Applygrease(MakitagreaseNNo.2orequivalent)
every30hoursofoperation.
►Fig.29
NOTE:GenuineMakitagreasemaybepurchased
fromyourlocalMakitadealer.
Grease lubrication
Interval of lubrication:Every50operatinghours
1. Removetheshearbladesfromtheattachment.
2. Applygreasetotheinnerperipheryoftheholeson
theshearblades(Approximately1.5gasaguide).
►Fig.30: 1.Hole
3. Installtheshearbladestotheattachment.
Grinding the shear blades
NOTICE: If the shear blades have considerably
deformed by grinding, replace the shear blades
with new ones.
1. Installthebatterycartridgetothetool.
2. Turnonandstartthetoolsothattheupperblade
andlowerbladearepositionedalternately.
►Fig.31
3. Turnothetoolandremovethebatterycartridge
fromthetool.
4. Settheangleofaleto45°,andgrindtheupper
bladefrom3directionswiththele.
►Fig.32: (1)File(2)45°
CAUTION: Before grinding the shear blades,
battery cartridge is removed from the tool.
5. Placethetoolupsidedown,andthenremovethe
burrsfromtheshearbladeswiththedressingstone.
►Fig.33: 1.Dressingstone
6. Settheangleoftheleto45°,andgrindthelower
bladefrom3directionswiththele.
7. Returnthetooltonormalposition,andthen
removetheburrsfromtheshearbladeswiththedress-
ing stone.
TROUBLESHOOTING
Beforeaskingforrepairs,conductyourowninspectionrst.Ifyoundaproblemthatisnotexplainedinthemanual,
donotattempttodismantlethetool.Instead,askMakitaAuthorizedServiceCenters,alwaysusingMakitareplace-
mentpartsforrepairs.
State of abnormality Probable cause (malfunction) Remedy
Motordoesnotstart. -Refertotheinstructionmanualofthepowerunit.
Motorstopssoon. -Refertotheinstructionmanualofthepowerunit.
Motorspeeddoesnotincrease. -Refertotheinstructionmanualofthepowerunit.
Shearbladesdonotmove:
stopthemachineimmediately!
Foreignobjectsarecaughtbetweenthe
shearblades.
Switchothetoolandremovethebatterycartridge,
andthenremovetheforeignobjectsusingtools
suchaspliers.
Thedrivesystemdoesnotwork
correctly.
Askyourlocalauthorizedservicecenterforrepair.
Abnormalvibration:
stopthemachineimmediately!
Shearbladesarebroken,bentorworn. Replacetheshearblades.
Thedrivesystemdoesnotwork
correctly.
Askyourlocalauthorizedservicecenterforrepair.
Shearbladesandmotorcannotstop:
Removethebatteryimmediately!
Electricmalfunction. Removethebatteryandaskyourlocalauthorized
servicecenterforrepair.

14
OPTIONAL
ACCESSORIES
CAUTION: These accessories or attachments
are recommended for use with your Makita
Theuseofany
otheraccessoriesorattachmentsmightpresentarisk
ofinjurytopersons.Onlyuseaccessoryorattach-
mentforitsstatedpurpose.
Ifyouneedanyassistanceformoredetailsregard-
ingtheseaccessories,askyourlocalMakitaService
Center.
• Shearbladeassembly
• Makitagenuinebatteryandcharger
NOTE:Someitemsinthelistmaybeincludedinthe
productpackageasstandardaccessories.Theymay
dierfromcountrytocountry.
ENGLISH

15 ESPAÑOL
ESPAÑOL (Instrucciones originales)
ESPECIFICACIONES
Modelo: EN424MP
Amplituddecorte 330 mm
Dimensiones
(LaxAnxAl)
820 mm x 350 mm x 191 mm
Peso neto 2,3kg
• Debidoanuestroprogramacontinuodeinvestigaciónydesarrollo,lasespecicacionesaquídadasestán
sujetasacambiossinprevioaviso.
• Lasespecicacionespuedenvariardepaísapaís.
Unidad motorizada aprobada
Esteaccesorioestáaprobadoparausarseúnicamente
conla(s)siguiente(s)unidad(es)motorizada(s):
• HerramientaMultifuncionalInalámbricaDUX60
• HerramientaMultifuncionalInalámbricaDUX18
• HerramientaMultifuncionalInalámbricaUX01G
ADVERTENCIA: Nunca utilice el accesorio
con una unidad motorizada no aprobada. Una
combinación no aprobada podría ocasionar lesio-
nes graves.
Símbolos
Acontinuaciónsemuestranlossímbolosquepue-
denserutilizadosparaelequipo.Asegúresedeque
entiendesusignicadoantesdeutilizar.
Leaysigaelmanualdeinstrucciones.
PELIGRO:Mantengalasmanosalejadas
delacuchilla.
Utiliceuncascoprotectoryprotecciónpara
losojosyoídos.
Utiliceguantesdeprotección.
Utilicebotasresistentesconsuelas
antiderrapantes.
Mantengaalaspersonasyanimales
alrededoraporlomenos15m(50ft)de
distanciadelaherramientaeléctrica.
Niveldepotenciasonoragarantizadode
acuerdoconlaDirectivaderuidoexterior
delaUE.
Niveldepotenciasonoradeacuerdoconel
ReglamentodecontrolderuidodeNueva
GalesdelSurenAustralia
Uso pretendido
Esteaccesoriohasidodiseñadoconelúnicopropósito
derecortarcéspedesymalezasarasdepisojuntocon
unaunidadmotorizadaaprobada.Nuncauseelacce-
sorioparaningúnotropropósito.Hacerunmalusodel
accesoriopuedecausarlesionesgraves.
ADVERTENCIAS DE
SEGURIDAD
Advertencias de seguridad para las
tijeras inalámbricas para hierba
1. No utilice las tijeras para césped en condicio-
nes de mal clima, especialmente cuando exista
riesgo de rayos.Estodisminuyeelriesgodeser
golpeadoporunrayo.
2. Mantenga todos los cables de alimentación
y cables lejos del área de corte.Loscables
dealimentaciónocablespuedenestarocultosy
puedencortarseaccidentalmenteconlacuchilla.
3. Utilice protección en los oídos.Elequipode
protecciónadecuadoreduciráelriesgodepérdida
deaudición.
4. Sujete las tijeras para hierba solamente por
que la cuchilla podría entrar en contacto con
cableado oculto.Lascuchillasqueentrenen
contactoconuncableconcorrientepodránhacer
quelacorrientecirculeporlaspartesmetálicas
expuestasdelastijerasparacésped,pudiendo
ocasionarunadescargaeléctricaaloperador.
5. Mantenga todas las partes del cuerpo alejadas
de la cuchilla. No retire el material cortado ni
sostenga el material que va a cortar cuando
las cuchillas estén en movimiento.Lascuchi-
llascontinúanmoviéndosedespuésdeapagarel
interruptor.Unmomentodedistracciónmientras
operalastijerasparacéspedpodríaocasionar
lesionespersonalesgraves.

16 ESPAÑOL
6. Al retirar material atascado o reparar las tijeras
para césped, asegúrese de que el interruptor
de alimentación esté apagado, y que la batería
esté retirada o desconectada.Laactivación
inesperadadelastijerasparacéspedmientras
sequitaelmaterialatascadooseledaservicio
podríaresultarenlesionespersonalesgraves.
7. Lleve las tijeras para césped por el mango con
la cuchilla detenida, y con cuidado de no ope-
rar el interruptor de alimentación.Eltransporte
adecuadodelastijerasparacéspedreduciráel
riesgodeunarranqueaccidentalydelesiones
personalesresultantesdelascuchillas.
8. Cuando transporte o almacene las tijeras para
césped, siempre use la cubierta de las cuchi-
llas.Lamanipulaciónadecuadadelastijeraspara
céspeddisminuiráelriesgodelesionespersona-
lesocasionadasporlascuchillas.
Instrucciones adicionales de
seguridad
Instrucciones generales
1. Para garantizar el correcto funcionamiento,
el usuario debe leer este manual de instruc-
ciones para familiarizarse con el manejo del
equipo.Losusuariossinsucienteinformación
correránelriesgodeponerseenpeligroasí
mismosyalosdemásdebidoaunmanejo
inadecuado.
2. Nunca permita que los niños ni las personas
con capacidades físicas, sensoriales o menta-
les reducidas, o que no cuenten con experien-
cia ni conocimientos o no estén familiarizadas
con estas instrucciones utilicen la máquina, y
las regulaciones locales podrían restringir la
edad del operador.
3. Use el equipo con extremo cuidado y atención.
4. Opere el equipo solo si se encuentra en buena
condición física. Realice todo el trabajo tran-
quila y cuidadosamente. Use el sentido común
y tenga en cuenta que el operador o usuario es
responsable de los accidentes o peligros que
le ocurran a otras personas o a su propiedad.
5. Nunca opere la máquina cuando haya perso-
nas, especialmente niños, o mascotas cerca.
6. El motor debe apagarse inmediatamente en
caso de que el equipo muestre algún problema
o señal anormal.
7. Apague y retire el cartucho de batería cuando
descanse y cuando deje el equipo desaten-
dido, y colóquelo en un lugar seguro para
evitar peligros para otras personas o daños al
equipo.
8. Evite usar la máquina en condiciones de mal
clima, especialmente cuando exista riesgo de
rayos.
Equipo de protección personal
1. Utilice protección para los ojos y calzado
grueso en todo momento mientras opera la
máquina.
2. Siempre use calzado robusto y pantalones
largos al operar la máquina.
Puesta en marcha del equipo
1. Asegúrese de que no haya niños ni otras
personas cerca, y cuide también que no haya
animales alrededor del área de trabajo.Encaso
contrario,interrumpalaoperacióndelequipo.
2. Durante la operación, mantenga a las perso-
nas o animales alrededor a por lo menos 15 m
de distancia de la herramienta. Detenga la
herramienta en cuanto alguien se acerque.
3. Antes de usar el equipo, revíselo siempre para
una operación segura. Compruebe la seguri-
dad de la herramienta de corte y el protector,
así como el gatillo interruptor/palanca para un
accionamiento fácil y correcto. Revise que los
mangos estén limpios y secos, y compruebe el
funcionamiento del encendido/apagado.
4. Inspeccione las piezas dañadas antes de
continuar usando el equipo. Si un protector u
otra pieza están dañados, deberá revisarlos
cuidadosamente para cerciorarse de que van
a funcionar correctamente y realizar el trabajo
alineación de las piezas móviles, la unión de
las mismas, roturas de las piezas, montura y
cualquier otra condición que pueda afectar la
operación. Cualquier protector o pieza dañada
deberá ser debidamente reparada o reempla-
zada por un centro de servicio autorizado, a
menos que se indique de alguna otra forma en
este manual.
5. Encienda el motor sólo cuando tenga las
manos y pies alejados de la herramienta de
corte.
6. Antes de comenzar, asegúrese de que la herra-
mienta de corte no tenga contacto con ningún
objeto.
7. Siempre que utilice la herramienta sosténgala
8. Evite un arranque accidental. No traslade la
herramienta cuando el cartucho de batería
esté instalado y con el dedo puesto sobre el
interruptor. Asegúrese de que el interruptor se
encuentre apagado cuando instale el cartucho
de batería.
9. Antes de la operación, examine el área de
trabajo para ver si hay alambrados, piedras u
otros objetos sólidos. Estos pueden dañar las
cuchillas.
10. Antes de operar la herramienta, revise los
setos y arbustos para ver que no haya objetos
extraños, tales como cercas de alambre o
cableado oculto.
Método de operación
1. Use el equipo solo en condiciones de buena
iluminación y visibilidad. Durante la época de
invierno, tenga cuidado con las áreas resbalo-
sas o mojadas, así como con el hielo y la nieve
(riesgo de resbalones). Asegúrese siempre de
pisar con seguridad en las pendientes y ase-
gúrese de caminar y nunca correr.
2. Tenga cuidado con la herramienta de corte
para evitar lesiones en pies y manos.
3. Nunca se coloque sobre una escalera para
poner en marcha el equipo.

17 ESPAÑOL
4. Nunca se suba a árboles para realizar una
operación de corte con el equipo.
5.
6. Retire la arena, piedras, clavos, etc., que
encuentre en el área de trabajo.Laspartículas
extrañaspodríandañarlaherramientadecortey
causarunpeligrosoretrocesobrusco.
7. Si la herramienta de corte llega a golpear pie-
dras u otros objetos duros, apague inmediata-
mente el motor e inspeccione la herramienta
de corte.
8. Inspeccione la herramienta de corte a inter-
valos cortos y regulares en busca de daños
de ruido de golpeteo).
9. Antes de comenzar a cortar, la herramienta de
corte deberá haber alcanzado su velocidad de
trabajo completa.
10. La herramienta de corte debe estar equipada
con la protección adecuada. ¡Nunca ponga en
marcha el equipo con un protector dañado o
que no esté colocado en su lugar!
11. Todas las instalaciones de protección y todos
los protectores suministrados con el equipo
deberán utilizarse durante la operación.
12. Siempre retire el cartucho de batería del
equipo:
— cada vez que lo vaya a dejar desatendido;
— antes de despejar una obstrucción;
— antes de revisar, limpiar o trabajar en el
equipo;
— después de golpear algún objeto extraño;
— cada vez que el equipo comience a vibrar
de manera anormal.
13. Asegúrese siempre de que las aberturas de
ventilación estén libres de residuos.
14. Los medios de corte siguen funcionando des-
pués de apagar el motor.
15. Si las cuchillas se dejan de mover a causa de
objetos extraños atorados entre ellas durante
la operación, apague la herramienta, extraiga
el cartucho de batería y luego retire los obje-
tos extraños usando herramientas tales como
pinzas.Elretirarlosobjetosextrañosconlamano
podríaocasionarunalesión,debidoaquelas
cuchillaspuedenmoversealintentarretirarlos.
16. Al colocar o quitar la cubierta de las cuchillas,
tenga cuidado de no lastimarse las manos.
Herramientas de corte
Emplee únicamente la herramienta de corte
correcta para el trabajo en cuestión.
Instrucciones de mantenimiento
1. La condición del equipo, en particular de la
herramienta de corte, así como de los dispo-
sitivos de protección, deberán ser revisados
antes de iniciar la operación.
2. Apague el motor y quite el cartucho de batería
antes de llevar a cabo operaciones de mante-
nimiento, reemplazo de las herramientas de
corte o la limpieza del equipo o de la herra-
mienta de corte.
3. Cuando no se vayan a usar, coloque la
cubierta de las cuchillas a la herramienta y
almacene la herramienta en interiores en un
lugar seco y elevado, cerrado con llave, fuera
del alcance de los niños.
GUARDE ESTAS
INSTRUCCIONES.
ADVERTENCIA: NO DEJE que la comodidad
o familiaridad con el producto (a base de utilizarlo
repetidamente) evite que siga estrictamente las
normas de seguridad para dicho producto. El
USO INCORRECTO o el no seguir las normas de
seguridad indicadas en este manual de instruc-
ciones puede ocasionar lesiones graves.
DESCRIPCIÓN DE LAS
PIEZAS
►Fig.1: 1.Cubiertadelascuchillas2.Tapa
3.Cuchillasdecizalla4.Rueda
MONTAJE
ADVERTENCIA: Antes de ensamblar o
ajustar el equipo, apague el motor y retire el car-
tucho de batería.Delocontrario,lamáquinapodría
ponerseenmarchasinquereryprovocarlesiones.
ADVERTENCIA: Cuando ensamble o ajuste
el equipo, déjelo siempre en el suelo. Elensamble
oajustedelequipoenunaposiciónverticalpodría
ocasionarlesionesgraves.
ADVERTENCIA: Siga las advertencias
y precauciones contenidas en el capítulo
“ADVERTENCIAS DE SEGURIDAD” y el manual
de instrucciones de la unidad motorizada.
Ensamble del accesorio
1. Retirelatapadeunextremodeltubodelladode
laplaca.
►Fig.2: 1.Tapa2.Placa
2. Aojeelpernodelasruedasconlallave
hexagonal.
►Fig.3: 1.Llavehexagonal
3. Alineelaplacadeltuboconlaranuradelasrue-
das,yluegojelasruedasaltubocomosemuestra
enlagura.Aprietermementeelpernoparajarlas
ruedas.
►Fig.4: 1.Tubo2.Rueda3.Placa4.Perno
AVISO: Asegúrese de colocar las ruedas de
modo que la placa quede acoplada con las
ruedas.
4. Retirelatapadelaccesorio.
►Fig.5: 1.Tapa

18 ESPAÑOL
5. Fijeelaccesorioaltubo,demodoqueeloricio
deltuboquedealineadoconeloriciodelaccesorio.
Aprietermementeelpernocortoprimero,yluego
aprieteelpernolargoparajareltubo.
►Fig.6: 1.Tubo2.Perno(corto)3.Perno(largo)
NOTA:Cuandoaprietelospernos,apliqueunator-
siónde4,0N•ma6,0N•mcomotorsióndeapriete.
Ensamble del aditamento del tubo
PRECAUCIÓN: -
tamento del tubo quede asegurado después de la
instalación.Unainstalaciónincorrectapodríacausar
queeladitamentosedesprendieradelaunidad
motorizadaocasionandoalgunalesiónpersonal.
Ensambleeladitamentodeltuboenlaunidad
motorizada.
1. Retirelatapadelextremodeltubo.
►Fig.7: 1.Tubo2.Tapa
AVISO: No deseche la tapa, ya que hace falta
para guardar el aditamento.
2. Girelapalancahaciaeladitamento.
►Fig.8: 1.Palanca
3. Alineeelpasadorconlamarcadeechaenla
unidadmotorizada.Inserteeltubohastaqueelbotón
deliberaciónaparezca.
Asegúresedequelalíneadeposiciónestéenlapunta
delamarcadeechaenlaunidadmotorizada,yquela
marcadeechaenlaunidadmotorizadaylamarcade
echaeneltuboesténorientadasentresí.
►Fig.9: 1.Botóndeliberación2.Marcadeechaen
launidadmotorizada3.Pasador4.Líneade
posición5.Marcadeechaeneltubo
4. Girelapalancahacialaunidadmotorizada.
►Fig.10: 1.Palanca
Asegúresedequelasuperciedelapalancase
encuentreparalelaaltubo.
AVISO: No apriete la palanca sin que el adita-
mento del tubo esté insertado.Delocontrario,la
palancapodríaapretardemasiadolaentradadeleje
detransmisiónydañarla.
Paraextraereltubo,girelapalancahaciaeladitamento
yjaleeltubohaciaafueramientraspresionahacia
abajoelbotóndeliberación.
►Fig.11: 1.Botóndeliberación2.Palanca3.Tubo
Extracción o colocación de la
cubierta de las cuchillas
Liberelospestillosdelacubiertadelascuchillas
tirandodeellos,yluegoabralacubiertadelas
cuchillas.
►Fig.12: 1.Pestillo
Alcolocarlacubiertadelascuchillasenlascuchillas
decizalla,asegúresedequelacubiertadelascuchillas
estécerradayqueambospestillosesténbiensujetos.
Instalación o extracción de las
cuchillas de cizalla
PRECAUCIÓN: Siempre utilice guantes al
reemplazar las cuchillas de cizalla de manera que
sus manos no hagan contacto directo con las
cuchillas.
PRECAUCIÓN: Coloque la cubierta de las
cuchillas antes de extraer o instalar las cuchillas
de cizalla.
AVISO: Cuando reemplace las cuchillas de ciza-
lla, no elimine la grasa de la manivela.
1. Coloquelacubiertadelascuchillasdecizallaen
lacubiertadelascuchillas.
►Fig.13: 1.Cubiertadelascuchillas
2. Gireelejedemaneraquelacuchillasuperioryla
cuchillainferioresténposicionadasalternadamente.
►Fig.14: 1.Eje
3. Cierrelacubiertadelascuchillas,yluegocoloque
elaccesoriobocaabajo.
4. Retirelos4pernosconlallavehexagonal,yretire
lacubierta.
►Fig.15: 1.Perno2.Cubierta
5. Extraigalascuchillasdecizalla.
►Fig.16
6. Girelamanivelaconeldestornilladorplano,para
quelamanivelaquedeenladirecciónquesemuestra
enlagura.
►Fig.17: 1.Manivela
7. Retirelacubiertadelascuchillasdelascuchillas
decizalla,yluegocoloquelasnuevascuchillasde
cizallaenlacubiertadelascuchillas.
8. Alineelosoriciosdelacuchillasuperiordelas
tijerasylacuchillainferiordelastijeras,comosemues-
traenlagura.
►Fig.18: 1.Oricio
9. Cierrelacubiertadelascuchillasyluegoinserte
elpernoretiradoenelpaso4eneloriciodelacubierta
delascuchillas,parajartemporalmentelascuchillas
decizalla.
►Fig.19: 1.Perno
10. Apliqueunapequeñacantidaddegrasaalaperi-
feriadelamanivela.
11. Coloquelascuchillasdecizallaenelaccesorio.
►Fig.20
12. Coloquelacubierta,yluegoaprietelos3pernos.
Retireelpernoinsertadoenlacubiertadelascuchillas
enelpaso9,yluegoaprieteelperno.
►Fig.21: 1.Perno2.Cubierta

19 ESPAÑOL
AVISO: Si las cuchillas de cizalla no funcionan
correctamente es porque las cuchillas no están
bien embonadas en la manivela. Extraiga las
cuchillas y vuelva a instalarlas.
AVISO: Si las piezas, además de las cuchillas de
cizalla, como la manivela están desgastadas, pida
a los centros de servicio autorizados de Makita
las piezas de reemplazo o su reparación.
DESCRIPCIÓN DEL
FUNCIONAMIENTO
PRECAUCIÓN: Asegúrese siempre de que la
herramienta esté apagada y el cartucho de batería
haya sido extraído antes de realizar cualquier
ajuste o comprobación en la herramienta.
Ajuste del ángulo de corte
PRECAUCIÓN: Asegúrese siempre de apa-
gar la herramienta antes de ajustar el ángulo de
corte.
Elángulodelaccesoriosepuedeajustarcambiandola
posicióndelasruedas.Aojeelpernodelasruedas,
luegomuevalasruedasalaposicióndeseadayluego
aprietermementeelpernoparajarlasruedas.
►Fig.22: 1.Rueda
AVISO: Asegúrese de que la placa del tubo esté
acoplada con las ruedas.
OPERACIÓN
ADVERTENCIA: Siga las advertencias
y precauciones contenidas en el capítulo
“ADVERTENCIAS DE SEGURIDAD” y el manual
de instrucciones de la unidad motorizada.
Operación de la herramienta
ADVERTENCIA: Mantenga las manos aleja-
das de las cuchillas de cizalla.
ADVERTENCIA: Sea extremadamente cui-
dadoso en mantener el control de la herramienta
en todo momento. No permita que la herramienta
se desvíe hacia usted ni hacia otra persona alre-
dedor.Elnomantenerelcontroldelaherramienta
podríaocasionarlesionesgravesalaspersonas
alrededoryaloperador.
ADVERTENCIA: Antes del cizallado, retire
las varas y piedras del área de cizallado.
►Fig.23
PRECAUCIÓN: Si es posible, evite utilizar
la herramienta cuando haga demasiado calor.
Durante la operación de la herramienta, vigile su
condición física.
PRECAUCIÓN: Tenga cuidado de no tocar
accidentalmente una cerca de metal u otros
objetos duros durante el podado.Lascuchillasde
cizallapodríanromperseyocasionarunalesión.
PRECAUCIÓN: Trabajar con la herramienta
en un lugar donde no alcance, particularmente
desde una escalera, es extremadamente peli-
groso.Notrabajemientrasestéparadosobreuna
supercietambaleanteopocorme.
AVISO: No corte árboles muertos ni otros obje-
tos duros similares.Elhacerlopodríadañarla
herramienta.
AVISO: No utilice la herramienta en ninguna
forma que ocasione que el motor se detenga o
rote extremadamente lento.
AVISO: No intente cortar ramas gruesas.
AVISO: No permita que las cuchillas de cizalla
hagan contacto con el suelo durante la operación.
AVISO: No pode hierba ni follaje de árboles
pequeños en caso de estar mojados.
Sujetelaherramientaconambasmanossujetandoel
mangodelanteroylaempuñaduratraseradelaunidad
motorizada.
►Fig.24: 1.Mangodelantero2.Empuñaduratrasera
Conlasruedasencontactoconelsuelo,jaleelgatillo
interruptormientraspresionalapalancadedesbloqueo,
yluegomuevalaherramientahaciaadelante.
►Fig.25
Cuandopodealrededordecunetas,cercasoárboles,
desplacelaherramientaalolargodeéstos.Tenga
cuidadodequelascuchillasnolostoquen.
MANTENIMIENTO
ADVERTENCIA: Antes de inspeccionar o dar
mantenimiento al equipo, apague el motor y retire
el cartucho de batería.Delocontrario,lamáquina
podríaponerseenmarchasinquereryprovocar
lesionesserias.
ADVERTENCIA: Cuando inspeccione o dé
mantenimiento al equipo, déjelo siempre en el
suelo.Elensambleoajustedelequipoenunaposi-
ciónverticalpodríaocasionarlesionesgraves.
ADVERTENCIA: Siga las advertencias
y precauciones contenidas en el capítulo
“ADVERTENCIAS DE SEGURIDAD” y el manual
de instrucciones de la unidad motorizada.
PRECAUCIÓN: Use guantes al realizar la
inspección o dar mantenimiento.

20 ESPAÑOL
AVISO: Nunca use gasolina, bencina, diluyente
(tíner), alcohol o sustancias similares. Puede que
esto ocasione grietas o descoloramiento.
ParamantenerlaSEGURIDADyFIABILIDADdelpro-
ducto,lasreparaciones,ycualquierotratareademan-
tenimientooajustedeberánserrealizadasencentros
deservicioautorizadosodefábricaMakita,empleando
siemprerepuestosMakita.
Limpieza de la herramienta
Quiteelpolvodelaherramientaconunpañosecoo
humedezcaunpañoenaguayjabónyexprímalopara
limpiarla.
AVISO: Nunca use gasolina, bencina, diluyente
(tíner), alcohol o sustancias similares. Puede que
esto ocasione grietas o descoloramiento.
Mantenimiento de las cuchillas de
cizalla
Antesdelaoperaciónounavezporhoradurantela
operación,apliqueaceitedebajaviscosidad(aceite
paramáquinasoaceitelubricanteenaerosol)alas
cuchillasdecizalla.
►Fig.26
Despuésdelaoperación,elimineelpolvoenambos
ladosdelascuchillasdecizallaconuncepillodealam-
bre,limpieconunpañoyluegoapliqueaceitedebaja
viscosidad(aceiteparamáquinasoaceitelubricanteen
aerosol)alascuchillasdecizalla.
►Fig.27
AVISO: No lave las cuchillas de cizalla con
agua.Estopodríaocasionaroxidaciónodañosala
herramienta.
AVISO: La suciedad y la corrosión causan una
fricción excesiva de las cuchillas y acorta el
tiempo de operación en cada carga de batería.
Almacenamiento
Coloquelacubiertadelascuchillasdecizallade
maneraquelascuchillasnoquedenexpuestas.
Almacenelaherramientafueradelalcancedelos
niños.Almacenelaherramientaenunlugarquenoesté
expuestoalahumedadolalluvia.
Cuandoalmaceneeladitamentoseparadodelaunidad
motorizada,coloquelatapaenelextremodeltubo.
►Fig.28
Lubricación de las piezas móviles
AVISO: Siga la instrucción sobre la frecuencia
y cantidad de grasa suministrada.Delocontrario,
unalubricacióninsucientepodríadañarlaspiezas
móviles.
Eje de transmisión:
Apliquegrasa(grasaMakitaNNo.2oequivalente)cada
30horasdeoperación.
►Fig.29
NOTA:UstedpuedeadquirirgrasaoriginaldeMakita
coneldistribuidorMakitadesulocalidad.
Lubricación con grasa
Intervalo de lubricación:Cada50horasdeoperación
1. Extraigalascuchillasdecizalladelaccesorio.
2. Apliquegrasaalaperiferiainternadelosoricios
delascuchillasdecizalla(aproximadamente1,5g
comoguía).
►Fig.30: 1.Oricio
3. Instalelascuchillasdecizallaenelaccesorio.
AVISO: Si las cuchillas de cizalla se encuentran
considerablemente desgastadas a causa del
1. Instaleelcartuchodebateríaenlaherramienta.
2. Enciendaypongaenmarchalaherramientade
maneraquelascuchillassuperioreinferioresténposi-
cionadasalternativamente.
►Fig.31
3. Apaguelaherramientayretireelcartuchode
batería.
4. Ajusteelángulodelalimaa45,yalelacuchilla
superiordesde3direccionesconlalima.
►Fig.32: (1)Lima(2)45°
PRECAUCIÓN:
de cizalla, asegúrese de que la herramienta esté
apagada y que el cartucho de batería haya sido
extraído de la herramienta.
5. Coloquelaherramientadecabezayluegoretire
lasrebabasdelascuchillasdecizallaconlapiedrade
acabado.
►Fig.33: 1.Piedradeacabado
6. Ajusteelángulodelalimaa45,yalelacuchilla
inferiordesde3direccionesconlalima.
7. Regreselaherramientaalaposiciónnormaly
luegoretirelasrebabasdelascuchillasdecizallacon
lapiedradeacabado.
Other manuals for EN424MP
2
Table of contents
Languages:
Other Makita Garden Machinery Accessories manuals

Makita
Makita EM408MP User guide

Makita
Makita ER400MP User guide

Makita
Makita EN401MP User guide

Makita
Makita 191M27-0 User manual

Makita
Makita EN410MP User manual

Makita
Makita 197726-4 User manual

Makita
Makita EN410MP User manual

Makita
Makita EM407MP User manual

Makita
Makita EN424MP User manual

Makita
Makita EM409MP User guide