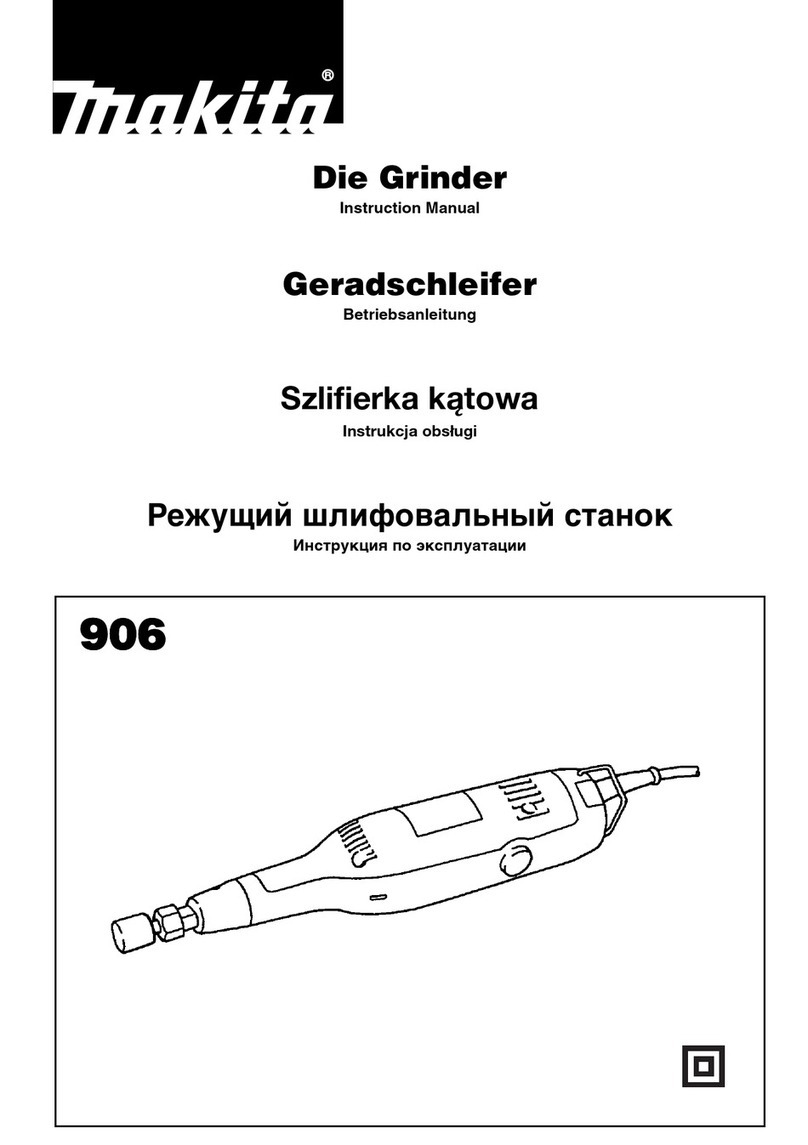
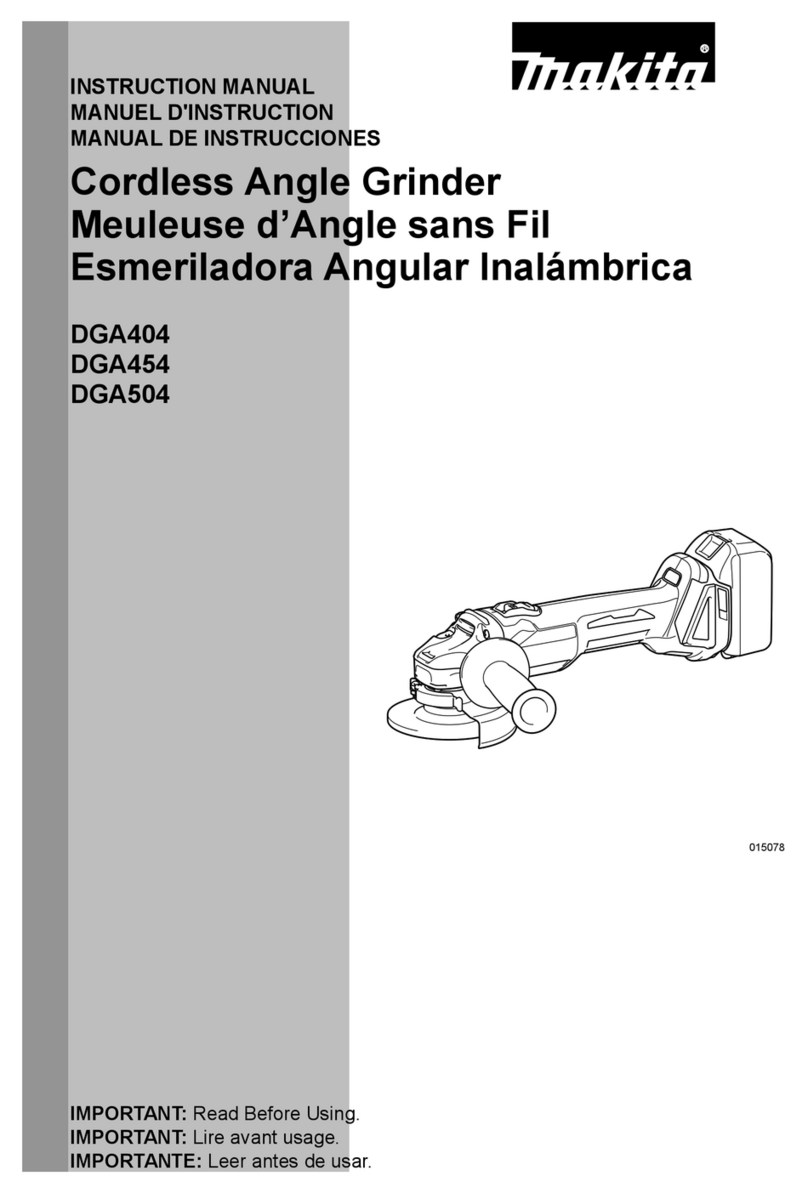
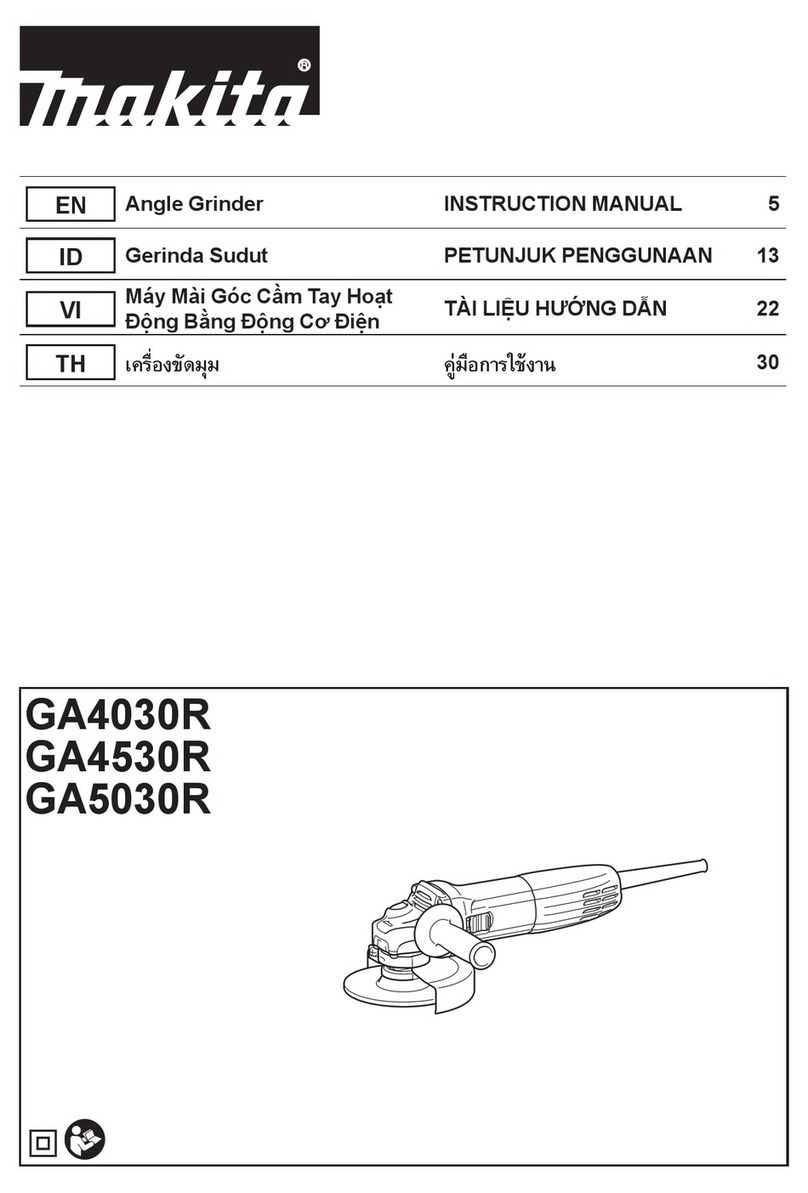
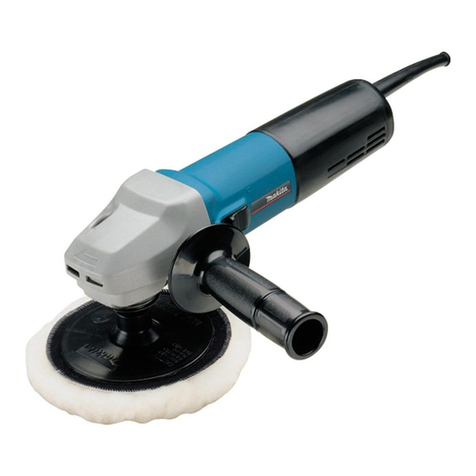
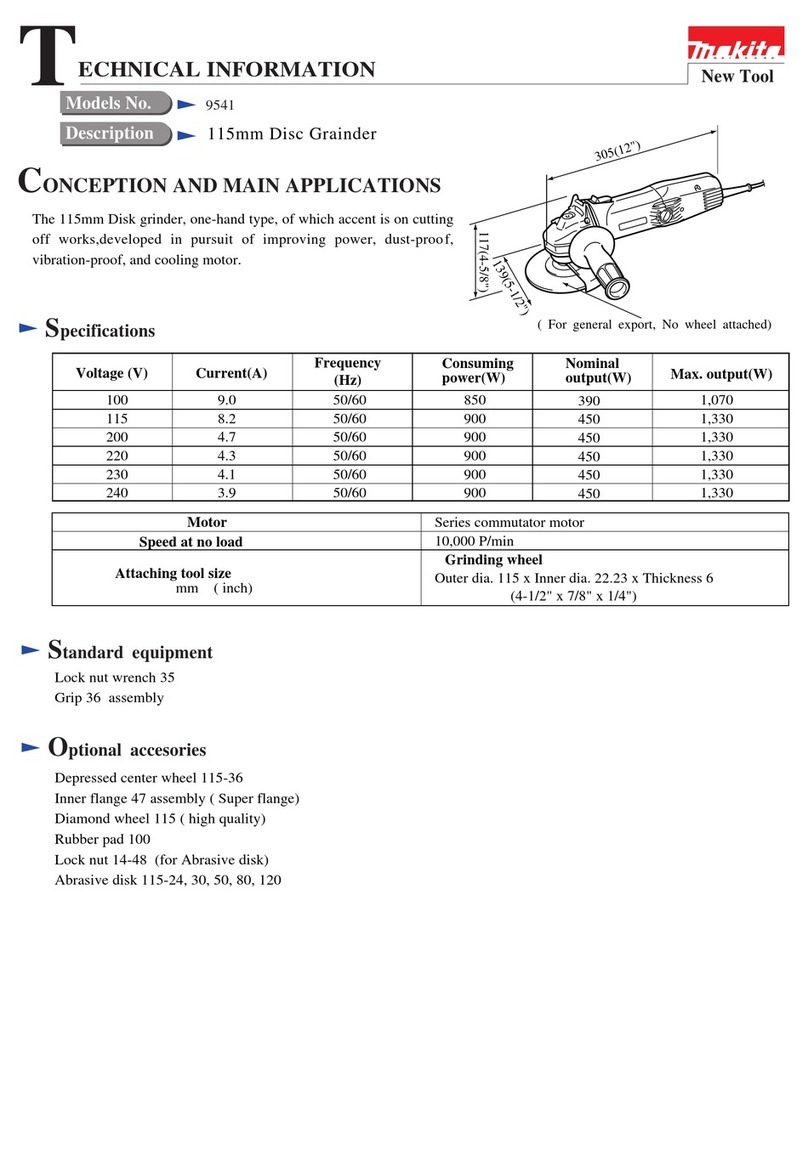
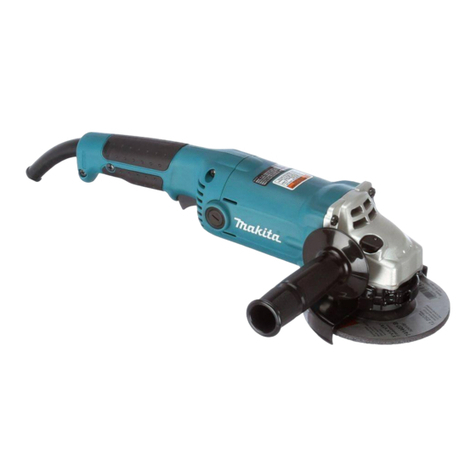
Makita 9564PC User manual

9564PC
9564PCV
9565PC
9565PCV
9566PC
9566PCV
EN Angle Grinder INSTRUCTION MANUAL 6
FR Meuleuse d’Angle MANUEL D’INSTRUCTIONS 18
DE Winkelschleifer BETRIEBSANLEITUNG 31
IT Smerigliatrice angolare ISTRUZIONI PER L’USO 44
NL Haakse slijpmachine GEBRUIKSAANWIJZING 57
ES Esmeriladora Angular MANUAL DE
INSTRUCCIONES 70
PT Esmerilhadeira Angular MANUAL DE INSTRUÇÕES 83
DA Vinkelsliber BRUGSANVISNING 96
EL 108
TR KULLANMA KILAVUZU 121

2
1
Fig.1
1
2
Fig.2
1
Fig.3
Fig.4
1
2
3
Fig.5
1
2
3
4
Fig.6
1
2
Fig.7
Fig.8

3
2
3
4
1
Fig.9
1
2
Fig.10
1
2
3
4
Fig.11
1
2
3
Fig.12
1
2
4
3
Fig.13
1
Fig.14
12
Fig.15
Fig.16

4
1
3
2
4
Fig.17
11
44
23
Fig.18
11
44
23
Fig.19
1
Fig.20
1
Fig.21
1
Fig.22
1
2
4
5
6
3
Fig.23
Fig.24

5
15
Fig.25
Fig.26
Fig.27
Fig.28
Fig.29
Fig.30
Fig.31
1
2
Fig.32

6ENGLISH
ENGLISH (Original instructions)
SPECIFICATIONS
Model: 9564PC
9564PCV
9565PC
9565PCV
9566PC
9566PCV
Applicable grinding wheel Max. wheel diameter 115 mm 125 mm 150 mm
Max. wheel thickness 7.2 mm 6.4 mm
Max. wheel diameter 115 mm 125 mm 150 mm
Max. wheel thickness 3.2 mm 3.0 mm
Applicable wire wheel brush Max. wheel diameter 115 mm 125 mm
Max. wheel thickness 20 mm
Spindle thread
Max. spindle length 23 mm
0 12,000 min-1 10,000 min-1
Overall length 307 mm
Net weight 2.4 - 3.5 kg 2.5 - 2.9 kg
/II
without notice.
EPTA-Procedure 01/2014, are shown in the table.
Symbols
meaning before use.
operations.
DOUBLE INSULATION
Due to the presence of hazardous compo-
nents in the equipment, used electrical and
impact on the environment and human
health.
Do not dispose of electrical and electronic
appliances with household waste!
In accordance with the European Directive
on waste electrical and electronic equip-
ment and its adaptation to national law,
used electrical and electronic equipment
delivered to a separate collection point
for municipal waste, operating in accor-
dance with the environmental protection
regulations.
crossed-out wheeled bin placed on the
equipment.
Intended use
The tool is intended for grinding, sanding, wire brush-
ing, hole cutting and cutting of metal and stone materi-
als without the use of water.
Power supply
the same voltage as indicated on the nameplate, and
are double-insulated and can, therefore, also be used
from sockets without earth wire.

7ENGLISH
Noise
Model Sound pressure
level (LpA) : (dB(A))
Sound power level
(LWA) : (dB(A))
Uncertainty (K) :
(dB(A))
84 92 3
84 92 3
85 93 3
85 93 3
87 95 3
87 95 3
NOTE:
NOTE:
WARNING: Wear ear protection.
WARNING: -
ue(s) depending on the ways in which the tool is used especially what kind of workpiece is processed.
WARNING: Be sure to identify safety measures to protect the operator that are based on an estimation
of exposure in the actual conditions of use (taking account of all parts of the operating cycle such as the
WARNING: Grinding thin sheets of metal or other easily vibrating structures with a large surface can
result in a total noise emission much higher (up to 15 dB) than the declared noise emission values.
Take the increased noise emission into consideration for both the risk assessment of noise exposure and
selecting adequate hearing protection.
Vibration
Work mode: surface grinding with anti vibration side grip
Model
Vibration emission (ah, AG) : (m/s2)
Uncertainty (K) : (m/s2)
10.0 1.5
10.0 1.5
10.0 1.5
10.0 1.5
8.5 1.5
8.5 1.5
Work mode: disc sanding
Model
Vibration emission (ah, DS) : (m/s2)
Uncertainty (K) : (m/s2)
2.5 m/s2or less 1.5
2.5 m/s2or less 1.5
2.5 m/s2or less 1.5
2.5 m/s2or less 1.5
2.5 1.5
2.5 1.5
NOTE:
NOTE:

8ENGLISH
WARNING:
value(s) depending on the ways in which the tool is used especially what kind of workpiece is processed.
WARNING: Be sure to identify safety measures to protect the operator that are based on an estimation
of exposure in the actual conditions of use (taking account of all parts of the operating cycle such as the
WARNING: The declared vibration emission value is used for main applications of the power tool. However if
EC Declaration of Conformity
For European countries only
to this instruction manual.
SAFETY WARNINGS
General power tool safety warnings
WARNING Read all safety warnings, instructions,
power tool. Failure to follow all instructions listed below
Save all warnings and instruc-
tions for future reference.
Grinder safety warnings
Safety warnings common for grinding, sanding,
1.
This power tool is intended to function as a grinder,
all safety warnings, instructions, illustrations and
Failure
2. Operations such as polishing are not to be
performed with this power tool. Operations for
3. Do not convert this power tool to operate in
Such a con-
4.
power tool, it does not assure safe operation.
5. The rated speed of the accessory must be at
least equal to the maximum speed marked on
the power tool. Accessories running faster than
6. The outside diameter and the thickness of your
accessory must be within the capacity rating
of your power tool.
7. The dimensions of the accessory mounting
-
ware of the power tool. Accessories that do not
match the mounting hardware of the power tool
8.
Do not use a damaged accessory. Before each use
inspect the accessory such as abrasive wheels for
chips and cracks, backing pad for cracks, tear or
excess wear, wire brush for loose or cracked wires.
If power tool or accessory is dropped, inspect for
damage or install an undamaged accessory. After
inspecting and installing an accessory, position
yourself and bystanders away from the plane of the
rotating accessory and run the power tool at maxi-
mum no-load speed for one minute. Damaged acces-
9. Wear personal protective equipment.
Depending on application, use face shield,
safety goggles or safety glasses. As appro-
priate, wear dust mask, hearing protectors,
gloves and workshop apron capable of stop-
ping small abrasive or workpiece fragments.
The dust mask or respirator must be capable
10.
Keep bystanders a safe distance away from work
area. Anyone entering the work area must wear
personal protective equipment. Fragments of
11.
Hold the power tool by insulated gripping sur-
faces only, when performing an operation where
the cutting accessory may contact hidden wiring
or its own cord.
"live" and could give the operator an electric shock.
12. Position the cord clear of the spinning acces-
sory.
13. Never lay the power tool down until the acces-
sory has come to a complete stop. The spinning
14. Do not run the power tool while carrying it at
your side. Accidental contact with the spinning
15. Regularly clean the power tool’s air vents. The
motor’s fan will draw the dust inside the housing
and excessive accumulation of powdered metal

9ENGLISH
16.
materials. Sparks could ignite these materials.
17. Do not use accessories that require liquid
coolants. Using water or other liquid coolants
Kickback and related warnings:
Kickback is a sudden reaction to a pinched or snagged
-
-
trolled power tool to be forced in the direction opposite
the workpiece, the edge of the wheel that is entering into the
pinch point can dig into the surface of the material causing
of the wheel’s movement at the point of pinching. Abrasive
Kickback is the result of power tool misuse and/or
incorrect operating procedures or conditions and can be
1.
power tool and position your body and arms
to allow you to resist kickback forces. Always
use auxiliary handle, if provided, for maximum
control over kickback or torque reaction during
start-up. The operator can control torque reactions
or kickback forces, if proper precautions are taken.
2. Never place your hand near the rotating acces-
sory.
3. Do not position your body in the area where
power tool will move if kickback occurs.
Kickback will propel the tool in direction opposite
to the wheel’s movement at the point of snagging.
4.
Use special care when working corners, sharp edges,
etc. Avoid bouncing and snagging the accessory.
5.
Do not attach a saw chain woodcarving blade,
segmented diamond wheel with a peripheral gap
greater than 10 mm or toothed saw blade. Such
blades create frequent kickback and loss of control.
operations:
1.
designed for the selected wheel. Wheels for
which the power tool was not designed cannot be
2.
The grinding surface of centre depressed wheels
must be mounted below the plane of the guard lip.
3.
The guard must be securely attached to the
power tool and positioned for maximum safety,
so the least amount of wheel is exposed towards
the operator. The guard helps to protect the opera-
tor from broken wheel fragments, accidental contact
with wheel and sparks that could ignite clothing.
4.
-
tions. For example: do not grind with the side of
for peripheral grinding, side forces applied to these
5.
of correct size and shape for your selected
wheel.
6. Do not use worn down wheels from larger
power tools. A wheel intended for larger power
tool is not suitable for the higher speed of a
7.
When using dual purpose wheels always use the cor-
rect guard for the application being performed. Failure
operations:
1. -
sive pressure. Do not attempt to make an
excessive depth of cut. Overstressing the wheel
or binding of the wheel in the cut and the possibil-
2. Do not position your body in line with and
behind the rotating wheel. When the wheel, at
-
3. When the wheel is binding or when interrupt-
tool and hold it motionless until the wheel
comes to a complete stop. Never attempt to
the wheel is in motion otherwise kickback may
occur. Investigate and take corrective action to
eliminate the cause of wheel binding.
4.
Do not restart the cutting operation in the work-
piece. Let the wheel reach full speed and carefully
re-enter the cut.
kickback if the power tool is restarted in the workpiece.
5. Support panels or any oversized workpiece to
minimize the risk of wheel pinching and kick-
back. Large workpieces tend to sag under their
own weight. Supports must be placed under the
workpiece near the line of cut and near the edge
of the workpiece on both sides of the wheel.
6. Use extra caution when making a “pocket cut”
into existing walls or other blind areas. The
-
7. Do not attempt to do curved cutting.
Overstressing the wheel increases the loading and
8. Before using a segmented diamond wheel,
make sure that the diamond wheel has the
peripheral gap between segments of 10 mm or
less, only with a negative rake angle.
1. Use proper sized sanding disc paper. Follow
manufacturers recommendations, when
selecting sanding paper. Larger sanding paper
-
tearing of the disc or kickback.

10 ENGLISH
1. Be aware that wire bristles are thrown by the
brush even during ordinary operation. Do not
overstress the wires by applying excessive
load to the brush.
penetrate light clothing and/or skin.
2.
do not allow any interference of the wire wheel or
brush with the guard.
in diameter due to work load and centrifugal forces.
Additional Safety Warnings:
1.
When using depressed centre grinding wheels,
2. NEVER USE Stone Cup type wheels with this
grinder. This grinder is not designed for these
3.
-
cially the installing surface) or the lock nut. Damage to
these parts could result in wheel breakage.
4. Make sure the wheel is not contacting the
workpiece before the switch is turned on.
5. Before using the tool on an actual workpiece,
let it run for a while. Watch for vibration or
wobbling that could indicate poor installation
or a poorly balanced wheel.
6. -
form the grinding.
7. Do not leave the tool running. Operate the tool
only when hand-held.
8. Do not touch the workpiece immediately after
operation; it may be extremely hot and could
burn your skin.
9.
Do not touch accessories immediately after operation;
it may be extremely hot and could burn your skin.
10. Observe the instructions of the manufacturer
for correct mounting and use of wheels.
Handle and store wheels with care.
11. Do not use separate reducing bushings or
adaptors to adapt large hole abrasive wheels.
12.
13.
hole wheel, ensure that the thread in the wheel
is long enough to accept the spindle length.
14.
Check that the workpiece is properly supported.
15. Pay attention that the wheel continues to
16.
If working place is extremely hot and humid, or
badly polluted by conductive dust, use a short-cir-
cuit breaker (30 mA) to assure operator safety.
17.
Do not use the tool on any materials containing asbestos.
18.
the dust collecting wheel guard if required by
domestic regulation.
19. Cutting discs must not be subjected to any
lateral pressure.
20. Do not use cloth work gloves during operation.
causes tool breakage.
21.
Before operation, make sure that there is no
buried object such as electric pipe, water pipe or
gas pipe in the workpiece.
an electric shock, electrical leakage or gas leak.
22.
If a blotter is attached to the wheel, do not remove
it. The diameter of the blotter must be larger than
23. Before installing a grinding wheel, always
check that the blotter part does not have any
abnormalities such as chips or cracks.
24. Tighten the lock nut properly. Overtightening
SAVE THESE INSTRUCTIONS.
WARNING: DO NOT let comfort or familiarity
with product (gained from repeated use) replace
strict adherence to safety rules for the subject
product. MISUSE or failure to follow the safety
rules stated in this instruction manual may cause
serious personal injury.
FUNCTIONAL DESCRIPTION
CAUTION: Always be sure that the tool is
checking function on the tool.
Shaft lock
WARNING: Never actuate the shaft lock when
the spindle is moving.
the tool damage.
Press the shaft lock to prevent spindle rotation when
installing or removing accessories.
Fig.1: 1. Shaft lock
Switch action
CAUTION: Before plugging in the tool, always
check to see that the switch lever actuates
properly and returns to the "OFF" position when
released.
CAUTION: For your safety, this tool is
tool from unintended starting. NEVER use the tool
if it runs when you simply pull the switch lever
to our authorized service center for proper repairs
BEFORE further usage.
CAUTION: Do not pull the switch lever hard
This can cause
switch breakage.
CAUTION: NEVER tape down or defeat pur-
-
tor and then pull the switch lever.
To stop the tool, release the switch lever.
Fig.2: 1.2. Switch lever

11 ENGLISH
Speed adjusting dial
-
ber on the dial and the corresponding rotation speed.
Fig.3: 1.
Only for model 9564PCV / 9565PCV
Number Speed
12,800 min-1
24,000 min-1
36,500 min-1
49,000 min-1
512,000 min-1
Only for model 9566PCV
Number Speed
14,000 min-1
25,000 min-1
36,500 min-1
48,000 min-1
510,000 min-1
NOTICE: If the tool is operated continuously at
low speed for a long time, the motor will get over-
loaded, resulting in tool malfunction.
NOTICE:
The speed adjusting dial can be turned
only as far as 5 and back to 1. Do not force it past 5 or
1, or the speed adjusting function may no longer work.
Soft start feature
Soft start feature reduces starting reaction.
Constant speed control
Overload protector
When the load on the tool exceeds admissible levels, power to the
motor is reduced to protect the motor from overheating. When the
load returns to admissible levels, the tool will operate as normal.
ASSEMBLY
CAUTION: Always be sure that the tool is
any work on the tool.
Installing side grip (handle)
CAUTION: Always be sure that the side grip is
installed securely before operation.
Fig.4
Installing or removing wheel guard
WARNING: When using a depressed center
the closed side of the guard always points toward
the operator.
WARNING:
/ diamond wheel, be sure to use only the special
For tool with locking screw type
wheel guard
Mount the wheel guard with the protrusions on the
wheel guard band aligned with the notches on the bear-
ing box. Then rotate the wheel guard to such an angle
that it can protect the operator according to work. Be
To remove wheel guard, follow the installation proce-
dure in reverse.
Fig.5: 1. Wheel guard 2. Bearing box 3. Screw
For tool with clamp lever type wheel
guard
Loosen the screw, and then pull the lever in the direc-
tion of the arrow. Mount the wheel guard with the protru-
sions on the wheel guard band aligned with the notches
on the bearing box. Then rotate the wheel guard to such
an angle that it can protect the operator according to
work.
Fig.6: 1. Wheel guard 2. Bearing box 3. Screw
4. Lever
Pull the lever in direction of the arrow. Then tighten the
wheel guard with fastening the screw. Be sure to tighten
Fig.7: 1. Screw 2. Lever
To remove wheel guard, follow the installation proce-
dure in reverse.
Clip-on cutting wheel guard
attachment
Optional accessory
NOTE:
wheel guard attachment can be used with the wheel
Not available in some countries.
Fig.8

12 ENGLISH
Installing or removing depressed
Optional accessory
WARNING: When using a depressed center
on the tool so that the closed side of the guard
always points toward the operator.
WARNING: Make sure that the mounting part
result in the dangerous vibration.
the straight part at the bottom of the spindle.
Fig.9: 1. Lock nut 2. Depressed center wheel
3.4. Mounting part
that the spindle cannot revolve, then use the lock nut
Fig.10: 1. Lock nut wrench 2. Shaft lock
To remove the wheel, follow the installation procedure
in reverse.
Optional accessory
WARNING: Always use supplied guard when
Wheel can shatter during
use and guard helps to reduce chances of personal
Fig.11: 1. Lock nut 2. Flex wheel 3. Back up pad
4.
Follow instructions for depressed center wheel but also
use back up pad over wheel.
Installing or removing abrasive disc
Optional accessory
Fig.12: 1. Sanding lock nut 2. Abrasive disc
3.
1. Mount the rubber pad onto the spindle.
2. Fit the disc on the rubber pad and screw the sand-
ing lock nut onto the spindle.
3.
tighten the sanding lock nut clockwise with the lock nut
wrench.
To remove the disc, follow the installation procedure in
reverse.
NOTE:-
Optional accessory
NOT equipped with a brake function.
Models with the letter F are standard-equipped with
Installing or removing Ezynut
Optional accessory
Only for tools with M14 spindle thread.
CAUTION: Do not use Ezynut with Super
thread cannot be retained by the spindle.
Fig.13: 1.2. Abrasive wheel 3.
4. Spindle
abrasive wheel clockwise as far as it turns.
Fig.14: 1. Shaft lock
counterclockwise.
NOTE:
as the arrow points the notch. Otherwise a lock nut
wrench is required to loosen it. Insert one pin of the
Fig.15: 1. Arrow 2. Notch
Fig.16
wheel
Optional accessory
WARNING:
/ diamond wheel, be sure to use only the special
WARNING:
grinding.
Fig.17: 1. Lock nut 2.-
mond wheel 3.4. Wheel guard
As for the installation, follow the instructions for
depressed center wheel.
The direction for mounting the lock nut and the inner
Fig.18: 1. Lock nut 2.
3. Abrasive cut-
4. Inner
When installing the diamond wheel:
Fig.19: 1. Lock nut 2.
3.
4.

13 ENGLISH
Installing wire cup brush
Optional accessory
CAUTION: Do not use brush that is damaged,
or which is out of balance. Use of damaged brush
broken brush wires.
spindle.
brush onto spindle and tighten with supplied wrench.
Fig.20: 1. Wire cup brush
Installing wire wheel brush
Optional accessory
CAUTION: Do not use wire wheel brush that
is damaged, or which is out of balance. Use of
damaged wire wheel brush could increase potential
CAUTION: ALWAYS use guard with wire
inside guard. Wheel can shatter during use and
spindle.
brush onto spindle and tighten with the wrenches.
Fig.21: 1. Wire wheel brush
Installing hole cutter
Optional accessory
spindle.
hole cutter onto the spindle, and tighten it with the sup-
plied wrench.
Fig.22: 1. Hole cutter
Installing dust collecting wheel
guard for grinding
Only for model 9564PC / 9564PCV / 9565PC /
9565PCV
Optional accessory
planing concrete surface.
CAUTION: Dust collecting wheel guard for
grinding is only for use in planing concrete sur-
face with a cup-type diamond wheel. Do not use
this guard with any other cutting accessory or for
any other purpose.
CAUTION: Before operation, make sure that
a vacuum cleaner is connected to the tool and
turned on.
Place the tool upside down and install the dust collect-
ing wheel guard.
tighten the lock nut onto the spindle.
Fig.23: 1. Lock nut 2.
3.4. Inner
5. Dust collecting wheel guard
6. Bearing box
NOTE: For information how to install the dust col-
lecting wheel guard, refer to the manual of the dust
collecting wheel guard.
Installing dust collecting wheel
Only for model 9564PC / 9564PCV / 9565PC /
9565PCV
Optional accessory
cutting stone materials.
Fig.24
NOTE: For information how to install the dust col-
lecting wheel guard, refer to the manual of the dust
collecting wheel guard.
Installing or removing dust cover
attachment
Optional accessory
CAUTION: Always be sure that the tool is
removing the dust cover attachment. Failure to do
position.
For details, refer to the instruction manual of the dust
cover attachment.
NOTICE: Clean out the dust cover attachment
when it is clogged with dust or foreign matters.
attachment will damage the tool.

14 ENGLISH
OPERATION
WARNING: It should never be necessary to
force the tool. The weight of the tool applies ade-
quate pressure. Forcing and excessive pressure
could cause dangerous wheel breakage.
WARNING: ALWAYS replace wheel if tool is
dropped while grinding.
WARNING: NEVER hit the workpiece with the
wheel.
WARNING: Avoid bouncing and snagging
the wheel, especially when working corners,
sharp edges etc. This can cause loss of control and
kickback.
WARNING: NEVER use tool with wood cutting
blades and other saw blades. Such blades when
CAUTION: Never switch on the tool when it
is in contact with the workpiece, it may cause an
injury to operator.
CAUTION: Always wear safety goggles or a
face shield during operation.
CAUTION:
the tool and wait until the wheel has come to a
complete stop before putting the tool down.
CAUTION:
one hand on housing and the other on the side
grip (handle).
NOTE: A dual purpose wheel can be used for both
grinding operation, and refer to the "Operation with
operation.
Grinding and sanding operation
Fig.25
workpiece.
In general, keep the edge of the wheel or disc at an
angle of about 15° to the workpiece surface.
During the break-in period with a new wheel, do not
the workpiece. Once the edge of the wheel has been
forward and backward direction.
Usage example: operation with cup-type diamond
wheel
Fig.26
diamond wheel to the workpiece surface.
diamond wheel
Optional accessory
WARNING: Do not "jam" the wheel or apply
excessive pressure. Do not attempt to make an
excessive depth of cut. Overstressing the wheel
of kickback, wheel breakage and overheating of the
WARNING: Do not start the cutting operation
in the workpiece. Let the wheel reach full speed
and carefully enter into the cut moving the tool
forward over the workpiece surface. The wheel
started in the workpiece.
WARNING: During cutting operations, never
change the angle of the wheel. Placing side pres-
the wheel to crack and break, causing serious per-
WARNING: A diamond wheel shall be oper-
ated perpendicular to the material being cut.
wheel
Fig.27
Usage example: operation with diamond wheel
Fig.28
Operation with wire cup brush
Optional accessory
CAUTION: Check operation of brush by run-
ning tool with no load, insuring that no one is in
front of or in line with brush.
NOTICE: Avoid applying too much pressure
which causes over bending of wires when using
the wire cup brush.
breakage.
Usage example: operation with wire cup brush
Fig.29
Operation with wire wheel brush
Optional accessory
CAUTION: Check operation of wire wheel
brush by running tool with no load, insuring that
no one is in front of or in line with the wire wheel
brush.
NOTICE: Avoid applying too much pressure
which causes over bending of wires when
using wire wheel brush.
breakage.
Usage example: operation with wire wheel brush
Fig.30

15 ENGLISH
Operation with hole cutter
Optional accessory
CAUTION: Check operation of the hole cutter
by running the tool with no load, insuring that no
one is in front of the hole cutter.
NOTICE: Do not tilt the tool during operation. It
Usage example: operation with hole cutter
Fig.31
MAINTENANCE
CAUTION: Always be sure that the tool is
perform inspection or maintenance.
NOTICE: Never use gasoline, benzine, thinner,
alcohol or the like. Discoloration, deformation or
cracks may result.
using Makita replacement parts.
Air vent cleaning
The tool and its air vents have to be kept clean.
vents start to become obstructed.
Fig.32: 1. Exhaust vent 2. Inhalation vent

16 ENGLISH
COMBINATION OF APPLICATIONS AND
ACCESSORIES
Optional accessory
CAUTION: Using the tool with incorrect guards can cause risks as follows.
• -
piece causing poor control.
• -
mond wheels, there is an increased risk of exposure to rotating wheels, emitted sparks and particles,
as well as exposure to wheel fragments in the event of wheel burst.
• -
mond wheels, the wheel guard may interfere with the workpiece causing poor control.
• -
the guard leading to breaking of wires.
•
reduces a risk of exposure to dust.
•
1
222
11
12
4
3
8
7
9
10
13
3
5
3
14 2
17
3
16
15
16
17
19
20
3
21
3
18
22
5656
56
5656
-Application 115 mm model 125 mm model 150 mm model
1 - Side grip
2 -
3 -
4 Depressed center wheel / Flap disc
5 - Lock nut
6 -
7 - Back up pad -
8 Flex wheel -
9 -
10 Sanding Abrasive disc
11 -Sanding lock nut
12 Wire brushing Wire wheel brush

17 ENGLISH
-Application 115 mm model 125 mm model 150 mm model
13 Wire brushing Wire cup brush
14 Hole cutting Hole cutter
15 -
16
17 Dual purpose wheel -
18 -
19 - -
20 Diamond wheel -
21 - -
22 -
- - Lock nut wrench
- - Dust cover attachment
NOTE:
NOTE:
NOTE:
instruction manual of the clip-on cutting wheel guard attachment.
NOTE:
For more details, refer to each instruction manual of the guard.
NOTE:
For more details, refer to each instruction manual of the guard.
OPTIONAL
ACCESSORIES
CAUTION: These accessories or attachments
are recommended for use with your Makita tool
accessories or attachments might present a risk of
for its stated purpose.
-
NOTE:

18 FRANÇAIS
FRANÇAIS (Instructions originales)
SPÉCIFICATIONS
Modèle : 9564PC
9564PCV
9565PC
9565PCV
9566PC
9566PCV
Meule ordinaire applicable Diamètre max. de la meule 115 mm 125 mm 150 mm
Épaisseur max. de la meule 7,2 mm 6,4 mm
Meule à tronçonner applicable Diamètre max. de la meule 115 mm 125 mm 150 mm
Épaisseur max. de la meule 3,2 mm 3,0 mm
Brosse métallique circulaire
applicable
Diamètre max. de la meule 115 mm 125 mm
Épaisseur max. de la meule 20 mm
Filetage de l’axe
Longueur max. de l’axe 23 mm
0 12 000 min-1 10 000 min-1
Longueur totale 307 mm
Poids net 2,4 - 3,5 kg 2,5 - 2,9 kg
/II
-
ment à la procédure EPTA 01/2014, sont indiquées dans le tableau.
Symboles
Lire le mode d’emploi.
Portez des lunettes de sécurité.
Ne pas utiliser le carter de meule pour les
travaux de tronçonnage.
DOUBLE ISOLATION
uniquement
En raison de la présence de composants
dangereux dans l’équipement, les équipe-
ments électriques et électroniques usagés
peuvent avoir un impact négatif sur l’envi-
ronnement et la santé humaine.
électroniques avec les ordures ména-
gères !
relative aux déchets d’équipements élec-
triques et électroniques et à son adaptation
à la législation nationale, les équipements
électriques et électroniques usagés doivent
être collectés séparément et déposés
dans un point de collecte distinct pour
déchets urbains, conformément aux régle-
mentations en matière de protection de
l’environnement.
-
belle à roulettes barrée sur l’équipement.
Utilisations
L’outil est conçu pour le meulage, le ponçage, le bros-
sage métallique, le découpage de trous et la coupe de
matériaux en métal ou en pierre sans utiliser d’eau.
Alimentation
L’outil ne devra être raccordé qu’à une alimentation
signalétique, et il ne pourra fonctionner que sur un
isolation, il peut de ce fait être alimenté par une prise
sans mise à la terre.

19 FRANÇAIS
Bruit
Modèle
Niveau de pression
sonore (LpA) : (dB (A))
Niveau de puissance
sonore (LWA) : (dB (A))
Incertitude (K) :
(dB (A))
84 92 3
84 92 3
85 93 3
85 93 3
87 95 3
87 95 3
NOTE : La ou les valeurs d’émission de bruit déclarées ont été mesurées conformément à la méthode de test
standard et peuvent être utilisées pour comparer les outils entre eux.
NOTE :
La ou les valeurs d’émission de bruit déclarées peuvent aussi être utilisées pour l’évaluation préliminaire de l’exposition.
AVERTISSEMENT : Portez un serre-tête antibruit.
AVERTISSEMENT :
ou des valeurs déclarées, suivant la façon dont l’outil est utilisé, particulièrement selon le type de pièce usinée.
AVERTISSEMENT : Les mesures de sécurité à prendre pour protéger l’utilisateur doivent être basées
sur une estimation de l’exposition dans des conditions réelles d’utilisation (en tenant compte de toutes
les composantes du cycle d’utilisation, comme par exemple le moment de sa mise hors tension, lorsqu’il
tourne à vide et le moment de son déclenchement).
AVERTISSEMENT :
ayant une grande surface peut entraîner une émission totale de bruit beaucoup plus élevée (jusqu’à 15 dB)
que les valeurs d’émission de bruit déclarées.
Placez des tapis anti-bruit souples et lourds ou similaires sur ces pièces pour les empêcher d’émettre du son.
Prenez en compte l’augmentation des émissions de bruit pour l’évaluation des risques liés à l’exposition
au bruit et le choix d’un protecteur d’oreilles adéquat.
Vibrations
Mode de travail : meulage de surfaces avec poignée latérale anti-vibration
Modèle
Émission de vibrations (ah, AG) : (m/s2)
Incertitude (K) : (m/s2)
10,0 1,5
10,0 1,5
10,0 1,5
10,0 1,5
8,5 1,5
8,5 1,5
Mode de travail : ponçage au disque
Modèle
Émission de vibrations (ah, DS) : (m/s2)
Incertitude (K) : (m/s2)
2,5 m/s2ou moins 1,5
2,5 1,5
2,5 1,5
NOTE : La ou les valeurs de vibration totales déclarées ont été mesurées conformément à la méthode de test
standard et peuvent être utilisées pour comparer les outils entre eux.
NOTE : La ou les valeurs de vibration totales déclarées peuvent aussi être utilisées pour l’évaluation préliminaire
de l’exposition.

20 FRANÇAIS
AVERTISSEMENT : -
rente de la ou des valeurs déclarées, suivant la façon dont l’outil est utilisé, particulièrement selon le type
de pièce usinée.
AVERTISSEMENT : Les mesures de sécurité à prendre pour protéger l’utilisateur doivent être basées
sur une estimation de l’exposition dans des conditions réelles d’utilisation (en tenant compte de toutes
les composantes du cycle d’utilisation, comme par exemple le moment de sa mise hors tension, lorsqu’il
tourne à vide et le moment de son déclenchement).
AVERTISSEMENT : La valeur d’émission de vibrations déclarée est utilisée pour les applications principales
de l’outil électrique. Toutefois si l’outil électrique est utilisé pour d’autres applications, la valeur d’émission de
Déclaration de conformité CE
Pour les pays européens uniquement
A à ce mode d’emploi.
CONSIGNES DE
SÉCURITÉ
Consignes de sécurité générales
pour outils électriques
AVERTISSEMENT Veuillez lire toutes les
consignes de sécurité, instructions, illustrations
-
trique. Le non-respect de toutes les instructions indi-
quées ci-dessous peut entraîner une électrocution, un
incendie et/ou de graves blessures.
Conservez toutes les mises en
garde et instructions pour réfé-
rence ultérieure.
Le terme « outil électrique » dans les avertissements
fait référence à l’outil électrique alimenté par le secteur
-
Consignes de sécurité pour
meuleuse
Consignes de sécurité communes aux travaux de
meulage, ponçage, brossage métallique ou tron-
çonnage :
1. Cet outil électrique est conçu pour être uti-
lisé en tant que meuleuse, ponceuse, brosse
métallique, emporte-pièce ou outil de tron-
çonnage. Veuillez consulter les consignes de
sécurité, les instructions, les illustrations et
-
trique. Le non-respect de toutes les instructions
indiquées ci-dessous peut entraîner une électro-
cution, un incendie et/ou de graves blessures.
2. Les travaux de polissage ne doivent pas être
réalisés avec cet outil électrique.
danger et de blessure si l’outil électrique est utilisé
pour exécuter des travaux pour lesquels il n’a pas
été conçu.
3.
Ne convertissez pas cet outil électrique pour qu’il
-
l’outil. Une telle conversion peut entraîner une perte
de contrôle et provoquer des blessures graves.
4. N’utilisez pas d’accessoires qui n’ont pas
fabricant de l’outil. Même si un accessoire peut
qu’il fonctionnera de manière sûre.
5.
La vitesse nominale de l’accessoire doit être au
moins égale à la vitesse maximum inscrite sur l’outil
électrique. Les accessoires tournant plus vite que leur
vitesse nominale peuvent se casser et voler en éclats.
6.
Le diamètre extérieur et l’épaisseur de l’accessoire
ne doivent pas dépasser la capacité nominale de
l’outil électrique. Les accessoires de taille incorrecte
ne peuvent être protégés ou contrôlés adéquatement.
7. Les dimensions du support d’accessoires
doivent correspondre aux dimensions de la
pièce où ils sont montés sur l’outil électrique.
Les accessoires qui ne sont pas bien adaptés à
la taille de la pièce où ils sont montés sur l’outil
électrique se déséquilibreront, vibreront trop et
pourront entraîner une perte de maîtrise de l’outil.
8.
N’utilisez pas d’accessoire endommagé. Avant
chaque utilisation, assurez-vous que la meule
usée, ou que la brosse métallique est exempte de
tomber l’outil électrique ou un accessoire, assu-
rez-vous qu’il n’est pas endommagé ou bien rem-
et posé un accessoire, assurez-vous que personne,
y compris vous-même, ne se trouve dans la trajec-
toire de l’accessoire en rotation et faites tourner
l’outil électrique à vitesse à vide maximale pendant
une minute. Les accessoires endommagés se brisent
généralement au cours de cette période d’essai.
9.
Portez un équipement de protection indivi-
-
lisez un écran facial, des lunettes à coques ou
des lunettes de sécurité. Si nécessaire, portez
un masque anti-poussière, des protège-tym-
pans, des gants et un tablier de travail pouvant
arrêter les petites particules abrasives ou les
petits fragments de pièce. La protection oculaire
doit pouvoir arrêter les débris volants produits par
les diverses applications. Le masque anti-pous-
particules générées par une application donnée.
Une exposition prolongée à un bruit d’intensité
élevée peut entraîner une perte auditive.
Other manuals for 9564PC
10
This manual suits for next models
6
Table of contents
Languages:
Other Makita Grinder manuals

Makita
Makita 9560 User manual

Makita
Makita 9067 User manual

Makita
Makita DGA462 User manual

Makita
Makita 9561CH User manual

Makita
Makita 9564H User manual

Makita
Makita 9553NB User manual

Makita
Makita GA4540R User manual

Makita
Makita 9523NB User manual

Makita
Makita GA035GZ User manual

Makita
Makita DGA417 User manual

Makita
Makita GA5040CZ1 User manual

Makita
Makita GA9012C User manual

Makita
Makita 9501BKLT User manual

Makita
Makita DGA700 User manual

Makita
Makita 9560CV User manual

Makita
Makita GA4030 User manual

Makita
Makita GA5010 Manual

Makita
Makita DGA413 User manual

Makita
Makita GA011G User manual

Makita
Makita 9565CLR User manual