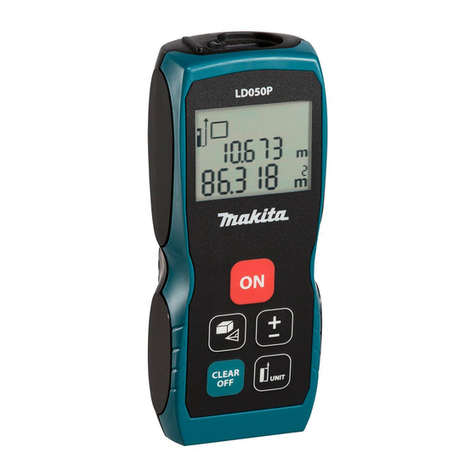
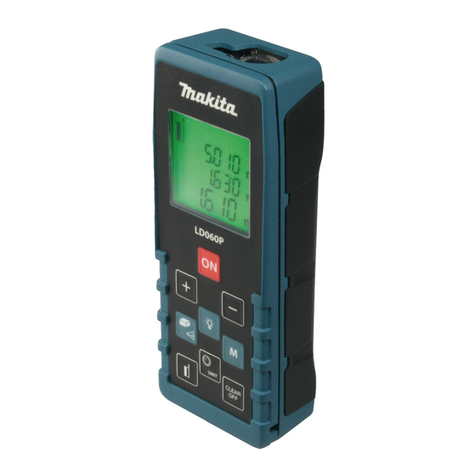
Makita LD060P User manual

reduced
English
/
Spanish
INSTRUCTION
MANUAL
Laser
Distance
Measure
LD060P
AWARNING:
For
your
personal
safety,
READ
and
UNDERSTAND
before
using.
SAVE
THESE
INSTRUCTIONS
FOR
FUTURE
REFERENCE.


o
LD060P
Complies
with
21
CFR
1040.10
and
1040.11
except
for
deviations
pursuant
to
laser
Notice
No.
50.
dated
July
26,2001.
Makita
Corporation.
Anjo,
Aichi,
Japan.
Made
in
Hungary

B
e
d
i
e
n
u
n
g
san
l
e
i
t
u
n
g
User
Manual
Manu
e
l
d'ut
i
li
s
ation
Manua
l
e
d'uso
Manual
de
empleo
G
e
b
r
u
i
k
saanwijz
i
n
g
Manual
de
Operaqao
Bruk
e
r
handbok
K
a
ytt
a
j
a
n
k
a
s
i
k
irj
a
Brug
e
r
v
e
j
l
e
d
n
i
n
g
Bruks
a
n
v
i
s
n
i
ng
Ku
ll
a
n
m
a
K
i
l
a
vuzu
U
Jvat
el
ska
prirucka
Navod
na
pou
lt
i
o
I
n
s
trukcja
obstug
i
Manua
l
u
l
ut
ili
zatoru
l
u
i
Haszna
l
a
t
i
utmutato
osnyicq
xpnons
—
PyKOBOflcrmo
nonb
30
B
aT
e
n!n
L
ie
totaja
rokasgramata
Kasutusjuhond
Bondrosios
i
n
s
trukc
i
jos
-

User
Manual
English
Congratulations
on
the
purchase
of
your
Makita
LD060P.
The
safety
instructions
and
the
user
manual
should
be
read
through
carefully
before
you
use
the
product
for
the
first
time.
The
person
responsible
for
the
product
must
ensure
that
all
users
understand
these
directions
and
adhere
to
them.
Symbols
used
in
this
manual
The
symbols
used
have
the
following
meaning:
WARNING
Indicates
a
potentially
hazardous
situation
or
an
unintended
use
which,
if
not
avoided,
could
result
in
death
or
serious
injury.
A
CAUTION:
Indicates
a
potentially
hazardous
situation
or
an
unintended
use
which,
if
not
avoided,
may
result
in
minor
injury
and/or
in
appreciable
material,
finan¬
cial
and
environmental
damage.
Cjp
Important
paragraphs
which
must
be
adhered
to
in
practice,
as
they
enable
the
product
to
be
used
in
a
technically
correct
and
efficient
manner.
Makita
LD060P
Intended
Use
GB
Permitted
uses
•
Measuring
distances
•
Computing
functions,
e.g.
areas
and
volumes
Adverse
uses
•
Using
the
instrument
without
instructions
•
Using
outside
the
stated
limits
•
Deactivation
of
safety
systems
and
removal
of
explanatory
and
hazard
labels
•
Opening
of
the
equipment
by
using
tools
(screwdrivers
etc.)
•
Carrying
out
modification
or
conversion
of
the
product
•
Use
of
accessories
from
other
manufacturers
without
the
express
approval
of
Makita.
•
Deliberate
or
irresponsible
behaviour
on
scaffol¬
ding,
when
using
ladders,
when
measuring
near
machines
which
are
running,
or
near
parts
of
machines
or
installations
which
are
unprotected
•
Aiming
directly
into
the
sun
•
Deliberate
dazzling
of
third
parties;
even
in
the
dark
•
Inadequate
safeguards
at
the
surveying
site
(e.g
when
measuring
on
roads,
construction
sites,
etc.)
Symbols
used
in
this
manual

GB
Limits
of
use
pjp
Also
see
section
"Technical
data".
The
Makita
LD060P
is
designed
for
use
in
areas
permanently
habitable
by
humans,
do
not
use
the
product
in
explosion
hazardous
areas
or
in
aggressive
environments.
Responsibilities
Responsibilities
of
the
manufacturer
of
the
original
equipment
Makita
Corporation
Anjo,
Aichi
446-8502,
Japan:
Makita
is
responsible
for
supplying
the
product,
inclu¬
ding
the
User
Manual
and
original
accessories,
in
a
completely
safe
condition.
Responsibilities
of
the
manufacturer
of
non-
Makita
accessories:
The
manufacturers
of
non-Makita
accessories
for
the
Makita
LD060P
are
responsible
for
developing,
imple¬
menting
and
communicating
safety
concepts
for
their
products.
They
are
also
responsible
for
the
effecti¬
veness
of
these
safety
concepts
in
combination
with
the
Makita
equipment.
Responsibilities
of
the
person
in
charge
of
the
instrument:
A
WARNING
The
person
responsible
for
the
instrument
must
ensure
that
the
equipment
is
used
in
accor¬
dance
with
the
instructions.
This
person
is
also
accountable
for
the
deployment
of
personnel
and
for
Overview
their
training
and
for
the
safety
of
the
equipment
when
in
use.The
person
in
charge
of
the
product
has
the
following
duties:
•
To
understand
the
safety
instructions
on
the
product
and
the
instructions
in
the
user
manual.
•
To
be
familiar
with
local
safety
regulations
rela¬
ting
to
accident
prevention.
•
To
inform
Makita
immediately
if
the
equipment
becomes
unsafe.
Overview
Keyboard
See
drawing
{A}:
1
ON
(ON/MEAS)
-
button
2
PLUS
[+]
-
button
3
ILLUMINATION
-
button
4
MEASUREMENT
-
button
5
TIMER
/
UNIT
-
button
6
REFERENCE
-
button
7
CLEAR
/
OFF
-
button
8
HISTORICAL
MEMORY
-
button
9
MINUS
[-]
-
button
2
Makita
LD060P

Display
See
drawing
{B}
1
Laser
"ON"
2
Reference
(front/rear/end
piece)
3
Pythagoras
4
Timer
(self-triggering)
5
Historical
memory
6
Area/volume
7
Battery
status
8
Units
with
exponents
(
2
/
3
)
9
Intermediate
line
2
10
Intermediate
line
1
11
A/lain
line
12
min
/
max
display
13
Info
symbol
Start
up
Inserting
/
Replacing
Batteries
1
Remove
battery
compartment
lid.
See
drawing
{C}.
2
Insert
batteries,
observing
correct
polarity.
3
Close
the
battery
compartment.
•
Replace
the
batteries
when
the
symbol
||j
flashes
permanently
in
the
display.
cJP
Only
use
alkaline
batteries.
If
the
instrument
will
not
be
used
for
a
long
time,
remove
the
batteries
as
a
protection
against
corrosion.
Makita
LD060P
Operation
GB
Measuring
Conditions
Range
Range
is
limited
to
60
m.
At
night
or
dusk
and
if
the
target
is
in
shadow
the
measuring
range
without
target
plate
is
increased.
Use
a
target
plate
to
increase
the
measurement
range
during
daylight,
or
if
the
target
has
poor
reflec¬
tion
properties!
Target
Surfaces
A
CAUTION:
Measuring
errors
can
occur
when
measuring
toward
colourless
liquids
(e.g.
water)
or
dust
free
glass,
Styrofoam
or
similar
semi-permeable
surfaces.
Aiming
at
high
gloss
surfaces
may
deflect
the
laser-
beam
and
lead
to
measurement
errors.
Hazards
of
Use
A
CAUTION:
Watch
out
for
erroneous
distance
measure¬
ments
if
the
instrument
is
defective
or
if
it
has
been
dropped
or
has
been
misused
or
modified.
Precautions:
Carry
out
periodic
test
measurements.
Particularly
after
the
instrument
has
been
subject
to
Start
up

GB
abnormal
use,
and
before,
during
and
after
important
measurements.
Make
sure
the
Makita
LD060P
optic
is
kept
clean
and
that
there
is
no
mechanical
damage
to
the
bumpers.
A
CAUTION:
In
using
the
instrument
for
distance
measure¬
ments
or
for
positioning
moving
objects
(e.g.
cranes,
building
equipment,
platforms,
etc.)
unforeseen
events
may
cause
erroneous
measurements.
Precautions:
Only
use
this
product
as
a
measuring
sensor,
not
as
a
control
device.
Your
system
must
be
configured
and
operated
in
such
a
way,
that
in
case
of
an
erroneous
measurement,
malfunction
of
the
device
or
power
failure
due
to
installed
safety
measures
(e.g.
safety
limit
switch),
it
is
assured
that
no
damage
will
occur.
Switching
on/off
ON
lx
briefly:
the
instrument
and
the
laser
are
swit¬
ched
on.
The
display
shows
the
battery
symbol
||j
until
the
next
button
is
pressed.
Pressing
this
button
for
longer
switches
the
instrument
off.
The
instrument
switches
off
automatically
after
three
minutes
of
inactivity.
Operation
Setting
the
instrument
PH
Press
long
until
the
desired
unit
is
displayed.
Possible
units:
Distance
Area
Volume
1.
0.000
m
0.000
m
2
0.000
m
3
2.
0'0"
Vi6
0.00
ft
2
0.0
ft
3
3.
o
in
Vi6
0.00
ft
2
0.0
ft
3
4.
0.00
ft
0.00
ft
2
0.0
ft
3
CLEAR-Key
lx
briefly:
the
last
action
is
cancelled.
Illumination
lx
briefly:
the
display
illumination
is
switched
on
or
off.
Reference
Setting
Default
reference
setting
is
from
the
rear
of
the
instrument.
The
instrument
can
be
set
for
the
following
measure¬
ments:
•
To
measure
from
an
edge
(see
drawing
{D}),
fold
out
the
stop
bracket
until
it
snaps
in
for
the
first
time.
See
drawing
{E}.
•
To
measure
out
of
a
corner
(see
drawing
{D}),
fold
out
the
stop
bracket
until
it
snaps
in,
push
Makita
LD060P

the
stop
bracket
with
a
little
force
to
the
right
side;
the
stop
bracket
can
now
be
completely
unfolded.
See
drawing
{E}.
A
CAUTION:
Make
sure
that
when
measuring
from
the
unfolded
endpiece,
the
measuring
reference
is
set
to
"End
piece"!
lx
briefly:
the
next
measurement
is
taken
from
the
front
edge.
jjjj
2x
briefly:
the
measurement
is
taken
from
the
unfolded
end
piece.
After
one
measurement,
the
reference
returns
auto¬
matically
to
the
default
setting
(rear
reference).
lx
long:
the
measurements
are
taken
with
the
front
as
reference
until
a
new
measuring
refe¬
rence
is
set
2x
long:
the
measurements
are
taken
from
the
unfolded
end
piece
until
a
new
measuring
refe¬
rence
is
set.
See
drawing
{F}.
Measuring
Single
Distance
Measurement
lx
briefly:
the
laser
is
activated.
lx
briefly:
a
distance
measurement
is
taken.
Makita
LD060P
The
result
is
displayed
immediately.
GB
Continuous
measurement
Distances
can
be
measured
with
this
function
lx
long:
a
"beep"
is
sounded.A
continuous
measurement
is
started.
ON
lx
briefly:
the
continuous
measurement
is
stopped.
The
last
measured
value
is
displayed
in
the
summary
line.
Minimum-/Maximum-Measuring
This
function
enables
determining
the
minimum
or
maximum
distance
from
a
specific
measuring
point,
e.g.
the
determination
of
room
diagonals
(maximum
value)
or
horizontal
distance
(minimum
value).
Switching
on
continuous
measurement
(see
above).
The
corresponding
maximum
and
minimum
values
are
displayed.
Functions
Addition
/
Subtraction
Distance
Measurement.
lx
briefly:
the
next
measurement
is
added
to
the
previous
one.
Measuring

GB
lx
briefly:
the
next
measurement
is
subtracted
from
the
previous
one.
Repeat
this
procedure
for
as
many
times
as
required.
The
result
is
displayed
in
the
summary
row,
the
previously
measured
value
is
displayed
in
interme¬
diate
line
2,
the
value
to
be
added
in
intermediate
line
1
.
lx
briefly:
the
last
step
is
cancelled.
Area
function
lx
briefly:
The
symbol
is
displayed.
lx
briefly:
takes
first
distance
measurement
(e.g.
length)
ON
lx
briefly:
takes
second
distance
measurement
(e.g.
width)
The
result
of
the
area
measurement
is
displayed
in
the
summary
row,
the
individually
measured
values
are
displayed
in
intermediate
lines
1
and
2.
Adding
and
subtracting
areas
Calling
up
the
area
function
and
measuring
areas.
Press
or
lx
briefly:
takes
first
distance
measurement
(e.g.
length)
lx
briefly:
takes
second
distance
measurement
(e.g.
width)
Functions
The
result
of
the
second
area
measurement,
"+"
flashes.
lx
briefly:
confirms
the
addition;
the
added
area
results
are
displayed
in
the
summary
row.
Volume
function
2x
briefly:
the
jfll
symbol
is
displayed.
lx
briefly:
takes
first
distance
measurement
(e.g.
length)
ON
lx
briefly:
takes
second
distance
measurement
(e.g.
width)
The
result
of
the
area
measurement
from
the
values
already
measured
is
displayed
in
the
summary
row.
j
lx
briefly:
takes
the
third
distance
measure¬
ment
(e.g.
height).
The
value
is
displayed
in
intermediate
line
1.
The
result
of
the
area
measurement
is
displayed
in
the
summary
row,
the
two
previously
measured
values
in
intermediate
lines
1
and
2.
Indirect
Measurement
The
instrument
can
measure
distances
with
the
Pythagorean
method.
This
procedure
facilitates
in
measuring
distances
that
are
difficult
to
access.
Adhere
to
the
prescribed
sequence
of
measu¬
rements:
Makita
LD060P

•
All
target
points
must
be
vertical
or
horizontal
on
the
surface
of
the
wall.
•
The
best
results
are
achieved
when
the
intrument
is
rotated
around
a
fixed
point
(e.g.
the
stop
bracket
is
fully
extended
and
the
instrument
is
placed
against
a
wall).
•
To
take
the
measurement,
the
minimum/
maximum
function
can
be
called
up.
The
minimum
value
is
used
for
measurements
that
must
be
at
right-angles
to
the
target;
the
maximum
distance
is
used
for
all
other
measurements.
Make
sure
that
the
first
measurement
and
the
distance
to
be
measured
are
at
right
angles.
Use
the
minimum/maximum
function.
Indirect
measurement
-
determining
a
distance
using
2
auxilliary
measurements
See
drawing
{G}
3x
briefly:
the
l\
symbol
is
displayed.
The
distance
to
be
measured
flashes
in
the
symbol.
'
I
lx
briefly:
takes
a
measurement
of
the
distance
The
second
distance
to
be
measured
flashes
in
the
symbol
j
lx
briefly:
takes
a
measurement
of
the
hori¬
zontal
distance
The
result
of
the
function
is
displayed
in
the
summary
row.
If
the
ON
button
is
pressed
for
along
time
while
Makita
LD060P
measuring
a
distance,
maximum
or
minimum
conti¬
nuous
measuring
is
activated.
Indirect
measurement
-
determining
a
distance
using
3
auxilliary
measurements
See
drawing
{H}
l\
4x
briefly:
the
symbol
is
displayed.
The
distance
to
be
measured
flashes
in
the
symbol,
j
lx
briefly:
takes
a
distance
measuement
The
second
distance
to
be
measured
flashes
in
the
symbol
j
lx
briefly:
takes
a
horizontal
measurement.
The
third
distance
to
be
measured
flashes
in
the
symbol
|
lx
briefly:
takes
a
measurement
of
the
distance
The
result
of
the
function
is
displayed
in
the
summary
row.
_
If
the
button
is
pressed
for
along
time
while
measuring
a
distance,
maximum
or
minimum
conti¬
nuous
measuring
is
activated.
Stake
out
function
This
function
is
helpful
when
staking
out
equal
distances,
e.g
in
the
erection
of
wooden
substruc¬
tures.
See
drawing
{1}
5x
briefly:
the
-
j—/
-
symbol
is
displayed.
A
value
is
displayed
in
the
summary
row
(default
GB
Functions

GB
value
1.000
m).
This
value
can
be
adjusted
to
the
desired
stake
out
distance.
The
value
is
increased.
The
value
is
reduced.
Holding
the
button
down
accelerates
the
speed
at
which
the
value
changes.
ON
lx
briefly:
starts
continuous
measurement.
In
intermediate
line
1,
the
set
distance
or
the
next
appropriate
multiple
thereof
is
displayed.
In
the
summary
row,
the
distance
to
the
next
appro¬
priate
stake
out
point
is
displayed.
When
approaching
a
stakeout
point
(to
less
than
0,10
m),
the
instrument
starts
to
beep.
When
the
point
is
reached,
the
beep
sound
changes
and
inter¬
mediate
line
1
starts
to
flash.
lx
briefly:
distance
measurement
is
interrupted
and
the
instrument
switches
back
to
individual
distance
measuring
mode.
Historical
memory
lx
briefly:
the
|^J
symbol
and
the
last
measured
value
are
displayed.
Use
the
"+"
orbuttons
to
navigate
through
the
last
10
values.
The
values
can
also
be
used
in
functions.
Functions
Using
stored
values
in
functions
Using
added
distances
in
area
functions
(e.g.
wall
surfaces
or
painters):
Adding
distances
(see
additions
/
subtractions)
Call
up
area
function
to
e.g.
measure
the
height
of
a
room.
lx
briefly:
calls
up
the
historical
memory
and
to
possibly
search
for
the
correct
value.
lx
briefly:
the
value
is
entered
into
the
function
and
the
result
of
the
function
(e.g.
area)
is
displayed.
Timer
(self-triggering)
lx
briefly:
The
(^)
symbol
is
displayed.
The
timer
is
preset
to
5
seconds.
The
value
is
increased.
The
value
is
reduced.
Holding
the
buttons
down
increases
the
rate
of
change
of
the
values.
The
countdown
starts
automatically
(if
the
laser
is
activated)
and
then
triggers
the
measurement.
Makita
LD060P

Switching
off
the
beep
Press
and
hold
simultaneously
for
5
seconds:
The
beep
is
switched
off.
To
reactivate
it,
press
and
hold
for
5
seconds.
Appendix
Display
Notices
All
display
notices
are
either
displayed
with
(i)
or
"Error".
The
following
errors
can
be
corrected.
(D
Cause
Correction
204
Calculation
error
Repeat
procedure
252
Temperature
too
high
Let
device
cool
down.
253
Temperature
too
low
Warm
device
up
255
Received
signal
too
weak,
time
for
a
measurement
too
long.
Use
a
target
plate
256
Received
signal
too
strong
Use
target
plate
(gray
side)
257
Faulty
measure¬
ment,
too
much
background
light
Use
target
plate
(brown
side)
Makita
LD060P
CD
Cause
Correction
258
Outside
of
the
range
of
measurement
Select
measurement
distance
within
the
range
of
measurement
Error
Cause
Correction
Error
Hardware
error
Should
this
message
remain
active
after
switching
the
instru¬
ment
off
and
on
several
times,
please
contact
the
dealerhip.
Technical
Specifications
Range
0.05
m
to
60
m*
Measuring
accuracy
(2
a)
typically
±
1.5
mm**
Smallest
unit
displayed
1
mm
Laser
class
2
Laser
type
635
nm,
<
1
mW
Protection
against
IP
54,
dust-proof,
splashes
and
dust
splash-proof
Autom.
power
off:
Laser
after
60
s
Instrument
after
180
s
Illumination
/
Folding
out
endpiece
V
Battery
life,
up
to
Type
2
x
AAA
5
000
measurements
Dimension
112
x
43
x
25
mm
Weight
100
g
GB
Appendix

GB
Temperature
range:
Storage
-25°C
to
+70°C
Operation
0°C
to
+40°C
*
Use
a
target
plate
to
increase
the
measurement
range
during
daylight
or
if
the
target
has
poor
reflection
properties
**
in
favourable
conditions
(good
target
surface
properties,
room
temperature)
up
to
10
m.
In
unfavourable
conditions,
such
as
intense
sunshine,
poorly
reflecting
target
surface
or
high
temperature
variations,
the
deviation
over
distances
above
10
m
can
increase
by
±
0.15
mm/m.
Electromagnetic
Compatibility
(EMC)
The
term
"electromagnetic
compatibility"
is
taken
to
mean
the
capability
of
the
product
to
function
smoothly
in
an
environment
where
electromagnetic
radiation
and
electrostatic
discharges
are
present,
and
without
causing
electromagnetic
interference
to
other
equipment.
A
WARNING
The
Makita
LD060P
conforms
to
the
most
strin¬
gent
requirements
of
the
relevant
standards
and
regulations.
Yet.
the
possibility
of
the
product
causing
interfe¬
rence
in
other
equipment
cannot
be
fully
excluded.
Appendix
FCC
statement
(applic.
in
U.S.)
This
equipment
has
been
tested
and
found
to
comply
with
the
limits
for
a
Class
B
digital
device,
pursuant
to
part
15
of
the
FCC
Rules.
These
limits
are
designed
to
provide
reasonable
protection
against
harmful
inter¬
ference
in
a
residential
installation.
This
equipment
generates,
uses
and
can
radiate
radio
frequency
energy
and,
if
not
installed
and
used
in
accordance
with
the
instructions,
may
cause
harmful
interference
to
radio
communications.
However,
there
is
no
guarantee
that
interference
will
not
occur
in
a
particular
installation.
If
this
equipment
does
cause
harmful
interference
to
radio
or
television
reception,
which
can
be
determined
by
turning
the
equipment
off
and
on,
the
user
is
encouraged
to
try
to
correct
the
interference
by
one
or
more
of
the
following
measures:
•
Reorient
or
relocate
the
receiving
antenna.
•
Increase
the
separation
between
the
equipment
and
receiver.
•
Connect
the
equipment
into
an
outlet
on
a
circuit
different
from
that
to
which
the
receiver
is
connected.
•
Consult
the
dealer
or
an
experienced
radio/TV
technician
for
help
A
WARNING
Changes
or
modifications
not
expressly
approved
by
Makita
for
compliance
could
void
the
user's
authority
to
operate
the
equipment.
10
Makita
LD060P

Laser
classification
The
Makita
LD060P
produces
a
visible
laser
beam
which
emerges
from
the
front
of
the
instrument.
See
drawing
{K}.
The
product
is
a
Class
2
Laser
Product
in
accordance
with:
•
IEC60825-1
:
2007
"Radiation
safety
of
laser
products"
Class
2
Laser
Products:
Do
not
stare
into
the
beam
or
direct
it
unnecessarily
at
other
persons.
Eye
protection
is
normally
afforded
by
aversion
responses
including
the
blink
reflex.
A
WARNING
Looking
directly
into
the
laser
beam
with
optical
aids
(e.g.
binoculars,
telescopes)
can
be
hazardous.
Precautions:
Do
not
look
directly
into
the
beam
with
optical
aids.
A
CAUTION:
Looking
into
the
laser
beam
may
be
hazardous
to
the
eyes.
Precautions:
Do
not
stare
into
beam.
Do
not
look
into
the
laser
beam.
Make
sure
the
laser
is
aimed
above
or
below
eye
level
(particularly
with
fixed
installations,
in
machines,
etc.).
Makita
LD060P
Labelling
Laser
Radiation
Do
not
stare
into
the
beam
Laser
class
2
acc.
IEC
60825-1:2007
Maximum
radiant
power
*:
<
lmW
Emitted
wavelength:
620-690nm
Beam
divergence
0.16
x
0.6
mrad
Impulse
duration
1
x
10
"
9
s
A
For
the
position
of
the
type
plate
see
drawing
{J}.
Care
Wipe
off
dirt
with
a
damp,
soft
cloth.
Do
not
immerse
the
instrument
in
water.
Do
not
use
aggressive
cleaning
agents
or
solutions.
Appendix

GB
Disposal
A
CAUTION:
Flat
batteries
must
not
be
disposed
of
with
household
waste.
Care
for
the
environment
and
take
them
to
the
collection
points
provided
in
accordance
with
national
or
local
regulations.
H
T
he
product
must
not
be
disposed
with
household
waste.
Dispose
of
the
product
appropriately
in
accordance
with
the
national
regulations
in
force
in
your
country.
Adhere
to
the
national
and
country
specific
regula¬
tions.
All
right
reserved
for
changes
(drawings,
descriptions
and
technical
specifications).
Appendix
12
EC
Declaration
of
Conformity
EC-DECLARATION
OF
CONFORMITY
Model;
LD060P
We
declare
under
our
sole
responsibility
that
this
product
is
in
compliance
with
the
following
standards
of
standardized
documents;
EN55022:
2006,
EN61000-4-2:
2001
EN61000-4-3:
2006,
EN61000-4-8:
2001
in
accordance
with
Council
Directives,
2004/108/EC.
CE
2008
Tomoyasu
Kato
Director
Responsible
Manufacturer:
Makita
Corporation
3-11-8,
Sumiyoshi-cho,
Anjo,
Aichi,
JAPAN
Authorized
Representative
in
Europe:
Makita
International
Europe
Ltd.
Michigan
Drive,
Tongwell,
Milton
Keynes,
Bucks
MK15
8JD,
ENGLAND
Makita
LD060P

Manual
de
empleo
Espahol
Le
felicitamos
por
la
adquisicion
de
su
Makita
LD060P.
Lea
detenidamente
las
instruc-
ciones
de
seguridad
y
el
Manual
de
empleo
antes
de
empezar
a
trabajar
con
su
nuevo
equipo.
La
persona
responsable
del
producto
debera
cerciorarse
de
que
todos
los
usuarios
entienden
y
cumplen
estas
instruc-
ciones.
Sfmbolos
utilizados
Los
sfmbolos
utilizados
tienen
el
siguiente
significado:
A
ADVERTENCIA
Indica
una
situacion
de
riesgo
potencial
o
de
uso
inadecuado
que,
en
caso
de
no
evitarse,
puede
ocasionar
lesiones
graves
o
incluso
la
muerte.
A
CUIDADO:
Indica
una
situacion
de
peligro
potencial
o
un
empleo
no
conforme
que
pueden
ocasionar
danos
personales
leves
pero
considerables
danos
mate-
riales,
economicos
o
medioambientales.
qJP
Informacion
importante
que
debe
respetarse
en
la
practica
y
que
ayuda
al
usuario
a
emplear
el
instrumento
de
forma
eficiente
y
adecuada
tecnica-
mente.
Makita
LD060P
Utilizacion
Uso
apropiado
•
Medicion
de
distancias
•
Funciones
de
calculo,
como
superficies
y
volu-
menes
E
Uso
inapropiado
•
Uso
del
instrumento
sin
instrucciones
•
Emplear
el
equipo
fuera
de
los
limites
de
aplica-
cion
•
Anular
los
dispositivos
de
seguridad
y
retirar
los
rotulos
indicativos
o
de
advertencia.
•
Abrir
el
equipo
utilizando
herramientas
(destor-
nilladores,
etc.)
•
Modificar
o
alterar
el
equipo
•
Utilizar
accesorios
de
otros
fabricantes
que
no
esten
expresamente
autorizados
por
Makita.
•
Manipular
de
forma
voluntaria
o
involuntaria
el
metrolaser
en
andamios,
escaleras,
asi
como
durante
mediciones
en
las
proximidades
de
maquinas
en
marcha,
de
elementos
de
maquinas
y
de
instalaciones
desprotegidas.
•
Apuntar
directamente
al
sol.
•
Deslumbrar
deliberadamente
a
terceros,
incluso
en
la
oscuridad
•
Proteger
insuficientemente
el
emplazamiento
de
medicion
(p.
ej.,
al
efectuar
mediciones
en
carre-
teras,
espacios
de
construccion,
etc.)
Sfmbolos
utilizados

L
mites
de
utilizacion
qJP
Ver
tambien
la
seccion
"Especificaciones
tecnicas".
El
Makita
LD060P
esta
disenado
para
su
uso
en
areas
habitadas
permanentemente,
no
utilice
el
producto
en
areas
con
peligro
de
explosion
o
en
entornos
agre-
sivos.
Ambitos
de
responsabilidad
Responsabilidades
del
fabricante
del
equipo
original
IVlakita
Corporation
Anjo,
Aichi
446-
8502,
Japan
(en
adelante
IVlakita):
Makita
asume
la
responsabilidad
del
suministro
del
producto
en
perfectas
condiciones
tecnicas
de
seguridad,
inclusive
el
Manual
de
empleo
y
los
accesorios
originales.
Ambito
de
responsabilidad
del
fabricante
de
accesorios
de
otras
marcas:
Los
fabricantes
de
accesorios
que
no
sean
de
Makita
para
el
Makita
LD060P
son
responsables
del
desar-
rollo,
la
implementacion
y
la
comunicacion
de
conceptos
de
seguridad
para
sus
productos.
Tambien
son
responsables
de
la
efectividad
de
estos
conceptos
en
combinacion
con
el
equipo
de
Makita.
Ambito
de
responsabilidad
del
encargado
del
producto:
A
ADVERTENCIA
El
encargado
del
producto
tiene
la
responsabi¬
lidad
de
que
el
equipo
se
utilice
conforme
a
las
Vista
general
normas
establecidas.
Esta
persona
tambien
es
responsable
de
la
formacion
de
los
usuarios
del
equipo
y
de
la
seguridad
en
la
utilizacion
del
mismo.
El
encargado
del
producto
tiene
las
siguientes
obliga-
ciones:
•
Entender
la
informacion
de
seguridad
que
figura
en
el
producto
asi
como
las
correspondientes
al
Manual
de
empleo.
•
Conocer
las
normas
de
prevencion
de
accidentes
laborales
usuales
en
el
lugar.
•
Informar
inmediatamente
a
Makita
en
cuanto
aparezcan
defectos
de
seguridad
en
el
equipo.
Vista
general
Teclado
Ver
el
dibujo
{A}:
1
Boton
ON
(ON/IV1EAS)
2
Boton
MAS
[+]
3
Boton
ILUMINACION
4
Boton
MEDICION
5
Boton
TIIVIER
/
UNITS
6
Boton
REFERENCIA
7
Boton
CLEAR/OFF
8
Boton
HISTORIAL
9
Boton
MENOS
[-]
Makita
LD060P

Pantalla
Ver
el
dibujo
{B}
1
Laser
"ON"
2
Referenda
(delante/detras/pieza
final)
3
Funcion
de
Pitagoras
4
Temporizador
(disparador
automatico)
5
Historial
6
Superficie/Volumen
7
Estado
de
las
pilas
8
Unidades
con
exponentes
(
2
/
3
)
9
Li'nea
intermedia
2
10
Li'nea
intermedia
1
11
Li'nea
principal
12
Pantalla
mfn/max
13
Si'mbolo
de
informacion
Inicio
Insercion/sustitucion
de
pilas
1
Retirar
la
tapa
del
compartimento
para
pilas.
Ver
el
dibujo
{C}.
2
Colocar
las
pilas
por
el
lado
correcto.
3
Cerrar
el
compartimento
para
pilas.
•
Sustituir
las
pilas
cuando
el
si'mbolo
||j
parpadee
permanentemente
en
la
pantalla.
cJP
Utilizar
unicamente
pilas
alcalinas.
Si
el
instrumento
no
se
va
a
utilizar
durante
un
periodo
prolongado,
retirar
las
pilas
como
medida
de
proteccion
contra
la
corrosion.
Makita
LD060P
Funcionamiento
Condiciones
de
medicion
Alcance
E
El
alcance
esta
limitado
a
60
m.
Al
trabajar
de
noche,
en
entornos
con
polvo
y
cuando
la
tablilla
de
punteri'a
quede
en
la
sombra,
el
alcance
de
medicion
sin
tablilla
de
punteri'a
se
incrementa.
Utilizar
una
tablilla
de
punteri'a
para
aumentar
el
alcance
de
medicion
con
luz
diurna
o
si
la
serial
de
punteria
tiene
propiedades
de
reflexion
escasas.
Superficies
de
serial
de
punteria
A
CUIDADO:
Se
pueden
presentar
errores
en
la
medicion
al
medir
hacia
superficies
h'quidas
incoloras
(como
el
agua)
o
hacia
vidrios
libres
de
polvo,
poliestireno
aislante
o
superficies
semi
permeables
similares.
Apuntar
a
superficies
muy
brillantes
puede
desviar
el
rayo
laser
y
provocar
errores
de
medicion.
Inicio

E
Peligros
durante
el
uso
A
CUIDADO:
Pueden
producirse
mediciones
erroneas
si
se
utiliza
un
producto
que
este
defectuoso,
despues
de
haberse
caido
o
haber
sido
objeto
de
transforma-
ciones
no
permitidas.
Medidas
preventivas:
Realizar
periodicamente
mediciones
de
control,
espe-
cialmente
cuando
el
producto
ha
estado
sometido
a
esfuerzos
excesivos
asi
como
antes
y
despues
de
tareas
de
medicion
importantes.
Asegurarse
de
que
la
optica
Makita
LD060P
se
mantiene
limpia
y
que
no
se
han
producido
dahos
mecanicos
en
las
protecciones
contra
golpes.
A
CUIDADO:
Al
utilizar
el
producto
en
medicion
de
distancias
o
posicionamiento
de
objetos
en
movimiento
(p.ej.
gruas,
maquinas
de
construccion,
plataformas,...),
pueden
producirse
errores
de
medicion
debidos
a
circunstancias
no
previsibles.
Medidas
preventivas:
Utilice
el
producto
solo
como
sensor
de
medicion
y
no
como
aparato
de
control.
El
sistema
debe
utilizarse
de
modo
que,
en
caso
de
medicion
erronea,
fallo
del
producto
o
corte
del
suministro
electrico,
cuente
con
los
dispositivos
de
seguridad
adecuados
(p.ej.
inter-
ruptor
de
fin
de
carrera)
para
garantizar
que
no
se
produzcan
dahos.
Funcionamiento
4
Conexion/desconexion
ON
1
vez
brevemente:
el
instrumento
y
el
laser
se
conectan.
La
pantalla
muestra
el
simbolo
de
bateria
[|j
hasta
que
se
pulsa
el
siguiente
boton.
Al
pulsar
y
mantener
pulsada
esta
tecla,
el
instrumento
se
apaga.
Despues
de
tres
minutos
de
inactividad,
el
instrumento
se
apaga
automaticamente.
Ajuste
del
instrumento
Pulsar
y
mantener
pulsada
hasta
que
se
visua-
lice
la
unidad
deseada.
Unidades
posibles:
Distancia
Superficie
Volumen
1
.
0.000
m
0.000
m
2
0.000
m
3
2.
0'0"
Vi6
0.00
ft
2
0.0
ft
3
3.
0
in
Vi6
0.00
ft
2
0.0
ft
3
4.
0.00
ft
0.00
ft
2
0.0
ft
3
Tecla
CLEAR
1
vez
brevemente:
se
cancela
la
ultima
accion.
Makita
LD060P
Other manuals for LD060P
4
Table of contents
Languages:
Other Makita Measuring Instrument manuals
Makita
Makita SK700D User manual

Makita
Makita LVH800 User manual

Makita
Makita LD100P User manual

Makita
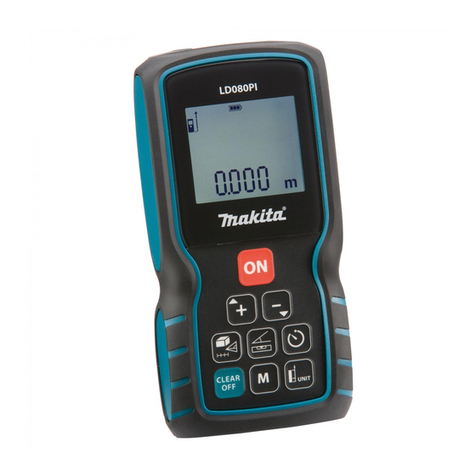
Makita LD080P User manual

Makita
Makita LD050P User manual

Makita
Makita 2012NB User manual

Makita
Makita SK106D User manual

Makita
Makita LD060P User manual

Makita
Makita SK312GD User manual
Makita
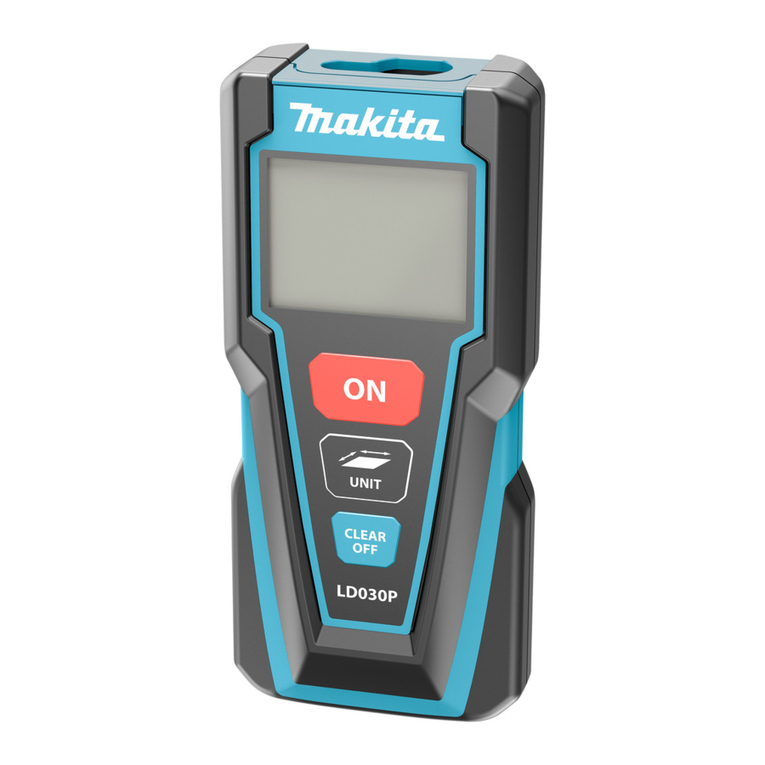
Makita LD060P User manual

Makita
Makita LD080P User manual

Makita
Makita SK103P User manual
Makita
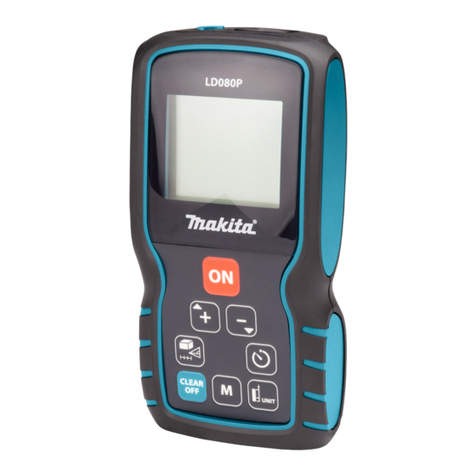
Makita LD060P User manual

Makita
Makita SK700D User manual

Makita
Makita SK103PZ User manual
Makita
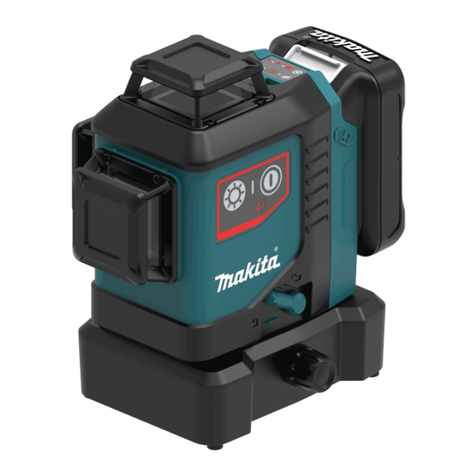
Makita LD060P User manual
Makita
Makita SKR301 User manual

Makita
Makita LD080PI User manual

Makita
Makita SK105D User manual
Makita
Makita SK209GD User manual