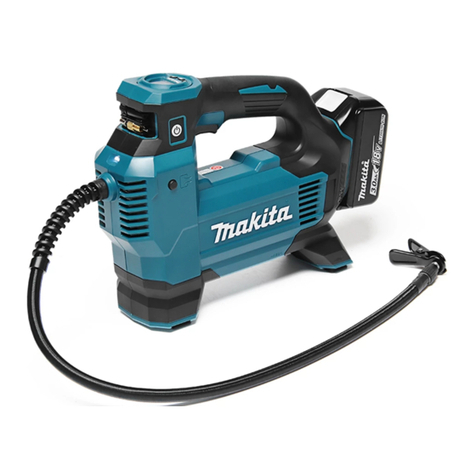
Makita DMP180 User manual

DMP180
EN Cordless Inator INSTRUCTION MANUAL 4
PTBR Compressor a Bateria MANUAL DE INSTRUÇÕES 11
ID Pompa Nirkabel PETUNJUK PENGGUNAAN 19
MS Pam angin Tanpa Kord MANUAL ARAHAN 27
VI Máy Bơm Hơi Cầm Tay Hoạt
Động Bằng Pin TÀI LIỆU HƯỚNG DẪN 35
TH 42
ZHCN 充电式充气机 使用说明书 51
ZHTW 充電式打氣機 使用說明書 58
KO 충전 공기 주입기 취급 설명서 65

1
2
3
Fig.1
1
2
Fig.2
1
Fig.3
1
Fig.4
1
23
Fig.5
1
2
Fig.6
12
3
Fig.7
12
Fig.8
2

12 3
4
Fig.9
1
2
3
Fig.10
1
Fig.11
21 3
4
Fig.12
3
12
4
Fig.13
3

4ENGLISH
ENGLISH (Original instructions)
SPECIFICATIONS
Model: DMP180
Overall length 251 – 266 mm
Maximum air pressure 830 kPa
Duty cycle 5 minutes On / 5 minutes O
Rated voltage D.C. 18 V
Net weight 1.4 - 1.7 kg
• Due to our continuing program of research and development, the specications herein are subject to change
without notice.
• Specications and battery cartridge may dier from country to country.
• The weight may dier depending on the attachment(s), including the battery cartridge. The lightest and heavi-
est combinations, according to EPTA-Procedure 01/2014, are shown in the table.
Applicable battery cartridge and charger
For the countries other than Taiwan and Korea
Battery cartridge BL1815N / BL1820 / BL1820B / BL1830 / BL1830B / BL1840 /
BL1840B / BL1850 / BL1850B / BL1860B
Charger DC18RC / DC18RD / DC18RE / DC18SD / DC18SE / DC18SF /
DC18SH
For Taiwan
Battery cartridge BL1815N / BL1820 / BL1820B / BL1830 / BL1830B / BL1840 /
BL1840B / BL1850 / BL1850B / BL1860B
Charger DC18RC / DC18RD / DC18RE / DC18SH
For Korea
Battery cartridge BL1815N / BL1820 / BL1820B / BL1830 / BL1830B / BL1840 /
BL1840B / BL1850 / BL1850B / BL1860B
Charger DC18RC / DC18RD / DC18RE / DC18SE / DC18SF / DC18SH
• Some of the battery cartridges and chargers listed above may not be available depending on your region of
residence.
WARNING: Only use the battery cartridges and chargers listed above. Use of any other battery cartridges
and chargers may cause injury and/or re.
Symbols
The followings show the symbols used for the equip-
ment. Be sure that you understand their meaning before
use.
Read instruction manual.
Risk of bursting.
Ni-MH
Li-ion
Only for EU countries
Do not dispose of electric equipment or
battery pack together with household waste
material!
In observance of the European Directives,
on Waste Electric and Electronic
Equipment and Batteries and Accumulators
and Waste Batteries and Accumulators
and their implementation in accordance
with national laws, electric equipment and
batteries and battery pack(s) that have
reached the end of their life must be col-
lected separately and returned to an envi-
ronmentally compatible recycling facility.
Intended use
This tool is intended for inating tire, sport ball, or small
oating tube.

5ENGLISH
SAFETY WARNINGS
General power tool safety warnings
WARNING: Read all safety warnings, instruc-
tions, illustrations and specications provided
with this power tool. Failure to follow all instructions
listed below may result in electric shock, re and/or
serious injury.
Save all warnings and instruc-
tions for future reference.
The term “power tool” in the warnings refers to your
mains-operated (corded) power tool or battery-operated
(cordless) power tool.
Work area safety
1. Keep work area clean and well lit. Cluttered or
dark areas invite accidents.
2. Do not operate power tools in explosive atmo-
spheres, such as in the presence of ammable
liquids, gases or dust. Power tools create sparks
which may ignite the dust or fumes.
3. Keep children and bystanders away while
operating a power tool. Distractions can cause
you to lose control.
Electrical safety
1. Power tool plugs must match the outlet. Never
modify the plug in any way. Do not use any
adapter plugs with earthed (grounded) power
tools. Unmodied plugs and matching outlets will
reduce risk of electric shock.
2. Avoid body contact with earthed or grounded
surfaces, such as pipes, radiators, ranges and
refrigerators. There is an increased risk of elec-
tric shock if your body is earthed or grounded.
3. Do not expose power tools to rain or wet con-
ditions. Water entering a power tool will increase
the risk of electric shock.
4. Do not abuse the cord. Never use the cord for
carrying, pulling or unplugging the power tool.
Keep cord away from heat, oil, sharp edges
or moving parts. Damaged or entangled cords
increase the risk of electric shock.
5. When operating a power tool outdoors, use an
extension cord suitable for outdoor use. Use of
a cord suitable for outdoor use reduces the risk of
electric shock.
6. If operating a power tool in a damp location
is unavoidable, use a residual current device
(RCD) protected supply. Use of an RCD reduces
the risk of electric shock.
7. Power tools can produce electromagnetic
elds (EMF) that are not harmful to the user.
However, users of pacemakers and other similar
medical devices should contact the maker of their
device and/or doctor for advice before operating
this power tool.
Personal safety
1. Stay alert, watch what you are doing and use
common sense when operating a power tool.
Do not use a power tool while you are tired or
under the inuence of drugs, alcohol or med-
ication. A moment of inattention while operating
power tools may result in serious personal injury.
2. Use personal protective equipment. Always
wear eye protection. Protective equipment such
as a dust mask, non-skid safety shoes, hard hat or
hearing protection used for appropriate conditions
will reduce personal injuries.
3. Prevent unintentional starting. Ensure the
switch is in the o-position before connecting
to power source and/or battery pack, picking
up or carrying the tool. Carrying power tools with
your nger on the switch or energising power tools
that have the switch on invites accidents.
4. Remove any adjusting key or wrench before
turning the power tool on. A wrench or a key left
attached to a rotating part of the power tool may
result in personal injury.
5. Do not overreach. Keep proper footing and
balance at all times. This enables better control
of the power tool in unexpected situations.
6. Dress properly. Do not wear loose clothing or
jewellery. Keep your hair and clothing away
from moving parts. Loose clothes, jewellery or
long hair can be caught in moving parts.
7. If devices are provided for the connection of
dust extraction and collection facilities, ensure
these are connected and properly used. Use of
dust collection can reduce dust-related hazards.
8. Do not let familiarity gained from frequent use
of tools allow you to become complacent and
ignore tool safety principles. A careless action
can cause severe injury within a fraction of a
second.
9. Always wear protective goggles to protect
your eyes from injury when using power tools.
The goggles must comply with ANSI Z87.1 in
the USA, EN 166 in Europe, or AS/NZS 1336
in Australia/New Zealand. In Australia/New
Zealand, it is legally required to wear a face
shield to protect your face, too.
It is an employer's responsibility to enforce
the use of appropriate safety protective equip-
ments by the tool operators and by other per-
sons in the immediate working area.

6ENGLISH
Power tool use and care
1. Do not force the power tool. Use the correct
power tool for your application. The correct
power tool will do the job better and safer at the
rate for which it was designed.
2. Do not use the power tool if the switch does
not turn it on and o. Any power tool that cannot
be controlled with the switch is dangerous and
must be repaired.
3. Disconnect the plug from the power source
and/or remove the battery pack, if detachable,
from the power tool before making any adjust-
ments, changing accessories, or storing power
tools. Such preventive safety measures reduce
the risk of starting the power tool accidentally.
4. Store idle power tools out of the reach of chil-
dren and do not allow persons unfamiliar with
the power tool or these instructions to operate
the power tool. Power tools are dangerous in the
hands of untrained users.
5. Maintain power tools and accessories. Check
for misalignment or binding of moving parts,
breakage of parts and any other condition that
may aect the power tool’s operation. If dam-
aged, have the power tool repaired before use.
Many accidents are caused by poorly maintained
power tools.
6. Keep cutting tools sharp and clean. Properly
maintained cutting tools with sharp cutting edges
are less likely to bind and are easier to control.
7. Use the power tool, accessories and tool bits
etc. in accordance with these instructions, tak-
ing into account the working conditions and
the work to be performed. Use of the power tool
for operations dierent from those intended could
result in a hazardous situation.
8. Keep handles and grasping surfaces dry,
clean and free from oil and grease. Slippery
handles and grasping surfaces do not allow for
safe handling and control of the tool in unexpected
situations.
9. When using the tool, do not wear cloth work
gloves which may be entangled. The entangle-
ment of cloth work gloves in the moving parts may
result in personal injury.
Battery tool use and care
1. Recharge only with the charger specied by
the manufacturer. A charger that is suitable for
one type of battery pack may create a risk of re
when used with another battery pack.
2. Use power tools only with specically desig-
nated battery packs. Use of any other battery
packs may create a risk of injury and re.
3. When battery pack is not in use, keep it away
from other metal objects, like paper clips,
coins, keys, nails, screws or other small metal
objects, that can make a connection from one
terminal to another. Shorting the battery termi-
nals together may cause burns or a re.
4. Under abusive conditions, liquid may be
ejected from the battery; avoid contact. If con-
tact accidentally occurs, ush with water. If
liquid contacts eyes, additionally seek medical
help. Liquid ejected from the battery may cause
irritation or burns.
5. Do not use a battery pack or tool that is dam-
aged or modied. Damaged or modied batteries
may exhibit unpredictable behaviour resulting in
re, explosion or risk of injury.
6. Do not expose a battery pack or tool to re or
excessive temperature. Exposure to re or tem-
perature above 130 °C may cause explosion.
7. Follow all charging instructions and do not
charge the battery pack or tool outside the
temperature range specied in the instruc-
tions. Charging improperly or at temperatures
outside the specied range may damage the
battery and increase the risk of re.
Service
1. Have your power tool serviced by a qualied
repair person using only identical replacement
parts. This will ensure that the safety of the power
tool is maintained.
2. Never service damaged battery packs. Service
of battery packs should only be performed by the
manufacturer or authorized service providers.
3. Follow instruction for lubricating and chang-
ing accessories.
Cordless inator safety warnings
1. When inating objects, connect the air chuck,
adapter, and valve tightly. Otherwise, the object,
hose, air chuck, or adapter may be damaged and
you may be injured.
2. Release air pressure slowly. When remov-
ing the hose after inating objects, hold the
object, hose, and air chuck rmly. The object,
air chuck, or adapter may bounce due to exhaust
air and cause an injury.
3. Do not inate object beyond the maximum
pressure of the object. Otherwise, the tool or
object may be damaged and you may be injured.
4. Do not use the tool beyond the maximum out-
put pressure of the tool. Using the tool at output
pressure greater than the maximum output pres-
sure of the tool may burst the object or the tool.
5. Inate the objects intended to be inated by
the manufacturer only, such as tire, sport ball,
or small oating tube. Inating other objects may
damage them and cause an injury.
6. When inating objects, check the pressure
gauge, status of the tool and object, and check
that there is no air leak. Otherwise, the tool or
object may be damaged and cause an injury.
7. When carrying the tool, hold the handle of the
tool. Do not hold or pull the hose. The tool may
be damaged and cause an injury.
8. After inating objects, check the air pressure
using a reliable and calibrated measuring
equipment. Use the pressure gauge of the tool
only as a reference.
9. After using the tool for 5 minutes continuously,
stop using the tool for 5 minutes for cooling
down. Do not use the tool beyond the continu-
ous operating time allowed. Otherwise, the tool
may be damaged and cause an injury.
10. Do not use the tool on sand or dusty surface.
Foreign objects may enter the inside of the tool
and cause a malfunction.
7ENGLISH
11. Do not point the outlet of the hose to yourself
or others. Objects may be blown away and cause
an injury.
12. Do not point the outlet of the hose to dust or
similar. The dust may be scattered and cause an
injury.
13. Do not inate large capacity objects. If you
inate a large capacity object, the tool may
become extremely hot and could burn your skin.
14. Do not touch the tool, hose, air chuck, or
adapter right after inating objects. The metal
parts may become extremely hot and could burn
your skin.
15. Do not use the tool with wet hands.
16. When folding the clamp of air chuck, be care-
ful not to pinch your ngers between the air
chuck and clamp.
17. Make sure that the hose is not entangled. The
entangled hose may cause loss of balance and
cause an injury.
18. Never leave the tool unattended when the hose
is attached to the object or during operation.
19. Do not use the tool as a breathing device.
20. Do not use the tool to spray chemicals. Your
lungs may be damaged by inhaling toxic fumes.
21. Operate the tool in an open area at least 50 cm
away from any wall or object that could restrict
air ow to ventilation openings.
22. Do not disassemble the tool.
23. Use only standard accessories provided
by Makita. The use of any other accessories
or attachments might present a risk of injury to
persons.
Important safety instructions for
battery cartridge
1. Before using battery cartridge, read all instruc-
tions and cautionary markings on (1) battery
charger, (2) battery, and (3) product using
battery.
2. Do not disassemble battery cartridge.
3. If operating time has become excessively
shorter, stop operating immediately. It may
result in a risk of overheating, possible burns
and even an explosion.
4. If electrolyte gets into your eyes, rinse them
out with clear water and seek medical atten-
tion right away. It may result in loss of your
eyesight.
5. Do not short the battery cartridge:
(1) Do not touch the terminals with any con-
ductive material.
(2) Avoid storing battery cartridge in a con-
tainer with other metal objects such as
nails, coins, etc.
(3) Do not expose battery cartridge to water
or rain.
A battery short can cause a large current
ow, overheating, possible burns and even a
breakdown.
6. Do not store the tool and battery cartridge in
locations where the temperature may reach or
exceed 50 °C (122 °F).
7. Do not incinerate the battery cartridge even if
it is severely damaged or is completely worn
out. The battery cartridge can explode in a re.
8. Be careful not to drop or strike battery.
9. Do not use a damaged battery.
10. The contained lithium-ion batteries are subject
to the Dangerous Goods Legislation require-
ments.
For commercial transports e.g. by third parties,
forwarding agents, special requirement on pack-
aging and labeling must be observed.
For preparation of the item being shipped, consult-
ing an expert for hazardous material is required.
Please also observe possibly more detailed
national regulations.
Tape or mask o open contacts and pack up the
battery in such a manner that it cannot move
around in the packaging.
11. When disposing the battery cartridge, remove
it from the tool and dispose of it in a safe
place. Follow your local regulations relating to
disposal of battery.
12. Use the batteries only with the products
specied by Makita. Installing the batteries to
non-compliant products may result in a re, exces-
sive heat, explosion, or leak of electrolyte.
13. If the tool is not used for a long period of time,
the battery must be removed from the tool.
SAVE THESE INSTRUCTIONS.
CAUTION: Only use genuine Makita batteries.
Use of non-genuine Makita batteries, or batteries that
have been altered, may result in the battery bursting
causing res, personal injury and damage. It will
also void the Makita warranty for the Makita tool and
charger.
Tips for maintaining maximum
battery life
1. Charge the battery cartridge before completely
discharged. Always stop tool operation and
charge the battery cartridge when you notice
less tool power.
2. Never recharge a fully charged battery car-
tridge. Overcharging shortens the battery
service life.
3. Charge the battery cartridge with room tem-
perature at 10 °C - 40 °C (50 °F - 104 °F). Let
a hot battery cartridge cool down before
charging it.
4. Charge the battery cartridge if you do not use
it for a long period (more than six months).
FUNCTIONAL
DESCRIPTION
CAUTION: Always be sure that the tool is
switched o and the battery cartridge is removed
before adjusting or checking function on the tool.

8ENGLISH
Installing or removing battery
cartridge
CAUTION: Always switch o the tool before
installing or removing of the battery cartridge.
CAUTION: Hold the tool and the battery car-
tridge rmly when installing or removing battery
cartridge. Failure to hold the tool and the battery
cartridge rmly may cause them to slip o your hands
and result in damage to the tool and battery cartridge
and a personal injury.
► Fig.1: 1. Red indicator 2. Button 3. Battery cartridge
To remove the battery cartridge, slide it from the tool
while sliding the button on the front of the cartridge.
To install the battery cartridge, align the tongue on the
battery cartridge with the groove in the housing and slip
it into place. Insert it all the way until it locks in place
with a little click. If you can see the red indicator on the
upper side of the button, it is not locked completely.
CAUTION: Always install the battery cartridge
fully until the red indicator cannot be seen. If not,
it may accidentally fall out of the tool, causing injury to
you or someone around you.
CAUTION: Do not install the battery cartridge
forcibly. If the cartridge does not slide in easily, it is
not being inserted correctly.
Indicating the remaining battery
capacity
Only for battery cartridges with the indicator
► Fig.2: 1. Indicator lamps 2. Check button
Press the check button on the battery cartridge to indi-
cate the remaining battery capacity. The indicator lamps
light up for a few seconds.
Indicator lamps Remaining
capacity
Lighted O Blinking
75% to 100%
50% to 75%
25% to 50%
0% to 25%
Charge the
battery.
The battery
may have
malfunctioned.
NOTE: Depending on the conditions of use and the
ambient temperature, the indication may dier slightly
from the actual capacity.
Tool / battery protection system
The tool is equipped with a tool/battery protection sys-
tem. This system automatically cuts o the power to
extend tool and battery life. The tool will automatically
stop during operation if the tool or battery is placed
under one of the following conditions:
Overload protection
This protection works when the tool is operated in a
manner that causes it to draw an abnormally high cur-
rent. In this situation, turn the tool o and stop the appli-
cation that caused the tool to become overloaded. Then
turn the tool on to restart.
Overheat protection
This protection works and the light blinks when the tool
or battery is overheated. In this situation, let the tool and
battery cool before turning the tool on again.
Overdischarge protection
This protection works when the remaining battery
capacity gets low. In this situation, remove the battery
from the tool and charge the battery.
Main power switch
WARNING: Always turn o the main power
switch when not in use.
CAUTION: When carrying the tool, turn o the
main power switch. Otherwise, pulling the switch
trigger unintentionally may cause an injury.
► Fig.3: 1. Main power switch
To turn on the tool, press the main power switch. To turn
o the tool, press the main power switch again.
NOTE: This tool employs the auto power-o function.
To avoid unintentional start up, the main power switch
will automatically shut down when the switch trigger
is not pulled for a certain period after the main power
switch is turned on.
Switch action
WARNING: Before installing the battery car-
tridge into the tool, always check to see that the
switch trigger actuates properly and returns to
the “OFF” position when released.
► Fig.4: 1. Switch trigger
To start the tool, simply pull the switch trigger. Release
the switch trigger to stop.

9ENGLISH
Pressure gauge
► Fig.5: 1. Unit button 2. Minus button 3. Plus button
If the object to be inated is connected to the tool, the
air pressure of the object is displayed on the pressure
gauge when you turn on the tool. If nothing is connected
to the tool, the pressure gauge displays “0”.
You can set the air pressure on the pressure gauge. To
change the unit, press the unit button. To increase the
pressure value, press the plus button. To decrease the
pressure value, press the minus button. You can set the
pressure value between 20 kPa (3 PSI) and 830 kPa
(121 PSI).
Lighting up the front lamp
► Fig.6: 1. Lamp 2. Main power switch
CAUTION: Do not look in the light or see the
source of light directly.
When you turn on the tool by pressing the main power
switch, the lamp lights up. When you turn o the tool by
pressing the main power switch, the lamp goes out.
NOTICE: When the tool is overheated, the lamp
ickers. Cool down the tool fully before operating
the tool again.
NOTE: Use a dry cloth to wipe the dirt o the lens of
the lamp. Be careful not to scratch the lens of lamp, or
it may lower the illumination.
Storing adapter
► Fig.7: 1. Sport ball needle 2. Presta valve adapter
3. Adapter holder
The adapters can be stored in the adapter holder of the
tool. Insert the sport ball needle into the Presta valve
adapter before attaching them to the adapter holder.
Storing hose
► Fig.8: 1. Hose holder 2. Hose
The hose can be attached to the hose holder of the tool.
OPERATION
NOTE: The standard adapters vary depending on the
country.
Using the English valve adapter
1. Unfold the air chuck clamp.
2. Insert the English valve adapter into the air chuck.
3. Fold the air chuck clamp rmly.
► Fig.9: 1. English valve adapter 2. Air chuck 3. Air
chuck clamp 4. Valve stem
4. Attach the English valve adapter to the valve stem
while opening the English valve adapter.
5. Turn on the tool.
6. Inate the tire by pulling the switch trigger while
checking the status of the tire.
NOTICE: When using the English valve adapter,
the pressure gauge will not display an accurate
value due to characteristics of the valve. When
inating a tire, do not use the value on the pres-
sure gauge, but inate it by checking the status
of the tire.
If the tool stops before the tire reaches the
desired air pressure, adjust the pressure value,
and then inate the tire again.
Using the Schrader valve adapter
1. Unfold the air chuck clamp.
2. Attach the air chuck to the valve stem.
► Fig.10: 1. Air chuck clamp 2. Valve stem 3. Air
chuck
3. Fold the air chuck clamp rmly.
4. Turn on the tool, and then set the pressure value
appropriate for the tire using the pressure gauge.
5. Keep pulling the switch trigger until the tool stops.
The tire is inated with the specied pressure.
Using the Presta valve adapter
1. Loosen the locking nut on the valve stem.
► Fig.11: 1. Locking nut
2. Unfold the air chuck clamp.
3. Attach the Presta valve adapter to the valve
stem, and then attach the air chuck to the Presta valve
adapter.
► Fig.12: 1. Presta valve adapter 2. Air chuck 3. Air
chuck clamp 4. Valve stem
4. Fold the air chuck clamp rmly.
5. Turn on the tool, and then set the pressure value
appropriate for the tire using the pressure gauge.
6. Keep pulling the switch trigger until the tool stops.
The tire is inated with the specied pressure.
7. Remove the air chuck and Presta valve adapter,
and then tighten the locking nut.
Using the sport ball needle or
tapered adapter
You can inate small items such as sport balls or oat-
ing tubes. To inate sport balls, use the sport ball nee-
dle. To inate oating tubes, use the tapered adapter.
1. Unfold the air chuck clamp.
2. Attach the sport ball needle or tapered adapter to
the air chuck.
► Fig.13: 1. Air chuck clamp 2. Air chuck 3. Sport ball
needle 4. Tapered adapter
3. Fold the air chuck clamp rmly.
4. Insert the sport ball needle or tapered adapter into
the hole on the item.
5. Turn on the tool, and then set the appropriate
pressure value using the pressure gauge.

10 ENGLISH
NOTICE: When inating a oating tube, the
pressure gauge will not display an accurate value
since the pressure of oating tube is less than
20 kPa (3 PSI). When inating a oating tube,
do not use the value on the pressure gauge, but
inate it by checking the status of the oating
tube.
6. Keep pulling the switch trigger until the tool stops.
The item is inated with the specied pressure.
MAINTENANCE
CAUTION: Always be sure that the tool is
switched o and the battery cartridge is removed
before attempting to perform inspection or
maintenance.
NOTICE: Never use gasoline, benzine, thinner,
alcohol or the like. Discoloration, deformation or
cracks may result.
To maintain product SAFETY and RELIABILITY,
repairs, any other maintenance or adjustment should
be performed by Makita Authorized or Factory Service
Centers, always using Makita replacement parts.

11 PORTUGUÊS DO BRASIL
PORTUGUÊS DO BRASIL (Instruções originais)
ESPECIFICAÇÕES
Modelo: DMP180
Comprimento total 251 - 266 mm
Pressão máxima de ar 830 kPa
Ciclo de serviço 5 minutos ligado / 5 minutos desligado
Tensão nominal 18 V CC
Peso líquido 1,4 - 1,7 kg
• Devido ao nosso contínuo programa de pesquisa e desenvolvimento, reservamo-nos o direito de alterar espe-
cicações de partes e acessórios que constam neste manual, sem aviso prévio.
• As especicações e a bateria podem diferir de país para país.
• O peso pode variar de acordo com o(s) acessório(s), incluindo a bateria. A combinação mais leve e a mais
pesada, de acordo com o Procedimento 01/2014 da EPTA, estão mostradas na tabela.
Bateria e carregador aplicáveis
Para outros países exceto Taiwan e Coreia do Sul
Bateria BL1815N / BL1820 / BL1820B / BL1830 / BL1830B / BL1840 /
BL1840B / BL1850 / BL1850B / BL1860B
Carregador DC18RC / DC18RD / DC18RE / DC18SD / DC18SE / DC18SF /
DC18SH
Para Taiwan
Bateria BL1815N / BL1820 / BL1820B / BL1830 / BL1830B / BL1840 /
BL1840B / BL1850 / BL1850B / BL1860B
Carregador DC18RC / DC18RD / DC18RE / DC18SH
Para a Coreia do Sul
Bateria BL1815N / BL1820 / BL1820B / BL1830 / BL1830B / BL1840 /
BL1840B / BL1850 / BL1850B / BL1860B
Carregador DC18RC / DC18RD / DC18RE / DC18SE / DC18SF / DC18SH
• Alguns dos carregadores e baterias listados acima podem não estar disponíveis na sua região de residência.
AVISO: Use somente as baterias e carregadores listados acima. O uso de outras baterias e carregadores
pode provocar ferimentos e/ou incêndios.
Símbolos
A seguir, estão os símbolos usados para esta ferra-
menta. Certique-se de que compreende o seu signi-
cado antes da utilização.
Leia o manual de instruções.
Risco de estouro.
Ni-MH
Li-ion
Apenas para países da UE
Não jogue equipamentos elétricos nem
baterias no lixo doméstico!
De acordo com as diretivas europeias
sobre descartes de equipamentos elétricos
e eletrônicos e sobre baterias e acumu-
ladores e seus descartes, e a implemen-
tação dessas diretivas conforme as leis
nacionais, os equipamentos elétricos e as
baterias que atingem o m de sua vida útil
devem ser coletados em separado e enca-
minhados a uma instalação de reciclagem
de acordo com os regulamentos sobre o
meio ambiente.
Indicação de uso
Esta ferramenta é indicada para encher pneus, bolas
de esportes ou pequenas boias.

12 PORTUGUÊS DO BRASIL
AVISOS DE SEGURANÇA
Avisos gerais de segurança para
ferramentas elétricas
AVISO: Leia todas as advertências de segu-
rança, instruções, ilustrações e especicações
fornecidas com esta ferramenta elétrica. O des-
cumprimento das instruções descritas abaixo pode
resultar em choque elétrico, incêndio e/ou ferimentos
graves.
Guarde todos esses avisos e ins-
truções para futuras referências.
O termo “ferramenta elétrica” nos avisos refere-se a
ferramentas operadas através de conexão à rede elé-
trica (com cabo) ou por bateria (sem cabo).
Segurança na área de trabalho
1. Mantenha a área de trabalho limpa e bem ilu-
minada. Áreas desorganizadas ou escuras são
mais propícias a acidentes.
2. Não use ferramentas elétricas em atmosferas
explosivas, como as que contêm líquidos,
gases ou poeiras inamáveis. Ferramentas elé-
tricas geram faíscas que podem incendiar poeiras
ou vapores.
3. Mantenha crianças e espectadores longe
do local de operação da ferramenta elétrica.
Distrações podem fazer com que você perca o
controle.
Segurança elétrica
1. As tomadas da ferramenta elétrica devem
ser compatíveis com as tomadas na parede.
Nunca faça qualquer tipo de modicação nas
tomadas da ferramenta. Não use adaptadores
de tomada em ferramentas elétricas aterradas.
Tomadas não modicadas e compatíveis com as
tomadas na parede reduzem o risco de choque
elétrico.
2. Evite o contato corporal com superfícies ater-
radas, como tubulações, fogões, geladeiras,
radiadores, etc. Há um maior risco de choque
elétrico se o seu corpo estiver conectado à terra.
3. Não exponha ferramentas elétricas a chuva ou
condições molhadas. Se entrar água em uma
ferramenta elétrica, o risco de choque elétrico
aumenta.
4. Use o cabo da ferramenta com cuidado. Nunca
o use para carregar ou puxar a ferramenta ou
desligá-la da tomada. Mantenha o cabo afas-
tado de fontes de calor, óleo, arestas vivas
e partes em movimento. Cabos danicados
ou emaranhados aumentam o risco de choque
elétrico.
5. Para operar uma ferramenta elétrica ao ar livre,
use um cabo de extensão adequado para uso
externo. O uso de um cabo especíco para uso
externo reduz o risco de choque elétrico.
6. Se for inevitável operar uma ferramenta elé-
trica em local úmido, use um dispositivo de
proteção contra corrente residual (DCR). O uso
de um dispositivo DCR reduz o risco de choque
elétrico.
7. Ferramentas elétricas podem produzir campos
eletromagnéticos (EMF), que não são nocivos
aos usuários. Todavia, usuários com marca-pas-
sos ou outros dispositivos médicos semelhantes
devem entrar em contato com os fabricantes de
seus dispositivos e/ou médicos para obter orienta-
ção antes de usar esta ferramenta elétrica.
Segurança pessoal
1. Mantenha-se alerta, preste atenção no que
está fazendo e use bom senso ao operar
ferramentas elétricas. Não use ferramentas
elétricas quando estiver cansado ou sob a
inuência de drogas, álcool ou medicamentos.
Uma pequena falta de atenção durante a opera-
ção de ferramentas elétricas pode causar lesões
pessoais graves.
2. Use equipamentos de proteção individual. Use
sempre óculos de proteção. Equipamentos de
proteção, como máscara contra pó, sapatos de
segurança antiderrapantes, capacete de segu-
rança e protetores auditivos, reduzem lesões
pessoais quando usados conforme exigido pelas
condições.
3. Evite ligar a ferramenta acidentalmente.
Certique-se de que o interruptor está na
posição desligada antes de conectar a fonte
de energia e/ou bateria, ou pegar e carregar a
ferramenta. Carregar ferramentas elétricas com o
dedo no interruptor ou energizadas e o interruptor
ligado pode causar acidentes.
4. Remova as chaves de ajuste ou chaves de
boca antes de ligar a ferramenta elétrica. Uma
chave de boca ou de ajuste conectada a uma
peça rotativa da ferramenta elétrica pode resultar
em lesão pessoal.
5. Não tente alcançar posições distantes demais.
Mantenha sempre os pés bem assentados e
rmes. Isto permite que você tenha um melhor
controle da ferramenta elétrica em situações
inesperadas.
6. Vista-se apropriadamente. Não use roupas
soltas nem acessórios. Mantenha os cabelos
e roupas afastados de partes móveis. Roupas
soltas, acessórios e cabelos compridos podem se
enroscar em partes móveis.
7. Se forem fornecidos equipamentos para liga-
ção de extração e coleta de pó, certique-se
de que eles sejam conectados e usados corre-
tamente. O uso de coletor de pó pode reduzir os
riscos relacionados a pó.
8. Não permita que a familiaridade adquirida
com o uso frequente de ferramentas o torne
complacente e o faça ignorar os princípios de
segurança das ferramentas. Uma ação descui-
dada pode provocar lesões sérias em uma fração
de segundo.

13 PORTUGUÊS DO BRASIL
9. Use sempre óculos de proteção para proteger
os olhos contra ferimentos ao usar ferramen-
tas elétricas. Os óculos de proteção devem
atender à norma ANSI Z87.1 nos EUA, à norma
EN 166 na Europa, ou à norma AS/NZS 1336
na Austrália/Nova Zelândia. Na Austrália/Nova
Zelândia, o uso de um protetor facial também é
exigido por lei para a proteção do rosto.
É responsabilidade do empregador garantir
que os equipamentos de proteção individual
apropriados sejam usados pelos operadores
da ferramenta ou por outras pessoas que
estiverem na área de trabalho imediata.
Uso e cuidados de manuseio da ferramenta elétrica
1. Não force a ferramenta elétrica. Use a ferra-
menta elétrica correta para a sua aplicação.
A ferramenta elétrica correta executa um melhor
trabalho e é mais segura quando operada à velo-
cidade para a qual foi projetada.
2. Não utilize a ferramenta elétrica se não for
possível ligar e desligar o interruptor. Qualquer
ferramenta que não possa ser controlada pelo
interruptor é perigosa e tem que ser reparada.
3. Desconecte a tomada da fonte de alimentação
ou retire a bateria, se removível, da ferramenta
elétrica antes de fazer ajustes, trocar acessó-
rios ou guardar a ferramenta elétrica. Estas
medidas preventivas de segurança reduzem
o risco de a ferramenta elétrica ser acionada
acidentalmente.
4. Coloque ferramentas elétricas que estejam
funcionando em vazio longe do alcance de
crianças e não permita que pessoas não fami-
liarizadas com a ferramenta, ou com estas
instruções, a operem. Ferramentas elétricas são
perigosas nas mãos de pessoas não treinadas.
5. Execute a manutenção de ferramentas elétri-
cas e acessórios. Verique o desalinhamento
e emperramento de partes móveis, a quebra de
peças e todas as demais condições que pos-
sam afetar a operação da ferramenta elétrica.
Em caso de danos, providencie para que a
ferramenta elétrica seja reparada antes do uso.
Muitos acidentes são provocados pela manuten-
ção insatisfatória de ferramentas elétricas.
6. Mantenha as ferramentas de corte aadas e
limpas. Ferramentas de corte devidamente man-
tidas com as arestas de corte aadas têm menos
probabilidade de emperrar e são mais fáceis de
controlar.
7. Use a ferramenta elétrica, os acessórios, as
pontas cortantes da ferramenta, etc. de acordo
com estas instruções, levando em conta as
condições de trabalho e a tarefa a ser reali-
zada. O uso da ferramenta elétrica para realizar
operações diferentes daquelas para as quais foi
projetada pode resultar em situações perigosas.
8. Mantenha empunhaduras e superfícies de
agarre secas, limpas e isentas de óleos e
graxas. Empunhaduras e superfícies de agarre
escorregadias não permitem o manuseio e
controle seguros da ferramenta em situações
inesperadas.
9. Ao usar esta ferramenta, não use luvas de tra-
balho de tecido que possam car enroscadas.
O enroscamento de luvas de trabalho de tecido
nas partes móveis pode resultar em ferimentos
pessoais.
Uso e cuidados de manuseio da bateria
1. Recarregue somente com o carregador espe-
cicado pelo fabricante. Um carregador que é
adequado para um tipo de bateria pode criar risco
de incêndio quando usado com outra bateria.
2. Use as ferramentas elétricas somente com as
baterias especicamente designadas. O uso de
qualquer outro tipo de bateria pode criar riscos de
lesão e incêndio.
3. Quando a bateria não estiver em uso, mante-
nha-a longe de outros objetos metálicos, como
clipes, moedas, chaves, pregos, parafusos,
etc., que podem conectar um terminal ao
outro. O curto-circuito dos terminais da bateria
pode causar queimaduras ou incêndio.
4. Sob condições extremas, a bateria pode eje-
tar líquido; evite contato com tal líquido. Se
ocorrer um contato acidental, lave com água.
Se o líquido entrar nos olhos, procure também
assistência médica. O líquido ejetado pela bate-
ria pode causar irritação e queimaduras.
5. Não use uma bateria ou ferramenta que esteja
danicada ou tenha sido modicada. Baterias
danicadas ou modicadas podem exibir um com-
portamento imprevisível, resultando em incêndio,
explosão ou risco de lesões.
6. Não exponha a bateria nem a ferramenta a cha-
mas ou a temperaturas excessivas. A exposição
a chamas ou a uma temperatura acima de 130 °C
podem causar explosão.
7. Siga todas as instruções de carregamento
e não carregue a bateria nem a ferramenta
fora da faixa de temperatura especicada nas
instruções. O carregamento inadequado ou a
temperaturas fora da faixa especicada pode
danicar a bateria e aumentar o risco de incêndio.
Serviços de reparo
1. Os serviços de reparo devem ser conduzidos
por um técnico qualicado e usando somente
peças de reposição idênticas. Isso irá garantir
que a segurança da ferramenta elétrica será
mantida.
2. Nunca execute a manutenção em baterias
danicadas. A manutenção de baterias somente
deve ser realizada pelo fabricante ou por presta-
dores de serviços autorizados.

14 PORTUGUÊS DO BRASIL
3. Siga as instruções para lubricação e
mudança de acessórios.
Avisos de segurança do
compressor a bateria
1. Ao encher objetos, conecte o mandril de ar, o
adaptador e a válvula com rmeza. Caso con-
trário, o objeto, a mangueira, o mandril de ar ou o
adaptador poderão sofrer danos e você poderá se
ferir.
2. Libere a pressão do ar lentamente. Ao remover
a mangueira depois de encher objetos, segure
o objeto, a mangueira e o mandril de ar com
rmeza. O objeto, o mandril de ar ou o adaptador
podem ricochetear devido ao ar de escape e
provocar ferimentos.
3. Não encha um objeto além de sua pressão
máxima. Caso contrário, a ferramenta ou o objeto
poderão sofrer danos e você poderá se ferir.
4. Não use a ferramenta além da pressão máxima
de saída. Usar a ferramenta a uma pressão de
saída maior que a pressão máxima de saída pode
causar a explosão do objeto ou da ferramenta.
5. Encha apenas os objetos indicados pelo fabri-
cante, tais como pneus, bolas de esportes ou
pequenas boias. Encher outros objetos poderá
danicá-los e provocar ferimentos.
6. Ao encher objetos, verique o manômetro,
o status da ferramenta e do objeto e certi-
que-se de que não existem fugas de ar. Caso
contrário, a ferramenta ou o objeto poderão sofrer
danos e provocar ferimentos.
7. Ao transportar a ferramenta, segure-a pela
empunhadura. Não segure nem puxe pela
mangueira. A ferramenta poderá sofrer danos e
provocar ferimentos.
8. Depois de encher os objetos, verique a pres-
são de ar usando um equipamento de medição
conável e calibrado. Utilize o manômetro da
ferramenta apenas como referência.
9. Depois de usar a ferramenta por 5 minutos
continuamente, pare de usá-la por 5 minutos
para que ela esfrie. Não use a ferramenta além
do período de operação contínua permitido.
Caso contrário, a ferramenta poderá sofrer danos
e provocar ferimentos.
10. Não use a ferramenta em superfícies com areia
ou empoeiradas. Objetos estranhos poderão
entrar na ferramenta e provocar problemas de
funcionamento.
11. Não aponte a saída da mangueira para si
mesmo ou para outras pessoas. Os objetos
poderão ser arremessados e provocar ferimentos.
12. Não aponte a saída da mangueira para poeiras
ou materiais semelhantes. As poeiras poderão
ser dispersas e provocar ferimentos.
13. Não encha objetos de grande capacidade. Se
você encher um objeto de grande capacidade, a
ferramenta poderá car extremamente quente e
causar queimaduras na sua pele.
14. Não encoste na ferramenta, mangueira, man-
dril de ar ou no adaptador logo depois de
encher objetos. As peças metálicas podem car
extremamente quentes e causar queimaduras na
sua pele.
15. Não use a ferramenta com as mãos molhadas.
16. Ao fechar o grampo do mandril de ar, tome
cuidado para não prensar os dedos entre o
mandril de ar e o grampo.
17. Certique-se de que a mangueira não está
emaranhada. A mangueira emaranhada
pode causar a perda de equilíbrio e provocar
ferimentos.
18. Nunca deixe a ferramenta sem supervisão
quando a mangueira estiver acoplada ao
objeto ou durante a operação.
19. Não utilize a ferramenta como um respirador.
20. Não use a ferramenta para vaporizar produtos
químicos. Seus pulmões poderão sofrer danos
com a inalação de fumos tóxicos.
21. Opere a ferramenta em uma área aberta,
afastado a pelo menos 50 cm de distância
das paredes ou de qualquer objeto que possa
restringir o uxo de ar para as aberturas de
ventilação.
22. Não desmonte a ferramenta.
23. Use somente os acessórios padrão fornecidos
pela Makita. A utilização de outros acessórios
pode oferecer risco de ferimentos em pessoas.
Instruções de segurança
importantes para o cartucho da
bateria
1. Antes de utilizar a bateria, leia todas as instru-
ções e notas de precaução do (1) carregador
de bateria, da (2) bateria e do (3) produto
usando a bateria.
2. Não desmonte a bateria.
3. Se o tempo de operação se tornar excessi-
vamente mais curto, pare imediatamente a
operação. Operação nessas condições poderá
resultar em superaquecimento, possíveis
queimaduras e até explosão.
4. Caso caia eletrólitos em seus olhos, lave-os
com água limpa e procure assistência de um
médico imediatamente. Esse acidente pode
resultar na perda de visão.
5. Não provoque um curto-circuito na bateria:
(1) Não toque nos terminais com nenhum
material condutor.
(2) Não guarde a bateria junto com outros
objetos metálicos, tais como pregos,
moedas, etc.
(3) Não exponha a bateria à chuva ou água.
Um curto-circuito na bateria pode causar
sobrecarga de corrente, aquecimento exces-
sivo ou possíveis queimaduras ou avarias.
6. Não guarde a ferramenta nem a bateria em
locais onde a temperatura possa atingir ou
ultrapassar 50°C.

15 PORTUGUÊS DO BRASIL
7. Não queime a bateria mesmo se estiver seve-
ramente danicada ou gasta. A bateria pode
explodir no fogo.
8. Tenha cuidado para não deixar cair, sacudir ou
dar pancadas na bateria.
9. Não utilize uma bateria danicada.
10. As baterias de íons de lítio desta máquina
estão sujeitas aos requisitos da legislação de
produtos perigosos.
Para transportes comerciais, por exemplo por
terceiros e agentes de embarque, os requisitos
especiais referentes a embalagem e rotulação
devem ser obedecidos.
Para a preparação do item sendo expedido, é
necessário consultar um especialista em materiais
perigosos. Considere também que as regulamen-
tações nacionais podem ser mais detalhadas e
devem ser obedecidas.
Coloque ta ou tape os contatos abertos e embale
a bateria de maneira que não se mova dentro da
embalagem.
11. Para descartar a bateria, retire-a da ferramenta
e descarte-a em um local seguro. Siga as regu-
lamentações locais referentes ao descarte de
baterias.
12. Use as baterias somente com os produtos
especicados pela Makita. A instalação das
baterias com produtos não compatíveis poderá
resultar em incêndio, aquecimento excessivo,
explosão ou vazamento de eletrólito.
13. A bateria deverá ser retirada da ferramenta
caso esta não vá ser usada por um período de
tempo prolongado.
GUARDE ESTAS INSTRUÇÕES.
PRECAUÇÃO: Use somente baterias Makita
originais. O uso de baterias Makita não originais ou
baterias que foram alteradas pode causar a explo-
são da bateria e resultar em incêndio, ferimentos às
pessoas na área e danos aos equipamentos. O uso
de baterias não originais cancela a garantia Makita
tanto para a ferramenta quanto para o carregador da
bateria.
Dicas para manter a vida útil
máxima da bateria
1. Carregue a bateria antes de uma descarga
completa. Sempre pare a operação da ferra-
menta e carregue a bateria quando notar perda
de potência.
2. Nunca recarregue uma bateria completamente
carregada. O carregamento demasiado dimi-
nuirá a vida útil da bateria.
3. Carregue a bateria em uma temperatura
ambiente entre 10°C e 40°C. Deixe a bateria
esfriar antes de carregá-la.
4. Carregue a bateria se não utilizá-la por um
longo período de tempo (mais de seis meses).
DESCRIÇÃO FUNCIONAL
PRECAUÇÃO: Certique-se sempre de que
a ferramenta esteja desligada e a bateria retirada
antes de executar qualquer ajuste ou vericação
das funções da ferramenta.
Instalação ou remoção da bateria
PRECAUÇÃO: Sempre desligue a ferramenta
antes de colocar ou retirar a bateria.
PRECAUÇÃO: Segure a ferramenta e a bate-
ria rme ao colocar ou retirar a bateria. Falha em
segurar a ferramenta e a bateria rmemente pode
fazer com que elas escorreguem das mãos e sejam
danicadas ou causem lesões pessoais.
► Fig.1: 1. Indicador vermelho 2. Botão 3. Bateria
Para retirar a bateria, deslize-a para fora ao mesmo
tempo em que desliza o botão na frente da bateria.
Para inserir a bateria, alinhe a sua lingueta com
a ranhura no compartimento e deslize-a no lugar.
Coloque-a até o m até ouvir um clique, indicando que
está travada. Se puder ver o indicador vermelho no
lado superior do botão, signica que não está comple-
tamente travada.
PRECAUÇÃO: Sempre coloque a bateria
completamente, até não ver mais o indicador ver-
melho. Caso contrário, ela poderá cair da ferramenta
acidentalmente e provocar ferimentos em você ou em
alguém por perto.
PRECAUÇÃO: Não force a colocação da
bateria. Se ela não deslizar com facilidade é porque
não está sendo colocada corretamente.

16 PORTUGUÊS DO BRASIL
Indicação da capacidade restante
das baterias
Somente para baterias com o indicador
► Fig.2: 1. Lâmpadas indicadoras 2. Botão de
checagem
Pressione o botão de checagem na bateria para ver a
capacidade restante das baterias. As lâmpadas indica-
doras acendem por alguns segundos.
Lâmpadas indicadoras Capacidade
restante
Acesa Desl Piscando
75% a 100%
50% a 75%
25% a 50%
0% a 25%
Carregue a
bateria.
A bateria
pode ter
falhado.
NOTA: Dependendo das condições de uso e da tem-
peratura ambiente, a indicação pode ser um pouco
diferente da capacidade real.
Sistema de proteção da ferramenta /
bateria
A ferramenta é equipada com um sistema de proteção
da ferramenta/bateria. Esse sistema corta automatica-
mente a alimentação de energia para prolongar a vida
útil da ferramenta e da bateria. A ferramenta para auto-
maticamente durante a operação se uma das seguintes
condições ocorrer com ela ou com a bateria:
Proteção contra sobrecarga
Esta proteção atua quando a ferramenta é operada
de tal maneira que a faz consumir uma quantidade
anormalmente alta de corrente. Nesse caso, desligue
a ferramenta e interrompa a aplicação que provocou a
sobrecarga. Em seguida, torne a ligar a ferramenta.
Proteção contra superaquecimento
Esta proteção atua e a luz pisca quando a ferramenta
ou a bateria aquecem demais. Nesse caso, aguarde
até a ferramenta e a bateria esfriarem antes de ligar a
ferramenta novamente.
Proteção contra descarga excessiva
Esta proteção atua quando a capacidade restante da
bateria ca baixa. Nesse caso, remova a bateria da
ferramenta e recarregue-a.
Interruptor liga/desliga principal
AVISO: Desligue o interruptor liga/desliga
principal sempre que a ferramenta não estiver
em uso.
PRECAUÇÃO: Quando transportar a ferra-
menta, desligue o interruptor liga/desliga princi-
pal. Caso contrário, o gatilho do interruptor poderá
ser acionado acidentalmente e provocar ferimentos.
► Fig.3: 1. Interruptor liga/desliga principal
Para ligar a ferramenta, pressione o interruptor liga/
desliga principal. Para desligar a ferramenta, pressione
o interruptor liga/desliga principal novamente.
NOTA: Esta ferramenta utiliza uma função de des-
ligamento automático. Para evitar o acionamento
acidental, o interruptor liga/desliga principal é auto-
maticamente desligado quando o gatilho do inter-
ruptor não é puxado por um determinado período de
tempo depois de o interruptor liga/desliga principal
ser ligado.
Ação do interruptor
AVISO: Antes de colocar a bateria na ferra-
menta, verique sempre se o gatilho funciona
normalmente e se retorna para a posição “OFF”
(DESL) quando é liberado.
► Fig.4: 1. Gatilho do interruptor
Para acionar a ferramenta, basta puxar o gatilho do
interruptor. Solte o gatilho do interruptor para parar.
Manômetro
► Fig.5: 1. Botão de unidade 2. Botão de diminuição
3. Botão de aumento
Se o objeto a ser enchido estiver conectado à ferra-
menta, a pressão de ar do objeto será mostrada no
manômetro quando a ferramenta for ligada. Se não
houver nada conectado à ferramenta, o manômetro
exibirá “0”.
A pressão do ar pode ser ajustada no manômetro. Para
alterar a unidade, pressione o botão de unidade. Para
aumentar o valor da pressão, pressione o botão de
aumento. Para reduzir o valor da pressão, pressione
o botão de diminuição. O valor da pressão pode ser
ajustado entre 20 kPa (3 psi) e 830 kPa (121 psi).

17 PORTUGUÊS DO BRASIL
Para acender a lâmpada frontal
► Fig.6: 1. Lâmpada 2. Interruptor liga/desliga
principal
PRECAUÇÃO: Não olhe diretamente para a
lâmpada ou a fonte luminosa.
Quando a ferramenta é ligada pressionando-se o inter-
ruptor liga/desliga principal, a lâmpada acende. Quando
a ferramenta é desligada pressionando-se o interruptor
liga/desliga principal, a lâmpada apaga.
OBSERVAÇÃO: Quando a ferramenta estiver
superaquecida, a lâmpada piscará. Deixe a ferra-
menta resfriar-se por completo antes de voltar a
operá-la.
NOTA: Use um pano seco para tirar a poeira da lente
da lâmpada. Tenha cuidado para não riscar a lente da
lâmpada, pois a iluminação pode ser prejudicada.
Como guardar o adaptador
► Fig.7: 1. Bico-agulha para bolas de esportes
2. Adaptador da válvula Presta 3. Suporte
dos adaptadores
Os adaptadores podem ser guardados no suporte dos
adaptadores da ferramenta. Insira o bico-agulha para
bolas de esportes no adaptador da válvula Presta antes
de colocá-los no suporte dos adaptadores.
Como guardar a mangueira
► Fig.8: 1. Suporte da mangueira 2. Mangueira
A mangueira pode ser colocada no suporte da man-
gueira da ferramenta.
OPERAÇÃO
NOTA: Os adaptadores padrão variam de acordo
com o país.
Como usar o adaptador da válvula
Dunlop
1. Abra o grampo do mandril de ar.
2. Insira o adaptador da válvula Dunlop no mandril
de ar.
3. Feche o grampo do mandril de ar com rmeza.
► Fig.9: 1. Adaptador da válvula Dunlop 2. Mandril
de ar 3. Grampo do mandril de ar 4. Haste
da válvula
4. Instale o adaptador da válvula Dunlop na haste da
válvula enquanto abre o adaptador da válvula Dunlop.
5. Ligue a ferramenta.
6. Encha o pneu puxando o gatilho do interruptor
enquanto verica o status do pneu.
OBSERVAÇÃO: Quando o adaptador da válvula
Dunlop estiver sendo usado, o manômetro não
exibirá um valor preciso, devido às caracterís-
ticas da válvula. Quando estiver enchendo um
pneu, não use o valor do manômetro; encha o
pneu vericando o seu status.
Se a ferramenta parar antes que o pneu atinja a
pressão de ar desejada, ajuste o valor da pressão
e encha o pneu novamente.
Como usar o adaptador da válvula
Schrader
1. Abra o grampo do mandril de ar.
2. Coloque o mandril de ar na haste da válvula.
► Fig.10: 1. Grampo do mandril de ar 2. Haste da
válvula 3. Mandril de ar
3. Feche o grampo do mandril de ar com rmeza.
4. Ligue a ferramenta e ajuste o valor de pressão
apropriado para o pneu usando o manômetro.
5. Continue a puxar o gatilho do interruptor até a
ferramenta parar. O pneu estará cheio na pressão
especicada.
Como usar o adaptador da válvula
Presta
1. Desaperte a contraporca na haste da válvula.
► Fig.11: 1. Contraporca
2. Abra o grampo do mandril de ar.
3. Instale o adaptador da válvula Presta na haste
da válvula e conecte o mandril de ar ao adaptador da
válvula Presta.
► Fig.12: 1. Adaptador da válvula Presta 2. Mandril
de ar 3. Grampo do mandril de ar 4. Haste
da válvula
4. Feche o grampo do mandril de ar com rmeza.
5. Ligue a ferramenta e ajuste o valor de pressão
apropriado para o pneu usando o manômetro.
6. Continue a puxar o gatilho do interruptor até a
ferramenta parar. O pneu estará cheio na pressão
especicada.
7. Retire o mandril de ar e o adaptador da válvula
Presta e aperte a contraporca.

Como usar o bico-agulha para bolas
de esportes ou o adaptador cônico
Você pode encher pequenos itens, tais como bolas de
esportes ou boias. Para encher bolas de esporte, use o
bico-agulha para bolas de esportes. Para encher boias,
use o adaptador cônico.
1. Abra o grampo do mandril de ar.
2. Coloque o bico-agulha para bolas de esportes ou
o adaptador cônico no mandril de ar.
► Fig.13: 1. Grampo do mandril de ar 2. Mandril de
ar 3. Bico-agulha para bolas de esportes
4. Adaptador cônico
3. Feche o grampo do mandril de ar com rmeza.
4. Insira o bico-agulha para bolas de esportes ou o
adaptador cônico no furo do item.
5. Ligue a ferramenta e ajuste o valor de pressão
apropriado usando o manômetro.
OBSERVAÇÃO: Quando estiver enchendo uma
boia, o manômetro não exibirá um valor preciso,
uma vez que a pressão da boia é inferior a 20 kPa
(3 psi). Quando estiver enchendo uma boia, não
use o valor do manômetro; encha a boia veri-
cando o seu status.
6. Continue a puxar o gatilho do interruptor até
a ferramenta parar. O item estará cheio na pressão
especicada.
MANUTENÇÃO
PRECAUÇÃO: Certique-se sempre de
que a ferramenta esteja desligada e a bateria
retirada antes de realizar qualquer inspeção ou
manutenção.
OBSERVAÇÃO: Nunca use gasolina, ben-
zina, diluente, álcool ou produtos semelhantes.
Pode ocorrer descoloração, deformação ou
rachaduras.
Para manter a SEGURANÇA e a CONFIABILIDADE do
produto, os reparos e qualquer outra manutenção ou
ajustes devem ser feitos pelos centros autorizados de
assistência técnica da Makita ou na própria fábrica da
Makita, utilizando sempre peças originais Makita.
18 PORTUGUÊS DO BRASIL

19 BAHASA INDONESIA
BAHASA INDONESIA (Petunjuk Asli)
SPESIFIKASI
Model: DMP180
Panjang keseluruhan 251 – 266 mm
Tekanan udara maksimum 830 kPa
Siklus kerja 5 menit Nyala / 5 menit Mati
Tegangan terukur D.C. 18 V
Berat bersih 1,4 - 1,7 kg
• Karena kesinambungan program penelitian dan pengembangan kami, spesikasi yang disebutkan di sini dapat
berubah tanpa pemberitahuan.
• Spesikasi dan kartrid baterai dapat berbeda dari satu negara ke negara lainnya.
• Berat alat mungkin berbeda tergantung perangkat tambahan yang dipasang, termasuk kartrid baterai.
Kombinasi alat terberat dan teringan, sesuai Prosedur EPTA 01/2014, ditunjukkan pada tabel.
Kartrid dan pengisi daya baterai yang dapat digunakan
Untuk negara selain Taiwan dan Korea
Kartrid baterai BL1815N / BL1820 / BL1820B / BL1830 / BL1830B / BL1840 /
BL1840B / BL1850 / BL1850B / BL1860B
Pengisi daya DC18RC / DC18RD / DC18RE / DC18SD / DC18SE / DC18SF /
DC18SH
Untuk Taiwan
Kartrid baterai BL1815N / BL1820 / BL1820B / BL1830 / BL1830B / BL1840 /
BL1840B / BL1850 / BL1850B / BL1860B
Pengisi daya DC18RC / DC18RD / DC18RE / DC18SH
Untuk Korea
Kartrid baterai BL1815N / BL1820 / BL1820B / BL1830 / BL1830B / BL1840 /
BL1840B / BL1850 / BL1850B / BL1860B
Pengisi daya DC18RC / DC18RD / DC18RE / DC18SE / DC18SF / DC18SH
• Beberapa kartrid baterai dan pengisi daya yang tercantum di atas mungkin tidak tersedia, tergantung wilayah
tempat tinggal Anda.
PERINGATAN: Hanya gunakan kartrid dan pengisi daya baterai yang tercantum di atas. Penggunaan
kartrid dan pengisi daya baterai lain dapat menimbulkan risiko cedera dan/atau kebakaran.
Simbol
Berikut ini adalah simbol-simbol yang digunakan pada
peralatan ini. Pastikan Anda mengerti makna masing-
masing simbol sebelum menggunakan alat.
Baca petunjuk penggunaan.
Risiko ledakan.
Ni-MH
Li-ion
Hanya untuk negara-negara UE
Jangan membuang peralatan listrik atau
paket baterai bersama-sama dengan
bahan limbah rumah tangga!
Dengan memerhatikan Petunjuk Eropa,
tentang Limbah Peralatan Listrik dan
Elektronik serta Baterai dan Akumulator
serta Limbah Baterai dan Akumulator dan
pelaksanaannya sesuai dengan ketentuan
hukum nasional, peralatan listrik dan
baterai dan paket baterai yang telah habis
umur pakainya harus dikumpulkan secara
terpisah dan dikembalikan ke fasilitas daur
ulang yang kompatibel secara lingkungan.
Penggunaan
Mesin ini dirancang untuk memompa ban, bola
olahraga, atau tabung pelampung kecil.

20 BAHASA INDONESIA
PERINGATAN
KESELAMATAN
Peringatan keselamatan umum
mesin listrik
PERINGATAN: Bacalah semua peringatan
keselamatan, petunjuk, ilustrasi dan spesikasi
yang disertakan bersama mesin listrik ini.
Kelalaian untuk mematuhi semua petunjuk yang
tercantum di bawah ini dapat menyebabkan sengatan
listrik, kebakaran dan/atau cedera serius.
Simpanlah semua peringatan
dan petunjuk untuk acuan di
masa depan.
Istilah “mesin listrik” dalam semua peringatan mengacu
pada mesin listrik yang dijalankan dengan sumber listrik
jala-jala (berkabel) atau baterai (tanpa kabel).
Keselamatan tempat kerja
1. Jaga tempat kerja selalu bersih dan
berpenerangan cukup. Tempat kerja yang
berantakan dan gelap mengundang kecelakaan.
2. Jangan gunakan mesin listrik dalam
lingkungan yang mudah meledak, misalnya
jika ada cairan, gas, atau debu yang mudah
menyala. Mesin listrik menimbulkan bunga api
yang dapat menyalakan debu atau uap tersebut.
3. Jauhkan anak-anak dan orang lain saat
menggunakan mesin listrik. Bila perhatian
terpecah, anda dapat kehilangan kendali.
Keamanan Kelistrikan
1. Steker mesin listrik harus cocok dengan
stopkontak. Jangan sekali-kali mengubah
steker dengan cara apa pun. Jangan
menggunakan steker adaptor dengan mesin
listrik terbumi (dibumikan). Steker yang
tidak diubah dan stopkontak yang cocok akan
mengurangi risiko sengatan listrik.
2. Hindari sentuhan tubuh dengan permukaan
terbumi atau yang dibumikan seperti pipa,
radiator, kompor, dan kulkas. Risiko sengatan
listrik bertambah jika tubuh Anda terbumikan atau
dibumikan.
3. Jangan membiarkan mesin listrik kehujanan
atau kebasahan. Air yang masuk ke dalam mesin
listrik akan meningkatkan risiko sengatan listrik.
4. Jangan menyalahgunakan kabel. Jangan
sekali-kali menggunakan kabel untuk
membawa, menarik, atau mencabut mesin
listrik dari stopkontak. Jauhkan kabel dari
panas, minyak, tepian tajam, atau bagian
yang bergerak. Kabel yang rusak atau kusut
memperbesar risiko sengatan listrik.
5. Bila menggunakan mesin listrik di luar
ruangan, gunakan kabel ekstensi yang
sesuai untuk penggunaan di luar ruangan.
Penggunaan kabel yang sesuai untuk
penggunaan luar ruangan mengurangi risiko
sengatan listrik.
6. Jika mengoperasikan mesin listrik di lokasi
lembap tidak terhindarkan, gunakan pasokan
daya yang dilindungi peranti imbasan arus
(residual current device - RCD). Penggunaan
RCD mengurangi risiko sengatan listrik.
7. Mesin listrik dapat menghasilkan medan
magnet (EMF) yang tidak berbahaya bagi
pengguna. Namun, pengguna alat pacu
jantung atau peralatan medis sejenisnya harus
berkonsultasi dengan produsen peralatan tersebut
dan/atau dokter mereka sebelum mengoperasikan
mesin listrik ini.
Keselamatan Diri
1. Jaga kewaspadaan, perhatikan pekerjaan Anda
dan gunakan akal sehat bila menggunakan
mesin listrik. Jangan menggunakan mesin
listrik saat Anda lelah atau di bawah pengaruh
obat bius, alkohol, atau obat. Sekejap saja
lalai saat menggunakan mesin listrik dapat
menyebabkan cedera badan serius.
2. Gunakan alat pelindung diri. Selalu gunakan
pelindung mata. Peralatan pelindung seperti
masker debu, sepatu pengaman anti-selip, helm
pengaman, atau pelindung telinga yang digunakan
untuk kondisi yang sesuai akan mengurangi risiko
cedera badan.
3. Cegah penyalaan yang tidak disengaja.
Pastikan bahwa sakelar berada dalam posisi
mati (o) sebelum menghubungkan mesin
ke sumber daya dan/atau paket baterai, atau
mengangkat atau membawanya. Membawa
mesin listrik dengan jari Anda pada sakelarnya
atau mengalirkan listrik pada mesin listrik
yang sakelarnya hidup (on) akan mengundang
kecelakaan.
4. Lepaskan kunci-kunci penyetel sebelum
menghidupkan mesin listrik. Kunci-kunci yang
masih terpasang pada bagian mesin listrik yang
berputar dapat menyebabkan cedera.
5. Jangan meraih terlalu jauh. Jagalah pijakan
dan keseimbangan sepanjang waktu. Hal ini
memungkinkan kendali yang lebih baik atas mesin
listrik dalam situasi yang tidak diharapkan.
6. Kenakan pakaian yang memadai. Jangan
memakai pakaian yang longgar atau
perhiasan. Jaga jarak antara rambut dan
pakaian Anda dengan komponen mesin yang
bergerak. Pakaian yang longgar, perhiasan,
atau rambut yang panjang dapat tersangkut pada
komponen yang bergerak.
7. Jika tersedia fasilitas untuk menghisap dan
mengumpulkan debu, pastikan fasilitas
tersebut terhubung listrik dan digunakan
dengan baik. Penggunaan pembersih debu dapat
mengurangi bahaya yang terkait dengan debu.
8. Jangan sampai Anda lengah dan mengabaikan
prinsip keselamatan mesin ini hanya karena
sudah sering mengoperasikannya dan sudah
merasa terbiasa. Tindakan yang lalai dapat
menyebabkan cedera berat dalam sepersekian
detik saja.
Other manuals for DMP180
3
Table of contents
Languages:
Other Makita Power Tools manuals

Makita
Makita HM1801 User manual

Makita
Makita DTW450 User manual

Makita
Makita JN1600 Manual

Makita
Makita RP1800 User manual

Makita
Makita DTR180 User manual

Makita
Makita 3708 User manual

Makita
Makita DTW152 User manual

Makita
Makita M1901 User manual

Makita
Makita HM1400 User manual

Makita
Makita RP1800 User manual

Makita
Makita 3620 User manual

Makita
Makita UT120 User manual

Makita
Makita AT638A User manual

Makita
Makita JN3201 User manual

Makita
Makita 4302C User manual

Makita
Makita ST113DZJ User manual

Makita
Makita JN3200 User manual

Makita
Makita 3901 User manual

Makita
Makita DHR242 User manual

Makita
Makita AF201Z User manual