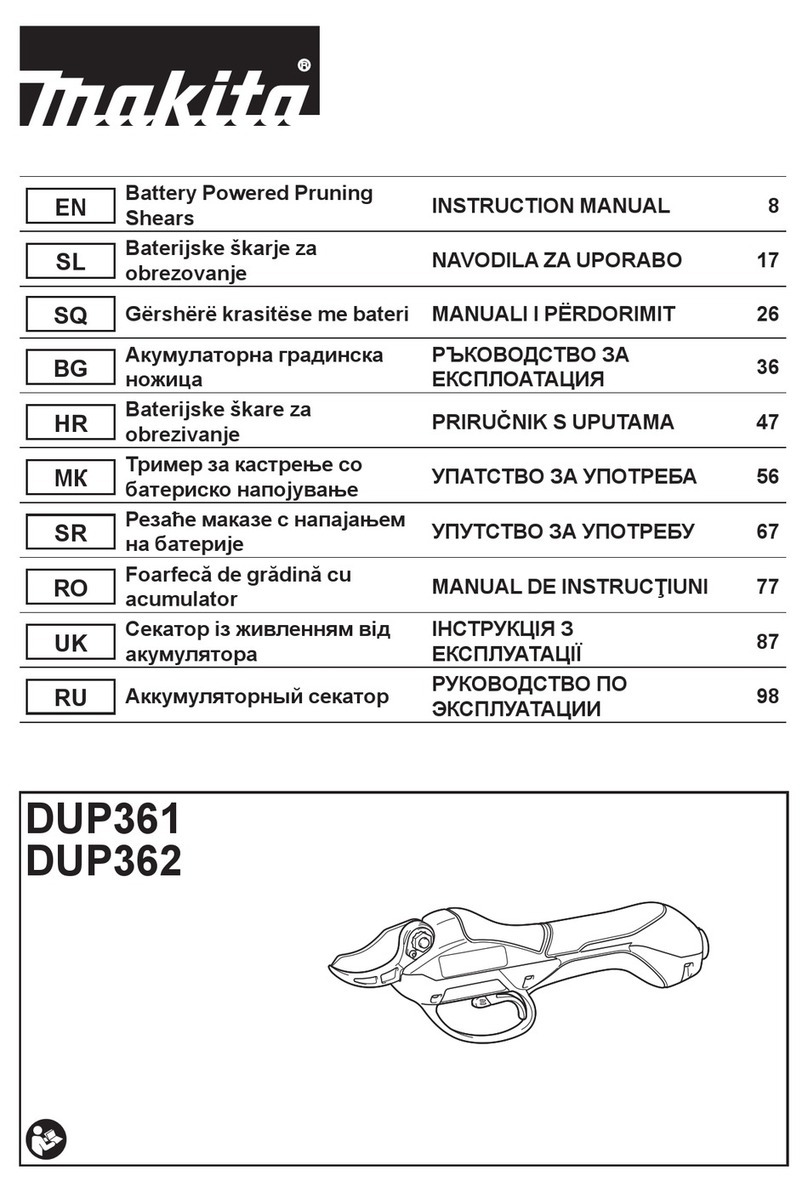
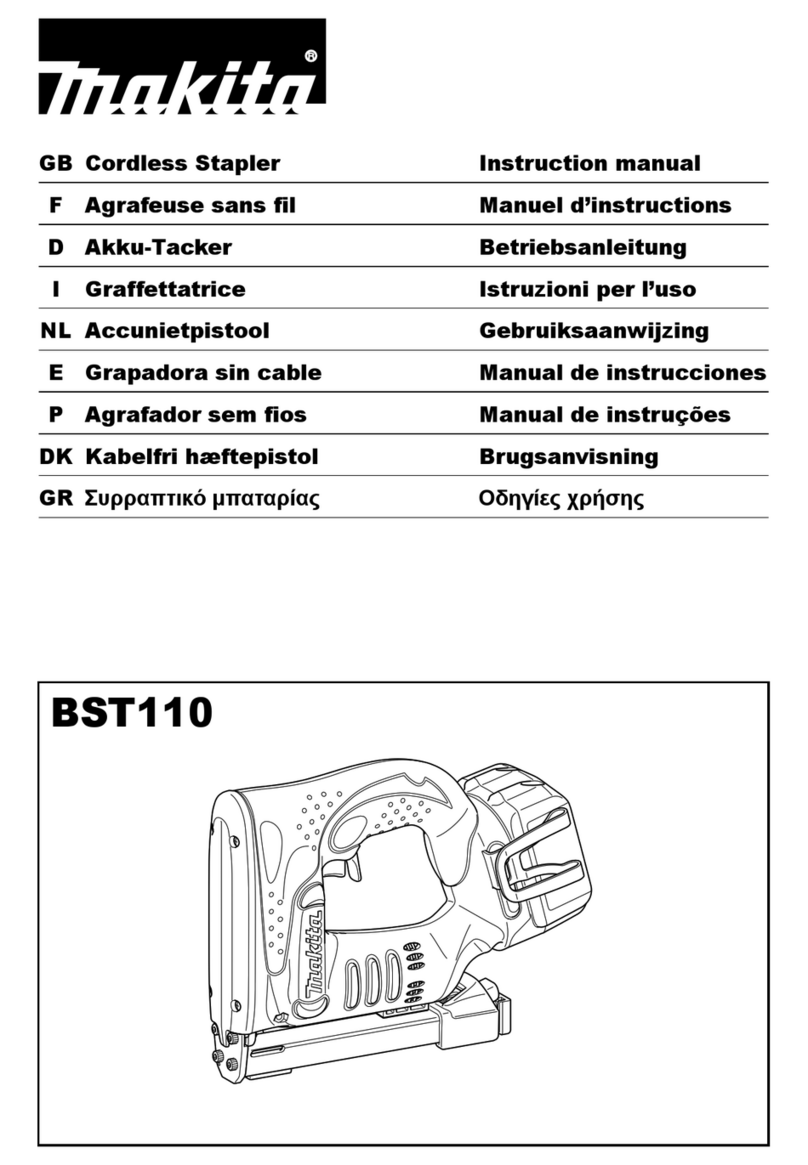
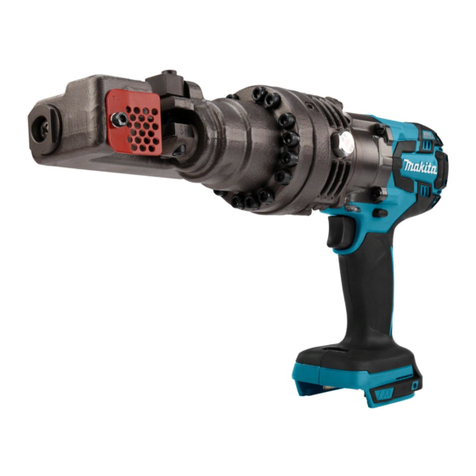
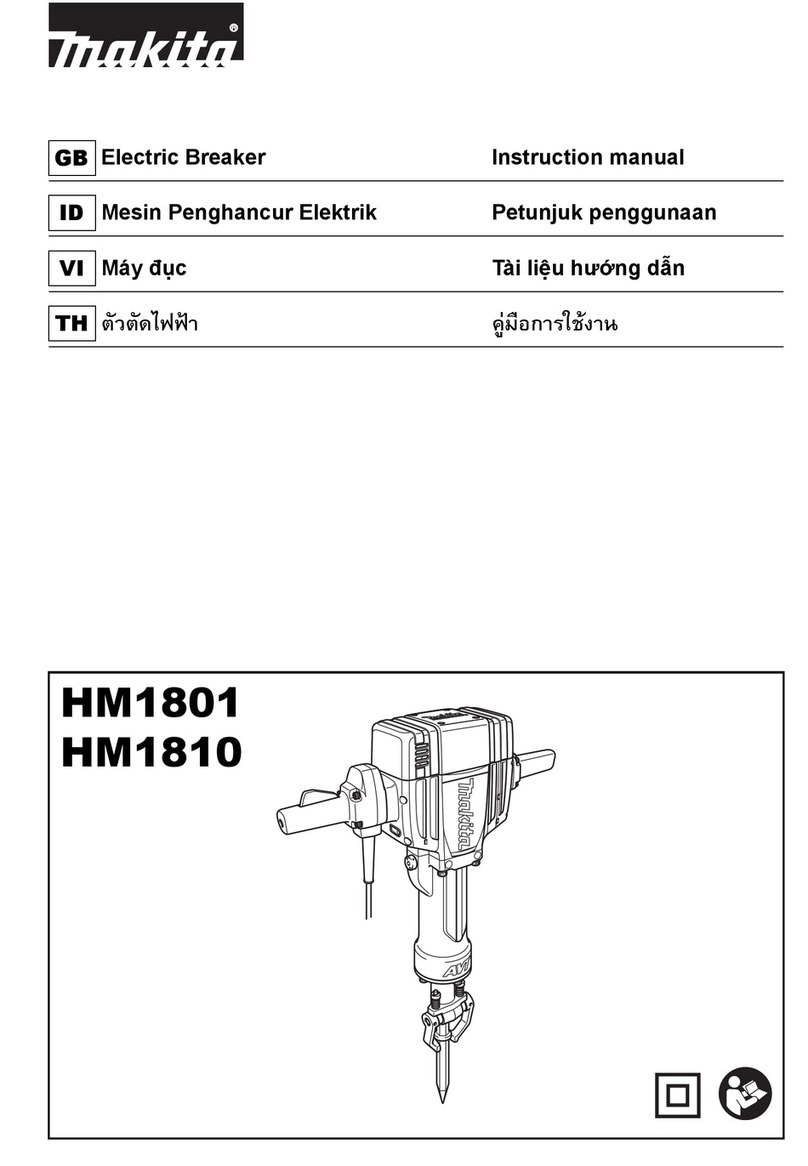
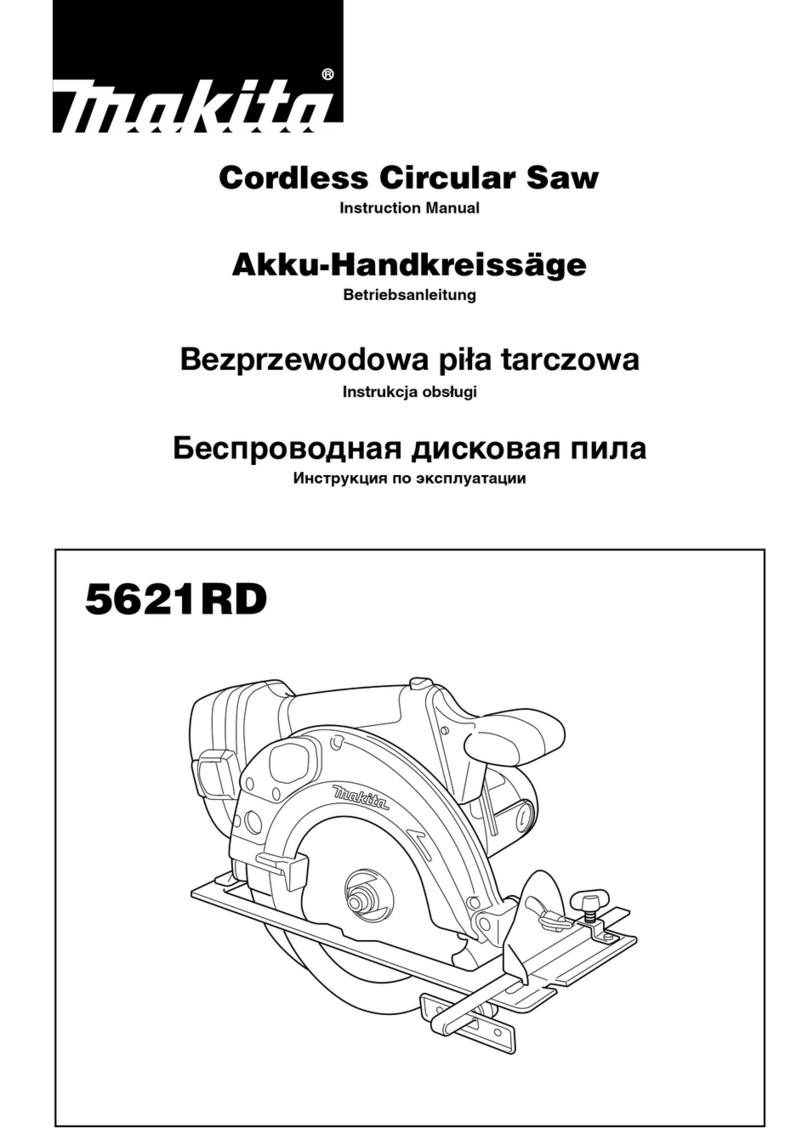
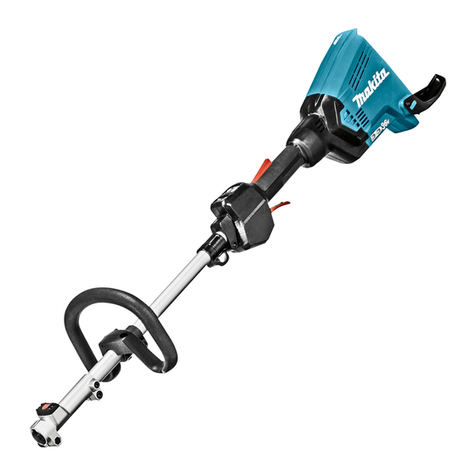
Makita DUP361 User manual

DUP361
EN Battery Powered Pruning
Shears INSTRUCTION MANUAL 8
ID Gunting Kebun Bertenaga
Baterai PETUNJUK PENGGUNAAN 16
VI Kéo Tỉa Cành chạy Pin TÀI LIỆU HƯỚNG DẪN 25
TH 33

1
4
2
10
3
7
9
11
8
56
Fig.1
1
2
3
4
3
Fig.2
1
2
Fig.3
2

1
2
3
Fig.4
1
Fig.5
1
Fig.6
1
Fig.7
1
2
3
Fig.8
1
2
3
Fig.9
1
2
Fig.10
1
Fig.11
3

Fig.12
1
Fig.13
2
1
4
1
3
5
Fig.14
Fig.15
Fig.16
Fig.17
4

Fig.18
1
Fig.19
21
4
1
3
5
Fig.20
Fig.21
Fig.22
1
Fig.23
Fig.24
5

Fig.25
Fig.26
1
23
Fig.27
Fig.28
1
2
Fig.29
1
2
Fig.30
1
Fig.31
1
Fig.32
6

Fig.33
2
1
Fig.34
1
2
Fig.35
Fig.36
7

8ENGLISH
ENGLISH (Original instructions)
SPECIFICATIONS
Model: DUP361
Max. cutting capacity 33 mm
Overall length (shears part) 305 mm
Rated voltage D.C.36 V
Battery cartridge BL1815N, BL1820, BL1820B BL1830, BL1830B, BL1840, BL1840B, BL1850,
BL1850B, BL1860B
Net weight (with shears,
switch box, connection
cord, two battery cartridges
and back pack)
3.3 kg 3.8 kg
• Duetoourcontinuingprogramofresearchanddevelopment,thespecicationshereinaresubjecttochange
without notice.
• Specicationsandbatterycartridgemaydifferfromcountrytocountry.
• Weight, with battery cartridge, according to EPTA-Procedure 01/2003
Symbols
The following show the symbols used for the equip-
ment. Be sure that you understand their meaning before
use.
Read instruction manual.
Do not expose to moisture.
Danger;beawareofthrownobjects.
Keep bystanders away.
Cd
Ni-MH
Li-ion
Only for EU countries
Do not dispose of electric equipment or
battery pack together with household waste
material!
In observance of the European Directives,
on Waste Electric and Electronic
Equipment and Batteries and Accumulators
and Waste Batteries and Accumulators
and their implementation in accordance
with national laws, electric equipment and
batteries and battery pack(s) that have
reached the end of their life must be col-
lected separately and returned to an envi-
ronmentally compatible recycling facility.
Intended use
The tool is intended for pruning twigs or branches.
Pruning shears safety warnings
WARNING: Read all safety warnings and
all instructions. Failure to follow the warnings and
instructionsmayresultinelectricshock,reand/or
seriousinjury.
Save all warnings and instruc-
tions for future reference.
The term “power tool” in the warnings refers to your
mains-operated (corded) power tool or battery-operated
(cordless) power tool.
1. Use personal protective equipment. Always
wear eye protection. Protective equipment such
as dust mask, non-skid safety shoes, hard hat, or
hearing protection used for appropriate conditions
willreducepersonalinjuries.
2. Prevent unintentional starting. Ensure the
switch is in the off-position before connecting
to power source and/or battery pack, picking
up or carrying the tool. Carrying power tools with
yourngerontheswitchorenergisingpowertools
that have the switch on invites accidents.
3. Dress properly. Do not wear loose clothing or
jewellery. Keep your hair, clothing, and gloves
away from moving parts.Looseclothes,jewel-
lery or long hair can be caught in moving parts.
4. This tool is for pruning branches. Do not use it
foranyjobexceptthatforwhichitisintended.
5. Never allow children, persons with reduced
physical, sensory or mental capabilities or
lack of experience and knowledge or people
unfamiliar with these instructions to use the
tool. Local regulations may restrict the age of
the operator.
6. Never operate the tool while people, especially
children, or pets are nearby.
7. Do not overreach and keep balance at all
times. Always be sure of footing on slopes and to
walk, never run.
8. Do not touch moving hazardous parts before
the tool is disconnected from the mains and/or
the battery pack is removed from the tool.
9. Always wear substantial footwear and long
trousers while operating the tool.
10. Disconnect the supply and/or remove the
battery pack from the tool:
• whenever the tool is left by the user,

9ENGLISH
• before clearing a blockage,
• before checking, cleaning or working on the
tool,
• afterstrikingaforeignobjecttoinspectthe
tool for damage,
• if the tool starts to vibrate abnormally, for
immediately check.
11. Never operate the tool with defective guards
or shields, or without safety devices, or if the
cord is damaged or worn.
12. Avoid using the tool in bad weather conditions
especially when there is a risk of lightning.
13. Don’t use the tool or perform battery charging
operations in the rain.
14. Don’t leave the tool in rain or wet locations.
15. Be careful not to catch foreign matter between
the blades.Ifthebladesarejammedwithforeign
matter, immediately switch off the tool and discon-
nect the battery from the tool. Then remove the
foreign matter from the blades.
16. Never hold the branch you are pruning with
your free hand. Keep your free hand away from
the cutting area. Never touch the blades, they are
very sharp and you may cut yourself.
17. Don’t force the tool to make it cut. You could
slipandinjureyourselforcutsomethingelse
unintentionally.
18. Avoid cutting electrical wires that may be
hidden.
19. Always check the blades carefully before
operation.
20. Handle the blades with extreme care to prevent
cuts or injury from the blades.
21. Disconnect the battery from the tool after each
use and before attempting to perform inspec-
tion or maintenance.
22. When not in use, always keep the tool in its
holster.
Battery tool use and care
1. Recharge only with the charger specied by
the manufacturer. A charger that is suitable for
onetypeofbatterypackmaycreateariskofre
when used with another battery pack.
2. Use power tools only with specically desig-
nated battery packs. Use of any other battery
packsmaycreateariskofinjuryandre.
3. When battery pack is not in use, keep it away
from other metal objects, like paper clips,
coins, keys, nails, screws or other small metal
objects, that can make a connection from one
terminal to another. Shorting the battery termi-
nalstogethermaycauseburnsorare.
4. Under abusive conditions, liquid may be
ejected from the battery; avoid contact. If con-
tact accidentally occurs, ush with water. If
liquid contacts eyes, additionally seek medical
help.Liquidejectedfromthebatterymaycause
irritation or burns.
Service
1. Have your power tool serviced by a qualied
repair person using only identical replacement
parts. This will ensure that the safety of the power
tool is maintained.
2. Follow instruction for lubricating and chang-
ing accessories.
3. Keep handles dry, clean and free from oil and
grease.
WARNING: DO NOT let comfort or familiarity
with product (gained from repeated use) replace
strict adherence to safety rules for the subject
product. MISUSE or failure to follow the safety
rules stated in this instruction manual may cause
serious personal injury.
Important safety instructions for
battery cartridge
1. Before using battery cartridge, read all instruc-
tions and cautionary markings on (1) battery
charger, (2) battery, and (3) product using
battery.
2. Do not disassemble battery cartridge.
3. If operating time has become excessively
shorter, stop operating immediately. It may
result in a risk of overheating, possible burns
and even an explosion.
4. If electrolyte gets into your eyes, rinse them
out with clear water and seek medical atten-
tion right away. It may result in loss of your
eyesight.
5. Do not short the battery cartridge:
(1) Do not touch the terminals with any con-
ductive material.
(2) Avoid storing battery cartridge in a con-
tainer with other metal objects such as
nails, coins, etc.
(3) Do not expose battery cartridge to water
or rain.
A battery short can cause a large current
ow, overheating, possible burns and even a
breakdown.
6. Do not store the tool and battery cartridge in
locations where the temperature may reach or
exceed 50 °C (122 °F).
7. Do not incinerate the battery cartridge even if
it is severely damaged or is completely worn
out. The battery cartridge can explode in a re.
8. Be careful not to drop or strike battery.
9. Do not use a damaged battery.
10. The contained lithium-ion batteries are subject
to the Dangerous Goods Legislation require-
ments.
For commercial transports e.g. by third parties,
forwarding agents, special requirement on pack-
aging and labeling must be observed.
For preparation of the item being shipped, consult-
ing an expert for hazardous material is required.
Please also observe possibly more detailed
national regulations.
Tape or mask off open contacts and pack up the
battery in such a manner that it cannot move
around in the packaging.
11. Follow your local regulations relating to dis-
posal of battery.
SAVE THESE INSTRUCTIONS.

10 ENGLISH
CAUTION: Only use genuine Makita batteries.
Use of non-genuine Makita batteries, or batteries that
have been altered, may result in the battery bursting
causingres,personalinjuryanddamage.Itwill
also void the Makita warranty for the Makita tool and
charger.
Tips for maintaining maximum
battery life
1. Charge the battery cartridge before completely
discharged. Always stop tool operation and
charge the battery cartridge when you notice
less tool power.
2. Never recharge a fully charged battery car-
tridge. Overcharging shortens the battery
service life.
3. Charge the battery cartridge with room tem-
perature at 10 °C - 40 °C (50 °F - 104 °F). Let
a hot battery cartridge cool down before
charging it.
4. Charge the battery cartridge if you do not use
it for a long period (more than six months).
N Mark
The N Mark is a trademark or registered trademark of
NFC Formula, Inc. in USA and other countries in the
world.
PARTS DESCRIPTION
►Fig.1
1Harness 2Back pack 3Switch box 4Pilot lamp (red)
5Pilot lamp (green) 6I/O switch 7Holster 8Cord holder
9Connection cord 10 Shears 11 Switch trigger - -
FUNCTIONAL
DESCRIPTION
CAUTION: Always be sure that the tool is
switched off and the battery cartridge is removed
before adjusting or checking function on the tool.
Removing or installing battery
cartridge
CAUTION: Always switch off the tool before
installing or removing of the battery cartridge.
CAUTION: Hold the tool and the battery car-
tridge rmly when installing or removing battery
cartridge. Failure to hold the tool and the battery
cartridgermlymaycausethemtoslipoffyourhands
and result in damage to the tool and battery cartridge
andapersonalinjury.
►Fig.2: 1. Red indicator 2. Button 3. Battery cartridge
4. Battery holder
To remove the battery cartridge, slide it from the tool
while sliding the button on the front of the cartridge.
To install the battery cartridge, align the tongue on the
battery cartridge with the groove in the housing and slip
it into place. Insert it all the way until it locks in place
with a little click. If you can see the red indicator on the
upper side of the button, it is not locked completely.
CAUTION: Always install the battery cartridge
fully until the red indicator cannot be seen. If not,
itmayaccidentallyfalloutofthetool,causinginjuryto
you or someone around you.
CAUTION: Do not install the battery cartridge
forcibly. If the cartridge does not slide in easily, it is
not being inserted correctly.
NOTE: The tool does not work with only one battery
cartridge.

11 ENGLISH
Tool / battery protection system
The tool is equipped with a tool/battery protection
system. This system automatically cuts off power to
the motor to extend tool and battery life. The tool will
automatically stop during operation if the tool or battery
is placed under one of the following conditions. In some
conditions, the lamps on the switch box lights up.
Overload protection
When the tool is operated in a manner that causes it to
draw an abnormally high current, the tool automatically
stops without any indication. In this situation, turn the
tool off and stop the application that caused the tool to
become overloaded. Then turn the tool on to restart.
Overheat protection
When the tool is overheated, the tool stops automati-
cally, and the green lamp on the switch box blinks. In
this situation, let the tool cool down before turning the
tool on again.
Overdischarge protection
When the battery capacity becomes low, the tool stops
automatically. And the red lamp on the switch box lights
up or blinks. If the product does not operate even when
the switches are operated, remove the batteries from
the battery holder and charge the batteries.
Indicating the remaining battery
capacity
Only for battery cartridges with “B” at the end of the
model number
►Fig.3: 1. Indicator lamps 2. Check button
Press the check button on the battery cartridge to indi-
cate the remaining battery capacity. The indicator lamps
light up for few seconds.
Indicator lamps Remaining
capacity
Lighted Off Blinking
75% to 100%
50% to 75%
25% to 50%
0% to 25%
Charge the
battery.
The battery
may have
malfunctioned.
NOTE: Depending on the conditions of use and the
ambient temperature, the indication may differ slightly
from the actual capacity.
Switch action
CAUTION: Before connecting the battery to
the shears, always check to see that the switch
trigger actuates properly and returns to the “OFF”
position when released.
CAUTION: When not operating the tool,
always make sure that the I/O switch is on the “O”
side.
CAUTION: Do not press the I/O switch to the
“I” (on) position while pulling the switch trigger.
The blade closes slightly and it may cause personal
injury.
To turn on the tool, perform as follows:
1. Connect the switch box, connection cord, and
shears. (Refer to “Installing the connection cord”.)
2. Holdtheshearsrmly,andpresstheI/Oswitchto
the “I” (on) position. The green pilot lamp lights up.
►Fig.4: 1. I/O switch 2. Pilot lamp (green) 3. Pilot
lamp (red)
3. The shear blades are locked-mode when the I/O
switch is on. To release the lock, pull the switch trigger
two times. The upper shear blade opens automatically.
4. To close the shear blade, pull the switch trigger.
►Fig.5: 1. Switch trigger
Auto locked-mode and shut-off
mode shift
For safety reasons, the tool shifts into locked-mode or
shut-off mode automatically if the tool is left untouched
for a certain period of time.
After 5 minutes: The tool shifts into locked-mode. Pull
the switch trigger two times to release the lock.
After 15 minutes: The tool is shift into shut-off mode,
and the green pilot lamp turns off. Press the I/O switch

12 ENGLISH
to the “O” (off) position once, and press the I/O switch
to the “I” (on) position again, then pull the switch trigger
two times to release the lock.
Opening angle selector lever
►Fig.6: 1. Opening angle selector lever
By tilting the opening angle selector lever to the left
side, you can open the upper shear blade wider.
Tolimittheuppershearbladeopeningangle,rstpull
the switch trigger fully, and then return the opening
angle selector lever to straight position.
Cutting depth adjustment
CAUTION: Do not let your hands or part of
body close to the shear blades. Otherwise per-
sonal injury may result.
Aftersharpeningorreplacingtheshearblade,adjust
cutting depth if necessary.
Turn on the tool, and pull the switch trigger two times to
open the shear blades, and then press the I/O switch to
the “O” (off) position.
To deepen the cutting depth, turn the cutting depth
adjustingscrewclockwisewiththehexwrench.Andto
make the cutting depth shallower, turn the cutting depth
adjustingscrewcounterclockwise.
►Fig.7: 1.Cuttingdepthadjustingscrew
NOTE:Checkthecuttingdepthafteradjustment.If
the cutting depth is too shallow, the branch may not
cut fully.
Pilot lamps on the switch box
►Fig.8: 1. I/O switch 2. Pilot lamp (green) 3. Pilot
lamp (red)
The green and red lamps indicate as follows:
(On: Off: Blinking: )
• Green lamp lights up: the tool is turned on.
Green Red
• Green lamp and red lamp light up: if you insert the
battery to the battry holder when I/O switch is “I”
(on) position, both of the lamps light up and the
blade does not move though you pull the switch
trigger. In this situation, press the I/O switch to the
“O” (off) position once, and press the I/O switch to
the “I” (on) position again.
Green Red
• Green lamp blinks: the tool is overheated. Let the
tool cool down before turning the tool on again.
Green Red
• Green lamp lights up and red lamp blinks or lights
up:batteryisloworalmostat.Chargethebatter-
ies. When either of the battery becomes low, the
red lamp blinks even one of the batteries is full.
Green Red
• Green lamp and red lamp blink alternately: the tool
detects breaking of wire. Check the connection
cord for loose connection with the switch box and
the shears. If the lamps still blink alternately, stop
using the tool immediately, disconnect the connec-
tion cord, remove the battery, and ask your local
authorized service center for repair.
Lamps blink alternately
ASSEMBLY
CAUTION: Always be sure that the tool is
switched off and the battery cartridge is removed
before carrying out any work on the tool.
Installing the battery holder into the
backpack
►Fig.9: 1. Clamp 2. Battery holder 3. Strap
1. Pass the switch box through the opening (either
right or left) of the back pack.
2. Pass the clamp through the square hole of the bat-
tery holder, and secure the battery holder with the strap.
Make sure that the battery holder sits in the backpack
rmly.
Installing the holster
►Fig.10: 1. Holster 2. Strap
Pass the belt of the lower buckle through the opening of
the holster.
Adjusting the harness
Adjusttheharnessasfollows:
1. Closeandlockthelowerbuckle,andadjustitsbelt
length.
►Fig.11: 1. Lower buckle
2. Adjusttheshoulderstraplength.
►Fig.12
3. Adjustthepositionoftheupperbuckle.Closeand
locktheupperbuckleandadjustitsbeltlength.
►Fig.13: 1. Upper buckle
CAUTION: In case of emergency, quickly
open the lower buckle and upper buckle, loosen
shoulder straps, and set down the backpack.

13 ENGLISH
Installing the connection cord
CAUTION: Always make sure that the switch
box's I/O switch is on the “O” side before attach-
ing the connection cord.
CAUTION: Do not operate the tool if the con-
nection cord is damaged.
NOTICE: Do not abuse the connection cord. Do not
carry the tool by pulling the connection cord. Keep the
connection cord away from heat, oil, or sharp edges.
Otherwise the connection cord may be damaged.
Attach the connection cord with the switch box and the
shears as follows:
1. First, align the triangular marks of the male plug
of the connection cord with the triangular mark of the
female connector of the switch box. Push in the plug of
the connection cord to the connector of the switch box.
Then, align the marking on the coupling with the trian-
glar marks, and push in and turn the coupling to tighten.
►Fig.14: 1. Triangular mark 2. Connection cord
3. Switch box 4. Marking on coupling
5. Coupling
NOTICE: Turn the coupling and align the marking
onthecouplingwiththetriangularmarksrstwhen
disconnecting the connection cable.
2. Hang the switch box on the waist belt or upper
belt.
►Fig.15
3. Push the connection cord into the loop of the cord
holder.
►Fig.16
Hang the cord holder on either the upper belt or the
waist belt on which the switch box is not hung.
The cord holder prevents the connection cord from dan-
gling around your body, and also the cord holder can
prevent the connection cord from being cut by mistake.
►Fig.17
►Fig.18
NOTICE: Do not hang anything other than the
connection code on the cord holder. Otherwise the
code holder may be broken.
NOTICE: Do not force the cord holder opening.
Otherwise it may result in deformation or breakage of
the code holder.
4. Put the arm band on your arm. And slip the con-
nection cord through the arm band.
►Fig.19: 1. Arm band
5. First, align the triangular marks of the female
socket of the connection cord with the triangular mark
of the male connector of the shears. Push in the socket
of the connection cord to the connector of the shears.
Then, align the marking on the coupling with the trian-
glar marks, and push in and turn the coupling to tighten.
►Fig.20: 1. Triangular mark 2. Connection cord
3. Shears 4. Marking on coupling
5. Coupling
NOTICE: Turn the coupling and align the marking
onthecouplingwiththetriangularmarksrstwhen
disconnecting the connection cable.
Putting shears in the holster
Keep pulling the switch trigger to close the shear
blades, and press the I/O switch to “O” side to turn off
the tool. Then put the shears into the holster and hold
the shears with the strap of the holster.
OPERATION
CAUTION: Always hold the tool rmly. And
keep rm footing.
CAUTION: Do not put any of your body parts
near to the blades during operation.
CAUTION: Before use, inspect if the blades,
blade bolts or other parts are not worn or dam-
aged. Replace worn or damaged parts for safe
operation.
NOTICE: If the blade is stuck in a branch during
operation, do not twitst the blade. In that situation,
turn off the tool and pull the blades straight out
slowly from the branch. Otherwise the blade may be
damaged.
NOTICE: In case you cut too thick branch or some-
thing too hard, the overload protection works and the
tool stops. In that situation, if the upper shear blade is
opened too wide and the switch trigger is pulled fully,
the upper blade closes slightly when you press the
I/O switch to “I” (on) position for restarting the tool.
Pruning operation
►Fig.21
Cut branches one by one. The maximum thickness of
branches which can be cut with these shears is about
33mm. Maintain your proper footing and balance at all
times.
After use
Close the shear blades, press the I/O switch to the “O”
(off) position, and disconnect the connection cord from
the shears and the switch box, and remove the batteries
from battery holder.
Store the shears in dry, high or locked-up place – out of
reach of children.
NOTICE: Remove the battery when not using the
shears. Otherwise the battery capacity is reduced
during course of time.

14 ENGLISH
MAINTENANCE
CAUTION: Always be sure that the tool is
switched off and the battery cartridge is removed
before attempting to perform inspection or
maintenance.
CAUTION: Wear safety gloves when handling
the blade.Otherwiseitmayresultinpersonalinjury.
NOTICE: Never use gasoline, benzine, thinner,
alcohol or the like. Discoloration, deformation or
cracks may result.
Blade maintenance
NOTICE: Failure to perform blade maintenance may
cause excessive blade friction and shorten the oper-
ating time per battery charge.
Before and after operation, check the shear blades
carefully.
After operation, clean off the blades with a stiff brush.
Then wipe the blades with a cloth. And apply Makita
genuine machine oil onto the blade edge and movable
part.
►Fig.22
Sharpening blades
Upper shear blade
1. Applytheatsurfaceofthediamondletothe
blade edge.
Pushthediamondletowardsthetipofthebladeto
sharpen along the entire blade edge.
Maintainthesameatcontactwiththeleconsistently
along the entire blade edge.
►Fig.23: 1.Diamondle
2. Applytheatsurfaceofthediamondlelightlyto
the opposite side of the blade.
Movethediamondletowardsthetipoftheblade
lightly to remove burrs.
►Fig.24
NOTICE: Do not sharpen this side too much. File
lightly only for removing burrs. Otherwise the blade
clearance may become too much or the blade life
may be shortened.
Lower shear blade
1. Applytheroundsurfaceofthediamondletothe
blade edge.
Pushthediamondletowardsthetipofthebladeto
sharpen along the entire blade edge.
►Fig.25
2. Applytheatsurfaceofthediamondlelightlyto
the opposite side of the blade.
Movethediamondletowardsthetipoftheblade
lightly to remove burrs.
►Fig.26
NOTICE: Do not sharpen this side too much. File
lightly only for removing burrs. Otherwise the blade
clearance may become too much or the blade life
may be shortened.
Adjustment for blade clearance
►Fig.27: 1.Platexingbolt2. Lock plate 3. Blades
tightening nut
Fromtimetotime,adjusttheclearanceoftheshear
blades as follows:
1. Switch on the tool, and pull the switch trigger to
open the shear blades.
2. With shear blades open, switch off the tool. And
disconnect the connection cord from the tool.
3. Loosentheplatexingbolt.Andthenremovethe
lock plate.
4. Adjustthetightnessofthebladestighteningnut
by hand (fastening torque for the blade tightening nut:
approximately 0.5 N•m).
5. Installthelockplateandplatexingboltagain.
6. Check the tightness of the blade whether the
blades never rattle but upper blade can be opened or
closed about 3mm by hand. If the blades are too tight or
loose,adjusttheclearanceagain.
NOTICE: Pay attention to the clearance of the
blades. Too loose clearance may result in dull cut,
and too tight blade clearance may result in overload
for the motor and short running time of the tool.
Removing or installing shear blades
To remove the shear blades, perform following steps:
1. Tilt the opening angle selector lever to the left side
rsttoopenthebladesfully.
2. Switch on the tool, and pull the switch trigger to
open the shear blades.
3. With shear blades open, switch off the tool. And
disconnect the connection cord from the tool.
►Fig.28
4. Remove two bolts near the switch trigger with the
hex wrench.
Remove the trigger guard by separating the tongue on
the trigger guard from the groove of the housing.
►Fig.29: 1. Bolts 2. Trigger guard
5. Remove the E-ring on the link arm with a slotted
screwdriver or alike.
►Fig.30: 1. E-ring 2. Link arm
NOTICE: The E-ring is expendable part. Do not
re-use the E-ring when reassembling.
6. Carefully remove the pin.
►Fig.31: 1. Pin
7. Remove two bolts from the side of the housing.
►Fig.32: 1. Bolts
8. Carefully remove the upper and lower shears from
the housing.
►Fig.33

15 ENGLISH
9. To separate the upper blade and the lower blade,
rstloosentheplatexingbolt.
Then remove the lock plate.
►Fig.34: 1.Platexingbolt2. Lock plate
10. Loosen and remove the blades tightening nut.
►Fig.35: 1. Blade tightening nut 2. Blade tightening
bolt
To install the shear blades, perform the procedures
above in reverse. Make sure all the bolts are securely
tightened.
Afterinstallingtheblade,alwaysadjustthebladeclear-
ance.(Referto“Adjustmentforbladeclearance”.)
To install the shear blades, perform the procedures
above in reverse. When installing the shear blades, pay
attention to the following points:
• Apply machine oil or grease on to the blade tight-
ening bolt and between the blades.
• Ifyoucannotplacetheplatexingboltproperly,
rst,removetheO-ringandtheplatexingbolt
from the lock plate. And then overturn the lock
plate,andreturntheO-ringandtheplatexing
bolt.
• When installing the trigger guard, align the tongue
of the trigger guard with the groove of the housing.
►Fig.36
• Make sure all the bolts are securely tightened.
• Afterinstallingtheblade,alwaysadjustblade
clearance.(Referto“Adjustmentforblade
clearance”.)
• Afterinstallingtheblade,alwaysadjustcutting
depth.(Referto“Cuttingdepthadjustment”.)
Trouble shooting
Before making a request for repairs, check for trouble
by yourself. If any abnormality is found, control your
tool according to the description of this manual. If the
remedy mentioned below cannot solve the problem, ask
your local authorized service center for repair. Never
tamper or dismount any part contrary to the description.
State of
abnormality
Probable cause
(malfunction)
Remedy
The shear blade
does not move
even after pull-
ing the switch
trigger.
The battery is
low.
Charge the battery.
I/O switch is “Off”
position.
Press the I/O switch to
“I” position.
The shears are
locked.
Unlock the shears by
performing the steps in
“Switch action”.
Connection cord
is loose.
Check the connecting
points of the switch box
and shears of connec-
tion cord.
I/O switch is “on”
position when
inserting the bat-
tery cartridge.
Press the I/O switch
to the “O” (off) position
once, and press the I/O
switch to the “I” (on)
position again.
Switch trigger
defect.
Stop using the tool
immediately, and ask
your local authorized
service center for
repair.
State of
abnormality
Probable cause
(malfunction)
Remedy
The shear
blades are stuck
on the branch.
The branch is too
thick.
Release the switch
trigger. Press the I/O
switch to “O” position.
Then pull the blades
straight out slowly from
the branch.
The switch
trigger is locked
and can not be
pulled.
Shear blades are
opened forcibly.
Switch off and on with
the I/O switch. (The
upper shear blade
closes slightly when
switching on.)
The cut is not
smooth.
The shear blades
are dull.
Sharpen the shear
blades,oradjustblade
clearance.
The shear blades
are worn out.
Replace the shear
blades.
To maintain product SAFETY and RELIABILITY,
repairs,anyothermaintenanceoradjustmentshould
be performed by Makita Authorized or Factory Service
Centers, always using Makita replacement parts.
OPTIONAL
ACCESSORIES
CAUTION: These accessories or attachments
are recommended for use with your Makita tool
specied in this manual. The use of any other
accessories or attachments might present a risk of
injurytopersons.Onlyuseaccessoryorattachment
for its stated purpose.
If you need any assistance for more details regard-
ing these accessories, ask your local Makita Service
Center.
• Upper shear blade
• Lower shear blade
• Diamondle
• Arm band
• Holster
• Cord holder
• Makita genuine battery and charger
NOTE: Some items in the list may be included in the
tool package as standard accessories. They may
differ from country to country.

16 BAHASA INDONESIA
BAHASA INDONESIA (Petunjuk Asli)
SPESIFIKASI
Model: DUP361
Kapasitas pemotongan
maks
33 mm
PanjangKeseluruhan
(bagian pemangkas)
305 mm
Tegangan terukur D.C.36 V
Kartrid baterai BL1815N, BL1820, BL1820B BL1830, BL1830B, BL1840, BL1840B, BL1850,
BL1850B, BL1860B
Berat bersih (dengan
pemangkas, kotak sakelar,
kabel penghubung, dua
kartrid baterai dan back
pack)
3,3 kg 3,8 kg
• Karenakesinambunganprogrampenelitiandanpengembangankami,spesikasiyangdisebutkandisinidapat
berubah tanpa pemberitahuan.
• Spesikasidankartridbateraidapatberbedadarisatunegarakenegaralainnya.
• Berat, dengan kartrid baterai, menurut Prosedur EPTA 01/2003
Simbol
Berikut ini adalah simbol-simbol yang digunakan pada
peralatan ini. Pastikan Anda mengerti makna masing-
masing simbol sebelum menggunakan alat.
Bacapetunjukpenggunaan.
Jangan biarkan lembab.
Bahaya;hati-hatiterhadapobjekyang
terlempar.
Jauhkan dari orang di sekitar.
Cd
Ni-MH
Li-ion
Hanya untuk negara-negara UE
Jangan membuang peralatan listrik atau
paket baterai bersama-sama dengan
bahan limbah rumah tangga!
DenganmemerhatikanPetunjukEropa,
tentang Limbah Peralatan Listrik dan
Elektronik serta Baterai dan Akumulator
serta Limbah Baterai dan Akumulator dan
pelaksanaannya sesuai dengan ketentuan
hukum nasional, peralatan listrik dan
baterai dan paket baterai yang telah habis
umur pakainya harus dikumpulkan secara
terpisah dan dikembalikan ke fasilitas daur
ulang yang kompatibel secara lingkungan.
Penggunaan
Alatiniditujukanuntukmemangkasrantingatau
cabang.
Peringatan keselamatan gunting
kebun
PERINGATAN: Bacalah semua peringatan
keselamatan dan semua petunjuk. Kelalaian
mematuhiperingatandanpetunjukdapat
menyebabkan sengatan listrik, kebakaran dan/atau
cedera serius.
Simpanlah semua peringatan
dan petunjuk untuk acuan di
masa depan.
Istilah “mesin listrik” dalam semua peringatan mengacu
padamesinlistrikyangdijalankandengansumberlistrik
jala-jala(berkabel)ataubaterai(tanpakabel).
1. Gunakan alat pelindung diri. Selalu gunakan
pelindung mata. Peralatan pelindung seperti
masker debu, sepatu pengaman anti-selip, helm
pengaman, atau pelindung telinga yang digunakan
untuk kondisi yang sesuai akan mengurangi risiko
cedera badan.
2. Cegah penyalaan yang tidak disengaja.
Pastikan bahwa sakelar berada dalam posisi
mati (off) sebelum menghubungkan mesin
ke sumber daya dan/atau paket baterai, atau
mengangkat atau membawanya. Membawa
mesinlistrikdenganjariAndapadasakelarnya
atau mengalirkan listrik pada mesin listrik
yang sakelarnya hidup (on) akan mengundang
kecelakaan.
3. Kenakan pakaian dengan baik. Jangan
memakai pakaian yang kedodoran atau
perhiasan. Jaga jarak antara rambut, pakaian,
dan sarung tangan Anda dengan bagian mesin
yang bergerak. Pakaian kedodoran, perhiasan,
ataurambutpanjangdapattersangkutpada
bagian yang bergerak.

17 BAHASA INDONESIA
4. Alat digunakan untuk memangkas cabang.
Jangangunakanalatinikecualiuntuktujuanyang
dimaksudkan.
5. Jangan biarkan anak kecil, orang dengan
kemampuan sik, indera atau mental
yang kurang atau kurang pengalaman dan
pengetahuan atau orang yang tidak biasa
dengan instruksi ini untuk menggunakan alat.
Peraturan setempat bisa saja membatasi usia
operator.
6. Jangan operasikan alat pada saat orang,
terutama anak-anak, atau hewan peliharaan
berada di sekitar.
7. Jangan meraih terlalu jauh dan jaga
keseimbangan sepanjang waktu. Selalu berhati-
hatiketikamemijakpadalerengdanpastikan
untukberjalan,tidakberlari.
8. Jangan sentuh bagian berbahaya yang
bergerak sebelum alat terputus dari listrik dan/
atau baterai dicopot dari alat.
9. Selalu gunakan alas kaki yang layak dan
celana panjang pada saat menggunakan alat.
10. Putuskan suplai dan/atau cabut baterai dari
alat:
• pada saat alat ditinggalkan oleh pengguna,
• sebelum membersihkan penghalang,
• sebelum memeriksa, membersihkan atau
menggunakan alat,
• setelah menggunakan benda asing untuk
melihat kerusakan pada alat,
• apabila alat mulai bergetar tidak normal,
untuk segera diperiksa.
11. Jangan operasikan alat dengan perlindungan
atau penahan yang cacat, atau tanpa peralatan
keamanan, atau apabila tali rusak atau aus.
12. Hindari penggunaan alat pada kondisi cuaca
yang buruk khususnya pada saat ada risiko
petir.
13. Jangan gunakan alat atau melakukan
pengisian baterai pada saat hujan.
14. Jangan tinggalkan alat saat hujan atau pada
kondisi yang basah.
15. Berhati-hatilah untuk tidak mengambil benda
asing di antara pisau. Apabila pisau macet
karena benda asing, segeralah matikan peralatan
dan lepaskan baterai dari alat. Kemudian cabut
benda asing dari pisau.
16. Jangan sentuh batang yang Anda pangkas
dengan tangan kosong. Jauhkan tangan Anda
yang bebas dari area yang sedang dipotong.
Jangan pernah menyentuh pisau, karena sangat
tajamdanbisasajamelukaiAnda.
17. Jangan paksa alat untuk memotong. Anda
bisasajaterpelesetdanmencederaidirisendiri
atau memotong sesuatu yang lain dengan tidak
disengaja.
18. Hindari memotong kabel listrik yang mungkin
saja tersembunyi.
19. Selalu periksa pisau sebelum penggunaan.
20. Pegang pisau dengan sangat hati-hati untuk
mencegah terpotong atau cedera karena pisau.
21. Cabut baterai dari alat setelah setiap
penggunaan dan sebelum mencoba
melakukan pemeriksaan atau perbaikan.
22. Pada saat tidak digunakan, selalu letakkan alat
pada tempat penyimpanannya.
Penggunaan dan pemeliharaan mesin bertenaga
baterai
1. Isi ulang baterai hanya dengan pengisi daya
yang ditentukan oleh pabrikan. Pengisi daya
yangcocokuntuksatujenispaketbateraidapat
menimbulkan risiko kebakaran ketika digunakan
untuk paket baterai yang lain.
2. Gunakan mesin listrik hanya dengan
paket baterai yang telah ditentukan secara
khusus. Penggunaan paket baterai lain dapat
menimbulkan risiko cedera dan kebakaran.
3. Ketika paket baterai tidak digunakan, jauhkan
dari benda logam lain, seperti penjepit
kertas, uang logam, kunci, paku, sekrup
atau benda logam kecil lainnya, yang dapat
menghubungkan satu terminal ke terminal
lain. Hubungan singkat terminal baterai dapat
menyebabkan luka bakar atau kebakaran.
4. Pemakaian yang salah, dapat menyebabkan
keluarnya cairan dari baterai; hindari kontak.
Jika terjadi kontak secara tidak sengaja, bilas
dengan air. Jika cairan mengenai mata, cari
bantuan medis. Cairan yang keluar dari baterai
bisa menyebabkan iritasi atau luka bakar.
Servis
1. Berikan mesin listrik untuk diperbaiki hanya
kepada oleh teknisi yang berkualikasi dengan
menggunakan hanya suku cadang pengganti
yang serupa.Haliniakanmenjaminterjaganya
keamanan mesin listrik.
2. Patuhi petunjuk pelumasan dan penggantian
aksesori.
3. Jagalah agar gagang kering, bersih, dan bebas
dari minyak dan gemuk.
PERINGATAN: JANGAN biarkan kenyamanan
atau terbiasanya Anda dengan produk (karena
penggunaan berulang) mengurangi kepatuhan
yang ketat terhadap aturan keselamatan untuk
produk yang terkait. PENYALAHGUNAAN atau
kelalaian mematuhi kaidah keselamatan yang
tertera dalam petunjuk ini dapat menyebabkan
cedera badan serius.
Petunjuk keselamatan penting untuk
kartrid baterai
1. Sebelum menggunakan kartrid baterai,
bacalah semua petunjuk dan penandaan pada
(1) pengisi daya baterai, (2) baterai, dan (3)
produk yang menggunakan baterai.
2. Jangan membongkar kartrid baterai.
3. Jika waktu beroperasinya menjadi sangat
singkat, segera hentikan penggunaan. Hal
tersebut dapat menimbulkan risiko panas
berlebih, kemungkinan mengalami luka bakar
atau bahkan terjadi ledakan.
4. Jika elektrolit mengenai mata Anda, basuh
dengan air bersih dan segera cari pertolongan
medis. Hal tersebut dapat mengakibatkan
hilangnya kemampuan penglihatan Anda.

18 BAHASA INDONESIA
5. Jangan menghubungkan terminal kartrid
baterai:
(1) Jangan menyentuhkan terminal dengan
bahan penghantar listrik apa pun.
(2) Hindari menyimpan kartrid baterai pada
wadah yang berisi benda logam lain
seperti paku, uang logam, dsb.
(3) Jangan membiarkan baterai terkena air
atau kehujanan.
Hubungan singkat baterai dapat menyebabkan
aliran arus listrik yang besar, panas berlebih,
kemungkinan mengalami luka bakar dan
bahkan kerusakan pada baterai.
6. Jangan menyimpan mesin dan kartrid baterai
pada lokasi dengan suhu yang bisa mencapai
atau melebihi 50 °C.
7. Jangan membuang kartrid baterai di tempat
pembakaran sampah walaupun benar-benar
rusak atau tidak bisa digunakan sama sekali.
Kartrid baterai bisa meledak jika terbakar.
8. Berhati-hatilah jangan sampai baterai jatuh
atau terbentur.
9. Jangan menggunakan baterai yang rusak.
10. Baterai litium-ion yang disertakan sesuai
dengan persyaratan Perundangan Makanan
Berbahaya.
Harus ada pengawasan untuk pengangkutan
komersial misalnya oleh pihak ketiga, ekspeditor,
persyaratan khusus terhadap pengemasan dan
pelabelan.
Diperlukan adanya konsultasi dengan ahli
mengenai material berbahaya untuk persiapan
barang yang akan dikirimkan. Perhatikan pula
peraturan nasional yang lebih terperinci yang
mungkin ada.
Beri perekat atau tutupi bagian yang terbuka
dan kemasi baterai dengan cara yang tidak akan
menimbulkan pergeseran dalam pengemasan.
11. Patuhi peraturan setempat yang berkaitan
dengan pembuangan baterai.
SIMPAN PETUNJUK INI.
PERHATIAN: Gunakan baterai asli Makita.
Penggunaan baterai Makita yang tidak asli, atau
baterai yang sudah diubah, akan mengakibatkan
baterai mudah terbakar, cedera dan kerusakan. Akan
menghilangkan garansi Makita pada pengisi daya
dan alat Makita.
Tip untuk menjaga agar umur
pemakaian baterai maksimum
1. Isi ulang kartrid baterai sebelum habis sama
sekali. Selalu hentikan penggunaan mesin dan
ganti kartrid baterai jika Anda melihat bahwa
mesin kurang tenaga.
2. Jangan pernah mengisi ulang kartrid baterai
yang sudah diisi penuh. Pengisian ulang yang
berlebih memperpendek umur pemakaian
baterai.
3. Isi ulang kartrid baterai pada suhu ruangan
10 °C - 40 °C. Biarkan kartrid baterai yang
panas menjadi dingin terlebih dahulu sebelum
diisi ulang.
4. Isi ulang daya kartrid baterai jika Anda tidak
menggunakannya untuk jangka waktu yang
lama (lebih dari enam bulan).
Tanda N
Tanda N adalah merek dagang atau merek dagang
terdaftar milik NFC Formula, Inc. di Amerika Serikat dan
negara-negara lain di dunia.
DESKRIPSI BAGIAN-BAGIAN MESIN
►Gbr.1
1Bajuperlengkapan 2Tas punggung 3Kotak sakelar 4Lampu pilot (merah)
5Lampupilot(hijau) 6Sakelar I/O 7Sarung 8Penahan kabel
9Kabel penghubung 10 Mesin Gunting 11 Pelatuk sakelar - -
DESKRIPSI FUNGSI
PERHATIAN: Selalu pastikan bahwa mesin
dimatikan dan kartrid baterai dilepas sebelum
menyetel atau memeriksa kerja mesin.
Memasang atau melepas baterai
PERHATIAN: Selalu matikan mesin sebelum
memasang atau melepas kartrid baterai.
PERHATIAN: Pegang mesin dan kartrid
baterai kuat-kuat saat memasang atau melepas
kartrid baterai. Kelalaian untuk memegang mesin
dan kartrid baterai kuat-kuat bisa menyebabkan
keduanya tergelincir dari tangan Anda dan
mengakibatkan kerusakan pada mesin dan kartrid
baterai dan cedera diri.
►Gbr.2: 1. Indikator berwarna merah 2. Tombol
3. Kartrid baterai 4. Tempat baterai

19 BAHASA INDONESIA
Untuk melepas kartrid baterai, geser dari mesin sambil
menggeser tombol pada bagian depan kartrid.
Untukmemasangkartridbaterai,sejajarkanlidah
kartrid baterai dengan alur pada rumah dan masukkan
ke dalam tempatnya. Masukkan seluruhnya sampai
terkunci pada tempatnya dan terdengar bunyi klik kecil.
Jika Anda bisa melihat indikator berwarna merah pada
sisi atas tombol, berarti tidak terkunci sepenuhnya.
PERHATIAN: Selalu pasang kartrid baterai
sepenuhnya sampai indikator berwarna merah
tidak terlihat. Jika tidak, bisa terlepas dari mesin
secaratidaksengaja,menyebabkanlukapadaAnda
atau orang di sekitar Anda.
PERHATIAN: Jangan memasang kartrid
baterai secara paksa. Jika kartrid tidak bergeser
dengan mudah, berarti tidak dimasukkan dengan
benar.
CATATAN:Mesintidakakanbekerjadenganhanya
satu kartrid baterai.
Sistem perlindungan mesin / baterai
Mesin ini dilengkapi dengan sistem perlindungan mesin/
baterai. Sistem ini memutus daya ke motor secara
otomatisuntukmemperpanjangumurpemakaianmesin
dan baterai. Mesin akan berhenti secara otomatis saat
penggunaanjikamesinataubateraiberadadalam
salah satu kondisi berikut ini. Pada beberapa kondisi,
lampu pada kotak sakelar akan menyala.
Perlindungan kelebihan beban
Bilamesindijalankandengancarayang
menyebabkannya menarik arus tinggi yang tidak
normal, mesin akan berhenti secara otomatis tanpa
menunjukkanapa-apa.Untuksituasiini,matikanmesin
danhentikanpekerjaanyangmenyebabkanmesin
mengalami kelebihan beban. Kemudian nyalakan mesin
untukmemulailagipekerjaan.
Perlindungan panas berlebih
Bila mesin mengalami panas berlebih, mesin akan
berhenti secara otomatis, dan lampu pada kotak
sakelar akan berkedip. Untuk situasi ini, biarkan mesin
menjadidinginsebelummenyalakanmesinlagi.
Perlindungan pengisian daya
berlebih
Ketika kapasitas baterai melemah, mesin akan berhenti
secara otomatis. Dan lampu merah pada kotak sakelar
menyala atau berkedip. Jika produk tidak beroperasi
bahkan ketika sakelar digunakan, lepaskan baterai dari
penahan baterai dan isi daya baterai.
Mengindikasikan kapasitas baterai
yang tersisa
Hanya untuk kartrid baterai dengan huruf “B” pada
akhir nomor model
►Gbr.3: 1. Lampu indikator 2. Tombol pemeriksaan
Tekan tombol pemeriksaan pada kartrid baterai untuk
melihat kapasitas baterai yang tersisa. Lampu indikator
menyala selama beberapa detik.
Lampu indikator Kapasitas
yang tersisa
Menyala Mati Berkedip
75% hingga
100%
50% hingga
75%
25% hingga
50%
0% hingga
25%
Isi ulang
baterai.
Baterai
mungkin
sudah rusak.
CATATAN: Tergantung kondisi penggunaan dan suhu
lingkungannya,penunjukkanmungkinsajasedikit
berbeda dari kapasitas sebenarnya.
Kerja sakelar
PERHATIAN: Sebelum menghubungkan
baterai pada mesin, pastikan pelatuk sakelar
berfungsi dengan baik dan kembali ke posisi
“OFF” saat dilepas.
PERHATIAN: Pada saat tidak
mengoperasikan alat, selalu gunakan sakelar I/O
pada sisi “O”
PERHATIAN: Jangan tekan sakelar I/O pada
posisi I (menyala) pada saat menarik pelatuk
sakelar. Pisau akan menutup sedikit dan bisa
mengakibatkan cedera.
Untuk menghidupkan mesin, lakukan seperti berikut:
1. Hubungkan kotak sakelar, kabel penghubung, dan
mesinpemotong.(Merujuklahpada“Memasangkabel
penghubung”.)
2. Pegang mesin pemotong secara kuat, dan tekan
sakelarI/OpadaposisiI(menyala).Lampupilothijau
menyala.
►Gbr.4: 1. Sakelar I/O 2.Lampupilot(hijau)
3. Lampu pilot (merah)
3. Pisau mesin pemotong berada dalam modus
mengunci pada saat sakelar I/O menyala. Untuk
melepas pengunci, tarik picu sakelar dua kali. Bagian
atas pisau pemotong akan membuka secara otomatis.
4. Untuk menutup mesin, cukup tarik pelatuk
sakelarnya.
►Gbr.5: 1. Pelatuk sakelar

20 BAHASA INDONESIA
Pemindahan modus penguncian
dan modus mematikan mesin
otomatis
Untuk alasan keamanan, pemindahan peralatan pada
modus penguncian atau mematikan mesin otomatis
apabila peralatan ditinggalkan tanpa perawatan untuk
waktu yang lama.
Setelah 5 menit: Pemindahan peralatan pada modus
penguncian. Tarik picu sakelar dua kali untuk melepas
penguncian.
Setelah 15 menit: Peralatan berpindah pada modus
mematikanmesin,danlampupilothijaumati.Tekan
sakelar I/O pada posisi O (mati) sekali, dan tekan
sakelar I/O pada posisi I (menyala) lagi, dan kemudian
tarik pelatuk sakelar dua kali untuk melepas pengunci.
Tuas pemilih sudut pembukaan
►Gbr.6: 1. Tuas pemilih sudut pembukaan
Dengan memiringkan tuas pemilih sudut pembukaan
pada sisi kiri, Anda bisa membuka pisau mesin
pemotong bagian atas lebih tinggi.
Untuk membatasi sudut pembukaan pisau mesin
pemotong bagian atas, pertama tarik pelatuk sakelar
secara penuh, dan kemudian kembalikan tuas pemilih
sudut pembukaan pada posisi lurus.
Penyesuaian kedalaman
pemotongan
PERHATIAN: Jangan biarkan tangan atau
bagian tubuh Anda berdekatan dengan pisau
mesin pemotong. Atau akan membuat cedera.
Setelahmenajamkanataumenggantipisaumesin
pemotong,sesuaikankedalamanpemotongjikaperlu.
Hidupkan peralatan, dan tarik pelatuk sakelar dua kali
untuk membuka pisau mesin pemotong, dan kemudian
tekan sakelar I/O ke posisi O (mati).
Untuk kedalaman memotong lebih dalam, putar sekrup
penyesuaiankedalamanpemotongansearahjarum
jamdengankunciL.Danuntukmembuatkedalaman
pemotongan lebih dangkal, putar sekrup penyesuaian
kedalamanmemotongberlawananarahjarumjam.
►Gbr.7: 1. Sekrup penyetel kedalaman pemotongan
CATATAN: Periksa kedalaman pemotongan setelah
penyetelan. Jika kedalaman pemotongan terlalu
dangkal, cabang mungkin tidak terpotong sempurna.
Lampu pilot pada kotak sakelar
►Gbr.8: 1. Sakelar I/O 2.Lampupilot(hijau)
3. Lampu pilot (merah)
Lampuhijaudanmerahmengindikasikanhalberikut:
(Hidup: Mati: Berkedip: )
• Lampuhijaumenyala:alatdihidupkan.
Hijau Merah
• Lampuhijaudanmerahmenyala:jikaAnda
memasukkan baterai ke pemegang baterai
ketika sakelar I/O berada di posisi “I” (menyala),
kedua lampu menyala dan mata pisau tidak
bergerak walaupun Anda menarik pelatuk sakelar.
Dalam situasi ini, tekan sakelar I/O ke posisi “O”
(mati) sekali, dan tekan sakelar I/O ke posisi “I”
(menyala) lagi.
Hijau Merah
• Lampuhijauberkedip:alatterlalupanas.Biarkan
mesinmenjadidinginsebelummenyalakanmesin
lagi.
Hijau Merah
• Lampuhijaumenyaladanlampumerahberkedip
atau menyala: baterai sangat lemah atau hampir
habis. Isi daya baterai. Pada saat baterai lemah,
lampu merah berkedip meski salah satu baterai
penuh.
Hijau Merah
• Lampuhijaudanmerahberkedipsecarabersama-
sama: alat mendeteksi kabel yang rusak. Periksa
kabel penghubung untuk sambungan yang kendor
dengan kotak sakelar dan mesin pemotong.
Apabila lampu masih berkedip secara bergantian,
hentikan penggunaan peralatan segera, cabut
kabel penghubung, lepaskan baterai, dan
mintalah kepada pusat layanan resmi setempat
untuk memperbaiki.
Lampu berkedip secara bergantian
PERAKITAN
PERHATIAN: Selalu pastikan bahwa mesin
dimatikan dan kartrid baterai dilepas sebelum
melakukan pekerjaan apa pun pada mesin.
Memasang penahan baterai pada
back pack
►Gbr.9: 1. Gesper 2. Tempat baterai 3. Pengikat
1. Lewatkan kotak sakelar melalui pembukaannya
(baik kanan atau kiri) dari backpack.
2. Lewatkan gesper melalui lubang kotak dari
tempat baterai, dan kencangkan tempat baterai dengan
pengikat. Pastikan tempat baterai terpasang pada back
pack secara kuat.
Memasang sarung
►Gbr.10: 1. Sarung 2. Pengikat
Lewatkan sabuk pada gesper bagian bawah melalui
pembuka pada sarung.
Other manuals for DUP361
13
Table of contents
Languages:
Other Makita Power Tools manuals

Makita
Makita BFH040 User manual

Makita
Makita XWT18XV User manual

Makita
Makita AN451 User manual

Makita
Makita XRH12 User manual

Makita
Makita DSS610 User manual

Makita
Makita HM1801 User manual

Makita
Makita 5620D User manual

Makita
Makita BST220 User manual

Makita
Makita BJV140 Manual

Makita
Makita HR4001C User manual

Makita
Makita RP1111C User manual

Makita
Makita 4604D User manual

Makita
Makita DHK180 User manual

Makita
Makita XMT04 User manual

Makita
Makita HM1214C User manual

Makita
Makita 3612 User manual

Makita
Makita HM0871C User manual

Makita
Makita 3606 User manual

Makita
Makita BJS130 User manual

Makita
Makita DTW284 User manual