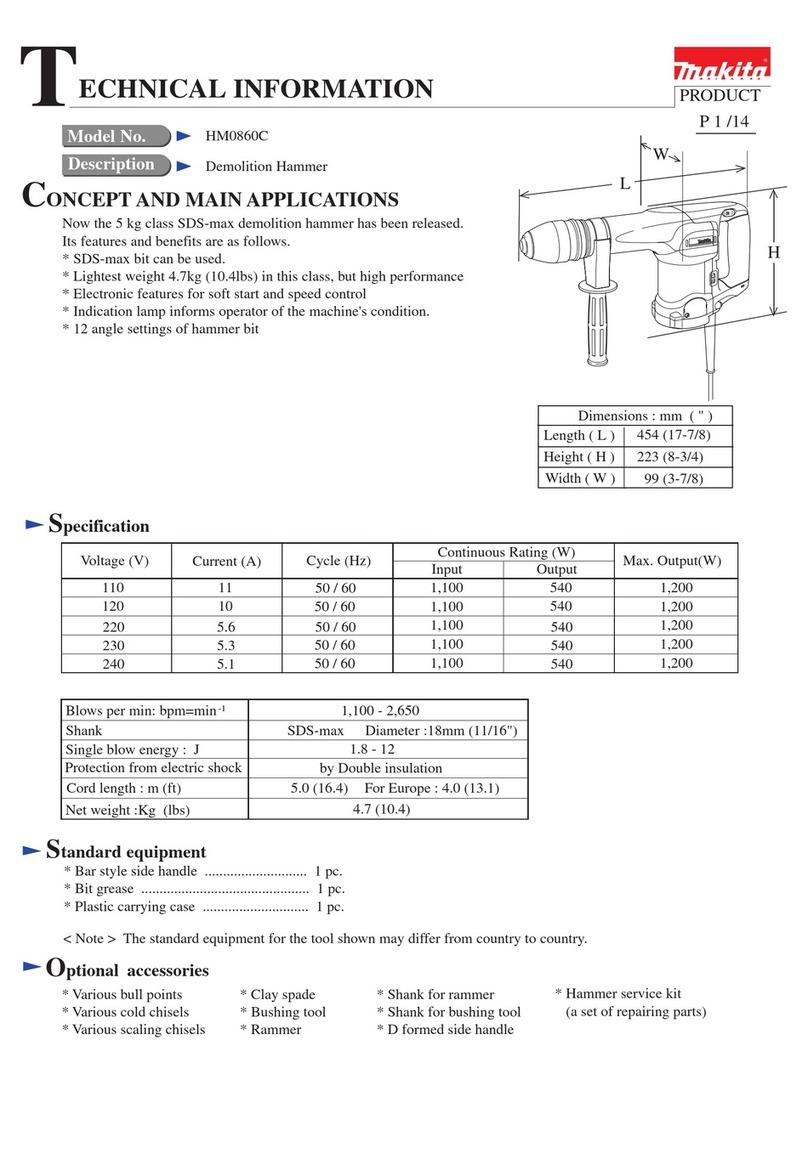
Makita DUX18 User manual

DUX18
EN Cordless Multi Function
Power Head INSTRUCTION MANUAL 6
SL Brezžična večfunkcijska
pogonska glava NAVODILA ZA UPORABO 16
SQ Kokë elektrike me shumë
funksione pa kordon MANUALI I PËRDORIMIT 26
BG
Многофункционална
задвижваща глава без кабел
РЪКОВОДСТВО ЗА
ЕКСПЛОАТАЦИЯ 37
HR Bežična višefunkcijska
električna glava PRIRUČNIK S UPUTAMA 49
МК
Безжична повеќефункционална
глава за напојување
УПАТСТВО ЗА УПОТРЕБА 59
SR Бежична вишенаменска
погонска глава УПУТСТВО ЗА УПОТРЕБУ 71
RO
Cap cu motor universal fără cablu
MANUAL DE INSTRUCŢIUNI 82
UK
Акумуляторний
багатофункціональний
приводний інструмент
ІНСТРУКЦІЯ З
ЕКСПЛУАТАЦІЇ 93
RU
Многофункциональный
Аккумуляторный Привод
Для Садовых Насадок
РУКОВОДСТВО ПО
ЭКСПЛУАТАЦИИ 105

Fig.1
Fig.2
12
1
2
3
4
5
11
10
9
8
Fig.3
2
1
8
3
4
7
10
5
6
8
9
Fig.4
2

2
1
3
Fig.5
1
Fig.6
1
2
Fig.7
1
2
Fig.8
2
1
Fig.9
1
2
Fig.10
3
2
1
1
5
4
Fig.11
1
2
Fig.12
3

1
Fig.13
1
2
3
Fig.14
1
Fig.15
Fig.12
3
1
2
Fig.16
1
2
Fig.17
Fig.18
1
2
Fig.19
Fig.20
4

1
Fig.21
1
2
Fig.22
1
Fig.23
5

6ENGLISH
ENGLISH (Original instructions)
SPECIFICATIONS
Model: DUX18
No load speed
(without attachment)
Low 0 - 6,800 min-1
High 0 - 9,700 min-1
Overall length 977 mm
Rated voltage D.C. 18 V
Net weight 4.0 kg - 10.3 kg
• Duetoourcontinuingprogramofresearchanddevelopment,thespecicationshereinaresubjecttochange
without notice.
• Specicationsmaydierfromcountrytocountry.
• Theweightmaydierdependingontheattachment(s),includingthebatterycartridge.Thelightestandheavi-
estcombination,accordingtoEPTA-Procedure01/2014,areshowninthetable.
Applicable battery cartridge and charger
Batterycartridge BL1820B/BL1830B/BL1840B/BL1850B/BL1860B
Charger DC18RC/DC18RD/DC18RE/DC18SD/DC18SE/DC18SF/
DC18SH
• Someofthebatterycartridgesandchargerslistedabovemaynotbeavailabledependingonyourregionof
residence.
WARNING: Only use the battery cartridges and chargers listed above.Useofanyotherbatterycartridges
andchargersmaycauseinjuryand/orre.
Recommended portable power pack
Portablepowerpack PDC01
• Theportablepowerpack(s)listedabovemaynotbeavailabledependingonyourregionofresidence.
• Beforeusingtheportablepowerpack,readinstructionandcautionarymarkingsontheportablepowerpack.
No load speed with attachment
Model Rotation speed
Low High
EM408MP,EM409MP 0-5,000min-1 0 - 7,000 min-1
EN401MP,EN410MP,EN420MP
(Strokes per minute)
0-2,800min-1 0 - 4,000 min-1
EY401MP(chainspeed) 0-14m/s 0-20m/s
KR400MP 0-200min-1 0-280min-1
KR401MP 0 - 160 min-1 0-230min-1
EE400MP 0 - 3,300 min-1 0 - 4,700 min-1
EJ400MP 0-2,000min-1 0-2,800min-1
BR400MP 0 - 160 min-1 0-230min-1
SW400MP 0 - 160 min-1 0-230min-1
UB400MP 0 - 6,100 min-1 0 - 6,700 min-1

7ENGLISH
Approved attachment
Type Model
Grass trimmer attachment EM408MP,EM409MP
Hedge trimmer attachment EN401MP,EN410MP
Ground trimmer attachment EN420MP
Polesawattachment EY401MP
Cultivator attachment KR400MP,KR401MP
Edgerattachment EE400MP
Coeeharvesterattachment EJ400MP
Shaft extension attachment LE400MP
Powerbrushattachment BR400MP
Powersweepattachment SW400MP
Blower attachment UB400MP
Symbols
Thefollowingsshowthesymbolswhichmaybeused
fortheequipment.Besurethatyouunderstandtheir
meaningbeforeuse.
Read instruction manual.
Take particular care and attention.
Do not expose to moisture.
Ni-MH
Li-ion
OnlyforEUcountries
Do not dispose of electric equipment or
batterypacktogetherwithhousehold
wastematerial!Inobservanceofthe
EuropeanDirectives,onWasteElectric
andElectronicEquipmentandBatteries
andAccumulatorsandWasteBatteriesand
Accumulatorsandtheirimplementation
in accordance with national laws, electric
equipmentandbatteriesandbattery
pack(s) that have reached the end of
theirlifemustbecollectedseparatelyand
returnedtoanenvironmentallycompatible
recyclingfacility.
Intended use
This cordless multi function power head is intended for
driving an approved attachment listed in the section
"SPECIFICATIONS"ofthisinstructionmanual.Never
use the unit for the other purpose.
WARNING: Read the instruction manual of
the attachment as well as this instruction manual
before using.Failuretofollowthewarningsand
instructionsmayresultseriousinjury.

8ENGLISH
Noise
Attachment
Sound pressure level average Sound power level average
Applicable
standard
LPA (dB (A))
Uncertainty K
(dB (A))
LWA (dB (A))
Uncertainty K
(dB (A))
EM408MP Metalblade 78.7 1.2 94.0 2.3
ISO22868
(ISO11806-1)
Nyloncuttinghead 77.7 1.7 91.7 1.2
ISO22868
(ISO11806-1)/
EN50636-2-91
Plasticblade 79.3 1.0 90.5 1.3
ISO22868
(ISO11806-1)/
EN50636-2-91
EM409MP Nyloncuttinghead 78.2 2.1 92.4 1.2
ISO22868
(ISO11806-1)/
EN50636-2-91
Plasticblade 79.8 0.8 91.0 2.0
ISO22868
(ISO11806-1)/
EN50636-2-91
EN401MP 83.0 394.0 3
EN62841-4-2
EN401MP+LE400MP 84.1 395.1 3
EN62841-4-2
EN410MP 80.6 391.6 3
EN62841-4-2
EN410MP+LE400MP 79.0 390.0 3
EN62841-4-2
EN420MP 82.1 393.1 3
EN62841-4-2
EY401MP 94.5 2.4 103.2 2.2
ISO22868
(ISO11680-1)
EY401MP+LE400MP 85.0 2.3 102.7 1.5
ISO22868
(ISO11680-1)
KR400MP 73.0 3.2 83.4 2.7 EN709
KR401MP 73.6 3.8 83.2 2.9 EN709
EE400MP 73.8 1.4 86.8 3.3 ISO11789/
2000/14/EC
EJ400MP 80.7 0.7 91.4 1.2
ISO22868
(ISO11806-1)
EJ400MP+LE400MP 78.1 0.9 91.3 0.6
ISO22868
(ISO11806-1)
BR400MP 76.0 1.3 86.8 1.2
EN60335-2-72
SW400MP 76.2 0.2 85.8 0.7
EN60335-2-72
UB400MP 85.3 1.7 99.5 1.2
EN50636-2-100
• Evenifthesoundpressurelevellistedaboveis80dB(A)orless,thelevelunderworkingmayexceed80dB
(A).Wearearprotection.
NOTE:Thedeclarednoiseemissionvalue(s)hasbeenmeasuredinaccordancewithastandardtestmethodand
maybeusedforcomparingonetoolwithanother.
NOTE:Thedeclarednoiseemissionvalue(s)mayalsobeusedinapreliminaryassessmentofexposure.
WARNING: Wear ear protection.
WARNING: The noise emission during actual use of the power tool can dier from the declared val-
ue(s) depending on the ways in which the tool is used especially what kind of workpiece is processed.
WARNING: Be sure to identify safety measures to protect the operator that are based on an estimation
of exposure in the actual conditions of use (taking account of all parts of the operating cycle such as the
times when the tool is switched o and when it is running idle in addition to the trigger time).

9ENGLISH
Vibration
Attachment Left handle (Front grip) Right handle (Rear grip) Applicable
standard
ah (m/s2)
Uncertainty K
(m/s2)
ah (m/s2)
Uncertainty K
(m/s2)
EM408MP Metalblade 2.5orless 1.5 2.5orless 1.5
ISO22867
(ISO11806-1)
Nyloncuttinghead 2.5orless 1.5 2.5orless 1.5
ISO22867
(ISO11806-1)
Plasticblade 2.5orless 1.5 2.5orless 1.5
ISO22867
(ISO11806-1)
EM409MP Nyloncuttinghead 2.5orless 1.5 2.5orless 1.5
ISO22867
(ISO11806-1)
Plasticblade 2.5orless 1.5 2.5orless 1.5
ISO22867
(ISO11806-1)
EN401MP 3.1 1.5 3.5 1.5
EN62841-4-2
EN401MP+LE400MP 5.5 1.5 3.8 1.5
EN62841-4-2
EN410MP 2.5orless 1.5 2.9 1.5
EN62841-4-2
EN410MP+LE400MP 4.3 1.5 3.7 1.5
EN62841-4-2
EN420MP 2.9 1.5 3.0 1.5
EN62841-4-2
EY401MP 2.5orless 1.5 2.5orless 1.5
ISO22867
(ISO11680-1)
EY401MP+LE400MP 3.1 1.5 2.5orless 1.5
ISO22867
(ISO11680-1)
KR400MP 2.5orless 1.5 2.5orless 1.5 EN709
KR401MP 2.5orless 1.5 2.5orless 1.5 EN709
EE400MP 2.5orless 1.5 2.5orless 1.5 ISO11789
EJ400MP 3.4 1.9 5.0 1.9
ISO22867
(ISO11806-1)
EJ400MP+LE400MP 4.6 1.5 3.2 1.5
ISO22867
(ISO11806-1)
BR400MP 2.5orless 1.5 2.5orless 1.5
EN60335-2-72
SW400MP 2.6 1.5 2.5orless 1.5
EN60335-2-72
UB400MP 4.2 2.2 2.8 1.2
EN50636-2-100
NOTE:Thedeclaredvibrationtotalvalue(s)hasbeenmeasuredinaccordancewithastandardtestmethodand
maybeusedforcomparingonetoolwithanother.
NOTE:Thedeclaredvibrationtotalvalue(s)mayalsobeusedinapreliminaryassessmentofexposure.
WARNING: The vibration emission during actual use of the power tool can dier from the declared
value(s) depending on the ways in which the tool is used especially what kind of workpiece is processed.
WARNING: Be sure to identify safety measures to protect the operator that are based on an estimation
of exposure in the actual conditions of use (taking account of all parts of the operating cycle such as the
times when the tool is switched o and when it is running idle in addition to the trigger time).
EC Declaration of Conformity
For European countries only
TheECdeclarationofconformityisincludedasAnnexA
to this instruction manual.

10 ENGLISH
SAFETY WARNINGS
General power tool safety warnings
WARNING: Read all safety warnings, instruc-
tions, illustrations and specications provided
with this power tool.Failuretofollowallinstructions
listedbelowmayresultinelectricshock,reand/or
seriousinjury.
Save all warnings and instruc-
tions for future reference.
Theterm"powertool"inthewarningsreferstoyour
mains-operated(corded)powertoolorbattery-operated
(cordless) power tool.
Additional safety instructions
1. Always keep your hands, face, and clothes
away from the cutting tool when it is rotating.
Failuretodosomaycausepersonalinjury.
2. During operation, keep bystanders or animals
at least 15 m away from the tool. Stop the tool
as soon as someone approaches.
3. During operation, never stand on an unstable
or slippery surface or a steep slope. During
the cold season, beware of ice and snow and
always ensure secure footing.
4. Never work on a ladder or tree to avoid loss of
control.
5. Before operation, examine the work area for
stones or other solid objects.Theycanbe
thrownorcausedangerouskickbackandresultin
seriousinjuryand/orpropertydamage.
6. When using cutting blades, avoid kickback
and always prepare for an accidental kickback.
See the section for Kickback.
7. When you leave the tool, even if it is a short
time, always remove the battery cartridge. The
unattendedtoolwiththebatterycartridgeinstalled
maybeusedbyunauthorizedpersonandcause
serious accident.
8. Before doing any maintenance or repair work
or cleaning the tool, always turn it o and
remove the battery cartridge.
9. Before storing the tool, perform full cleaning
and maintenance. Remove the battery car-
tridge. Attach the cover to the cutting blade.
10. Store the tool in a dry and high or locked loca-
tion out of reach of children.
11. When touching the cutting blade, wear protec-
tive gloves.Cuttingbladescancutbarehands
severely.
12. When handling a cutter blade, always wear
gloves and put the blade cover on the blade.
13. When not in use, attach the blade cover onto
the blade. Remove the cover before operation.
14. Before transporting the tool, turn it o and
remove the battery cartridge. Attach the cover
to the cutting blade.
15. Before starting the tool, be sure that the cut-
ting tool is not touching the ground and other
obstacles such as a tree.
16. The cutting tool has to be equipped with the
guard. Never run the tool with damaged guards
or without guards in place!
17. Check the cutting attachment frequently
during operation for cracks or damages.
Before the inspection, remove the battery
cartridge and wait until the cutting attachment
stops completely. Replace damaged cutting
attachment immediately, even if it has only
supercial cracks.
18. Do not operate the tool in bad weather or if
there is a risk of lightning.
19. Make sure there are no electrical cables, water
pipes, gas pipes etc. that could cause a hazard
if damaged by use of the tool.
20. During operation always hold the tool with
both hands. Never hold the tool with one hand
during use.
21. Keep handles dry, clean and free from oil and
grease. Keep all cooling air inlets clear of
debris.
22. During operation, use the shoulder harness.
Keep the tool on your right side rmly.
23. Do not touch the gear case during and imme-
diately after the operation. The gear case
becomeshotduringoperationandcancauseburn
injury.
24. Take a rest to prevent loss of control caused
by fatigue.Werecommendtakinga10to20-min-
uteresteveryhour.
25. Avoid dangerous environment. Don't use the
tool in dump or wet locations or expose it to
rain. Water entering the tool will increase the risk
of electric shock.
26. Do not dispose of the battery(ies) in a re.
Thecellmayexplode.Checkwithlocalcodesfor
possiblespecialdisposalinstructions.
27. Do not open or mutilate the battery(ies).
Releasedelectrolyteiscorrosiveandmaycause
damagetotheeyesorskin.Itmaybetoxicif
swallowed.
28. Do not charge battery in rain, or in wet
locations.
Personal protective equipment
►Fig.1
1. Wear safety helmet, protective goggles and
protective gloves to protect yourself from
ying debris or falling objects.
2. Wear ear protection such as ear mus to pre-
vent hearing loss.
3. Wear proper clothing and shoes for safe
operation, such as a work overall and sturdy,
non-slip shoes. Do not wear loose clothing or
jewelry.Looseclothes,jewelryorlonghaircanbe
caught in moving parts.
4. When touching the cutting blade, wear protec-
tive gloves.Cuttingbladescancutbarehands
severely.


11 ENGLISH
Kickback (Blade thrust)
1. Kickback (blade thrust) is a sudden reaction
to a caught or bound cutting blade. Once it
occurs, the tool is thrown sideway or toward
the operator at great force and it may cause
serious injury.
2. Kickback occurs particularly when applying
the blade segment between 12 and 2 o'clock
to solids, bushes and trees with 3 cm or larger
diameter.
►Fig.2
3. To avoid kickback:
1. Apply the segment between 8 and 11
o'clock.
2. Never apply the segment between 12 and
2 o'clock.
3. Never apply the segment between 11 and
12 o'clock and between 2 and 5 o'clock,
unless the operator is well trained and
experienced and does it at his/her own
risk.
4. Never use cutting blades close to solids,
such as fences, walls, tree trunks and
stones.
5. Never use cutting blades vertically, for
such operations as edging and trimming
hedges.
►Fig.3
Vibration
1. People with poor circulation who are exposed
to excessive vibration may experience injury
to blood vessels or the nervous system.
Vibrationmaycausethefollowingsymptoms
tooccurinthengers,handsorwrists:"Falling
asleep"(numbness),tingling,pain,stabbingsen-
sation,alterationofskincolororoftheskin.Ifany
ofthesesymptomsoccur,seeaphysician!
2. To reduce the risk of "white nger disease",
keep your hands warm during operation and
well maintain the tool and accessories.
Important safety instructions for
battery cartridge
1. Before using battery cartridge, read all instruc-
tions and cautionary markings on (1) battery
charger, (2) battery, and (3) product using
battery.
2. Do not disassemble or tamper with the battery
cartridge.Itmayresultinare,excessiveheat,
or explosion.
3. If operating time has become excessively
shorter, stop operating immediately. It may
result in a risk of overheating, possible burns
and even an explosion.
4. If electrolyte gets into your eyes, rinse them
out with clear water and seek medical atten-
tion right away. It may result in loss of your
eyesight.
5. Do not short the battery cartridge:
(1) Do not touch the terminals with any con-
ductive material.
(2) Avoid storing battery cartridge in a con-
tainer with other metal objects such as
nails, coins, etc.
(3) Do not expose battery cartridge to water
or rain.
A battery short can cause a large current
ow, overheating, possible burns and even a
breakdown.
6. Do not store and use the tool and battery car-
tridge in locations where the temperature may
reach or exceed 50 °C (122 °F).
7. Do not incinerate the battery cartridge even if
it is severely damaged or is completely worn
out. The battery cartridge can explode in a re.
8. Do not nail, cut, crush, throw, drop the battery
cartridge, or hit against a hard object to the
battery cartridge.Suchconductmayresultina
re,excessiveheat,orexplosion.
9. Do not use a damaged battery.
10.
The contained lithium-ion batteries are subject to
the Dangerous Goods Legislation requirements.
Forcommercialtransportse.g.bythirdparties,
forwarding agents, special requirement on pack-
agingandlabelingmustbeobserved.
Forpreparationoftheitembeingshipped,consultingan
expertforhazardousmaterialisrequired.Pleasealso
observepossiblymoredetailednationalregulations.
Tapeormaskoopencontactsandpackupthe
batteryinsuchamannerthatitcannotmove
around in the packaging.
11. When disposing the battery cartridge, remove
it from the tool and dispose of it in a safe
place. Follow your local regulations relating to
disposal of battery.
12. Use the batteries only with the products
specied by Makita.Installingthebatteriesto
non-compliantproductsmayresultinare,exces-
siveheat,explosion,orleakofelectrolyte.
13. If the tool is not used for a long period of time,
the battery must be removed from the tool.
14. During and after use, the battery cartridge may
take on heat which can cause burns or low
temperature burns. Pay attention to the han-
dling of hot battery cartridges.
15.
Do not touch the terminal of the tool immediately
after use as it may get hot enough to cause burns.
16. Do not allow chips, dust, or soil stuck into the
terminals, holes, and grooves of the battery
cartridge.Itmayresultinpoorperformanceor
breakdownofthetoolorbatterycartridge.
17. Unless the tool supports the use near
high-voltage electrical power lines, do not use
the battery cartridge near high-voltage electri-
cal power lines.Itmayresultinamalfunctionor
breakdownofthetoolorbatterycartridge.
18. Keep the battery away from children.
SAVE THESE INSTRUCTIONS.
CAUTION: Only use genuine Makita batteries.
Useofnon-genuineMakitabatteries,orbatteriesthat
havebeenaltered,mayresultinthebatterybursting
causingres,personalinjuryanddamage.Itwill
alsovoidtheMakitawarrantyfortheMakitatooland
charger.

12 ENGLISH
Tips for maintaining maximum
battery life
1.
Charge the battery cartridge before completely dis-
charged. Always stop tool operation and charge the
battery cartridge when you notice less tool power.
2. Never recharge a fully charged battery car-
tridge. Overcharging shortens the battery
service life.
3. Charge the battery cartridge with room tem-
perature at 10 °C - 40 °C (50 °F - 104 °F). Let
a hot battery cartridge cool down before
charging it.
4. When not using the battery cartridge, remove
it from the tool or the charger.
5. Charge the battery cartridge if you do not use
it for a long period (more than six months).
PARTS DESCRIPTION
►Fig.4
1Batterycartridge 2Lock-olever 3Switch trigger 4Hanger
5Handle 6Releasebutton 7Barrier 8Indicator lamps
9Mainpowerbutton 10 Shoulder harness ----
FUNCTIONAL
DESCRIPTION
WARNING: Always be sure that the tool is
switched o and the battery cartridge is removed
before adjusting or checking function on the tool.
Failuretoswitchoandremovethebatterycartridge
mayresultinseriouspersonalinjuryfromaccidental
start-up.
Installing or removing battery
cartridge
CAUTION: Always switch o the tool before
installing or removing of the battery cartridge.
CAUTION: Hold the tool and the battery car-
tridge rmly when installing or removing battery
cartridge.Failuretoholdthetoolandthebattery
cartridgermlymaycausethemtoslipoyourhands
andresultindamagetothetoolandbatterycartridge
andapersonalinjury.
►Fig.5: 1. Red indicator 2. Button 3.Batterycartridge
Toremovethebatterycartridge,slideitfromthetool
whileslidingthebuttononthefrontofthecartridge.
Toinstallthebatterycartridge,alignthetongueonthe
batterycartridgewiththegrooveinthehousingandslip
itintoplace.Insertitallthewayuntilitlocksinplace
withalittleclick.Ifyoucanseetheredindicatoronthe
uppersideofthebutton,itisnotlockedcompletely.
CAUTION: Always install the battery cartridge
fully until the red indicator cannot be seen. If not,
itmayaccidentallyfalloutofthetool,causinginjuryto
youorsomeonearoundyou.
CAUTION: Do not install the battery cartridge
forcibly.Ifthecartridgedoesnotslideineasily,itis
notbeinginsertedcorrectly.
Tool / battery protection system
Thetoolisequippedwithatool/batteryprotectionsystem.
Thissystemautomaticallycutsopowertothemotorto
extendtoolandbatterylife.Thetoolwillautomatically
stop during operation and the indicator lamps light up if
thetoolisplacedunderoneofthefollowingconditions:
►Fig.6: 1. Indicator lamps
Indicator lamps Protection
status
Color
Lighted O Blinking
Green Overload
Red Overheat
Red Over-
discharge
Overload protection
Ifthetoolorbatterygetsintooneofthefollowingsitua-
tion,thetoolautomaticallystopsandtheindicatorlamp
startsblinkingingreen:
— Thetoolorbatteryisoverloadedbyentangled
weedsorotherdebris.
— The tool is locked.
— Themainpowerbuttonisturnedonwhilethe
switchtriggerisbeingpulled.
In this situation, release the switch trigger and remove
thecauseofoverloadifnecessary.Afterthat,pullthe
switch trigger again to resume.
CAUTION: Before you remove the cause of
overload, be sure to turn the tool o.

13 ENGLISH
Overheat protection for tool or battery
Whenthetoolorbatterycartridgeisoverheated,thetoolstops
automaticallyandtheindicatorlamplightsupinred.Letthe
tooland/orbatterycooldownbeforeturningthetoolonagain.
Overdischarge protection
Whenthebatterycapacitybecomeslow,thetoolstops
automatically.Theindicatorlampstartsblinkinginred.
If the tool does not operate even when the switches are oper-
ated,removethebatterycartridgefromthetoolandchargeit.
Indicating the remaining battery capacity
Only for battery cartridges with the indicator
►Fig.7: 1. Indicator lamps 2.Checkbutton
Pressthecheckbuttononthebatterycartridgetoindi-
catetheremainingbatterycapacity.Theindicatorlamps
light up for a few seconds.
Indicator lamps Remaining
capacity
Lighted O Blinking
75%to100%
50%to75%
25%to50%
0%to25%
Charge the
battery.
Thebattery
mayhave
malfunctioned.
NOTE: Depending on the conditions of use and the
ambienttemperature,theindicationmaydierslightly
fromtheactualcapacity.
NOTE:Therst(farleft)indicatorlampwillblinkwhen
thebatteryprotectionsystemworks.
Main power switch
WARNING: Always turn o the main power
switch when not in use.
Pressthemainpowerbuttontoturnonthetool.Toturnothetool,
pressandholdthemainpowerbuttonuntiltheindicatorlampsgoo.
►Fig.8: 1. Indicator lamps 2.Mainpowerbutton
NOTE:Theindicatorlampbrinksiftheswitchtrigger
ispulledunderunoperatableconditions.Thelamp
blinksifyouturnonthemainpowerswitchwhilehold-
ingdownthelock-oleverandtheswitchtrigger.
NOTE:
Thistoolemploystheautopower-ofunction.To
avoid unintentional start up, the main power switch will auto-
maticallyshutdownwhentheswitchtriggerisnotpulledfor
a certain period after the main power switch is turned on.
Switch action
WARNING: For your safety, this tool is
equipped with lock-o lever which prevents the
tool from unintended starting. NEVER use the tool
if it runs when you simply pull the switch trigger
without pressing the lock-o lever. Return the
tool to our authorized service center for proper
repairs BEFORE further usage.
WARNING: NEVER tape down or defeat pur-
pose and function of lock-o lever.
CAUTION: Before installing the battery car-
tridge into the tool, always check to see that the
switch trigger actuates properly and returns to
the "OFF" position when released.
CAUTION: Never put your nger on the main
power button and switch trigger when carrying
the tool.Thetoolmaystartunintentionallyandcause
injury.
NOTICE: Do not pull the switch trigger hard with-
out pressing the lock-o lever. This can cause
switch breakage.
Topreventtheswitchtriggerfrombeingaccidentally
pulled,alock-oleverisprovided.
►Fig.9: 1.Lock-olever2. Switch trigger
To start the tool, turn on the main power switch and
graspthehandle(thelock-oleverisreleasedbythe
grasp) and then pull the switch trigger. Tool speed is
increasedbyincreasingthepressureontheswitch
trigger. To stop the tool, release the switch trigger.
Speed adjusting
Youcanselectthetoolspeedbytappingthemain
powerbutton.Eachtimeyoutapthemainpowerbutton,
the level of speed will change.
►Fig.10: 1. Indicator lamps 2.Mainpowerbutton
Indicator lamps Mode
High
Low
Electronic torque control function
Thetoolelectronicallydetectsasuddendropinthe
rotationspeedwhichmaycauseakickback.Inthis
situation,thetoolautomaticallystopstopreventfurther
rotation of cutting tool. To restart the tool, release the
switch trigger. Clear the cause of sudden drop in the
rotation speed and then turn the tool on.
NOTE: This function is not a preventive measure for
kickbacks.

14 ENGLISH
ASSEMBLY
WARNING: Always be sure that the tool is
switched o and battery cartridge is removed
before carrying out any work on the tool.Failureto
switchoandremovethebatterycartridgemayresult
inseriouspersonalinjuryfromaccidentalstart-up.
WARNING: Never start the tool unless it is
completely assembled. Operation of the tool in a
partiallyassembledstatemayresultinseriousper-
sonalinjuryfromaccidentalstart-up.
Mounting the handle
Attachthehandlewithsuppliedclampsandbolts.Make
surethatthehandleislocatedbetweenthespacerand
the arrow mark. Do not remove or shrink the spacer.
►Fig.11: 1. Clamp 2.Hexsocketbolt3. Handle
4.Arrowmark5. Spacer
Whenusingthefollowingattachments,besuretoattach
thebarriertothehandleusingthescrewonthebarrier.
• Grass trimmer attachment *
• Edgerattachment
*.Onlywhenmetalbladeisattached.
►Fig.12: 1. Barrier 2. Screw
Mounting the attachment pipe
CAUTION: Always check that the attachment
pipe is secured after installation. Improper instal-
lationmaycausetheattachmentfallingofromthe
powerunitandcausepersonalinjury.
Mounttheattachmentpipetothepowerunit.
1. Turn the lever of the power unit toward the attach-
ment side.
►Fig.13: 1. Lever
2. Removethecapoftheattachment.Alignthepin
with the arrow mark and insert the attachment pipe until
thereleasebuttonpopsup.
►Fig.14: 1.Releasebutton2.Arrowmark3.Pin
3. Turn the lever toward the power unit side.
►Fig.15: 1. Lever
Makesurethatthesurfaceoftheleverisparalleltothe
pipe.
To remove the pipe, turn the lever toward the attach-
ment side and pull the pipe out while pressing down the
releasebutton.
►Fig.16: 1.Releasebutton2. Lever 3.Pipe
Adjusting the handle position
Adjustthehandlepositiontoobtaincomfortablehan-
dling of the tool.
Loosenthehexsocketheadboltonthehandle.Move
thehandletoacomfortableworkingpositionandthen
tightenthebolt.
►Fig.17: 1. Handle 2.Hexsocketheadbolt
Attaching the shoulder harness
WARNING: Be extremely careful to maintain
control of the tool at all times. Do not allow the
tool to be deected toward you or anyone in the
work vicinity.Failuretokeepcontrolofthetool
couldresultinseriousinjurytothebystanderandthe
operator.
CAUTION: When you use the tool in combi-
nation of the backpack-type power supply such
as portable power pack, do not use the shoulder
harness included in the tool package, but use the
hanging band recommended by Makita.
Ifyouputontheshoulderharnessincludedinthe
toolpackageandtheshoulderharnessoftheback-
pack-typepowersupplyatthesametime,removing
thetoolorbackpack-typepowersupplyisdicultin
caseofanemergency,anditmaycauseanaccident
orinjury.Fortherecommendedhangingband,ask
MakitaAuthorizedServiceCenters.
CAUTION: Always use the shoulder harness
attached to the tool. Before operation, adjust the
shoulder harness according to the user size to
prevent fatigue.
CAUTION: Before operation, make sure that
the shoulder harness is properly attached to the
hanger on the tool.
1. Weartheshoulderharnessonyourleftshoulder.
►Fig.18
2. Clasp the hook on the shoulder strap to tool's
hanger.
►Fig.19: 1. Hanger 2. Hook
3. Adjusttheshoulderharnesstoacomfortable
working position.
►Fig.20
The shoulder harness features a means of quick
release.
Simplysqueezethesidesofthebuckletoreleasethe
tool from the shoulder harness.
►Fig.21: 1. Buckle
Hex wrench storage
CAUTION: Be careful not to leave the hex
wrench inserted in the tool head. Itmaycause
injuryand/ordamagetothetool.
When not in use, store the hex wrench as illustrated to
keepitfrombeinglost.
►Fig.22: 1. Handle 2. Hex wrench

15 ENGLISH
MAINTENANCE
WARNING: Always be sure that the tool is
switched o and battery cartridge is removed
before attempting to perform inspection or main-
tenance on the tool.Failuretoswitchoandremove
thebatterycartridgemayresultinseriouspersonal
injuryfromaccidentalstart-up.
NOTICE: Never use gasoline, benzine, thinner,
alcohol or the like. Discoloration, deformation or
cracks may result.
TomaintainproductSAFETYandRELIABILITY,
repairs,anyothermaintenanceoradjustmentshould
beperformedbyMakitaAuthorizedorFactoryService
Centers,alwaysusingMakitareplacementparts.
Cleaning the tool
Cleanthetoolbywipingodust,dirt,orcutograss
withadryclothoronedippedinsoapywaterandwrung
out.Toavoidoverheatingofthetool,besuretoremove
thecutograssordebrisadheredtotheventofthe
tool.
Battery guard
WARNING: Do not remove the battery
guard. Do not use the tool with the battery guard
removed or damaged.Directimpacttothebattery
cartridgemaycausebatterymalfunctionandresult
ininjuryand/orre.Ifthebatteryguardisdeformed
ordamaged,contactyourauthorizedservicecenter
for repairs.
►Fig.23: 1.Batteryguard
TROUBLESHOOTING
Beforeaskingforrepairs,conductyourowninspectionrst.Ifyoundaproblemthatisnotexplainedinthemanual,
donotattempttodismantlethetool.Instead,askMakitaAuthorizedServiceCenters,alwaysusingMakitareplace-
ment parts for repairs.
State of abnormality Probable cause (malfunction) Remedy
Motordoesnotrun. Batterycartridgeisnotinstalled. Installthebatterycartridge.
Batteryproblem(undervoltage) Rechargethebattery.Ifrechargingisnoteective,
replacebattery.
Thedrivesystemdoesnotwork
correctly.
Askyourlocalauthorizedservicecenterforrepair.
Motorstopsrunningafteralittleuse. Battery'schargelevelislow. Rechargethebattery.Ifrechargingisnoteective,
replacebattery.
Overheating. Stop using of tool to allow it to cool down.
ItdoesnotreachmaximumRPM. Batteryisinstalledimproperly. Installthebatterycartridgeasdescribedinthis
manual.
Batterypowerisdropping. Rechargethebattery.Ifrechargingisnoteective,
replacebattery.
Thedrivesystemdoesnotwork
correctly.
Askyourlocalauthorizedservicecenterforrepair.
OPTIONAL
ACCESSORIES
CAUTION: These accessories or attachments
are recommended for use with your Makita tool
specied in this manual.Theuseofanyother
accessories or attachments might present a risk of
injurytopersons.Onlyuseaccessoryorattachment
for its stated purpose.
Ifyouneedanyassistanceformoredetailsregard-
ingtheseaccessories,askyourlocalMakitaService
Center.
Referto"Approvedattachment"sectionfortheapplica-
blemodelsforthistool.
• Grass trimmer attachment
• Hedge trimmer attachment
• Ground trimmer attachment
• Polesawattachment
• Cultivator attachment
• Edgerattachment
• Coeeharvesterattachment
• Shaft extension attachment
• Powerbrushattachment
• Powersweepattachment
• Blower attachment
• Makitagenuinebatteryandcharger
NOTE:Someitemsinthelistmaybeincludedinthe
toolpackageasstandardaccessories.Theymay
dierfromcountrytocountry.

16 SLOVENŠČINA
SLOVENŠČINA (Originalna navodila)
TEHNIČNI PODATKI
Model: DUX18
Hitrostbrezobremenitve
(brezpriključka)
Počasi 0 – 6.800 min-1
Hitro 0 – 9.700 min-1
Celotnadolžina 977 mm
Nazivnanapetost D.C. 18 V
Netoteža 4,0 kg – 10,3 kg
• Kernenehnoopravljamoraziskaveinrazvijamosvojeizdelke,selahkotehničnipodatkivtemdokumentu
spremenijobrezobvestila.
• Tehničnipodatkiselahkorazlikujejooddržavedodržave.
• Težaselahkorazlikujegledenapriključke,vključnozakumulatorskobaterijo.Najlažjainnajtežjakombinacijav
skladuspostopkomEPTA01/2014staprikazanivpreglednici.
Uporabna akumulatorska baterija in polnilnik
Baterijskivložek BL1820B/BL1830B/BL1840B/BL1850B/BL1860B
Polnilnik DC18RC/DC18RD/DC18RE/DC18SD/DC18SE/DC18SF/
DC18SH
• Nekaterezgorajnavedeneakumulatorskebaterijeinpolnilnikimordavvašidržaviprebivališčanisonavoljo.
OPOZORILO: Uporabljajte le zgoraj navedene akumulatorske baterije in polnilnike.Uporabadrugih
akumulatorskihbaterijinpolnilnikovlahkopovzročitelesnepoškodbein/alipožar.
Priporočena prenosna polnilna enota
Prenosnapolnilnaenota PDC01
• Nekaterezgorajnavedeneprenosnepolnilneenotemordavvašidržaviprebivališčanisonavoljo.
• Preduporaboprenosnepolnilneenotepreberitenavodilainopozorilneznakenaprenosnipolnilnienoti.
Hitrost brez obremenitve s priključkom
Model Hitrost vrtenja
Počasi Hitro
EM408MP,EM409MP 0–5.000min-1 0 – 7.000 min-1
EN401MP,EN410MP,EN420MP
(Hodi na minuto)
0–2.800min-1 0 – 4.000 min-1
EY401MP(hitrostverige) 0–14m/s 0–20m/s
KR400MP 0–200min-1 0–280min-1
KR401MP 0 – 160 min-1 0–230min-1
EE400MP 0 – 3.300 min-1 0 – 4.700 min-1
EJ400MP 0–2.000min-1 0–2.800min-1
BR400MP 0 – 160 min-1 0–230min-1
SW400MP 0 – 160 min-1 0–230min-1
UB400MP 0 – 6.100 min-1 0 – 6.700 min-1

17 SLOVENŠČINA
Odobreni priključki
Vrsta Model
Priključekkosilniceznitjo EM408MP,EM409MP
Priključekškarijzaživomejo EN401MP,EN410MP
Priključekzatalnirezalnik EN420MP
Priključekteleskopskežage EY401MP
Priključekkultivatorja KR400MP,KR401MP
Priključekrezalnikazarobove EE400MP
Priključekobiralnikakave EJ400MP
Priključekpodaljškadroga LE400MP
Električnipriključekzakrtačenje BR400MP
Električnipriključekzapometanje SW400MP
Nastavekzapihanje UB400MP
Simboli
Naslednjisimboliselahkouporabljajovpovezavis
strojem.Preduporaboizdelkaseobveznoseznanitez
njihovimpomenom.
Preberitenavodilazauporabo.
Potrebnajeposebnapozornostin
previdnost.
Neizpostavljajtevlagi.
Ni-MH
Li-ion
SamozadržaveEU
Električnegaorodjainakumulatorskebate-
rijeneodlagajteskupajzgospodinjskimi
odpadki!Vskladuzevropskimidirektivami
oodpadnielektričniinelektronskiopremi,
baterijahinakumulatorjih,odpadnihbate-
rijahinakumulatorjihterupoštevanjem
njihovihdoločilvskladuzdržavnozako-
nodajojetrebaelektričnoopremo,baterije
inakumulatorje,katerihživljenjskadoba
jepretekla,zbiratiločenoinjihdostaviti
vustrezenobratzarecikliranje,kideluje
skladnozokoljevarstvenimizahtevami.
Predvidena uporaba
Tabrezžičnavečfunkcijskapogonskaglavajename-
njenazaodobrenepriključke,navedenevrazdelku
„TEHNIČNIPODATKI“tehnavodilzauporabo.Enote
nikolineuporabljajtezadrugenamene.
OPOZORILO: Pred uporabo preberite
navodila za uporabo priključka in ta navodila za
uporabo.Neupoštevanjeopozorilinnavodillahko
privededohudihtelesnihpoškodb.

18 SLOVENŠČINA
Hrup
Priključek Povprečna raven zvoč-
nega tlaka Povprečna raven zvočne
moči Veljavni
standard
LPA (dB (A))
Odstopanje K
(dB (A))
LWA (dB (A))
Odstopanje K
(dB (A))
EM408MP Kovinskorezilo 78,7 1,2 94,0 2,3
ISO22868
(ISO11806-1)
Najlonskarezalnaglava 77,7 1,7 91,7 1,2
ISO22868
(ISO11806-1)/
EN50636-2-91
Plastičnorezilo 79,3 1,0 90,5 1,3
ISO22868
(ISO11806-1)/
EN50636-2-91
EM409MP Najlonskarezalnaglava 78,2 2,1 92,4 1,2
ISO22868
(ISO11806-1)/
EN50636-2-91
Plastičnorezilo 79,8 0,8 91,0 2,0
ISO22868
(ISO11806-1)/
EN50636-2-91
EN401MP 83,0 394,0 3
EN62841-4-2
EN401MP+LE400MP 84,1 395,1 3
EN62841-4-2
EN410MP 80,6 391,6 3
EN62841-4-2
EN410MP+LE400MP 79,0 390,0 3
EN62841-4-2
EN420MP 82,1 393,1 3
EN62841-4-2
EY401MP 94,5 2,4 103,2 2,2
ISO22868
(ISO11680-1)
EY401MP+LE400MP 85,0 2,3 102,7 1,5
ISO22868
(ISO11680-1)
KR400MP 73,0 3,2 83,4 2,7 EN709
KR401MP 73,6 3,8 83,2 2,9 EN709
EE400MP 73,8 1,4 86,8 3,3 ISO11789/
2000/14/EC
EJ400MP 80,7 0,7 91,4 1,2
ISO22868
(ISO11806-1)
EJ400MP+LE400MP 78,1 0,9 91,3 0,6
ISO22868
(ISO11806-1)
BR400MP 76,0 1,3 86,8 1,2
EN60335-2-72
SW400MP 76,2 0,2 85,8 0,7
EN60335-2-72
UB400MP 85,3 1,7 99,5 1,2
EN50636-2-100
• Tudičejezgorajnavedenaravenzvočnegatlaka80dB(A)alimanj,lahkomeddelovanjempreseže80dB(A).
Uporabljajtezaščitozasluh.
OPOMBA:Navedenevrednostioddajanjahrupasobileizmerjenevskladusstandardnimimetodamitestiranjain
selahkouporabljajozaprimerjavoorodij.
OPOMBA:Navedenevrednostioddajanjahrupaselahkouporabljajotudipripredhodnioceniizpostavljenosti.
OPOZORILO: Uporabljajte zaščito za sluh.
OPOZORILO: Oddajanje hrupa med dejansko uporabo električnega orodja se lahko razlikuje od nave-
denih vrednosti, odvisno od načina uporabe orodja in predvsem vrste obdelovanca.
OPOZORILO: Upravljavec mora za lastno zaščito poznati varnostne ukrepe, ki temeljijo na oceni izpo-
stavljenosti v dejanskih pogojih uporabe (poleg časa proženja je treba upoštevati celoten delovni cikel,
vključno s časom, ko je orodje izklopljeno, in časom, ko deluje v prostem teku).

19 SLOVENŠČINA
Vibracije
Priključek
Levi ročaj (sprednje držalo) Desni ročaj (zadnje držalo)
Veljavni
standard
ah (m/s2)
Odstopanje K
(m/s2)
ah (m/s2)
Odstopanje K
(m/s2)
EM408MP Kovinskorezilo 2,5alimanj 1,5 2,5alimanj 1,5
ISO22867
(ISO11806-1)
Najlonskarezalnaglava 2,5alimanj 1,5 2,5alimanj 1,5
ISO22867
(ISO11806-1)
Plastičnorezilo 2,5alimanj 1,5 2,5alimanj 1,5
ISO22867
(ISO11806-1)
EM409MP Najlonskarezalnaglava 2,5alimanj 1,5 2,5alimanj 1,5
ISO22867
(ISO11806-1)
Plastičnorezilo 2,5alimanj 1,5 2,5alimanj 1,5
ISO22867
(ISO11806-1)
EN401MP 3,1 1,5 3,5 1,5
EN62841-4-2
EN401MP+LE400MP 5,5 1,5 3,8 1,5
EN62841-4-2
EN410MP 2,5alimanj 1,5 2,9 1,5
EN62841-4-2
EN410MP+LE400MP 4,3 1,5 3,7 1,5
EN62841-4-2
EN420MP 2,9 1,5 3,0 1,5
EN62841-4-2
EY401MP 2,5alimanj 1,5 2,5alimanj 1,5
ISO22867
(ISO11680-1)
EY401MP+LE400MP 3,1 1,5 2,5alimanj 1,5
ISO22867
(ISO11680-1)
KR400MP 2,5alimanj 1,5 2,5alimanj 1,5 EN709
KR401MP 2,5alimanj 1,5 2,5alimanj 1,5 EN709
EE400MP 2,5alimanj 1,5 2,5alimanj 1,5 ISO11789
EJ400MP 3,4 1,9 5,0 1,9
ISO22867
(ISO11806-1)
EJ400MP+LE400MP 4,6 1,5 3,2 1,5
ISO22867
(ISO11806-1)
BR400MP 2,5alimanj 1,5 2,5alimanj 1,5
EN60335-2-72
SW400MP 2,6 1,5 2,5alimanj 1,5
EN60335-2-72
UB400MP 4,2 2,2 2,8 1,2
EN50636-2-100
OPOMBA:Navedeneskupnevrednostioddajanjavibracijsobileizmerjenevskladusstandardnimimetodami
testiranjainselahkouporabljajozaprimerjavoorodij.
OPOMBA:Navedeneskupnevrednostioddajanjavibracijselahkouporabljajotudipripredhodnioceni
izpostavljenosti.
OPOZORILO: Oddajanje vibracij med dejansko uporabo električnega orodja se lahko razlikuje od
navedenih vrednosti, odvisno od načina uporabe orodja in predvsem vrste obdelovanca.
OPOZORILO: Upravljavec mora za lastno zaščito poznati varnostne ukrepe, ki temeljijo na oceni izpo-
stavljenosti v dejanskih pogojih uporabe (poleg časa proženja je treba upoštevati celoten delovni cikel,
vključno s časom, ko je orodje izklopljeno, in časom, ko deluje v prostem teku).
Izjava o skladnosti ES
Samo za evropske države
IzjavaESoskladnostijevključenavdodatkuA,kije
priložentemnavodilomzauporabo.

20 SLOVENŠČINA
VARNOSTNA
OPOZORILA
Splošna varnostna opozorila za
električno orodje
OPOZORILO: Preberite vsa varnostna opo-
zorila in navodila s slikami in tehničnimi podatki,
ki so dobavljeni skupaj z električnim orodjem.
Obneupoštevanjuspodajnavedenihnavodilobstaja
nevarnostelektričnegaudara,požarain/alihudih
telesnihpoškodb.
Shranite vsa opozorila in navo-
dila za poznejšo uporabo.
Izraz„električnoorodje“vopozorilihsenanašanavaše
električnoorodje(skablom)alibaterijskoelektrično
orodje(brezkabla).
Dodatna varnostna navodila
1. Vrtečemu se rezalnemu orodju ne približujte
rok, obraza ali oblačil. V nasprotnem primeru
lahkopridedotelesnihpoškodb.
2. Med uporabo naj bodo prisotne osebe ali živali
vsaj 15 m oddaljeni od orodja. Če se kdo prib-
liža, takoj ustavite orodje.
3. Med delom nikoli ne stojte na nestabilni ali
drseči podlagi oziroma strmini. V hladnem
obdobju bodite pozorni na led in sneg ter
vedno zagotovite dobro stabilnost.
4. Da preprečite izgubo nadzora nad opremo, ne
delajte na lestvi ali drevesu.
5. Pred uporabo poglejte, ali se na delovnem
območju nahajajo kamni ali drugi trdi pred-
meti.Medkošnjojihlahkonamrečvrževzrak,
lahkopapovzročijotudinevarenpovratniudarec,
zaradikateregalahkopridedohudihtelesnih
poškodbin/alimaterialneškode.
6. Ko uporabljate rezila kose, se poskušajte izo-
gniti povratnemu udarcu, vendar bodite vedno
pripravljeni na nenadni povratni udarec. Glejte
razdelek „Povratni udarec“.
7. Kadar se oddaljite od orodja, tudi če le za
kratek čas, vedno odstranite akumulatorsko
baterijo.Nenadzorovanoorodjeznameščeno
akumulatorskobaterijolahkouporabinepooblaš-
čenaosebainpovzročihudonesrečo.
8. Pred izvedbo kakršnega koli vzdrževanja ali
popravila ali pred čiščenjem orodje vedno
izklopite in odstranite akumulatorsko baterijo.
9. Pred shranjevanjem orodja izvedite celoten
postopek čiščenja in vzdrževanja. Odstranite
akumulatorsko baterijo. Pritrdite pokrov na
rezilo kose.
10. Orodje shranjujte v suhem in dobro prezra-
čenem prostoru na visokem ali zaklenjenem
mestu zunaj dosega otrok.
11. Kadar se dotikate rezila kose, uporabljajte
zaščitne rokavice.Rezilakoselahkohudopore-
žejogoledlani.
12. Pri ravnanju z rezilom kose vedno uporabljajte
rokavice in na rezilo namestite pokrov.
13. Kadar rezila ne uporabljate, nanj namestite
pokrov. Pred začetkom uporabe odstranite
pokrov.
14. Pred prenašanjem vedno izklopite orodje in
odstranite akumulatorsko baterijo. Pritrdite
pokrov na rezilo kose.
15. Rezalno orodje vklopite šele, ko se prepričate,
da se ne dotika tal in drugih ovir (na primer
drevesa).
16. Rezalno orodje mora biti opremljeno s ščitni-
kom. Nikoli ne uporabljajte orodja s poškodo-
vanimi ščitniki ali brez nameščenih ščitnikov!
17. Med delom večkrat preverite, da rezalni
nastavek ni počen ali poškodovan. Pred pre-
gledom odstranite akumulatorsko baterijo in
počakajte, da se rezalni nastavek popolnoma
ustavi. Takoj zamenjajte poškodovan rezalni
nastavek, tudi če so razpoke le površinske.
18. Ne uporabljajte orodja v slabem vremenu ali
kadar obstaja nevarnost udara strele.
19. Prepričajte se, da v bližini ni električnih kablov,
vodovodnih cevi, plinskih cevi in drugih ele-
mentov, ki bi predstavljali nevarnost, če bi jih
poškodovali z orodjem.
20. Med uporabo orodje vedno držite z obema
rokama. Orodja med uporabo nikoli ne držite z
eno roko.
21. Ročaji morajo biti suhi, čisti ter brez olja in
masti. Poskrbite, da se na dovodih hladilnega
zraka ne bo zadrževala umazanija.
22. Med delom uporabljajte naramni pas. Orodje
trdno držite ob svoji desni strani.
23. Ne dotikajte se ohišja menjalnika med uporabo
in takoj po njej.Ohišjemenjalnikasemedupo-
rabosegrejeinlahkopovzročiopekline.
24. Med delom naredite premor, da preprečite
izgubo nadzora zaradi utrujenosti.Priporočamo
10-do20-minutnipočitekvsakouro.
25. Izogibajte se nevarnemu okolju. Orodja ne
uporabljajte na vlažnih ali mokrih mestih in ga
ne izpostavljajte dežju.Voda,kiprodrevorodje,
bopovečalanevarnostelektričnegaudara.
26. Akumulatorja/-ev ni dovoljeno metati v
ogenj.Celicalahkoeksplodira.Preveritelokalne
predpisegledemorebitnihposebnihnavodilza
odstranjevanje.
27. Ne odpirajte ali spreminjajte akumulatorja/-ev.
Sproščenielektrolitjekoroziveninlahkopovzroči
poškodbeočialikože.Prizaužitjujelahko
strupen.
28. Akumulatorja ne polnite v dežju ali na mokrih
mestih.
Osebna zaščitna oprema
►Sl.1
1. Uporabljajte zaščitno čelado, zaščitna očala in
zaščitne rokavice, da se zaščitite pred letečimi
delci ali padajočimi predmeti.
2. Uporabljajte zaščito za sluh, kot so naušniki,
da preprečite izgubo sluha.
Other manuals for DUX18
7
Table of contents
Languages:
Other Makita Power Tools manuals

Makita
Makita 4351CT Manual

Makita
Makita 4326 User manual

Makita
Makita MAKSTAR BTW250 Series User manual

Makita
Makita 4341CT Manual

Makita
Makita DJV140 User manual

Makita
Makita M4301 User manual

Makita
Makita 6922NB User manual

Makita
Makita HG6530V User manual

Makita
Makita HS301D User manual

Makita
Makita 4326 User manual

Makita
Makita 3901 User manual

Makita
Makita WT06 User manual

Makita
Makita DTW302 User manual

Makita
Makita DTW450 User manual

Makita
Makita 1923H User manual

Makita
Makita WT04 User manual

Makita
Makita TW141DSME User manual

Makita
Makita DHR241 User manual

Makita
Makita HM1400 User manual

Makita
Makita JS8000 User manual