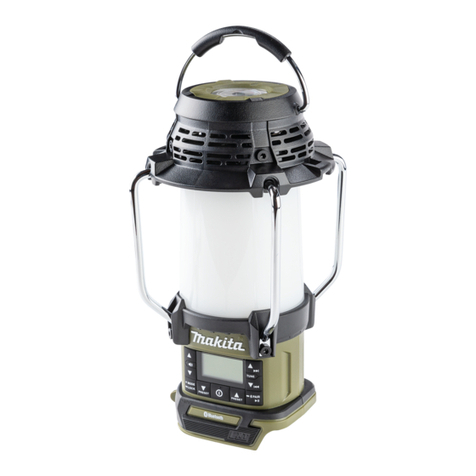
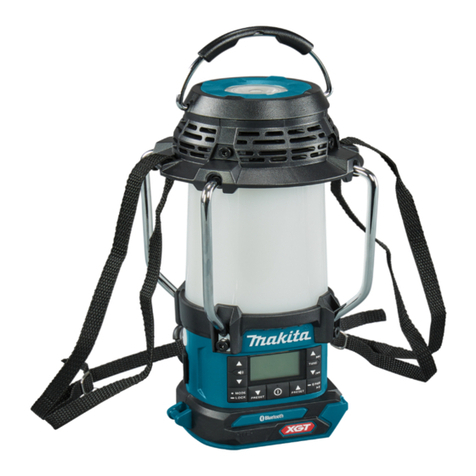
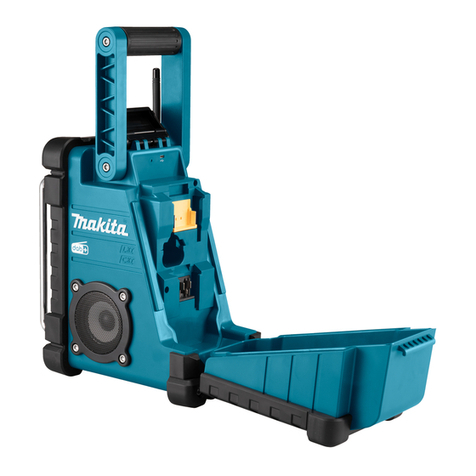
Makita DMR056 User manual

EN Cordless Radio with Lantern Instruction manual 5
PL Akumulatorowe Radio z Latarką Instrukcja obsługi 14
HU Vezeték nélküli rádió lámpával Használati utasítás 24
SK Bezdrôtové rádio s lampášom Návod na obsluhu 33
CS Bezdrátové rádio s lucernou Návod k obsluze 42
UK Бездротове радіо з ліхтарем Інструкція з експлуатації 51
RO Radio fără r cu lanternă Manual de instrucţiuni 62
DE Akku-Radio mit Laterne Betriebsanleitung 71
SL Brezžični radio s svetilko Navodila za uporabo 80
SQ Radio fener me bateri Manuali i përdorimit 89
BG Безжично радио с фенер Упътване за употреба 98
HR Bežični radio sa svjetiljkom Upute za uporabu 108
MK Безжично радио со ламба Упатство за работа 117
SR Бeжични Радио са Лампом Упутство за употребу 128
RU Аккумуляторный Радио-Фонарь Инструкция по
эксплуатации 137
DMR056/
MR009G

2
1
1
4
5
2
3
7 8 9 10 11 14 15 16 18 19176 12 13

3
1
2
1
2
2
4
3
5
DMR056
(LXT)
LXT
MR009G
(XGT)
XGT

4
6

5 ENGLISH
ENGLISH
(Original instructions)
EXPLANATION OF
GENERAL VIEW (Fig. 1)
1. Carrying handle
2. Flashlight
3. Speaker
4. LED Lantern
5. Battery compartment
6. Volume up/down button
7. Mode/Lock button
8. Info/Menu button
9. Power button
10. Select/Memory button
11. Preset/Bluetooth pairing/Play/Pause button
12. Tuning down/Previous track/Rewind button
13. Tuning up/Next track/Fast-forward button
14. Light brightness button
15. Light on/off button/Light mode button
16. Color temperature button
17. USB charging on/off button/Charging LED
indicator
18. USB power supply port
19. Strap buckle
SYMBOLS
The following show the symbols used for the equipment.
Be sure that you understand their meaning before use.
Read instruction manual.
Only for EU countries
Due to the presence of hazardous
components in the equipment, waste
electrical and electronic equipment,
accumulators and batteries may have
a negative impact on the environment
and human health. Do not dispose of
electrical and electronic appliances
or batteries with household waste! In
accordance with the European Directive
on waste electrical and electronic
equipment and on accumulators and
batteries and waste accumulators and
batteries, as well as their adaptation
to national law, waste electrical
equipment, batteries and accumulators
should be stored separately and
delivered to a separate collection
point for municipal waste, operating
in accordance with the regulations
on environmental protection. This
is indicated by the symbol of the
crossed-out wheeled bin placed on the
equipment.
IMPORTANT SAFETY
INSTRUCTIONS
WARNING:
When using this product, basic safety precautions
should always be followed to reduce the risk of fire,
electric shock, and personal injury, including the
following:
1. Read this instruction manual and the charger
instruction manual carefully before use.
2. Clean only with dry cloth.
3. Do not install near any heat sources such as
radiators, heat registers, stoves, or other apparatus
(including amplifiers) that produce heat.
4. Only use attachments/accessories specified by the
manufacturer.
5. A battery operated radio with integral batteries or a
separate battery pack must be recharged only with
the specified charger for the battery. A charger that
may be suitable for one type of battery may create a
risk of fire when used with another battery.
6. Use battery operated radio only with specifically
designated battery packs. Use of any other batteries
may create a risk of fire.
7. When battery pack is not in use, keep it away from
other metal objects like: paper clips, coins, keys,
nails, screws, or other small metal objects that can
make a connection from one terminal to another.
Shorting the battery terminals together may cause
sparks, burns, or a fire.
8. Avoid body contact with grounded surfaces such
as pipes, radiators, ranges and refrigerators. There
is an increased risk of electric shock if your body is
grounded.
9. Under abusive conditions, liquid may be ejected
from the battery; avoid contact. If contact
accidentally occurs, flush with water. If liquid
contacts eyes, additionally seek medical help.
Liquid ejected from the battery may cause irritation
or burns.
10. Do not use a battery pack or tool that is damaged
or modified. Damaged or modified batteries may
exhibit unpredictable behaviour resulting in fire,
explosion or risk of injury.
11. Do not expose a battery pack or tool to fire
or excessive temperature. Exposure to fire or
temperature above 130°C (266°F) may cause
explosion.

6 ENGLISH
12. Follow all charging instructions and do not charge
the battery pack or tool outside the temperature
range specified in the instructions. Charging
improperly or at temperatures outside the specified
range may damage the battery and increase the risk
of fire.
13. Do not use the product at a high volume for any
extended period. To avoid hearing damage, use the
product at moderate volume level.
14. (For products with LCD display only) LCD displays
include liquid which may cause irritation and
poisoning. If the liquid enters the eyes, mouth or
skin, rinse it with water and call a doctor.
15. Do not expose the product to rain or wet conditions.
Water entering the product will increase the risk of
electric shock.
16. This product is not intended for use by persons
(including children) with reduced physical, sensory
or mental capabilities, or lack of experience
and knowledge, unless they have been given
supervision or instruction concerning use of the
product by a person responsible for their safety.
Children should be supervised to ensure that they
do not play with the product. Store the product out
of the reach of children.
SAVE THESE INSTRUCTIONS
SPECIFIC SAFETY RULES
FOR BATTERY CARTRIDGE
1. Before using battery cartridge, read all instructions
and cautionary markings on (1) battery charger, (2)
battery, and (3) product using battery.
2. Do not disassemble battery cartridge.
3. If operating time has become excessively shorter,
stop operating immediately. It may result in a risk of
overheating, possible burns and even an explosion.
4. If electrolyte gets into your eyes, rinse them out with
clear water and seek medical attention right away. It
may result in loss of your eyesight.
5. Do not short the battery cartridge:
(1) Do not touch the terminals with any conductive
material.
(2) Avoid storing battery cartridge in a container
with other metal objects such as nails, coins,
etc.
(3) Do not expose battery cartridge to water or
rain. A battery short can cause a large current
flow, overheating, possible burns and even a
breakdown.
6. Do not store and use the tool and battery cartridge
in locations where the temperature may reach or
exceed 50°C (122°F).
7. Do not incinerate the battery cartridge even if it is
severely damaged or is completely worn out. The
battery cartridge can explode in a fire.
8. Be careful not to drop or strike battery.
9. Do not use a damaged battery.
10. To avoid risk, the manual of replaceable the battery
should be read before use.
11. The contained lithium-ion-batteries are subject to
the Dangerous Goods Legislation requirements.
For commercial transports e.g. by third parties,
forwarding agents, special requirement on
packaging and labeling must be observed. For
preparation of the item being shipped, consulting
an expert for hazardous material is required. Please
also observe possibly more detailed national
regulations. Tape or mask off open contacts and
pack up the battery in such a manner that it cannot
move around in the packaging.
12. When disposing the battery cartridge, remove
it from the tool and dispose of it in a safe place.
Follow your local regulations relating to disposal of
battery.
13. Use the batteries only with the products specified
by Makita. Installing the batteries to non-compliant
products may result in a fire, excessive heat,
explosion, or leak of electrolyte. If the tool is not
used for a long period of time, the battery must be
removed from the tool.
14. If the tool is not used for a long period of time, the
battery must be removed from the tool.
15. Do not allow chips, dust, or soil stuck into the
terminals, holes, and grooves of the battery
cartridge. It may result in poor performance or
breakdown of the tool or battery cartridge.
16. Keep the battery away from children.
17. During and after use, the battery cartridge may take
on heat which can cause burns or low temperature
burns.
18. Do not touch the terminal of the tool immediately
after use as it may get hot enough to cause burns.
19. Unless the tool supports the use near a high-
voltage electrical power lines, do not use the battery
cartridge near a high-voltage electrical power lines.
It may result in a malfunction or breakdown of the
tool or battery cartridge.
CAUTION:
Only use genuine Makita batteries. Use of
nongenuine Makita batteries, or batteries that have
been altered, may result in the battery bursting
causing fires, personal injury and damage. It will
also void the Makita warranty for the Makita tool and
charger.
7 ENGLISH
OPERATING TIME
* The suitable battery packs for this radio listed as the following table.
* The following table indicates the operating time on a single charge.
Model Battery cartridge Battery
capacity
Unit: Hour (Approximately)
Radio* Lantern (360˚
light coverage)
Flash Light
(torch mode)
DMR056
LXT
(14.4V)
BL1415N 1.5Ah 11 4.0 8.5
BL1430B 3.0Ah 19 7.0 14
BL1440 4.0Ah 30 11 22
BL1460B 6.0Ah 39 15 29
LXT
(18V)
BL1815N 1.5Ah 13 4.5 9.0
BL1820B 2.0Ah 17 6.0 12
BL1830B 3.0Ah 24 8.5 16
BL1840B 4.0Ah 34 12 23
BL1850B 5.0Ah 44 16 30
BL1860B 6.0Ah 53 19 37
MR009G XGT
(36V-40Vmax)
BL4020 2.0Ah 20 13 26
BL4025 2.5Ah 24 16 31
BL4040 4.0Ah 36 24 46
BL4050F 5.0Ah 51 34 66
* AT SPEAKERS OUTPUT=100mW
WARNING:
Only use the battery cartridges listed above. Use of any other battery cartridges may cause injury and/or fire.
NOTE:
●Table regarding to the battery operating time above is for reference.
●The actual operating time may differ with the type of the battery, charging condition, or usage environment.
●Some of the battery cartridges listed above may not be available depending on your region of residence.
Tips for maintaining maximum battery
life
1. Charge the battery cartridge before completely
discharged. Always stop tool operation and charge
the battery cartridge when you notice less tool power.
2. Never recharge a fully charged battery cartridge.
Overcharging shortens the battery service life.
3. Charge the battery cartridge with room temperature
at 10°C - 40°C (50°F - 104°F). Let a hot battery
cartridge cool down before charging it.
4. When not using the battery cartridge, remove it from
the tool or the charger.
5. Charge the battery cartridge if you do not use it for a
long period (more than six months).

8 ENGLISH
Recommended cord
connected power source
Model Portable power pack
DMR056 PDC01
MR009G PDC01 / PDC1200
●The cord connected battery pack (s) listed above
may not be available depending on your region of
residence.
●Before using the cord connected battery pack, read
instruction and cautionary markings on them.
INSTALLATION AND POWER
SUPPLY
CAUTION:
●Always switch off the radio before installing or
removing the battery cartridge.
●Be careful not to drop or strike the radio. Broken shell
may slash your finger or stab your body. Damaged
radio may exhibit unpredictable behaviour resulting in
fire, explosion or risk of injury.
●Hold the tool and the battery cartridge firmly when
installing or removing battery cartridge.
IMPORTANT:
●Reduced power, distortion, stuttering sound or screen
backlight flashing are all the signs that the battery
needs to be replaced.
●The battery cartridge is not included as standard
accessories.
Installing or removing the sliding
battery cartridge (Fig. 2-3)
●To install the battery cartridge, align the tongue on
the battery cartridge with the groove in the housing
and slip it into place. Always insert it all the way until
it locks in place with a little click.
●If you can see the red indicator on the upper side of
the button, it is not locked completely. Install it fully
until the red indicator cannot be seen. If not, it may
accidentally fall out of the radio, causing injury to you
or someone around you.
●Do not use force when installing the battery cartridge.
If the cartridge does not slide in easily, it is not being
inserted correctly.
●To remove the battery cartridge, slide it from the radio
while sliding the button on the front of the cartridge.
Indicating the remaining battery
capacity (Fig. 4-5)
1. Indicator lamps 2. Check button
Press the check button on the battery cartridge to
indicate the remaining battery capacity. The indicator
lamps light up for few seconds.
●XGT/LXT battery cartridge
Indicator lamps
Remaining
capacity
Lighted Off Blinking
75% ~ 100%
50% ~ 75%
25% ~ 50%
0% ~ 25%
Charge the battery
The battery
may have
malfunctioned
NOTE:
●Depending on the conditions of use and the ambient
temperature, the indication may differ slightly from
the actual capacity.
●The first (far left) indicator lamp will brink when the
battery protection system works.
Charging with USB power supply port
NOTE:
●Connect only devices which are compatible with DC
5V, 2.4A power source to the USB power supply port.
Otherwise it may cause malfunction to the product.
●Connect the USB cable (not included) with the USB
power supply port of the product. And then connect
the other end of the cable with the device.
●To start charging, press the USB charging on/off
button to enable the charging function. The USB
charging on/off button will light up green.
●When the battery power is low, the screen backlight
will flash until the charging function is turned off.
●If the charging function is turned on without charging,
the USB charging on/off button will flash green, and
the charging function will be automatically turned off
after 30 minutes.
●To stop charging, press the USB charging on/off
button to disable the charging function.
●The maximum volume of the output power speaker
will decrease when your USB is charging.
IMPORTANT:
●Before connecting USB device to the charger, always
backup your data of USB device. Otherwise your data
may lose by any possibility.

9 ENGLISH
●The charger may not supply power to some USB
devices.
●When not using or after charging, remove the USB
cable and close the cover.
●Do not connect this USB socket with your PC
USB port, as it is highly possible that it may cause
breakdown of the units.
LISTENING TO DAB RADIO
Tuning into DAB stations
To tune into DAB radio stations, follow these steps:
1. Turn on the radio using the Power button.
2. Select the DAB radio mode by repeatedly pressing
the Mode button.
3. If this is the first time the DAB radio mode is being
used, the radio will automatically perform a full scan
in order to find all available DAB radio stations.
During the scanning process, as new stations are
detected the station counter will increase and the
stations will be added to the list which is stored in the
radio. The bar graph indicates the progress of the
scan.
4. When scanning is completed, the radio will list all
stations that were found. Use the Tuning up or Tuning
down button to scroll through the list of stations and
press the Select button to tune into a station.
NOTE:
For DAB radio mode, if the radio's reception is not good,
it may be necessary to relocate your radio to a position
giving better reception.
The DAB radio menu
You can open the DAB radio menu by pressing and
holding the Info/Menu button while the radio is in the
DAB radio mode. Use the Tuning up or Tuning down
button to select one of the options and then press the
Select button to confirm your choice.
The radio's default and recommended settings are
indicated using an asterisk.
The DAB radio menu offers the following options:
●[Full Scan]: Select this option to perform a full scan
and store all DAB radio stations that were found in
the station list.
●[Manual tune]: Select this option to manually tune
into a DAB channel/frequency.
●[DRC]: Dynamic Range Control (also known as DRC)
can make quieter sounds easier to hear when your
radio is used in a noisy environment by reducing the
dynamic range of the audio signal.
Select this option and then use the Tuning up or
Tuning down button to highlight the required DRC
setting:
[1]: Maximum compression applied.
[1/2]: Medium compression applied.
[0]: No compression applied.
Press the Select button to confirm the setting.
●[Station order]: Select this option and subsequently
[Alphanumeric] to sort the station list alphanumerically
or select [Ensemble] to sort the station list by DAB
multiplex or select [Valid] to show only those stations
for which a signal can be found.
●[System]: Select this option to go to the system
menu settings and configure the radio (refer to the
chapter "Using the System menu" for details).
●[Back]: Select this option to go back one step in the
radio's menus or return to the previous screen.
Showing DAB information on the
display
When listening to a DAB radio broadcast, repeatedly
press the Info/Menu button to cycle through the following
information on the radio's display:
●Dynamic Label Segment (Scrolling text)
●Program type
●Multiplex name
●Frequency and channel
●Signal error/Strength
●Bit rate/Audio type
●Date
LISTENING TO FM RADIO
Tuning into FM stations
To tune into FM radio stations, follow these steps:
1. Turn on the radio using the Power button.
2. Select the FM radio mode by repeatedly pressing the
Mode button.
3. Press and hold the Tuning up or Tuning down
button to automatically tune into an FM station with
a higher or lower frequency respectively. Your radio
will stop scanning when it finds a station of sufficient
strength. The display will show the frequency of the
signal which has been found. If RDS information is
available, after a few seconds the display will show
the radio station name.
4. Press the Tuning up or Tuning down button to fine-
tune the frequency with steps of 0.05MHz if needed.
5. Repeat the steps 3 and 4 to tune into other radio
stations.
NOTE:
For FM radio mode, if the radio's reception is not good,
it may be necessary to relocate your radio to a position
giving better reception.

10 ENGLISH
The FM radio menu
You can open the FM radio menu by pressing and
holding the Info/Menu button while the radio is in the FM
radio mode. Use the Tuning up or Tuning down button
to select one of the options and then press the Select
button to confirm your choice.
The radio's default and recommended settings are
indicated using an asterisk.
The FM radio menu offers the following options:
●[Scan Zone]: Select this option to configure if the
radio should only look for strong signals (“Local”) or
all signals (“Distant”) when using the automatic tuning
feature.
●[System]: Select this option to go to the system
menu settings and configure the radio (refer to the
chapter "Using the System menu" for details).
●[Back]: Select this option to go back one step in the
radio's menus or return to the previous screen.
Showing FM information on the
display
When listening to a FM radio station that is also
broadcasting RDS data, repeatedly press the Info/Menu
button to cycle through the following information on the
radio's display:
●Radio text
●Program type
●Frequency
●Audio mode
●Date
If no RDS information is available, the radio will be
unable to display the text message and program type.
Presetting stations in DAB and FM
modes
There are 9 memory presets each for DAB and FM
radio. They are used in the same way for each operating
mode.
1. Turn on the radio, then select the DAB or FM radio
mode and Tune to the required radio station as
previously described.
2. Press and hold the Select/Memory button. The
display will show a “Save to Preset” menu.
3. Press the Tuning up or Tuning down button to select
the required Preset number. Then press the Select
button to store the preset station. "Saved" will be
shown on the display indicating the station is stored
under the selected preset number. If another station
has already been stored under the chosen preset
number, that station will be overwritten. Repeat this
procedure as needed for the remaining presets.
Recalling a preset in DAB and FM
modes
1. Turn on the radio and then select the DAB or FM
radio mode using the Mode button.
2. Press the Preset button to display the “Preset Recall”
menu.
3. Select a preset number using the Tuning up or
Tuning down button and then press the Select button
to confirm your choice. The radio will now tune into
the selected preset. If the Select button or any other
button is not pressed, the radio will also tune into the
selected preset after 2 seconds. The chosen preset
number is shown in the upper area of the radio
display.
Using the System menu
The System menu can be used to configure the radio.
Follow these steps to access the system settings:
1. Turn on the radio using the Power button.
2. Press and hold the Info/Menu button to open the
menu for the current mode.
3. Use the Tuning up or Tuning down button to select
[System] and press the Select button to open the
menu.
The System menu offers the following options:
Use the Tuning up or Tuning down button to select
one of the options and then press the Select button to
confirm your choice.
The radio's default and recommended settings are
indicated using an asterisk.
●[Time/Date]: Select this option to set the source
for automatically updating the time and date
and set the time format. The subsequent option
[Auto update] allows you to select a source for
automatically updating the time and date and [Set
format] allows you to select the 12 or 24 hour
format. If the 12 hour clock format is chosen, the
radio will display a 12 hour clock with an AM or PM
indicator.
● [Language]: Select this option to configure the
language in which the radio's menus are shown.
●[Radio Reset]: Select this option to reset the radio
to the default factory settings. After confirmation,
all user settings and preset stations will be erased.
● [SW Upgrade]: Software updates for your radio
may be available in the future. As software updates
become available software and information on
how to update your radio can be found at Makita
website. Select this option to perform a software
upgrade.
●[SW Version]: Select this option to view the
software version of the radio. To exit the software
display, press the Info/Menu button.

11 ENGLISH
●[Back]: Select this option to go back one step in
the radio's menus or return to the previous screen.
LISTENING TO MUSIC VIA
BLUETOOTH STREAMING
You need to pair your Bluetooth device with the radio
before you can auto-link to play/stream Bluetooth
music through the radio. Pairing creates a ‘bond’ so two
devices can recognize each other.
Note:
●To have the better sound quality, we recommend
setting the volume to more than two-thirds level on
your Bluetooth device and then adjust the volume on
the radio as required.
●The radio can memorize up to 8 sets of paired
device, when the memory exceed this amount, the
oldest pairing history will be over written.
Pairing your Bluetooth device for the
rst time
1. Press the Power button to turn on the radio. Press
the Mode button to select Bluetooth mode. The
Bluetooth status icon flashes and "Pairing" appears
on the display to show the radio is discoverable.
2. Activate Bluetooth on your device according to the
device’s user manual to link to the radio. Locate the
Bluetooth device list and select the device with the
name of your radio (With some mobiles which are
equipped with earlier versions than BT 2.1 Bluetooth
device, you may need to input the pass code “0000”).
3. Once connected, there will be a confirmation tone
sound. The Bluetooth icon will cease flashing and
display a check mark next to it. You can simply select
and play any music from your source device. Volume
control can be adjusted from your source device, or
directly from the radio.
4. Use the controls on your Bluetooth-enabled device or
on the radio to play/pause and navigate tracks.
Note:
●If 2 Bluetooth devices, pairing for the first time, both
search for the radio, it will show its availability on both
devices. However, if one device links with this unit
first, then the other Bluetooth device won’t find it on
the list.
●If your Bluetooth device is temporarily disconnected
to the radio, then you need to manually reconnect
your device again to the radio.
●If the name of your radio shows in your Bluetooth
device list but your device cannot connect with it,
please delete the item from your list and pair the
device with the radio again following the steps
described previously.
●The optimal Bluetooth transmission range is
approximately 10 meters (33 feet) in line of sight to
the radio, but a distance up to 30 meters (100 feet) is
possible.
●If Bluetooth connection is lost due to exceeding time
of separation, exceeding the optimum distance,
obstacles or otherwise, reconnecting your device with
the radio may be necessary.
●Physical obstacles, other wireless devices or
electromagnetic devices may affect the connection
quality.
●Bluetooth connectivity performance may vary
depending on the connected Bluetooth devices.
Please refer to the Bluetooth capabilities of your
device before connecting to the radio. All features
may not be supported on some paired Bluetooth
devices.
Playing audio les in Bluetooth mode
When you have successfully connected the radio with
the chosen Bluetooth device you can start to play your
music using the controls on your connected Bluetooth
device.
1. Once playing has started, the volume can be adjusted
both on the radio using the Volume buttons and on
the Bluetooth device using the volume control of the
device.
2. Use the controls on your Bluetooth device to play/
pause and navigate tracks. Alternatively, control the
playback using Play/Pause, Next track, Previous
track buttons on your radio.
3. Press and hold the Fast-forward or Rewind button to
move through the current track. Release the button
when the desired point is reached.
Note:
●Some player applications or devices may not respond
to all of these controls.
●Some mobile phones may temporarily disconnect
from the radio when you make or receive calls. Some
devices may temporarily mute their Bluetooth audio
streaming when they receive text messages, emails
or for other reasons unrelated to audio streaming.
Such behaviour is a function of the connected device
and does not indicate a fault with the radio.
Playing a previously-paired Bluetooth
source device
If your Bluetooth device already paired with the radio
previously, the unit will memorize your Bluetooth device
and it attempts to reconnect with a device in memory
which is last connected. If the last connected device is
not available, the radio will be discoverable.

12 ENGLISH
Disconnecting your Bluetooth device
Press and hold the Bluetooth pairing button for 2-3
seconds until "Pairing" appears on the display or turn
off Bluetooth on your Bluetooth device to disable the
connection.
You can also press the Mode button to select any mode
other than Bluetooth mode to disable the connection.
LED LANTERN/FLASHLIGHT
FUNCTION
1. Press the Light on/off button repeatedly to select
different light modes. This multifunctional LED
lantern/flashlight features 4 different modes, you
can select the suitable light operation mode for each
application.
The 4 light modes are as follows:
Lantern (360˚ light coverage)
Lantern (side-carry mode)
Flashlight (torch mode)
Flashlight (strobe mode)
2. Press the Light brightness button to adjust the
suitable light brightness.
3. Press the Color temperature button to select different
color temperatures.
4. Press and hold the Light on/off button to turn off the
light.
Note:
In side-carry mode, only three sides of the lantern are
lit. When using the strap, the lantern can be positioned
as the side-carry mode to prevent the light from blinding
user's eyes.
MISCELLANEOUS
SETTINGS
Key lock
The key lock function is used to prevent unintentional
operation of the radio.
1. Press and hold the Lock button for 2-3 seconds until
“Keys Locked” appears on the display. All buttons
except the Power button will be disabled.
2. To release the lock, press and hold the Lock button
for 2-3 seconds until “Keys Unlocked” appears on the
display.
Using the strap (Fig. 6)
Using the supplied strap, you can hang the product
in different ways whenever needed. (Refer to the
installation method in Figure 6.)
MAINTENANCE
CAUTION:
●Never use gasoline, benzine, thinner, alcohol or the
like. Discoloration, deformation or cracks may result.
●Do not wash the radio with water.

13 ENGLISH
SPECIFICATIONS
Model DMR056 MR009G
Battery 14.4V & 18V 36V - 40Vmax
Frequency coverage FM: 87.50-108MHz (0.05MHz/step)
DAB/DAB+: 174.928-239.200 MHz
DAB/DAB+ Channel block DAB (Band III) 5A-13F
Compatible standard DAB/DAB+
Antenna system FM/DAB: Built-in antenna
USB output 5V / 2.4A
Loudspeaker 2.25 inches
Output power 14.4V: 2.4W
18V: 3W 36V: 3W
Dimensions (L x W x H) 126 x 129 x 289mm
(with BL1860B)
126 x 166 x 315mm
(with BL4050F)
Weight (without battery) 0.98KG 0.99KG
Bluetooth®
(The Bluetooth®word mark and logos are registered trademarks owned by Bluetooth SIG, Inc.)
Bluetooth Version 5.0 Certified
Bluetooth Profiles A2DP/SCMS-T/AVRCP
Transmission Power Power Class 2
Transmission Range
Optimum range: Within 10 meters (33 feet)
Maximum range: Up to 30 meters (100 feet)
(It may vary according to different conditions.)
Bluetooth Codec SBC, AAC
Maximum radio frequency power BT EDR: 3.88dBm BT EDR: 3.90dBm
Operating Frequency 2402MHz ~ 2480MHz

14 POLSKI
POLSKI
(Oryginalna instrukcja)
OBJAŚNIENIE BUDOWY
OGÓLNEJ (Rys. 1)
1. Uchwyt do przenoszenia
2. Latarka
3. Głośnik
4. Latarnia LED
5. Komora baterii
6. Przycisk zwiększania/zmniejszania głośności
7. Przycisk Trybu/Blokady
8. Przycisk Info/Menu
9. Przycisk zasilania
10. Przycisk Wyboru/Pamięci
11. Przycisk Nastawiania/Parowania Bluetooth/
Odtwarzania/Pauzy
12. Przycisk Strojenia w dół/Poprzedni utwór/
Przewijanie do tyłu
13. Przycisk Strojenia w górę/Następny utwór/
Przewijanie do przodu
14. Przycisk jasności oświetlenia
15. Przycisk włączania/wyłączania oświetlenia/
Przycisk trybu oświetlenia
16. Przycisk temperatury barwy
17. Przycisk wł./wył. ładowania USB/Wskaźnik
ładowania LED
18. Port zasilania USB
19. Klamra do paska
SYMBOLE
Poniżej przedstawiono symbole stosowane w
urządzeniu. Upewnij się, że rozumiesz ich znaczenie
przed użyciem.
Przeczytaj instrukcję obsługi.
Tylko dla krajów UE.
Ze względu na obecność
niebezpiecznych części w sprzęcie,
zużyty sprzęt elektryczny i
elektroniczny, akumulatory i baterie
mogą mieć negatywny wpływ na
środowisko i zdrowie człowieka.
Nie należy wyrzucać urządzeń
elektrycznych i elektronicznych ani
baterii z odpadami domowymi! Zgodnie
z Dyrektywą Europejską dotyczącą
zużytego sprzętu elektrycznego i
elektronicznego, akumulatorów i baterii
oraz zużytych akumulatorów i baterii,
a także ich dostosowania do prawa
krajowego, zużyty sprzęt elektryczny,
baterie i akumulatory powinny być
składowane oddzielnie i dostarczane
do punktu selektywnej zbiórki odpadów
komunalnych, działającego zgodnie
z przepisami dotyczącymi ochrony
środowiska.
Wskazuje na to symbol przekreślonego
kosza na kółkach umieszczony na
urządzeniu.
WAŻNE INSTRUKCJE
DOTYCZĄCE
BEZPIECZEŃSTWA
OSTRZEŻENIE:
Podczas korzystania z tego produktu należy zawsze
przestrzegać podstawowych zasad bezpieczeństwa,
aby zmniejszyć ryzyko pożaru, porażenia prądem i
obrażeń ciała:
1. Przed użyciem należy uważnie przeczytać niniejszą
instrukcję obsługi i instrukcję obsługi ładowarki.
2. Czyść wyłącznie suchą szmatką.
3. Nie należy montować w pobliżu źródeł ciepła, takich
jak kaloryfer, kuchenka lub inne urządzenia (w tym
wzmacniacze) wytwarzające ciepło.
4. Używaj tylko akcesoriów wskazanych przez
producenta.
5. Akumulatorowy odbiornik radiowy z akumulatorem
wbudowanym lub oddzielnym musi być ładowany
wyłącznie za pomocą określonej ładowarki do
akumulatora. Ładowarka przeznaczona do jednego
typu akumulatora może stwarzać zagrożenie
wystąpienia pożaru w przypadku stosowania jej do
ładowania innego akumulatora.
6. Do zasilania akumulatorowego odbiornika
radiowego należy używać tylko przeznaczonych
do niego akumulatorów. Używanie innych
akumulatorów może stwarzać ryzyko wystąpienia
pożaru.
7. Kiedy akumulator nie jest używany, należy trzymać
go z dala od innych metalowych przedmiotów,
takich jak: spinacze do papieru, monety, klucze,
gwoździe, śruby lub inne drobne przedmioty
metalowe, które mogą łączyć jeden zacisk z innym.
Zwarcie zacisków akumulatora może spowodować
iskry, oparzenia lub pożar.
8. Należy unikać kontaktu ciała z uziemionymi
powierzchniami, takimi jak rury, grzejniki, kuchenki
i lodówki. Istnieje zwiększone ryzyko porażenia
prądem, jeśli twoje ciało jest uziemione.
9. W niekorzystnych warunkach ciecz może wyciec
z akumulatora; należy unikać kontaktu. W razie

15 POLSKI
przypadkowego kontaktu opłukać wodą. Jeśli
płyn dostanie się do oczu, dodatkowo należy
skontaktować się z lekarzem. Ciecz, która wyciekła
z akumulatora może powodować podrażnienia lub
poparzenia.
10. Nie należy używać akumulatora ani urządzenia,
które jest uszkodzone lub zmodyfikowane.
Uszkodzone lub zmodyfikowane akumulatory
mogą wykazywać nieprzewidziane zachowanie,
powodując pożar, wybuch lub ryzyko obrażeń.
11. Nie wystawiaj akumulatora ani urządzenia na
działanie ognia lub nadmiernej temperatury.
Narażenie na działanie ognia lub temperatury
powyżej 130°C (266°F) może spowodować wybuch.
12. Należy postępować zgodnie z instrukcją
ładowania i i nie należy ładować akumulatora
lub urządzenia poza zakresem określonym w
instrukcji. Nieprawidłowe ładowanie lub ładowanie
w temperaturze spoza wskazanego zakresu może
spowodować uszkodzenie akumulatora i zwiększyć
ryzyko pożaru.
13. Nie należy używać produktu przy wysokim poziomie
głośności przez dłuższy okres czasu. Aby uniknąć
uszkodzenia słuchu należy używać urządzenia przy
umiarkowanym poziomie głośności.
14. (Dla produktów z wyświetlaczem LCD)
Wyświetlacze LCD zawierają ciecz, która może
powodować podrażnienie i zatrucie. Jeśli ciecz
dostanie się do oczu, ust lub na skórę, należy
przemyć wodą i skontaktować się z lekarzem.
15. Nie należy narażać produktu na działanie deszczu
lub wilgoci. Przedostanie się wody do urządzenia
zwiększa ryzyko porażenia prądem.
16. Ten produkt nie jest przeznaczony do użytkowania
przez osoby (w tym dzieci) o ograniczonej
sprawności fizycznej, sensorycznej lub umysłowej,
czy braku doświadczenia i wiedzy, za wyjątkiem
przypadków, gdy były one pod nadzorem lub
przekazane im zostały instrukcje dotyczące
korzystania z produktu przez osobę odpowiedzialną
za ich bezpieczeństwo. Dzieci powinny być
nadzorowane, aby nie bawiły się urządzeniem.
Produkt należy przechowywać w miejscu
niedostępnym dla dzieci.
INSTRUKCJE TE NALEŻY
ZACHOWAĆ
SZCZEGÓLNE ZASADY
BEZPIECZEŃSTWA DLA
KASETY AKUMULATORA
1. Przed użyciem kasety akumulatora należy
przeczytać wszystkie instrukcje i ostrzeżenia na (1)
ładowarce, (2) akumulatorze i (3) produkcie, który
wykorzystuje akumulator.
2. Nie należy rozmontowywać kasety akumulatora.
3. Jeśli czas pracy jest zbyt krótki, należy natychmiast
przerwać pracę. Może to spowodować ryzyko
przegrzania, ewentualnych oparzeń, a nawet
wybuchu.
4. Jeśli elektrolit dostanie się do oczu, należy przemyć
je czystą wodą i natychmiast skontaktować się z
lekarzem. To może prowadzić do utraty wzroku.
5. Nie wolno zwierać kasety akumulatora:
(1) Nie dotykaj zacisków żadnym materiałem
przewodzącym.
(2) Unikaj przechowywania kasety akumulatora w
pojemniku z innymi metalowymi przedmiotami,
takimi jak gwoździe, monety itp.
(3) Nie wystawiaj kasety akumulatora na działanie
wody lub deszczu. Zwarcie akumulatora może
spowodować duży przepływ prądu, przegrzanie,
możliwe poparzenia, a nawet awarię.
6. Nie przechowuj narzędzia i baterii w miejscach,
gdzie temperatura może osiągać lub przekraczać
50°C (122°F).
7. Nie pal kasety akumulatora, nawet jeśli jest ona
poważnie uszkodzona lub całkowicie zużyta. Kaseta
akumulatora może eksplodować w ogniu.
8. Uważaj, aby nie upuścić ani nie uderzyć w
akumulator.
9. Nie należy używać uszkodzonego akumulatora.
10. Aby uniknąć ryzyka, przed użyciem należy
przeczytać instrukcję wymiany akumulatora.
11. Akumulatory litowo-jonowe podlegają przepisom
dotyczącym towarów niebezpiecznych. Do
transportu komercyjnego np. przez osoby trzecie,
spedytorów, należy przestrzegać specjalnych
wymagań dotyczących pakowania i etykietowania.
W celu przygotowania wysyłanego przedmiotu
wymagana jest konsultacja z ekspertem ds.
materiałów niebezpiecznych. Należy również
przestrzegać możliwie bardziej szczegółowych
przepisów krajowych.
Zabezpiecz taśmą lub zakryj otwarte styki i
włóż akumulator w taki sposób, aby nie mógł
przemieszczać się w opakowaniu.
12. Aby usunąć kasetę akumulatora, wyjmij ją z
urządzenia, a następnie zutylizuj w bezpiecznym
miejscu. Postępuj zgodnie z lokalnymi przepisami
dotyczącymi utylizacji baterii.
13. Używaj akumulatora tylko z produktami określonymi
przez Makita. Założenie akumulatorów w produktach
niekompatybilnych może spowodować pożar,
nadmierne ciepło, wybuch lub wyciek elektrolitu.
Jeżeli urządzenie nie będzie używane przez dłuższy
czas, akumulator należy z niego wyjąć.

16 POLSKI
14. Jeżeli urządzenie nie będzie używane przez dłuższy
czas, akumulator należy z niego wyjąć.
15. Nie pozwól, aby wióry, kurz lub brud dostały się do
styków, otworów i rowków we wkładzie akumulatora.
Może to spowodować słabą wydajność lub
uszkodzenie urządzenia lub akumulatora.
16. Trzymaj akumulator z dala od dzieci.
17. Podczas i po użyciu akumulator może się
nagrzewać, co może powodować poparzenia lub
oparzenia niskotemperaturowe.
18. Nie dotykać końcówki terminala bezpośrednio po
użyciu, ponieważ może być nagrzany na tyle, aby
spowodować oparzenia.
19. O ile urządzenie pozwala na użytkowanie w
pobliżu linii wysokiego napięcia, nie należy używać
akumulatora w pobliżu linii wysokiego napięcia.
Może to spowodować nieprawidłowe działanie lub
uszkodzenie urządzenia lub akumulatora.
UWAGA:
Używaj tylko oryginalnych akumulatorów Makita.
Korzystanie z nieoryginalnych akumulatorów Makita
lub akumulatorów, które zostały zmodyfikowane,
może doprowadzić do ich pęknięcia, powodując
pożar, urazy i uszkodzenia. To również powoduje
utratę gwarancji Makita na urządzenie i ładowarkę.
Wskazówki dotyczące utrzymania
maksymalnej żywotności akumulatora
1. Ładuj baterię przed jej całkowitym rozładowaniem
się. Zawsze zatrzymaj urządzenie i naładuj baterię,
gdy zauważysz spadek mocy w narzędziu.
2. Nigdy nie ładuj całkowicie naładowanego
akumulatora. Przeładowanie skraca żywotność
akumulatora.
3. Ładuj akumulator w temperaturze pokojowej 10°C -
40°C (50°F - 104°F). Przed ładowaniem poczekaj, aż
gorący akumulator się ochłodzi.
4. Jeśli akumulator nie jest używany, należy wyjąć go z
urządzenia lub ładowarki.
5. Naładuj akumulator, jeśli nie był używany przez
dłuższy okres (ponad sześć miesięcy).

17 POLSKI
CZAS PRACY
* Odpowiednie zestawy baterii dla tego radia są wymienione w poniższej tabeli.
* Poniższa tabela wskazuje czas pracy na jednym ładowaniu.
Model Kaseta akumulatora Pojemność
baterii
Jednostka: godzina (w przybliżeniu)
Radio*
Latarnia
(zasięg światła
360˚)
Lampa
błyskowa
(tryb latarki)
DMR056
LXT
(14.4V)
BL1415N 1.5Ah 11 4.0 8.5
BL1430B 3.0Ah 19 7.0 14
BL1440 4.0Ah 30 11 22
BL1460B 6.0Ah 39 15 29
LXT
(18V)
BL1815N 1.5Ah 13 4.5 9.0
BL1820B 2.0Ah 17 6.0 12
BL1830B 3.0Ah 24 8.5 16
BL1840B 4.0Ah 34 12 23
BL1850B 5.0Ah 44 16 30
BL1860B 6.0Ah 53 19 37
MR009G XGT
(36V-40Vmaks)
BL4020 2.0Ah 20 13 26
BL4025 2.5Ah 24 16 31
BL4040 4.0Ah 36 24 46
BL4050F 5.0Ah 51 34 66
* PRZY WYJŚCIU GŁOŚNIKA = 100 mW
OSTRZEŻENIE:
Należy stosować tylko wymienione wyżej kasety akumulatora. Korzystanie z innych akumulatorów może
spowodować obrażenia ciała i/lub pożar.
UWAGA:
● Powyższa tabela dotycząca czasu pracy akumulatora przedstawiona została w celach informacyjnych.
● Rzeczywisty czas pracy może różnić się w zależności od rodzaju akumulatora i warunków ładowania lub
warunków użytkowania.
● Niektóre wymienione powyżej wkłady akumulatorowe mogą nie być dostępne w zależności od regionu
zamieszkania.

18 POLSKI
Zalecane źródło zasilania
podłączone przewodem
Model Przenośny zasilacz
DMR056 PDC01
MR009G PDC01 / PDC1200
● Wymienione powyżej akumulator podłączone
przewodem mogą nie być dostępne w zależności od
Twojego regionu zamieszkania.
● Przed użyciem akumulatora podłączonego do
przewodu przeczytaj instrukcje i oznaczenia
ostrzegawcze na nich.
INSTALACJA I ZASILANIE
UWAGA:
● Zawsze wyłączaj radio przed instalowaniem lub
wyjęciem baterii.
● Uważaj, aby nie upuścić lub uderzyć radia. Odłamek
może rozciąć palce lub wbić się w ciało. Uszkodzone
radio może wykazywać nieprzewidywalne
zachowanie skutkujące pożarem, wybuchem lub
wystąpieniem ryzyka obrażeń.
●Podczas instalowania lub wyjmowania akumulatora
mocno trzymaj urządzenie i akumulator.
WAŻNE:
● Zmniejszona moc, zniekształcenie, czy „jąkający
dźwięk” lub miganie podświetlenia wyświetlacza
wskazują na to, że akumulator musi zostać
wymieniony.
● Kaseta akumulatora nie wchodzi w skład
wyposażenia standardowego.
Montowanie lub wyjmowanie
wsuwanej kasety akumulatora
(Rys. 2-3)
● Aby zamontować akumulator, wyrównaj występ na
akumulatorze z rowkiem w obudowie i wsuń go na
miejsce. Zawsze wkładaj go do końca, aż zaskoczy
na miejsce z małym kliknięciem.
● Jeśli czerwony wskaźnik w górnej części przycisku
jest nadal widoczny, oznacza to, że nie został on
całkowicie zablokowany. Należy go zamontować
całkowicie, tak aby czerwony wskaźnik nie był
widoczny. W przeciwnym razie akumulator może
przypadkowo wysunąć się z odbiornika radiowego,
raniąc operatora lub osoby postronne.
● Podczas montażu akumulatora nie używać
nadmiernej siły. Jeśli nie można go swobodnie
wsunąć, prawdopodobnie został on nieprawidłowo
włożony.
● Aby wyjąć baterię, wysuń ją z radia przesuwając
przycisk z przodu.
Wskazanie pozostałej pojemności
baterii (Rys. 4-5)
1. Lampki kontrolne 2. Przycisk Check
Kliknij przycisk Check na kasecie akumulatora, aby
wskazać pozostałą pojemność akumulatora. Lampki
kontrolne zapalą się na kilka sekund.
●Kaseta akumulatora XGT/LXT
Wskaźnik lub lampki
Pozostała
pojemność
Podświetlony Wył. Migający
75% ~ 100%
50% ~ 75%
25% ~ 50%
0% ~ 25%
Naładuj
akumulator
Możliwe, że
akumulator jest
uszkodzony
UWAGA:
● W zależności od warunków pracy i temperatury
otoczenia wskaźnik może nieznacznie różnić się od
rzeczywistej mocy.
●Pierwsza (najdalej po lewej) lampka kontrolna
będzie migać, gdy aktywny jest system ochrony
akumulatora.
Ładowanie za pomocą portu zasilania
USB
UWAGA:
● Do portu zasilania USB podłącz tylko urządzenia
kompatybilne ze źródłem zasilania DC 5V, 2,4A.
W przeciwnym razie może to spowodować
nieprawidłowe działanie produktu.
● Podłącz kabel USB (brak w zestawie) do portu
zasilania USB produktu. A następnie podłącz drugi
koniec kabla do urządzenia.
● Naciśnij przycisk włączania/wyłączania ładowania
USB, aby włączyć funkcję ładowania. Przycisk
włączania/wyłączania ładowania USB zaświeci się na
zielono.
● Gdy poziom naładowania baterii jest niski,
podświetlenie ekranu będzie migać, dopóki funkcja
ładowania nie zostanie wyłączona.
● Jeśli funkcja ładowania jest włączona bez ładowania,
przycisk wł./wył. ładowania USB miga na zielono, a

19 POLSKI
funkcja ładowania zostanie automatycznie wyłączona
po 30 minutach.
● Naciśnij przycisk włączania/wyłączania ładowania
USB, aby wyłączyć funkcję ładowania.
● Maksymalna głośność głośnika zostanie zmniejszona
w przypadku ładowania za pomocą USB.
WAŻNE:
● Przed podłączeniem urządzenia USB do portu USB
należy zawsze utworzyć kopię zapasową danych
znajdujących się na urządzeniu USB. W przeciwnym
wypadku istnieje ryzyko utraty danych z jakichkolwiek
przyczyn.
● Radio nie może zasilać niektórych urządzeń USB.
● W przypadku nieużywania lub po ładowaniu należy
wyjąć przewód USB i zamknąć osłonę.
● Nie podłączać wejścia USB do portu USB komputera,
ponieważ istnieje duże prawdopodobieństwo
uszkodzenia urządzeń.
SŁUCHANIE RADIA DAB
Strojenie stacji DAB
Aby nastroić stacje radiowe DAB, wykonaj następujące
kroki:
1. Włącz radio za pomocą przycisku zasilania.
2. Wybierz tryb radia DAB, naciskając wielokrotnie
przycisk Mode.
3. Jeśli tryb radiowy DAB jest używany po raz pierwszy,
radio automatycznie wykona pełne skanowanie
w celu znalezienia wszystkich dostępnych stacji
radiowych DAB. Podczas procesu skanowania, gdy
nowe stacje zostaną wykryte, licznik stacji wzrośnie,
a stacje zostaną dodane do listy przechowywanej
w radiu. Wykres słupkowy wskazuje postęp
skanowania.
4. Po zakończeniu skanowania radio wyświetli listę
wszystkich znalezionych stacji. Użyj przycisku
strojenie w górę lub strojenie w dół, aby przewijać
listę stacji i naciśnij przycisk Wybierz, aby dostroić
stację.
UWAGA:
W przypadku trybu radiowego DAB, jeśli odbiór radia
nie jest dobry, może być konieczne przeniesienie radia
do pozycji zapewniającej lepszy odbiór.
Menu radia DAB
Menu radia DAB można otworzyć, naciskając i
przytrzymując przycisk Info/Menu, gdy radio jest w
trybie DAB. Użyj przycisku strojenie w górę lub w dół,
aby wybrać jedną z opcji, a następnie naciśnij przycisk
Wybierz, aby potwierdzić swój wybór.
Domyślne i zalecane ustawienia radia są oznaczone
gwiazdką.
Menu radia DAB oferuje następujące opcje:
● [Pełne Skanowanie]: Wybierz tę opcję, aby wykonać
pełne skanowanie i zapisać wszystkie stacje radiowe
DAB, które zostały znalezione na liście stacji.
● [Strojenie ręczne]: Wybierz tę opcję, aby ręcznie
dostroić kanał/częstotliwość DAB.
●[DRC]: Funkcja dynamicznej kontroli zakresu (znana
również jako DRC) może sprawić, że niższe dźwięki
będą łatwiej słyszalne, gdy radio będzie używane
w hałaśliwym otoczeniu, zmniejszając zakres
dynamiczny sygnału audio.
Wybierz tę opcję, a następnie użyj przycisku strojenia
w górę lub w dół, aby podświetlić wymagane
ustawienie DRC:
[1]: Maksymalna kompresja.
[1/2]: Średnia kompresja.
[0]: Brak kompresji.
Naciśnij przycisk wyboru, aby zatwierdzić ustawienia.
● [Kolejność stacji]: Wybierz tę opcję, a następnie
[Alfanumeryczna] aby posortować listę stacji
alfanumerycznie lub [Grupy] aby posortować listę
stacji według multipleksu DAB lub [Dostępne] aby
pokazać tylko te stacje, dla których można znaleźć
sygnał.
●[System]: Wybierz tę opcję, aby przejść do ustawień
menu systemowego i skonfigurować radio (szczegóły
w rozdziale „Korzystanie z menu systemowego”).
●[Powrót]: Wybierz tę opcję, aby cofnąć się o jeden
krok w menu radia lub powrócić do poprzedniego
ekranu.
Wyświetlanie informacji DAB na
wyświetlaczu
Podczas słuchania audycji radiowej DAB należy
wielokrotnie nacisnąć przycisk Info/Menu, aby
przełączyć następujące informacje na wyświetlaczu
radia:
●Dynamic Label Segment (przewijanie tekstu)
●Typ programu
●Nazwa multipleks
● Częstotliwość i kanał
● Błąd/siła sygnału
● Szybkość transmisji/Typ dźwięku
●Data
SŁUCHANIE RADIA FM
Strojenie stacji FM
Aby nastroić stacje radiowe FM, wykonaj następujące
kroki:
1. Włącz radio za pomocą przycisku zasilania.
2. Wybierz tryb radia FM, naciskając wielokrotnie
przycisk Mode.

20 POLSKI
3. Naciśnij i przytrzymaj przycisk strojenia w górę
lub w dół, aby automatycznie nastroić stację FM
o odpowiednio wyższej lub niższej częstotliwości.
Twoje radio przestanie skanować, gdy znajdzie
stację o wystarczającej sile. Na wyświetlaczu
pojawi się częstotliwość znalezionego sygnału. Jeśli
informacje RDS są dostępne, po kilku sekundach na
wyświetlaczu pojawi się nazwa stacji radiowej.
4. Naciśnij przycisk strojenia w górę lub w dół, aby w
razie potrzeby dostroić częstotliwość o 0,05MHz.
5. Powtórz kroki 3 i 4, aby dostroić inne stacje radiowe.
UWAGA:
W przypadku trybu radiowego FM, jeśli odbiór radia nie
jest dobry, może być konieczne przeniesienie radia do
pozycji zapewniającej lepszy odbiór.
Menu radia FM
Menu radia FM można otworzyć, naciskając i
przytrzymując przycisk Info/Menu, gdy radio jest w
trybie FM. Użyj przycisku strojenie w górę lub w dół,
aby wybrać jedną z opcji, a następnie naciśnij przycisk
Wybierz, aby potwierdzić swój wybór.
Domyślne i zalecane ustawienia radia są oznaczone
gwiazdką.
Menu radia FM oferuje następujące opcje:
●[Strefa skanowania]: Wybierz tę opcję, aby
skonfigurować, czy radio powinno szukać tylko
silnych sygnałów („Lokalnych”) lub wszystkich
sygnałów („Odległych”) podczas korzystania z funkcji
automatycznego strojenia.
●[System]: Wybierz tę opcję, aby przejść do ustawień
menu systemowego i skonfigurować radio (szczegóły
w rozdziale „Korzystanie z menu systemowego”).
●[Powrót]: Wybierz tę opcję, aby cofnąć się o jeden krok
w menu radia lub powrócić do poprzedniego ekranu.
Wyświetlanie informacji FM na
wyświetlaczu
Podczas słuchania audycji radiowej FM, które nadaje
również dane RDS, należy wielokrotnie nacisnąć
przycisk Info/Menu, aby przełączyć następujące
informacje na wyświetlaczu radia:
●Tekst radiowy
●Typ programu
● Częstotliwość
●Tryb Audio
●Data
Jeśli informacje RDS nie są dostępne, radio nie
będzie w stanie wyświetlić wiadomości tekstowej i typu
programu.
Wstępne ustawienia stacji w trybach
DAB i FM.
Dostępnych jest 9 wstępnie ustawionych stacji dla
trybów DAB i FM. Są one stosowane tak samo dla
każdego trybu pracy.
1. Włącz radio, a następnie wybierz tryb radiowy DAB
lub FM i nastrój wymaganą stację radiową, jak
opisano wcześniej.
2. Naciśnij i przytrzymaj przycisk Select/Memory.
Na wyświetlaczu pojawi się menu „Zapisz w
zaprogramowanych stacjach”.
3. Naciśnij przycisk strojenia w górę albo w dół,
aby wybrać żądaną liczbę zaprogramowanych
stacji. Następnie naciśnij przycisk wyboru, aby
zapisać zaprogramowaną stację. Na wyświetlaczu
wyświetli się „Zapisano” wskazując, że stacja
jest przechowywana pod wybranym numerem
zaprogramowanej stacji. Jeśli inna stacja została już
zapisana pod wybranym numerem zaprogramowanej
stacji, zostanie ona nadpisana. Powtórz tę procedurę,
jeśli konieczne, dla pozostałych ustawień.
Przywrócenie ustawień wstępnych w
trybach DAB i FM
1. Włącz radio, a następnie wybierz tryb radia DAB lub
FM za pomocą przycisku Mode.
2. Naciśnij przycisk Preset, aby wyświetlić menu
„Przywróć ustawienia wstępne”.
3. Wybierz wstępnie ustawiony numer za pomocą
przycisku strojenia w górę albo w dół, a następnie
naciśnij przycisk wyboru, aby potwierdzić swój wybór.
Radio dostroi się teraz do wybranego ustawienia.
Jeśli przycisk wyboru lub inny przycisk nie zostanie
naciśnięty, radio również dostroi się do wybranego
ustawienia po 2 sekundach. Wybrany numer
wstępnie ustawionej stacji jest wyświetlany w górnej
części wyświetlacza radiowego.
Korzystanie z menu systemowego
Menu systemowe może być używane do konfiguracji
radia. Wykonaj następujące kroki, aby uzyskać dostęp
do ustawień systemowych:
1. Włącz radio za pomocą przycisku zasilania.
2. Naciśnij i przytrzymaj przycisk Info/Menu, aby
otworzyć menu dla bieżącego trybu.
3. Użyj przycisku strojenia w górę lub w dół, aby wybrać
[System] i naciśnij przycisk wyboru, aby otworzyć
menu.
Menu systemowe oferuje następujące opcje:
Użyj przycisku strojenie w górę lub w dół, aby wybrać
jedną z opcji, a następnie naciśnij przycisk Wybierz,
aby potwierdzić swój wybór.
Domyślne i zalecane ustawienia radia są oznaczone
gwiazdką.
●[Godzina/Data]: Wybierz tę opcję, aby ustawić
źródło automatycznej aktualizacji czasu i daty
oraz ustawić format czasu. Kolejna opcja
Other manuals for DMR056
2
This manual suits for next models
1
Table of contents
Languages:
Other Makita Radio manuals

Makita
Makita DMR113 User manual

Makita
Makita MR004G User manual

Makita
Makita DMR108B User manual

Makita
Makita DMR108 User manual

Makita
Makita GRM01 User manual

Makita
Makita DMR056 User manual

Makita
Makita BMR103 User manual

Makita
Makita BMR102 User manual

Makita
Makita DMR106B User manual

Makita
Makita XRM03 User manual

Makita
Makita BMR100 User manual

Makita
Makita BMR100 Quick start guide

Makita
Makita DMR300 User manual

Makita
Makita XRM06A User manual

Makita
Makita XRM02W User manual

Makita
Makita XRM06X User manual

Makita
Makita DMR102 User manual

Makita
Makita DMR112 User manual

Makita
Makita DMR108AR User manual

Makita
Makita MR051 User manual