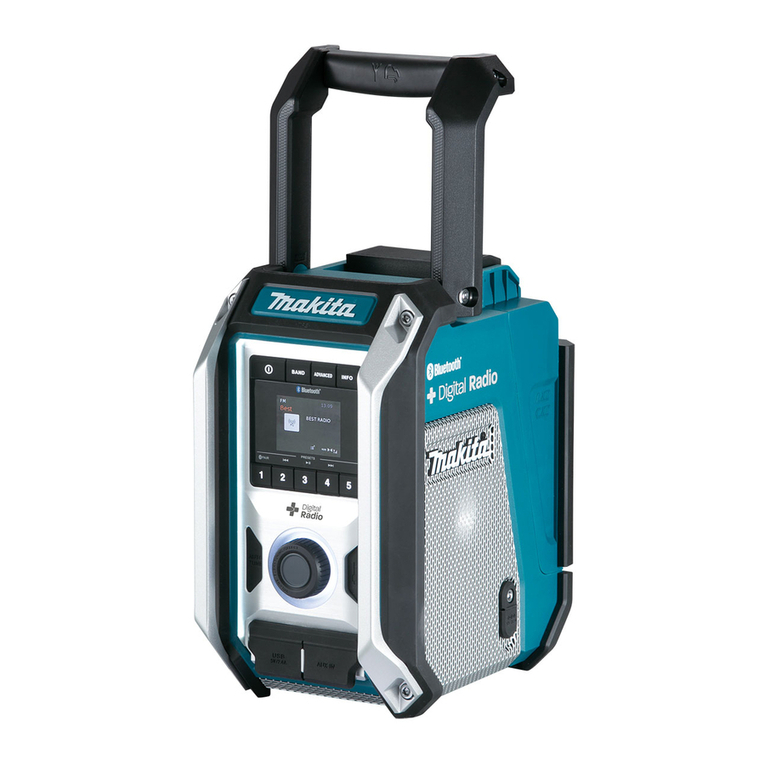
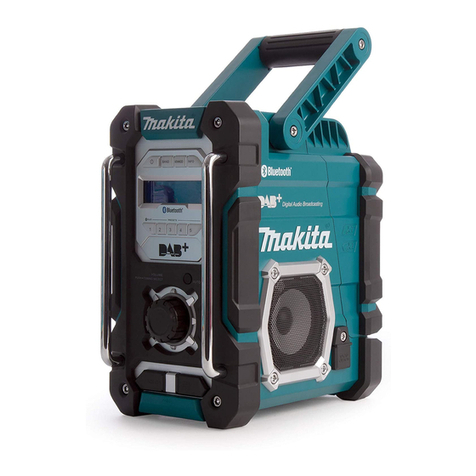
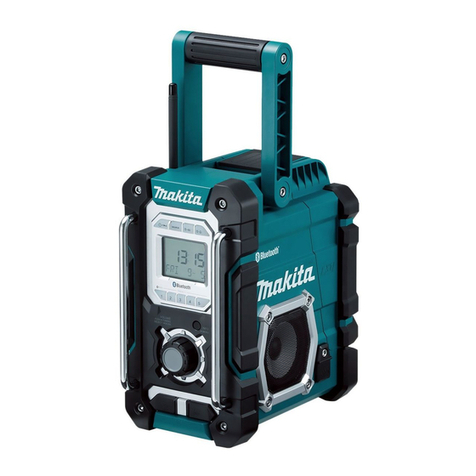
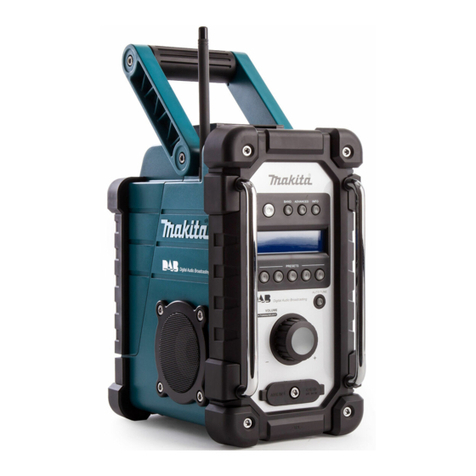
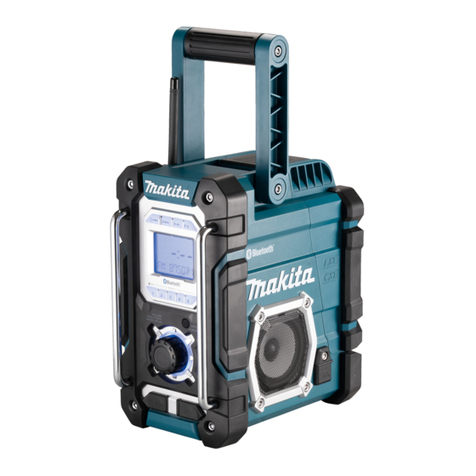
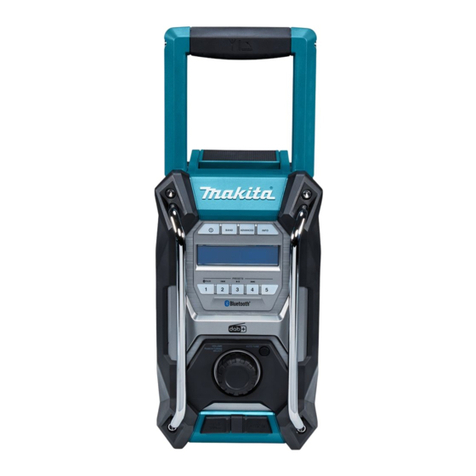
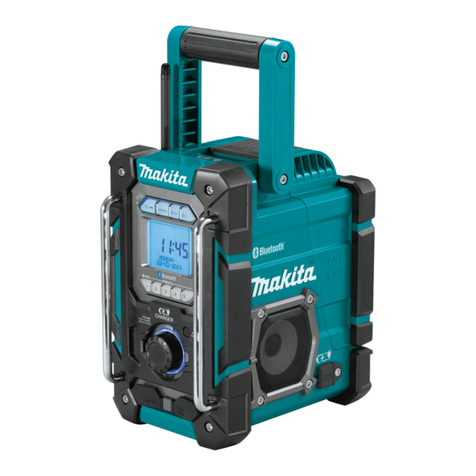
Makita DMR300 User manual

DMR300
DMR301
EN Job Site Charger Radio INSTRUCTION MANUAL 6
ZHCN 充电式收音机(具充电功能)使用说明书 18
ID Radio Situs Kerja dengan
Baterai Isi Ulang PETUNJUK PENGGUNAAN 32
MS Radio Pengecas Tapak Kerja MANUAL ARAHAN 45
VI Radio Công Trường Có Chức
Năng Sạc TÀI LIỆU HƯỚNG DẪN 58
TH 70

(a) (b) (c)
(d) (e) (f)
1
2
3
4
5
678
9
10
11
12
13
14
15
16
17
18 19
3
Fig.1
2

6
511
12
10
8
9
16
1 2 3 4
18
713
14
15
17
Fig.2
1
2
Fig.3
1
Fig.4
3

12
3
3
4
4
Fig.5
1
2
Fig.6
1
Fig.7
2
1
3
Fig.8
1
2
Fig.9
1
Fig.10
4

1
2
3
Fig.11
1
2
3
Fig.12
1
Fig.13
5

6ENGLISH
ENGLISH (Original instructions)
SPECIFICATIONS
Model: DMR300 DMR301
AC power adaptor DC 24 V / 5.0 A, inner sleeve positive
Battery UM-3 (AA size) x 2 for back up
CXT battery: DC 10.8 V - 12 V max
LXT battery: DC 14.4 V - 18 V
Band FM
AM
FM
AM
DAB
Frequency coverage For European countries:
50 KHz (0.05 MHz/step)
For countries other than Europe:
Refer to the nameplate on the radio for the frequency coverage.
(The frequency coverage varies depending on the countries.)
Bluetooth®Bluetooth®
Bluetooth®QD ID
147189
(The Bluetooth®word mark and logos
are registered trademarks
owned by Bluetooth SIG, Inc.)
Bluetooth®version 5.0 Certied
Bluetooth® proles A2DP / AVRCP
Transmission power Power Class2
Operating Frequency 2,402 MHz - 2,480 MHz
Maximum radio-frequency power 6.32 dBm
(Declaration for EU Compliance)
Transmission range Optimum: Max.10 meters
Possible: Max.30 meters
(varies according to usage conditions)
Supported codec SBC
Circuit feature
Loudspeaker
3.5 inches 8 ohm x 2
Output Power DC 10.8 V - 12 V max: 1.2 W x 2
DC 14.4 V: 2.2 W x 2
DC 18 V: 3.5 W x 2
USB output USB TYPE A x 2 (5 V / 2.4 A TOTAL)
Battery charge output CXT battery: DC 10.8 V - 12 V max, 3.5 A
LXT battery: DC 14.4 V - 18 V, 3.5 A
Input terminal 3.5 mm dia. (AUX IN1/AUX IN2)
Antenna system FM: soft bended rod antenna
AM: bar antenna
Dimension (L x W x H) 268 x 185 x 305 mm
Weight (without battery cartridge) 5.9 kg
• Due to our continuing program of research and development, the specications herein are subject to change
without notice.
• Specications may dier from country to country.
The Bluetooth®word mark and logos are registered trademarks owned by the Bluetooth SIG, Inc. and any use of
such marks by Makita is under license. Other trademarks and trade names are those of their respective owners.
The following table indicates the operating time on a single charge in Radio mode.

7ENGLISH
Battery capacity Battery Cartridge Voltage Operating time (hour)
(at speaker output = 50 mW +
50 mW)
Charging time
(min)
10.8 V - 12
V max
14.4 V 18 V In radio or AUX In Bluetooth®
with USB
charging
1.3 Ah -BL1415 -5.6 1.0 27
- - BL1815 6.1 1.4 27
1.5 Ah BL1015
BL1016
- - 6.3 0.9 31
-BL1415N -5.6 1.0 27
- - BL1815N 6.1 1.4 27
2.0 Ah BL1020B
BL1021B
- - 8.2 1.2 40
- - BL1820
BL1820B
8.2 1.8 38
3.0 Ah -BL1430
BL1430B
-9.4 1.7 48
- - BL1830
BL1830B
11.3 2.5 48
4.0 Ah BL1040B
BL1041B
- - 16.4 2.3 75
-BL1440 -14.8 2.7 67
- - BL1840
BL1840B
16.0 3.6 67
5.0 Ah -BL1450 -17.8 3.3 84
- - BL1850
BL1850B
20.5 4.6 84
6.0 Ah -BL1460B -19.5 3.6 100
- - BL1860B 24.7 5.5 100
WARNING: Only use the battery cartridges listed above. Use of any other battery cartridges may cause
injury and/or re.
NOTE: Some of the battery cartridges listed above may not be available depending on your region of residence.
NOTE: Table regarding to the battery operating time above is for reference. The actual operating time may dier
with the type of the battery, charging condition, or usage environment.
Symbols
The followings show the symbols used for the equip-
ment. Be sure that you understand their meaning before
use.
Read instruction manual.
Ni-MH
Li-ion
Only for EU countries
Do not dispose of electric equipment or
battery pack together with household waste
material!
In observance of the European Directives,
on Waste Electric and Electronic
Equipment and Batteries and Accumulators
and Waste Batteries and Accumulators
and their implementation in accordance
with national laws, electric equipment and
batteries and battery pack(s) that have
reached the end of their life must be col-
lected separately and returned to an envi-
ronmentally compatible recycling facility.
SAFETY WARNINGS
IMPORTANT SAFETY
INSTRUCTIONS
SAVE THESE INSTRUCTIONS.
WARNING: When using electric tools, basic
safety precautions should always be followed to
reduce the risk of re, electric shock, and per-
sonal injury, including the following:
1. Read this instruction manual carefully before
use. If you use a Makita charger, also read the
charger instruction manual.
2. Clean only with dry cloth. Do not use water for
cleaning.
3. Do not install near any heat sources such as
radiators, heat registers, stoves, or other appa-
ratus (including ampliers) that produce heat.
4. Only use attachments/accessories specied
by the manufacturer.

8ENGLISH
5. Unplug this appliance during lightning storms
or when unused for long periods of time.
6. The battery pack must be recharged only with
this radio or the specied charger for the bat-
tery. A charger that may be suitable for one
type of battery may create a risk of re when
used with another battery.
7. Use battery operated radio only with specif-
ically designated battery packs. Use of any
other batteries may create a risk of re.
8. When battery pack is not in use, keep it away
from other metal objects like: paper clips,
coins, keys, nails, screws, or other small metal
objects that can make a connection from one
terminal to another. Shorting the battery ter-
minals together may cause sparks, burns, or a
re.
9. Avoid body contact with grounded surfaces
such as pipes, radiators, ranges and refrig-
erators. There is an increased risk of electric
shock if your body is grounded.
10. Under abusive conditions, liquid may be
ejected from the battery; avoid contact. If
contact accidentally occurs, ush with water.
If liquid contacts eyes,additionally seek med-
ical help. Liquid ejected from the battery may
cause irritation or burns.
11. Do not use a battery pack and radio that is
damaged or modied. Doing so may exhibit
unpredictable behaviour resulting in re, explosion
or risk of injury.
12. Do not expose a battery pack or tool to re
or excessive temperature. Exposure to re or
temperature above 130 °C(266°F) may cause
explosion.
13. Follow all charging instructions and do not
charge the battery pack or tool outside the
temperature range specied in the instruc-
tions. Charging improperly or at temperatures
outside the specied range may damage the
battery and increase the risk of re.
14. The MAINS plug is used as the disconnect
device. The MAINS plug shall remain readily
operable.
15. Do not use the product at a high volume for
any extended period. To avoid hearing damage,
use the product at moderate volume level.
16. LCD displays include liquid which may cause
irritation and poisoning. If the liquid enters the
eyes, mouth or skin, rinse it with water and call a
doctor.
17. Do not expose the product to rain or wet con-
ditions. Water entering the product will increase
the risk of electric shock.
18. This product is not intended for use by per-
sons (including children) with reduced phys-
ical, sensory or mental capabilities, or lack
of experience and knowledge, unless they
have been given supervision or instruction
concerning use of the product by a person
responsible for their safety. Children should be
supervised to ensure that they do not play with
the product. Store the product out of the reach
of children.
19. Be careful not to pinch your ngers when
opening and closing the battery cover.
20. Return the battery compartment locker to the
original position, after installing or removing
battery pack. If not, battery pack may accidentally
fall out of the radio, causing injury to you or some-
one around you.
21. Always close and lock the battery compart-
ment locker before moving the radio.
22. When the radio is powered from the battery,
switch o the radio before removing the bat-
tery pack.
23. Be careful not to drop or strike the radio.
Broken shell may slash your nger or stab
your body. Damaged radio may exhibit unpredict-
able behaviour resulting in re, explosion or risk of
injury.
24. Have servicing performed by a qualied repair
person using only identical replacement parts.
This will ensure that the safety of the product is
maintained.
25. Do not modify or attempt to repair the appli-
ance or the battery pack except as indicated in
the instructions for use and care.
Important safety instructions for
battery cartridge
1. Before using battery cartridge, read all instruc-
tions and cautionary markings on (1) battery
charger, (2) battery, and (3) product using
battery.
2. Do not disassemble or tamper with the battery
cartridge. It may result in a re, excessive heat,
or explosion.
3. If operating time has become excessively
shorter, stop operating immediately. It may
result in a risk of overheating, possible burns
and even an explosion.
4. If electrolyte gets into your eyes, rinse them
out with clear water and seek medical atten-
tion right away. It may result in loss of your
eyesight.
5. Do not short the battery cartridge:
(1) Do not touch the terminals with any con-
ductive material.
(2) Avoid storing battery cartridge in a con-
tainer with other metal objects such as
nails, coins, etc.
(3) Do not expose battery cartridge to water
or rain.
A battery short can cause a large current
ow, overheating, possible burns and even a
breakdown.
6. Do not store and use the tool and battery car-
tridge in locations where the temperature may
reach or exceed 50 °C (122 °F).
7. Do not incinerate the battery cartridge even if
it is severely damaged or is completely worn
out. The battery cartridge can explode in a re.
8. Do not nail, cut, crush, throw, drop the battery
cartridge, or hit against a hard object to the
battery cartridge. Such conduct may result in a
re, excessive heat, or explosion.
9ENGLISH
9. Do not use a damaged battery.
10. The contained lithium-ion batteries are subject
to the Dangerous Goods Legislation require-
ments.
For commercial transports e.g. by third parties,
forwarding agents, special requirement on pack-
aging and labeling must be observed.
For preparation of the item being shipped, consult-
ing an expert for hazardous material is required.
Please also observe possibly more detailed
national regulations.
Tape or mask o open contacts and pack up the
battery in such a manner that it cannot move
around in the packaging.
11. When disposing the battery cartridge, remove
it from the tool and dispose of it in a safe
place. Follow your local regulations relating to
disposal of battery.
12. Use the batteries only with the products
specied by Makita. Installing the batteries to
non-compliant products may result in a re, exces-
sive heat, explosion, or leak of electrolyte.
13. If the tool is not used for a long period of time,
the battery must be removed from the tool.
14. During and after use, the battery cartridge may
take on heat which can cause burns or low
temperature burns. Pay attention to the han-
dling of hot battery cartridges.
15. Do not touch the terminal of the tool imme-
diately after use as it may get hot enough to
cause burns.
16. Do not allow chips, dust, or soil stuck into the
terminals, holes, and grooves of the battery
cartridge. It may result in poor performance or
breakdown of the tool or battery cartridge.
17. Unless the tool supports the use near
high-voltage electrical power lines, do not use
the battery cartridge near high-voltage electri-
cal power lines. It may result in a malfunction or
breakdown of the tool or battery cartridge.
18. Keep the battery away from children.
SAVE THESE INSTRUCTIONS.
CAUTION: Only use genuine Makita batteries.
Use of non-genuine Makita batteries, or batteries that
have been altered, may result in the battery bursting
causing res, personal injury and damage. It will
also void the Makita warranty for the Makita tool and
charger.
CAUTION: RISK OF EXPLOSION IF BATTERY
IS REPLACED BY AN INCORRECT TYPE. Disposal
of a battery into re or a hot oven, or mechanically
crushing or cutting of a battery, that can result in an
explosion. Leaving a battery in an extremely high
temperature surrounding environment that can result
in an explosion or the leakage of ammable liquid or
gas. A battery subjected to extremely low air pressure
that may result in an explosion or the leakage of
ammable liquid or gas.
Tips for maintaining maximum
battery life
1. Charge the battery cartridge before completely
discharged. Always stop tool operation and
charge the battery cartridge when you notice
less tool power.
2. Never recharge a fully charged battery car-
tridge. Overcharging shortens the battery
service life.
3. Charge the battery cartridge with room tem-
perature at 10 °C - 40 °C (50 °F - 104 °F). Let
a hot battery cartridge cool down before
charging it.
4. Charge the battery cartridge if you do not use
it for a long period (more than six months).
Important safety instructions for
battery charging
CAUTION:
1. SAVE THESE INSTRUCTIONS – This manual
contains important safety and operating
instructions for battery charging.
2. Before charging, read all instructions and cau-
tionary markings on this appliance, AC power
adaptor, and battery cartridge.
3. CAUTION – To reduce risk of injury, charge
only Makita type rechargeable batteries. Other
types of batteries may burst causing personal
injury and damage.
4. Non-rechargeable batteries cannot be charged
with this appliance.
5. Use a power source with the voltage specied
on the nameplate of the AC power adaptor.
6. Do not charge the battery cartridge in pres-
ence of ammable liquids or gases.
7. Do not expose the AC power adaptor to rain,
snow, or wet condition.
8. Never carry the AC power adaptor by cord or
yank it to disconnect from receptacle.
9. Before attempting any maintenance or clean-
ing, unplug the AC power adaptor and remove
battery cartridge. Pull by plug rather than cord
whenever disconnecting the appliance.
10. Do not leave the AC power adaptor discon-
nected from the appliance while the power is
supplied from the mains.
11. Make sure cord is located so that it will not be
stepped on, tripped over, or otherwise sub-
jected to damage or stress.
12. Do not operate this appliance with damaged
cord or plug. If the cord or plug is damaged,
ask Makita authorized service center to replace
it in order to avoid a hazard.
13. Do not operate or disassemble this appliance
if it has received a sharp blow, been dropped,
or otherwise damaged in any way; take it to a
qualied serviceman. Incorrect use or reas-
sembly may result in a risk of electric shock or
re.

10 ENGLISH
14. Do not charge battery cartridge when room
temperature is BELOW 10°C (50°F) or ABOVE
40°C (104°F). At the cold temperature, charging
may not start.
15. Do not attempt to use the AC power adaptor
with a step-up transformer, an engine genera-
tor or DC power receptacle.
16. Do not allow anything to cover or clog the
vents on this appliance.
17. Do not plug or unplug the power cord and the
AC power adaptor with wet hands.
18. Do not install or remove the battery cartridge
with wet hands.
INTRODUCTION
Parts description
Body
► Fig.1: a) Left side b) Front c) Right side d) Back (battery cover closed) e) Back (battery cover opened) f) Top
1Handle 2Soft bended rod antenna 3Speaker 4Menu/Info button
5Volume/Tuning control/
Select knob
6Auxiliary input socket
(AUX IN 1)
7USB power supply port 8DC IN socket
9Hook for AC adaptor 10 Bottle cap opener 11 Battery cover 12 Slot for LXT battery
cartridge
13 Slot for CXT battery
cartridge
14 Auxiliary input socket
(AUX IN 2)
15 USB power supply port 16 Battery compartment
(covering back up
batteries)
17 Battery compartment
locker
18 Power cord 19 AC power adaptor - -
Buttons and LCD display
► Fig.2
1Power/Sleep timer
button
2Source button 3Radio alarm button 4Buzzer alarm button
5“TIMER TO ALARM”
icon
6“TIMER TO SPEAKER”
icon
7Icon for delay charge 8Band
9Icon for sleep timer 10 PM indicator for clock 11 Stereo symbol 12 No power indicator
13 Error icon for charging
failure
14 Indicator for battery
status/capacity
15 Indicator for AC power
supply
16 Clock
17 Information area 18 Preset stations/Preset
1 button as Bluetooth®
pair button
- - - -
NOTE: DAB is only receivable with DMR301.
Installing back up batteries
NOTE: Keeping back up batteries inside the compart-
ment prevent stored data in preset memories from
being lost.
1. Pull up the battery compartment to unlock it and
then open the battery cover.
► Fig.3: 1. Battery compartment locker 2. Battery
cover
2. Remove back up battery compartment cover and
install 2 fresh UM-3 (AA sizes) batteries. Make sure the
batteries are with correct polarity as shown inside the
compartment.
► Fig.4: 1. Back up battery compartment cover
3. Close the back up battery compartment cover.
FUNCTIONAL
DESCRIPTION
Installing or removing battery
cartridge
CAUTION: Hold the tool and the battery car-
tridge rmly when installing or removing battery
cartridge. Failure to hold the radio and the battery
cartridge rmly may cause them to slip o your hands
and result in damage to the radio and battery car-
tridge and a personal injury.
Pull up the battery compartment to unlock it and then
open the battery cover.

11 ENGLISH
To install the battery cartridge, align the tongue on the
battery cartridge with the groove in the housing and slip
it into place. Insert it all the way until it locks in place
with a little click. If you can see the red indicator on the
upper side of the button, it is not locked completely.
► Fig.5: 1. LXT battery cartridge 2. CXT battery car-
tridge 3. Red indicator 4. Button
To remove the battery cartridge, slide it from the tool
while sliding the button on the front of the cartridge.
After installing/removing the battery cartridge, be sure
to close the battery cover.
CAUTION: Always install the battery cartridge
fully until the red indicator cannot be seen. If not,
it may accidentally fall out of the tool, causing injury to
you or someone around you.
CAUTION: Do not install the battery cartridge
forcibly. If the cartridge does not slide in easily, it is
not being inserted correctly.
Indicating the remaining battery
capacity
Only for battery cartridges with the indicator
► Fig.6: 1. Indicator lamps 2. Check button
Press the check button on the battery cartridge to indi-
cate the remaining battery capacity. The indicator lamps
light up for a few seconds.
Indicator lamps Remaining
capacity
Lighted O Blinking
75% to 100%
50% to 75%
25% to 50%
0% to 25%
(For LXT battery only)
Charge the
battery.
(For LXT battery only)
The battery
may have
malfunctioned.
NOTE: Depending on the conditions of use and the
ambient temperature, the indication may dier slightly
from the actual capacity.
Using the soft bended rod antenna
When listening to FM radio stations, straight up the soft
bended rod antenna as shown in the gure.
► Fig.7: 1. Soft bended rod antenna
NOTICE: Always store the soft bended rod antenna
to the original position after use.
Using Supplied AC power adaptor
WARNING: Always disconnect the AC power
adaptor completely before moving the radio. If the
AC power adaptor is not removed, it may cause
an electric shock.
WARNING: Never pull and/or drag the cord
of the AC power adaptor. If not, the radio may
accidentally fall down, causing injury to you or
someone around you.
WARNING: The AC power adaptor is used as
the means of connecting the radio to the mains
supply. The mains socket used for the radio must
remain accessible during normal use.
WARNING: In order to disconnect the radio,
the AC power adaptor should be removed from
the mains outlet completely
WARNING: Use the AC power adaptor sup-
plied with the product or specied by Makita only.
WARNING: Do not hold the power supply
cable and plug by your mouth. Doing so might
cause an electric shock.
WARNING: Do not handle the plug with wet or
greasy hand.
WARNING: Damaged or entangled cords
increase the risk of electric shock. If the cord
is damaged, have it replaced by our authorized
service center in order to avoid a safety hazard.
Do not use it before repair.
WARNING: After use, always store AC power
adaptor out of the reach of children.
Open the cover and insert the adaptor plug into the DC
IN socket on the side of the radio. Plug the adaptor into
a standard mains socket outlet. While the radio is pow-
ered from AC power adaptor, the indicator for AC power
supply ( ) will appear on the display.
► Fig.8: 1. Cover 2. DC IN socket 3. Adaptor plug
NOTE: When the adaptor is used, the radio is pow-
ered from the mains and the battery cartridge is
charged.
NOTE: When the radio has any interference in AM
band by its AC adaptor, move the radio away from the
AC adaptor further than 30 cm (1 feet).
Auxiliary input socket
► Fig.9: 1. AUX IN 1 2. AUX IN 2
Two 3.5 mm stereo auxiliary input sockets are provided.
One is at the front of the radio (AUX IN 1); the other is
located in the battery compartment (AUX IN 2).
1. Connect an external audio source, such as a MP3
or CD player, to the auxiliary input socket.
2. Repeatedly press and release the Source but-
ton until AUX IN 1 or 2 is displayed.
3. Adjust the volume setting on your external audio
source to ensure an adequate signal level. After that,
use the Tuning control knob on the radio as needed
for comfortable listening.

12 ENGLISH
Charging with USB power supply
port
CAUTION: Do not connect power source to
USB port. Otherwise there is risk of re. The USB
port is only intended for charging lower voltage
device. Always place the cover onto the USB port
when not charging the lower voltage device.
CAUTION: Do not insert a nail, wire, etc. into
USB power supply port. Otherwise a circuit short
may cause smoke and re.
NOTICE: Before connecting USB device to the
charger, always backup your data of USB device.
Otherwise your data may lose by any possibility.
NOTICE: When not using or after charging, remove
the USB cable and close the cover.
NOTICE: Do not connect this USB socket with your
PC USB port, as it is highly possible that it may cause
breakdown of the units.
NOTE: The charger may not supply power to some
USB devices.
There are USB power supply ports at the front and back
side of the radio. You can charge USB device through
the USB power supply port.
► Fig.10: 1. USB power supply port
1. Connect the USB device, such as a MP3 or CD
player, to the USB power supply port using a USB cable
available in the market.
2. Press the Power button to switch on the
radio.
NOTE: No matter if the radio is AC powered or battery
powered, you can charge a USB device when the
radio is switched on and in FM radio mode, Bluetooth
mode, or AUX mode which is appeared when an
external audio source is connected.
NOTE: The maximum volume of the output power
speaker will decrease when your USB device is being
charged.
NOTE: The USB socket can provide max 2.4 A 5 V (2
port total) of electrical current.
Charging the battery cartridge
To charge the battery cartridge with this radio, insert
the adaptor plug into the DC IN socket and then plug it
to the mains. After that, insert the battery cartridge to
the slot.
► Fig.11: 1. LXT battery cartridge 2. CXT battery car-
tridge 3. Indicator for battery status/capacity
The indicator for battery status/capacity blinks when the
battery cartridge is being charged. The charging status
is as follows:
Indicator for battery status/
capacity
Charging status
(blinking)
Charging (less than 80%)
(blinking)
Charging (80% or more has
been charged)
(not blinking)
Charged (100%)
NOTICE: You cannot charge LXT and CXT bat-
tery cartridges at the same time.
NOTE: It will take several seconds until the indicator
for battery status/capacity appears after the AC power
adaptor is plugged into the mains.
NOTE: If the AC power adaptor is disconnected from
the radio during battery charging, the radio turns o
for a few seconds and then automatically turns on
with the battery power supply.
Hook for the AC power adaptor
The hook on the back of the radio is useful for carrying
the AC power adaptor. When carrying, bundle the cords
and tie them with AC power adaptor using the band.
► Fig.12: 1. Hook 2. AC power adaptor 3. Band
NOTICE: Do not store AC power adaptor in the
battery compartment. The cord may be pinched and
damaged when closing the battery cover.
NOTICE: Always hold the handle when carrying
the radio.
NOTICE: Be careful not to drop the AC power
adaptor hooked on the back of the radio.
Bottle cap opener
The bottle cap opener is provided on the back of the
radio.
► Fig.13: 1. Bottle cap opener
NOTICE: Hold the radio rmly when using the
bottle cap opener. Failure to do so may cause the
radio tipped over and result in damage or malfunction.
NOTICE: Be careful not to spill the beverage
onto the radio when opening the cap.
OPERATION
Switching on/o the radio
Press the Power button to switch on the radio.
Press the Power button again to switch o the
radio.

13 ENGLISH
Adjusting the volume level
Turn the Tuning control knob clockwise to increase
the volume. Turn the Tuning control knob counter-
clockwise to decrease the volume.
NOTE: The volume adjustment is not available during
tuning and some settings.
Scan tuning AM/FM or DAB
1. Press the Power button to switch on your
radio.
2. Press the Source button to select AM/FM or
DAB radio mode.
3. Press and hold the Tuning control knob to carry
out an auto-tune.
Your radio will scan up the AM/FM or DAB band from
the currently displayed frequency and will stop scan-
ning automatically when it nds a station of sucient
strength.
NOTE: The stations to be found by scan tuning vary
depending on the receiving sensitivity at the location
where the scan tuning is performed. If you don't have
desired station, change the location and perform the
procedure above.
NOTE: When the end of the waveband is reached
your radio will recommence tuning from the opposite
end of the waveband.
Manual tuning – FM/AM or DAB
1. Press the Power button to switch on your
radio.
2. Press the Source button to select FM/AM or
DAB radio mode.
3. Press the Tuning control knob .
4. Rotate the Tuning control knob to tune to a
station.
5. Press the Tuning control knob to set the
tuning.
NOTE: Manual tuning is available while “MANUAL
TUNING” is displayed on the display. If “MANUAL
TUNING” is not displayed, start the manual tuning
from the beginning.
NOTE: The stations to be found by manual tuning
vary depending on the receiving sensitivity at the
location where the manual tuning is performed. If you
don't have desired station, change the location and
perform the procedure above.
NOTE: When the end of the waveband is reached
your radio will recommence tuning from the opposite
end of the waveband.
Presetting stations in FM/AM or DAB
There are 5 preset stations each for FM/AM or DAB
radio. They are used in the same way for each
waveband.
1. Press the Power button to switch on your
radio.
2. Press the Source button to select the desired
waveband. Tune to the required radio station.
3. Press and hold the required Preset button (1 to 5)
until the display shows “PRESET X
STORED” (X indicates the number of the Preset button
that you pressed). The station will be stored using the
preset number (P1-P5). Repeat this procedure for the
remaining presets as you wish.
NOTE: Preset stations which have already been
stored may be overwritten by following the above
procedure.
Recalling a preset station in AM/FM
or DAB
1. Press the Power button to switch on your
radio.
2. Press the Source button to select AM, FM or
DAB radio mode.
3. Press the desired Preset button that
you stored in the preset memory.
Display modes – FM
Your radio has a range of display options for FM radio
mode.
Station name Displays the name of the sta-
tion being listened to, together
with the band and frequency.
Program type Displays the type of station
being listened to such as Pop,
Classic, News, etc, together
with the band and frequency.
Radio text Displays radio text message
such as new items etc,
together with the band and
frequency.
Time/Date Displays the time and date
according to the date setting
of your radio.

14 ENGLISH
Display modes – DAB
Your radio has a range of display options for DAB radio
mode.
Station name Displays the name of the
station being listened to.
Program type Displays the type of station
being listened to such as Pop,
Classic, News, etc.
Multiplex name Displays the name of the DAB
multiplex to which the current
station belongs.
Time/Date Displays the time and date.
Frequency and channel Displays the frequency and
channel number for the cur-
rently tuned DAB station.
Bit rate/ Audio type Displays the digital audio bit
rate and audio type for the
currently tuned DAB station.
Signal strength Displays the signal strength
for the currently tuned DAB
station.
Setting the clock
Setting the time and date format
NOTE: The selected time and date format is also
used when setting the alarms.
1. Press and hold the Menu/Info button
INFO
MENU
to enter
the menu setting.
2. Rotate the Tuning control knob until <TIME>
appears on the display and press the Tuning control
knob to enter the setting.
3. Rotate the Tuning control knob until <SET
12/24 HOUR> appears on the display and press the
control knob to enter the setting.
4. Rotate the Tuning control knob to select either
<12 HOUR> or <24 HOUR> format. Press the Tuning
control knob to conrm your choice.
NOTE: If the 12 hour clock format is chosen, the radio
will then use the 12 hour clock for the setting.
5. Press and hold the Menu/Info button
INFO
MENU
to enter
the menu setting.
6. Rotate the Tuning control knob until <TIME>
appears on the display and press the Tuning control
knob to enter the setting.
7. Rotate the Tuning control knob until <DATE
FORMAT> appears on the display and press the control
knob to enter the setting.
8. Rotate the Tuning control knob to select the
desired date format (<DD/MM/YYYY> or <MM/DD/
YYYY>). Press the Tuning control knob to conrm
your choice.
Setting the time
1. Press and hold the Menu/Info button
INFO
MENU
.
2. Rotate the Tuning control knob until <TIME>
appears on the display. Press the Tuning control
knob to enter the setting.
3. Press the Tuning control knob while <SET
TIME> appears on the display to enter the setting.
4. The hour setting on the display will begin ashing.
Rotate the Tuning control knob to select the desired
hour, and press the Tuning control knob to conrm
the setting. Then rotate the Tuning control knob to
select the desired minute, and press the Tuning control
knob to conrm the setting.
Setting the date
1. Press and hold the Menu/Info button
INFO
MENU
.
2. Rotate the Tuning control knob until <TIME>
appears on the display. Press the Tuning control
knob to enter the setting.
3. Rotate the Tuning control knob until <SET
DATE> appears on the display. Press the Tuning control
knob to enter the setting.
4. Rotate the Tuning control knob to select the
desired year and press the Tuning control knob to
conrm the setting. Then rotate the Tuning control
knob to select the desired month, and press the
Tuning control knob to conrm the setting. Then
rotate the Tuning control knob to select the desired
date and press the Tuning control knob to conrm
the setting.
Setting the alarm clock
Your radio has two alarms which can each be set to
wake you to AM/FM/DAB radio or buzzer alarm. The
alarms may be set while the unit is in standby mode or
while playing.
Setting radio alarm time
1. Press and hold the radio alarm button , the
radio alarm symbol and the display hour will ash along
with a beep.
2. While the radio alarm symbol is ashing,
rotate Tuning control knob to select the hour and
press Tuning control knob again to conrm hour
setting. Then rotate the Tuning control knob to select
the minute and press Tuning control knob to conrm
minute setting.

15 ENGLISH
3. Rotate the Tuning control knob and the display will
show the frequency options for the alarm.
The alarm options are as follows:
ONCE The alarm will sound
once
DAILY The alarm will sound
everyday
WEEKDAYS The alarm will sound only
on weekdays
WEEKENDS The alarm will sound only
at weekends
Press the Tuning control knob to conrm the setting.
4. Rotate Tuning control knob to select the band
(FM/AM/DAB) and press Tuning control knob again
to conrm the setting.
5. Rotate Tuning control knob to select <LAST
LISTENED> or <PRESET NO.> and press Tuning
control knob again to conrm the setting.
6. Rotate Tuning control knob to select the
desired volume and press Tuning control knob to con-
rm the volume. Radio alarm setting is now completed.
NOTE: If new radio alarm station is not selected, the
radio will select the last alarm station.
Setting HWS (Humane Wake System)
buzzer alarm
A beep tone will activate when selecting the HWS
buzzer alarm.
The alarm beep starts to ring and it becomes quicker
as the time elapses. The alarm beep continues to ring
for one minute and stops. After one minute silence, the
alarm beep resume ringing. The alarm beep repeats
this cycle until you press the Power button .
NOTE: The buzzer alarm can be set when the radio
is turned o.
1. Press and hold the buzzer alarm button ,
the symbol and the display hour will ash along with a
beep.
2. While the buzzer alarm symbol is ashing,
rotate Tuning control knob to select the hour and
press Tuning control knob again to conrm hour
setting. Then rotate the Tuning control knob to select
the minute and press Tuning control knob to conrm
minute setting.
3. Rotate the Tuning control knob and the display
will show the frequency options for the alarm.
The alarm options are as follows:
ONCE The alarm will sound
once
DAILY The alarm will sound
everyday
WEEKDAYS The alarm will sound only
on weekdays
WEEKENDS The alarm will sound only
at weekends
4. Press the Tuning control knob to conrm the
setting.
NOTE: There is no volume adjustment for buzzer
alarm.
When the alarm sounds
To cancel a sounding alarm, press the Power but-
ton .
Disabling/cancelling alarms
To disable an active alarm, press and hold the corre-
sponding alarm button to cancel the alarm.
Snooze
When the alarm sounds, press any button other than
the Power button to stop the alarm for 5 minutes.
“SNOOZE” will appear on the display.
To adjust the silence time, follow the procedures below:
1. Press and hold the Menu/Info button
INFO
MENU
to enter
the menu setting.
2. Rotate the Tuning control knob until “SNOOZE”
appears on the display. Press the Tuning control
knob to enter the setting. Rotate the Tuning control
knob to adjust the silence time from 5, 10, 15 and
20 minutes.
NOTE: To cancel the snooze timer while the alarm is
suspended, press the Power button .
Sleep timer
Your radio can be set to turn o automatically after a
preset time has elapsed. The Sleep Timer setting can
be adjusted for 15, 30, 45, 60, 90, or 120 minutes.
1. Press and hold the Power button to enter
the Sleep Timer setting. “SLEEP 60 MINUTES” will be
shown on the display.
2. Keep holding the Power button . The sleep
timer options will start switching on the display. Release
the Power button when the desired Sleep Timer
setting appears on the display. The setting will be saved
and the icon for sleep timer ( ) will appear on the
display.

16 ENGLISH
NOTE: Your radio will switch o automatically after
the preset Sleep Timer has elapsed.
NOTE: To cancel the sleep timer before the preset
time has elapsed, simply press the Power but-
ton to turn the radio o.
Loudness
You can get compensation on lower and higher
frequency for your radio by adjusting the loudness
function.
1. Press and hold the Menu/Info button
INFO
MENU
to enter
the menu setting.
2. Rotate the Tuning control knob until
<LOUDNESS> appears on the display. Press the
Tuning control knob to enter the setting.
3. Rotate the Tuning control knob to choose
<ON> or <OFF> to turn on or turn o the loudness func-
tion, then press the Tuning control knob to conrm
the setting.
NOTE: To turn o the loudness function, select
<OFF> and press the Tuning control knob to con-
rm the setting.
Listening to Bluetooth®music
You need to pair your Bluetooth®device with your radio
before you can auto-link to play/stream Bluetooth®
music through your radio. Paring creates a permanent
“bond” so two devices can always recognize each other.
Pairing your Bluetooth®device
1. Press the Source button to select Bluetooth®
function. “READY BLUETOOTH” will be shown on the
display and “READY” will ash.
2. Activate Bluetooth® on your device according to
the device’s user manual to allow the paring procedure.
3. Press and release the Pair button . “PAIR
BLUETOOTH” will be shown on the display and it will
ash. You can start the search of your radio on your
Bluetooth®device. Once the name of your radio is
appeared on your Bluetooth®device, press the item in
your Bluetooth®list.
NOTE: With some mobiles (versions earlier than
BT2.1 Bluetooth®device), you may need to input the
pass code “0000”.
4. Your Bluetooth®device will be linked with the
radio. Once connected, “CONNECTED BLUETOOTH”
will appear on the display.
You can now play the music in your Bluetooth® device
via your radio.
Playing Bluetooth®device which has
already paired
1. Press the Source button to select Bluetooth®
function. “READY BLUETOOTH” will be shown on the
display and “READY” will ash.
2. Search and link the radio on your Bluetooth®
device. Some device may link with the radio
automatically.
You can now play the music in your Bluetooth® device
via your radio.
NOTE: The radio can pair with 8 Bluetooth®devices
at most. When you pair Bluetooth®devices more than
this number, pairing history will be overwritten from
the oldest pairing history.
NOTE: If there are 2 Bluetooth®devices searching for
your radio, it will show its availability on both devices.
NOTE: If your Bluetooth®device is temporarily dis-
connected to your radio, then you need to manually
reconnect your device again to the radio.
NOTE: If the name of your radio is appeared on your
Bluetooth®device list but your device cannot connect
with it, delete the item name of your radio from your
list and pair the device with your radio again following
the steps described previously.
NOTE: The optimum operation range between
the radio and the paired device is approximately
10 meters (30 feet).
NOTE: Any obstacle between the radio and the
device can reduce the operational range.
Disconnecting your Bluetooth®
device
1. Press and hold the Pair button for a few
seconds to disconnect with your Bluetooth® device.
“ CONNECTED BLUETOOTH” will turn to be “PAIR
BLUETOOTH”.
2. Press the Power button .
Language options
For DMR301 only
There are four language options available in the radio:
English, Italian, French, and German.
1. Press the Source button to select DAB radio
mode.
2. Rotate the Tuning Control knob until <System>
shown on the display. Press the Tuning Control
knob to enter the setting.
3. Rotate the Tuning Control knob to choose
<Language>.
4. Rotate the Tuning Control knob to choose
the language and press the Tuning Control knob to
conrm.

17 ENGLISH
System reset
For DMR301 only
If your radio fails to work correctly, or some digits on the
display are missing or incomplete, carry out the follow-
ing procedure.
1. Press the Source button to select DAB radio
mode.
2. Rotate the Tuning Control knob until <System>
shown on the display. Press the Tuning Control
knob to enter the setting.
3. Rotate the Tuning Control knob to choose
<Factory Reset>. Press the Tuning Control knob to
conrm the setting (<Yes>) and a full reset will be
performed.
Software version
For DMR301 only
1. Press the Source button to select DAB radio
mode.
2. Rotate the Tuning Control knob until <System>
shown on the display. Press the Tuning Control
knob to enter the setting.
3. Rotate the Tuning Control knob to choose <SW
Version> and press the Tuning Control knob you will
view the software version installed in the radio.
MAINTENANCE
CAUTION: Always be sure that the appli-
ance is switched o and the battery cartridge is
removed before attempting to perform inspection
or maintenance.
NOTICE: Never use gasoline, benzine, thinner,
alcohol or the like. Discoloration, deformation or
cracks may result.
To maintain product SAFETY and RELIABILITY,
repairs, any other maintenance or adjustment should
be performed by Makita Authorized or Factory Service
Centers, always using Makita replacement parts.
OPTIONAL
ACCESSORIES
CAUTION: These accessories or attachments
are recommended for use with your Makita tool
specied in this manual. The use of any other
accessories or attachments might present a risk of
injury to persons. Only use accessory or attachment
for its stated purpose.
If you need any assistance for more details regard-
ing these accessories, ask your local Makita Service
Center.
• Makita genuine battery and charger
NOTE: Some items in the list may be included in the
tool package as standard accessories. They may
dier from country to country.

18
中文简体
中文简体 (原本)
规格
型号: DMR300 DMR301
电源适配器 直流24 V / 5.0 A,内侧套筒为正极
电池 UM-3(AA规格)× 2 备用
CXT电池:直流10.8 V - 12 V最大
LXT电池:直流14.4 V - 18 V
波段 FM
AM
FM
AM
DAB
频率范围 欧洲国家:
50 KHz(0.05 MHz/档)
非欧洲国家:
有关频率范围,请参阅收音机上的铭牌。
(频率范围因销往国家而异。)
Bluetooth®Bluetooth®
Bluetooth®QD ID
147189
(Bluetooth®文字标记和商标属于
Bluetooth SIG, Inc.
的注册商标)
Bluetooth®版本 5.0认证
Bluetooth®配置文件 A2DP / AVRCP
传输功率 Power Class2
工作频率 2,402 MHz - 2,480 MHz
最大射频功率 6.32 dBm
(EU符合性声明)
传输范围 最佳距离:10米以内
容许距离:30米以内
(因使用条件不同而变化)
可支持的编码解码器 SBC
扬声器
电路特性
3.5英寸 8欧姆 ×2
输出功率 直流10.8 V - 12 V最大:1.2 W ×2
直流14.4 V:2.2 W ×2
直流18 V:3.5 W ×2
USB输出 USB A型×2(5 V / 2.4 A总值)
电池充电输出 CXT电池:直流10.8 V - 12 V最大、3.5 A
LXT电池:直流14.4 V - 18 V、3.5 A
输入端子 直径3.5 mm(AUX IN1/AUX IN2)
天线系统 FM:柔性弯曲杆天线
AM:棒形天线
尺寸(长 ×宽×高) 268 ×185 ×305 mm
重量(不含电池组) 5.9 kg

19
中文简体
•生产者保留变更规格不另行通知之权利。
•规格可能因销往国家之不同而异。
Bluetooth®文字标志和标识是Bluetooth SIG的注册商标,Makita(牧田)所有对该商标的使
用行为均已经过授权。其他商标和商品名称都是它们各自所有者的商标。
下表中展示了收音机经过单次充电后在无线电广播模式下的工作时间。
电池电量 电池组电压 工作时间(小时)
(扬声器输出 = 50 mW
+ 50 mW)
充电时间
(分钟)
10.8 V -
12 V最大
14.4 V 18 V 音频或AUX
Bluetooth®,
使用USB
进行充电
1.3 Ah -BL1415 -5.6 1.0 27
- - BL1815 6.1 1.4 27
1.5 Ah BL1015
BL1016
- - 6.3 0.9 31
-BL1415N -5.6 1.0 27
- - BL1815N 6.1 1.4 27
2.0 Ah BL1020B
BL1021B
- - 8.2 1.2 40
- - BL1820
BL1820B
8.2 1.8 38
3.0 Ah -BL1430
BL1430B
-9.4 1.7 48
- - BL1830
BL1830B
11.3 2.5 48
4.0 Ah BL1040B
BL1041B
- - 16.4 2.3 75
-BL1440 -14.8 2.7 67
- - BL1840
BL1840B
16.0 3.6 67
5.0 Ah -BL1450 -17.8 3.3 84
- - BL1850
BL1850B
20.5 4.6 84
6.0 Ah -BL1460B -19.5 3.6 100
- - BL1860B 24.7 5.5 100
警告: 请仅使用以上所列电池组。使用其他类型的电池组可能会导致人身伤害和/或失
火。
注: 部分以上所列电池组是否适用视用户所在地区而异。
注: 以上电池工作时间表中的信息仅供参考。实际工作时间可能因电池类型、充电情况或
使用环境不同而存在差异。

20
中文简体
符号
以下显示本工具使用的符号。在使用工具之
前请务必理解其含义。
阅读使用说明书。
Ni-MH
Li-ion 仅限于欧盟国家
请勿将电气设备或电池组与家
庭普通废弃物一同丢弃!
请务必遵守欧洲关于废弃电子
电气设备、电池和蓄电池以及
废弃电池和蓄电池的指令并根
据法律法规执行。达到使用寿
命的电气设备和电池组必须分
类回收至符合环境保护规定的
再循环机构。
安全警告
重要安全注意事项
请保留此说明书。
警告: 使用电动工具时,应始终遵守基
本安全注意事项,以降低火灾、触电和人身
伤害风险,具体包括以下事项:
1. 使用前请阅读此使用说明书。若使用
Makita(牧田)充电器,还请阅读对应
的充电器使用说明书。
2. 只能使用干布进行清洁。请勿用水清洁。
3. 请勿安装在发热的热源附近,例如散热
器、热记录器、火炉或其他设备(包括
放大器)等。
4. 只能使用制造商指定的装置/附件。
5. 如长时间闲置或者遭遇雷雨天气,请拔
下工具插头。
6. 电池组只能通过本收音机或者使用指定
的充电器进行充电。将适用于某一类型
电池的充电器用于其他类型的电池时,
可能会导致起火。
7. 此电池供电收音机只能使用指定的专用
电池组。使用任何其他电池可能会导致
起火。
8. 不使用电池组时,请将其放置在远离纸
夹、硬币、钥匙、钉子、螺丝或其他小
型金属物体的地方。这些物体可能会使
电池端子短路。电池端子短路可能会引
起火花、灼伤或起火。
9. 请避免与接地表面如管子、散热器、炉
灶以及冰箱等进行身体接触。如果您的
身体接地,将会增加触电风险。
10. 过度使用时,电池中可能溢出液体。请
避免接触电池漏液。如果意外接触到电
池漏液,请用水冲洗。如果液体接触到
眼睛,请就医。电池漏液可能会导致过
敏发炎或灼伤。
11. 请勿使用损坏或改装过的电池组和收音
机。否则可能会产生无法预测的后果,
由此可能会引起火灾、爆炸或人身伤害。
12. 请勿将电池组或电动工具暴露于火或高温
中。暴露于火或高于130 °C(266°F)的
高温环境下可能导致爆炸。
13. 遵循所有充电说明。请勿在说明书中指
定的温度范围之外给电池组或电动工具充
电。不正确充电或在指定的温度范围外充
电可能会损坏电池并增加着火的风险。
14. 主电源插头是用于断开连接的装置。主
电源插头应始终处于可操作状态。
15. 请勿长时间高音量使用本产品。请以中
等音量使用本产品以避免听力损伤。
16. LCD显示屏中包含的液体可能引起刺激
和中毒症状。若此液体进入眼部、口部
或接触皮肤,应先用水冲洗,然后就医。
17. 请勿将此产品暴露在雨水或潮湿的环境
中。产品受潮将增加触电的风险。
18. 本产品不得由不熟悉操作说明的人员
(包括小孩)以及体力、感知能力及心
智不健全或缺乏经验和知识的人员使用,
除非由负责其安全的人员在使用产品时
对其进行监督和指导。请看管好儿童,
勿让其玩耍本产品。将产品存放在儿童
无法触及的地方。
19. 打开和关闭电池盖时请小心操作,避免
夹住手指。
20. 在安装或拆卸电池组之后,将电池盒锁
扣置于原位。否则,电池组可能会从收
音机中意外脱落,从而造成自身或他人
受伤。
21. 移动收音机之前,务必关闭并锁紧电池
盒锁扣。
22. 当收音机由电池组供电时,请先关闭收
音机,再取下电池组。
23. 请小心,勿掉落或撞击此收音机。损坏
的壳体可能划伤手指或刺伤身体。收音
机损坏可能产生无法预测的后果,由此
可能引起火灾、爆炸或人身伤害。
Other manuals for DMR300
4
This manual suits for next models
1
Table of contents
Languages:
Other Makita Radio manuals

Makita
Makita DMR116 User manual

Makita
Makita BMR101 User manual

Makita
Makita DMR056 User manual

Makita
Makita GRM03 User manual

Makita
Makita XRM05 User manual

Makita
Makita MR051 User manual

Makita
Makita MR002GZ User manual

Makita
Makita DMR109 User manual

Makita
Makita MR002G User manual

Makita
Makita DMR108AR User manual

Makita
Makita DMR102 User manual

Makita
Makita DMR055 User manual

Makita
Makita BMR102 User manual

Makita
Makita Outdoor Adventure ADRM06 User manual

Makita
Makita DMR102 User manual

Makita
Makita XRM10 User manual

Makita
Makita DMR115 User manual

Makita
Makita RM02 User manual

Makita
Makita DMR108N User manual

Makita
Makita XRM02W User manual