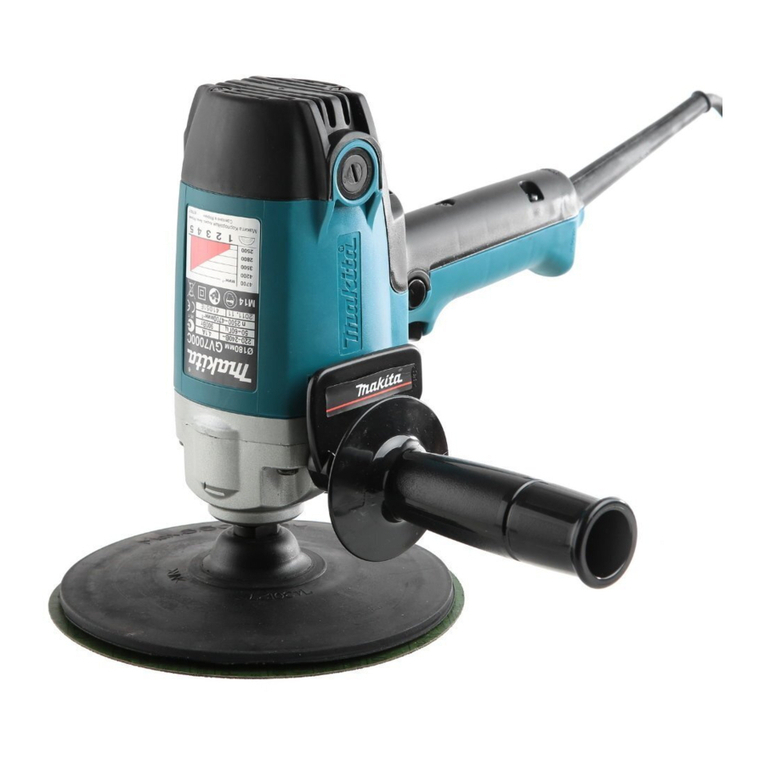
Makita DPV300 User manual

DPV300
EN Cordless Sander Polisher INSTRUCTION MANUAL 4
SL Brezžično brusilno-polirno
orodje NAVODILA ZA UPORABO 11
SQ Polirues-smerilues me bateri MANUALI I PËRDORIMIT 19
BG Акумулаторна шлайф и
полираща машина РЪКОВОДСТВО ЗА
ЕКСПЛОАТАЦИЯ 27
HR Bežična polirna brusilica PRIRUČNIK S UPUTAMA 36
МК Безжична машина за
шмирглање/полирање УПАТСТВО ЗА УПОТРЕБА 44
SR Бежична брусилица за
полирање УПУТСТВО ЗА УПОТРЕБУ 53
RO Mașină de șlefuit și de lustruit
fără cablu MANUAL DE INSTRUCŢIUNI 61
UK
Акумуляторна шліфувально-
полірувальна машина
ІНСТРУКЦІЯ З
ЕКСПЛУАТАЦІЇ 69
RU
Аккумуляторная полировальная
(шлифовальная) машина
РУКОВОДСТВО ПО
ЭКСПЛУАТАЦИИ 78

1
2
3
Fig.1
1
2
Fig.2
1
A
B
Fig.3
12
3
Fig.4
1
Fig.5
1
2
Fig.6
2
1
3
Fig.7
2

1
2
3
4
Fig.8
1
2
Fig.9
1
2
Fig.10
Fig.11
Fig.12
15°
Fig.13
1
1
Fig.14
3

4ENGLISH
ENGLISH (Original instructions)
SPECIFICATIONS
Model: DPV300
Maximum capacities Wool pad 80 mm
Sponge pad 80 mm
Sanding disc 50 mm
Backing pad diameter For sanding 46 mm
For polishing 75 mm
Rated speed (n) / No load speed (n0)
High (2 ):
sanding mode
0 - 9,500 min-1
Low (1 ):
polishing mode
0 - 2,800 min-1
Overall length 160 mm *1
Rated voltage D.C. 18 V
Net weight 1.3 - 1.6 kg
*1. With battery cartridge (BL1860B).
• Duetoourcontinuingprogramofresearchanddevelopment,thespecicationshereinaresubjecttochange
without notice.
• Specicationsandbatterycartridgemaydierfromcountrytocountry.
• Theweightmaydierdependingontheattachment(s),includingthebatterycartridge.Thelightestandheavi-
est combinations, according to EPTA-Procedure 01/2014, are shown in the table.
Applicable battery cartridge and charger
Battery cartridge BL1815N / BL1820B / BL1830B / BL1840B / BL1850B / BL1860B
Charger DC18RC / DC18RD / DC18RE / DC18SD / DC18SE / DC18SF /
DC18SH
• Some of the battery cartridges and chargers listed above may not be available depending on your region of
residence.
WARNING: Only use the battery cartridges and chargers listed above. Use of any other battery cartridges
andchargersmaycauseinjuryand/orre.
Intended use
The tool is intended for polishing, smoothing before
painting,nishingsurfaces,andremovingrustand
paint.
Noise
The typical A-weighted noise level determined accord-
ing to EN60745-2-3:
Sound pressure level (LpA) : 73 dB(A)
Uncertainty (K) : 3 dB(A)
NOTE: The declared noise emission value(s) has
been measured in accordance with a standard test
method and may be used for comparing one tool with
another.
NOTE: The declared noise emission value(s)
may also be used in a preliminary assessment of
exposure.
WARNING: Wear ear protection.
WARNING:
The noise emission during actual
use of the power tool can dier from the declared
value(s) depending on the ways in which the tool is
used especially what kind of workpiece is processed.
WARNING:
Be sure to identify safety measures
to protect the operator that are based on an estima-
tion of exposure in the actual conditions of use (tak-
ing account of all parts of the operating cycle such
as the times when the tool is switched o and when
it is running idle in addition to the trigger time).
Vibration
The vibration total value (tri-axial vector sum) deter-
mined according to EN60745-2-3:
Work mode: disc sanding
Vibration emission (ah, DS) : 2.5 m/s2or less
Uncertainty (K) : 1.5 m/s2
Work mode: polishing
Vibration emission (ah, P) : 2.5 m/s2or less
Uncertainty (K) : 1.5 m/s2

5ENGLISH
NOTE: The declared vibration total value(s) has been
measured in accordance with a standard test method
and may be used for comparing one tool with another.
NOTE: The declared vibration total value(s) may also
be used in a preliminary assessment of exposure.
WARNING: The vibration emission during
actual use of the power tool can dier from the
declared value(s) depending on the ways in which
the tool is used especially what kind of workpiece
is processed.
WARNING: Be sure to identify safety mea-
sures to protect the operator that are based on an
estimation of exposure in the actual conditions of
use (taking account of all parts of the operating
cycle such as the times when the tool is switched
o and when it is running idle in addition to the
trigger time).
WARNING: The declared vibration emission
value is used for main applications of the power tool.
However if the power tool is used for other applica-
tions,thevibrationemissionvaluemaybedierent.
EC Declaration of Conformity
For European countries only
The EC declaration of conformity is included as Annex A
to this instruction manual.
SAFETY WARNINGS
General power tool safety warnings
WARNING: Read all safety warnings, instruc-
tions, illustrations and specications provided
with this power tool. Failure to follow all instructions
listedbelowmayresultinelectricshock,reand/or
seriousinjury.
Save all warnings and instruc-
tions for future reference.
The term "power tool" in the warnings refers to your
mains-operated (corded) power tool or battery-operated
(cordless) power tool.
Cordless sander polisher safety
warnings
Safety Warnings Common for Sanding or Polishing Operations:
1. This power tool is intended to function as a
sander or polisher. Read all safety warnings,
instructions, illustrations and specications
provided with this power tool. Failure to follow
all instructions listed below may result in electric
shock,reand/orseriousinjury.
2. Operations such as grinding, wire brushing
or cutting-o are not recommended to be
performed with this power tool. Operations for
which the power tool was not designed may create
ahazardandcausepersonalinjury.
3.
Do not use accessories which are not specically
designed and recommended by the tool manufac-
turer. Just because the accessory can be attached to
your power tool, it does not assure safe operation.
4. The rated speed of the accessory must be at
least equal to the maximum speed marked on
the power tool. Accessories running faster than
theirratedspeedcanbreakandyapart.
5. The outside diameter and the thickness of your
accessory must be within the capacity rating
of your power tool. Incorrectly sized accessories
cannot be adequately guarded or controlled.
6.
Threaded mounting of accessories must match
the spindle thread of the tool. For accessories
mounted by anges, the arbour hole of the
accessory must t the locating diameter of the
ange. Accessories that do not match the mounting
hardware of the power tool will run out of balance,
vibrate excessively and may cause loss of control.
7.
Do not use a damaged accessory. Before each use
inspect the accessory such as backing pad for cracks,
tear or excess wear. If power tool or accessory is
dropped, inspect for damage or install an undamaged
accessory. After inspecting and installing an acces-
sory, position yourself and bystanders away from the
plane of the rotating accessory and run the power tool
at maximum no-load speed for one minute. Damaged
accessories will normally break apart during this test time.
8.
Wear personal protective equipment. Depending
on application, use face shield, safety goggles or
safety glasses. As appropriate, wear dust mask,
hearing protectors, gloves and workshop apron
capable of stopping small abrasive or workpiece
fragments. The eye protection must be capable of
stoppingyingdebrisgeneratedbyvariousoperations.
Thedustmaskorrespiratormustbecapableofltrating
particles generated by your operation. Prolonged expo-
sure to high intensity noise may cause hearing loss.
9.
Keep bystanders a safe distance away from work
area. Anyone entering the work area must wear
personal protective equipment. Fragments of
workpieceorofabrokenaccessorymayyawayand
causeinjurybeyondimmediateareaofoperation.
10. Hold the power tool by insulated gripping
surfaces only, when performing an operation
where the cutting tool may contact hidden
wiring. Contact with a "live" wire will also make
exposed metal parts of the power tool "live" and
could give the operator an electric shock.
11. Never lay the power tool down until the acces-
sory has come to a complete stop. The spinning
accessory may grab the surface and pull the
power tool out of your control.
12.
Do not run the power tool while carrying it at your side.
Accidental contact with the spinning accessory could snag
your clothing, pulling the accessory into your body.
13. Regularly clean the power tool’s air vents. The
motor’s fan will draw the dust inside the housing
and excessive accumulation of powdered metal
may cause electrical hazards.
14. Do not operate the power tool near ammable
materials. Sparks could ignite these materials.
15. Do not use accessories that require liquid
coolants. Using water or other liquid coolants
may result in electrocution or shock.

6ENGLISH
Kickback and Related Warnings
Kickback is a sudden reaction to a pinched or snagged
rotating wheel, backing pad, brush or any other acces-
sory. Pinching or snagging causes rapid stalling of the
rotating accessory which in turn causes the uncon-
trolled power tool to be forced in the direction opposite
of the accessory’s rotation at the point of the binding.
For example, if an abrasive wheel is snagged or pinched
by the workpiece, the edge of the wheel that is entering into
the pinch point can dig into the surface of the material caus-
ing the wheel to climb out or kick out. The wheel may either
jumptowardorawayfromtheoperator,dependingon
direction of the wheel’s movement at the point of pinching.
Abrasive wheels may also break under these conditions.
Kickback is the result of power tool misuse and/or
incorrect operating procedures or conditions and can be
avoided by taking proper precautions as given below.
1. Maintain a rm grip on the power tool and
position your body and arm to allow you to
resist kickback forces. Always use auxiliary
handle, if provided, for maximum control over
kickback or torque reaction during start-up.
The operator can control torque reactions or kick-
back forces, if proper precautions are taken.
2. Never place your hand near the rotating acces-
sory. Accessory may kickback over your hand.
3. Do not position your body in the area where
power tool will move if kickback occurs.
Kickback will propel the tool in direction opposite
to the wheel’s movement at the point of snagging.
4. Use special care when working corners, sharp
edges etc. Avoid bouncing and snagging the
accessory. Corners, sharp edges or bouncing
have a tendency to snag the rotating accessory
and cause loss of control or kickback.
5. Do not attach a saw chain woodcarving blade
or toothed saw blade. Such blades create fre-
quent kickback and loss of control.
Safety Warnings Specic for Sanding Operations:
1.
Do not use excessively oversized sanding disc paper.
Follow manufacturers recommendations, when select-
ing sanding paper. Larger sanding paper extending
beyond the sanding pad presents a laceration hazard and
may cause snagging, tearing of the disc or kickback.
Safety Warnings Specic for Polishing Operations:
1.
Do not allow any loose portion of the polishing
bonnet or its attachment strings to spin freely.
Tuck away or trim any loose attachment strings.
Loose and spinning attachment strings can entan-
gleyourngersorsnagontheworkpiece.
Additional Safety Warnings:
1. Make sure the wheel is not contacting the
workpiece before the switch is turned on.
2. Before using the tool on an actual workpiece,
let it run for a while. Watch for vibration or
wobbling that could indicate poor installation
or a poorly balanced wheel.
3. Use the specied surface of the wheel to per-
form the sanding or polishing.
4. Do not leave the tool running. Operate the tool
only when hand-held.
5. Do not touch the workpiece immediately after
operation; it may be extremely hot and could
burn your skin.
6. Do not touch accessories immediately after
operation; it may be extremely hot and could
burn your skin.
7. Observe the instructions of the manufacturer
for correct mounting and use of wheels.
Handle and store wheels with care.
8.
Check that the workpiece is properly supported.
9. Pay attention that the wheel continues to
rotate after the tool is switched o.
10. Do not use the tool on any materials contain-
ing asbestos.
11. Do not use cloth work gloves during operation.
Fibers from cloth gloves may enter the tool, which
causes tool breakage.
SAVE THESE INSTRUCTIONS.
WARNING: DO NOT let comfort or familiarity
with product (gained from repeated use) replace
strict adherence to safety rules for the subject
product. MISUSE or failure to follow the safety
rules stated in this instruction manual may cause
serious personal injury.
Important safety instructions for
battery cartridge
1. Before using battery cartridge, read all instruc-
tions and cautionary markings on (1) battery
charger, (2) battery, and (3) product using
battery.
2. Do not disassemble or tamper with the battery
cartridge.Itmayresultinare,excessiveheat,
or explosion.
3. If operating time has become excessively
shorter, stop operating immediately. It may
result in a risk of overheating, possible burns
and even an explosion.
4. If electrolyte gets into your eyes, rinse them
out with clear water and seek medical atten-
tion right away. It may result in loss of your
eyesight.
5. Do not short the battery cartridge:
(1) Do not touch the terminals with any con-
ductive material.
(2) Avoid storing battery cartridge in a con-
tainer with other metal objects such as
nails, coins, etc.
(3) Do not expose battery cartridge to water
or rain.
A battery short can cause a large current
ow, overheating, possible burns and even a
breakdown.
6. Do not store and use the tool and battery car-
tridge in locations where the temperature may
reach or exceed 50 °C (122 °F).
7. Do not incinerate the battery cartridge even if
it is severely damaged or is completely worn
out. The battery cartridge can explode in a re.
8. Do not nail, cut, crush, throw, drop the battery
cartridge, or hit against a hard object to the
battery cartridge. Such conduct may result in a
re,excessiveheat,orexplosion.
9. Do not use a damaged battery.
7ENGLISH
10.
The contained lithium-ion batteries are subject to
the Dangerous Goods Legislation requirements.
For commercial transports e.g. by third parties,
forwarding agents, special requirement on pack-
aging and labeling must be observed.
For preparation of the item being shipped, consult-
ing an expert for hazardous material is required.
Please also observe possibly more detailed
national regulations.
Tapeormaskoopencontactsandpackupthe
battery in such a manner that it cannot move
around in the packaging.
11. When disposing the battery cartridge, remove
it from the tool and dispose of it in a safe
place. Follow your local regulations relating to
disposal of battery.
12. Use the batteries only with the products
specied by Makita. Installing the batteries to
non-compliantproductsmayresultinare,exces-
sive heat, explosion, or leak of electrolyte.
13. If the tool is not used for a long period of time,
the battery must be removed from the tool.
14. During and after use, the battery cartridge may
take on heat which can cause burns or low
temperature burns. Pay attention to the han-
dling of hot battery cartridges.
15. Do not touch the terminal of the tool imme-
diately after use as it may get hot enough to
cause burns.
16. Do not allow chips, dust, or soil stuck into the
terminals, holes, and grooves of the battery
cartridge.Itmaycauseheating,catchingre,
burst and malfunction of the tool or battery car-
tridge,resultinginburnsorpersonalinjury.
17. Unless the tool supports the use near
high-voltage electrical power lines, do not use
the battery cartridge near high-voltage electri-
cal power lines. It may result in a malfunction or
breakdown of the tool or battery cartridge.
18. Keep the battery away from children.
SAVE THESE INSTRUCTIONS.
CAUTION: Only use genuine Makita batteries.
Use of non-genuine Makita batteries, or batteries that
have been altered, may result in the battery bursting
causingres,personalinjuryanddamage.Itwill
also void the Makita warranty for the Makita tool and
charger.
Tips for maintaining maximum
battery life
1. Charge the battery cartridge before completely
discharged. Always stop tool operation and
charge the battery cartridge when you notice
less tool power.
2.
Never recharge a fully charged battery cartridge.
Overcharging shortens the battery service life.
3.
Charge the battery cartridge with room tempera-
ture at 10 °C - 40 °C (50 °F - 104 °F). Let a hot
battery cartridge cool down before charging it.
4. When not using the battery cartridge, remove
it from the tool or the charger.
5. Charge the battery cartridge if you do not use
it for a long period (more than six months).
FUNCTIONAL DESCRIPTION
CAUTION: Always be sure that the tool is
switched o and the battery cartridge is removed
before adjusting or checking function on the tool.
Installing or removing battery cartridge
CAUTION: Always switch o the tool before
installing or removing of the battery cartridge.
CAUTION: Hold the tool and the battery car-
tridge rmly when installing or removing battery
cartridge. Failure to hold the tool and the battery
cartridgermlymaycausethemtoslipoyourhands
and result in damage to the tool and battery cartridge
andapersonalinjury.
►Fig.1: 1. Red indicator 2. Button 3. Battery cartridge
To remove the battery cartridge, slide it from the tool
while sliding the button on the front of the cartridge.
To install the battery cartridge, align the tongue on the
battery cartridge with the groove in the housing and slip
it into place. Insert it all the way until it locks in place
with a little click. If you can see the red indicator as
showninthegure,itisnotlockedcompletely.
CAUTION: Always install the battery cartridge
fully until the red indicator cannot be seen. If not,
itmayaccidentallyfalloutofthetool,causinginjuryto
you or someone around you.
CAUTION: Do not install the battery cartridge
forcibly. If the cartridge does not slide in easily, it is
not being inserted correctly.
Indicating the remaining battery capacity
Only for battery cartridges with the indicator
►Fig.2: 1. Indicator lamps 2. Check button
Press the check button on the battery cartridge to indi-
cate the remaining battery capacity. The indicator lamps
light up for a few seconds.
Indicator lamps Remaining
capacity
Lighted O Blinking
75% to 100%
50% to 75%
25% to 50%
0% to 25%
Charge the
battery.
The battery
may have
malfunctioned.

8ENGLISH
NOTE: Depending on the conditions of use and the
ambienttemperature,theindicationmaydierslightly
from the actual capacity.
NOTE:Therst(farleft)indicatorlampwillblinkwhen
the battery protection system works.
Tool / battery protection system
The tool is equipped with a tool/battery protection sys-
tem.Thissystemautomaticallycutsopowertothe
motor to extend tool and battery life. The tool will auto-
matically stop during operation if the tool or battery is
placed under one of the following conditions:
Overload protection
When the tool or battery is operated in a manner that
causes it to draw an abnormally high current, the tool auto-
matically stops without any indication. In this situation, turn
thetooloandstoptheapplicationthatcausedthetoolto
become overloaded. Then turn the tool on to restart.
Overheat protection
When the tool or battery is overheated, the tool stops
automatically. In this case, let the tool and battery cool
before turning the tool on again.
Overdischarge protection
When the battery capacity is not enough, the tool stops
automatically. In this case, remove the battery from the
tool and charge the battery.
Switch action
CAUTION: Before installing the battery car-
tridge into the tool, always check to see that the
switch trigger actuates properly and returns to
the "OFF" position when released.
CAUTION: Switch can be locked in "ON" posi-
tion for ease of operator comfort during extended
use. Apply caution when locking tool in "ON"
position and maintain rm grasp on tool.
CAUTION: Do not install the battery cartridge
with the lock button engaged.
CAUTION: When not operating the tool,
depress the trigger-lock button from side to
lock the switch trigger in the OFF position.
To prevent the switch trigger from accidentally pulled,
the trigger-lock button is provided. To start the tool,
depress the trigger-lock button from A ( ) side and pull
the switch trigger. Tool speed is increased by increas-
ing pressure on the switch trigger. Release the switch
trigger to stop. After use, depress the trigger-lock button
from B ( ) side.
►Fig.3: 1. Trigger-lock button
For continuous operation, depress the lock button while
pulling the switch trigger, and then release the switch
trigger. To stop the tool, pull the switch trigger fully, then
release it.
►Fig.4: 1. Switch trigger 2. Lock button 3. Trigger-
lock button
Speed change lever
CAUTION: Always set the speed change lever
fully to the correct position. If you operate the
tool with the speed change lever positioned halfway
between the "1" side and "2" side, the tool may be
damaged.
CAUTION: Do not use the speed change lever
while the tool is running. The tool may be damaged.
CAUTION: If the tool is operated continuously
at low speeds for a long time, the motor will get
overloaded, resulting in tool malfunction.
Tochangethespeed,switchothetoolrst.Pushthe
speed change lever to display "2" for high speed or "1"
for low speed. Be sure that the speed change lever is
set to the correct position before operation. Use the
rightspeedforyourjob.
►Fig.5: 1. Speed change lever
Displayed
number Symbol Speed Applicable operation
2High Sanding operation
1Low Polishing operation
Accidental restart preventive
function
If you install the battery cartridge while pulling the
switch trigger or locking the switch trigger, the tool does
not start. To start the tool, release the switch trigger, and
then pull the switch trigger.
ASSEMBLY
CAUTION: Always be sure that the tool is
switched o and the battery cartridge is removed
before carrying out any work on the tool.
Installing side grip
CAUTION: Tighten the caps or side grip
rmly. Otherwise, the front cover may fall and cause
aninjury.
Remove the cap and screw the side grip on the tool
securely.
The side grip can be installed on either side of the tool.
►Fig.6: 1. Cap 2. Side grip
Installing backing pad
CAUTION: Make sure that the backing pad is
secured properly. Loose attachment will run out of
balance and cause an excessive vibration which may
cause loss of control.
CAUTION: Never actuate the shaft lock when
the spindle is moving. The tool may be damaged.

9ENGLISH
NOTE: Regularly clean the accessories and spindle
to remove dust and debris. Wipe the components
clean with a cloth dampened in soapy water if
necessary.
Hook-and-loop system
Press in the shaft lock to prevent spindle rotation, and
thread the backing pad into the spindle. Hand tighten
securely.
►Fig.7: 1. Shaft lock 2. Spindle 3. Backing pad
To remove the backing pad, follow the installation pro-
cedure in reverse.
Twist-on/twist-o system
Screw the backing pad onto the adapter. Then thread
the other end of the adapter into the spindle while
pressing in the shaft lock. Hand tighten securely.
►Fig.8: 1. Backing pad 2. Adapter 3. Shaft lock
4. Spindle
To remove the backing pad and adapter, follow the
installationprocedureinreverse.Ifitisdicultto
remove them, use a wrench.
Installing and removing
polishing pad
CAUTION: Only use the hook-and-loop sys-
tem pads for polishing.
CAUTION: Make sure that the pad and
backing pad are aligned and securely attached.
Otherwise the pad will cause an excessive vibration
which may cause loss of control or the pad may be
thrown out from the tool.
Remove all dirt and foreign matter from the hook-and-
loop system of a pad and backing pad. Attach the pad to
the backing pad so that their edges are aligned.
Toremovethepadfromthebackingpad,justpullup
from its edge.
►Fig.9: 1. Pad 2. Backing pad
Installing abrasive disc
Optional accessory
CAUTION: Only use the twist-on/twist-o
system discs for sanding.
Disc selection
CAUTION: The outside diameter of accessory
must be within the capacity rating of the power
tool.
CAUTION: The rated speed of accessory
must be equal or higher than the maximum speed
marked on the power tool.
Always use the correct sized wheel that is made from
appropriate abrasive materials with the right grit size for
yourjob.
Abrasive disc materials
Abrasive materials Basic features Practical
applications
Aluminum Oxide Best for steel,
stainless steel
and metals. Single
crystal abrasive
material with
high tenacity and
durability.
Fast sanding
Mostmetaljobs
Alumina Zirconium Best for INOX and
metals. Extremely
sharp and hard
abrasive material
with high durability.
Removing paint
from cars and
boats, etc.
Ceramic
Best for INOX, metals
and non-ferrous mate-
rials. Extremely sharp
and high resistant to
shock/heat/wear.
General metal work
Grit size
Grit Practical applications
24/36 (coarse) Heavy stock removal
60/80 Medium stock removal
120(ne) Finishing
Installing and removing abrasive disc
CAUTION: Make sure that the backing pad is
secured properly. Loose attachment will run out of
balance and cause an excessive vibration which may
cause loss of control.
Remove all dirt and foreign matter from the backing
pad. Thread an abrasive disc onto the backing pad
while pressing in the shaft lock. Hand tighten securely.
To remove the disc from the backing pad, follow the
installation procedure in reverse.
►Fig.10: 1. Abrasive disc 2. Backing pad
OPERATION
CAUTION: Only use Makita genuine pads for
polishing.
CAUTION: Only use Makita genuine abrasive
disc for sanding (optional accessories).
CAUTION:
Make sure the work material is secured
and stable. Falling object may cause personal injury.
CAUTION: Hold the tool rmly with one hand
on the switch handle and the other hand on the
side grip when performing the tool.
CAUTION:
Do not run the tool at high load over
an extended time period. It may result in tool malfunc-
tionwhichcauseselectricshock,reand/orseriousinjury.
CAUTION:
Be careful not to touch the rotating part.
CAUTION:
Before operating the tool, make sure
that the side grip or caps are not loose. If the side grip or
capsareloose,thefrontcovermayfallandcauseaninjury.

10 ENGLISH
NOTICE:
Never force the tool. Excessive pressure may lead
todecreasedpolishingeciency,damagedpad,orshortentoollife.
NOTICE: Continuous operation at high speed
may damage work surface.
General operation
►Fig.11
1. Make sure that the workpiece is properly sup-
ported and both hands are free to control the tool.
2. Holdthetoolrmlywithonehandontheswitch
handle and the other hand on the side grip.
3. Turn the tool on, letting the wheel reach full speed,
and then carefully enter into operation moving the tool
forward over the workpiece surface.
4.
Havingnished,switchthetooloandwaituntilthewheel
has come to a complete stop before putting the tool down.
Polishing operation
►Fig.12
1. Surface treatment
Useawoolpadforroughnishingthenuseasponge
padfornenishing.
2. Applying wax
Use a sponge pad. Apply wax to the sponge pad or work
surface. Run the tool at low speed to smooth out wax.
CAUTION: Do not apply excessive wax or
polishing agent. It will generate more dust and may
cause eye or respiratory diseases.
NOTE:
First, perform a test waxing on an inconspicu-
ous portion of the work surface. Make sure that the tool
will not scratch the surface or result in uneven waxing.
3. Removing wax
Use a sponge pad. Run the tool to remove wax.
4. Polishing
Apply a sponge pad gently to the work surface.
Sanding operation
CAUTION:
Never switch on the tool when it is in con-
tact with the workpiece, it may cause an injury to operator.
CAUTION: Never run the tool without the
abrasive disc. You may seriously damage the pad.
CAUTION: Always wear safety goggles or a
face shield during operation.
CAUTION: After operation, always switch
o the tool and wait until the disc has come to a
complete stop before putting the tool down.
►Fig.13
ALWAYSholdthetoolrmlywithonehandonrear
handle and the other on the side handle. Turn the tool
on and then apply the abrasive disc to the workpiece.
In general, keep the abrasive disc at an angle of about
15 degrees to the workpiece surface.
Apply slight pressure only. Excessive pressure will result in
poor performance and premature wear to abrasive disc.
MAINTENANCE
CAUTION: Always be sure that the tool is
switched o and the battery cartridge is removed
before attempting to perform inspection or
maintenance.
NOTICE: Never use gasoline, benzine, thinner,
alcohol or the like. Discoloration, deformation or
cracks may result.
To maintain product SAFETY and RELIABILITY,
repairs,anyothermaintenanceoradjustmentshould
be performed by Makita Authorized or Factory Service
Centers, always using Makita replacement parts.
Cleaning dust covers
►Fig.14: 1. Dust cover
Regularly clean the dust covers on the inhalation vents
for smooth air circulation. Remove the dust covers and
clean the mesh.
OPTIONAL
ACCESSORIES
CAUTION: These accessories or attachments
are recommended for use with your Makita tool
specied in this manual. The use of any other
accessories or attachments might present a risk of
injurytopersons.Onlyuseaccessoryorattachment
for its stated purpose.
If you need any assistance for more details regard-
ing these accessories, ask your local Makita Service
Center.
• Wool pad
• Sponge pad (yellow)
• Sponge pad (white)
• Magic pad
• Twist-on/twist-opad
• Makita genuine battery and charger
NOTE: Some items in the list may be included in the
tool package as standard accessories. They may
dierfromcountrytocountry.

11 SLOVENŠČINA
SLOVENŠČINA (Originalna navodila)
TEHNIČNI PODATKI
Model: DPV300
Največjezmogljivosti Volnena blazinica 80 mm
Gobasta blazinica 80 mm
Ploščazabrušenje 50 mm
Premerpomožneplošče Zabrušenje 46 mm
Zapoliranje 75 mm
Nazivna hitrost (n)/
hitrost brez obremenitve (n0)Visoka (2 ):
načinzabrušenje
0 – 9.500 min-1
Nizka (1 ):
načinzapoliranje
0 – 2.800 min-1
Celotnadolžina 160 mm *1
Nazivna napetost D.C. 18 V
Netoteža 1,3 – 1,6 kg
*1.Zakumulatorskobaterijo(BL1860B).
• Kernenehnoopravljamoraziskaveinrazvijamosvojeizdelke,selahkotehničnipodatkivtemdokumentu
spremenijobrezobvestila.
• Tehničnipodatkiinbaterijskivložkiselahkorazlikujejogledenadržavouporabeizdelka.
• Težaselahkorazlikujegledenapriključke,vključnozakumulatorskobaterijo.Najlažjainnajtežjakombinacijav
skladu s postopkom EPTA 01/2014 sta prikazani v preglednici.
Uporabna akumulatorska baterija in polnilnik
Baterijskivložek BL1815N / BL1820B / BL1830B / BL1840B / BL1850B / BL1860B
Polnilnik DC18RC / DC18RD / DC18RE / DC18SD / DC18SE / DC18SF /
DC18SH
• Nekaterezgorajnavedeneakumulatorskebaterijeinpolnilnikimordavvašidržaviprebivališčanisonavoljo.
OPOZORILO: Uporabljajte le zgoraj navedene akumulatorske baterije in polnilnike. Uporaba drugih
akumulatorskihbaterijinpolnilnikovlahkopovzročitelesnepoškodbein/alipožar.
Predvidena uporaba
Orodjenamenjenozapoliranje,glajenjepredbarva-
njem,končnoobdelavopovršininodstranjevanjerjein
barve.
Hrup
ObičajnaA-ovrednotenaravenhrupavskladuz
EN60745-2-3:
Ravenzvočnegatlaka(LpA): 73 dB (A)
Odstopanje(K):3dB(A)
OPOMBA:Navedenevrednostioddajanjahrupaso
bileizmerjenevskladusstandardnimimetodami
testiranjainselahkouporabljajozaprimerjavoorodij.
OPOMBA:Navedenevrednostioddajanjahrupa
selahkouporabljajotudipripredhodnioceni
izpostavljenosti.
OPOZORILO: Uporabljajte zaščito za sluh.
OPOZORILO: Oddajanje hrupa med dejansko
uporabo električnega orodja se lahko razlikuje od
navedenih vrednosti, odvisno od načina uporabe
orodja in predvsem vrste obdelovanca.
OPOZORILO: Upravljavec mora za lastno
zaščito poznati varnostne ukrepe, ki temeljijo
na oceni izpostavljenosti v dejanskih pogojih
uporabe (poleg časa proženja je treba upoštevati
celoten delovni cikel, vključno s časom, ko je
orodje izklopljeno, in časom, ko deluje v prostem
teku).
Vibracije
Skupnevrednostivibracij(vektorskavsotatrehosi)v
skladu z EN60745-2-3:
Delovninačin:brušenjesploščo
Oddajanjetresljajev(ah, DS): 2,5 m/s2alimanj
Odstopanje(K):1,5m/s2
Delovninačin:poliranje
Oddajanjetresljajev(ah, P): 2,5 m/s2alimanj
Odstopanje(K):1,5m/s2

12 SLOVENŠČINA
OPOMBA:Navedeneskupnevrednostioddajanja
vibracijsobileizmerjenevskladusstandardnimi
metodamitestiranjainselahkouporabljajozaprimer-
javoorodij.
OPOMBA:Navedeneskupnevrednostioddajanja
vibracijselahkouporabljajotudipripredhodnioceni
izpostavljenosti.
OPOZORILO: Oddajanje vibracij med
dejansko uporabo električnega orodja se lahko
razlikuje od navedenih vrednosti, odvisno
od načina uporabe orodja in predvsem vrste
obdelovanca.
OPOZORILO: Upravljavec mora za lastno
zaščito poznati varnostne ukrepe, ki temeljijo
na oceni izpostavljenosti v dejanskih pogojih
uporabe (poleg časa proženja je treba upoštevati
celoten delovni cikel, vključno s časom, ko je
orodje izklopljeno, in časom, ko deluje v prostem
teku).
OPOZORILO:Navedenavrednostoddajanja
vibracijseuporabljazaglavnouporaboelektričnega
orodja.Vendarčeelektričnoorodjeuporabljateza
drugenamene,selahkovrednostioddajanjavibracij
razlikujejo.
Izjava o skladnosti ES
Samo za evropske države
IzjavaESoskladnostijevključenavdodatkuA,kije
priložentemnavodilomzauporabo.
VARNOSTNA
OPOZORILA
Splošna varnostna opozorila za
električno orodje
OPOZORILO: Preberite vsa varnostna opo-
zorila in navodila s slikami in tehničnimi podatki,
ki so dobavljeni skupaj z električnim orodjem.
Obneupoštevanjuspodajnavedenihnavodilobstaja
nevarnostelektričnegaudara,požarain/alihudih
telesnih poškodb.
Shranite vsa opozorila in navo-
dila za poznejšo uporabo.
Izraz„električnoorodje“vopozorilihsenanašanavaše
električnoorodje(skablom)alibaterijskoelektrično
orodje(brezkabla).
Varnostna opozorila za brezžično
brusilno-polirno orodje
Običajna varnostna opozorila za brušenje ali
poliranje:
1. To električno orodje je po zasnovi namenjeno
brušenju ali poliranju. Preberite vsa varnostna
opozorila ter navodila s slikami in tehničnimi
podatki, ki so priloženi temu električnemu
orodju.Obneupoštevanjuspodajnavedenih
navodilobstajanevarnostelektričnegaudara,
požarain/alihudihtelesnihpoškodb.
2. To električno orodje ni primerno za izvajanje
delovnih opravil, kot so grobo brušenje, žično
brušenje ali rezanje.Izvajanjedel,zakatera
električnoorodjenibilozasnovano,jenevarnoin
lahkopovzročihudetelesnepoškodbe.
3. Uporabljajte le nastavke, ki jih je posebej za
to orodje zasnoval oz. jih priporoča proizvaja-
lec.Čejenastavekmogočepritrditinaelektrično
orodje,tošenepomeni,dajeuporabatega
nastavka varna.
4. Nazivno število vrtljajev nastavka mora ustre-
zati vsaj največjemu številu vrtljajev, ki je
označeno na električnem orodju. Nastavek,
kisevrtihitrejeodnazivnegaštevilavrtljajev,se
lahko zlomi in razleti.
5. Zunanji premer in debelina nastavka morata
ustrezati nazivni moči električnega orodja.
Nastavkaneustreznevelikostinimogočepravilno
zavarovatisščitnikialigapovsemnadzorovati.
6. Pritrditev nastavkov z navoji se mora prilegati
navojem vretena orodja. Pri nastavkih, name-
ščenih s prirobnicami, se morajo osne luknje
nastavkov natančno prilegati premeru prirob-
nice.Nastavkov,kiseneujemajo,nimogoče
ustreznonamestitinaelektričnoorodje,karlahko
povzročineuravnoteženost,čezmernovibriranjein
izgubo nadzora.
7. Ne uporabljajte poškodovane dodatne opreme.
Pred vsako uporabo preverite, ali pripomočki,
kot je pomožna plošča, niso počeni, natrgani
ali čezmerno obrabljeni. Če pade električno
orodje ali dodatna oprema na tla, preverite,
ali so nastale poškodbe, in po potrebi zame-
njajte poškodovano dodatno opremo z novo.
Po pregledu in namestitvi dodatne opreme
se postavite izven ravnine vrtenja dodatne
opreme in opozorite osebe v vaši bližini, naj se
oddaljijo, ter vključite orodje in ga pustite teči
eno minuto brez obremenitve. Med tem preizku-
sompoškodovanadodatnaopremaobičajnopoči.
8. Uporabljajte osebna zaščitna sredstva.
Odvisno od dela, ki ga opravljate, uporabljajte
zaščitno masko za obraz in oči ali zaščitna
očala. Če je potrebno, uporabljajte zaščitno
masko proti prahu, glušnike, rokavice ali pred-
pasnik za zaščito pred drobci materiala.Zaščita
zaočimorazadržatiletečedrobce,kisoprisotni
prirazličnihnačinihdela.Protiprašnamaskaali
maskazazaščitodihalmorazadržatiprah,ki
nastajameddelom.Izpostavljanjehrupulahko
povzročiizgubosluha.

13 SLOVENŠČINA
9. Pri delu poskrbite, da bodo druge osebe varno
oddaljene od delovnega območja. V delovno
območje lahko vstopajo samo osebe z ustre-
zno osebno zaščitno opremo.Letečidrobci
materialaobdelovancaalipočeneganastavkaso
nevarniinlahkopovzročijopoškodbetudiizven
delovnegaobmočja.
10. Če obstaja nevarnost, da bi z rezalnim orodjem
prerezali skrito električno napeljavo, držite
električno orodje samo na izoliranih držalnih
površinah.Čepridedostikazvodnikipodnape-
tostjo,sopodnapetostjovsineizoliranikovinski
delielektričnegaorodja,zaradičesarlahkoupo-
rabnikutrpielektričniudar.
11. Ne odlagajte električnega orodja iz rok, dok-
ler se nameščeni nastavek ne neha vrteti.
Nastavek, ki se še vedno vrti, lahko pride v stik
zodlagalnopovršinoinpovzročiizgubonadzora
nadelektričnimorodjem.
12. Ne puščajte električnega orodja vključenega
brez nadzora.Vrtečisenastavekselahkonepri-
čakovanozapletevvašooblekoinvaspoškoduje.
13. Redno čistite hladilne reže električnega orodja.
Ventilatormotorjavsesavavohišjeprah,ki
povzročaškodljivokopičenjeprahuinstemnevar-
nostelektričneokvare.
14. Ne uporabljajte električnega orodja v bližini
gorljivih snovi.Gorljivesnoviselahkovnamejo
zaradiiskrenja.
15. Ne uporabljajte nastavkov, ki so predvideni
za uporabo s tekočim hladilnim sredstvom.
Uporabavodealidrugihtekočinzahlajenjelahko
povzročielektričniudar.
Opozorila v zvezi s povratnim udarcem
Povratniudarecjenenadnareakcija,česestisneali
zagozdivrtečaseplošča,brusilnikrožnik,ščetkaali
drugnastavek.Blokadaalizagozdenjenamrečpovzroči
hitrozaustavitevvrtečihsedelovorodja,pričemer
električnoorodjesunevobratnosmerodsmerigibanja
vrtečihsedelov.
Čepridenaprimerdoblokadeabrazivneploščev
obdelovancu,lahkorobvtočkizagozdenjazarežev
površino,pritempanastalasilarezalnoploščoodbije
odmateriala.Rezalnaploščalahkoodskočibodisiproti
vamalivnasprotnismeri,karjeodvisnoodsmerivode-
njarezalneploščevtočkizagozdenja.Abrazivnaplošča
selahkopodtemipogojitudizlomi.
Povratniudarecjeposledicanestrokovnegaravnanjaz
električnimorodjemalineugodnihokoliščin.Preprečite
galahkozupoštevanjemspodajnavedenihopozoril.
1. Električno orodje držite s trdnim prijemom
in se postavite v takšen položaj, da lahko
prestrežete sile povratnega udarca. Če je na
električno orodje mogoče namestiti dodatni
ročaj, ga tudi uporabljajte, saj vam omogoča
najboljši nadzor nad povratnimi udarci ali reak-
cijskim vrtilnim momentom.Reakcijskevrtilne
momentealipovratneudarcejemogočeučin-
kovitopreprečitizupoštevanjemprevidnostnih
ukrepov.
2. Ne približujte rok vrtečim se delom električ-
nega orodja.Nameščeninastaveklahkoudari
nazajprekvašeroke.
3. S telesom se postavite stran od smeri, v katero
orodje lahko skoči v primeru, da pride do
povratnega udarca. Povratni udarec sunkovito
potisneorodjevnasprotnismerivrtenjarezalne
ploščevtočkizagozdenja.
4. Pri obdelavi vogalov, ostrih robov ipd. je
potrebna večja previdnost. Izogibajte se polo-
žajem, v katerih lahko orodje odskoči iz obde-
lovanca ali se zagozdi. V vogalih in na ostrih
robovihobstajapovečananevarnostpovratnega
sunkaalizagozdenjanastavka.Posledicategaje
lahko izguba nadzora ali povratni udarec.
5. Ne uporabljajte verižnih ali nazobčanih žagi-
nih listov.Tovrstnaorodjapogostopovzročijo
povratniudarecaliizgubonadzoranadelektričnim
orodjem.
Varnostna opozorila za brušenje:
1. Ne uporabljajte prevelikega brusnega papirja.
Pri izbiri brusnega papirja upoštevajte priporo-
čile proizvajalca.Večjibrusnipapir,kisegaprek
brusilneblazinice,predstavljanevarnostpretrga
inlahkopovzročizagozditev,trganjealipovratni
udarecrezalneplošče.
Posebna varnostna opozorila za poliranje:
1. Ne dovolite, da bi se ohlapni deli polirnega
nastavka ali vrvice njegovega priključka
prosto vrteli. Pospravite ali odrežite ohlapne
vrvice nastavka.Ohlapneinvrtečesevrvice
nastavkaselahkozamotajovvašeprstealiopri-
mejoobdelovanca.
Dodatna varnostna opozorila:
1. Ko zaženete napravo, brusni nastavek ne sme
biti v stiku z obdelovancem.
2. Pred začetkom dela na obdelovancu pustite
orodje delovati nekaj časa v prostem teku.
Bodite pozorni na morebitne vibracije ali
tresljaje, ki bi lahko nakazovali na nepravilno
nameščeno oziroma slabo centrirano ploščo.
3. Za brušenje ali poliranje uporabljajte nastavek
z ustrezno površino.
4. Orodja ne pustite delovati brez nadzora.
Dovoljeno ga je uporabljati samo ročno.
5. Takoj po končani obdelavi se ne dotikajte
obdelovanca; ta je lahko zelo vroč in lahko
povzroči opekline kože.
6. Ne dotikajte se dodatne opreme takoj po koncu
obdelave, saj je lahko zelo vroča in vas lahko
opeče.
7. Za pravilno namestitev in uporabo plošč sle-
dite navodilom proizvajalca. Skrbno ravnajte s
ploščami in jih pravilno shranjujte.
8. Poskrbite za ustrezno podporo obdelovanca.
9. Preverite, če se plošča vrti tudi potem, ko ste
orodje že izklopili.
10. Orodja ne uporabljajte na materialih, ki vsebu-
jejo azbest.
11. Pri delu ne uporabljajte tekstilnih delovnih
rokavic.Vlaknaiztekstilnihrokaviclahkoprodrejo
vorodje,zaradičesarselahkoorodjepoškoduje.
SHRANITE TA NAVODILA.

14 SLOVENŠČINA
OPOZORILO: NE dovolite, da bi zaradi udob-
nejšega dela ali znanja o uporabi izdelka (prido-
bljenega z večkratno uporabo) opustili strogo
upoštevanje varnostnih zahtev v okviru pravilne
uporabe orodja. ZLORABA ali neupoštevanje var-
nostnih zahtev v teh navodilih za uporabo lahko
povzroči resne telesne poškodbe.
Pomembna varnostna navodila za
akumulatorsko baterijo
1. Pred uporabo baterijskega vložka preberite
vsa navodila in opozorilne oznake na (1) pol-
nilniku akumulatorja, (2) akumulatorju in (3)
izdelku, ki uporablja akumulator.
2. Ne razstavljajte ali spreminjajte akumulatorske
baterije.Stemlahkopovzročitepožar,preko-
mernovročinoalieksplozijo.
3. Če se je čas delovanja občutno skrajšal, takoj
prenehajte uporabljati orodje. V nasprotnem
primeru lahko pride do pregretja, morebitnih
opeklin in celo eksplozije.
4. Če pride elektrolit v stik z očmi, jih sperite s
čisto vodo in takoj poiščite zdravniško pomoč.
Posledica je lahko izguba vida.
5. Ne povzročite kratkega stika baterijskega
vložka:
(1) Ne dotikajte se priključkov s kakršnim
koli prevodnim materialom.
(2) Izogibajte se shranjevanju baterijskega
vložka v vsebniku z drugimi kovinskimi
predmeti kot so žeblji, kovanci itn.
(3) Ne izpostavljajte baterijskega vložka vodi
ali dežju.
Kratek stik akumulatorja lahko povzroči velik
električni tok, pregrevanje, morebitne opekline
in celo okvaro.
6. Ne shranjujte in uporabljajte orodja in akumu-
latorske baterije na mestih, kjer lahko tempera-
tura doseže ali preseže 50 °C (122 °F).
7. Ne sežigajte baterijskega vložka, tudi če je
hudo poškodovan ali v celoti izpraznjen.
Baterijski vložek lahko v ognju eksplodira.
8. Ne pribijajte, režite, drobite, mečite, spuščajte
akumulatorske baterije oziroma ne udarjajte
z akumulatorsko baterijo po trdem predmetu.
Takšnoravnanjelahkopovzročipožar,preko-
mernovročinoalieksplozijo.
9. Ne uporabljajte poškodovanih akumulatorjev.
10. Priložene litij-ionske baterije ustrezajo zahte-
vam zakonodaje v zvezi z nevarnim blagom.
Zakomercialneprevoze,npr.tiste,kijihopravljajo
tretjestrankeincarinskiposredniki,jetrebaupo-
števatiposebnezahtevevzvezizembalažoin
označevanjem.
Med postopkom priprave na odpremo izdelka se
jetrebaposvetovatisstrokovnjakomzanevarne
snovi.Pritemupoštevajtetudipodrobnejšenacio-
nalne predpise.
Odprtestikeoblepitezlepilnimtrakomalijihdru-
gačezaščitite,baterijopazapakirajtetako,dasev
embalažinemorepremikati.
11. Ko odstranjujete akumulatorsko baterijo, jo
vzemite iz orodja in varno zavrzite. Upoštevajte
lokalne uredbe glede odlaganja baterije.
12. Baterije uporabljajte le z izdelki, ki jih določi
Makita.Čenamestitebaterijevneskladneizdelke,
lahkopridedopožara,pregrevanja,eksplozijeali
puščanjaelektrolita.
13. Če orodja dlje časa ne uporabljate, morate iz
njega odstraniti baterijo.
14. Med uporabo in po uporabi lahko akumu-
latorska baterija postane vroča in povzroči
opekline. Z vročimi akumulatorskimi baterijami
ravnajte pazljivo.
15. Ne dotikajte se priključka orodja takoj po upo-
rabi, ker se lahko dovolj segreje, da povzroči
opekline.
16. Ne dovolite, da bi se v priključke, odprtine in
utore akumulatorske baterije zlepili ostružki,
prah ali zemlja.Tolahkopovzročipregrevanje,
požar,razpočenjeinokvaroorodjaaliakumula-
torskebaterijeterprivededoopeklinalidrugih
telesnih poškodb.
17. Razen če orodje podpira uporabo v bližini
visokonapetostnih električnih vodov, akumula-
torske baterije ne uporabljajte v bližini visoko-
napetostnih električnih vodov. Takšna uporaba
lahkopovzročimotnjevdelovanjualiokvaro
orodjaoziromaakumulatorskebaterije.
18. Baterijo hranite izven dosega otrok.
SHRANITE TA NAVODILA.
POZOR: Uporabljajte le originalne baterije
Makita.ČeuporabljateneoriginalnebaterijeMakita
alibaterije,kisobilespremenjene,lahkopridedo
eksplozijebaterijeinposledičnodopožara,telesnih
poškodb ali materialne škode. S takšno uporabo
bostetudirazveljaviligarancijoMakitazaorodjein
polnilnik Makita.
Nasveti za ohranjanje največje
zmogljivosti akumulatorja
1. Napolnite baterijski vložek, preden se v celoti
izprazni. Ko opazite, da ima orodje manjšo
moč, vedno ustavite delovanje orodja in napol-
nite baterijski vložek.
2. Nikoli znova ne polnite popolnoma napol-
njenega baterijskega vložka. Prenapolnjenje
skrajša življenjsko dobo akumulatorja.
3. Baterijski vložek s sobno temperaturo pol-
nite pri temperaturi okolja od 10 °C do 40 °C.
Počakajte, da se vroč baterijski vložek pred
polnjenjem ohladi.
4. Ko akumulatorske baterije ne uporabljate, jo
odstranite iz orodja ali polnilnika.
5. Če baterijskega vložka ne uporabljate dalj časa
(več kot 6 mesecev), ga napolnite.

15 SLOVENŠČINA
OPIS DELOVANJA
POZOR: Pred nastavljanjem ali preizkusom
delovanja orodja se prepričajte, ali je orodje
izključeno in ali je akumulatorska baterija
odstranjena.
Nameščanje ali odstranjevanje
akumulatorske baterije
POZOR: Vedno izklopite orodje, preden name-
stite ali odstranite akumulatorsko baterijo.
POZOR: Kadar nameščate ali odstranjujete
akumulatorsko baterijo, trdno držite orodje in
akumulatorsko baterijo.Čeorodjainakumulatorske
baterijenedržitetrdno,selahkozgodi,davamzdr-
snetaizrok,posledicapajelahkopoškodbaorodjain
akumulatorskebaterijetertelesnapoškodba.
►Sl.1: 1.Rdečiindikator2. Gumb 3.Baterijskivložek
Čeželiteodstranitiakumulatorskobaterijo,jopotisniteiz
orodja,pritempapomikajtegumbnasprednjistranivložka.
Akumulatorskobaterijovstavitetako,daporavnatejezičekna
baterijizutoromnaohišjuinjopotisnetevležišče.Potisnitejo
dokonca,dasezaskoči.Čeviditerdečiindikator,kotjeprika-
zanonasliki,seakumulatorskabaterijaniustreznozaskočila.
POZOR: Vedno namestite akumulatorsko
baterijo tako, da rdeči indikator ni več viden.Če
teganeupoštevate,lahkobaterijanepričakovano
padeizorodjainpoškodujevasaliosebevneposre-
dnibližini.
POZOR: Ne nameščajte akumulatorske bate-
rije s silo.Česeakumulatorskabaterijanezaskoči
zlahka,nipravilnovstavljena.
Prikazuje preostalo raven
napolnjenosti akumulatorja
Samo za akumulatorske baterije z indikatorjem
►Sl.2: 1.Indikatorskelučke2.Gumbzapreverjanje
Pritisnitegumbzapreverjanjenabaterijskemvložku,
dapreveriteravennapolnjenostiakumulatorja.
Indikatorskelučkenakratkozasvetijo.
Indikatorske lučke Prikaz pre-
ostale ravni
napolnjenosti
Sveti Ne sveti Utripa
od 75 % do
100 %
od 50 % do
75 %
od 25 % do
50 %
od 0 % do
25 %
Napolnite
akumulator.
Indikatorske lučke Prikaz pre-
ostale ravni
napolnjenosti
Sveti Ne sveti Utripa
Akumulator
jemorda
okvarjen.
OPOMBA:Odvisnoodpogojevuporabeinokoljske
temperatureseoznačbalahkonekolikorazlikujeod
dejanskenapolnjenosti.
OPOMBA:Prvaopozorilnalučka(skrajnolevo)bo
utripala,kosistemzazaščitoakumulatorjadeluje.
Zaščitni sistem orodja/akumulatorja
Orodjejeopremljenozzaščitnimsistemomzaorodje/
akumulator.Sistemsamodejnoprekinenapajanje
orodja,dapodaljšaživljenjskodoboorodjainakumula-
torja.Orodjesesamodejnozaustavimeddelovanjem,
čeorodjealiakumulatordelujetapodnaslednjimi
pogoji:
Zaščita pred preobremenitvijo
Kadarorodjealiakumulatoruporabljatenanačin,ki
povzročauporaboneobičajnovisokegatoka,seorodje
samodejnoustavibrezkakršnihkoliznakov.Vtem
primeruizklopiteorodjeinprekinitedelo,kijepovzročilo
preobremenitevorodja.Natovklopiteorodje,daga
znovazaženete.
Zaščita pred pregrevanjem
Česeorodjealiakumulatorpregreje,seorodjesamo-
dejnoustavi.Vtemprimerupočakajte,daseorodjein
akumulatorohladita,predenznovavklopiteorodje.
Zaščita pred izpraznjenjem
Kojezmogljivostakumulatorjaprenizka,seorodje
samodejnoustavi.Vtemprimeruodstraniteakumulator
izorodjainganapolnite.
Delovanje stikala
POZOR: Preden vstavite akumulatorsko
baterijo v orodje, se vedno prepričajte, da stikalo
deluje brezhibno in se vrača v položaj za izklop
(OFF), ko ga spustite.
POZOR: Stikalo lahko zaklenete v položaju za
vklop „ON“ za lažje upravljanje med podaljšano
uporabo. Bodite previdni pri zaklepanju orodja v
položaju za vklop „ON“ in dobro držite orodje.
POZOR: Ne nameščajte akumulatorske bate-
rije, ko je gumb za zaklep aktiviran.
POZOR: Kadar orodja ne uporabljate, pri-
tisnite gumb za zaklep sprožilca s strani , da
zaklenete sprožilec v položaju OFF (izklopljeno).

16 SLOVENŠČINA
Zapreprečevanjenenamernegaaktiviranjasprožilca
jenameščengumbzazaklepsprožilnegastikala.Za
zagonorodjapritisnitegumbzazaklepsprožilnegasti-
kala s strani A ( )insprožilec.Zmočnejšimpritiskom
nasprožilecsepovečahitrostorodja.Čeželiteustaviti
orodje,spustitesprožilec.Pouporabipritisnitegumbza
zaklepsprožilnegastikalasstraniB( ).
►Sl.3: 1.Gumbzazaklepsprožilca
Zaneprekinjenodelovanjepritisnitegumbzazaklepin
hkratisprožilecternatospustitesprožilec.Zazaustavitev
orodjapritisnitesprožilecdokoncainganatospustite.
►Sl.4: 1.Sprožilnostikalo2. Gumb za zaklep
3.Gumbzazaklepsprožilca
Ročica za spreminjanje hitrosti
POZOR: Ročico za spreminjanje hitrosti
vedno potisnite do konca v pravilen položaj.Če
vklopiteorodje,medtemkojeročicazaspremembo
hitrostivvmesnempoložajumedoznakama„1“in„2“,
lahkopridedookvareorodja.
POZOR: Ročice za spreminjanje hitrosti ne
premikajte med delovanjem orodja.Orodjese
lahkopoškoduje.
POZOR: Če stroj dalj časa neprekinjeno
deluje z nizkim številom vrtljajev, pride do čez-
merne obremenitve motorja in morebitne okvare
stroja.
Čeželitespremenitihitrost,najprejizklopiteorodje.
Potisniteročicozaspreminjanjehitrostina„2“zavisoko
hitrostali„1“zanizkohitrost.Predobratovanjempreverite,
alijeročicazaspreminjanjehitrostivrtenjanastavljenav
pravilenpoložaj.Hitrostvrtenjaprilagoditezahtevamdela.
►Sl.5: 1.Ročicazaspreminjanjehitrosti
Prikazana
številka Simbol Hitrost Namenska uporaba
2Hitro Brušenje
1Počasi Poliranje
Funkcija za preprečevanje
nenamernega ponovnega zagona
Čenameščateakumulatorskobaterijo,medtemkopri-
tiskatesprožilecaligazaklepate,seorodjenezažene.
Zavkloporodjasprostitesprožilecingapritisnite.
MONTAŽA
POZOR: Pred vsako izvedbo dela na orodju se
prepričajte, da je le to izključeno in da je akumula-
torska baterija odstranjena.
Nameščanje stranskega ročaja
POZOR: Trdno privijte pokrovčke ali stranski
ročaj.Čepokrovčkinisotrdnopriviti,lahkopadejoin
povzročijotelesnepoškodbe.
Odstranitepokrovčekinnatostranskiročajtrdnoprivijte
naorodje.
Stranskiročajlahkonamestitenaenoalidrugostran
orodja.
►Sl.6: 1.Pokrovček2.Stranskiročaj
Nameščanje pomožne plošče
POZOR: Preverite, ali je pomožna plošča
ustrezno nameščena.Čeblazinicaniustrezno
nameščena,lahkopridedoneravnovesjainpreko-
mernihtresljajev,zaradičesarlahkoizgubitenadzor
nadorodjem.
POZOR:Nikolinesprožitezaporevretena,kose
topremika.Orodjeselahkopoškoduje.
OPOMBA:Dodatkeinvretenorednočistite,da
odstranite prah in ostanke. Sestavne dele po potrebi
obrišiteskrpo,namočenovmilnico.
Sistem kavlja in zanke
Pritisnitezaporovretena,dapreprečitevrtenjevretena,
inprivijtepomožnoploščonavreteno.Zrokotrdno
zategnite.
►Sl.7: 1. Zapora vretena 2. Vreteno 3.Pomožna
plošča
Zaodstranjevanjepomožneploščeravnajtevobratnem
vrstnem redu.
Sistem privijanja/odvijanja
Naadapterprivijtepomožnoploščo.Natomedpritiska-
njemzaporevretenaprivijtedrugikonecadapterjana
vreteno. Z roko trdno zategnite.
►Sl.8: 1.Pomožnaplošča2. Adapter 3. Zapora
vretena 4. Vreteno
Zaodstranjevanjepomožneploščeinadapterjarav-
najtevobratnemvrstnemredu.Čejujetežkoodstraniti,
uporabiteključ.
Nameščanje in odstranjevanje
blazinice za poliranje
POZOR: Za poliranje uporabljajte le blazinice
s sistemom kavlja in zanke.
POZOR: Blazinica in pomožna plošča morata
biti poravnani in trdno pritrjeni. V nasprotnem
primeruboblazinicapovzročalaprekomernetresljaje,
zaradičesarlahkoizgubitenadzor,alipalahkoblazi-
nicosilavržezorodja.
Odstranitevsoumazanijointujkeizsistemakavljain
zankenablaziniciinpomožniplošči.Blazinicopritrdite
napomožnoploščotako,dasonjuniroboviporavnani.
Zaodstranitevblazinicespomožneploščepreprosto
povlecite za rob.
►Sl.9: 1. Blazinica 2.Pomožnaplošča

17 SLOVENŠČINA
Namestitev brusne plošče
Dodatna oprema
POZOR: Za brušenje uporabljajte samo sis-
tem privijanja/odvijanja.
Izbira plošče
POZOR: Zunanji premer nastavka morata
ustrezati nazivni moči električnega orodja.
POZOR: Nazivno število vrtljajev nastavka
mora biti enako ali večje od največjega števila
vrtljajev, ki je označeno na električnem orodju.
Vednouporabljajteploščopravilnevelikosti,kijeizde-
lanaizprimernihbrusnihmaterialovzgranulacijo,kije
prava za vaše delo.
Materiali brusne plošče
Brusni materiali Osnovne lastnosti Praktična uporaba
Aluminijevoksid Zajeklo,nerjavno
jekloinkovine.
Monokristalni
brusni material z
visokotrdnostjoin
vzdržljivostjo.
Hitrobrušenje
Zavečinokovin
Aluminacirkonij Za INOKS in
kovine.Izjemno
oster in trd brusni
material z visoko
vzdržljivostjo.
Odstranjevanje
barve z avtomobi-
lov in plovil, ipd.
Keramika Za INOKS, kovine
in materiale iz
neželeznihkovin.
Izjemnoosterin
visoko odporen
naudare/vročino/
obrabo.
Splošno delo s
kovino
Velikost granulacije
Granulacija Praktična uporaba
24/36 (grobo) Odstranjevanjevelikekoličine
materiala
60/80 Odstranjevanjesrednjevelike
količinemateriala
120(no) Končnaobdelava
Namestitev in odstranitev brusne
plošče
POZOR: Preverite, ali je pomožna plošča
ustrezno nameščena.Čeblazinicaniustrezno
nameščena,lahkopridedoneravnovesjainpreko-
mernihtresljajev,zaradičesarlahkoizgubitenadzor
nadorodjem.
Spomožneploščeodstranitevsoumazanijointujke.
Brusnoploščoprivijtenapomožnoploščo,medtemko
pritiskate zaporo vretena. Z roko trdno zategnite.
Zaodstranjevanjeploščespomožneploščeravnajtev
obratnem vrstnem redu.
►Sl.10: 1.Brusnaplošča2.Pomožnaplošča
UPRAVLJANJE
POZOR: Za poliranje uporabljajte le pristne
blazinice Makita.
POZOR: Za brušenje uporabljajte le originalne
brusne plošče Makita (izbirna dodatna oprema).
POZOR: Obdelovani material mora biti trdno
pritrjen in stabilen. Padajoč predmet lahko
povzroči telesne poškodbe.
POZOR: Pri uporabi orodje z eno roko trdno
držite za pretični ročaj, z drugo pa za stranski
ročaj.
POZOR: Orodja ne uporabljajte dlje časa pri
visoki obremenitvi.Tolahkopovzročiokvaroorodja,
kiposledičnopovzročielektričniudar,požarin/ali
hude poškodbe.
POZOR: Ne dotikajte se vrtljivega dela.
POZOR: Pred uporabo orodja preverite, da
stranski ročaj ali pokrovčki niso razrahljani.Česo
stranskiročajalipokrovčkirazrahljani,lahkosprednji
pokrovpadezorodjainpovzročipoškodbo.
OBVESTILO: Nikoli ne preobremenjujte orodja.
Preobremenitevlahkopovzročimanjšoučinkovitost
poliranja,poškodbeblazinicealikrajšoživljenjsko
doboorodja.
OBVESTILO: Neprekinjeno delovanje pri visoki
hitrosti lahko poškoduje delovno površino.
Splošno delovanje
►Sl.11
1. Prepričajtese,dajeobdelovanecdobropodprtin
daimateoberokiprostizanadzororodja.
2. Orodjezenorokotrdnodržitezapretičniročaj,z
drugopazastranskiročaj.
3. Orodjevključite,počakajte,daploščadoseže
polnohitrost,inpotemprevidnopomakniteorodjenap-
rejpopovršiniobdelovanca.
4. Kokončate,izklopiteorodjeinpočakajte,dase
ploščapopolnomaustavi,predenorodjeodložite.
Poliranje
►Sl.12
1. Obdelovanjepovršine
Zagrobzaključekuporabitevolnenoblazinico,natopa
zanzaključekuporabitegobastoblazinico.
2. Nanašanjevoska
Uporabite gobasto blazinico. Na gobasto blazinico ali
delovnopovršinonanesitevosek.Orodjenajdelujepri
nizki hitrosti, da zgladi vosek.
POZOR: Ne nanesite preveč voska ali
sredstva za poliranje.Takobinamrečnastaloveč
prahu,karbilahkopovzročilobolezniočialidihal.

18 SLOVENŠČINA
OPOMBA:Najprejizvediteposkusnovoskanjena
stranskemdeludelovnepovršine.Prepričajtese,da
orodjeneboopraskalopovršinealipovzročiloneena-
komernegavoskanja.
3. Odstranjevanjevoska
Uporabitegobastoblazinico.Orodjenajdeluje,dase
odstrani vosek.
4. Poliranje
Gobastoblaziniconežnopritisniteobdelovnopovršino.
Brušenje
POZOR: Nikoli ne vključite orodja, ko je
v stiku z obdelovancem, saj lahko poškoduje
upravljavca.
POZOR: Stroja nikoli ne uporabljajte brez bru-
sne plošče. Blazinica se lahko močno poškoduje.
POZOR: Med delovanjem vedno nosite varo-
valna očala ali ščitnik obraza.
POZOR: Po uporabi vedno izklopite orodje in
počakajte, da se plošča popolnoma ustavi, pre-
den orodje odložite.
►Sl.13
VEDNOtrdnodržiteorodjezenorokozazadnjiročaj
inzdrugozastranskiročaj.Vklopiteorodjeinzačnite
poliratiobdelovancazabrazivnoploščo.
Nasplošnodržiteabrazivnoploščopodkotompribližno
15stopinjgledenapovršinoobdelovanca.
Naorodjepritiskajtelerahlo.Čezmerenpritiskposlabša
učinkovitost,abrazivnaploščapasehitrejeobrabi.
VZDRŽEVANJE
POZOR: Preden se lotite pregledovanja ali
vzdrževanja orodja, se vedno prepričajte, da
je orodje izklopljeno in akumulatorska baterija
odstranjena.
OBVESTILO: Nikoli ne uporabljajte bencina,
razredčila, alkohola ali podobnega sredstva. V
tem primeru se lahko orodje razbarva ali defor-
mira oziroma lahko nastanejo razpoke.
VARNOinZANESLJIVOdelovanjetegaizdelkabo
zagotovljenole,čebostepopravila,vzdrževanjein
nastavitveprepustilipooblaščenemuservisuzaorodja
Makitaalitovarniškemuosebju,kivgrajujeizključno
originalne nadomestne dele.
Čiščenje protiprašnih pokrovov
►Sl.14: 1. Protiprašni pokrov
Rednočistiteprotiprašnepokrovenaprezračevalnih
odprtinahzagladkokroženjezraka.Odstraniteprotipra-
šnepokroveinočistitemrežico.
DODATNA OPREMA
POZOR: Ta dodatni pribor ali pripomočki so
predvideni za uporabo z orodjem Makita, ki je
opisano v teh navodilih za uporabo. Pri uporabi
drugegapriboraalipripomočkovobstajanevarnost
telesnihpoškodb.Dodatnipriboralipripomočke
uporabljajtesamozanavedeninamen.
Zavečinformacijododatniopremiseobrnitenanaj-
bližjipooblaščeniserviszaorodjaMakita.
• Volnena blazinica
• Gobasta blazinica (rumena)
• Gobasta blazinica (bela)
• Magičnablazinica
• Blazinicazaprivijanje/odvijanje
• Originalna akumulator in polnilnik Makita
OPOMBA: Nekateri predmeti na seznamu so lahko
priloženiorodjukotstandardnadodatnaoprema.
Lahkoserazlikujejooddržavedodržave.

19 SHQIP
SHQIP (Udhëzimet origjinale)
SPECIFIKIMET
Modeli: DPV300
Kapacitetet maksimale Pllakë me lesh 80 mm
Pllakëmesfungjer 80 mm
Disk smerilimi 50 mm
Diametri i pllakës mbështetëse Për smerilim 46 mm
Për polirim 75 mm
Shpejtësianominale(n)/
Shpejtësiapangarkesë(n0)I lartë (2 ):
regjimiismerilimit
0 - 9 500 min-1
I ulët (1 ):
regjimiipolirimit
0 - 2 800 min-1
Gjatësiatotale 160 mm *1
Tensioni nominal D.C. 18 V
Pesha neto 1,3 - 1,6 kg
*1. Me kutinë e baterisë (BL1860B).
• Përshkaktëprogramittonëtëvazhdueshëmtëkërkim-zhvillimit,specikimetqëjepenkëtumundtë
ndryshojnëpadhënënjoftim.
• Specikimetdhekutiaebaterisëmundtëndryshojnësipasshtetit.
• Peshamundtëndryshojënëvarësitëaksesorit(ëve),përfshirëkutinëebaterisë.Kombinimimëilehtëdhemë
i rëndë, sipas Procedurës EPTA 01/2014, tregohet në tabelë.
Kutia e aplikueshme e baterisë dhe karikuesi
Kutia e baterisë BL1815N / BL1820B / BL1830B / BL1840B / BL1850B / BL1860B
Karikuesi DC18RC / DC18RD / DC18RE / DC18SD / DC18SE / DC18SF /
DC18SH
• Disaprejkutivetëbaterivedhekarikuesvetërendituramëlartmundtëmosjenëtëdisponueshmenëvarësitë
zonëskujubanoni.
PARALAJMËRIM: Përdorni vetëm kutitë e baterisë dhe karikuesit e listuar më lart. Përdorimi i
karikuesvedhekutivetëtjeratëbaterisëmundtëshkaktojëlëndimdhe/osezjarr.
Përdorimi i synuar
Pajisjaështësynuarpërlustrim,lëmimpërparalyerjes,
polirimtësipërfaqevedheheqjetëndryshkutdhebojës.
Zhurma
Niveli tipik i zhurmës A, i matur sipas EN60745-2-3:
Niveli i presionit të zhurmës (LpA) : 73 dB (A)
Pasiguria (K): 3 dB (A)
SHËNIM: Vlerat e deklaruar totale të emetimeve
tëzhurmësjanëmatursipasnjëmetodestandarde
testimidhemundtëpërdorenpërtëkrahasuarnjë
vegëlmenjëtjetër.
SHËNIM: Vlerat e deklaruara të emetimeve të
zhurmësmundtëpërdorenpërnjëvlerësimparaprak
të ekspozimit.
PARALAJMËRIM: Mbani mbrojtëse për
veshët.
PARALAJMËRIM: Emetimet e zhurmës gjatë
përdorimit aktual të veglës elektrike mund të
ndryshojnë nga vlerat e deklaruara në varësi të
mënyrave sesi përdoret vegla, veçanërisht nga
lloji i materialit të punës që përdoret.
PARALAJMËRIM: Vërtetoni që masat e
sigurisë për mbrojtjen e përdoruesit bazohen në
vlerësimin e ekspozimit ndaj kushteve aktuale të
përdorimit (duke marrë parasysh të gjitha pjesët
e ciklit të funksionimit si ato kur pajisja është
e kur dhe punon pa prerë ashtu edhe kohën e
përdorimit).

20 SHQIP
Dridhja
Vleratotaleedridhjeve(shumaevektoritmetreakse)
përcaktohet sipas EN60745-2-3:
Regjimiipunës:smerilimimedisk
Emetimiidridhjeve(ah, DS) : 2,5 m/s2ose më pak
Pasiguria (K): 1,5 m/s2
Regjimiipunës:Lëmimi
Emetimiidridhjeve(ah, P) : 2,5 m/s2ose më pak
Pasiguria (K): 1,5 m/s2
SHËNIM:Vleratedeklaruaratotaletëdridhjevejanë
matursipasnjëmetodestandardetestimidhemund
tëpërdorenpërtëkrahasuarnjëvegëlmenjëtjetër.
SHËNIM:Vleratedeklaruaratotaletëdridhjevemund
tëpërdorenpërnjëvlerësimparapraktëekspozimit.
PARALAJMËRIM: Emetimet e dridhjeve
gjatë përdorimit aktual të veglës elektrike mund
të ndryshojnë nga vlerat e deklaruara në varësi
të mënyrave sesi përdoret vegla, veçanërisht nga
lloji i materialit të punës që përdoret.
PARALAJMËRIM: Vërtetoni që masat e
sigurisë për mbrojtjen e përdoruesit bazohen në
vlerësimin e ekspozimit ndaj kushteve aktuale të
përdorimit (duke marrë parasysh të gjitha pjesët
e ciklit të funksionimit si ato kur pajisja është
e kur dhe punon pa prerë ashtu edhe kohën e
përdorimit).
PARALAJMËRIM: Vlera e deklaruar e
emetimevetëdridhjevepërdoretpëraplikacionet
kryesoretëveglëselektrike.Megjithatë,nësevegla
elektrikepërdoretpëraplikacionetëtjera,vlerae
emetimevetëdridhjevemundtëndryshojë.
Deklarata e konformitetit me KE-në
Vetëm për shtetet evropiane
Deklarata e konformitetit me KE-në përfshihet si
ShtojcaAnëkëtëmanualpërdorimi.
PARALAJMËRIME
SIGURIE
Paralajmërimet e përgjithshme për
sigurinë e veglës
PARALAJMËRIM: Lexoni të gjitha
paralajmërimet për sigurinë, udhëzimet, ilustrimet
dhe specikimet e dhëna me këtë vegël elektrike.
Mosndjekjaetëgjithaudhëzimevetërendituramë
poshtëmundtëshkaktojëgoditjeelektrike,zjarrdhe/
ose lëndim të rëndë.
Ruajini të gjitha paralajmërimet
dhe udhëzimet për të ardhmen.
Termi“vegëlelektrike”nëparalajmërimeireferohet
veglës elektrike që përdoret e lidhur në prizë (me
kordon) ose veglës së përdorur me bateri (pa kordon).
Paralajmërimet e sigurisë të
poliruesit-smerilues me bateri
Paralajmërime të zakonshme sigurie për veprimet e
smerilimit ose të polirimit:
1.
Kjo vegël elektrike është prodhuar që të
funksionojë si smerilues ose polirues. Lexoni të
gjitha paralajmërimet për sigurinë, udhëzimet,
ilustrimet dhe specikimet e dhëna me këtë
vegël elektrike.Mosndjekjaetëgjithaudhëzimeve
tërendituramëposhtëmundtëshkaktojëgoditje
elektrike,zjarrdhe/oselëndimtërëndë.
2.
Veprimet si lëmimi, pastrimi me furçë me spica
teli, lustrimi ose prerja nuk rekomandohen për t’u
kryer me këtë vegël elektrike. Veprimet për të cilat
pajisjaelektrikenukështëepërshtatshmemundtë
krijojnërrezikdhetëshkaktojnëdëmtimepersonale.
3. Mos përdorni aksesorë që nuk janë projektuar
dhe rekomanduar nga prodhuesi i veglës. Fakti
qënjëaksesormundtëmontohetnëveglëntuaj
elektrike,nukgarantonnjëfunksionimtësigurt.
4. Shpejtësia e matur e aksesorit duhet të jetë
minimalisht e barabartë me shpejtësinë
maksimale të caktuar në veglën elektrike.
Aksesorëtqëekalojnëshpejtësinëematurmund
të thyhen dhe të ndahen në copa.
5.
Diametri i jashtëm dhe trashësia e aksesorit tuaj
duhet të jetë brenda kapacitetit të matur të veglës
elektrike. Aksesorët me përmasa të gabuara nuk
mund të mbrohen ose të kontrollohen siç duhet.
6.
Montimi me leto i aksesorëve duhet të
përputhet me leton e boshtit të veglës. Për
aksesorët e montuar me anxha, vrima e
boshtit të aksesorit duhet të përputhet me
diametrin e folesë së anxhës. Aksesorët që nuk
përputhenmepjesënmontuesetëveglëselektrike
dotëhumbasinekuilibrin,dotëlëkundenjashtë
masedhemundtëshkaktojnëhumbjenekontrollit.
7. Mos përdorni aksesorë të dëmtuar. Përpara
secilit përdorim, kontrollojeni aksesorin, si
p.sh. pllakën mbështetëse, për plasaritje, çarje
apo konsumim të tepërt. Nëse pajisja elektrike
ose aksesori bie, kontrolloni nëse ka dëmtime
ose instaloni një aksesor të padëmtuar. Pas
inspektimit dhe instalimit të aksesorëve, si
ju ashtu edhe personat e tjerë, qëndroni larg
trajektores së rrotullimit të aksesorit dhe lëreni
elementin elektrik të punojë me shpejtësi
maksimale pa ngarkesë për një minutë.
Aksesorët e dëmtuar zakonisht do të shkëputen
ngapajisjagjatëkëtijtesti.
8. Mbani pajisje mbrojtëse personale. Në varësi
të përdorimit, përdorni mbrojtëse për fytyrën
ose syze sigurie të mëdha ose të vogla. Sipas
rastit, mbani maskë kundër pluhurit, mbrojtëse
për dëgjimin, doreza dhe përparëse mbrojtëse
që mund të ndalojë copëzat abrazive ose të
materialit të punës.Mbrojtësjaesyveduhet
tëketëaftësitëndalojëcopatuturueseqë
prodhohen nga veprimet e ndryshme. Maska
kundërpluhuritoserespiratoriduhettëjenë
nëgjendjetëltrojnëgrimcateprodhuaranga
funksionimiipajisjes.Ekspozimipërnjëkohëtë
gjatëndajzhurmavetëfortamundtëshkaktojë
humbjenedëgjimit.
Other manuals for DPV300
6
This manual suits for next models
1
Table of contents
Languages:
Other Makita Sander manuals

Makita
Makita GV5010 User manual

Makita
Makita DBO480 User manual

Makita
Makita 9031 Quick start guide

Makita
Makita BO6050 Manual

Makita
Makita 9227C User manual

Makita
Makita DBO380 User manual

Makita
Makita BO4510 User manual

Makita
Makita BO3710 User manual

Makita
Makita BO5030 User manual

Makita
Makita 9032 User manual