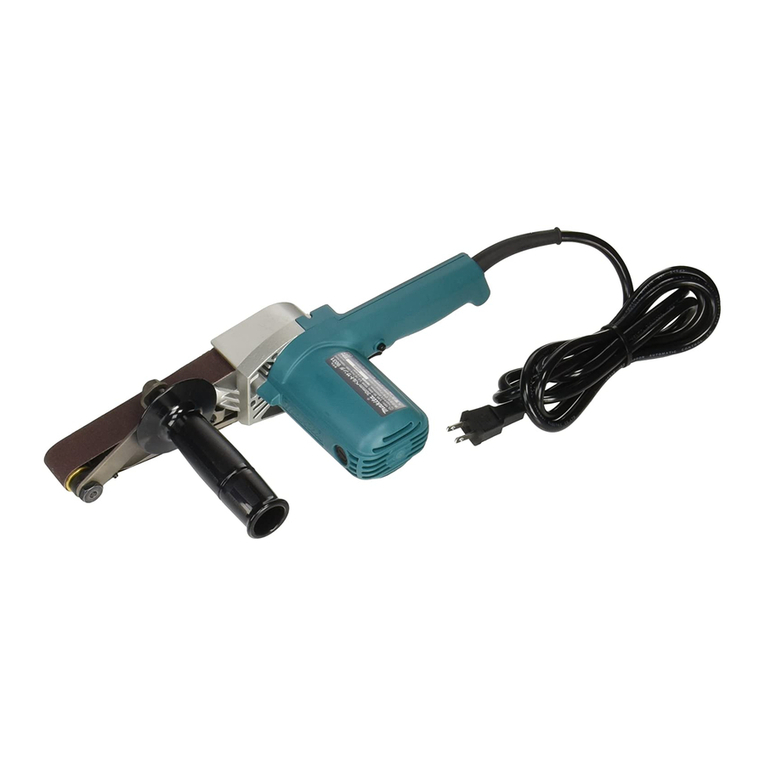
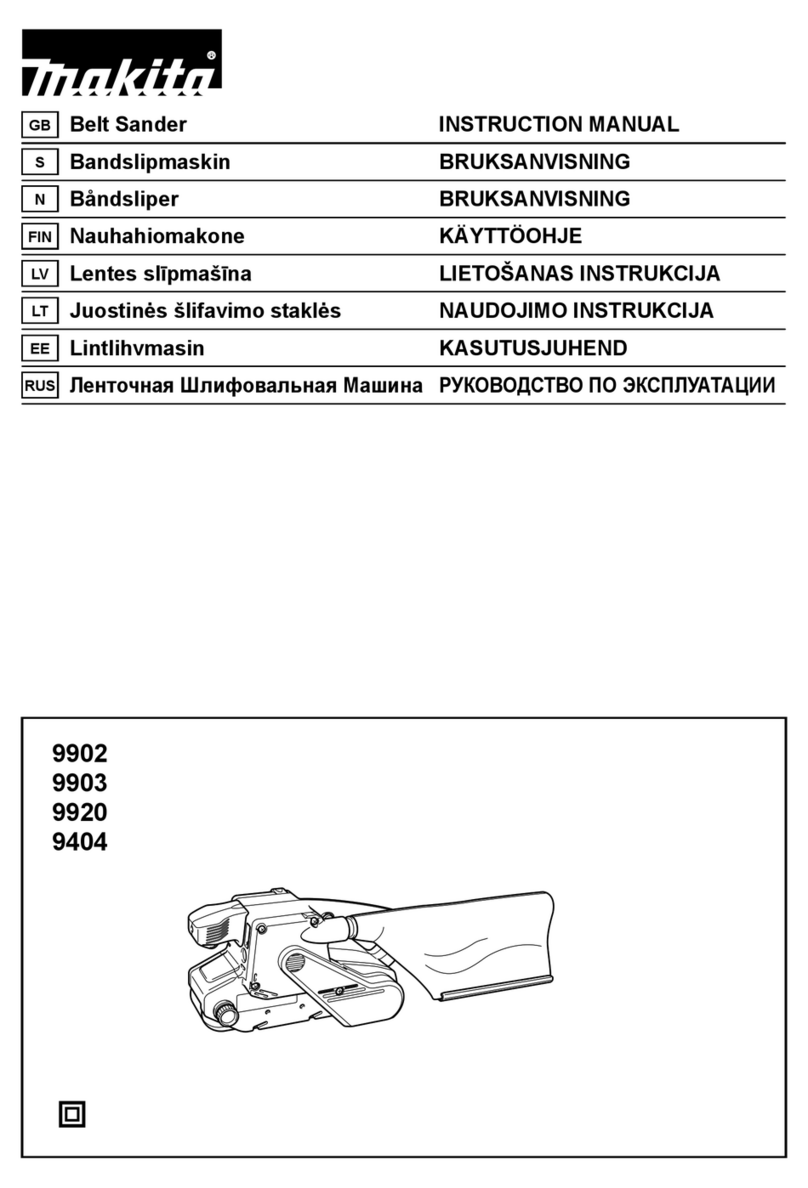
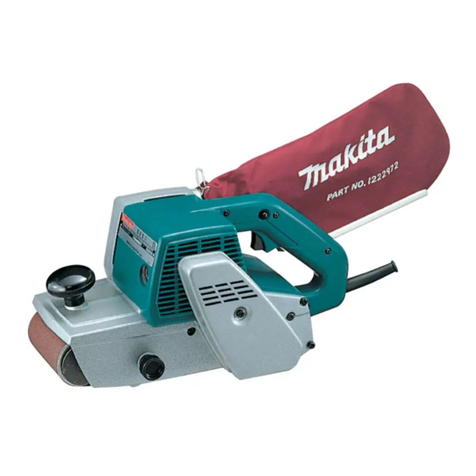
Makita 9032 User manual

DOUBLE
INSULATION
INSTRUCTION MANUAL
READ
and
UNDERSTAND
before
using.
TIONS FOR
FUTURE REFERENCE.
ww.
makitatools.com

SPECIFICATIONS
Beltsize Belt speed Overalllength
5
-
28
mls
9
mm
x
533 mm
420
mm
(3/8"
x
21")
(980
-
5600fthin.) (16-1
/2")
Net weight
1.5 kg
(3.3
Ibs)
Manufacturer reserves the right to change specifications without notice.
Specifications maydiffer from country
to
country.
GENERALSAFETY RULES
(For
All
Tools)
USA002-2
A
WARNING:
Read and understand
all
instructions.
Failure to
follow all
instructions listed below, may result in electric shock, fire and/or
serious personal injury.
SAVE THESE INSTRUCTIONS
Work Area
Keep your work area clean and well lit.
Cluttered benchesand dark areas inviteacci-
dents.
Do not operate power tools
in
explosive
atmospheres, such as in the presence of
flammable liquids, gases, or dust. Power
tools
create sparks which may ignitethe dust
or fumes.
Keep bystanders, children, and visitors
away while operating a powertool. Distrac-
tions can cause you
to
lose control.
Electrical Safety
Double insulated tools are equipped with
a polarized plug (one blade is wider than
the other.) This plug will fit
in
a polarized
outlet only one way. Ifthe plugdoes notfit
fully
in
the outlet, reverse the plug. If it
still
does not fit, contact a qualified elec-
trician to install a polarized outlet. Do not
changethe plug inany way. Double insula-
tion
IEi
eliminates the needfor the three wire
grounded power cord and grounded power
supply system.
Avoid body contact with grounded sur-
faces such aspipes, radiators, ranges and
refrigerators. There is an increased risk of
electric shock
if
your body is grounded.
2

6. Do not expose power tools to rain or wet
conditions. Water entering a power tool will
increasethe risk of electric shock.
7.
Donotabusethe cord. Neveruse the cord
to carry the tools or pullthe plug from an
outlet. Keep cord away from heat, oil,
sharp edges or moving parts. Replace
damaged cords immediately. Damaged
cords increasethe risk of electric shock.
8.
When operating a power tool outside, use
an outdoor extension cord marked "W-A"
or
"W". These cords are rated for outdoor
use andreducethe riskof electricshock.
PersonalSafety
9.
Stay alert, watch what you are doing and
use common sense when operating a
power tool. Do not use tool while tired or
under the influence of drugs, alcohol, or
medication. A moment of inattention while
operating power tools may result in serious
personalinjury.
10.
Dress properly. Do not wear loose cloth-
ing or jewelry. Contain long hair. Keep
your hair, clothing, and gloves away from
movingparts. Looseclothes,jewelry,or long
haircanbecaught inmovingparts.
11. Avoid accidental starting. Be sure switch
is
off
before pluggingin. Carrying
tools
with
your finger on the switch or pluggingin
tools
that havethe switch on invitesaccidents.
12. Remove adjusting keys or wrenches
before turning the tool on.
A
wrench or a
key that is left attached
to
a rotating part of
thetool may result in personalinjury.
13.
Do not overreach. Keep proper footing
andbalanceat alltimes. Proper footingand
balance enables better control of the
tool
in
unexpectedsituations.
14.
Use safety equipment. Always wear eye
protection. Dust mask, non-skid safety
shoes, hard hat, or hearing protection must
be used for appropriate conditions. Ordinary
eye or sun glassesare NOT eye protection.
Tool
UseandCare
15. Use clamps or other practical way to
secure and support the workpiece to a
stable platform. Holdingthework by handor
against your body is unstable and may lead
to
loss
of control.
16. Do not force tool. Use the correct tool for
your application. The correct
tool
will do the
job better and safer at the rate for which it is
designed.
17. Do not use tool if switch does not turn it
on or
off.
Any
tool
that cannot be controlled
with the switch is dangerous and must be
repaired.
18.
Disconnect the plug from the power
source before making any adjustments,
changing accessories, or storing the tool.
Such preventive safety measures reducethe
riskof starting the tool accidentally.
19. Store idle tools out of reach of children
and other untrained persons.
Tools
are
dangerousinthe hands
of
untrainedusers.
20. Maintain tools with care. Keep cutting
tools sharp and clean. Properlymaintained
tools with sharp cutting edges are less likely
to bindand are easier
to
control.
21. Check for misalignment or binding of
moving parts, breakage of parts, and any
other condition that may affect the tools
operation. If damaged, have the tool ser-
viced before using. Many accidents are
causedby poorlymaintainedtools.
22. Use only accessories that are recom-
mended by the manufacturer for your
model. Accessories that may be suitablefor
one tool, may become hazardouswhen used
on another
tool.
SERVICE
23.
Tool
service must be performed only by
qualified repair personnel. Serviceor main-
tenance performed by unqualified personnel
could result ina risk of injury.
3

24.
When servicing a tool, use only identical
replacement parts. Follow instructions in
the Maintenance section of this manual.
Use of unauthorized parts or failure
to
follow
Maintenanceinstructionsmay create a
risk
of
electric
shock or injury.
USE
PROPER
EXTENSION
CORD:
Make sure your extension cord is in good condition.
When using an extension cord, be sure
to
use one heavy enough
to
carry the current your
product will draw.
An
undersized cord will cause a drop in line voltage resulting in
loss
of
power and overheating.Table
1
shows the correct size
to
use depending on cord lengthand
nameplateampere rating.
If
in doubt, use the next heaviergage. The smallerthe gage num-
ber, the heavierthe cord. Table
1:
Minimum gagefor cord
SPECIFIC
SAFETY
RULES
USBOO7-3
DO
NOT
let comfort or familiarity with product (gained from repeated use) replace strict
adherence to sander safety rules. If you use this tool unsafely or incorrectly, you can suffer
serious personal injury.
1.
2.
3.
4.
5.
6.
Hold tool by insulated gripping surfaces
when performing an operation where the
cutting tool may contact hidden wiring or
its own cord. Contact with a
"live"
wire
will
make exposed metal parts
of
the
tool
"live"
and shock the operator.
Always use safety glasses or goggles.
Ordinary eye or sun glasses are NOT
safety glasses.
Holdthetoolfirmly with bothhands.
Make sure the belt is not contacting the
workpiece beforethe switch isturnedon.
Keep hands away from rotating parts.
Do
not leavethe tool running. Operatethe
tool only when hand-held.
This tool has not been waterproofed,
so
do not use water on the workpiece sur-
face.
Ventilate your work area adequately when
you perform sandingoperations.
Use of this tool to sand some products,
paints and wood could expose user to
dust containing hazardous substances.
Useappropriate respiratoryprotection.
4

SAVE THESE INSTRUCTIONS
A
WARNING:
MISUSE
or failure to
follow
the safety rules stated in this instruction
manual may cause seriouspersonalinjury.
SYMBOLS
USD204-3
The followings show the
symbols
usedfor
tool.
v
.......................
volts
A
.......................
amperes
Hz
.....................
hertz
CL
................alternatingcurrent
...................
Class
II
Construction
mls
....................
meter per second
Wmin
................
feet per minute
5

A
CAUTION:
Always be sure that the tool is switched off and
unplugged before adjusting or checking function on the
tool.
FUNCTIONAL
DESCRIPTION
001215
1.
Lock lever
Adjustingarm inclination
The arm can be pivotedand fixed at any desired angle within
the "A" range accordingto the operatingpositionor the figure
of the workpiece.
Loosen the lock lever by raising it. Pivot the arm to the
desired position, and secure the lock lever to
fix
the arm
firmly.
2.
Arm
~12~6
Replacingarm
By replacing the standard-equipped arm by optional one,
6
mm
(1/4")
or
13
mm (1/2") width belt can be used. Remove
the arm by looseningthe screw that secures the arm. Insert
the arm that fits the belt to be used, and tighten the screw
firmly.
1.
Screw
2.
Arm
Switchaction
A
CAUTION:
Before plugging in the tool, always check to see that the
switchtrigger actuatesproperly and returnsto the "OFF"
positionwhen released.
001217
To
start the tool, simply pull the switch trigger. Release the
switch trigger to stop. For continuous operation, pull the
switch trigger and then push in the lock button.
To
stop the
tool from the locked position,pullthe switchtrigger fully, then
releaseit.
1.
Lock button
2.
Switchtrigger
6

001218
I
1.
Speed adjusting dial
ASSEMBLY
Speedadjustingdial
The belt speed can be infinitely adjusted between
5
m and
28
m per second
(980
-
5600 ft./min.) by turning the speed
adjusting dial
to
a given number setting from
1
to
6.
Higher speed is obtained when the dial is turned inthe direc-
tion of number
6;
lower speed is obtained when it is turned in
the direction
of
number
1.
Select the proper speed for the
workpiece to be sanded.
CAUTION:
The speed adjusting dial can be turned only as far as
6
and back to
1.
Do
not force it past
6
or
1,
or the speed
adjusting function may no longer work.
CAUTION:
Always be sure that the tool is switched off and
unplugged before carrying out any work on the tool.
Installingor removingabrasivebelt
001219
Pullthe cam lever all the way out. Install the belt over the rear
pulley, and slip the belt over the front pulley, with the belt
pulled out
to
the front arm. Return the cam lever
to
the origi-
nal position.
1
Arm
2
Abrasive belt
3
Cam lever
4 Rear
pulley
001220
Adjustingbelt tracking
Switch on the
tool
and make sure that the belt is aligned
properly.
Use the adjusting dial
to
center the belt tracking. Turn the
adjusting dial clockwise to incline the arm to the right, or
counterclockwise to incline
it
to
the left.
1.
Arm
2.
Adjusting dial
7

001221
2.
Hose28
3.
Hose
of
vacuum
cleaner
4.
Vacuum cleaner
00122
Connectingto Makitavacuum cleaner or dust col-
lector
A
CAUTION:
Always close the nozzle cap when the vacuum cleaner/
dust collector is not connected to the nozzle. Never
insert your finger intothe nozzle.
Cleaner sanding operations can be performed by connecting
the belt sander to Makita vacuum cleaner
or
dust collector.
Open the nozzle cap, and install the dust nozzle. Connect
the hose
of
a vacuum cleaner/dust collector
to
the dust noz-
zle.
When connecting to Makita vacuum cleaner, an optional
hose
28
mm
(1-1/8")
in inner diameter is necessary.
When connecting
to
Makita dust collector, connect the hose
of the dust collector directly
to
the dust nozzle.
.
Dust
nozzle
2. Hose28
3.
Dust collector
8

OPERATION
W177R
Hold the
tool
firmly with bothhands. Turnthe tool on andwait
until it attains full speed. Gently apply the tool
to
the work-
piece surface and move the
tool
forward and back. Press the
belt only lightly on the workpiece. Excessive pressure may
damage the belt and shorten tool life.
Always use "A" range of the belt tosand the workpiece.
001224
001225
A
CAUTION:
Secure the workpiece with clamps, etc.
if
there is any
possibility of it moving during the work operations.
The
tool
should not already be
in
contact with the
workpiece surface when you turn the tool on or off.
Otherwise a poor sanding finish, damage
to
the belt
of
loss
of control of the
tool
may result.
When working with the
tool,
be very careful to avoid any
contact of the
tool
and belt with any part of your body or
anyone or anything near you.
9

MAINTENANCE
Limit mark
001226
I
1
I
I
1.
Brush holdercap
2.
Screwdriver
A
CAUTION:
Always be sure that the tool is switched
off
and
unplugged before attempting to perform inspection or
maintenance.
Replacingcarbon brushes
Remove and check the carbon brushes regularly. Replace
when they wear down to the limit mark. Keep the carbon
brushes clean and free to slip in the holders. Both carbon
brushes should be replacedat the same time. Useonly iden-
tical carbon brushes.
Use a screwdriver to removethe brush holdercaps. Take out
the worn carbon brushes, insert the new ones and secure
the brush holder caps.
To
maintain product SAFETY and RELIABILITY, repairs, any
other maintenance or adjustment should be performed by
Makita Authorized or Factory Service Centers, always using
Makita replacement parts.
10

These accessoriesor attachmentsare recommended for
use with your Makita tool specified in this manual. The
use of any other accessories
or
attachments might
present a risk of injury
to
persons. Only use accessory
or attachmentfor its stated purpose.
If you need any assistance for more details regardingthese
accessories,ask your local Makita service center.
Arm (6,
9,
13 mm:
1/4",
3/8",
1/27
6 mm
(1/4")
Abrasive belt
(#40,
#60,
#80,
#loo, #120)
9
mm (3/8")Abrasive belt
(#40,
#60,
#80,
#loo,
#120)
13
mm
(1/2")
Abrasive belt
(#40,
#60,
#80,
MOO,
#120)
Dust nozzleassembly
Hose 28
11

Memo
........
........
...................
..
_._..
-
....
__
.
...
...
.
.__.
.
.
-
,
.
12

I
I
I
I
I
I
I
I
I
I
I
I
I
I
Makita
U.S.A.,
Inc.
14930
Northam Street
I
La
Mirada,
CA
90638-5753
I
I
I
I
I
I
Firs1
Class
not
deliver
WlthOUl
proper
IIIIIIIIIIIIIIIIIIIIIIIIIIIIIIIIIIIIIIIIIIIIIIIIIIII
I
I
I
I
I
I
I
I
I
I
I
I
I
I
I
I
I
I
I
I
I
I
I
I
I
I
I
I
I
I
I
I
I
I
I

MAIL
THIS
PORTION
)ATE PURCHASED
YEAR
Tmll
I
I
I
I
I
I
I
I
Your answer to the following questions are appreciated.
1.This product was purchased
from:
3.
How
did you learn
of
about
this
product:
MODELNO
SERIAL NO
0
Home Center
0
Hardware/LumberStore
Tool Distributor
0
IndustrialSupply
[7
Constructionsupply
2.
Use
of
the product isintendedfor:
0
Other
(
[7
ConstructionTrade
0
Industrial Maintenance
0
Home
Maintenance
Hobby
0
Other
(
j
5.
Any comments:
)
0
Magazine
0
From Dealer
0
Newspaper
0
Catalog
4. Mostfavored pointsare:
0
Design
0
Features
0
Size
0
Price
0
Makita Brand
StoreDisplay
0
Radio
0
Exhibition
0
From Friend
0
PreviousUsage
0
Other
(
j
0
RepairService
0
Durability
0
Power
0
Other
(
j
I
I
I
I
I
I
I
I
I
I
I
I
I
I
I
I
I
I
I
I
I
I
I
I
I
I
I
I
I
I
I
I
I
I
AREA
I
CODE
STATE ZIP CODE PHONE
AGE:
Under19
0
20-29
[7
30-39
0
40-49
0
50-60
0
Over
60
BE
SURETO COMPLETE THE CUSTOMER'S PORTION
OF
THIS FORMAND RETAIN FORYOUR RECORDS
Please returnthis portion
by
facsimile or mail.
Facsimile
No:
(714)
522-8133
I
I
I
I
I
I
I
I
I
I
I
I
I
I
I
I
I
I
I
I
I
I
I
I
I
I
I
I
I
I
I
I
I
I
I
I
I
I
I
I
I
I
I
I
I
I
I
I

FACTORY SERVICE CENTERS
1
-800-4-MAKITA
RETAIN
THIS
PORTION
FOR
YOUR RECORDS
ALIBAMA
2365
l'clttam
l'nkway
f'dhain
A1
35174
1205,120
1791
l121N
L:lovirAue
Sle
112
hrru,
c*
83127
15501
752
5166
CUSTOMER'S
RECORD
GEORGIA
4680
Rive1
Green
Parkway
NW
Uul,ilh
GA
3ooM
(1701471,
"91
I
HAWAII
4510
Salt
I
ahe
Elvd
iiiile
A7
H'inolu,,,
,,I
96818
lR08)
847
"03"
(117,334
998"
UANSAS
When
you
need
service Send
complete
tool
(prepaidJ
to
one
01
the Makita FactoryService
Centerslisted or
to
an Authorized
MakitaServiceCenter
Be
sure
10
anach a letter
to
the outside
of
the carton detailingthe problem
with your tool
PUERTO ROC0
200
Goa""
s,
HaloHey
PRO3917
(787)
250
8776
TENNESSEE
4655
Nuleiinville
Rd
Nashville
TN
37211
16l5)331
9922
3453
114
15
N",li,
Sle
IO,
hnn Anlonia
7X
/8210
(?l"122R(Xi/G
UTAH
145
E
I300
S
,
Sle
101
SaltIaksCiV
UTRIIIS
(80,)
359.1410
VIRGINIA
5760 Norlhnmplon
Qlvd
Str
102
"i'gllllatkeach
VA
23455
,7571
060
0280
WASHINGTON
22220
84lh
Ave
Sa,
Bldg
A
Ksnf WAS8032
1253)
395
8055
WISCONSIN
2245
S
fORlhS1
WestAlle
WI
53227
(414)bbl
4116
Lill'aln
Plaza
Sllopplnq
ct,
Date
Purchased
15

WARNING
Some dust created by power sanding, sawing, grinding, drilling, and other
construction activities contains chemicals knownto the State of California
to cause cancer, birthdefectsor other reproductiveharm. Some examples
of these chemicals are:
lead from lead-based paints,
crystalline silica from bricks and cement and other masonry products,and
arsenic and chromium from chemically-treated lumber.
Your risk from these exposures varies, dependingon how often you do this
type of work.
To
reduceyour exposureto these chemicals:work in a well
ventilated area, and work with approvedsafety equipment, such as those
dust masksthat are specially designedto filter out microscopic particles.
MAKITA LIMITED ONEYEAR WARRANTY
Warranty
Policy
Every Makita
tool
isthoroughly inspectedandtested before leavingthe factory.
It
is
warranted
to
be free of
defects from workmanship and materialsfor the period of ONE YEAR from the date
of
originalpurchase.
Shouldany trouble develop duringthis one-year period, returnthe COMPLETE tool, freight prepaid,to one of
Makita'sFactory or Authorized Service Centers.
If
inspectionshows the trouble is caused by defective
workmanship or material,Makitawill repair (or at our option, replace)without charge.
ThisWarranty does not apply where:
repairshave beenmade or attemptedby others:
repairs are requiredbecauseof normalwear andtear:
*The
tool
has beenabused, misused or improperly maintained:
alterations havebeen made
to
the
tool.
INNO EVENT SHALL MAKITA BE LIABLE FOR ANY INDIRECT, INCIDENTAL
OR
CONSEQUENTIAL
DAMAGES FROMTHE SALE
OR
USEOFTHE PRODUCT. THIS DISCLAIMER APPLIES BOTH DURING
AND AFTER THETERM OF THISWARRANTY.
MAKITA DISCLAIMS LIABILITY FOR ANY IMPLIEDWARRANTIES, INCLUDING IMPLIEDWARRANTIESOF
"MERCHANTABILITY"AND "FITNESSFOR A SPECIFIC PURPOSE," AFTER THE ONE-YEARTERM OF
THISWARRANTY.
ThisWarranty gives you specific legalrights,and you may also have other rightswhich vary form state
to
state.
Some statesdo not allow the exclusion or limitationof incidentalor consequentialdamages,
so
the above
limitationor exclusion may not apply
to
you. Some states do not allow limitationon how longan implied
warranty lasts,
so
the above limitationmay not apply
to
you.
Makita
Corporation
3-
1
1-8,
Sumiyoshi-cho,
Anjo, Aichi 446-8502Japan
88441
0-069
Other manuals for 9032
21
Table of contents
Other Makita Sander manuals

Makita
Makita 9901 003360 User manual

Makita
Makita BO6040 User manual

Makita
Makita DPV300 User manual

Makita
Makita 9045B User manual

Makita
Makita M9203 User manual

Makita
Makita DBO140 User manual

Makita
Makita 9741 User manual

Makita
Makita BO6030 User manual

Makita
Makita BO5030 User manual

Makita
Makita BO4901 User manual

Makita
Makita Maktec MT925 Manual

Makita
Makita PO6000C User manual

Makita
Makita DBO484Z User manual

Makita
Makita 9207SPB User manual

Makita
Makita XSB01 User manual

Makita
Makita 9403 User manual

Makita
Makita B04556 User manual

Makita
Makita BO5041J User manual

Makita
Makita SA7000C User manual

Makita
Makita 9741 User manual