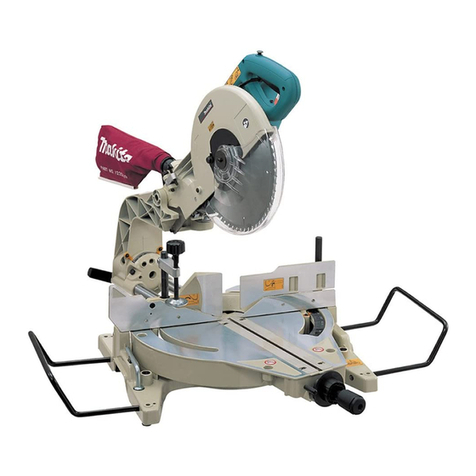
Makita 2702 User manual

INSTRUCTION MANUAL
MANUEL D'INSTRUCTION
MANUAL DE INSTRUCCIONES
WARNING:
For your personal safety, READ and UNDERSTAND before using.
SAVE THESE INSTRUCTIONS FOR FUTURE REFERENCE.
AVERTISSEMENT:
Pour votre propre sécurité, prière de lire attentivement avant l’utilisation.
GARDER CES INSTRUCTIONS POUR RÉFÉRENCE ULTÉRIEURE.
ADVERTENCIA:
Para su seguridad personal, LEA DETENIDAMENTE este manual antes de usar la herramienta.
GUARDE ESTAS INSTRUCCIONES PARA FUTURA REFERENCIA.
Table Saw
Scie de table
Sierra de Banco
2702
2703
2702X1
2703X1
006851
DOUBLE INSULATION
DOUBLE ISOLATION
DOBLE AISLAMIENTO

2
ENGLISH
SPECIFICATIONS
•Due to our continuing programme of research and development, the specifications herein are subject to change
without notice.
•Note: Specifications may differ from country to country.
For Your Own Safety Read Instruc-
tion Manual Before Operating Tool
Save it for future reference
GENERAL SAFETY PRECAUTIONS
USA007-2
(For All Tools)
1. KNOW YOUR POWER TOOL. Read the owner’s
manual carefully. Learn the tool’s applications
and limitations, as well as the specific potential
hazards peculiar to it.
2. KEEP GUARDS IN PLACE and in working order.
3. REMOVE ADJUSTING KEYS AND WRENCHES.
Form habit of checking to see that keys and
adjusting wrenches are removed from tool
before turning it on.
4. KEEP WORK AREA CLEAN. Cluttered areas and
benches invite accidents.
5. DON’T USE IN DANGEROUS ENVIRONMENT.
Don’t use power tools in damp or wet locations,
or expose them to rain. Keep work area well
lighted. Don’t use tool in presence of flammable
liquids or gases.
6. KEEP CHILDREN AWAY. All visitors should be
kept safe distance from work area.
7. MAKE WORKSHOP KID PROOF with padlocks,
master switches, or by removing starter keys.
8. DON’T FORCE TOOL. It will do the job better and
safer at the rate for which it was designed.
9. USE RIGHT TOOL. Don’t force tool or attachment
to do a job for which it was not designed.
10. WEAR PROPER APPAREL. Do not wear loose
clothing, gloves, neckties, rings, bracelets, or
other jewelry which may get caught in moving
parts. Nonslip footwear is recommended. Wear
protective hair covering to contain long hair.
11. ALWAYS USE SAFETY GLASSES. Also use face
or dust mask if cutting operation is dusty. Every-
day eyeglasses only have impact resistant
lenses, they are NOT safety glasses.
12. SECURE WORK. Use clamps or a vise to hold
work when practical. It’s safer than using your
hand and it frees both hands to operate tool.
13. DON’T OVERREACH. Keep proper footing and
balance at all times.
14. MAINTAIN TOOLS WITH CARE. Keep tools sharp
and clean for best and safest performance. Fol-
low instructions for lubricating and changing
accessories.
15. DISCONNECT TOOLS before servicing; when
changing accessories such as blades, bits, cut-
ters, and the like.
16. REDUCE THE RISK OF UNINTENTIONAL START-
ING. Make sure switch is in off position before
plugging in.
17. USE RECOMMENDED ACCESSORIES. Consult
the owner’s manual for recommended accesso-
ries. The use of improper accessories may cause
risk of injury to persons.
18. NEVER STAND ON TOOL. Serious injury could
occur if the tool is tipped or if the cutting tool is
unintentionally contacted.
19. CHECK DAMAGED PARTS. Before further use of
the tool, a guard or other part that is damaged
should be carefully checked to determine that it
Model 2702 / 2702X1 2703 / 2703X1
Arbor hole 5/8”
Blade diameter 210 mm (8-1/4”) 255 mm (10”)
Max. cutting capacities 90°68 mm (2-11/16”) 91 mm (3-9/16”)
45°47 mm (1-3/4”) 63 mm (2-1/2”)
Maximum dado capacity 13 mm (1/2”)
No load speed (RPM) 4,600/min.
Table size (W x L) 686 mm x 560 mm (27”x 22”)
Dimensions (L x W x H) 560 mm x 686 mm x 458 mm (22”x 27”x 18”)
Net weight 18 kg (40 lbs)

3
will operate properly and perform its intended
function - check for alignment of moving parts,
binding of moving parts, breakage of parts,
mounting, and any other conditions that may
affect its operation. A guard or other part that is
damaged should be properly repaired or
replaced.
20. DIRECTION OF FEED. Feed work into a blade or
cutter against the direction of rotation of the
blade or cutter only.
21. NEVER LEAVE TOOL RUNNING UNATTENDED.
TURN POWER OFF. Don’t leave tool until it
comes to a complete stop.
22. REPLACEMENT PARTS. When servicing use
only identical replacement parts.
23. POLARIZED PLUGS. To reduce the risk of elec-
tric shock, this equipment has a polarized plug
(one blade is wider than the other). This plug will
fit in a polarized outlet only one way. If the plug
does not fit fully in the outlet, reverse the plug. If
it still does not fit, contact a qualified electrician
to install the proper outlet. Do not change the
plug in any way.
VOLTAGE WARNING: Before connecting the tool to a
power source (receptacle, outlet, etc.) be sure the volt-
age supplied is the same as that specified on the name-
plate of the tool. A power source with voltage greater
than that specified for the tool can result in SERIOUS
INJURY to the user –as well as damage to the tool. If in
doubt, DO NOT PLUG IN THE TOOL. Using a power
source with voltage less than the nameplate rating is
harmful to the motor.
USE PROPER EXTENSION CORD. Make sure your
extension cord is in good condition. When using an
extension cord, be sure to use one heavy enough to
carry the current your product will draw. An undersized
cord will cause a drop in line voltage resulting in loss of
power and overheating. Table 1 shows the correct size to
use depending on cord length and nameplate ampere
rating. If in doubt, use the next heavier gage. The smaller
the gage number, the heavier the cord.
ADDITIONAL SAFETY RULES
USB059-1
DO NOT let comfort or familiarity with
product (gained from repeated use)
replace strict adherence to table saw
safety rules. If you use this tool unsafely
or incorrectly, you can suffer serious per-
sonal injury.
1. Wear eye protection.
2. Don’t use the tool in presence of flammable liq-
uids or gases.
3. NEVER use the tool with an abrasive cut-off
wheel installed.
4. Check the blade carefully for cracks or damage
before operation. Replace cracked or damaged
blade immediately.
5. Clean the spindle, flanges (especially the install-
ing surface) and hex nut before installing the
blade. Poor installation may cause vibration/
wobbling or slippage of the blade.
6. Use saw-blade guard and spreader for every
operation for which it can be used, including all
through sawing operations. Always assemble
and install the blade guard following the step by
step instructions out-lined in this manual.
Through sawing operations are those in which
the blade cuts completely through the workpiece
as in ripping or cross cutting. NEVER use the
tool with a faulty blade guard or secure the blade
guard with a rope, string, etc. Any irregular oper-
ation of the blade guard should be corrected
immediately.
7. Immediately reattach the guard and spreader
after completing an operation which requires
removal of the guard.
8. Do not cut metals such as nails and screws.
Inspect for and remove all nails, screws and
other foreign matter from the workpiece before
operation.
9. Remove wrenches, cut-off pieces, etc. from the
table before the switch is turned on.
10. NEVER wear gloves during operation.
11. Keep hands out of the line of the saw blade.
Table 1. Minimum gage for cord
Ampere Rating Volts Total length of cord in feet
120 V 25 ft. 50 ft. 100 ft. 150 ft.
More Than Not More Than AWG
0 6 18 16 16 14
6 10 18161412
10 12 16 16 14 12
12 16 14 12 Not Recommended

4
12. NEVER stand or permit anyone else to stand in
line with the path of the saw blade.
13. Make sure the blade is not contacting the
spreader or workpiece before the switch is
turned on.
14. Before cutting an actual workpiece, let the tool
run for a while. Watch for vibration or wobbling
that could indicate poor installation or a poorly
balanced blade.
15. NEVER make any adjustments while tool is run-
ning. Disconnect tool before making any adjust-
ments.
16. Use a push stick when required. Push sticks
MUST be used for ripping narrow workpieces to
keep your hands and fingers well away from the
blade.
17. Pay particular attention to instructions for reduc-
ing risk of KICKBACK. KICKBACK is a sudden
reaction to a pinched, bound or misaligned saw
blade. KICKBACK causes the ejection of the
workpiece from the tool back towards the opera-
tor. KICKBACKS CAN LEAD TO SERIOUS PER-
SONAL INJURY. Avoid KICKBACKS by keeping
the blade sharp, by keeping the rip fence parallel
to the blade, by keeping the spreader, antikick-
back pawls and blade guard in place and operat-
ing properly, by not releasing the workpiece until
you have pushed it all the way past the blade,
and by not ripping a workpiece that is twisted or
warped or does not have a straight edge to guide
along the fence.
18. Do not perform any operation freehand. Free-
hand means using your hands to support or
guide the workpiece, in lieu of a rip fence or
miter gauge.
19. NEVER reach around or over saw blade. NEVER
reach for a workpiece until the saw blade has
completely stopped.
20. Avoid abrupt, fast feeding. Feed as slowly as
possible when cutting hard workpieces. Do not
bend or twist workpiece while feeding. If you
stall or jam the blade in the workpiece, turn the
tool off immediately. Unplug the tool. Then clear
the jam.
21. NEVER remove cut-off pieces near the blade or
touch the blade guard while the blade is running.
22. Knock out any loose knots from workpiece
BEFORE beginning to cut.
23. Don’t abuse cord. Never yank cord to disconnect
from receptacle. Keep cord away from heat, oil,
water and sharp edges.
24. Some material contains chemicals which may be
toxic. Take caution to prevent dust inhalation
and skin contact. Follow material supplier safety
data.
25. The guard can be lifted during workpiece setup
and for ease of cleaning. Always make sure that
guard hood is down and flat against sawtable
before plugging in the tool.
SAVE THESE INSTRUCTIONS
WARNING:
MISUSE or failure to follow the safety
rules stated in this instruction manual
may cause serious personal injury.
INSTALLATION
Positioning table saw
Locate the table saw in a well lit and level area where you
can maintain good footing and balance. It should be
installed in an area that leaves enough room to easily
handle the size of your workpieces. The table saw should
be secured with four screws or bolts to the work bench or
table saw stand using the holes provided in the bottom of
the table saw. When securing the table saw on the work
bench, make sure that there is an opening in the top of
the work bench the same size as the opening in the bot-
tom of the table saw so the sawdust can drop through.
1. Hole diamter 8
mm (5/16”)
1. 6 mm (1/4”) Std.
washer
2. No.10 wood
screw 40 mm
(1-1/2”) min.
length
1. 6 mm (1/4”) Std.
washer
2. 6 mm (1/4”)
Mounting bolt &
Nut tighten
securely
459 mm
(18-1/16")
334 mm
(13-1/8")
1
006875
1
25 mm
2
(1")
006146
12
006148

5
If during operation there is any tendency for the table saw
to tip over, slide or move, the work bench or table saw
stand should be secured to the floor.
NOTE:
•Tabl e saw s tand
Models 2702X1 and 2703X1 are standard-
equipped with a table saw stand.
Storing accessories
The miter gauge and wrenches can be stored on the left
side of the base and the rip fence can be stored at the
rear of the base.
FUNCTIONAL DESCRIPTION
CAUTION:
•Always be sure that the tool is switched off and
unplugged before adjusting or checking function on
the tool.
Adjusting the depth of cut
The depth of cut may be adjusted by turning the handle.
Turn the handle clockwise to raise the blade or counter-
clockwise to lower it.
NOTE:
•Use a shallow depth setting when cutting thin
materials in order to obtain a cleaner cut.
Adjusting the bevel angle
Loosen the lock lever counterclockwise and turn the
handwheel until the desired angle (0°- 45°) is obtained.
The bevel angle is indicated by the arrow pointer.
After obtaining the desired angle, tighten the lock lever
clockwise to secure the adjustment.
CAUTION:
•After adjusting the bevel angle, be sure to tighten
the lock lever securely.
Adjusting positive stops
The tool is equipped with positive stops at 90°and 45°to
the table surface. To check and adjust the positive stops,
proceed as follows:
Move the handwheel as far as possible by turning it.
Place a triangular rule on the table and check to see if
the blade is at 90°or 45°to the table surface. If the blade
is at an angle shown in Fig. A, turn the adjusting screws
clockwise; if it is at an angle shown in Fig. B, turn the
1. Miter gauge
1. Rip fence
1. Handle
1
006858
1
006859
1
006860
1. Lock lever
2. Handwheel
3. Arrow pointer
1. 90°adjusting
screw
2. 45°adjusting
screw
1
23
006861
12
006862
(A)
(B)
90
90 45
45
006157

6
adjusting screws counterclockwise to adjust the positive
stops.
After adjusting the positive stops, set the blade at 90°to
the table surface. Then adjust the arrow pointer so that
its right edge is aligned to the 0°graduation.
Switch action
CAUTION:
•Before plugging in the tool, always check to see
that the switch lever actuates properly and returns
to the “OFF”position.
This tool is equipped with a special type of switch to pre-
vent unintentional starting. To start the tool, first depress
the switch lever. While keeping it depressed, pull its lower
portion toward you. To stop the tool, press the lower por-
tion of the switch lever.
When operating the switch lever, it is convenient to view it
through the window area in the table.
CAUTION:
•When not using the tool, remove the key and store
it in a secure place. This prevents unauthorized
operation.
•Do not pull the switch lever hard without the key.
This can cause breakage of the switch.
ASSEMBLY
CAUTION:
•Always be sure that the tool is switched off and
unplugged before carrying out any work on the tool.
The tool is shipped from the factory with the saw blade
and blade guard not in the installed condition. Assemble
as follows:
Installing or removing saw blade
CAUTION:
•Always be sure that the tool is switched off and
unplugged before installing or removing the blade.
•Use only the Makita socket wrench provided to
install or remove the blade. Failure to do so may
result in overtightening or insufficient tightening of
the hex bolt. This could cause an injury.
Remove the table insert on the table. Hold the outer
flange with the offset wrench and loosen the hex nut
counterclockwise with the wrench. Then remove the
outer flange.
Assemble the inner flange, blade, outer flange and hex
nut onto the arbor, making sure that the teeth of the blade
are pointing down at the front of the table. Always install
the hex nut with its recessed side facing the outer flange.
CAUTION:
•Keep the flange surface clean of dirt or other
adhering matter; it could cause blade slippage. Be
sure that the blade is installed so that the teeth are
aligned in the cutting (turning) direction.
To secure the blade in place, hold the outer flange with
the offset wrench, then tighten the hex nut clockwise with
the wrench. BE SURE TO TIGHTEN THE HEX NUT
SECURELY.
1. Arrow pointer
1. Switch lever
2. Key
1
006864
1
2
006868
006869
1. Wrench
2. Hex nut
3. Offset wrench
1. Inner flange
2. Outer flange
3. Saw blade
4. Hex nut
32
1
006852
12
3
4
006136

7
CAUTION:
•Be sure to hold the hex nut carefully with the
wrench. If your grip should slip, the wrench may
come off the hex nut, and your hand could strike the
sharp blade edges.
Installing blade guard
CAUTION:
•Before installing the blade guard, adjust the depth
of cut to its maximum elevation. Insert the spreader
between the blade guard mounting portion (stay)
and the pressure plate.
Tighten the hex bolts (A) with the offset wrench. The
spreader installing location is factory-adjusted so that the
blade and spreader will be in a straight line. However, if
they are not in a straight line, loosen the hex bolts (B)
and adjust the blade guard mounting portion (stay) so
that the spreader is aligned directly behind the blade.
Then tighten the hex bolts (B) to secure the stay.
CAUTION:
•Always grasp the striped portion of the offset
wrench when tightening the hex bolts. If you tighten
the hex bolts while grasping the offset wrench
further than the striped portion, the hex bolts may
be damaged and/or an injury to your hand may
result.
•If the blade and spreader are not aligned properly, a
dangerous pinching condition may result during
operation. Make sure they are properly aligned. You
could suffer serious personal injury while using the
tool without a properly aligned spreader.
•NEVER make any adjustments while tool is
running. Disconnect the tool before making any
adjustments.
There must be a clearance of about 4 - 5 mm (5/32”-13/
64”) between the spreader and the blade teeth.
Adjust the spreader accordingly and tighten the hex bolts
(A) securely. Attach the table insert on the table, then
check to see that the blade guard works smoothly before
cutting.
Installing and adjusting rip fence
Raise the grip of the rip fence. Install the rip fence on the
table so that the fence holder engages with the guide rail.
The rip fence can be secured by lowering the grip.
To check to be sure that the rip fence is parallel with the
blade, secure the rip fence 2 - 3 mm (5/64”- 1/8”) from
the blade. Raise the blade up to maximum elevation.
Mark one of the blade teeth with a crayon. Measure the
distance (A) and (B) between the rip fence and blade.
Take both measurements using the tooth marked with the
crayon. These two measurements should be identical. If
the rip fence is not parallel with the blade, proceed as fol-
lows:
1. Wrench
2. Offset wrench
1. Blade guard
2. Spreader
3. Antikickback
pawl
4. Pressure plate
1. These two
clearances
should be equal
2. Blade guard
portion
3. Blade
4. Spreader
5. Pressure plate
6. Hex bolts (A)
7. Hex bolts (B)
21
006854
1
2
3
4
006853
31
4
5
6
2
7
006856
1. Spreader
2. Blade guard
1. Fence holder
2. Guide rail
3. Grip
21
4 - 5 mm
(5/32" - 13/64")
006863
1
23
006865

8
1. Turn the adjusting nut counterclockwise a couple of
turns.
2. Loosen the two hex bolts on the rip fence with the
wrench provided.
3. Adjust the rip fence until it becomes parallel with
the blade.
4. Lower the grip to secure the rip fence.
5. Tighten the two hex bolts on the rip fence.
CAUTION:
•Always grasp the striped portion of the wrench
when tightening the hex bolts. If you tighten the hex
bolts while grasping the wrench further than the
striped portion, the hex bolts may be damaged and/
or an injury to your hand may result.
6. With the grip of the rip fence lowered, turn the
adjusting nut clockwise to secure the rear end of
the rip fence. Do not turn the adjusting nut clock-
wise excessively. You may have some difficulty
adjusting the rip fence parallel with the saw blade
when repositioning the rip fence.
CAUTION:
•Be sure to adjust the rip fence so that it is parallel
with the blade, or a dangerous kickback condition
may occur.
Bring the rip fence up flush against the side of the blade.
Make sure that the arrow pointer on the fence holder
points to the 0 graduation. If the arrow pointer does not
point to the 0 graduation, loosen the screw on the scale
plate and adjust the scale plate.
OPERATION
CAUTION:
•Always use “work helpers”such as push sticks and
push blocks when there is a danger that your hands
or fingers will come close to the blade.
•Always hold the workpiece firmly with the table and
the rip fence or miter gauge. Do not bend or twist it
while feeding. If the workpiece is bent or twisted,
dangerous kickbacks may occur.
•NEVER withdraw the workpiece while the blade is
running. If you must withdraw the workpiece before
completing a cut, first switch the tool off while
holding the workpiece firmly. Wait until the blade
has come to a complete stop before withdrawing
the workpiece. Failure to do so may cause
dangerous kickbacks.
•NEVER remove cut-off material while the blade is
running.
•NEVER place your hands or fingers in the path of
the saw blade. Be especially careful with bevel cuts.
•Always secure the rip fence firmly, or dangerous
kickbacks may occur.
•Always use “work helpers”such as push sticks and
push blocks when cutting small or narrow
workpieces, or when the dado head is hidden from
view while cutting.
Work helpers
Push sticks, push blocks or auxiliary fence are types of
“work helpers”. Use them to make safe, sure cuts without
the need for the operator to contact the blade with any
part of the body.
1. Scale
1. Hex bolts
2. Adjusting nut
3. Grip
A
B
1
006866
1
2
3
006881
006867
1. Screw
2. Fence hoder
3. Scale plate
4. Arrow mark
1
2
3
4
006882

9
Push stick
A push stick can be easily made from a piece of plywood
19 mm (3/4”) to 25 mm (1”) thick.
Cut out the hatched area on the stick and smooth edges
with a file. (H) dimension should be less than 12.7 mm (1/
2”) so as to be thinner than the workpiece.
Push block
Use a 19 mm (3/4”) piece of plywood.
Handle should be in center of plywood piece. Fasten with
glue and wood screws as shown. Small piece 9.5 mm x 8
mm x 50 mm (3/8”x 5/16”x 2”) of wood must always be
glued to plywood to keep the blade from dulling if the
operator cuts into push block by mistake. (Never use
nails in push block.)
Auxiliary fence
Make auxiliary fence from 9.5 mm (3/8”) and 19 mm (3/
4”) plywood pieces.
Fasten with glue and wood screws.
Wood facing (rip fence)
A wood facing should be used for operations when the
blade comes close to the rip fence. Wood facing for the
rip fence should be the same size as the rip fence. Make
sure the bottom of facing is flush with the table surface.
Ripping
CAUTION:
•When ripping, remove the miter gauge from the
table.
•When cutting long or large workpieces, always
provide adequate support behind the table. DO
NOT allow a long board to move or shift on the
table. This will cause the blade to bind and increase
the possibility of kickback and personal injury. The
support should be at the same height as the table.
Before operating the table saw, check to be sure that the
antikickback pawls operate properly. Turn the tool off and
unplug it. Feed the workpiece under the blade guard and
along both sides of the blade to simulate cutting. Try to
withdraw the workpiece on each side by pulling it toward
you. The antikickback pawls should grab the workpiece
and prevent it from moving back toward the operator.
Always keep the antikickback pawls sharp so they will
operate properly. Keep them sharp by using a round-
shaped file to maintain the original shape of the pawls.
1. Adjust the depth of cut a bit higher than the thick-
ness of the workpiece.
2. Position the rip fence to the desired width of rip and
lock in place by lowering the grip. Before ripping,
make sure the rear end of the rip fence is secured
firmly. If it is not secured enough, follow the proce-
1. Face/edge par-
allel
2. Handle
3. Wood screw
4. Glue together
1. Face/edge par-
allel
(H)
19mm
(3/4")
40mm
(1-1/2") 50mm(2")
380mm(15")
9.5mm(3/8")
75mm(3")
130mm(5")
9.5mm(3/8")
50mm
(2")
006876
120mm
(4-3/4")
300mm(12")
130mm(5")
50mm(2")
6mm
(1/4")
300mm(12")
130mm
(5")
100mm
(4")
50mm
(2")
9.5mm
(3/8")50mm
(2") 8mm(5/16")
1
2
34
006219
9.5mm
(3/8")
19mm
(3/4") 120mm
(4-3/4")
40mm
(1-1/2")
140mm
(5-1/2")
460mm
(18")
1
006211
1. No.10 wood
screws (long
enough to pene-
trate halfway
into facing)
1
006883
006886

10
dures in the section titled “Installing and adjusting
rip fence”.
3. Turn the tool on and gently feed the workpiece into
the blade along with the rip fence.
(1) When the width of rip is 150 mm (6”) and
wider, carefully use your right hand to feed
the workpiece. Use your left hand to hold the
workpiece in position against the rip fence.
(2) When the width of rip is 65 mm - 150 mm (2-
1/2”- 6”) wide, use the push stick to feed the
workpiece.
(3) When the width of rip is narrower than 65 mm
(2-1/2”), the push stick cannot be used
because the push stick will strike the blade
guard. Use the auxiliary fence and push
block. Attach the auxiliary fence to the rip
fence with two “C”clamps.
Feed the workpiece by hand until the end is
about 25 mm (1”) from the front edge of the
table. Continue to feed using the push block
on the top of the auxiliary fence until the cut is
complete.
Cross cutting
CAUTION:
•When making a crosscut, remove the rip fence from
the table.
•When cutting long or large workpieces, always
provide adequate support to the sides of the table.
The support should be at the same height as the
table.
•Always keep hands away from path of blade.
Miter gauge
Use the miter gauge for the 4 types of cutting shown in
the figure.
CAUTION:
•Secure the knob on the miter gauge carefully.
•Avoid creep of workpiece and gauge by firm
workholding arrangement, especially when cutting
at an angle.
•NEVER hold or grasp the intended “cut-off”portion
of the workpiece.
Use of miter gauge
Slide the miter gauge into the thick grooves in the table.
Loosen the knob on the gauge and align to desired angle
1. Push stick
1. Auxiliary fence
006887
1
006888
1
006889
1. Push block
2. Auxiliary fence
1. Cross cutting
2. Mitering
3. Bevel cutting
4. Compound
mitering
(angles)
1. Groove
2. Miter gauge
3. Knob
1
2
006874
12
34
006884
1
2
3
006870

11
(0°to 60°). Bring stock flush up against fence and feed
gently forward into the blade.
Auxiliary wood facing (miter gauge)
To prevent a long board from wobbling, fit the miter
gauge with an auxiliary fence board. Fasten with bolts/
nuts after drilling holes, but fasteners must not protrude
from the face board.
MAINTENANCE
CAUTION:
•Always be sure that the tool is switched off and
unplugged before attempting to perform inspection
or maintenance.
Cleaning
Clean out sawdust and chips from time to time. Carefully
clean the blade guard and moving parts inside the table
saw.
Lubrication
To keep the table saw in tip-top running condition, and to
assure maximum service life, oil or grease the moving
parts and rotating parts from time to time.
Lubrication places:
•Threaded shaft to elevate the blade
•Hinge to rotate the frame
•Elevation guide shafts on motor
•Gear to elevate the blade
Replacing carbon brushes
Remove and check the carbon brushes regularly.
Replace when they wear down to the limit mark. Keep
the carbon brushes clean and free to slip in the holders.
Both carbon brushes should be replaced at the same
time. Use only identical carbon brushes.
Use a holder cap opener to remove the brush holder
caps. To replace the carbon brush in the side near the
table, lower the blade as far as possible by turning the
handle. Loosen the lock lever, tilt the blade and secure it
at 45°. Then loosen the brush holder cap while viewing it
through the opening of the base. Remove the worn car-
bon brushes, insert the new ones and secure the brush
holder caps.
After replacing brushes, plug in the tool and break in
brushes by running tool with no load for about 10 min-
utes. Then check the tool while running and electric
brake operation when releasing the switch trigger. If elec-
tric brake is not working well, ask your local Makita ser-
vice center for repair.
To maintain product SAFETY and RELIABILITY, repairs,
any other maintenance or adjustment should be per-
formed by Makita Authorized or Factory Service Centers,
always using Makita replacement parts.
ACCESSORIES
CAUTION:
•These accessories or attachments are
recommended for use with your Makita tool
specified in this manual. The use of any other
accessories or attachments might present a risk of
injury to persons. Only use accessory or
attachment for its stated purpose.
If you need any assistance for more details regarding
these accessories, ask your local Makita Service Center.
Dado head set (Part No. 191543-4)
A dado is cutting a rabbet or a wide groove into the work-
piece. The dado head set consists of two outside cutters,
three inside cutters and paper washers.
1. Limit mark
006885
1
001145
1. Holder cap
opener
2. Brush holder
cap
1
2
006879
1/8" 1/8" 1/8" 1/8"1/16"
006890

12
•Outside cutters: 6”diameter, 1/8”thick, 5/8”arbor
hole, 2 pcs.
•Inside cutters: 6”diameter, 1/8”thick, 5/8”arbor hole,
2 pcs.
•Inside cutter: 6”diameter, 1/16”thick, 5/8”arbor hole,
1 pc.
•Paper washers: 5/8”arbor hole, 6 pcs.
Various combinations of these cutters are used to cut
grooves from 1/8”to 1/2”for use in making joints, tenon-
ing, grooving, etc.
Dado flange set (Part No. 192693-8)
1. Dado outer flange
When cutting groove 1/4”, 5/16”, 3/8”, 7/16”or 1/2”,
use this dado outer flange.
2. Dado hex nut
When cutting groove 1/4”, 5/16”, 3/8”, 7/16”or 1/2”,
use this dado hex nut.
3. Ring
When cutting groove 1/4”, 5/16”, 3/8”, 7/16”or 1/2”,
use this ring.
4. Washer
When cutting groove 1/4”, 5/16”or 3/8”, use this
washer.
Table insert (Part No. 317061-6)
When cutting grooves 5/16”, 3/8”,7/16”or 1/2”use this
table insert instead of the standard table insert.
To install the dado head set, proceed as follows:
1. Turn the tool off and unplug it before installing.
2. Remove the blade guard with the spreader.
3. Install the dado head set with the teeth pointing
down at the front of the table.
4. Use the chart below to select the proper cutters to
obtain the various cutting widths.
1
2
3
4
006891
006892

13
CAUTION:
•For a 1/8”cut width, the outside cutter is assembled
to the spindle in the same manner as the saw
blade.
•The outer flange or the dado outer flange must be
used for each cut width.
•The hex nut alone must not be used to secure the
dado on to the spindle.
NOTE:
•When widths slightly greater than the above are
required, fit the paper washers in between the
inside and outside cutters to adjust the width.
5. Arrange the cutters so that the tips of the inside cut-
ters are positioned at the gullets of the outside cut-
ter. When more than one inside cutter is used,
space the tips of the inside cutters equidistantly in
relation to one another. Poorly spaced cutters may
cause vibration and noise.
When installing two outside cutters without any inside
cutter, be sure that the cutter tips do not face each other.
6. While tightening the hex nut, be careful to maintain
the even spacing between the tips of the inside cut-
ters.
7. Rotate the dado head one turn by hand to make
sure that it does not contact anything before opera-
tion.
CUT
WIDTH
1/4"
5/16"
3/8"
7/16"
1/2"
1/8"
Spindle Inner
flange Ring Outside
Cutter
1/8"
Inside
cutter
1/16"
Inside
cutter
Outer
flange
Dado
Outer
flange
Outside
cutter Washer Hex
nut
Dado
Hex
nut
x2
006893
1. Outside cutter
2. Inside cutter
3. Gullet
1
2
3
006178
006179

14
When dadoing, use featherboards. The diagram shown
illustrates dimensions for making a typical featherboard.
It should be made from a straight piece of wood that is
free of knots or cracks.
Featherboards are used to keep the workpiece in contact
with the rip fence and table as shown, and to stop kick-
backs.
To install featherboards, proceed as follows:
1. Turn the tool off and unplug it.
2. Add 8”high flat facing board to the rip fence, the full
length of the rip fence.
3. Mount featherboards to the rip fence and table as
shown, so that the leading edges of the feather-
boards will support the workpiece until the cut is
completed, and the workpiece has been pushed
completely past the cutter with a push stick.
4. Make sure featherboards are securely attached.
CAUTION:
•Only the Makita dado head set (Part No. 191543-4)
should be used with Makita table saw Model 2702/
Model 2703. Do not use dado combinations wider
than 13 mm (1/2”).
•After dadoing, ALWAYS replace the blade guard
with the spreader back in its original position on the
table saw.
•NEVER attempt bevel cuts when dadoing.
•NEVER dado if there is vibration (flutter) or a
strange noise.
•NEVER attempt dados in other than wood.
•Do not use the dado set for cut-offs.
•Feed work slowly, especially when cutting deep or
wide grooves or dados. If a deep cut is needed,
make several passes through the workpiece rather
than one deep, wide cut. Fast or abrupt feeds can
be dangerous.
•Use a push stick. When the dado head is hidden
from view while cutting, your hands should never be
on top of the stock.
•A very dangerous throwback can result if the wood
becomes stuck and you try to remove it by pulling
toward you. Always stop the tool and wait for dado
head to come to a complete stop. Then simply
withdraw the wood.
WARNING:
•Use extra caution when the guard assembly is
removed for any non-through sawing operation
such as dadoing, rabbeting or re-sawing. Replace
guard immediately after non-through sawing is
completed.
How to perform rabbeting
1. Remove blade guard.
2. Attach auxiliary fence to rip fence for cuts that run
the length of the stock. Facing should be as high as
the workpiece is wide. Adjust fence and blade to
desired dimensions.
3. First cut: Hold board flat on table as in ordinary rip-
ping.
4. Second cut: Set workpiece on its edge. (Use feath-
erboards, push stick, push block and so on, using
precautions, safety rules and guidelines for ripping
or related work.)
5. For end-type rabbeting, if the workpiece is less than
10-1/2”wide, rest the wood flat on the table against
the miter gauge (with wood facing). The rip fence
should not be used.
6. After rabbeting is completed, immediately re-install
the blade guard as before.
Table saw stand
NOTE:
•The following is description only for the tools
equipped with a table saw stand. For table saw
stands as optional accessories, refer to the
instruction manuals for table saw stands provided
with them.
1. Kerf should be
about 6 mm
(1/4”) apart
1. C clamps
2. Facing board
3. Push stick
4. Featherboard
200 mm
600 mm
19 mm 115 mm
130 mm
1
(24")
(8")
(3/4") (4-1/2")
(5")
006180
1
2
3
4
006182 1. Rabbet
2. Second cut
3. First cut
1
2
3
006183

15
Place the stays on a level location and assemble the legs
inside. Secure with the bolts and nuts, then attach the
rubber caps to the ends of the legs.
Now set the table saw on top of the assembled stand and
secure with four bolts, washers and nuts.
NOTE:
•Models 2702X1 and 2703X1 are standard-
equipped with a table saw stand.
•Steel & Carbide-tipped saw blades
•Sub table set (Left / Right)
•Rip fence
•Miter gauge
•Offset wrench 13-22
•Wrench 19
•Key (Switch button)
•Holder cap opener
•Joint ( for connecting to dust collector )
•Stand set
EN0006-1
MAKITA LIMITED ONE YEAR WARRANTY
Warranty Policy
Every Makita tool is thoroughly inspected and tested
before leaving the factory. It is warranted to be free of
defects from workmanship and materials for the period of
ONE YEAR from the date of original purchase. Should
any trouble develop during this one year period, return
the COMPLETE tool, freight prepaid, to one of Makita’s
Factory or Authorized Service Centers. If inspection
shows the trouble is caused by defective workmanship or
material, Makita will repair (or at our option, replace)
without charge.
This Warranty does not apply where:
•repairs have been made or attempted by others:
•repairs are required because of normal wear and
tear:
•the tool has been abused, misused or improperly
maintained:
•alterations have been made to the tool.
IN NO EVENT SHALL MAKITA BE LIABLE FOR ANY
INDIRECT, INCIDENTAL OR CONSEQUENTIAL DAM-
AGES FROM THE SALE OR USE OF THE PRODUCT.
THIS DISCLAIMER APPLIES BOTH DURING AND
AFTER THE TERM OF THIS WARRANTY.
MAKITA DISCLAIMS LIABILITY FOR ANY IMPLIED
WARRANTIES, INCLUDING IMPLIED WARRANTIES
OF “MERCHANTABILITY”AND “FITNESS FOR A SPE-
CIFIC PURPOSE,”AFTER THE ONE YEAR TERM OF
THIS WARRANTY.
This Warranty gives you specific legal rights, and you
may also have other rights which vary from state to state.
Some states do not allow the exclusion or limitation of
incidental or consequential damages, so the above limi-
tation or exclusion may not apply to you. Some states do
not allow limitation on how long an implied warranty lasts,
so the above limitation may not apply to you.
1. Rubber cap
2. Nut
3. Leg
4. Under stay
5. stay
1. Bolt
2. Stand
1
3
4
5
2
006877
1
2
006878
Table/Miter saw
blades For general purpose cuts for table and miter saws.
Combination General purpose blade for fast and smooth rip,
crosscuts and miters.
Fine cross cuts For sand-free cuts cleanly against the grain.
006586

16
FRANÇAIS
SPÉCIFICATIONS
•Le fabricant se réserve le droit de modifier sans avertissement les spécifications.
•Note: Les spécifications peuvent varier selon les pays.
Pour votre propre sécurité, veuillez
lire le manuel d’instructions avant
d’utiliser l’outil Conservez-le pour
référence ultérieure
CONSIGNES GÉNÉRALES DE
SÉCURITÉ
USA007-2
(Pour TOUS LES OUTILS)
1. VOUS DEVEZ CONNAÎTRE VOTRE OUTIL
ÉLECTRIQUE. Lisez attentivement le manuel
d’instructions. Familiarisez-vous avec les
applications et limites de l’outil, ainsi qu’avec
les risques potentiels qui lui sont spécifiques.
2. MAINTENEZ LES PROTECTEURS EN PLACE et
en bon état de fonctionnement.
3. RETIREZ LES CLÉS DE RÉGLAGE ET LES CLÉS.
Prenez l’habitude de vous assurer que les clés et
clés de réglage ont été retirées de l’outil avant de
le mettre sous tension.
4. MAINTENEZ L’AIRE DE TRAVAIL PROPRE. Les
aires de travail et les établis encombrés ouvrent
la porte aux accidents.
5. ÉVITEZ L’UTILISATION DANS UN
ENVIRONNEMENT DANGEREUX. N’utilisez pas
les outils électriques dans les endroits humides
ou mouillés, et ne les exposez pas à la pluie.
Maintenez un éclairage adéquat dans l’aire de
travail. N’utilisez pas l’outil en présence de
liquides ou gaz inflammables.
6. MAINTENEZ LES ENFANTS À L’ÉCART. Toute
autre personne que l’utilisateur de l’outil doit se
tenir à une distance sûre de l’aire de travail.
7. FAITES EN SORTE QUE L’ATELIER SOIT SANS
DANGER POUR LES ENFANTS, en y posant des
cadenas, un interrupteur principal, ou en retirant
des équipements leurs clés de démarrage.
8. NE FORCEZ PAS L’OUTIL. Il effectuera un travail
de meilleure qualité et plus sûr s’il est utilisé au
régime pour lequel il a été conçu.
9. UTILISEZ LE BON OUTIL. Ne forcez pas un outil
ou accessoire à effectuer un travail pour lequel il
n’a pas été conçu.
10. PORTEZ DES VÊTEMENTS ADÉQUATS. Ne
portez ni vêtements ni gants amples, ni cravate,
anneaux, bracelets ou autres bijoux
susceptibles d’être happés par les pièces
mobiles de l’outil. Le port de chaussures
antidérapantes est recommandé. Portez un filet
de protection pour envelopper les cheveux
longs.
11. PORTEZ TOUJOURS DES LUNETTES DE
PROTECTION. Si le travail de coupe dégage de la
poussière, portez également un écran facial ou
un masque antipoussières. Les lunettes
ordinaires ne sont munies que de lentilles
résistances aux chocs ; elles ne constituent PAS
des lunettes de protection.
12. FIXEZ BIEN LA PIÈCE. Lorsque cela est
possible, fixez la pièce à travailler à l’aide de
dispositifs de serrage ou d’un étau. Cela est plus
sécuritaire que l’utilisation de la main et libère
les deux mains pour le maniement de l’outil.
13. MAINTENEZ UNE BONNE POSITION. Assurez-
vous d’une bonne prise au sol et d’une bonne
position d’équilibre en tout temps.
Modèle 2702 / 2702X1 2703 / 2703X1
Alésage central 5/8”
Diamètre de la lame 210 mm (8-1/4”) 255 mm (10”)
Capacités de coupe max. 90°68 mm (2-11/16”) 91 mm (3-9/16”)
45°47 mm (1-3/4”) 63 mm (2-1/2”)
Capacités de lambrissage maximales 13 mm (1/2”)
Vitesse àvide (T/MIN) 4,600/min.
Taille de la table (P X L) 686 mm x 560 mm (27”x 22”)
Dimensions (L x l x H) 560 mm x 686 mm x 458 mm (22”x 27”x 18”)
Poids net 18 kg (40 lbs)

17
14. PRENEZ SOIN DES OUTILS. Maintenez les outils
bien aiguisés et propres pour assurer une
performance sécuritaire et optimale. Suivez les
instructions de lubrification et de changement
des accessoires.
15. DÉBRANCHEZ LES OUTILS avant tout travail de
réparation ou avant de changer les accessoires
tels que lames, embouts/forets/fraises et
couteaux.
16. RÉDUISEZ LES RISQUES DE MISE EN MARCHE
ACCIDENTELLE. Assurez-vous que
l’interrupteur est en position d’arrêt avant de
brancher l’outil.
17. UTILISEZ LES ACCESSOIRES RECOMMANDÉS.
Consultez le manuel de l’utilisateur pour savoir
quels sont les accessoires recommandés.
L’utilisation d’accessoires non adéquats peut
comporter un risque de blessure.
18. NE VOUS APPUYEZ JAMAIS SUR L’OUTIL. Une
blessure grave peut survenir si l’outil bascule ou
si vous touchez accidentellement l’outil
tranchant.
19. VÉRIFIEZ S’IL Y A DES PIÈCES
ENDOMMAGÉES. Avant d’utiliser l’outil, tout
protecteur ou dispositif endommagé doit être
vérifié soigneusement afin de s’assurer qu’il
fonctionne adéquatement et peut remplir la
fonction pour laquelle il est conçu. Vérifiez si les
pièces mobiles sont bien alignées et bien fixées,
vérifiez la présence de pièces brisées, vérifiez
que l’outil est bien monté et assurez-vous que
rien ne peut entraver son bon fonctionnement.
Un protecteur ou tout autre dispositif
endommagé doit être adéquatement réparé ou
remplacé.
20. SENS D’ALIMENTATION. N’alimentez la lame ou
l’outil tranchant avec la pièce à travailler que
dans le sens opposé à celui de la progression de
la lame ou de l’outil tranchant.
21. NE LAISSEZ JAMAIS SANS SURVEILLANCE UN
OUTIL EN MARCHE. COUPEZ LE CONTACT.
Attendez que l’outil se soit complètement arrêté
avant de le quitter.
22. PIÈCES DE RECHANGE. Seules des pièces de
rechange identiques doivent être utilisées lors
des réparations.
23. FICHES POLARISÉES. Pour réduire les risques
de choc électrique, cet appareil est muni d’une
fiche polarisée (une des broches est plus large
que l’autre). Cette fiche ne peut être insérée
dans une prise polarisée que dans un seul sens.
Si la fiche ne s’insère pas à fond dans la prise,
insérez-la en sens inverse. Si elle ne s’insère
toujours pas à fond, contactez un technicien
qualifié pour faire installer une prise appropriée.
N’apportez aucune modification à la fiche.
MISE EN GARDE RELATIVE À LA TENSION: Avant de
brancher l’outil sur une source d’alimentation (prise ou
autre dispositif), assurez-vous que la tension du circuit
correspond àcelle qui est spécifiée sur la plaque
signalétique de l’outil. L’utilisation d’une source
d’alimentation dont la tension est supérieure àcelle
spécifiée pour l’outil peut entraîner l’utilisateur àune
GRAVE BLESSURE et endommager l’outil. En cas de
doute, NE BRANCHEZ PAS L’OUTIL. L’utilisation d’une
source d’alimentation dont la tension est inférieure àla
valeur indiquée sur la plaque signalétique endommagera
le moteur.
UTLISEZ UN CORDON PROLONGATEUR ADÉQUAT.
Assurez-vous que le cordon prolongateur est en bon
état. Lors de l’utilisation d’un cordon prolongateur,
utilisez sans faute un cordon assez gros pour conduire le
courant que le produit nécessite. Un cordon trop petit
provoquera une baisse de tension de secteur, résultant
en une perte de puissance et une surchauffe. Le Tableau
1 indique la dimension appropriée de cordon selon sa
longueur et selon l’intensiténominale indiquée sur la
plaque signalétique. En cas de doute sur un cordon
donné, utilisez le cordon suivant (plus gros). Plus le
numéro de gabarit indiquéest petit, plus le cordon est
gros.
Tableau 1. Gabarit minimum du cordon
Intensité nominale Volts Longueur totale du cordon en pieds
120 V 25 ft. 50 ft. 100 ft. 150 ft.
Plus de Pas plus de Calibre américain des fils
0 6 18 16 16 14
6 10 18161412
10 12 16 16 14 12
12 16 14 12 Non recommandé

18
CONSIGNES DE SÉCURITÉ
ADDITIONNELLES
USB059-1
NE vous laissez PAS tromper (au fil d’une
utilisation répétée) par un sentiment
d’aisance et de familiarité avec le
produit, en négligeant le respect
rigoureux des consignes de sécurité qui
accompagnent la scie circulaire à table.
Si cet outil n’est pas utilisé de façon sûre
et adéquate, il y a risque de blessure
grave.
1. Portez une protection oculaire.
2. Ne vous servez pas de votre outil en présence de
gaz ou liquides inflammables.
3. N’utilisez JAMAIS l’outil sans y avoir installé une
meule à tronçonner abrasive.
4. Avant l’utilisation, assurez-vous que la lame ne
comporte aucune fissure et qu’elle n’est pas
endommagée. Remplacez immédiatement toute
lame fissurée ou endommagée.
5. Avant d’installer la lame, nettoyez l’axe, les
flasques (tout particulièrement leur surface
d’installation) et l’écrou hexagonal. La lame
risque de vibrer, d’osciller ou de glisser si elle
n’est pas correctement installée.
6. Utilisez le protecteur de lame et l’extenseur
chaque fois que cela est possible, y compris lors
des coupes sur toute la pièce. Pour monter et
installer le protecteur de lame, suivez toujours
étape par étape les instructions de ce manuel.
Les "coupes sur toute la pièce" sont celles où la
lame traverse complètement la pièce, comme
lors du sciage en long et des coupes en travers.
NE JAMAIS utiliser l’outil si son protecteur de
lame est déficient, ni fixer le protecteur de lame
avec une corde, une ficelle, etc. Tout
fonctionnement irrégulier du protecteur de lame
doit être corrigé immédiatement.
7. Après un travail qui nécessite le retrait du
protecteur, remettez immédiatement en place ce
dernier et l’extenseur.
8. Évitez de couper des pièces de métal telles que
les clous et vis. Avant de procéder à la coupe,
vérifiez la pièce pour en retirer les clous, vis et
autres corps étrangers.
9. Avant de mettre le contact, retirez de la table les
clés, bouts de pièce sciés et autres objets.
10. Ne portez JAMAIS de gants pendant l’utilisation
de cet outil.
11. Gardez les mains à l’écart de la trajectoire de la
lame.
12. Ne vous placez JAMAIS dans la trajectoire de la
lame et assurez-vous que personne ne s’y
trouve.
13. Assurez-vous que la lame ne touche pas
l’extenseur ou la pièce à scier avant de mettre le
contact.
14. Avant de scier la pièce elle-même, faites tourner
l’outil un instant à vide. Assurez-vous que la
lame ne vibre ou ne tremble pas, ceci pouvant
indiquer qu’elle est mal installée ou mal
équilibrée.
15. N’effectuez JAMAIS de réglages pendant que
l’outil tourne. Débranchez l’outil avant
d’effectuer les réglages.
16. Lorsque nécessaire, utilisez un bâton-poussoir.
Vous DEVEZ utiliser un bâton-poussoir pour
scier en long des pièces minces, de sorte que
vous mains et doigts demeurent à l’écart de la
lame.
17. Prêtez une attention particulière aux instructions
relatives à la réduction des risques de CHOC EN
RETOUR. Le choc en retour est une réaction
soudaine de l’outil provoquée par le coincement,
le pincement ou le désalignement de la lame.
Lors d’un CHOC EN RETOUR la pièce se trouve
projetée vers l’utilisateur par l’outil. LES CHOCS
EN RETOUR COMPORTENT UN RISQUE DE
BLESSURE GRAVE. Évitez les CHOCS EN
RETOUR en maintenant la lame bien affûtée, le
garde parallèle en position parallèle à la lame,
l’extenseur, les cliquets de prévention des chocs
en retour et le protecteur de lame bien en place
et en bon état de fonctionnement, en évitant de
relâcher la pièce avant de l’avoir fait progresser
complètement derrière la lame, et en évitant de
scier en long dans une pièce tordue, déformée
ou dont les bords inégaux ne permettent pas
l’utilisation du guide.
18. Ne sciez jamais à la volée. Le sciage à la volée
consiste à utiliser les mains au lieu d’un garde
parallèle ou d’un guide d’onglet pour soutenir ou
guider la pièce.
19. NE JAMAIS passer la main près ou au-dessus de
la lame. NE JAMAIS passer la main près de la
lame pour saisir une pièce à scier avant que la
lame ne soit complètement arrêtée.
20. Évitez de faire avancer l’outil de manière
brusque ou rapide. Faites-le avancer le plus
lentement possible lorsque vous sciez des
pièces dures. Évitez de plier ou tordre la pièce
pendant la progression de l’outil. Coupez
immédiatement le contact de l’outil si la lame se
bloque ou se coince dans la pièce. Débranchez
l’outil. Dégagez la lame.
21. NE JAMAIS retirer les bouts de pièce coupés ni
toucher le protecteur de lame pendant que la
lame tourne.

19
22. AVANT de commencer la coupe, arrachez tous
les nœuds lâches non adhérents de la pièce.
23. Ne maltraitez pas le cordon. Ne tirez jamais
directement sur le cordon pour le débrancher de
la prise de courant. Maintenez le cordon à l’écart
de la chaleur, de l’eau, de l’huile et des objets à
bords tranchants.
24. Certains matériaux contiennent des produits
chimiques qui peuvent être toxiques. Prenez les
précautions nécessaires pour ne pas inhaler les
poussières qu’ils dégagent et pour éviter tout
contact avec la peau. Respectez les consignes
de sécurité fournies par le fabricant des
matériaux utilisés.
25. Vous pouvez soulever le protecteur pendant la
mise en place de la pièce à travailler et pour
faciliter le nettoyage. Assurez-vous toujours que
le capot du protecteur est abaissé et se trouve à
plat contre la table avant de brancher l’outil.
CONSERVEZ CES
INSTRUCTIONS
AVERTISSEMENT:
LA MAUVAISE UTILISATION de l’outil ou
l’ignorance des consignes de sécuritédu
présent manuel d’instructions comporte un
risque de blessure grave.
Pose
Placement de la scie circulaire à table
Placez la scie circulaire àtable dans un emplacement
bien éclairéet de niveau, oùvous pourrez maintenir une
position stable et équilibrée. Elle doit être installée dans
un emplacement fournissant l’espace nécessaire àla
facilitédes manipulations, suivant la taille des pièces à
travailler. La scie circulaire àtable doit être fixée àl’établi
ou au support de scie circulaire àtable au moyen de
quatre vis ou boulons, en utilisant les orifices prévus à
cet effet au bas de la scie circulaire àtable. Si vous
installez la scie circulaire àtable sur un établi, assurez-
vous que ce dernier comporte une ouverture sur le
dessus et que cette ouverture est de taille identique à
celle se trouvant sur la face inférieure de la scie circulaire
àtable, de sorte que la sciure de bois puisse s’y
échapper.
Il faudra fixer l’établi ou le support de scie circulaire à
table au plancher si, pendant la coupe, la scie circulaire à
table a tendance àbasculer, glisser ou bouger.
NOTE:
•Support de scie circulaire
Les modèles 2702X1 et 2703X1 sont équipés en
standard d’un support de scie circulaire.
Rangement des accessoires
Le guide d’onglet et les clés se rangent du côtégauche
de la base, et le garde parallèle du côtédroit de la base.
1. Diamètre
d’orifice 8 mm
(5/16 po)
1. Rondelle
ordinaire de 6
mm (1/4”)
2. Vis àbois no 10,
longueur min.
40 mm (1-1/2
po)
459 mm
(18-1/16")
334 mm
(13-1/8")
1
006875
1
25 mm
2
(1")
006146
1. Rondelle
ordinaire de 6
mm (1/4”)
2. Boulon et écrou
de montage de
6 mm (1/4”) –
Serrer
fermement
1. Guide d’onglet
1. Garde parallèle
12
006148
1
006858
1
006859

20
DESCRIPTION DU
FONCTIONNEMENT
ATTENTION:
•Assurez-vous toujours que l’outil est hors tension et
débranchéavant de l’ajuster ou de vérifier son
fonctionnement.
Réglage de la profondeur de coupe
Le réglage de la profondeur de coupe s’effectue en
tournant la poignée. Tournez la poignée dans le sens des
aiguilles d’une montre pour élever la lame, et en sens
inverse pour l’abaisser.
NOTE:
•Réglez-la sur une faible profondeur lorsque vous
coupez des matériaux minces, afin d’obtenir une
coupe plus nette.
Réglage de l’angle de coupe en biseau
Desserrez le levier de verrouillage en le tournant dans le
sens inverse des aiguilles d’une montre et tournez le
volant de commande jusqu’à l’angle désiré(0°à45°).
L’angle de coupe en biseau est indiquépar le pointeur
flèche.
Une fois l’angle désiréobtenu, serrez le levier de
verrouillage en le tournant dans le sens des aiguilles
d’une montre pour conserver ce réglage.
ATTENTION:
•Une fois l’angle de coupe en biseau réglé, n’oubliez
pas de serrer fermement le levier de verrouillage.
Réglage des butées fixes
L’outil est équipéde butées fixes sur les positions
correspondant à90°et 45°sur la surface de la table.
Pour vérifier et régler les butées fixes, procédez comme
suit :
Déplacez le volant de commande le plus loin possible en
le tournant. Placez une règle triangulaire sur la table et
vérifiez que la lame se trouve àun angle de 90°ou 45°
par rapport àla surface de la table. Si la lame se trouve
sur un angle indiquésur la Fig. A, tournez les vis de
réglage dans le sens des aiguilles d’une montre ; si elle
se trouve sur un angle indiquésur la Fig. B, tournez-les
dans le sens inverse pour ajuster les butées fixes.
Une fois les butées fixées réglées, réglez la lame sur un
angle de 90°par rapport àla surface de la table. Ajustez
ensuite la pointe de la flèche de sorte que son bord de
droite soit alignésur la valeur de graduation 0°.
1. Poignée
1. Levier de
verrouillage
2. Volant de
commande
3. Pointeur flèche
1
006860
1
23
006861
1. Vis de réglage
90°
2. Vis de réglage
45°
1. Pointeur flèche
12
006862
(A)
(B)
90
90 45
45
006157
1
006864
Other manuals for 2702
3
This manual suits for next models
3
Table of contents
Languages:
Other Makita Saw manuals

Makita
Makita 5705R User manual

Makita
Makita LS1040 User manual

Makita
Makita HS7611 User manual

Makita
Makita UC3020A User manual

Makita
Makita 5007FAK User manual

Makita
Makita 5604R User manual

Makita
Makita XRJ06 User manual

Makita
Makita LS0714 User manual

Makita
Makita LS1216 Manual

Makita
Makita XBP02TX User manual

Makita
Makita LS1013 Quick start guide

Makita
Makita 5800NB User manual

Makita
Makita HS6600 User manual

Makita
Makita LS1219 User manual

Makita
Makita XSL08 User manual

Makita
Makita 5104 User manual

Makita
Makita LS1216F User manual

Makita
Makita HS7601 User manual

Makita
Makita DLW140 User manual

Makita
Makita HS7601 Manual