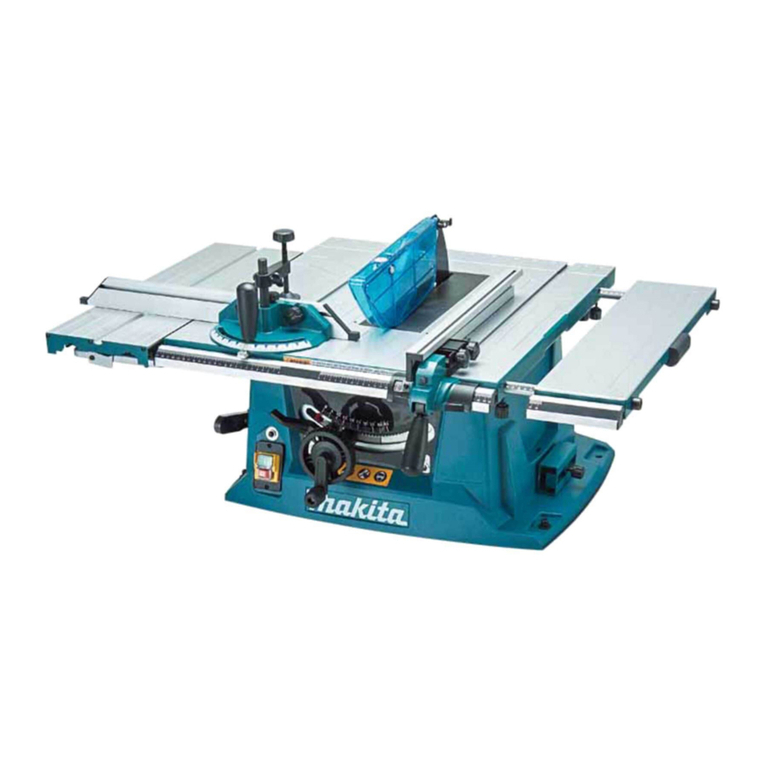
Makita ARBOR 2711 User manual

Table
Saw
Arbor
thole
255
mm
(10")
MODEL
2711
With Electric Brake
No
load
Dimensions
Ne,
Blade
Cutt,ng
CaPdCmeF
Table
size
IL
x
WI
Sliding
table
IL
x
W
x
HI
wetghf
255
mn,
91
mm
63
nirn
600
mm
x
405
inmi
295
mm
x
497
mm
3
800 1090
mm
x
715
mm
x
470
mm
32
5
kg
90" 45"
Fixed
table
dldnlPtel
iio"i
13
9
16'1
12
1
z
'I
123
5
8'
x
15
15
16
I
111
58'
x
19
$)I6
I
Rk"
1427<a
x
28
im"
ia
i:z'
I
171
6
ibsi
INSTRUCTION MANUAL
SPEC
IF
I
CAT
I
0
N
S
Manufacturer reserves the right to change specifications without notice.
*
Note. Specifications may differ from country to country.

For Your Own Safety Read Instruction
Manual Before Operating Table Saw
GENERAL SAFETY PRECAUTIONS
(For
All
Tools)
1
2.
3.
4.
5.
6.
7.
8.
9.
10.
11.
KNOW YOUR POWER TOOL. Read the owner's manualcarefully. Learnthe
tools applications and limitations, as well as the specific potential hazards
peculiar to
it.
KEEP GUARDS IN PLACE and in working order.
REMOVE ADJUSTING KEYS AND WRENCHES. Form habit of checking to
see that keys and adjusting wrenches are removed from tool before turning
it
on.
KEEP WORK AREA CLEAN. Cluttered areas and benches invite accidents.
DON'T USE INDANGEROUSENVIRONMENT.Don't use power tools indamp
or wet locations, or expose them to rain. Keep work area well lighted.
KEEP CHILDRENAWAY. All visitors should be kept safe distance from work
area.
MAKE WORKSHOP KID PROOF with padlocks, master switches, or by
removing starter keys.
DON'T FORCETOOL.
It
willdothejob better and safer at the ratefor which
it
was designed.
USE RIGHT TOOL. Don't force tool or attachment to do a job for which
it
was not designed.
WEAR PROPER APPAREL. Wear no loose clothing, gloves, neckties, rings.
bracelets, or other jewelry which may get caught in moving parts. Nonslip
footwear isrecommended. Wear protectivehaircoveringtocontainlonghair.
ALWAYS USESAFETY GLASSES. Also useface or dust maskif cutting oper-
ation is dusty. Everydayeyeglassesonly have impact resistant lenses, they
are NOT safety glasses.
12. SECURE WORK. Useclamps or a vise to holdwork when practical. It's safer
than using your hand and
it
frees both hands to operate tool.
13.
DON'T OVERREACH. Keep proper footing and balance at all times.
14.
MAINTAIN TOOLS WITH CARE. Keep tools sharp and clean for best and
safest performance. Follow instructionsfor lubricating and changing acces-
sories.
15. DISCONNECTTOOLS before servicing; when changing accessoriessuch as
blades, bits, cutters, and the like.
16. REDUCE THE RISK OF UNINTENTIONAL STARTING. Make sure switch is
in off position before plugging in.
2

17. USE RECOMMENDED ACCESSORIES. Consult the owner’s manual for
recommendedaccessories.The use of improper accessoriesmay cause risk
of injury to persons.
18.
NEVER STAND ON TOOL. Serious injury could occur if the tool is tipped or
if the cutting tool is accidentally contacted.
19.
CHECK DAMAGED PARTS. Before further use of the tool, a guard or other
part that is damaged should be carefully checked to determine that
it
will
operate properly and perform its intended function
-
check for alignment
of moving parts, binding
of
moving parts, breakageof parts, mounting, and
any other conditions that may affect itsoperation.
A
guard or other partthat
is damaged should be properly repaired or replaced.
20.
DIRECTIONOF FEED. Feed work into a blade or cutter against the direction
of
rotation of the blade or cutter only.
21. NEVER LEAVE TOOL RUNNING UNATTENDED. TURN POWER OFF. Don’t
leave tool until
it
comes to a complete stop.
22. PROPER GROUNDING. This tool should be grounded while inuseto protect
the operator from electric shock.
23.
EXTENSIONCORDS: Use only three-wireextension cords which have three-
prong grounding-type plugs and three-pole receptacles which accept the
tool’s plug. Replace or repair damaged or worn cord immediately.
VOLTAGE WARNING: Beforeconnecting the tool to a power source (receptacle,
outlet, etc.) be sure the voltage supplied is the same as that specified on the
nameplate of the tool. A power source with voltage greater than that specified
for the tool can result in SERIOUS INJURY to the user
-
as well as damage to
the tool.
If
in doubt, DO NOT PLUG IN THE TOOL. Using a power source with
voltage less than the nameplate rating is harmful to the motor.
3

G
R
0
UND
I
NG INSTRUCTIONS
ALL GROUNDED, CORD-CONNECTEDTOOLS: Inthe event of a malfunction or
breakdown, grounding providesa pathof least resistance for electric current to
reducethe risk of electric shock. This tool is equipped with an electric cord hav-
ingan equipment-grounding conductorand a grounding plug. The plug must be
pluggedinto a matchingoutlet that isproperly installedand grounded inaccord-
ance with all local codes and ordinances.
Donotmodifythe plug provided-if
it
will notfit the outlet, havethe proper out-
let installed by a qualified electrician.
Improper connectionof the equipment-grounding conductor can result in a risk
of electric shock. The conductor with insulation having an outer surface that is
green with or without yellow stripes is the equipment-grounding conductor. If
repair or replacement of the electric cord or plug is necessary, do not connect
the equipment-grounding conductor to a live terminal.
Check witha qualifiedelectricianor serviceman if the grounding instructionsare
not completely understood, or if in doubt as to whether the tool is properly
grounded.
This tool is intended for use on a circuit that has an outlet that looks like the
one illustratedinFigure
A.
The tool has a grounding plug that looks like the plug
illustrated in Figure A. A temporary adapter, which looks like the adapter illus-
trated inFigure
B
and C, may be usedtoconnectthis plugtoa 2-pole receptacle
as shown inFigure
B
if a properly grounded outlet is notavailable. The temporary
adapter should be used only untila properly grounded outlet can be installed by
a qualified electrician. The green-colored rigid ear, lug, etc. extending from the
adapter must be connected to a permanentground such as a properly grounded
outlet box.
FIG.A
Q
I
GROUNDING METHODS
FIG.
B
Cover
of
Grounded
-
Outlet
Box
FIG.C
Adaoter
9'
Grounding Pin Grounding
Means
4

ADDITIONAL SAFETY RULES
1.
Wear eye protection.
2.
Don't use the tool
in
presence of flammable liquids or gases.
3.
Never use the tool with an abrasive cut-off wheel installed.
4.
Check the blade carefully for cracks or damage before operation. Replace
cracked or damaged blade immediately.
5.
Clean the spindle, flanges (especially the installing surface) and hex
nut
before installingthe blade. Poor installation may cause vibration/wobbling
or slippage of the blade.
6.
Use saw-blade guard and spreader for every operation for which
it
can be
used, includingall through sawing operations. Through sawing operations
are those
in
which the blade cuts completely through the workpiece as in
ripping or cross cutting. Never use the tool with a faulty blade guard or
secure the blade guard with a rope, string, etc. Any irregular operation of
the blade guard should be corrected immediately.
7.
Avoid cutting nails, screws, etc. Inspectfor and remove all nails, screws and
other foreign matter from the workpiece before operation.
8.
Remove wrenches, cut-off pieces, etc. from the table before the switch is
turned on.
9.
Never wear gloves during operation.
IO.
Keep hands out of the line of saw blade.
Do
not stand or permit anyone else
to stand
in
line with the path of the saw blade.
11.
Make sure the bladeisnotcontactingthe spreader or workpiece beforethe
switch is turned on.
12.
Before cutting an actual workpiece, let the tool run for a while. Watch for
vibration or wobblingthat couldindicate poor installation or a poorly balanced
blade.
13.
Use a push stick when required. Push sticks should be used for ripping
narrow workpiecesto keep your hands and fingers well away from the blade.
14.
Pay particular attention to instructions for reducing risk of KICKBACK.
KICKBACK isthe ejectionof the workpiece from the tool back towards the
operator. Avoid KICKBACKS by keeping the blade sharp, by keepingthe rip
fence paralleltothe blade, by keeping the spreader, antikickback fingers and
blade guard
in
placeand operating properly, by not releasing the workpiece
until
youhavepushed
it
allthe way pastthe blade, andbynotripping a work-
piece that is twisted or warped or does not have a straight edge to guide
along the fence.
15.
Do not perform any operation freehand. Freehand means using your hands
to support or guide the workpiece.
16.
Never reach around or over saw blade.
17.
Avoid abrupt, fast feeding. Feed as slowly as possible when cutting hard
workpieces. Do not bend or twist workpiece while feeding. If you stall or
5

jam the blade
in
the workpiece, turn the tool off immediately. Unplug the
tool. Then clear the jam.
18.
Never remove cut-off pieces near the blade or touch the blade guard while
the blade is running.
19.
Don't abuse cord. Never yank cord todisconnect from receptacle. Keepcord
away from heat,
oil,
water and sharp edges.
SAVE THESE INSTRUCTIONS.
6

Movementand transport
of
table saw
Before moving the table saw, tighten the
wing bolt to secure the sliding table.
When moving the table saw, hold
it
by the
fixed table and the bars.
Be sure to use two personsto liftand move
it.
When transporting the table saw by
vehicle, secure
it
with
a
rope or other sub-
stantial means.
ASSEMBLY
The table saw
is
shipped from the factory with the ruler guides, miter gauge, saw blade,
ripfence, blade guard and table insert not installed. Assemble
as
follows.
CAUTION
:
Always be sure that the tool
is
switched off and unpluggedbefore assembly.
Installing ruler guides
Sliding fable
Fixed
fable
Install the graduated ruler guide on the
front side of the fixed table and the non-
graduated
one
on the
rear
side.
Use
the hex
wrench to tighten the bolts.
7

Installingmiter gauge
Insert the wooden gauge into the miter
gauge and tighten
the
two
screws lightly
but firmly. The wooden gauge will be used
later to help you accurately make cross-
cuts.
Place the miter gauge on the sliding table
with the wooden gauge extending toward
the fixed table. Insert the longer miter
gauge installation screw through the hole
(A)
inthe miter gauge and screw
it
intothe
threaded hole in the sliding table. Insert
the shorter miter gauge installation screw
through the hole
(B)
and screw
it
into the
nut in the sliding table. Loosen the wing
bolt securing the sliding table before
mov-
ing the slidingtable.
Installingor removing
saw
blade
Hold the outer flange with the offset
wrench and loosen the hex nut clockwise
with the wrench (thehex nut has left hand
thread). Then remove the outer flange and
flange.
8

Install the blade between the two flanges.
Then install
the
outer flange and hex nut
onto the arbor, making sure the teeth of
the blade are pointing down
at
the front
of
the table.
To secure the blade inplace, hold the outer
flange with the offset wrench, then tighten
the hex nut counterclockwise with the
wrench. When tightening the hex nut, the
offset wrench handle should be supported
by the table
as
shown in the figure. BE
SURE
TO TIGHTEN THE HEX NUT
SECURELY.
CAUTION
:
Be sure to hold the hex nut carefully with the wrench.
If
your grip should slip, the
wrench may come off the hex nut, and your hand could strike the sharp blade edges.
9

Installingand adjustingripfence
Loosen the lever on the rip fence and fit
the rip fence on the ruler guides.
To check to be sure that the rip fence
is
parallel with the blade, secure the rip fence
2
-
3
mm
(5/64"
-
1/8")
from the blade.
Raise
the blade up to maximum elevation.
Mark one of the blade teethwith
a
crayon.
Measure the distance (A) and
(B)
between
therip fence and blade.Take bothmeasure-
ments using the tooth marked with the
crayon. These
two
measurements should
be identical. If the rip fence
is
not parallel
with the blade, proceed
as
follows:
Insert
a
screwdriver into the holeinthe
rear end of the rip fence, then loosen
the screw counterclockwisetwo or three
turns.
Loosen the
two
bolts on the top of the
rip fence with the wrench.
Adjust the rip fence until
it
becomes
parallel with the blade, then secure
it
by
tighteningthe bolts.
Tighten the screw inthe hole inthe rear
end of the rip fence clockwise
two
or
three turns.
Lever
Rip
fence
Ruler
guide
1
I
10

Tighen the lever on the rip fence. Ifthe rip
fence
is
not
secure enough,
leave
the
lever
in the tightened position and tighen the
screw in the hole in the rear end
of
the rip
fence clockwise. However, do not tighten
the screw excessively, or the lever will be-
come loose.
I
CAUTION
:
Be sure to adjust the rip fence parallel with the blade, or
a
dangerous kickback condition
may occur.
Move the rip fence
a
bit away from the
blade and secure
it.
Use
a
ruler tomeasure
the distance
(A)
between the rip fence and
blade. Make sure that the pointer on the
rulerguidepointsto the correct graduation.
If
the pointerdoes not point to the correct
graduation,loosenthe screw on the pointer.
Then align the pointer with the correct
graduation and tighten the screw.
Blade
11

Installingblade guard
CAUTION
:
Before installing the blade guard, adjust the depth
of
cut to
its
maximum elevation.
(Note: The depth of cut
is
adjusted to
its
maximum elevation when the table saw
is
shippedfrom the factory.)
Temporarily tighten the bolts with the
offset wrench. Check to be sure that the
blade and spreader are in
a
straight line.
If they are not properly aligned, shift the
adjusting washers from one side to another
until the spreader
is
aligned directly behind
the blade.
These two clearances
should be equal.
r--l
h
washer
Spreader Blade
K'
/
Bolt
Pressure plate
CAUTION
:
If the blade and spreader are not aligned properly,
a
dangerous pinching condition may
result during operation. Make sure they are properly aligned.
There must be
a
clearance of about
4
-
1
Soreader
1
5mm(5/32"-13/64") betweenthe spreader
and the blade teeth. Adjust the spreader
accordingly and tighten the bolts securely.
Attach the table insert on the table, then
check to
see
that the blade guard works
smooth.
I
-,
----
I
CAUTION
:
Be sure to tighten the screws securely after installingthe table insert.
12

Positioning
table
saw
Locate the table
saw
in
a
well
lit
and
level
area where you can maintain good footing
and balance.
It
should be installed in an
area that
leaves
enough room to easily
handle the
size
of your workpieces. The
table
saw
should be secured with four
screws or bolts to the work bench or table
saw stand (optional accessory) using the
holes provided in
the
bottom
of
the
table
saw. When securing the table saw on the
work bench, make sure that there
is
an
opening in the top of the work bench the
same
size
as
the opening in the bottom
of
the table saw
so
the sawdust can drop
through.
No.
10
wood
screw
40
mm
Il-l/Z’’l
min.
length
If during operation there
is
any tendency for the table saw to tip over, slide
or
move, the
work bench or table saw stand should be secured
to
the floor.
13

Handtool storage pocket
The table saw comes with
a
hand tool
storage pocket in the base. Keep wrenches,
screwdriver, etc. inthis pocket.
Adjustingdepth
of
cut
The depth
of
cut may be adjustedby turn-
ing the knob. Turn the knob clockwise
to raise the blade
or
counterclockwise to
lower
it.
The depth
of
cut
is
indicated on
the scale by the pointer
(A).
If
the knob does not turn easily, loosen the
two adjusting screws on the inside
of
the
table saw counterclockwise.
If
the knob
is
loose enough to be turned by vibration,
tighten the adjusting screwsclockwise.
I
1
14

Bevel
cutting
Loosen the lock lever clockwise, then
tilt
the blade by swinging the knob until
it
reaches the desired angle
(0
to
45
degrees).
The bevel
is
indicated on the
scale
by
the pointer
(B).
After obtaining the desired
angle, tighten the lock lever counterclock-
wise tosecure the adjustment.
CAUTION
:
After adjusting the
bevel,
be sure totightenthe lock lever securely.
Adjusting
stopper plate
Secure the lock lever
at
the positionwhere
the lock lever contacts the stopper plate.
Make sure the blade
is
at
90
degrees or 45
degrees to the table surface. If the bevel
is
not
at
90
degrees or 45 degrees, proceed
as
follows:
:I,
Use the hex wrench to loosen the bolt
securingthe stopper plate.
Z
Loosen the lock lever and adjust the
blade to
90
degrees or 45 degrees, then
secure the lock lever.
3
Slide the stopper plate until
it
contacts
the lock lever, then tighten the bolt
securely.
@
Make sure the pointer
(B)
points to the
0"
or 45" graduation on the bevel scale when
the blade
is
at
90
degrees or 45 degrees.
If
it
does not point to the
0"
or 45" gradua-
tio!, loosen the screws holding the pointer
(B)
and align the pointer
(B)
with the
0"
or
45 graduation. Then tighten screws. (Note: The screws holding the pointer
(B)
are
located insidethe base.)
1s

Adjustingmiter angle
Loosen the miter gauge installation screws
and adjust the miter gauge to the desired
angle
(0
to
45
degrees). Then tighten the
miter gauge installationscrews securely.
CAUTION
:
After adjusting the miter angle, be sure to
securely. tighten the miter gauge installation screws
Switch action
To start the tool, press the "ON" button
while the key
is
pressedin. Press the"0FF"
buttonto stop.
When operatingthe key and switch buttons,
it
is
convenient to view them through the
window area in the fixed table.
CAUTION
:
When not using the tool, remove the key and store
it
in
a
secure place. This prevents
unauthorizedoperation.
16

Operation
CAUTION
:
*Make sure the blade guard works smoothly and properly for making both square cuts
and bevel cuts before operation.
*Never withdraw the workpiece while the blade
is
running. If you must withdraw the
workpiece before completing
a
cut, first switch the tool off while holding the work-
piece firmly.
Wait
until the blade has come to
a
complete stop before withdrawing the
workpiece. Failure todo
so
may cause dangerous kickback.
Never remove cut-off pieces that may be trapped inside the blade guard while the blade
is
running.
When moving the sliding table, do not place your fingers or hands on the reverseside of
the sliding table. You may
get
your fingers pinched betweenthe sliding table and bars.
Work helpers
Push sticks, push blocks or auxiliary fence are types of "work helpers." Use them to
make safe, sure cuts without the need for the operator tocontact the blade with any part
of the body.
Push
stick
A push stick can be easily made from
a
piece of plywood 19 mm
(3/4")
to25 mm (1")
thick.
130
mm
15")
(HI
19
mm
(314"I
mm
9
5
mm
3/8"1
'1
380
mm
(15"l
40
mm
(1-1
12"l
Cut out the hatchedarea on the stick and smooth edges with
a
file.
(H)
dimension should
be
less
than 12.7 mm (1/2")
so
as
to be thinner than the workpiece.
17

Push block
Use
a
19
mm (3/4") piece of plywood.
120.;.4-)fm11
mm
(5")
Faceledge
parallel
6
mm
(1/4"l
5o
mm
(2")
(5")
Handle should be incenterof plywoodpiece. Fastenwith glue and wood screws
as
shown.
Small piece
9.5
mmx 8 mm x
50
mm
(3/8"
x
5/16"
x
2")
of wood must always be glued
to plywood to keep the blade from dulling if the operator cuts into push block by mis-
take. (Neveruse nails in push block.)
Auxiliary fence
Make auxiliary fence from
9.5
mm (3/8")
and
19
mm
(3/4")
plywood pieces.
Wood
facing (Ripfence)
A
wood facing should be used for opera-
tions when the blade comes close to the
rip fence. Wood facing for the rip fence
should be same
size
as
the ripfence.
Make sure the bottom of facing
is
flush
with the table surface.
40
mm
(1-1
12"
I
19
mm
(314'')
9.5
mm
Faceledge
parallel (5-1
12")
(18")
Fasten
with
glue and
wood
screws.
18

Crosscutting
CAUTION
:
When making
a
crosscut, remove the rip fence from the table.
When cutting long or large workpieces, always provide adequatesupport
to
the sides of
the table. The support should be
at
the same height
as
the table.
(1;
Loosenthe wing bolt securing the sliding table.
0)
Adjust the blade to
90
degrees to the
table surface. Adjust the miter gauge to
0
degree. Switch the tool on and move
the sliding table forward to cut the
wooden gauge.
Align the cutting line on the workpiece
with the end
of
the wooden gauge.
131
Adjust the depth
of
cut
a
bit higher
than the thickness
of
the workpiece.
Firmly hold the workpiece flush against
the miter gauge and move the sliding
table forward gently to cut the work-
piece.
Miter
cutting
Adjust the miter gauge to the desired angle
(0
to
45
degrees) and tighten the miter
gauge
installation
screws securely. Follow
the same procedureas’mentionedin
@
for
crosscutting.
19

The wooden gauge cannot be used for miter cutting.
19
mm
(3/4")
*
63"
(2-1
/2")
19
mm
(3/4")
*
55mm
(2-1/8")
NOTE:
Miter cutting capacity
is
less
than crosscutting capacity. Make sure
of
the max miter cut-
tingcapacity before operation.
The followingreference table indicatessome examples of mitercuttingcapacity.
260
mm
(1
0-1/4")
210
mm
(8-1/4")
255
mm
(10")
220 mm
(8-5/8")
Miter angle
*
18mm
(23/32")
O0
45"
270
mm
(1
0-5/8")
Bevel angle
*
91"
(3-9/
1
6"
)
19
mm
(3/4")
0"
70
mm
(2-3/4")
60
mm
(2-3/8")
45
0"
45O
0"
45"
Cutting capacity
I
Thickness
I
Width
nl4
290
mm
(1
1
-3/8")
max. thickness at each angles.
(The illustrations in the referencetable show the table saw in use with the blade guard
removed. This
is
done only in the interest of the clarity of the illustrations and should
not beconstrued
as
a
normal working procedure.)
20
Table of contents
Other Makita Saw manuals

Makita
Makita LS0815F User manual

Makita
Makita LS1440 User manual

Makita
Makita MLT100N User manual

Makita
Makita 5604R User manual

Makita
Makita EA3500S Manual

Makita
Makita SP6000 User manual

Makita
Makita DLW140 User manual

Makita
Makita 5104 User manual

Makita
Makita 5008FA Quick start guide

Makita
Makita LS1018 User manual
Popular Saw manuals by other brands

Bosch
Bosch PKS 55 Original instructions

Chicago Electric
Chicago Electric 40315 Set up and operating instructions

Craftsman
Craftsman Professional 137.212210 Operator's manual

Norton Clipper
Norton Clipper CE414-350SS owner's manual

EINHELL
EINHELL TE-MS 254 T Original operating instructions

Sealey
Sealey SM1305 instructions