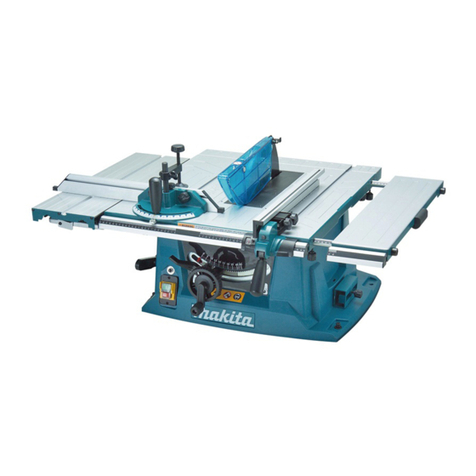
Makita 2712 User manual

1
ENGLISH (Original instructions)
INSTRUCTION MANUAL
IMPORTANT: Read Before Using.
Table Saw
2712
014518

2
ENGLISH (Original instructions)
SPECIFICATIONS
Model 2712
Arbor hole 30 mm
Blade diameter 315 mm
Blade body thickness 2 mm or less
Thickness at 90° 85 mm
Thickness at 45° 58 mm
Max. cutting capacities
Width 1,600 mm
No load speed 2,950 (min-1) (50 Hz) 3,400 (min-1) (60 Hz)
Table size (L x W) 550 mm x 1,600 mm with sub table (back)
Net weight 52.9 kg
Safety class Class I
• Due to our continuing program of research and development, the specifications herein are subject to change without notice.
• Specifications may differ from country to country.
• Weight according to EPTA-Procedure 01/2003
END310-1
Symbols
The following show the symbols used for the equipment.
Be sure that you understand their meaning before use.
・Read instruction manual.
・Wear safety glasses.
・Do not place hand or fingers close to
the blade.
・Only for EU countries
Do not dispose of electric equipment
together with household waste
material!
In observance of the European
Directive, on Waste Electric and
Electronic Equipment and its
implementation in accordance with
national law, electric equipment that
have reached the end of their life must
be collected separately and returned to
an environmentally compatible
recycling facility.
ENE003-1
Intended use
The tool is intended for cutting in wood.
ENF001-1
Power supply
The tool should be connected only to a power supply of
the same voltage as indicated on the nameplate, and
can only be operated on single-phase AC supply. This
tool should be grounded while in use to protect the
operator from electric shock. Use only three-wire
extension cords which have three-prong grounding-type
plugs and three-pole receptacles which accept the tool's
plug.
ENA001-2
SAFETY INSTRUCTIONS
WARNING! When using electric tools, basic safety
precautions, including the following, should always
be followed to reduce the risk of fire, electric shock
and personal injury. Read all these instructions
before operating this product and save these
instructions.
For safe operations:
1. Keep work area clean.
Cluttered areas and benches invite injuries.
2. Consider work area environment.
Do not expose power tools to rain. Do not use
power tools in damp or wet locations. Keep work
area well lit. Do not use power tools where there
is risk to cause fire or explosion.
3. Guard against electric shock.
Avoid body contact with earthed or grounded
surfaces (e.g. pipes, radiators, ranges, refrigerators).
4. Keep children away.
Do not let visitors touch the tool or extension cord.
All visitors should be kept away from work area.
5. Store idle tools.
When not in use, tools should be stored in a dry,
high or locked up place, out of reach of children.
6. Do not force the tool.
It will do the job better and safer at the rate for
which it was intended.
7. Use the right tool.
Do not force small tools or attachments to do the
job of a heavy duty tool. Do not use tools for
purposes not intended; for example, do not use
circular saws to cut tree limbs or logs.

3
8. Dress properly.
Do not wear loose clothing or jewellery, they can be
caught in moving parts. Rubber gloves and non-skid
footwear are recommended when working outdoors.
Wear protecting hair covering to contain long hair.
9. Use safety glasses and hearing protection.
Also use face or dust mask if the cutting
operation is dusty.
10. Connect dust extraction equipment.
If devices are provided for the connection of dust
extraction and collection facilities ensure these
are connected and properly used.
11. Do not abuse the cord.
Never carry the tool by the cord or yank it to
disconnect it from the socket. Keep the cord away
from heat, oil and sharp edges.
12. Secure work.
Use clamps or a vice to hold the work. It is safer
than using your hand and it frees both hands to
operate the tool.
13. Do not overreach.
Keep proper footing and balance at all times.
14. Maintain tools with care.
Keep cutting tools sharp and clean for better and
safer performance. Follow instructions for lubrication
and changing accessories. Inspect tool cord
periodically and if damaged have it repaired by an
authorized service facility. Inspect extension cords
periodically and replace, if damaged. Keep handles
dry, clean and free from oil and grease.
15. Disconnect tools.
When not in use, before servicing and when changing
accessories such as blades, bits and cutters.
16. Remove adjusting keys and wrenches.
Form the habit of checking to see that keys and
adjusting wrenches are removed from the tool
before turning it on.
17. Avoid unintentional starting.
Do not carry a plugged-in tool with a finger on the
switch. Ensure switch is off when plugging in.
18. Use outdoor extension leads.
When tool is used outdoors, use only extension
cords intended for outdoor use.
19. Stay alert.
Watch what you are doing. Use common sense.
Do not operate tool when you are tired.
20. Check damaged parts.
Before further use of the tool, a guard or other part
that is damaged should be carefully checked to
determine that it will operate properly and perform its
intended function. Check for alignment of moving
parts, free running of moving parts, breakage of parts,
mounting and any other conditions that may affect its
operation. A guard or other part that is damaged
should be properly repaired or replaced by an
authorized service center unless otherwise indicated
in this instruction manual. Have defective switches
replaced by an authorized service facility. Do not use
the tool if the switch does not turn it on and off.
21. Warning.
The use of any accessory or attachment, other than
those recommended in this instruction manual or
the catalog, may present a risk of personal injury.
22. Have your tool repaired by a qualified person.
This electric tool is in accordance with the
relevant safety requirements. Repairs should only
be carried out by qualified persons using original
spare parts, otherwise this may result in
considerable danger to the user.
ENB122-1
ADDITIONAL SAFETY RULES
FOR TOOL
SAVE THESE INSTRUCTIONS.
1. Wear eye protection.
2. Do not use the tool in presence of flammable
liquids or gases.
3. NEVER use the tool with an abrasive cut-off
wheel installed.
4. Check the blade carefully for cracks or
damage before operation. Replace cracked or
damaged blade immediately.
5.
Use only saw blades recommended by the
manufacturer and which conform to EN847-1, and
observe that the riving knife must not be thicker
than the width of the cut by the saw blade and not
thinner than the body of the blade.
6. Always use accessories recommended in this
manual. Use of improper accessories such as
abrasive cut-off wheels may cause an injury.
7. Select the correct saw blade for the material
to be cut.
8. Do not use saw blades manufactured from
high speed steel.
9. To reduce the emitted noise, always be sure
that the blade is sharp and clean.
10. Use correctly sharpened saw blades. Observe
the maximum speed marked on the saw blade.
11.
Clean the spindle, flanges (especially the
installing surface) and hex nut before installing
the blade. Poor installation may cause
vibration/wobbling or slippage of the blade.
12.
Use saw-blade guard and riving knife for every
operation for which it can be used, including all
through sawing operations. Always install the
blade guard following the instructions out-lined
in this manual. Through sawing operations are
those in which the blade cuts completely through

4
the workpiece as in ripping or cross cutting.
NEVER use the tool with a faulty blade guard or
secure the blade guard with a rope, string, etc.
Any irregular operation of the blade guard should
be corrected immediately.
13. Immediately reattach the guard and riving
knife after completing an operation which
requires removal of the guard.
14. Do not cut metal objects such as nails and
screws. Inspect for and remove all nails,
screws and other foreign material from the
workpiece before operation.
15. Remove wrenches, cut-off pieces, etc. from
the table before the switch is turned on.
16. NEVER wear gloves during operation.
17. Keep hands out of the line of the saw blade.
18. NEVER stand or permit anyone else to stand
in line with the path of the saw blade.
19.
Make sure the blade is not contacting the riving
knife or workpiece before the switch is turned on.
20. Before using the tool on an actual workpiece,
let it run for a while. Watch for vibration or
wobbling that could indicate poor installation
or a poorly balanced blade.
21. The tool should not be used for slotting,
rabbeting or grooving.
22. Replace table insert when worn.
23.
NEVER make any adjustments while tool is running.
Disconnect tool before making any adjustments.
24.
Use a push stick when required. Push sticks MUST
be used for ripping narrow workpieces to keep
your hands and fingers well away from the blade.
25.
Always store the push-stick when it is not in use.
26.
Pay particular attention to instructions for reducing
risk of KICKBACK. KICKBACK is a sudden reaction
to a pinched, bound or misaligned saw blade.
KICKBACK causes the ejection of the workpiece
from the tool back towards the operator.
KICKBACKS CAN LEAD TO SERIOUS PERSONAL
INJURY. Avoid KICKBACKS by keeping the blade
sharp, by keeping the rip fence parallel to the blade,
by keeping the riving knife and blade guard in
place and operating properly, by not releasing the
workpiece until you have pushed it all the way past
the blade, and by not ripping a workpiece that is
twisted or warped or does not have a straight edge
to guide along the fence.
27.
Do not perform any operation freehand. Freehand
means using your hands to support or guide the
workpiece, in lieu of a rip fence or miter gauge.
28. NEVER reach around or over saw blade.
NEVER reach for a workpiece until the saw
blade has completely stopped.
29.
Avoid abrupt, fast feeding. Feed as slowly as
possible when cutting hard workpieces. Do not
bend or twist workpiece while feeding. If you stall
or jam the blade in the workpiece, turn the tool off
immediately. Unplug the tool. Then clear the jam.
30.
NEVER remove cut-off pieces near the blade or
touch the blade guard while the blade is running.
31. Knock out any loose knots from workpiece
BEFORE beginning to cut.
32. Do not abuse cord. Never yank cord to
disconnect it from the receptacle. Keep cord
away from heat, oil, water and sharp edges.
33. Some dust created from operation contains
chemicals known to cause cancer, birth
defects or other reproductive harm. Some
examples of these chemicals are:
−lead from lead-based-painted material and,
−arsenic and chromium from chemically-
treated lumber.
−
Your risk from these exposures varies,
depending on how often you do this type of
work. To reduce your exposure to these
chemicals: work in a well ventilated area and
work with approved safety equipment, such
as those dust masks that are specially
designed to filter out microscopic particles.
34. When using the tool indoors, always connect
the tool to an external dust extraction system.
Switched on the dust extraction system
before starting the tool
35. The guard can be lifted during workpiece
setup and for ease of cleaning. Always make
sure that guard hood is down and flat against
sawtable before plugging in the tool.
36. Wear gloves against the hazard of cutting
when handling saw blades, feeding wood into
the tool or doing maintenance.
37. Never try to remove chips while the saw blade
is running or the tool is switched on.
38. Never try to use the tool unless all guards and
other safety devices necessary for tool are in
good working order.
39.
Operators must be adequately trained in the
assembly, adjustment and operation of the tool.
40. Never use the blades which maximum speed
is lower than the no load speed of the tool.
41. Keep work area well lit.
SAVE THESE INSTRUCTIONS.
INSTALLATION
PREPARATION
Check contents of package for the following
components. Please inform Makita service center of any
part missing in the package immediately.

5
−Table saw (1 unit)
−Leg (4 pcs)
−Foot (4 pcs)
−Countersunk screw for foot (4 pcs)
−Hex nut for foot (4 pcs)
−Leg support (long) (2 pcs)
−Leg support (short) (2 pcs)
−Tire complete (1 pc)
−Dust nozzle (1 pc)
−Carrying handle (2 pcs)
−Square neck bolt for guide rail (4 pcs)
−Hex bolt for guide rail (4 pcs)
−Guide rail (long) (1 pc)
−Guide rail (short) (1 pc)
−Sub table (1 pc)
−Stay (long) (2 pc)
−Stay (short) (2 pc)
−Hook (1 pc)
−Blade guard (1 pct)
−Tapping screw (3 pcs)
−Hex bolt (38 pcs)
−Hex nut (38 pcs)
−Hex wrench (1 pc)
−Wrench (1 pc)
−Push stick (1 pc)
−Push block (1 pc)
−Fence (for Rip fence) (1 pc)
−Rip fence (1 pc)
Installing table saw
1. Overturn the table saw on two boards. Check the
riving knife positions the space between two
boards.
1
2
014597
2.
Attach the four legs to the inside of base edge.
Attach the leg with the hole for the switch to the side
with the sign "A "on the base. Secure the four legs
temporarily, do not tighten the screws firmly yet.
1
2
3
014566
3. Attach the leg supports (long) to the legs and
then attach the leg supports (short) to the legs.
Secure the legs and leg supports with the screws
firmly. Always check the direction of support legs.
4. Install the feet at the bottoms of the legs. Secure
them with countersunk screws and hex nuts.
1
2
1
2
3
4
014567
1. Leg support (long)
2. Leg support (short)
3. Foot
4. Wider side
1. Leg
2. Switch hole
3. Sign A
1. Board
2. Riving knife

6
5. Install the tire complete to the legs and secure
them with screws and hex nuts.
1
014568
6. Install the dust nozzle.
7. Adjust the motor part to the 0°position and secure
it by tightening the knob. Secure the power cord
with the cord clamp.
1
014569
8. Turn the table saw back and then attach the
carrying handles.
1
2
014570
9. Install the switch to the leg and secure it with the
tapping screws.
1
2
014571
10. Install the saw blade and blade guard. When
installing them, refer to the Section "Removing or
installing saw blade" and "Installing blade guard".
11.
Install the guide rail (short) to the front side of the table
saw and the guide rail (long) to the left side of the base.
1
2
1
2
014572
12. Install the sub table to the base. Select the proper
length stays depending on the position.
1
2
3
014573
1. Sub table
2. Stay (long)
3. Stay (short)
1. Guide rail
2. Square neck bolt
1. Switch
2. Tapping screw
1. Carrying handle
2. Screw
1. Dust nozzle
1. Tire complete

7
1
2
3
014574
13. Install the hook to the leg.
1
014575
14. Locate the table saw in a well lit and level area
where you can maintain good footing and balance.
It should be installed in an area that leaves
enough room to easily handle the size of your
workpieces.
If there is any tendency for the table saw to tip
over, slide or move during operation, the table
saw should be secured to the floor.
Storing accessories
1
014519
Push stick and wrenches can be stored on the right side
of the tool.
FUNCTIONAL DESCRIPTION
CAUTION:
• Always be sure that the tool is switched off and
unplugged before adjusting or checking function
on the tool.
Adjusting the depth of cut
1
014520
The depth of cut may be adjusted by turning the handle.
Turn the handle counterclockwise to raise the blade or
clockwise to lower it.
NOTE:
• Use a shallow depth setting when cutting thin
materials in order to obtain a cleaner cut.
Adjusting the bevel angle
1
2
014521
Loosen the lock knob counterclockwise and the desired
angle (0° - 45°) is obtained. The arrow pointer indicates
the bevel angle.
After obtaining the desired angle, tighten the lock knob
clockwise to secure the adjustment.
CAUTION:
• After adjusting the bevel angle, be sure to tighten
the lock knob securely.
Switch action
CAUTION:
• Remove workpiece from the table.
• Before plugging in the tool, always be sure that the
tool is switched off.
1. Lock knob
2. Arrow pointer
1. Handle
1. Push stick
1. Hook
1. Sub table
2. Stay (short)
3. Stay (long)

8
1
014522
To start the tool, press the ON ( I ) button.
To stop it, press the OFF ( O ) button or the switch cover.
ASSEMBLY
CAUTION:
• Always be sure that the tool is switched off and
unplugged before carrying out any work on the
tool.
The tool is shipped from the factory with the saw blade
and blade guard not in the installed condition.
Removing or installing saw blade
CAUTION:
• Always be sure that the tool is switched off and
unplugged before installing or removing the blade.
• Use only the Makita hex wrench provided to install
or remove the blade. Failure to do so may result in
overtightening or insufficient tightening of the hex
bolt. This could cause an injury.
• Use the following saw blade. Do not use saw
blades which do not comply with the
characteristics specified in these instructions.
Model Dia. Blade thickness Kerf
2712 315 mm 2 mm or less 2.8 mm or more
014540
1
2
3
014525
To remove the saw blade, remove the table insert on the
table. Hold the outer flange with the wrench and loosen
the hex bolt clockwise with the hex wrench. Then
remove the outer flange.
12
3
5
4
014524
To install the saw blade, assemble the inner flange, saw
blade, outer flange, washer and hex bolt onto the arbor.
Make sure that the teeth of the blade are pointing down
at the front of the table.
CAUTION:
• Keep the flange surface clean of dirt or other
adhering matter; it could cause blade slippage. Be
sure that the blade is installed so that the teeth are
aligned in the cutting (turning) direction.
To secure the blade in place, hold the outer flange with
the wrench, then tighten the hex bolt counterclockwise
with the hex wrench. BE SURE TO TIGHTEN THE HEX
BOLT SECURELY.
1
2
3
4
014523
CAUTION:
• Be sure to hold the hex bolt carefully with the hex
wrench. If your grip should slip, the hex wrench
may come off the hex bolt, and your hand could
strike the sharp blade edges.
Installing blade guard
CAUTION:
• Before installing the blade guard, adjust the depth
of cut to its maximum elevation.
12
014526
1. Blade guard
2. Riving knife
1. Hex wrench
2. Wrench
3. Hex bolt
4. Tighten
1. Inner flange
2. Saw blade
3. Outer flange
4. Washer
5. Hex bolt
1. Hex wrench
2. Wrench
3. Loosen
1. Switch

9
12
014527
Place the blade guard into the groove on the riving knife.
Secure the blade guard by pivoting the lever on the
blade guard.
CAUTION:
• If the blade and riving knife are not aligned
properly, a dangerous pinching condition may
result during operation. Make sure they are
properly aligned. You could suffer serious personal
injury while using the tool without a properly
aligned riving knife.
• If they are not aligned for any reasons, always
have Makita authorized service center repair it.
• Don't remove the riving knife.
1
2
3
014547
There must be a clearance of about 4 - 5 mm between
the riving knife and the blade teeth. Adjust the riving
knife accordingly and tighten the hex nut securely.
Attach the table insert on the table, then check to see
that the blade guard works smoothly before cutting.
Installing and adjusting rip fence
1
014529
Install the rip fence on the table so that the rip fence
holder engages with the guide rail. Tighten the knob of
the rip fence firmly clockwise.
B
A
014530
To check that the rip fence is parallel with the blade,
secure the rip fence 2 - 3 mm from the blade.
Raise the blade up to maximum elevation. Measure the
distance (A) and (B) between the rip fence and blade.
These two measurements should be identical.
If the rip fence is not parallel with the blade, proceed as
follows;
1. Loosen the knob of the rip fence.
2. Adjust the rip fence until it becomes parallel with
the blade.
3. Tighten the knob.
CAUTION:
•
Make sure that the rip fence is parallel with the blade,
or a dangerous kickback condition may occur.
Connecting to vacuum cleaner
014531
Cleaner operations can be performed by connecting the
tool to Makita vacuum cleaner or dust collector.
OPERATION
CAUTION:
• Always use "work helpers" such as push sticks
and push blocks when there is a danger that your
hands or fingers will come close to the blade.
• Always hold the workpiece firmly with the table
and the rip fence or miter gauge. Do not bend or
twist it while feeding. If the workpiece is bent or
twisted, dangerous kickbacks may occur.
•
NEVER withdraw the workpiece while the blade is
running. If you must withdraw the workpiece before
completing a cut, first switch the tool off while holding
the workpiece firmly. Wait until the blade has come to
a complete stop before withdrawing the workpiece.
1. Knob
1. Riving knife
2. Hex nut
3. Clearance
between the
riving knife and
blade teeth
1. Blade guard
2. Riving knife

10
Failure to do so may cause dangerous kickbacks.
• NEVER remove cut-off material while the blade is
running.
•
NEVER place your hands or fingers in the path of
the saw blade. Be especially careful with bevel cuts.
• Always secure the rip fence firmly, or dangerous
kickbacks may occur.
•
Always use "work helpers" such as push sticks and
push blocks when cutting small or narrow workpieces.
Work helpers
Push sticks, push blocks or auxiliary fence are types of "work
helpers". Use them to make safe, sure cuts without the need
for the operator to contact the blade with any part of the body.
Auxiliary fence
9.5mm
19 mm 120 mm
40 mm
140 mm
460 mm
1
006210
Make auxiliary fence from 9.5 mm and 19 mm plywood pieces.
Ripping
CAUTION:
•
When cutting long or large workpieces, always provide
adequate support behind the table. DO NOT allow a
long board to move or shift on the table. This will
cause the blade to bind and increase the possibility of
kickback and personal injury. The support should be at
the same height as the table.
014533
1. Adjust the depth of cut a bit higher than the
thickness of the workpiece.
2. Position the rip fence to the desired width of rip
and secure it in place by tightening the knob.
3. Turn the tool on and gently feed the workpiece
into the blade along with the rip fence.
(1)
When the width of rip is 150 mm or wider,
carefully use your right hand to feed the
workpiece. Use your left hand to hold the
workpiece in position against the rip fence.
(2) When the width of rip is 65 mm - 150 mm wide,
use the push stick to feed the workpiece.
014535
(3)
When the width of rip is narrower than 65 mm, the
push stick cannot be used because the push stick
will strike the blade guard. Use the auxiliary fence
and push block. Attach the auxiliary fence to the
rip fence with two "C" clamps.
1
014536
Feed the workpiece by hand until the end is
about 25 mm from the front edge of the table.
Continue to feed using the push block on the
top of the auxiliary fence until the cut is
complete.
1
2
014537
Cross cutting
CAUTION:
• When making a crosscut, remove the rip fence
from the table.
•
When cutting long or large workpieces, always provide
adequate support to the sides of the table. The
support should be at the same height as the table.
• Always keep hands away from path of blade.
1. Workpiece
2. Push block
1. Auxiliary fence
1. Face/edge
parallel

11
1
2
014538
Slide the rip fence into the rail on the table. Loosen the
knob on the fence and align to desired angle (0° to 60°).
Bring stock flush up against fence, secure it with the
clamp on the rip fence and feed gently forward into the
blade.
Carrying tool
014539
Make sure that the tool is unplugged.
Carry the tool by holding the tool part shown in the figure.
CAUTION:
• Always secure all moving portions before carrying
the tool.
• Always make sure that the blade guard is installed
in place before carrying the tool.
MAINTENANCE
CAUTION:
• Always be sure that the tool is switched off and
unplugged before attempting to perform inspection
or maintenance.
•
If the push block handle or push sticks is broken,
contact Makita service center to get the replacement.
NOTICE:
•
Never use gasoline, benzine, thinner, alcohol or the
like. Discoloration, deformation or cracks may result.
Cleaning
Clean out sawdust and chips from time to time. Carefully
clean the blade guard and moving parts inside the table saw.
OPTIONAL ACCESSORIES
CAUTION:
• These accessories or attachments are
recommended for use with your Makita tool
specified in this manual. The use of any other
accessories or attachments might present a risk of
injury to persons. Only use accessory or
attachment for its stated purpose.
If you need any assistance for more details regarding
these accessories, ask your local Makita Service Center.
• Rip fence
• Wrench
• Hex wrench
NOTE:
• Some items in the list may be included in the tool
package as standard accessories. They may differ
from country to country.
1. Rip fence
2. Knob

12
Makita Corporation
www.makita.com
JM2718A012
Table of contents
Other Makita Saw manuals

Makita
Makita 2702 User manual

Makita
Makita 5604R User manual

Makita
Makita 2107F 2107FZ User manual

Makita
Makita LS1013F User manual

Makita
Makita HS6100 User manual

Makita
Makita LH1040 User manual

Makita
Makita HS7000 User manual

Makita
Makita DPB180 User manual

Makita
Makita 2704 User manual

Makita
Makita 5740NB User manual

Makita
Makita LS1019 User manual

Makita
Makita LS0816F User manual

Makita
Makita XSL01Z User manual

Makita
Makita JR3051T User manual

Makita
Makita LS0815F User manual

Makita
Makita DLW140 User manual

Makita
Makita LS1216 User manual

Makita
Makita JR140D User manual

Makita
Makita SD100D User manual

Makita
Makita HS7101 User manual