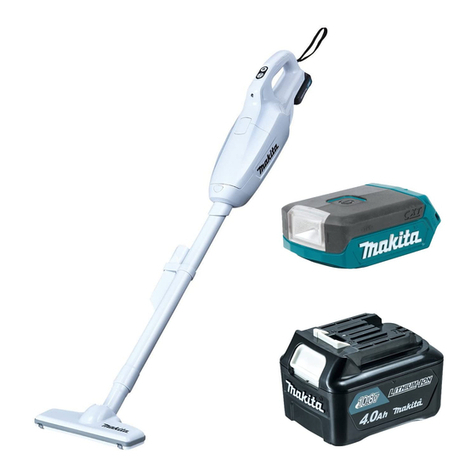
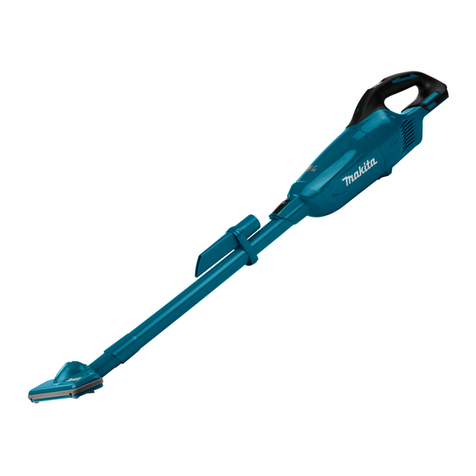
Makita DCL142 User manual

DCL142
DCL182
DCL182F
EN Cordless Cleaner INSTRUCTION MANUAL 7
SL Brezžični čistilnik NAVODILO ZA UPORABO 13
SQ Pastruesi me bateri MANUALI I PËRDORIMIT 19
BG Акумулаторна
прахосмукачка
РЪКОВОДСТВО ЗА
ЕКСПЛОАТАЦИЯ 25
HR Bežični usisivač PRIRUČNIK S UPUTAMA 32
МК Безжичен чистач УПАТСТВО ЗА УПОТРЕБА 38
RO Aspirator cu acumulator MANUAL DE INSTRUCŢIUNI 45
SR Бежични чистач УПУТСТВО ЗА УПОТРЕБУ 52
RU Аккумуляторный пылесос РУКОВОДСТВО ПО
ЭКСПЛУАТАЦИИ 59
UK Бездротовий очищувач ІНСТРУКЦІЯ З
ЕКСПЛУАТАЦІЇ 66

1
2
3
12
3
12
4
3
1
2
12
3
1
2
1
2
Fig.1
Fig.2
Fig.3
Fig.4
Fig.5
Fig.6
Fig.7
Fig.8
2

1
1
1
2
1
2
3
1
1
Fig.9
Fig.10
Fig.11
Fig.12
Fig.13
Fig.14
Fig.15
Fig.16
3

1
1
2
1
2
3
1
1
Fig.17
Fig.18
Fig.19
Fig.20
Fig.21
Fig.22
Fig.23
Fig.24
4

1
1
2
3
1
2
1
2
3
Fig.25
Fig.26
Fig.27
Fig.28
Fig.29
Fig.30
Fig.31
Fig.32
5

1
1
Fig.33
Fig.34
Fig.35
Fig.36
6

7ENGLISH
ENGLISH (Original instructions)
WARNING
This appliance can be used by children aged from 8 years and
above and persons with reduced physical, sensory or mental capa-
bilities or lack of experience and knowledge if they have been given
supervision or instruction concerning use of the appliance in a safe
way and understand the hazards involved. Children shall not play
with the appliance. Cleaning and user maintenance shall not be
made by children without supervision.
SPECIFICATIONS
Model DCL142 DCL182 DCL182F
Capacity with a dust bag 0.50 L
with a paper pack 0.33 L
Continuous use HIGH Approx. 20 min
LOW Approx. 40 min
Overall length 986 mm 1,004 mm
Net weight 1.3 kg
Rated voltage D.C. 14.4 V D.C. 18 V
•
Due to our continuing program of research and development, the specications herein are subject to change without notice.
• Specications and battery cartridge may differ from country to country.
• Weight, with battery cartridge, according to EPTA-Procedure 01/2003
Symbols
The following show the symbols used for the equipment.
Be sure that you understand their meaning before use.
Read instruction manual.
Cd
Ni-MH
Li-ion
Only for EU countries
Do not dispose of electric equipment or
battery pack together with household waste
material!
In observance of the European Directives,
on Waste Electric and Electronic
Equipment and Batteries and Accumulators
and Waste Batteries and Accumulators
and their implementation in accordance
with national laws, electric equipment and
batteries and battery pack(s) that have
reached the end of their life must be col-
lected separately and returned to an envi-
ronmentally compatible recycling facility.
Intended use
The tool is intended for collecting dry dust.
IMPORTANT
SAFETY INSTRUCTIONS
When using an electrical appliance, basic precautions
should always be followed, including the following:
READ ALL INSTRUCTIONS
BEFORE USING THIS
APPLIANCE.
WARNING - To reduce the risk of re, electric shock
or injury:
1. Do not expose to rain. Store indoors.
2.
Do not allow to be used as a toy. Close attention
is necessary when used by or near children.
3. Use only as described in this manual. Use only
manufacturer's recommended attachments.
4. Do not use with damaged battery. If appliance
is not working as it should, has been dropped,
damaged, left outdoors, or dropped into water,
return it to a service center.
5. Do not handle appliance with wet hands.
6.
Do not put any object into openings. Do not use
with any opening blocked; keep free of dust, lint,
hair, and anything that may reduce air ow.
7. Keep hair, loose clothing, ngers, and all parts
of body away from openings and moving parts.
8.
Turn off all controls before removing the battery.
9. Use extra care when cleaning on stairs.
10. Do not use to pick up ammable or combusti-
ble liquids, such as gasoline, or use in areas
where they may be present.

8ENGLISH
11. Use only the charger supplied by the manufac-
turer to recharge.
12.
Do not pick up anything that is burning or smok-
ing, such as cigarettes, matches, or hot ashes.
13. Do not use without lters in place.
14. Do not charge the battery outdoors.
Battery tool use and care
15. Recharge only with the charger specied by
the manufacturer. A charger that is suitable for
one type of battery pack may create a risk of re
when used with another battery pack.
16. Use power tools only with specically desig-
nated battery packs. Use of any other battery
packs may create a risk of injury and re.
17. When (the) battery pack is not in use, keep
it away from other metal objects, like paper
clips, coins, keys, nails, screws or other small
metal objects, that can make a connection
from one terminal to another.
18. Under abusive conditions, liquid may be
ejected from the battery; avoid contact. If con-
tact accidentally occurs, ush with water.
SAVE THESE INSTRUCTIONS.
This appliance is intended for household use.
ADDITIONAL SAFETY RULES
1. Read this instruction manual and the charger
instruction manual carefully before use.
2. Do not pick up the following materials:
—
Hot materials such as lit cigarettes or spark/
metal dust generated by grinding/cutting metal
— Flammable materials such as gasoline,
thinner, benzine, kerosene or paint
— Explosive materials like nitroglycerin
—
Ignitable materials such as Aluminum, zinc,
magnesium, titanium, phosphorus or celluloid
— Wet dirt, water, oil or the like
— Hard pieces with sharp edges, such as
wood chips, metals, stones, glasses,
nails, pins or razors
— Powder to clot such as cement or toner
— Conductive dust such as metal or carbon
— Fine particle like concrete dust
Such action may cause re, injury and/or prop-
erty damage.
3. Stop operation immediately if you notice any-
thing abnormal.
4. If you drop or strike the cleaner, check it care-
fully for cracks or damage before operation.
5.
Do not bring close to stoves or other heat sources.
6. Do not block the intake hole or vent holes.
SAVE THESE INSTRUCTIONS.
Important safety instructions for
battery cartridge
1. Before using battery cartridge, read all instruc-
tions and cautionary markings on (1) battery
charger, (2) battery, and (3) product using
battery.
2. Do not disassemble battery cartridge.
3. If operating time has become excessively
shorter, stop operating immediately. It may
result in a risk of overheating, possible burns
and even an explosion.
4.
If electrolyte gets into your eyes, rinse them out
with clear water and seek medical attention right
away. It may result in loss of your eyesight.
5. Do not short the battery cartridge:
(1) Do not touch the terminals with any con-
ductive material.
(2) Avoid storing battery cartridge in a con-
tainer with other metal objects such as
nails, coins, etc.
(3) Do not expose battery cartridge to water
or rain.
A battery short can cause a large current
ow, overheating, possible burns and even a
breakdown.
6. Do not store the tool and battery cartridge in
locations where the temperature may reach or
exceed 50 °C (122 °F).
7. Do not incinerate the battery cartridge even if
it is severely damaged or is completely worn
out. The battery cartridge can explode in a re.
8. Be careful not to drop or strike battery.
9. Do not use a damaged battery.
10.
The contained lithium-ion batteries are subject to
the Dangerous Goods Legislation requirements.
For commercial transports e.g. by third parties,
forwarding agents, special requirement on pack-
aging and labeling must be observed.
For preparation of the item being shipped, consult-
ing an expert for hazardous material is required.
Please also observe possibly more detailed
national regulations.
Tape or mask off open contacts and pack up the
battery in such a manner that it cannot move
around in the packaging.
11. Follow your local regulations relating to dis-
posal of battery.
SAVE THESE INSTRUCTIONS.
CAUTION: Only use genuine Makita batteries.
Use of non-genuine Makita batteries, or batteries that
have been altered, may result in the battery bursting
causing res, personal injury and damage. It will
also void the Makita warranty for the Makita tool and
charger.
Tips for maintaining maximum
battery life
1. Charge the battery cartridge before completely
discharged. Always stop tool operation and
charge the battery cartridge when you notice
less tool power.
2. Never recharge a fully charged battery car-
tridge. Overcharging shortens the battery
service life.
3.
Charge the battery cartridge with room tempera-
ture at 10 °C - 40 °C (50 °F - 104 °F). Let a hot
battery cartridge cool down before charging it.
4. Charge the battery cartridge if you do not use
it for a long period (more than six months).

9ENGLISH
FUNCTIONAL
DESCRIPTION
CAUTION:
• Always be sure that the tool is switched off and
the battery cartridge is removed before adjust-
ing or checking function on the tool.
• Take care not to trap nger(s) between cleaner
and battery as shown in diagram when loading
battery. Trapping nger(s) may cause injury.
► Fig.1
Installing or removing battery
cartridge
► Fig.2: 1. Red indicator 2. Button 3. Battery cartridge
CAUTION:
• Always switch off the tool before installing or
removing of the battery cartridge.
• Hold the tool and the battery cartridge rmly
when installing or removing battery car-
tridge. Failure to hold the tool and the battery
cartridge rmly may cause them to slip off your
hands and result in damage to the tool and
battery cartridge and a personal injury.
To remove the battery cartridge, slide it from the tool
while sliding the button on the front of the cartridge.
To install the battery cartridge, align the tongue on the
battery cartridge with the groove in the housing and slip
it into place. Insert it all the way until it locks in place
with a little click. If you can see the red indicator on the
upper side of the button, it is not locked completely.
CAUTION:
• Always install the battery cartridge fully until the
red indicator cannot be seen. If not, it may acci-
dentally fall out of the tool, causing injury to you
or someone around you.
• Do not install the battery cartridge forcibly. If the
cartridge does not slide in easily, it is not being
inserted correctly.
Battery protection system
The cleaner is equipped with the protection system,
which automatically cuts off the output power for its long
service life.
The cleaner stops during operation when the cleaner
and/or battery are placed under the following situation.
This is caused by the activation of protection system
and does not show the cleaner trouble.
• When the cleaner is overloaded:
At this time, release the switch trigger and
remove causes of overload and then pull the
switch trigger again to restart.
• When the remaining battery capacity gets low:
Recharge the battery cartridge.
Switch action
► Fig.3: 1. OFF button 2. HIGH/LOW button
3. Battery power lamp
To start the cleaner, simply press the "HIGH/LOW"
button. To switch off, press the "OFF" button. To change
the cleaner speed, press the "HIGH/LOW" button. The
rst press on this button is for high speed and the sec-
ond press for low speed and then each press on this
button repeats the high/low speed cycle alternatively.
Lighting the lamp
For Model DCL182F only
CAUTION:
• Never look into the light directly. Direct light
causes damage to your eyes.
► Fig.4: 1. OFF button 2. HIGH/LOW button
3. Battery power lamp 4. Lamp
To turn on the lamp, simply press the "HIGH/LOW"
button. To turn off the lamp, press the "OFF" button.
Indicating the remaining battery
capacity
Only for battery cartridges with the indicator
► Fig.5: 1. Indicator lamps 2. Check button
Press the check button on the battery cartridge to indi-
cate the remaining battery capacity. The indicator lamps
light up for few seconds.
Indicator lamps Remaining
capacity
Lighted Off Blinking
75% to 100%
50% to 75%
25% to 50%
0% to 25%
Charge the
battery.
The battery
may have
malfunctioned.
NOTE: Depending on the conditions of use and the
ambient temperature, the indication may differ slightly
from the actual capacity.
Battery power lamp
► Fig.6: 1. OFF button 2. HIGH/LOW button
3. Battery power lamp
• When the remaining battery capacity gets low, the
battery power lamp blinks.

10 ENGLISH
•
When the remaining battery capacity gets much lower,
the tool stops during operation and the battery power
lamp lights up for about ten seconds. At this time,
remove the battery cartridge from the tool and charge it .
NOTE:
• The time at which the battery power lamp start
blinking or lighting up depends on the tempera-
ture at work place and the battery cartridge
conditions.
ASSEMBLY
CAUTION:
• Always be sure that the tool is switched off and
the battery cartridge is removed before carrying
out any work on the tool.
Disposing of Dust
CAUTION:
• Empty the cleaner before it becomes too full, or
the suction force weakens.
• Be sure to empty out the dust inside the cleaner
itself. Failure to do so may cause the sponge
lter to be clogged or the motor to be damaged.
• Never throw away the dust stopper because it
should be used whenever either the dust bag or
the paper pack is used.
► Fig.7: 1. Front cover 2. Button
1. Push the button to open the front cover. Opening
it until a click is heard allows a positive stop at that
position.
► Fig.8: 1. Front cover 2. Front cover joint
NOTE:
• The cleaner is constructed in such a way that
the front cover comes off when trying to force
the front cover open at the angle of more than
90°. If the front cover comes off, insert it into the
front cover joint in place.
CAUTION:
• When closing the front cover, be careful not to
pinch your ngers.
► Fig.9: 1. Dust stopper
2. Pull out both the orange-colored dust stopper and
dust bag together at the same time.
► Fig.10: 1. Dust stopper
► Fig.11
3. Remove the dust stopper and empty the cleaner.
Dust bag and paper pack
Install either dust bag or paper pack before using cleaner.
Use the dust stopper when installing either dust bag or
paper pack.
The dust bag can be used repeatedly by cleaning it out.
Paper pack is a throw-away type. Throw away the entire
paper pack without emptying when it has become full.
Installing dust bag
► Fig.12: 1. Upper side of dust stopper 2. Lower side
of dust stopper
Use the dust stopper when installing dust bag. Be
careful not to take the upper side for the lower side by
mistake because they are different each other.
► Fig.13: 1. Dust stopper 2. Groove 3. Dust bag
1. Insert the protrusion of the dust bag into the
groove in the dust stopper as shown in the gure.
► Fig.14: 1. Lower groove
2. There is no distinction between the upper and
lower sides of the dust bag. You may insert its
protrusion of any side into the lower groove of the
dust stopper.
► Fig.15
3. Overlap the frame of dust stopper with that of the
dust bag.
► Fig.16: 1. Cleaner cavity
4. Place the dust stopper and the dust bag together
into the cleaner cavity in the same direction of
arrow on the dust stopper. Insert them all the way
into the slots in the cleaner cavity.
► Fig.17
5. Place the entire cloth part of the dust bag inside
the tool itself.
► Fig.18: 1. Front cover
6. Close the front cover completely.
Installing the paper pack
► Fig.19
1. Unfold the entrance of the paper pack before
setting it on the dust stopper.
► Fig.20: 1. Upper side of dust stopper 2. Lower side
of dust stopper
Use the dust stopper also when installing paper pack.
Be careful not to take the upper side for the lower side
by mistake because they are different each other.
► Fig.21: 1. Dust stopper 2. Paper pack 3. Groove
2. Insert the protrusion of the paper pack into the
groove in the dust stopper as shown in the gure.
► Fig.22: 1. Lower groove
3. There is no distinction between the upper and
lower sides of the paper pack. You may insert its
protrusion of any side into the lower groove of the
dust stopper.
► Fig.23
4. Overlap the frame of dust stopper with that of the
paper pack.
► Fig.24: 1. Cleaner cavity
5. Place the dust stopper and the paper pack
together into the cleaner cavity in the same direc-
tion of arrow on the dust stopper. Insert them all
the way into the slots in the cleaner cavity.
► Fig.25
6. Place the entire container part of the paper pack
inside the tool itself.
7. Close the front cover completely.

11 ENGLISH
CAUTION:
• Forgetting to install the dust bag or the paper
pack, failure to insert the dust stopper together
with the dust bag or the paper pack all the way
into the slots or using a broken or ripped bag,
may allow dust to get into the motor. This may
result in motor failure.
• Do not fold the cardboard at its opening when
installing the paper pack.
• Never throw away the dust stopper because it
needs to be used repeatedly whenever either
the dust bag or the paper pack is used.
• The paper pack for the cleaner is an important
component for maintaining the tool perfor-
mance. Using other than the genuine paper
pack may cause smokes or ignition.
OPERATION
CAUTION:
• To connect attachments, such as nozzle,
twist-insert attachment in direction of arrow to
ensure secure connection during use. To dis-
connect attachment, twist-extract also in direc-
tion of arrow.
► Fig.26
Cleaning (Suction)
Nozzle
Attach the nozzle to clean off tables, desks, furniture,
etc. Nozzle slips on easily.
► Fig.27: 1. Nozzle
Nozzle + Extension wand (Straight
pipe)
The extension wand ts in between the nozzle and the
cleaner itself. This arrangement is convenient for clean-
ing a oor while standing erect.
► Fig.28: 1. Cleaner body 2. Extension wand
3. Nozzle
Corner nozzle
Fit on the corner nozzle for cleaning corners and crev-
ices of a car or furniture.
► Fig.29: 1. Cleaner body 2. Corner nozzle
Corner nozzle +Extension wand
(Straight pipe)
In tight quarters where the cleaner itself cannot
squeeze in, or in high places hard to reach, use this
arrangement.
► Fig.30: 1. Cleaner body 2. Extension wand
3. Corner nozzle
Cleaning without nozzle
You can pick up powder and dust without nozzle.
► Fig.31
MAINTENANCE
CAUTION:
• Always be sure that the tool is switched off
before attempting to perform inspection or
maintenance.
After use
NOTE:
• Putting the cleaner against the wall without any
other support cause the cleaner to fall down and
be damaged.
► Fig.32
Cleaning
► Fig.33
From time to time wipe off the outside (cleaner body) of
the cleaner using a cloth dampened in soapy water.
Clean out also the suction opening, dust bag/paper
pack mounting area and the dust stopper.
CAUTION:
• Never use gasoline, benzine, thinner, alcohol
or the like. Discoloration, deformation or cracks
may result.
► Fig.34
Wash the dust bag in soapy water when it is clogged
with dust and the cleaner power becomes small. Dry it
out thoroughly before use. An insufciently dried bag
may cause poor suction and shorten the service life of
the motor.
NOTE:
• Paper pack is a throw-away type.
When the sponge lter is clogged with dust, remove it
from the cleaner and then wipe it off or wash in water.
Removing and installing the sponge
lter
► Fig.35: 1. Sponge lter
To remove the sponge lter, remove the dust bag or
paper pack and then pinch and take it out.
► Fig.36: 1. Recessed wall
Press in the whole edge of the sponge lter against the
recessed wall inside the dust bag/paper pack mounting
area.
CAUTION:
• After cleaning sponge lter, be sure to install
it on the cleaner. If washed in water, dry it up
before installing. An insufciently dried sponge
lter may shorten the service life of the motor.

12 ENGLISH
Things to Check Before Asking for Repairs
Symptom
Weak suction
power
Not working
Area to be investigated
Is battery cartridge exhausted ?
Fixing method
Empty dust bag or paper pack.
Dust down or wash the dust
bag.
Replace paper pack.
Charge the battery cartridge.
Is dust bag or paper pack full of dust ?
Is battery cartridge exhausted ?
Is dust bag clogged ?
Is paper pack clogged ?
NOTE:
• Do not attempt to repair cleaner by yourself.
To maintain product SAFETY and RELIABILITY, repairs, any other maintenance or adjustment should be performed
by Makita Authorized Service Centers, always using Makita replacement parts.
OPTIONAL
ACCESSORIES
CAUTION:
• These accessories or attachments are rec-
ommended for use with your Makita cleaner
specied in this manual. The use of any other
accessories or attachments might present a
risk of injury to persons. Only use accessory or
attachment for its stated purpose.
If you need any assistance for more details regard-
ing these accessories, ask your local Makita Service
Center.
• Extension wand (Straight pipe)
• Nozzle
• Nozzle for carpet
• Shelf brush
• Corner nozzle
• Round brush
• Flexible hose
• Paper pack
• Makita genuine battery and charger
NOTE:
• Some items in the list may be included in the
tool package as standard accessories. They
may differ from country to country.

13 SLOVENŠČINA
SLOVENŠČINA (Originalna navodila)
OPOZORILO
To napravo lahko na varen način, če razumejo vključena tveganja,
uporabljajo otroci, stari 8 let in več ter osebe z zmanjšanimi zič-
nimi, čutilnimi ali psihičnimi sposobnostmi, ter s pomanjkanjem izku-
šenj in znanja, če so pod ustreznim nadzorom ali so prejeli navodila
v zvezi z uporabo naprave. Otroci se z napravo ne smejo igrati.
Otroci brez nadzora ne smejo izvajati čiščenja in uporabniškega
vzdrževanja.
TEHNIČNI PODATKI
Model DCL142 DCL182 DCL182F
Kapaciteta z vrečko za prah 0,50 L
s papirnatim elementom 0,33 L
Neprekinjena uporaba Visoko Pribl. 20 min
Nizko Pribl. 40 min
Celotna dolžina 986 mm 1.004 mm
Neto teža 1,3 kg
Nazivna napetost D.C. 14,4 V D.C. 18 V
•
Zaradi našega nenehnega programa raziskav in razvoja si pridržujemo pravico do spremembe tehničnih podatkov brez obvestila.
• Tehnični podatki in baterijski vložki se lahko razlikujejo od države do države.
• Teža z baterijskim vložkom je v skladu z EPTA-postopkom 01/2003
Simboli
Naslednji simboli se uporabljajo v povezavi s strojem. Pred
uporabo proizvoda se obvezno seznanite z njihovim pomenom.
Preberite navodila za uporabo.
Cd
Ni-MH
Li-ion
Le za države EU
Električnega orodja ali akumulatorja ne
odlagajte skupaj z gospodinjskimi odpadki!
V skladu z Evropsko direktivo o odpadni
električni in elektronski opremi in o bateri-
jah in akumulatorjih ter odpadnih baterijah
in akumulatorjih in z njunim izvajanjem v
skladu z državno zakonodajo se morajo
električna oprema, baterije in akumulatorji,
ki so prišli do konca svojega življenjskega
cikla, zbirati ločeno in se vrniti v okoljsko
združljivo ustanovo za recikliranje.
Namenska uporaba
Orodje je namenjeno za zbiranje suhega prahu.
POMEMBNO
NAVODILA ZA VARNOST
Kadar uporabljate električne naprave, je vedno
treba upoštevati osnovne varnostne ukrepe,
vključno z naslednjimi:
PRED UPORABO NAPRAVE
PREBERITE VSA NAVODILA.
OPOZORILO - Za zmanjšanje tveganja požara, elek-
tričnega udara ali telesnih poškodb:
1.
Ne izpostavljajte dežju. Hranite v zaprtih prostorih.
2. Ne dovolite igranja z napravo. Potrebna je
posebna pozornost, kadar napravo uporabljajo
otroci ali se uporablja v njihovi bližini.
3.
Uporabljajte le v skladu z opisi v tem priročniku.
Uporabljajte le priključke, ki jih priporoča proizvajalec.
4.
Ne uporabljajte naprave s poškodovanim aku-
mulatorjem. Če naprava ne deluje kot bi morala,
je padla, je poškodovana, pozabljena na pros-
tem ali padla v vodo, jo odnesite v servis.
5. Ne rokujte z napravo z mokrimi rokami.
6.
Ne vstavljajte predmetov v odprtine. Ne uporabljajte
z zamašenimi odprtinami; odstranite prah, vlakna,
lase in vse, kar bi lahko zmanjšalo pretok zraka.
7.
Las, ohlapnih oblačil, prstov in nobenih delov telesa
ne približujte odprtinam in premikajočim delom.
8. Preden odstranite akumulator, izklopite vse
upravljalne elemente.
9.
Med čiščenjem na stopnicah bodite izjemno previdni.
10. Ne uporabljajte za pobiranje vnetljivih ali gor-
ljivih tekočin, kot je bencin, in ne uporabljajte v
območjih, kjer so lahko prisotne.

14 SLOVENŠČINA
11. Za polnjenje uporabljajte samo polnilnik, ki ga
dobavlja proizvajalec.
12.
Ne pobirajte ničesar, kar gori, ali iz česar se vije
dim, kot so cigarete, vžigalice ali vroč pepel.
13. Ne uporabljajte brez nameščenih ltrov.
14. Akumulatorja ne polnite na prostem.
Uporaba in nega akumulatorskega orodja
15.
Ponovno napolnite le s polnilnikom, ki ga je določil
proizvajalec. Polnilnik, ki je primeren za eno vrsto
akumulatorskih baterij, lahko povzroči nevarnost požara,
če ga uporabljate z drugimi akumulatorskimi baterijami.
16.
Električno orodje uporabljajte le s posebej oblikovanimi
akumulatorskimi baterijami. Uporaba drugih akumulator-
skih baterij lahko vodi do nevarnosti poškodbe in požara.
17.
Kadar akumulatorska baterija ni v uporabi, je ne
hranite ob kovinskih predmetih, kot so sponke za
papir, kovanci, ključi, žeblji, vijaki ali drugi manjši
kovinski predmeti, ki lahko povežejo oba terminala.
18. V neprimernih pogojih lahko iz baterije uhaja
tekočina; izogibajte se stiku. Če pride do nena-
mernega stika, sperite z vodo.
SHRANITE TA NAVODILA.
Ta naprava je namenjena le za domačo uporabo.
DODATNA VARNOSTNA PRAVILA
1. Pred uporabo pozorno preberite ta navodila za
uporabo in navodila za uporabo polnilnika.
2. Ne pobirajte naslednjih materialov:
— vročega materiala, kot so prižgane ciga-
rete ali isker/kovinskega prahu, ki nas-
tane zaradi brušenja/rezanja kovin
— vnetljivih materialov, kot so bencin,
razredčilo, kerozin ali barva
— eksplozivnih materialov, npr. nitroglicerin
— vnetljivih materialov, kot so aluminij, cink,
magnezij, titan, fosfor ali celuloid
— mokre zemlje, vode olja ipd
— trdih predmetov z ostrimi robovi, kot
so lesni ostružki, kovine, kamni, steklo,
žeblji, bucike ali britvice
— prahu, ki se strdi, kot je cement ali toner
— prevodnega prahu, kot je kovina ali ogljik
— nih delcev, kot je betonski prah
Takšna dejanja lahko povzročijo požar, telesne
poškodbe in/ali materialno škodo.
3.
Če opazite kaj neobičajnega, takoj prenehajte z uporabo.
4.
Če vam čistilnik pade ali če z njim kam udarite, ga pred
uporabo skrbno preglejte, ali je razpokan ali poškodovan.
5.
Ne približujte pečicam ali drugim virom vročine.
6. Ne zamašite vhodne odprtine ali odprtin za
prezračevanje.
SHRANITE TA NAVODILA.
Pomembna varnostna navodila za
akumulatorsko baterijo
1. Pred uporabo baterijskega vložka preberite
vsa navodila in opozorilne oznake na (1) pol-
nilniku akumulatorja, (2) akumulatorju in (3)
izdelku, ki uporablja akumulator.
2. Ne razstavljajte baterijskega vložka.
3. Če se je čas delovanja občutno skrajšal, takoj
prenehajte uporabljati orodje. V nasprotnem
primeru lahko pride do pregretja, morebitnih
opeklin in celo eksplozije.
4. Če pride elektrolit v stik z očmi, jih sperite s
čisto vodo in takoj poiščite zdravniško pomoč.
Posledica je lahko izguba vida.
5.
Ne povzročite kratkega stika baterijskega vložka:
(1) Ne dotikajte se priključkov s kakršnim
koli prevodnim materialom.
(2) Izogibajte se shranjevanju baterijskega
vložka v vsebniku z drugimi kovinskimi
predmeti kot so žeblji, kovanci itn.
(3) Ne izpostavljajte baterijskega vložka vodi
ali dežju.
Kratek stik akumulatorja lahko povzroči velik
električni tok, pregrevanje, morebitne opekline
in celo okvaro.
6.
Ne shranjujte orodja in baterijskega vložka na mes-
tih, kjer lahko temperatura doseže ali preseže 50 °C.
7. Ne sežigajte baterijskega vložka, tudi če je
hudo poškodovan ali v celoti izpraznjen.
Baterijski vložek lahko v ognju eksplodira.
8. Poskrbite, da akumulator ne bo izpostavljen
padcem ali udarcem.
9. Ne uporabljajte poškodovanih akumulatorjev.
10. Priložene litij-ionske baterije ustrezajo zahte-
vam zakonodaje v zvezi z nevarnim blagom.
Za komercialne prevoze, npr. tiste, ki jih opravljajo
tretje stranke in carinski posredniki, je treba upoštevati
posebne zahteve v zvezi z embalažo in označevanjem.
Med postopkom priprave na odpremo izdelka se je treba
posvetovati s strokovnjakom za nevarne snovi. Pri tem
upoštevajte tudi podrobnejše nacionalne predpise.
Odprte stike oblepite z lepilnim trakom ali jih dru-
gače zaščitite, baterijo pa zapakirajte tako, da se v
embalaži ne more premikati.
11. Upoštevajte lokalne uredbe glede odlaganja
akumulatorja.
SHRANITE TA NAVODILA.
POZOR:
Uporabljajte le originalne baterije
Makita. Če uporabljate neoriginalne baterije Makita ali
baterije, ki so bile spremenjene, lahko pride do eksplo-
zije baterije in posledično do požara, telesnih poškodb
ali materialne škode. S takšno uporabo boste tudi raz-
veljavili garancijo Makita za orodje in polnilnik Makita.
Nasveti za ohranjanje največje
zmogljivosti akumulatorja
1. Napolnite baterijski vložek, preden se v celoti
izprazni. Ko opazite, da ima orodje manjšo
moč, vedno ustavite delovanje orodja in napol-
nite baterijski vložek.
2. Nikoli znova ne polnite popolnoma napol-
njenega baterijskega vložka. Prenapolnjenje
skrajša življenjsko dobo akumulatorja.
3. Baterijski vložek s sobno temperaturo pol-
nite pri temperaturi okolja od 10 °C do 40 °C.
Počakajte, da se vroč baterijski vložek pred
polnjenjem ohladi.
4. Če baterijskega vložka ne uporabljate dalj časa
(več kot 6 mesecev), ga napolnite.

15 SLOVENŠČINA
OPIS DELOVANJA
POZOR:
• Pred vsako nastavitvijo ali pregledom delovanja
orodja se prepričajte, da je le to izključeno in da
je akumulatorska baterija odstranjena.
• Pazite, da si med nameščanjem akumulatorja
ne priprete prstov med čistilnik in akumulator,
kot je prikazano na diagramu. Tako se lahko
poškodujete.
► Sl.1
Nameščanje ali odstranjevanje
akumulatorske baterije
► Sl.2: 1. Rdeči indikator 2. Gumb 3. Baterijski vložek
POZOR:
• Vedno izklopite orodje, preden namestite ali
odstranite akumulatorsko baterijo.
• Kadar nameščate ali odstranjujete akumula-
torsko baterijo, trdno držite orodje in akumu-
latorsko baterijo. Če orodja in akumulatorske
baterije ne držite trdno, se lahko zgodi, da vam
zdrsneta iz rok, posledica pa je poškodba orodja
in akumulatorske baterije ter telesna poškodba.
Za odstranitev akumulatorske baterije iz orodja jo
premaknite iz orodja, ob tem pa premaknite gumb na
sprednji strani akumulatorske baterije.
Pri vstavljanju akumulatorske baterije poravnajte jezi-
ček na akumulatorski bateriji z utorom na ohišju in ga
potisnite v ležišče. Akumulatorsko baterijo vstavite do
konca, da se razločno zaskoči. Če vidite rdeči indikator
na zgornji strani gumba, ta ni popolnoma zaklenjen.
POZOR:
• Vedno namestite akumulatorsko baterijo, tako
da rdeči indikator ni več viden. Če tega ne
upoštevate, lahko akumulator nepričakovano
izpade iz orodja in poškoduje vas ali osebe v
neposredni bližini.
• Ne nameščajte akumulatorske baterije s silo. Če
se akumulatorska baterija ne zaskoči zlahka, ni
pravilno vstavljena.
Sistem za zaščito akumulatorja
Čistilnik je opremljen z zaščitnim sistemom, ki samo-
dejno prekine napajanje za daljšo življenjsko dobo.
Če čistilnik in/ali akumulator zazna naslednjo situacijo,
čistilnik prekine z obratovanjem. To povzroči vklop
zaščitnega sistema in ne pomeni napake čistilnika.
• Kadar je čistilnik preobremenjen:
Zdaj spustite sprožilno stikalo in odpravite
vzrok za preobremenitev, nato pa znova pov-
lecite sprožilno stikalo za ponovni zagon.
• Kadar je akumulator skoraj izpraznjen:
Znova napolnite akumulatorsko baterijo.
Delovanje stikala
► Sl.3: 1. Gumb OFF 2. Gumb HIGH/LOW 3. Lučka
za moč akumulatorja
Za zagon čistilnika preprosto pritisnite gumb "HIGH/LOW".
Za izklop pritisnite gumb "OFF". Za spremembo hitrosti čistil-
nika pritisnite gumb "HIGH/LOW". Prvi pritisk gumba pomeni
visoko hitrost, drugi pa nizko, nato pa se z vsakim pritiskom
gumba izmenično ponavlja cikel visoke/nizke hitrosti.
Prižiganje lučke
Samo za model DCL182F
POZOR:
• Nikoli ne glejte neposredno v lučko. Neposredna
svetloba poškoduje vaše oči.
► Sl.4: 1. Gumb OFF 2. Gumb HIGH/LOW 3. Lučka
za moč akumulatorja 4. Svetilka
Za vklop lučke pritisnite gumb „HIGH/LOW“ (VISOKO/
NIZKO). Za izklop lučke pritisnite gumb „OFF“
(IZKLOP).
Prikazuje preostalo raven
napolnjenosti akumulatorja
Samo za akumulatorske baterije z indikatorjem
► Sl.5: 1. Indikatorske lučke 2. Gumb za preverjanje
Pritisnite gumb za preverjanje na baterijskem vložku,
da preverite raven napolnjenosti akumulatorja.
Indikatorske lučke na kratko zasvetijo.
Indikatorske lučke Prikaz pre-
ostale ravni
napolnjenosti
Sveti Ne sveti Utripa
od 75 % do
100 %
od 50 % do
75 %
od 25 % do
50 %
od 0 % do
25 %
Napolnite
akumulator.
Akumulator
je morda
okvarjen.
OPOMBA: Odvisno od pogojev uporabe in okoljske
temperature se označba lahko nekoliko razlikuje od
dejanske napolnjenosti.
Lučka za moč akumulatorja
► Sl.6: 1. Gumb OFF 2. Gumb HIGH/LOW 3. Lučka
za moč akumulatorja
• Ko je preostala zmogljivost akumulatorja nizka,
utripa lučka za moč akumulatorja.

16 SLOVENŠČINA
• Ko je preostala zmogljivost akumulatorja še nižja,
se orodje ustavi in lučka za moč akumulatorja
zasveti za približno deset sekund. V tem primeru
odstranite akumulatorsko baterijo iz orodja in jo
napolnite.
OPOMBA:
• Čas, v katerem začne lučka za moč akumula-
torja utripati ali svetiti, je odvisen od temperature
na delovnem mestu in stanja akumulatorske
baterije.
MONTAŽA
POZOR:
• Pred vsako izvedbo dela na orodju se prepri-
čajte, da je le to izključeno in da je akumulator-
ska baterija odstranjena.
Odstranjevanje prahu
POZOR:
• Izpraznite čistilnik, preden se popolnoma
napolni ali pa bo sesalna moč manjša.
• Izpraznite morate tudi prah iz samega čistilnika.
Sicer lahko pride do zamašitve gobastega ltra
ali poškodb motorja.
• Naprave za ustavljanje prahu nikoli ne zavrzite,
saj jo je treba uporabiti vsakič, ko uporabljate
vrečko za prah ali papirnati element.
► Sl.7: 1. Sprednji pokrov 2. Gumb
1. Pritisnite gumb, da odprete sprednji pokrov. Ko ga
odprete toliko, da je slišen klik, bo pokrov ostal v
tistem položaju.
► Sl.8: 1. Sprednji pokrov 2. Spoj sprednjega pokrova
OPOMBA:
• Čistilnik je zasnovan tako, da se sprednji
pokrov sname, če poskušate sprednji pokrov
odpreti s silo pod kotom, višjim od 90°. Če se
sprednji pokrov sname, ga vstavite v spoj spre-
dnjega pokrova.
POZOR:
• Pri zapiranju sprednjega pokrova bodite pre-
vidni, da si ne priščipnete prstov.
► Sl.9: 1. Naprava za ustavljanje prahu
2. Hkrati izvlecite oranžno napravo za ustavljanje
prahu in vrečko za prah.
► Sl.10: 1. Naprava za ustavljanje prahu
► Sl.11
3. Odložite napravo za ustavljanje prahu v prazen
čistilnik.
Vrečka za prah in papirnati element
Namestite vrečko za prah ali papirnati element pred
uporabo čistilnika.
Kadar nameščate vrečko za prah ali papirnati element,
uporabite napravo za ustavljanje prahu.
Vrečko za prah lahko uporabite večkrat, če jo očistite.
Papirnati element je za enkratno uporabo. Zavrzite
celoten papirnati element, ko je poln, ne da bi ga
izpraznili.
Nameščanje vrečke za prah
► Sl.12: 1. Zgornja stran naprave za ustavljanje prahu
2. Spodnja stran naprave za ustavljanje
prahu
Kadar nameščate vrečko za prah, uporabite napravo za
ustavljanje prahu. Pazite, da ne boste pomotoma zame-
njali zgornje in spodnje strani, saj sta različni.
► Sl.13: 1. Naprava za ustavljanje prahu 2. Utor
3. Vrečka za prah
1. Vstavite izboklino vrečke za prah v utor v napravi
za ustavljanje prahu, kot je prikazano na sliki.
► Sl.14: 1. Spodnji utor
2. Spodnja in zgornja stran vrečke za prah se ne
razlikujeta. Izboklino lahko vstavite na katero koli
stran v spodnji utor naprave za ustavljanje prahu.
► Sl.15
3. Okvir vrečke za prah mora prekrivati okvir naprave
za ustavljanje prahu.
► Sl.16: 1. Odprtina čistilnika
4. Namestite napravo za ustavljanje prahu in vrečko
za prah skupaj v odprtino čistilnika v isti smeri,
kot kaže puščica na napravi za ustavljanje prahu.
Vstavite ju do konca v reže v odprtini čistilnika.
► Sl.17
5. Namestite celoten platneni del vrečke za prah v
orodje.
► Sl.18: 1. Sprednji pokrov
6. Popolnoma zaprite sprednji pokrov.
Nameščanje papirnatega elementa
► Sl.19
1. Odvijte vhodni del papirnatega elementa, preden
ga namestite na napravo za ustavljanje prahu.
► Sl.20: 1. Zgornja stran naprave za ustavljanje prahu
2. Spodnja stran naprave za ustavljanje
prahu
Tudi pri nameščanju papirnatega elementa uporabite
napravo za ustavljanje prahu. Pazite, da ne boste
pomotoma zamenjali zgornje in spodnje strani, saj sta
različni.
► Sl.21: 1. Naprava za ustavljanje prahu 2. Papirnati
element 3. Utor
2. Vstavite izboklino papirnatega elementa v utor v
napravi za ustavljanje prahu, kot je prikazano na
sliki.
► Sl.22: 1. Spodnji utor
3. Zgornja in spodnja stran papirnatega elementa se
ne razlikujeta. Izboklino lahko vstavite na katero
koli stran v spodnji utor naprave za ustavljanje
prahu.
► Sl.23
4. Okvir papirnatega elementa mora prekrivati okvir
naprave za ustavljanje prahu.
► Sl.24: 1. Odprtina čistilnika

17 SLOVENŠČINA
5. Napravo za ustavljanje prahu in papirnati element
namestite skupaj v odprtino čistilnika v isti smeri,
kot kaže puščica na napravi za ustavljanje prahu.
Vstavite ju do konca v reže v odprtini čistilnika.
► Sl.25
6. Namestite celoten vsebnik papirnatega elementa
v orodje.
7. Popolnoma zaprite sprednji pokrov.
POZOR:
• Če pozabite namestiti vrečko za prah ali posodo
za prah, ne vstavite naprave za ustavljanje
prahu skupaj z vrečko za prah ali s posodo za
prah do konca v reže ali uporabite predrto oz.
raztrgano vrečko, lahko prah prodre v motor. To
lahko povzroči okvaro motorja.
• Kadar nameščate papirnati element, ne pregi-
bajte kartona pri odprtini.
• Naprave za ustavljanje prahu ne zavrzite, saj
je namenjena za večkratno uporabo, kadar
je nameščena vrečka za prah ali papirnati
element.
• Papirnati element za čistilnik je prav tako
pomembna komponenta za vzdrževanje in
učinkovitost delovanja orodja. Zaradi uporabe
neoriginalnih papirnatih elementov lahko pride
do dima ali vžiga.
DELOVANJE
POZOR:
• Za priključitev nastavkov, kot je šoba, jih zavrtite
in vstavite v smeri puščice, da zagotovite trdno
pritrditev med uporabo. Da odklopite priključek,
zavrtite in odstranite tudi v smeri puščice.
► Sl.26
Čiščenje (sesanje)
Šoba
Priključite šobo za čiščenje miz, delovnih miz, pohištva
itd. Namestitev šobe je enostavna.
► Sl.27: 1. Šoba
Šoba + razširitvena palica (ravna cev)
Razširitvena palica se prilega med šobo in čistilnik.
Ta sklop je priročen za čiščenje tal, medtem ko stojite
pokonci.
► Sl.28: 1. Telo čistilnika 2. Razširitvena palica
3. Šoba
Kotna šoba
Namestite kotno šobo za čiščenje kotov in špranj v
avtomobilu ali pohištvu.
► Sl.29: 1. Telo čistilnika 2. Kotna šoba
Kotna šoba + razširitvena palica
(ravna cev)
Ta sklop uporabite v tesnih prostorih, kamor se čistilnik sam
ne prilega, ali na visokih mestih, ki jih težko dosežete.
► Sl.30: 1. Telo čistilnika 2. Razširitvena palica
3. Kotna šoba
Čiščenje brez šobe
Brez šobe lahko sesate prašek in prah.
► Sl.31
VZDRŽEVANJE
POZOR:
• Preden se lotite pregledovanja ali vzdrževa-
nja orodja, se vedno prepričajte, ali je orodje
izklopljeno.
Po uporabi
OPOMBA:
• Če postavite čistilnik ob steno brez kakršne koli
podpore, lahko čistilnik pade in se poškoduje.
► Sl.32
Čiščenje
► Sl.33
Občasno obrišite zunanjost (telo čistilnika) čistilnika z
uporabo krpe, namočene v milnico.
Očistite tudi sesalno odprtino, območje za namestitev
vrečke za prah/papirnatega elementa in napravo za
ustavljanje prahu.
POZOR:
• Nikoli ne uporabljajte bencina, razredčila, alko-
hola ali podobnega. V tem primeru se orodje
lahko razbarva, deformira, lahko pa tudi nasta-
nejo razpoke.
► Sl.34
Operite vrečko za prah v milnici, ko se zamaši s pra-
hom, saj se moč čistilnika zmanjša. Pred uporabo jo
temeljito posušite. Nezadostno posušena vrečka lahko
povzroči slabo sesanje in skrajša življenjsko dobo
motorja.
OPOMBA:
• Papirnati element je namenjen za enkratno
uporabo.
Ko je gobasti lter zamašen s prahom, ga odstranite iz
čistilnika in ga obrišite ali operite v vodi.
Odstranjevanje in nameščanje
gobastega ltra
► Sl.35: 1. Gobasti lter
Če želite odstraniti gobasti lter, najprej odstranite
vrečko za prah ali papirnati element in nato izvlecite
gobasti lter.

18 SLOVENŠČINA
► Sl.36: 1. Vgradna stena
Celoten rob gobastega ltra pritisnite ob vbočen del
predela za namestitev vrečke za prah/papirnatega
elementa.
POZOR:
• Po čiščenju gobastega ltra, ga morate name-
stiti v čistilnik. Če ste ga oprali v vodi, ga pred
namestitvijo posušite. Nezadostno posušen
gobasti lter lahko skrajša življenjsko dobo
motorja.
Stvari, ki jih morate preveriti, preden zaprosite za popravilo
Simptom
Majhna sesalna
moč
Ne deluje
Območje, ki ga je treba pregledati
Ali je akumulatorska baterija iztrošena?
Metoda pritrjevanja
Izpraznite vrečko za prah
ali papirnati element.
Odstranite prah ali operite vrečko za prah.
Zamenjajte papirnati element.
Napolnite akumulatorsko baterijo.
Ali je vrečka za prah ali papirnati
element polna prahu?
Ali je akumulatorska baterija iztrošena?
Ali je vrečka za prah zamašena?
Ali je papirnati element zamašen?
OPOMBA:
• Ne poskušajte sami popravljati čistilnika.
VARNO in ZANESLJIVO delovanje tega izdelka bo zagotovljeno le, če boste popravila, vzdrževanje in nastavitve
prepustili pooblaščenemu servisu za orodja Makita, ki vgrajuje izključno originalne nadomestne dele.
DODATNI PRIBOR
POZOR:
• Ta dodatni pribor ali pripomočki so predvideni
za uporabo s čistilnikom Makita, ki je opisan v
teh navodilih za uporabo. Pri uporabi drugega
pribora ali pripomočkov obstaja nevarnost tele-
snih poškodb. Dodatni pribor ali pripomočke
uporabljajte samo za navedeni namen.
Za več informacij o dodatnem priboru in opremi se
obrnite na najbližji pooblaščeni Makita servis.
• Razširitvena palica (ravna cev)
• Šoba
• Šoba za preprogo
• Krtača za police
• Kotna šoba
• Okrogla krtača
• Gibljiva cev
• Papirnati element
• Originalna akumulator in polnilnik Makita
OPOMBA:
• Nekateri predmeti na seznamu so lahko pri-
loženi orodju kot standardni pribor. Lahko se
razlikuje od države do države.

19 ALBANIAN
ALBANIAN (Udhëzimet origjinale)
PARALAJMËRIM
Kjo pajisje mund të përdoret nga fëmijë të moshës 8 vjeçare e lart
dhe persona me aftësi të kuzuara zike, shqisore ose mendore,
ose që u mungon përvoja dhe njohuria, nëse janë nën mbikëqyrje
apo kanë marrë udhëzime në lidhje me përdorimin e sigurt të
pajisjes dhe kuptimin e rreziqeve të mundshme. Fëmijët nuk duhet
të luajnë me pajisjen. Pastrimi dhe mirëmbajtja nga përdoruesi nuk
duhet të kryhet nga fëmijë pa mbikëqyrje.
SPECIFIKIMET
Modeli DCL142 DCL182 DCL182F
Kapaciteti me një qeskë pluhuri 0,50 L
me një paketë prej letre 0,33 L
Përdorim i vazhdueshëm I lartë Afërsisht 20 min
I ulët Afërsisht 40 min
Gjatësia e përgjithshme 986 mm 1004 mm
Pesha neto 1,3 kg
Tensioni nominal DC 14,4 V DC 18 V
• Për shkak të programit tonë të vazhdueshëm të kërkim-zhvillimit, specikimet e përmendura këtu mund të
ndryshojnë pa njoftim paraprak.
• Specikimet dhe kutia e baterisë mund të ndryshojnë nga njëri shtet në tjetrin.
• Pesha me kutinë e baterisë sipas procedurës EPTA 01.2003
Simbolet
Pjesët në vazhdim tregojnë simbolet e përdorura për pajisjen.
Sigurohuni që merrni vesh kuptimin e tyre përpara përdorimit.
Lexoni manualin e përdorimit.
Cd
Ni-MH
Li-ion
Vetëm për vendet e BE-së
Mos i hidhni pajisjet elektrike ose paketën e
baterisë së bashku me mbeturinat e shtëpisë!
Në përputhje me Direktivën Evropiane
për mbetjet nga pajisjet elektrike dhe
elektronike, për bateritë dhe akumulatorët
dhe mbetjet nga bateritë dhe akumulatorët
dhe implementimin e tyre në përputhje me
legjislacionin kombëtar, pajisjet elektrike,
bateritë dhe paketën(at) e baterisë që kanë
arritur fundin e jetëgjatësisë së tyre duhet
të mblidhen veçmas dhe të dorëzohen në
një objekt riciklimi që nuk dëmton mjedisin.
Përdorimi i synuar
Vegla është synuar për mbledhjen e pluhurit të thatë.
E RËNDËSISHME
UDHËZIMET E SIGURISË
Kur përdorni një pajisje elektrike, duhen zbatuar
masat e kujdesit paraprak, duke përfshirë sa vijon:
LEXONI TË GJITHA UDHËZIMET
PARA PËRDORIMIT TË PAJISJES.
PARALAJMËRIM – Për të pakësuar rrezikun nga
zjarri, goditja elektrike apo lëndimi:
1. Mos e ekspozoni në kohë me shi. Të ruhet në
ambiente të brendshme.
2.
Mos lejoni të përdoret si lodër. Nevojitet vëmendje e
kujdesshme kur përdoret nga ose në afërsi të fëmijëve.
3. Të përdoret vetëm sipas udhëzimeve të këtij
manuali. Përdorni vetëm pjesët shtesë të
rekomanduara nga kompania prodhuese.
4. Mos përdorni bateri të dëmtuar. Nëse pajisja
nuk funksionon siç duhet, është përplasur,
dëmtuar, lënë në ambiente të jashtme ose ka
rënë në ujë, dërgojeni në një qendër shërbimi.
5. Mos e përdorni pajisjen me duar të lagura.
6.
Mos vendosni objekte në pjesët e hapura. Mos
e përdorni me pjesët e hapura të bllokuara;
mbajeni të pastër nga pluhurat, jet, okët dhe
çfarëdo gjë që mund të pengojë rrjedhjen e ajrit.
7. Mbajini okët, veshjet e lirshme, gishtat dhe të
gjitha pjesët e trupit larg nga pjesët e hapura
dhe të lëvizshme.
8.
Fikni të gjitha kontrollet para se të hiqni baterinë.
9.
Tregoni kujdes maksimal kur pastroni në shkallë.

20 ALBANIAN
10.
Mos e përdorni për të mbledhur lëngje të
ndezshme ose të djegshme si benzina apo mos
e përdorni në zona ku mund të gjenden ato.
11. Për ngarkim, përdorni vetëm ngarkuesin e
dhënë nga kompania prodhuese.
12. Mos mblidhni ndonjë gjë që digjet apo është e
ndezur, si cigaret, shkrepëset apo hiri i nxehtë.
13. Mos e përdorni pa vendosur ltrat.
14.
Mos e ngarkoni baterinë në ambiente të jashtme.
Përdorimi dhe kujdesi për veglën me bateri
15. Ngarkojeni vetëm me ngarkuesin e specikuar
nga prodhuesi. Ngarkuesit e përshtatshëm me
një lloj pakete baterish mund të paraqesë rrezik
zjarri kur përdoret me një paketë tjetër baterish.
16. Përdorini veglat elektrike vetëm me paketat
e baterive me synim të përcaktuar. Përdorimi
i paketave të tjera të baterive mund të paraqesë
rrezik lëndimi dhe zjarri.
17. Kur paketa e baterisë nuk përdoret, mbajeni
larg objekteve të tjera metalike, si kapëset e
letrave, monedhat, çelësat, gozhdët, vidat ose
objektet e tjera të vogla metalike që mund të
bëjnë lidhje nga njëri terminal tek tjetri.
18. Në kushte sforcimi mund të dalë lëng
nga bateria; shmangni kontaktin. Nëse
aksidentalisht ndodh kontakt, shpëlani me ujë.
RUAJINI KËTO UDHËZIME.
Kjo pajisje synohet për përdorim shtëpiak.
RREGULLA TË TJERA SIGURIE
1. Lexoni me kujdes këtë manual përdorimi dhe
manualin e përdorimit të ngarkuesit para
përdorimit.
2. Mos i mblidhni materialet në vijim:
— Sendet si cigaret e ndezura apo pluhurin
e shkëndijave/metaleve të krijuar nga
gërryerja/prerja e metaleve
— Materialet e djegshme si gazolina,
holluesi, vajguri apo boja
— Materialet shpërthyese si nitroglicerina
— Materialet e ndezshme si alumini, zinku,
magnezi, titani, fosfori apo celuloidi
— Baltë të njomë, ujë, vaj ose sende të
ngjashme
— Sende të ngurta me cepa të mprehtë
si ashkla druri, metale, gurë, xhama,
gozhdë, gjilpëra ose brisqe
— Pluhur që mpikset si çimento apo toner
— Pluhur përcjellës si metal apo karbon
— Grimca të imëta si pluhur betoni
Veprime të tilla mund të shkaktojnë zjarr,
lëndim dhe/ose dëmtim të pronës.
3. Ndaloni menjëherë punën nëse vini re diçka
jonormale.
4. Nëse pastruesi ju rrëzohet ose goditet,
kontrollojeni me kujdes për plasaritje ose
dëmtim para përdorimit.
5.
Mos e afroni me sobat apo burime nxehtësie të tjera.
6. Mos e bllokoni vrimën e hyrjes së ajrit apo
vrimat e ventilimit.
RUAJINI KËTO UDHËZIME.
Udhëzime të rëndësishme rreth
sigurisë për kutinë e baterisë
1. Përpara se ta përdorni kutinë e baterisë, lexoni
të gjitha udhëzimet dhe shënimet e masave
parandaluese te (1) ngarkuesi i baterisë, (2)
bateria dhe (3) produkti që përdor baterinë.
2. Mos e hiqni kutinë e baterisë.
3. Nëse koha e përdorimit është shkurtuar jashtë
mase, ndalojeni punën menjëherë. Kjo mund
të rezultojë në rrezik mbinxehjeje, djegie të
mundshme, madje edhe shpërthim.
4. Nëse ju futen elektrolite në sy, shpëlajini
sytë me ujë të pastër dhe kërkoni ndihmë
mjekësore menjëherë. Kjo gjë mund të
rezultojë në humbje të shikimit.
5. Mos bëni lidhje të shkurtër me kutinë e
baterisë:
(1) Mos i prekni terminalet me materiale
përcjellëse.
(2) Shmangni ruajtjen e kutisë së baterisë
në një kuti me objekte të tjera metalike, si
gozhdë, monedha etj.
(3) Mos e ekspozoni kutinë e baterisë në ujë
ose shi.
Qarku i shkurtër i baterisë mund të shkaktojë
qarkullim të madh të rrymës elektrike,
mbinxehje, djegie të mundshme dhe madje
prishje.
6. Mos e ruani pajisjen dhe kutinë e baterisë
në vende ku temperatura mund të arrijë ose
tejkalojë 50 °C.
7. Mos e digjni kutinë e baterisë, edhe nëse
është shumë e dëmtuar ose është konsumuar
plotësisht. Kutia e baterisë mund të shpërthejë
në zjarr.
8. Bëni kujdes që të mos e rrëzoni ose ta godisni
baterinë.
9. Mos përdorni bateri të dëmtuar.
10. Bateritë e përfshira të litiumit, u nënshtrohen
kërkesave të legjislacionit për mallrat e
rrezikshme.
Për transport tregtar p.sh. nga palë të treta,
agjentë të ndërmjetëm, duhet të ndiqen kërkesa
specike mbi paketimin dhe etiketimin.
Për përgatitjen e artikullit për transport, është i
nevojshëm konsultimi i një eksperti për materiale
të rrezikshme. Ju lutemi, ndiqni gjithashtu
rregulloret me gjasë më të detajuara vendore.
Mbuloni me ngjitëse ose maskoni kontaktet e
zhveshura dhe paketojeni baterinë në mënyrë të
tillë që të mos lëvizë në paketim.
11. Zbatoni rregulloret lokale rreth asgjësimit të
baterisë.
RUAJINI KËTO UDHËZIME.
KUJDES: Përdorni vetëm bateri origjinale
Makita. Përdorimi i baterive jo-origjinale Makita
ose baterive që mund të jenë modikuar, mund
të rezultojë në marrjen akë të baterisë, lëndime
personale apo dëmtime. Kjo do të anulojë gjithashtu
edhe garancinë e Makita-s për veglën e Makita-s dhe
ngarkuesin.
Other manuals for DCL142
15
This manual suits for next models
3
Table of contents
Languages:
Other Makita Vacuum Cleaner manuals

Makita
Makita VC005GL User manual

Makita
Makita DCL501Z User manual

Makita
Makita DVC265 User manual

Makita
Makita DCL142 User manual

Makita
Makita DVC860L User manual

Makita
Makita VC011G User manual

Makita
Makita CL183D Manual

Makita
Makita DVC863L User manual

Makita
Makita DVC862L User manual

Makita
Makita DVC864L User manual

Makita
Makita DVC260 User manual

Makita
Makita VC009G User manual

Makita
Makita DVC860L User manual

Makita
Makita DVC260 User manual

Makita
Makita GCV05 User manual

Makita
Makita VC001GL User manual

Makita
Makita DCL281F User manual

Makita
Makita XLC02RB1W User manual

Makita
Makita VC2010L User manual

Makita
Makita DVC560 User manual