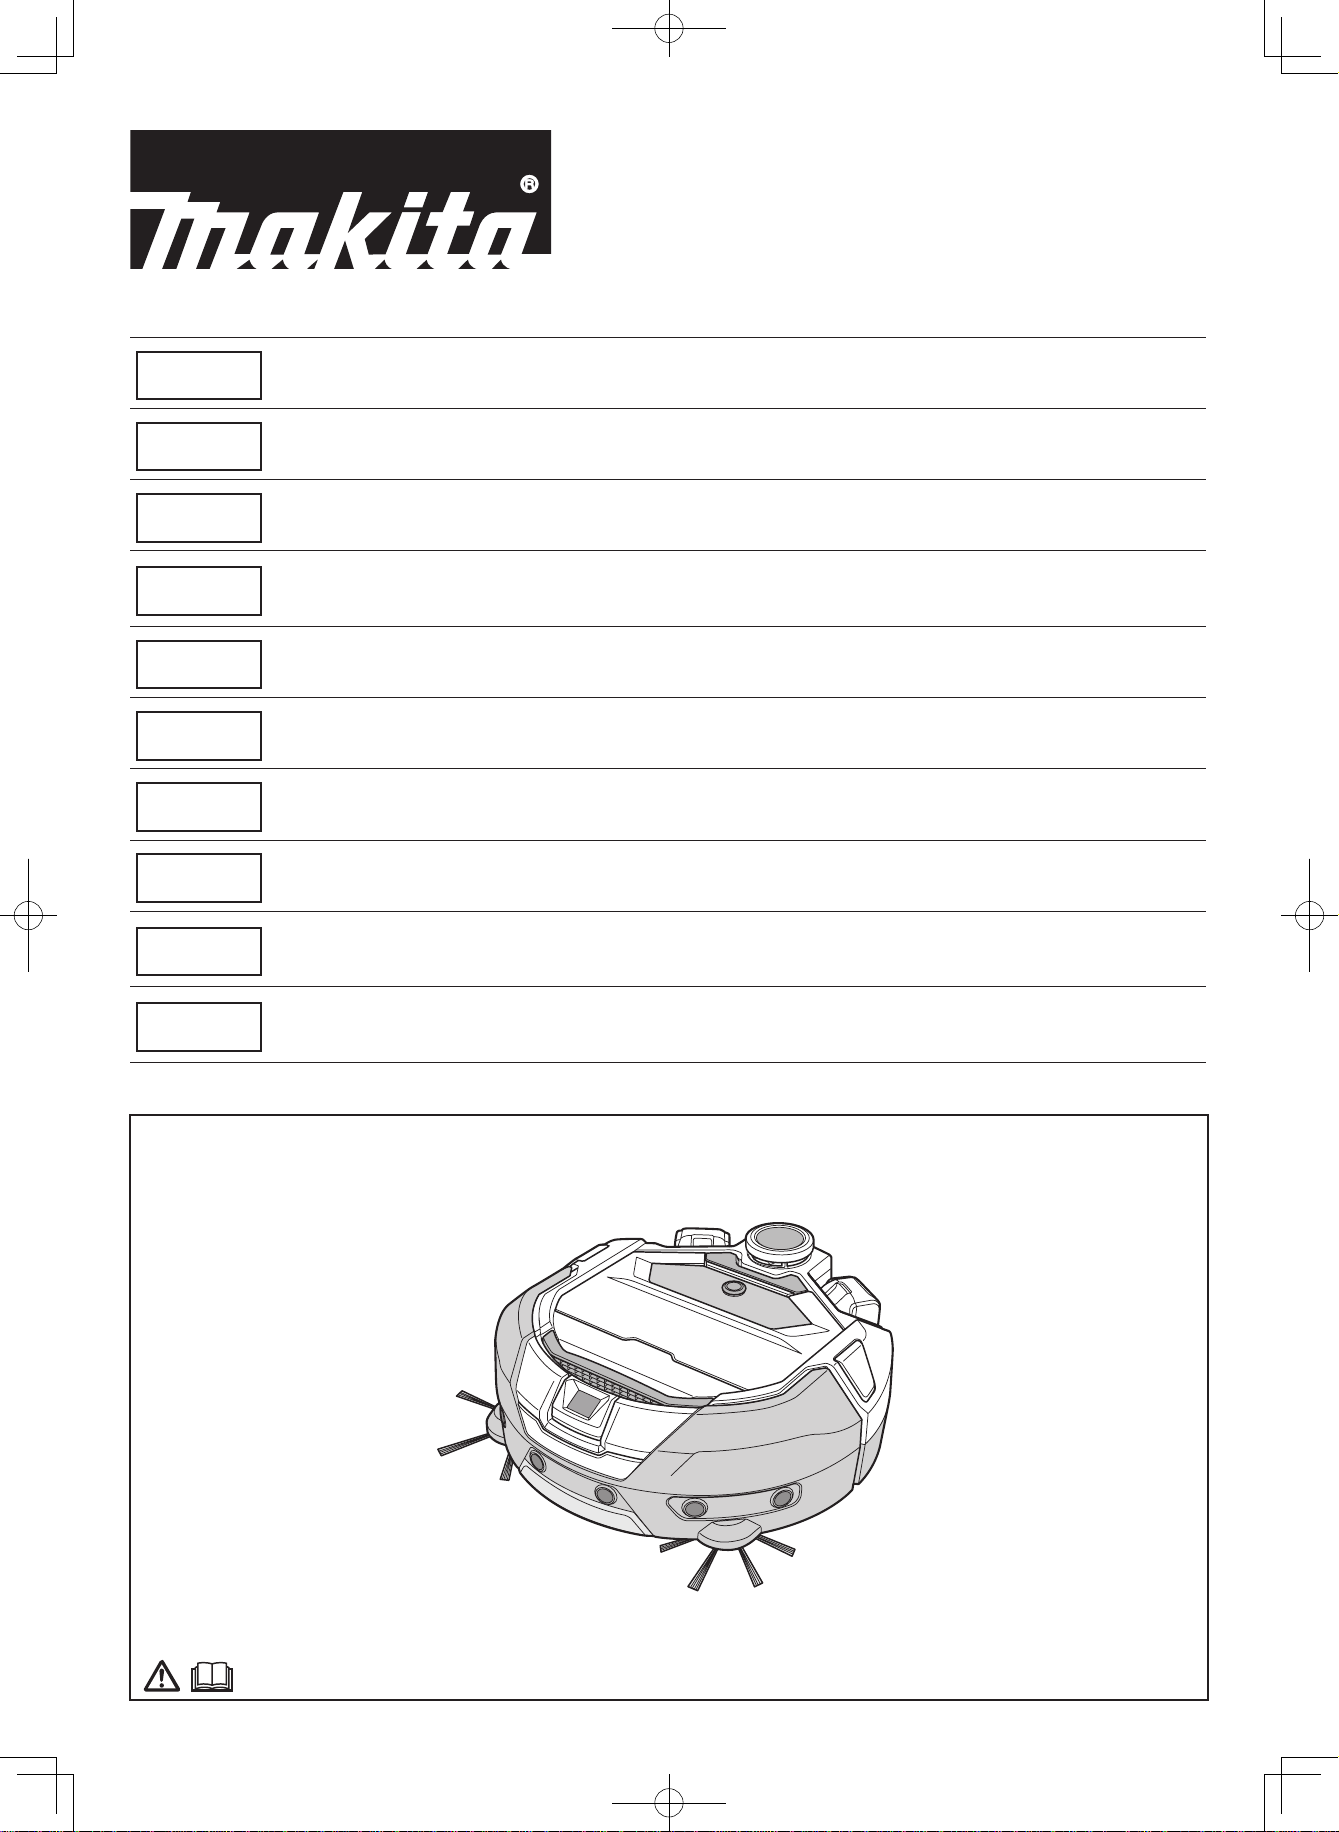
Makita DRC300 User manual

DRC300
EN Robotic Cleaner INSTRUCTION MANUAL
SL Robotski sesalnik NAVODILA ZA UPORABO
SQ Fshesë pastruese robot MANUALI I PËRDORIMIT
BG Робот за почистване РЪКОВОДСТВО ЗА
ЕКСПЛОАТАЦИЯ
HR Robotski čistač PRIRUČNIK S UPUTAMA
МК Роботски чистач УПАТСТВО ЗА УПОТРЕБА
SR Роботски усисивач УПУТСТВО ЗА УПОТРЕБУ
RO Aspirator robot MANUAL DE INSTRUCŢIUNI
UK Робот-прибиральник ІНСТРУКЦІЯ З ЕКСПЛУАТАЦІЇ
RU Робот-пылесос РУКОВОДСТВО ПО
ЭКСПЛУАТАЦИИ


ENGLISH

1 ENGLISH
• Warning 2
• About the Robotic Cleaner 2
• Major features 2
• Applicable battery cartridge and charger 2
• Intended use 3
• Symbols 3
• EC Declaration of Conformity 3
• Safety precautions 3
• Safety precautions for use of the robotic cleaner 4
• Precautions regarding radio waves 7
• Respective trademarks and registered trademarks 7
• Names of parts 8
• Standard accessories 9
• Prepare Before Cleaning 10
• About carrying the robotic cleaner 10
• About cleaning by the robotic cleaner 10
• To prevent the robotic cleaner from falling 10
• Tidying up a place to clean 11
• Preparation For Use 13
• Attaching the side brushes 13
• Unpacking the dust box 13
• Installing batteries in the remote control 13
• Indicating the remaining battery capacity 14
• Installing and removing batteries (sold separately) 14
• Turning the power on/o 15
• What to set up before cleaning 15
• How To Use 16
• Cleaning 16
• Cleaning a room with mapping 16
• Deleting mapping information 17
• Suspending or ending cleaning 18
• Switching the vacuum fan on/o 18
• Using the location beacon function 18
• Using the ON timer/OFF timer 18
• Controlling the cleaning range 20
• How to attach, remove, and use separately sold items 21
• How to dispose of garbage 21
• Setting the Robotic Cleaner 22
• Setting the time of day 22
• Setting up WiFi® (robotic cleaner and smartphone) 22
• Making a sound setting 22
• Resetting the settings 23
• Care 24
• Maintenance 24
• About repair 27
• Notication and Error Indication 28
• Canceling a notication and error indication 28
• Notication of a need of care, etc. 28
• Error notication 28
• Troubleshooting 29
• Storage 32
• Optional Accessories 32
• Smartphone App (For the DRC300) 33
• Table of contents 33
• What you can do with the app 33
• How to install the app 33
• Home screen 34
• Cleaning with the app 34
• Checking the history of cleaning 36
• Adding, changing, or deleting mapping information 38
• Changing and checking settings 41
• Error message/dialogue 44
• Appendix 45
• Notice Regarding Open Source Software 45
• For European countries 45
Table of Contents
ENGLISH (Original instructions)

2 ENGLISH
Warning
This appliance can be used by children aged from 8years and above and persons with reduced
physical, sensory or mental capabilities or lack of experience and knowledge if they have been given
supervision or instruction concerning use of the appliance in a safe way and understand the hazards
involved. Children shall not play with the appliance. Cleaning and user maintenance shall not be
made by children without supervision.
About the Robotic Cleaner
Major features
Major feature Model:DRC300
Voltage D.C. 18 V
Continuous run time*1 *2 Approx. 240 minutes
Dust collection volume 3.0 L
Dimensions 500 mm (L) × 500 mm (W) × 204 mm (H)
Weight*2 10.6 kg
Wireless communication Communication system 1. Robotic cleanertoremote control :Bluetooth
2. Robotic cleanertosmartphone: WiFi® (SoftAP)
Estimated communication
distance
1. 20 m or less
2. 10 m or less
Wireless LAN Frequency band 2.4 GHz
Maximum radiofrequency
power
17.48 dBm (EIRP)
Wireless LAN standards IEEE 802.11 b/g/n
Encryption method WPA/WPA2
WPS version Version 2.0
Bluetooth Frequency band 2402.02480.0 MHz
Maximum radiofrequency
power
Remote controller:4 dBm (EIRP)
Transmission range Approximately 10 m
Bluetooth® version 4.2 (Bluetooth low energy)
Laser output Wave length 775800 nm
Output 1 mW or less (IEC 608251:2014 Laser Class 1)
• Please note that the major features, shape, and other characteristics are subject to change for improvement.
•
The LiDAR sensor of this product is a Class 1 laser product as defined by international standard IEC 608251:2014 on the safety of laser products.
*1. When used on smooth ooring such as vinyl oor tiles with the vacuum fan turned on. The run time varies depending on the conditions of the running location, the kind
of the oor, the battery conditions, the room temperature, etc. In addition, the run time can be shorter in lowtemperature environments because of the characteristics of
a lithiumion battery.
*2. When equipped with two BL1860B batteries.
Applicable battery cartridge and charger
Battery cartridge BL1815N / BL1820B / BL1830B / BL1840B / BL1850B / BL1860B
Charger DC18RC / DC18RD / DC18RE / DC18SD / DC18SE / DC18SF / DC18SH
• Some of the battery cartridges and chargers listed above may not be available depending on your region of residence.
WARNING
Only use the battery cartridges and chargers listed above. Use of any other battery cartridges and chargers may cause injury and/or fire.
About cord connected power sources
Cord connected power sources cannot be used for this product. If used, they may cause injury or an accident.

3 ENGLISH
Intended use
This product is a robot vacuum cleaner intended for cleaning indoor floors.
Some operations and settings can be performed with the remote control and the
dedicated app.
Symbols
The followings show the symbols which may be used for the equipment. Be sure
that you understand their meaning before use.
Read the instruction manual.
Take particular care and attention.
Ni-MH
Li-ion
Only for EU countries
Due to the presence of hazardous components in the
equipment, waste electrical and electronic equipment,
accumulators and batteries may have anegative impact on
the environment and human health.
Do not dispose of electrical and electronic appliances or
batteries with household waste!
In accordance with the European Directive on waste
electrical and electronic equipment and on accumulators and
batteries and waste accumulators and batteries, as well as
their adaptation to national law, waste electrical equipment,
batteries and accumulators should be stored separately
and delivered to aseparate collection point for municipal
waste, operating in accordance with the regulations on
environmental protection.
This is indicated by the symbol of the crossedout wheeled
bin placed on the equipment.
Do not step or put objects on the robotic cleaner.
Do not use the robotic cleaner near an open flame or
flammable and/or dangerous materials.
Clean the cliff sensors on the bottom face if they are dirty or
wet.
EC Declaration of Conformity
For European countries only
The EC declaration of conformity is included as Annex A to this instruction manual.
Safety precautions
About the meaning of
WARNING
,
CAUTION
, and
NOTICE
in
precautions
Considerations for using this product are classified into WARNING ,
CAUTION , and NOTICE .
Their respective meanings are as follows.
WARNING :A precaution to indicate a risk of death or serious injury
of the user when the product is handled improperly.
CAUTION :Aprecaution to indicate arisk of injury of the user
or arisk of property damage when the product is
handled improperly. Note that amatter described
as CAUTION may possibly lead to serious
consequences depending on the situation.
Be sure to observe these precautions as all of them are
important for safety.
NOTICE :Important precautions for handling of the product and its
accessories.
• Be sure to observe the “Safety precautions” in order to prevent an accident
such as fire, electric shock, and injury before it happens.
• Before using the product, read all of this “Safety precautions” thoroughly to
ensure proper use of the product.
• After reading it, be sure to place it in safekeeping for use at any time by those
who use the product.
• When lending the product to another person, give it together with the user’s
manual.
•
The following pictorial signs are used to classify and explain things to observe.
Examples of pictorial signs
This pictorial sign indicates a “prohibited” thing, that is, what you must
not do.
This pictorial sign indicates a “mandatory” thing, that is, what you must
always do.
These illustrations are for reference purposes. Note that their design varies
depending on the product.
WARNING
Do not wash the product in water. Do not use this product in a moist or
wet place such as a bathroom.
• Entry of water into the motor can cause a short, heat generation, or
ignition.
• Some components can be washed in water. Refer to “Care” on page 24.
Never disassemble, repair, or modify the product.
• Doing so can cause ignition or abnormal operation, resulting in injury.
Do not let children play with this product or the charger.
• A moment's carelessness can result in serious injury.
Do not use this product outdoors.
Do not use this product in an unstable place such as stairs or a steep
slope.
• This product may tip over or fall, causing injury.
Do not use items other than Makita-specified accessories and separately
sold items.
• Using an item other than the accessories and separately sold items given
in this user’s manual and our catalog may cause an accident or injury.
Do not place this product near flames, heating devices, etc.
• Doing so may cause a short circuit or ignition due to deformation of the
product.
Do not use the product or charge the battery near flammable substances
(gasoline, benzine, thinner, gas, etc.).
• Doing so can cause explosion or fire.
Do not store this product in a place where the temperature can reach
50 °C (122 °F) (metallic box, the inside of a car in summer, etc.).
• Doing so can cause a short circuit or ignition due to deformation of this
product.
• The battery may deteriorate, causing smoking or ignition.
Do not charge in the following conditions, as doing so may cause fire.
• On paper such as corrugated cardboard, cloth such as a cushion, a
carpet, vinyl, etc.
• A charger with air holes is used but the air holes are blocked during
charging. Or, metals or combustible things are inserted into air holes.
• In a dusty place, for example, with cotton dust.
Do not charge in the rain, or remove or insert the power plug or battery
with wet hands.
Do not allow foreign matter such as pieces of metal or water near the
terminal of the charger.
• Doing so may cause electric shock or injury.
Do not use a charger other than the dedicated charger.
• Doing so can cause leakage, heating, or rupture of the battery.
• Do not use the charger for purposes other than charging.
Do not use the charger for purposes other than charging. Do not use the
battery and charger for equipment other than specified by Makita.
Do not abuse the cord of the charger.
• Do not carry the charger while holding the cord or do not yank the plug
cord to disconnect from the power receptacle.
• Keep the cord away from heat, oil, chemicals, and sharp corners.
• Be careful with the place for charging to prevent the cord from being
stepped on, being caught, or being damaged due to excessive force.
Electric shock or a short circuit may result, causing ignition.

4 ENGLISH
WARNING
Do not use if the cord of the charger is damaged or if the power plug is
not firmly inserted.
• Electric shock, a short circuit, or ignition may result.
The battery mounting part of the charger has a charging terminal. Do not
allow foreign matter such as pieces of metal or water near the charging
terminal.
Do not cover the battery and the charger with a cloth or something
during charging.
• Charge the battery in a wellventilated place. Otherwise, heating, rupture,
or ignition may result.
WARNING
Be sure to turn off the power and remove the batteries before care and
inspection to prevent this product from starting accidentally.
When inserting the battery into this product, be careful not to turn on the
power.
• When you install the battery in conditions where the power can possibly
be turned on (for example, when your finger is rested on the start/stop
button), this product may begin to move suddenly, causing an accident.
In the event of an inadvertent drop or collision, carefully check this
product, etc. for damage, cracks, and deformation.
• Damage, cracks, and deformation can be a cause of injury.
Move this product gently to prevent the product from being deformed
and damaged.
• Damage, cracks, and deformation can be a cause of injury.
If this product is not working properly or an abnormal sound is produced
when you use the product, turn off the power immediately and stop using
the product. Then, ask the shop from which you made a purchase or our
sales office to do inspection and repair.
• If you continue to use the product, injury or an accident may result.
Check for damaged parts.
• Before using the product, thoroughly inspect for damage on components
and check that the product works properly and provides predetermined
functionality.
• Check movable parts for proper positioning and tightening, and check
components for damage and proper fitting. Then, check all other areas
that can influence the operation to see if there is any abnormality.
• For replacement and repair of damaged components, follow the user’s
manual. If no description is given in the user’s manual, ask the shop from
which you made a purchase or our sales office to do repair.
Carefully keep this product in good condition.
• For replacement of accessories, follow the user’s manual.
• Periodically inspect the cord of the charger, and if it is damaged, ask the
shop from which you made a purchase or our sales office to do repair.
Electric shock or a short circuit may result, causing ignition.
• When an extension cord is used for charging, inspect it periodically, and
if it is damaged, replace it. Electric shock or a short circuit may result,
causing ignition.
• Always keep the carrying handle dry and clean and do not allow it to come
into contact with oil, grease, etc.
When this product is not used, keep it in proper storage.
• Keep it in a dry, safe place out of the reach of children or in a dry place
that can be locked. An accident may result.
Pull out the charger from a power outlet when it is not used for charging.
• Not doing so can cause electric shock, current leakage, or fire due to
insulation deterioration.
If you notice abnormal heat or other abnormal conditions during
charging, pull out the power plug of the charger immediately to stop
charging.
• If you let charging continue, smoke, ignition, or rupture may result.
CAUTION
Attach accessories securely in accordance with the user's manual.
• If they are not attached securely, it can cause injury, damage, or an
accident.
When carrying this product, always hold its carrying handle.
• Carrying the product while holding other than the carrying handle can
cause failure or injury.
Safety precautions for use of the robotic
cleaner
WARNING
Do not use this product in a high place with no enclosure or in a place
with a narrow width such as stairs.
• Doing so can cause injury or failure due to a fall of this product.
Do not use this product in a place where oil components such as edible
oil are floating, in a place where sprays and chemicals are used, such as
a barber shop, a beauty salon, a cleaning shop, or outdoors.
• Doing so can cause failure.
Do not use this product in a place with a person who cannot operate this
product properly, a young child, or an infant.
• Doing so can cause electric shock, an accident, or injury.
Do not use this product in a place with an animal, etc.
• Doing so can cause electric shock, an accident, or injury.
Do not use this product in a place with many people or with people
coming and going constantly.
• Doing so can cause electric shock, an accident, or injury.
Do not block the exhaust opening and suction opening or put in metals,
flammable foreign objects, etc.
• Doing so can cause electric shock, ignition, or failure.
Do not use this product near an object that may possibly block the
suction opening.
• Doing so can cause electric shock, ignition, or failure.
Do not throw this product into fire or heat it.
• Doing so can cause a short circuit, ignition, liquid leakage, or explosion.
Do not place this product in a high-temperature place, such as near fire
or a space heater, a place exposed to direct sunlight, and the inside of a
car under the blazing sun.
• Doing so can cause a short circuit, ignition, liquid leakage, or explosion.
Do not put objects over this product.
• Doing so can cause overheating, resulting in ignition.
Do not place this product in direct sunlight.
• Doing so may cause incorrect response of the LiDAR sensor and infrared
sensor, resulting in malfunction or failure.
Do not block sensors of this product or put in foreign objects.
• Doing so can cause faulty operation, malfunction, or failure.
Do not affix a sticker or tape on sensors and wheels.
• Doing so can cause malfunction or failure.
Do not sit on this product, place a heavy object on it, or give a strong
shock to it.
• Doing so can cause damage or failure of this product or injury. Pay special
attention when children are nearby.

5 ENGLISH
WARNING
During operation, do not touch drive wheels or put your hand or foot
under this product.
• Doing so can cause injury to a hand, etc. Pay special attention when
children are nearby.
Do not allow the product to be used by a child alone. People who
cannot express their will and people who cannot operate the product
independently should not use this product.
• Doing so can cause electric shock, an accident, or injury.
Do not pour water or a detergent on this product or wash this product
(except the main brush, side brush, dust box, and filter).
• Doing so can cause electric shock, a short circuit, or ignition.
Do not touch the product with wet hands.
• Doing so can cause electric shock.
Do not use magnetic boundary line that is torn or deformed or appears to
have lost its magnetic force.
• Doing so can cause an accident or injury.
Your body parts such as hands and hair and what you are wearing
should not be put in the suction opening and exhaust opening of this
product.
• Doing so can cause injury.
Your body parts such as hands and hair and what you are wearing
should not be allowed to come into contact with a brush that is rotating.
• Doing so may cause injury.
Do not allow this product to suck in the following. Doing so can cause
fire, injury, or motor failure.
Flammable substances
• Oils (kerosene, gasoline, etc.)
• Solvents (benzine, thinner, etc.)
• Burning things such as matches, incense, candles, and hot ash; things
that emit smoke such as cigarettes; things with high temperatures.
• Combustibles such as toner
• Paints
• Grinding sparks, metal dust, etc. that are generated in metal cutting and
grinding .
• Flammable gas (spray, etc.)
Explosive substances
• Nitroglycerin, etc.
• Combustible substances
• Aluminum, magnesium, titanium, zinc, red phosphorus, yellow
phosphorus, celluloid, and other chemical substances; dust, gas, and
vapor thereof
Sharp objects
• Glass, edged tools, wood chips, metal, stones, nails, razors, pushpins,
needles, etc.
Bubbly things such as carpet detergents
Things that solidify and conductive fine powder (metal powder, carbon)
Dehumidifying agents
A large amount of powder (flour, ash, powder in a fire extinguisher, etc.)
Substances that cause symptoms of poisoning
Medicines
Liquid and wet garbage
Excrement and vomit of animals, etc.
Large paper waste, plastic waste, strings
WARNING
Do not use the product in the following conditions, which can be a cause
of fire.
• Large volume of combustibles are drifting.
• The exhaust opening is blocked.
• The dust box and filter are not attached.
• Trash gets caught in the main brush, which is locked.
• There are holes and tears in the filter.
• The battery is not fully inserted.
Do not cause a short circuit between the terminals of the USB power
supply section (for repair).
• Inserting needles or wire into the USB terminal section may result in a
short circuit, causing ignition or emission of smoke.
Do not look directly into the laser light (beam).
• Doing so may cause injury to the eyes.
This product complies with the applicable safety regulations, so do not
modify this product.
• Performing repairs without the knowledge or skill to perform repairs may
cause inadequate performance of the laser, as well as accidents or injury.
Do not use rechargeable products near high-voltage power lines.
• There is a risk of malfunction or failure.
WARNING
Stop using the product if it sometimes fails to operate even though the
power is turned on.
• Not doing so can cause smoking, ignition, or electric shock.
Stop using the product immediately when it is deformed or is abnormally
hot.
• Not doing so can cause smoking, ignition, or electric shock.
Stop using the product when it sometimes stops during operation.
• Not doing so can cause smoking, ignition, or electric shock.
Stop using the product immediately when an abnormal sound is heard
during operation.
• Not doing so can cause smoking, ignition, or electric shock.
Stop using the product immediately when it smells like something is
burning.
• Not doing so can cause smoking, ignition, or electric shock.
Before use and maintenance, move lighted candles, vases, etc. on tables
and shelves.
• Not doing so can cause them to fall due to a shock when hit by this
product, possibly resulting in an accident.
Before use and maintenance, move rubber bands and other objects that
may possibly be dragged by this product.
• Not doing so can cause this product to drag a rubber band, etc. possibly
resulting in an accident.
Before use and maintenance, move equipment and devices with a
controller located on the same level as this product.
• Not doing so can cause this product to hit and press a controller, possibly
resulting in fire, injury, or an accident.
Before maintenance and inspection, be sure to turn off the power of this
product and remove the batteries.
• Not doing so can cause electric shock or injury.
During maintenance, be careful not to get your fingers caught.
• Doing so can cause injury.
If you have an implantable cardiac pacemaker or an implantable
defibrillator, use this product more than 15 cm away from the
implantation site.
• Radio waves may affect the operation of a medical device and can cause
malfunction of the medical device.

6 ENGLISH
WARNING
When you use equipment that emits radio waves in a medical institution,
follow the instructions by the medical institution. In an area where use is
prohibited, turn off the power of this product.
• Not doing so can cause malfunction of medical devices.
CAUTION
During use and maintenance, do not put foreign objects in gaps and
openings.
• Doing so can cause electric shock, fire, or failure of this product.
Do not use this product on a long-pile (exceeds 7 mm) carpet or other
rugs.
• Doing so can cause the side brushes to get caught, resulting in damage
to the carpet and side brushes.
Do not use this product on a delicate rug (mouton, felt, etc.), a delicate
floor (a plain wood floor, a marble floor, etc.), and a freshly waxed floor.
• Doing so can cause damage or scratches. If damage is caused, stop
using the product.
Do not stand or sit on the top surface of this product.
• Doing so can cause this product to move suddenly, resulting in injury such
as falling down.
Do not operate this product for long hours with the suction opening
blocked.
• Doing so can cause deformation or ignition of this product due to
overheating.
Do not put your hand or foot under this product.
• There is a risk that your fingers or toes will get caught, resulting in injury.
Do not continue using this product with the filter being dirty or with dust
accumulated.
• Doing so can cause reduction in suction power.
Do not hold this product with its front facing downward.
• Dust can fall from the suction opening.
CAUTION
To prevent malfunctions, ensure that each sensor is well maintained.
• An incorrect response of a sensor can cause injury or failure due to a
malfunction or a fall of this product.
Make sure that the long tassels of rugs such as a carpet and a mat are
tucked inside.
• The tassels may get caught in the drive wheels and/or main brush,
causing damage to rugs and this product.
When you carry this product, stop the operation first, then turn off the
power. Hold the carrying handle firmly so as not to get your hands
caught.
• Lifting this product inadvertently can cause injury or failure.
Put away cords and strings to ensure that they do not get caught in this
product.
• Not doing so can cause failure or faulty operation due to entanglement of
the power cord.
Before cleaning, move objects that break easily, objects that fall down
easily, and objects that should not be sucked in. Put away long strings
and cords.
• Not doing so can cause damage, scratches, or failure of this product.
CAUTION
Use this product with the filter set correctly. Do not use this product with
the filter removed, set in a wrong position, or torn.
• Doing so can cause failure such as motor burnout.
• Dust may escape and become harmful to health.
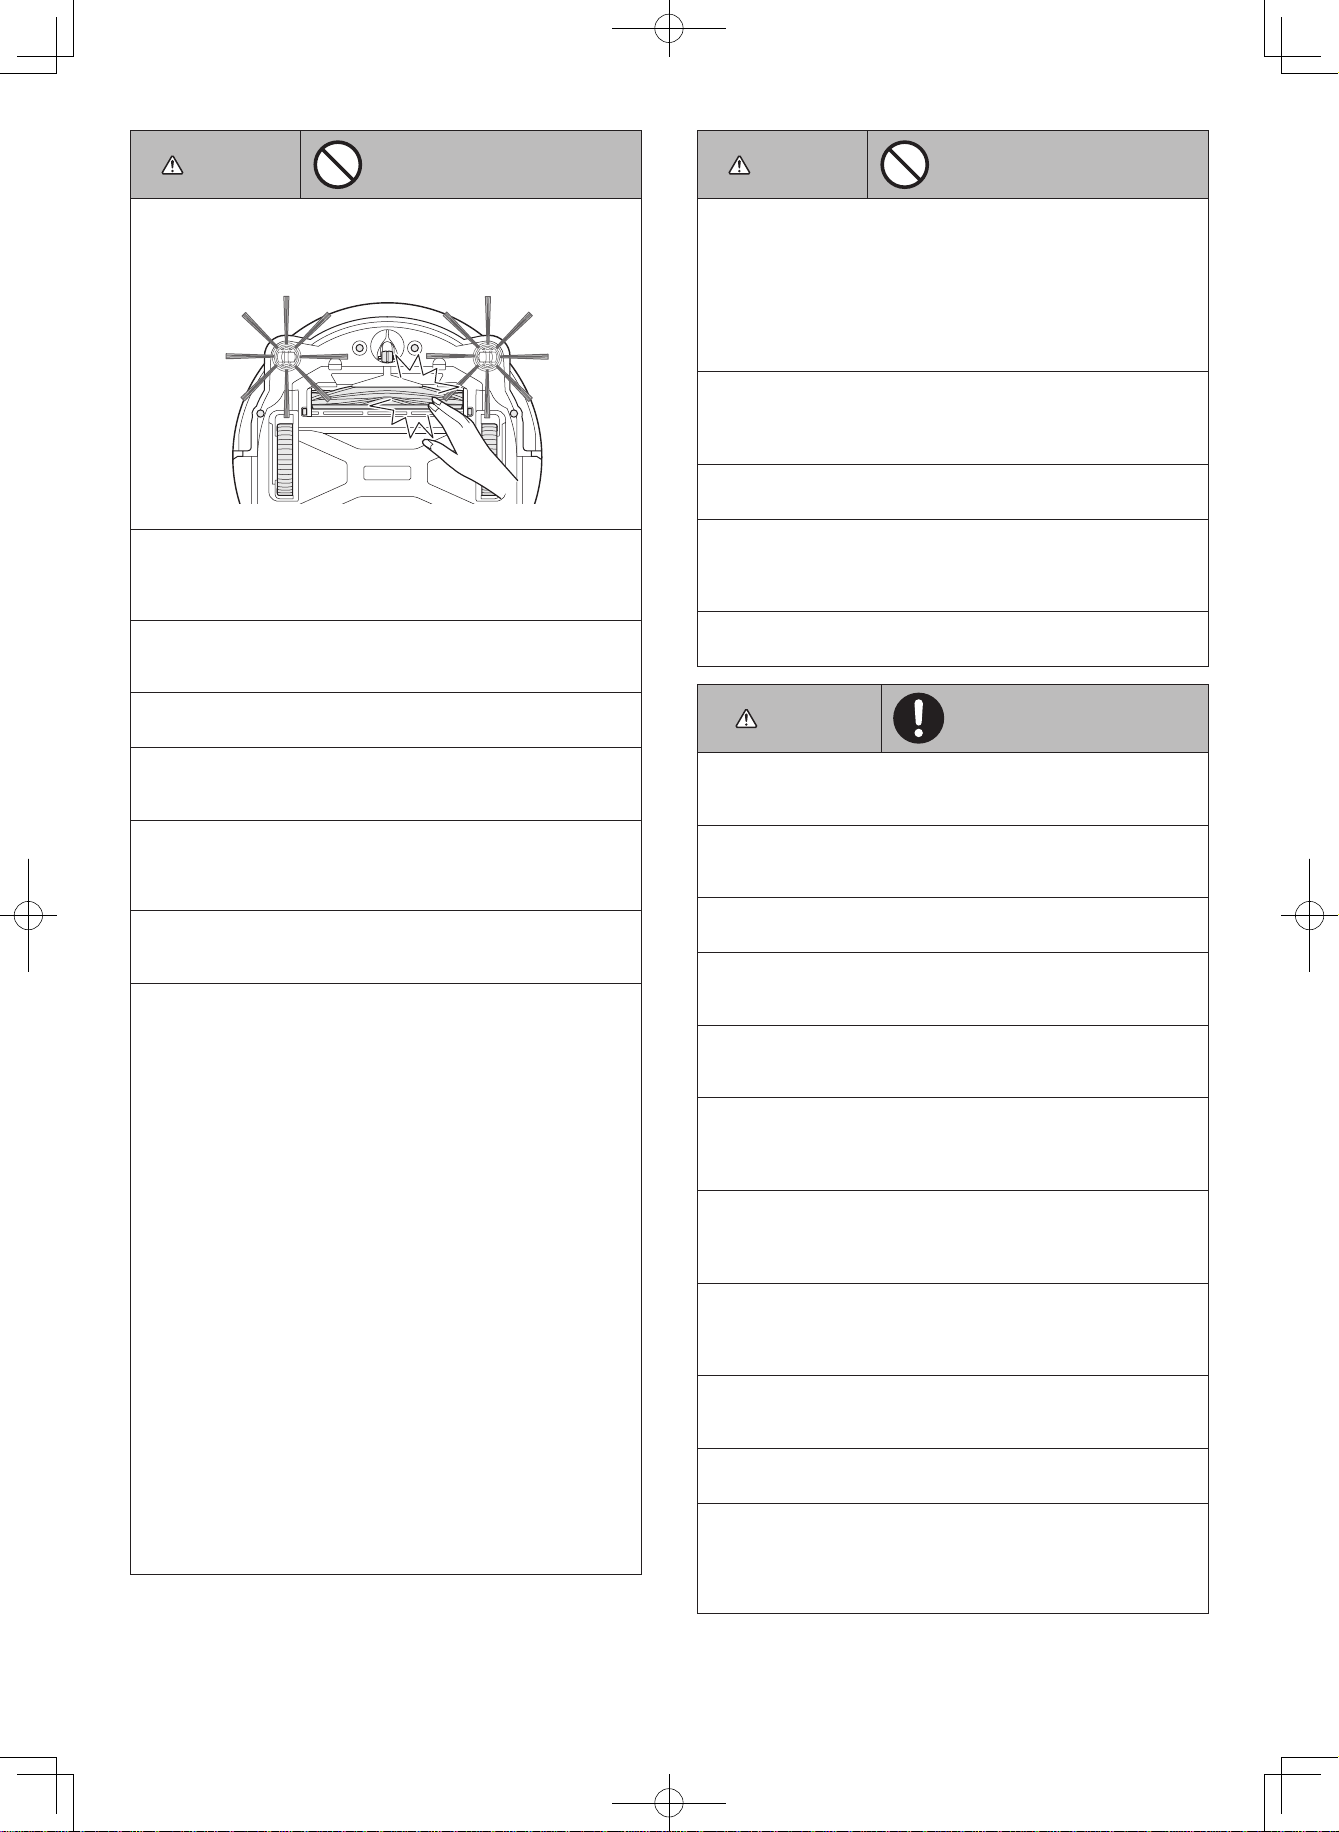
Be careful not to get your fingers caught when opening and closing the
top cover of the body and the top cover of the dust box, attaching the
filter, and connecting and disconnecting the battery.
• There is a risk that your fingers will get caught, resulting in injury.
About handling
1. Use this product indoors. Do not clean aplace with alarge amount of dust
even if it is indoors.
2. Do not clean a floor whose surface is hard and bumpy. Doing so can cause
brushes and wheels to wear out early.
3. After cleaning, remove sand dust stuck on the main brush, side brushes, and
wheels. If they are left uncleaned, the floor surface may be damaged.
4. Always attach the main brush and its cover when using this product.
5.
Do not lubricate the movable parts of the main brush, etc. Doing so can cause
plastic parts to break.
6. For use on adelicate floor surface, it is recommended to replace with the
separately sold items “soft main brush” and “soft side brush.” However,
scratches may be made depending on the floor surface conditions. In such a
case, stop using the product.
7. Do not drag this product. Lift this product when moving it.
8. Do not affix a sticker or tape to sensor parts and wheels, deform the bumper
and wheels, or allow the bumper to be pressed forcefully. Doing so can cause
malfunction.
9. If fine powder (such as plaster, cement, and chalk) is sucked in, care for the
filter, cliff sensor, and LiDAR sensor.
10. Do not allow this product to suck in the following, which can cause scratches
on the inside of this product, clogging of dust, or failure. If any of them is
sucked in accidentally, stop the operation and discard the dust.
(1) Wet waste (liquid and moist waste)
(2) Excrement of animals, etc.
(3) Large volume of sand and powder
(4) Strings
(5) Sharpedged objects (glass, cutting tools, pins, etc.)
(6) Large size of rubbish and large volume of rubbish
(7) Objects with poor air permeability (food plastic wrap, vinyl, wrapping film,
etc.)
11. If the bottom brush of the suction opening, casters, drive wheels, or the roller
part of the main brush cover wears out, stop using this product and consult
the shop from which you made apurchase or our sales office. Using the
robotic cleaner with worn out parts can cause damage to the floor surface.
12. During operation, noise may occur on a TV screen but does not affect the TV
itself.
13. Be careful when operating this product in aplace where asecurity system
works. This product may be wrongly detected as an intruder by the security
system.
14. Do not do the following.
(1) Nonuse for a long period of time with the battery installed
(2) Use with the sensor being dirty or with the filter clogged
(3) Use when you notice a battery error (a strange smell, liquid leakage,
heating, deformation, or other abnormal things)
(4) Use without removing sand dust and other foreign matter stuck on the
main brush, side brushes, and wheels
(5) Use with some components worn out or exhausted
(6) Use without reading the user’s manual
(7) Turning the product upside down and performing maintenance with the
battery installed
(8) Use without doing maintenance on the magnetic boundary line
Battery tool use and care
WARNING
Read all safety warnings and instructions. Failure to follow the warnings
and instructions may result in electric shock, fire and/or serious injury.
1. Recharge only with the charger specified by the manufacturer. A charger that
is suitable for one type of battery cartridge may create a risk of fire when used
with another battery cartridge.
2. Use appliances only with specifically designated battery cartridges. Use of
any other battery cartridges may create a risk of injury and fire.
3. When battery cartridge is not in use, keep it away from other metal objects,
like paper clips, coins, keys, nails, screws or other small metal objects, that
can make aconnection from one terminal to another. Shorting the battery
terminals together may cause burns or a fire.

7 ENGLISH
4. Under abusive conditions, liquid may be ejected from the battery; avoid
contact. If contact accidentally occurs, flush with water. If liquid contacts eyes,
additionally seek medical help. Liquid ejected from the battery may cause
irritation or burns.
5. Do not use a battery cartridge or tool that is damaged or modified. Damaged
or modified batteries may exhibit unpredictable behaviour resulting in fire,
explosion or risk of injury.
6. Do not expose abattery cartridge or tool to fire or excessive temperature.
Exposure to fire or temperature above 130 °C (265 °F) may cause explosion.
7. Follow all charging instructions and do not charge the battery cartridge or
tool outside the temperature range specified in the instructions. Charging
improperly or at temperatures outside the specified range may damage the
battery and increase the risk of fire.
8. Have servicing performed by aqualified repair person using only identical
replacement parts. This will ensure that the safety of the product is
maintained.
9. Do not modify or attempt to repair the appliance or the battery cartridge
except as indicated in the instructions for use and care.
10. Prevent unintentional starting. Ensure the switch is in the off position before
connecting to the battery cartridge, or picking up or carrying the robotic
cleaner. Carrying the robotic cleaner with your finger on the switch or
energizing the robotic cleaner with the switch on may cause accidents.
11. Disconnect the battery cartridge from the robotic cleaner before making any
adjustments, changing accessories, or storing the robotic cleaner. Such
preventive safety measures reduces the risk of starting the robotic cleaner
accidentally.
12. The battery cartridge is not charged sufficiently when factoryshipped. Charge
the battery before use.
13. When not using the battery cartridge, always put the cover on it.
Important safety instructions for battery cartridge
1. Before using battery cartridge, read all instructions and cautionary markings
on (1) battery charger, (2) battery, and (3) product using battery.
2. Do not disassemble or tamper with the battery cartridge. It may result in a fire,
excessive heat, or explosion.
3. If operating time has become excessively shorter, stop operating immediately.
It may result in a risk of overheating, possible burns and even an explosion.
4. If electrolyte gets into your eyes, rinse them out with clear water and seek
medical attention right away. It may result in loss of your eyesight.
5. Do not short the battery cartridge:
(1) Do not touch the terminals with any conductive material.
(2) Avoid storing battery cartridge in a container with other metal objects such
as nails, coins, etc.
(3) Do not expose battery cartridge to water or rain. A battery short can cause
a large current flow, overheating, possible burns and even a breakdown.
6. Do not store and use the tool and battery cartridge in locations where the
temperature may reach or exceed 50 °C (122 °F).
7. Do not incinerate the battery cartridge even if it is severely damaged or is
completely worn out. The battery cartridge can explode in a fire.
8. Do not nail, cut, crush, throw, drop the battery cartridge, or hit against a hard
object to the battery cartridge. Such conduct may result in afire, excessive
heat, or explosion.
9. Do not use a damaged battery.
10. The contained lithiumion batteries are subject to the Dangerous Goods
Legislation requirements. For commercial transports e.g. by third parties,
forwarding agents, special requirement on packaging and labeling must be
observed.
For preparation of the item being shipped, consulting an expert for hazardous
material is required. Please also observe possibly more detailed national
regulations.
Tape or mask off open contacts and pack up the battery in such amanner that
it cannot move around in the packaging.
11. When disposing the battery cartridge, remove it from the tool and dispose of it
in a safe place. Follow your local regulations relating to disposal of battery.
12. Use the batteries only with the products specified by Makita. Installing the
batteries to noncompliant products may result in afire, excessive heat,
explosion, or leak of electrolyte.
13. If the tool is not used for a long period of time, the battery must be removed
from the tool.
14. During and after use, the battery cartridge may take on heat which can cause
burns or low temperature burns. Pay attention to the handling of hot battery
cartridges.
15. Do not touch the terminal of the tool immediately after use as it may get hot
enough to cause burns.
16. Do not allow chips, dust, or soil stuck into the terminals, holes, and grooves
of the battery cartridge. It may result in poor performance or breakdown of the
tool or battery cartridge.
17. Unless the tool supports the use near highvoltage electrical power lines, do
not use the battery cartridge near highvoltage electrical power lines. It may
result in a malfunction or breakdown of the tool or battery cartridge.
18. Keep the battery away from children.
SAVE THESE INSTRUCTIONS.
CAUTION
Only use genuine Makita batteries. Use of non-genuine Makita batteries,
or batteries that have been altered, may result in the battery bursting
causing fires, personal injury and damage. It will also void the Makita
warranty for the Makita tool and charger.
Tips for maintaining maximum battery life
1. Charge the battery cartridge before completely discharged. Always stop tool
operation and charge the battery cartridge when you notice less tool power.
2. Never recharge afully charged battery cartridge. Overcharging shortens the
battery service life.
3. Charge the battery cartridge with room temperature at 10 °C40 °C (50 °F
104 °F). Let a hot battery cartridge cool down before charging it.
4. When not using the battery cartridge, remove it from the tool or the charger.
5. Charge the battery cartridge if you do not use it for a long period (more than
six months).
Precautions regarding radio waves
Do not use this product near electronic devices with highprecision control and
faint signals. (Examples of electronic devices that require caution: Ahearing aid,
a pacemaker, other medical equipment, a fire alarm, an automatic door, and other
automatic control equipment)
Respective trademarks and registered
trademarks
Trademark notice
• Android and Google Play are trademarks or registered trademarks of Google
LLC.
• iPhone is atrademark of Apple Inc., registered in the U.S. and other countries.
• The iPhone trademark is used under license from Aiphone Co., Ltd.
• App Store is a service mark of Apple Inc.
• WiFi is a trademark and registered trademark of WiFi Alliance.
• The Bluetooth®word mark and logos are registered trademarks owned by the
Bluetooth SIG, Inc. and any use of such marks by Makita is under license.
Other trademarks and trade names are those of their respective owners.
• All other trademarks in this document are the property of their respective
owners.
Note that ™ and ® marks are omitted in some of the main text.

8 ENGLISH
Names of parts
Main unit (top view, lateral view, interior)
1
2
3
45
11
10
9
12 7
13
12
8
6
1. Camera sensor
2. Bumper
3. Ultrasonic sensor
4. Carrying handle (See page 10.)
5. Top cover
6. Open button
7. Dust box (See page 13.)
8. Operation panel (display) (See page 9.)
9. Leftbattery insertion slot
10. Rightbattery insertion slot
11. Exhaust opening
12. Position LED
13. LiDAR sensor
Main unit (bottom view)
3
5
7
8
3
7
8
99
7
7 71
2 6
4
9 1
10
1. Magnet sensor for boundary sensing (builtin)
2. Main brush
3. Side brush
4. Bottom brush
5. Main brush cover
6. Suction opening
7. Cliff sensor
8. Drive wheel
9. Caster
10. Earthing line
NOTICE
• The earthing line reduces the electrical charge on the sensor. Do not accidentally pull or cut the earthing line.

9 ENGLISH
Main unit (operation panel (display))
1 2 3567
8
10
9
11
12
13
4
1417181916 15
20
21
22
23
24
1. Smartphone connection lamp (green)
2. ON timer lamp (green) (See page 19.)
3. OFF timer lamp (green) (See page 19.)
4. Time indicator (green)
5. Error lamp (red) (See page 28.)
6. Filter care lamp (red) (See page 28.)
7. Brush error lamp (red) (See page 28.)
8. Sound lamp (green) (See page 22.)
9. Boundarysensing lamp (green) (See page 20.)
10. Vacuum fan lamp (green) (See page 18.)
11. Setting button
12. Confirmation button
13. Next button
14. Up button, down button
15. Rightbattery power lamp (green) (See page 15.)
16. Leftbattery power lamp (green) (See page 15.)
17. Start/stop button (See page 15.)
18. Clean level lamp (white) (See page 17.)
19. OFF timer button (See page 19.)
20. ON timer button (See page 18.)
21. Smartphone connection button
22. Mode switch button (See page 16.)
23. Mode/room number display (See page 16.)
24. Room register lamp (green) (See page 16.)
Remote control
1
2
3
5
6
7
8
4
1. Power OFF button
2. Action buttons
3. Start/stop button
4. Location beacon buzzer/light button
5. Sound ON/OFF button
6. Vacuum fan ON/OFF button
7. Shift button
8. Start point button
Standard accessories
• Side brushes (four)
Two are for replacement. Attach two to the robotic
cleaner. (See page 13.)
• Remote control • AAA dry batteries (two)
Install them in the remote control. (See page 13.)

10 ENGLISH
Prepare Before Cleaning
About carrying the robotic cleaner
CAUTION
When you carry the robotic cleaner, stop the operation, then turn the
power off, and then hold the carrying handle firmly so as not to get your
hand caught.
• Not doing so can cause your hand to be caught in the handle.
Keep proper footing and balance at all times when lifting the robotic
cleaner.
• Not doing so can cause injury or failure.
Do not lift the robotic cleaner carelessly.
• Doing so can cause injury or failure.
Do not hold the robotic cleaner with its front facing downward.
• Dust can fall from the suction opening.
About cleaning by the robotic cleaner
•
The robotic cleaner detects obstacles by its LiDAR sensor and ultrasonic sensor
and runs while avoiding those obstacles. It collects and sucks dust with its side
brushes and main brush. It may fail to recognize an obstacle depending on the
conditions. When it hits an obstacle, the bumper detects the contact and avoid
the obstacle.
• The robotic cleaner can climb over a step of up to about 2.0 cm. If it is less
than 2.0 cm, however, the robotic cleaner sometimes fails to climb over it
depending on the conditions such as the shape of the step.
• On a slope or an uneven place, the undersurface of the robotic cleaner may
be caught and a drive wheel may be lifted, which causes the robotic cleaner
to stop due to an error. If the robotic cleaner stops often, do not allow it to
enter that place. (See page 20.)
• Where there is an obstacle near a wall, the robotic cleaner may run up onto
the wall while trying to avoid the obstacle.
• The LiDAR sensor may not be able to recognize obstacles with the following
characteristics, which may result in inaccurate mapping or bumping into
obstacles.
Highly reflective obstacles such as mirrors
Highly transparent obstacles such as glass
Obstacles made of black, glossy material
Slim obstacles such as the legs of a chair or desk
• When the robotic cleaner enters a narrow space lower than the height of the
robotic cleaner, it can get caught and stuck. In such a case, place a screen or
something.
1
1. Block a gap with a screen or something.
• A black floor, a transparent floor such as a glass floor, or black areas on the
grain of wood flooring may be determined to be a step by the robotic cleaner,
which then tries to avoid it.
• The robotic cleaner may not be able to suck dust in an area around astep
over which the robotic cleaner can climb, a secluded or narrow space that the
robotic cleaner cannot enter, or a place that the side brushes cannot reach.
• The robotic cleaner may kick away a small, hard object such as a small stone.
• The robotic cleaner may climb over astep accidentally if there is an object
which can help it climbing up (for example, aboard or carpet). Keep such
objects away from the steps.
CAUTION
Do not use the robotic cleaner in the following places.
•
Do not use the robotic cleaner on places such as a carpet with a pile height of
more than 7 mm, a rug with piles that fall out easily, and an uneven rug.
On such a rug, the robotic cleaner may stop operating, piles may be caught in
the side brushes, or the rug or the side brushes may be damaged. If the robotic
cleaner cannot run well on a rug other than described above, avoid use on that
rug.
• Do not use the robotic cleaner on a mattress, a blanket, a floor cushion,
etc.
• Do not use the robotic cleaner in a wet area, a toilet, a bathroom, an attic,
outdoors, etc.
• Do not use the robotic cleaner in a wet place, a place that may become
wet, or in a hot, humid place.
To prevent the robotic cleaner from falling
WARNING
Ensure that the robotic cleaner does not fall.
• If it falls, it may cause breakage or injury.
• Do not use the robotic cleaner in a mezzanine floor, a loft, a stairwell, a place
without walls, or a place with a slope of 10° or more.
• In aplace where an accident or other dangerous situation may occur due
to afall, place an object that has aheight of 25 cm or more and can serve
as awall (object that does not move or topple over when hit by the robotic
cleaner).

11 ENGLISH
1
1. Height of 25 cm or higher
• If dirt or water droplets due to condensation are formed on the cliff sensor on
the undersurface of the robotic cleaner, wipe them off with a dry, soft cloth, a
cotton swab, etc.
1
11
1
1. Cliff sensor (five places)
• The robotic cleaner may fail to operate properly when exposed to sunlight
or infrared light from other equipment. Ensure that the robotic cleaner is not
exposed to infrared light from ahalogen heater, aremote control, asensor,
and other equipment and sunlight coming from frosted glass, etc.
• If there is a carpet, a mat, a plate, or other object near a step, the cliff sensor
may fail to recognize it as a step. Move rugs and other objects near steps.
• In such a place that the distance from a wall to a step is less than about 1 m,
the robotic cleaner may fall while moving backward. Do not use the robotic
cleaner where the distance from a wall to a step is less than about 1 m.
1
1. Less than about 1 m
• Where there is adrain cover (grating cover), the cliff sensor may recognize
it as astep and the robotic cleaner may not be able to pass over it. If it is
necessary to pass over it, cover the grating with a plate or something.
• A step of about 3.0 cm or less may not be recognized as astep by the cliff
sensor, resulting in the robotic cleaner climbing down the step while going
straight. Where there is a step of from about 2.0 to 3.0 cm, refrain from using
the robotic cleaner.
• Shut any sliding doors, screens, or windows because the level difference of
their frames or rails may not be recognized as a step by the bumper sensors.
• Do not use the robotic cleaner on a breakable flooring surface such as glass.
Tidying up a place to clean
WARNING
Move objects that may cause damage or an accident when the robotic
cleaner comes into contact with them.
Put away objects that should not be sucked in, objects that hinder the
movement of the robotic cleaner, and objects that are likely to get caught
in the main brush, wheels, and side brushes.
• If you leave an object that will obstruct the movement of the robotic
cleaner during cleaning, it may cause an accident or injury.
• Do not use the robotic cleaner near objects that get hot, such as aheating
apparatus (space heater). Doing so can cause an accident, ignition, or failure.
(Do not use a heating apparatus during operation.)
• Do not use the robotic cleaner in a place equipped with a retractable outlet. A
retractable outlet should be always retracted.

12 ENGLISH
• For walls made of fragile material (e.g., amud wall, adecorated door or
sliding door, or a folding screen), place objects that serve as a wall in front of
them so that they will not be damaged.
• Unstable objects and objects that fall down easily should be moved to another
room.
• Move equipment and devices with acontroller located on the same level as
the robotic cleaner.
• Put away burning candles and easily breakable objects.
• For objects with casters such as atruck and awheelchair, and light chairs
that move easily, lock the casters or put them away.
• Make sure that power cables are laid alongside awall so that the robotic
cleaner will not be caught in them.
• Put away long, thin objects such as a cord and a belt.
• Put away small goods that are easily sucked in and valuable goods.
• Put away objects that block the passage of the robotic cleaner, such as a
work table, a chair, a tool, and a plate.
• If animal excrement or other liquid wastes are sucked in, the robotic cleaner
may malfunction. Clean them up.
• Make sure that the tassels of a mat or other coverings are tucked inside.
• Lift the hem of a curtain, etc. that hangs down on the floor. The hem may get
caught in the main brush, etc.
• Put away thin, slippery rugs, such as a mat and a carpet. The rugs and side
brushes may be damaged.
• Put away thin paper and cloth, plastic bags, etc.
• In aplace leading to outside, close the doors to prevent the robotic cleaner
from going to outside. If the doors cannot be closed, do not use the robotic
cleaner. In addition, close the doors of rooms that the robotic cleaner should
not enter.
• The robotic cleaner may not be able to run properly on aslippery floor
surface. Check the condition of the floor before use.
• Ensure a pathway of 80 cm or more for cleaning.

13 ENGLISH
Preparation For Use
Attaching the side brushes
WARNING
Before attaching the side brushes, make sure that the batteries are
removed from the robotic cleaner.
• If a battery is left inserted in the robotic cleaner, electric shock or injury
may result.
When attaching the side brushes, lay down a mat or something so that the robotic
cleaner and the floor surface will not be damaged.
1. Turn the robotic cleaner upside down.
2. Slide the side brush lock lever to (release mark).
1
2
1. Lock lever2. Side brush
3. Attach the side brush so that the shaft on the underside of the robotic cleaner
fits the shape of the hole of the side brush.
4. Push the lock lever of the side brush toward (lock mark) until it clicks. (Push
in properly until it reaches the point shown in the drawing.)
• After installation, lift the side brush slightly to see that it does not detach from
the robotic cleaner.
• Attach two side brushes, one on the left and one on the right.
Unpacking the dust box
WARNING
When you open the top cover of the robotic cleaner, make sure that the
batteries are removed from the robotic cleaner.
• If a battery is left inserted in the robotic cleaner, electric shock or injury
may result.
1. Press the open button ( ) to open the top cover.
Be careful because the top cover opens quickly.
2. Remove the dust box.
3. Remove the packing material.
4. Put the dust box back in the robotic cleaner and push the top cover to close
until it clicks.
When closing the top cover, be careful not to get your fingers caught.
Installing batteries in the remote control
1. While pressing on the lid of the remote control, slide the lid in the
direction shown by the arrow and remove it.
2. Insert the batteries in the correct direction.

14 ENGLISH
3. Attach the lid.
NOTICE
• Be sure to align the polarity of the batteries correctly.
• Two AAA dry batteries are required. The two batteries should be new and of
the same type.
• Take out the batteries when you do not use them for a long period of time in
order to prevent failure due to liquid leakage and rupture.
• If the solution in a battery gets into your eyes or contacts your skin or clothing,
wash it away immediately with clean water.
• Do not subject the remote control to shocks or allow it to get wet with water.
Do not place it in aplace under direct sunlight or near aspace heater, etc.
Doing so can cause failure.
Indicating the remaining battery capacity
Only for battery cartridges with the indicator
1
2
1. Indicator lamps 2. Check button
Press the check button on the battery cartridge to indicate the remaining battery
capacity. The indicator lamps light up for a few seconds.
Indicator lamps Remaining capacity
Lighted Off Blinking
75 % to 100 %
50%to75%
25%to50%
0%to25%
Charge the battery.
The battery may have
malfunctioned.
NOTICE
• Depending on the conditions of use and the ambient temperature, the
indication may differ slightly from the actual capacity.
• The first (far left) indicator lamp will blink when the battery protection system
works.
Installing and removing batteries (sold
separately)
• The robotic cleaner works even with only one battery.
• With two batteries, it can be run for a long period of time.
How to install
WARNING
A battery should be securely inserted as far as it will go. When the red
part in the upper section of the button is visible, it means that locking is
not complete. Insert a battery fully until the red part becomes invisible.
• If the insertion is not sufficient, the battery may come out, causing an
accident or failure.
Do not install the battery cartridge forcibly.
• If the cartridge does not slide in easily, it is not being inserted correctly.
Hold the tool and the battery cartridge firmly when installing the battery
cartridge.
Insert a battery securely along the groove of the robotic cleaner as far as it will go.
As the battery is locked completely, it clicks.
NOTICE
When installing a battery, be careful not to get your fingers caught in between the
robotic cleaner and the battery.
How to remove
WARNING
When you remove a battery, be sure that the power of the robotic cleaner
is off. Do not remove a battery when the robotic cleaner is in the stand-
by state. (See “Turning the power on/off” on page 15.)
• Removing a battery with the power on can cause failure.
Hold the tool and the battery cartridge firmly when removing the battery
cartridge.
Lift the battery while operating the button of the battery.

15 ENGLISH
Turning the power on/off
• As the power is turned on, the robotic cleaner enters the standby state. In the
standby state, it is possible to do cleaning, change settings, and establish
connection to the app.
•
If the robotic cleaner, remote control, or the app have not been operated for
approximately 30 minutes in the standby state, the power will shut off. (If the
smartphone connection lamp is lit in the above case, the power will not shut off.)
• Turn off the power at the end of operation and at the time of storage.
• When the robotic cleaner is in the sleep state, communication from the app is
not possible.
• When the power of the robotic cleaner is off, the robotic cleaner cannot be
operated from the remote control or the app.
How to turn on the power
1. With the power of the robotic cleaner off, press the start/stop button of the
robotic cleaner.
2. Wait without operating until the time is displayed.
When the robotic cleaner is used for the first time, time setting is necessary
first. Set the time of day. (See page 22.)
1
2
1. [LOAd] flashes in the time indicator, and the four clean level lamps turn
on and off clockwise. The switching speed of the lamps increases as the
startup progresses.
2. After all the lamps are lit, the robotic cleaner startup is complete (standby
state).
How to turn off the power
Hold down the start/stop button of the robotic cleaner, or press the power OFF
button of the remote control.
As the power is turned off completely, the display and lamps of the robotic cleaner
turn off. Therefore, wait without removing the batteries.
When finished using the robotic cleaner, or when storing it, turn off the power and
remove the batteries.
NOTICE
Do not remove the batteries before the power is turned off completely (before the
display and lamps turn off). The saved map information and cleaning history may
be deleted.
How to read the battery power lamp of the robotic
cleaner
State of the battery
power lamp Remaining battery capacity
About 60 % or more
About 20 to 60 %
Less than about 20 %
No remaining capacity
No battery installed
The remaining capacity is arough indication and can vary depending on
the operating conditions, room temperature, battery type, and battery power
consumption, etc.
What to set up before cleaning
Before cleaning, make settings for the robotic cleaner as required.
Switching the vacuum fan on/off
In the case of cleaning of visible large dust only, turning off the vacuum fan allows
the running time to be longer. For how to switch the vacuum fan on/off, refer to
page 18.
Switching the sound setting on/off
When the sound setting of the robotic cleaner is off, the robotic cleaner cleans
silently. (See page 22.)
Setting the boundary-sensing feature
With the boundarysensing feature on, the robotic cleaner recognizes magnetic
boundary line set up on afloor surface. Magnetic boundary line serves as a
boundary line, and the robotic cleaner does not go beyond the magnetic boundary
line; that is, the running area can be limited. For how to set the boundarysensing
feature, refer to page 20.

16 ENGLISH
How To Use
Cleaning
• The robotic cleaner works in three ways:
free cleaning mode, which does not require map registration,
mapping cleaning mode (see “Cleaning a room with mapping” on this page),
which requires room information to be registered for cleaning, and
manual operation using the remote control.
• Free cleaning mode is recommended for cleaning in various rooms or in an
environment that involves frequent, significant layout changes.
• For a room that cannot be adequately lighted at the time of mapping, use free
cleaning mode.
•
If the remaining battery charge of the robotic cleaner gets low, the robotic cleaner
suspends cleaning and returns to the location cleaning started.
Cleaning a room with the remote control
The robotic cleaner can be operated for cleaning by pressing the action buttons of
the remote control.
1
4
23
1. Move forward: Press .
2. Turn left: Press .
3. Turn right: Press .
4. Move backward: While holding down , press .
NOTICE
• Do not operate the robotic cleaner in a narrow or uneven place.
• When operating the robotic cleaner with the remote control, be careful to
avoid collisions or falls.
• If there is an obstacle in front of the moving robotic cleaner, the robotic
cleaner reverses to avoid it.
Cleaning a room without mapping (free cleaning
mode)
1. Place the robotic cleaner beside a wall of the place that you want to clean.
2. Put the robotic cleaner into the standby state. (See page 15.)
3. Press the mode switch button to select [F] (free cleaning mode).
Each time the mode switch button is pressed, the displayed character is
changed in the order “F, 1, 2, 3, 4, 5, F, ...” (each number represents a room
number).
4. As the start/stop button is pressed, the robotic cleaner produces a sound and
starts cleaning. (When the sound setting is on)
5. As the robotic cleaner determines that cleaning is finished, the robotic cleaner
returns back to the place from which it started cleaning.
• When the sound setting is on, completion of cleaning is informed with a
sound. (See page 22.)
• The robotic cleaner calculates its own position using the LiDAR sensor and
camera sensor. For the camera sensor to function fully, it is recommended to
make the room brighter for cleaning. If the room is dark, the robotic cleaner
may not be able to clean some area or may fail to return back to the place
from which it started cleaning.
Cleaning a room with mapping
Registering room information (mapping)
• When the rooms to clean are already determined, registering room
information (registration of mapping information) in the robotic cleaner allows
the cleaning to be more efficient. After completion of mapping, it becomes
possible to check the cleaning result and set prohibited areas from the app.
• The number of rooms that can be registered is five.
• Make the room brighter during mapping.
• Keep away from the robotic cleaner during mapping.
• Do not pick up the robotic cleaner during mapping.
• The mapping fails if there are no obstacles with aheight of 25 cm or more
within a radius of about 11 m of the robotic cleaner. In this case, cleaning in
free cleaning mode is recommended. (See “Cleaning a room without mapping
(free cleaning mode)” on this page)
1. Place the robotic cleaner in the place from which you want the robotic cleaner
to start cleaning.
• This starting location will be a location for cleaning to start.
• It is recommended to set the starting location near awall, acorner of the
room, or other point that is easy to identify.
• Keep a distance of about 30 cm from a wall.
2. Put the robotic cleaner into the standby state. (See page 15.)
3. Select an unmapped room number by pressing the mode switch button.
• [F] is free cleaning mode. (See “Cleaning aroom without mapping (free
cleaning mode)” on this page.)
• Unmapped room numbers will be displayed blinking, and the room register
lamp will be on.
• Mapped room numbers will be displayed lit, and the room register lamp will be
off.
4. As the start/stop button is pressed, the robotic cleaner starts mapping. After
mapping, the robotic cleaner goes back to where mapping began (starting
point of cleaning) and then completes room registration.
• Upon completion of mapping, the robotic cleaner enters the standby state. It
may take time for the robot cleaner to enter the standby state. Do not turn off
the power in this case.
• When the sound setting is on, completion of mapping is informed with a
sound.
• If the mapping is unsuccessful, add the mapping information manually using
the app. (See page 39.)

17 ENGLISH
Cleaning mapped rooms
• In mapping cleaning mode, the robotic cleaner works so that mapped rooms
are cleaned more efficiently.
• The use of mapping cleaning mode requires mapping information to be
registered. (See “Cleaning a room with mapping” on page 16.)
1. Place the robotic cleaner at the starting point for mapping.
Place the robotic cleaner with the same orientation as at the start of mapping
as much as possible. This allows the robotic cleaner to start cleaning more
smoothly.
2. Put the robotic cleaner into the standby state. (See page 15.)
3. Select a mapped room number by pressing the mode switch button.
• [F] is free cleaning mode. (See page 16.)
• Unmapped room numbers will be displayed blinking, and the room register
lamp will be on.
• Mapped room numbers will be displayed lit, and the room register lamp will be
off.
4. Press the start/stop button to begin cleaning.
5. As cleaning ends, the robotic cleaner goes back to where it started cleaning.
•
The clean level lamp indicates what proportion of the whole room has been
cleaned.
• When the sound setting is on, completion of cleaning is informed with a
sound. (See page 22.)
• If the target cleaning area is too wide to clean all at once, we recommend
using the [Continuous Cleaning] setting. (See page 42.)
How to read the clean level lamp
The clean level lamp informs you of the percentage cleaned area in the surface
area of the mapped room.
Clean level lamp status Percentage of completed cleaning area
90 % or more
75 % to less than 90 %
50 % to less than 75 %
25 % to less than 50 %
Deleting mapping information
1. Put the robotic cleaner into the standby state. (See page 15.)
2. Select the room number for which you want to delete mapping information by
pressing the mode switch button.
• Each time the mode switch button is pressed, the room number is changed in
the order “F, 1, 2, 3, 4, 5, F, ...” (For [F], deletion of mapping information is not
possible since [F] is free cleaning mode.)
•
A mapped room number will illuminate on the display.
3. When the mode switch button is held down, [dEL] is shown for about 10
seconds in the time indicator.
4. Press the confirmation button while [dEL] is shown.
• If the confirmation button is not pressed while [dEL] is shown, the robotic
cleaner goes back to the standby state.
• When mapping information is deleted, the selected room number will blink
and become unregistered.
Other manuals for DRC300
7
This manual suits for next models
1
Table of contents
Other Makita Vacuum Cleaner manuals

Makita
Makita VC005GL User manual

Makita
Makita 4073D User manual

Makita
Makita XLC02RB1W User manual

Makita
Makita VC4210L User manual

Makita
Makita DVC665 User manual

Makita
Makita DVC860L User manual

Makita
Makita DCL181F User manual

Makita
Makita DVC862L User manual

Makita
Makita DCL280F User manual

Makita
Makita CL183D User manual

Makita
Makita CL117FD User manual

Makita
Makita DVC152L User manual

Makita
Makita DVC861LPTX User manual

Makita
Makita CL102D User manual

Makita
Makita VC008G User manual

Makita
Makita XCV10 User manual

Makita
Makita XLC08 User manual

Makita
Makita DVC261 User manual

Makita
Makita 4013D User manual

Makita
Makita GCV05 User manual