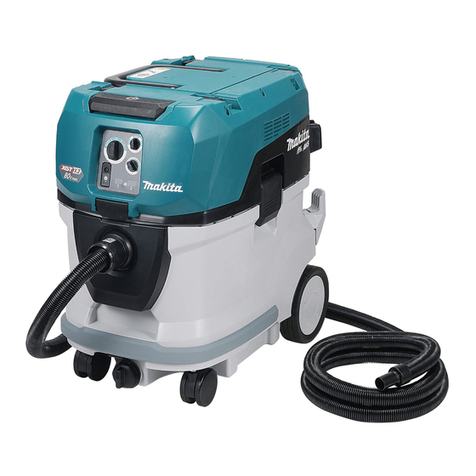
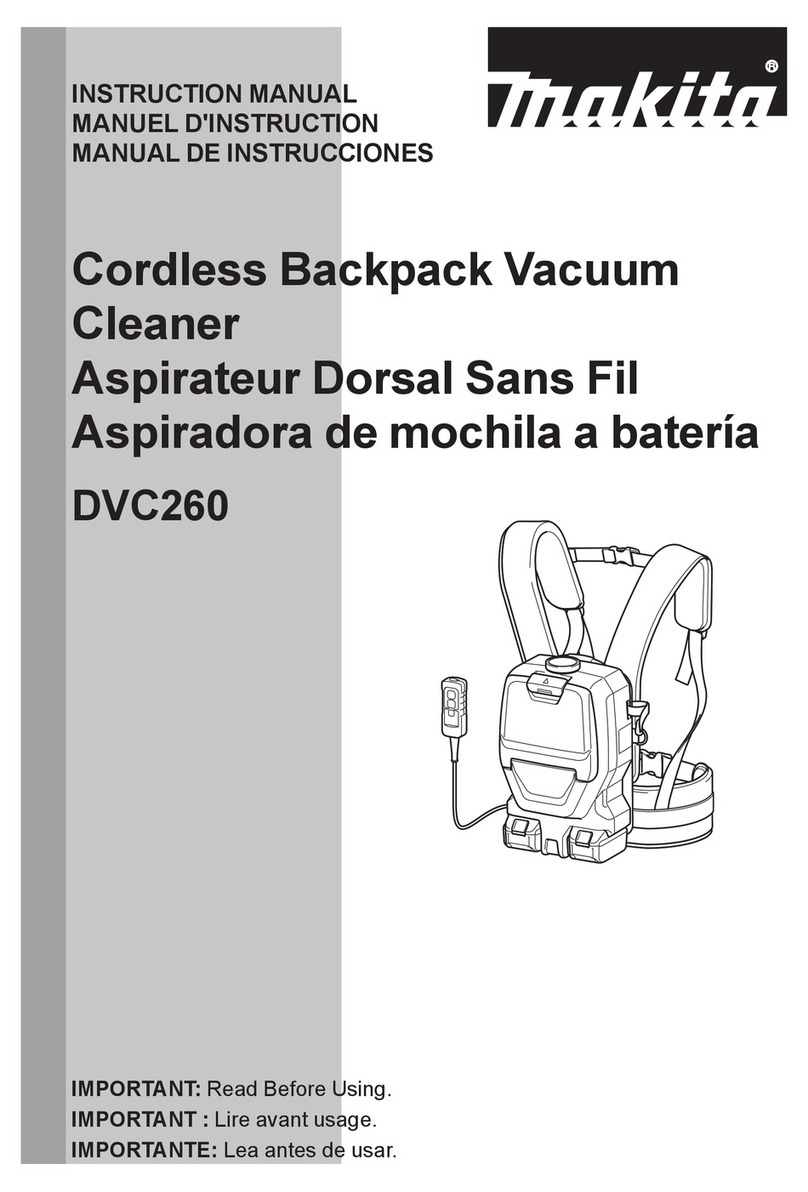
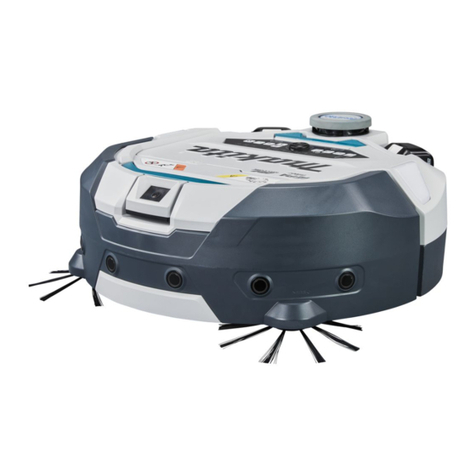
Makita DVC261ZX4 User manual

DVC261
EN Cordless Backpack Vacuum
Cleaner INSTRUCTION MANUAL 8
PL Akumulatorowy odkurzacz
plecakowy INSTRUKCJA OBSŁUGI 16
HU Vezeték nélküli háti porszívó HASZNÁLATI KÉZIKÖNYV 25
SK Plecniakový akumulátorový
vysávač NÁVOD NA OBSLUHU 34
CS Akumulátorový vysavač v
brašně na záda NÁVOD K OBSLUZE 43
UK Ранцевий акумуляторний
пилосос ІНСТРУКЦІЯ З
ЕКСПЛУАТАЦІЇ 51
RO Aspirator fără cablu de tip
rucsac MANUAL DE INSTRUCŢIUNI 60
DE Akku-Rucksackstaubsauger BETRIEBSANLEITUNG 69

1
2
3
Fig.1
1
2
Fig.2
12
1
2
Fig.3
1
2
Fig.4
2
1
Fig.5
1
2
Fig.6
1
Fig.7
2

Fig.8
Fig.9
1
2
3
Fig.10
1
2
Fig.11
Fig.12
1
2
Fig.13
1
234
Fig.14
3

2
1
3
4
Fig.15
1
Fig.16
1
2
3
Fig.17
1
Fig.18
1
2
3
4
4
Fig.19
2
3
1
Fig.20
4

1
2
Fig.21
2
1
1
3
Fig.22
4
1
3
2
Fig.23
1
2
3
Fig.24
1
2
Fig.25
1
2
Fig.26
5

2
1
3
Fig.27
3
2
1
4
1
Fig.28
Fig.29
Fig.30
2
1
Fig.31
1
Fig.32
1
Fig.33
Fig.34
6

1
2
3 4
Fig.35
Fig.36
4
1
3
2
Fig.37
1
2
3
Fig.38
7

8ENGLISH
ENGLISH (Original instructions)
SPECIFICATIONS
Model: DVC261
Capacity Filter bag 2.0 L
Dust bag 1.5 L
Maximum air volume With hose ø28 mm x 1.0 m 2.0 m3/min
With hose ø32 mm x 1.0 m 2.2 m3/min
With hose ø38 mm x 1.5 m 2.3 m3/min
Vacuum 110 hPa
Dimensions (L x W x H)
(excluding the harness)
230 mm x 152 mm x 373 mm
Rated voltage D.C. 36 V
Net weight 3.8 - 4.5 kg
• Duetoourcontinuingprogramofresearchanddevelopment,thespecicationshereinaresubjecttochange
without notice.
• Specicationsmaydifferfromcountrytocountry.
• The weight does not include accessories but battery cartridge(s). The lightest and heaviest combination weight
of the appliance and battery cartridge(s) are shown in the table.
• The length of supplied hose varies depending on the countries.
Applicable battery cartridge and charger
Battery cartridge BL1815N / BL1820 / BL1820B / BL1830 / BL1830B / BL1840 /
BL1840B / BL1850 / BL1850B / BL1860B
Charger DC18RC / DC18RD / DC18RE / DC18SD / DC18SE / DC18SF
• Some of the battery cartridges and chargers listed above may not be available depending on your region of
residence.
WARNING: Only use the battery cartridges and chargers listed above. Use of any other battery cartridges
andchargersmaycauseinjuryand/orre.
Symbols
The followings show the symbols used for the equip-
ment. Be sure that you understand their meaning before
use.
Read instruction manual.
Take particular care and attention.
Ni-MH
Li-ion
Only for EU countries
Do not dispose of electric equipment or
battery pack together with household
waste material! In observance of the
European Directives, on Waste Electric
and Electronic Equipment and Batteries
and Accumulators and Waste Batteries and
Accumulators and their implementation
in accordance with national laws, electric
equipment and batteries and battery
pack(s) that have reached the end of
their life must be collected separately and
returned to an environmentally compatible
recycling facility.
Intended use
The tool is intended for collecting dry dust. The tool
is suitable for commercial use, for example in hotels,
schools,hospitals,factories,shops,ofcesandrental
businesses.
Noise
The typical A-weighted noise level determined accord-
ing to EN60335-2-69, EN60704-2-1:
Sound pressure level (LpA) : 70 dB(A) or less
Uncertainty (K) : 2.5 dB(A)
The noise level under working may exceed 80 dB (A).
NOTE: The declared noise emission value(s) has
been measured in accordance with a standard test
method and may be used for comparing one tool with
another.
NOTE: The declared noise emission value(s)
may also be used in a preliminary assessment of
exposure.

9ENGLISH
WARNING: Wear ear protection.
WARNING:
The noise emission during actual
use of the power tool can differ from the declared
value(s) depending on the ways in which the tool is
used especially what kind of workpiece is processed.
WARNING:
Be sure to identify safety measures
to protect the operator that are based on an estima-
tion of exposure in the actual conditions of use (tak-
ing account of all parts of the operating cycle such
as the times when the tool is switched off and when
it is running idle in addition to the trigger time).
Vibration
The vibration total value (tri-axial vector sum) deter-
mined according to EN60335-2-69:
Work mode: operation without load
Vibration emission (ah) : 2.5 m/s2or less
Uncertainty (K) : 1.5 m/s2
NOTE: The declared vibration total value(s) has been
measured in accordance with a standard test method
and may be used for comparing one tool with another.
NOTE: The declared vibration total value(s) may also
be used in a preliminary assessment of exposure.
WARNING:
The vibration emission during actual
use of the power tool can differ from the declared val-
ue(s) depending on the ways in which the tool is used
especially what kind of workpiece is processed.
WARNING:
Be sure to identify safety measures
to protect the operator that are based on an estima-
tion of exposure in the actual conditions of use (tak-
ing account of all parts of the operating cycle such
as the times when the tool is switched off and when
it is running idle in addition to the trigger time).
EC Declaration of Conformity
For European countries only
The EC declaration of conformity is included as Annex A
to this instruction manual.
SAFETY WARNINGS
Cordless vacuum cleaner safety warnings
WARNING: IMPORTANT! READ CAREFULLY
all safety warnings and all instructions BEFORE
USE . Failure to follow the warnings and instructions
mayresultinelectricshock,reand/orseriousinjury.
1. Before use, make sure that this cleaner must
be used by people who have been adequately
instructed on the use of this cleaner.
2. Do not use the cleaner without the lter.
Replace a damaged lter immediately.
3. Do not attempt to pick up ammable materials,
re works, lighted cigarettes, hot ashes, hot
metal chips, sharp materials such as razors,
needles, broken glass or the like.
4. NEVER USE THE CLEANER IN THE VICINITY
OF GASOLINE, GAS, PAINT, ADHESIVES OR
OTHER HIGHLY EXPLOSIVE SUBSTANCES.
The switch emits sparks when turned ON and
OFF. And so does the motor commutator during
operation. A dangerous explosion may result.
5.
Never vacuum up toxic, carcinogenic, com-
bustible or other hazardous materials such as
asbestos, arsenic, barium, beryllium, lead, pes-
ticides, or other health endangering materials.
6. Never use the cleaner outdoors in the rain.
7. Do not use close to heat sources (stoves, etc.).
8. Do not block cooling vents. These vents per-
mit cooling of the motor. Blockage should be
carefully avoided otherwise the motor will burn
out from lack of ventilation.
9. Keep proper footing and balance at all times.
10. Do not fold, tug or step on the hose.
11.
Stop the cleaner immediately if you notice poor per-
formance or anything abnormal during operation.
12. DISCONNECT THE BATTERIES. When not in
use, before servicing, and when changing
accessories.
13.
Clean and service the cleaner immediately after
each use to keep it in tiptop operating condition.
14. MAINTAIN THE CLEANER WITH CARE. Keep
the cleaner clean for better and safer per-
formance. Follow instructions for changing
accessories. Keep handles dry, clean, and free
from oil and grease.
15. CHECK DAMAGED PARTS. Before further use
of the cleaner, a guard or other part that is
damaged should be carefully checked to deter-
mine that it will operate properly and perform
its intended function. Check for alignment of
moving parts, binding of moving parts, break-
age of parts, mounting, and any other condi-
tions that may affect its operation. A guard or
other part that is damaged should be properly
repaired or replaced by an authorized service
center unless otherwise indicated elsewhere
in this instruction manual. Have defective
switches replaced by authorized service cen-
ter. Don’t use the cleaner if switch does not
turn it on and off.
16. REPLACEMENT PARTS. When servicing, use
only identical replacement parts.
17. STORE IDLE CLEANER. When not in use, the
cleaner should be stored indoors.
18.
Be kind to your cleaner. Rough handling can cause
breakage of even the most sturdily built cleaner.
19. Do not attempt to clean the exterior or interior
with benzine, thinner or cleaning chemicals.
Cracks and discoloration may be caused.
20. Do not use cleaner in an enclosed space where
ammable, explosive or toxic vapors are given
off by oil-base paint, paint-thinner, gasoline,
some mothproong substances, etc., or in
areas where ammable dust is present.
21. Do not operate the cleaner while under the
inuence of drugs or alcohol.
22. As a basic rule of safety, use safety goggles or
safety glasses with side shields.
23. Use a dust mask in dusty work conditions.


10 ENGLISH
24. This machine is not intended for use by per-
sons including children with reduced physical,
sensory or mental capabilities, or lack of expe-
rience and knowledge.
25. Children should be supervised to ensure that
they do not play with the cleaner.
26.
Never handle batteries and cleaner with wet hands.
27. Use extreme caution when cleaning on stairs.
28. Do not use the cleaner as a stool or work
bench. The machine may fall down and may
result in personal injury.
Battery tool use and care
1. Recharge only with the charger specied by
the manufacturer. A charger that is suitable for
onetypeofbatterypackmaycreateariskofre
when used with another battery pack.
2. Use power tools only with specically desig-
nated battery packs. Use of any other battery
packsmaycreateariskofinjuryandre.
3. When battery pack is not in use, keep it away
from other metal objects, like paper clips,
coins, keys, nails, screws or other small metal
objects, that can make a connection from one
terminal to another. Shorting the battery termi-
nalstogethermaycauseburnsorare.
4.
Under abusive conditions, liquid may be ejected
from the battery; avoid contact. If contact acci-
dentally occurs, ush with water. If liquid contacts
eyes, additionally seek medical help.Liquidejected
from the battery may cause irritation or burns.
5. Do not use a battery pack or tool that is dam-
aged or modied.Damagedormodiedbatteries
may exhibit unpredictable behaviour resulting in
re,explosionorriskofinjury.
6. Do not expose a battery pack or tool to re or
excessive temperature.Exposuretoreortem-
perature above 130 °C may cause explosion.
7. Follow all charging instructions and do not
charge the battery pack or tool outside the
temperature range specied in the instruc-
tions. Charging improperly or at temperatures
outsidethespeciedrangemaydamagethe
batteryandincreasetheriskofre.
Service
1. Have your power tool serviced by a qualied
repair person using only identical replacement
parts. This will ensure that the safety of the power
tool is maintained.
2. Follow instruction for lubricating and chang-
ing accessories.
3. Keep handles dry, clean and free from oil and
grease.
Important safety instructions for
battery cartridge
1.
Before using battery cartridge, read all instruc-
tions and cautionary markings on (1) battery
charger, (2) battery, and (3) product using battery.
2. Do not disassemble battery cartridge.
3. If operating time has become excessively
shorter, stop operating immediately. It may
result in a risk of overheating, possible burns
and even an explosion.
4.
If electrolyte gets into your eyes, rinse them out
with clear water and seek medical attention right
away. It may result in loss of your eyesight.
5. Do not short the battery cartridge:
(1) Do not touch the terminals with any con-
ductive material.
(2) Avoid storing battery cartridge in a con-
tainer with other metal objects such as
nails, coins, etc.
(3) Do not expose battery cartridge to water
or rain.
A battery short can cause a large current
ow, overheating, possible burns and even a
breakdown.
6. Do not store the tool and battery cartridge in
locations where the temperature may reach or
exceed 50 °C (122 °F).
7. Do not incinerate the battery cartridge even if
it is severely damaged or is completely worn
out. The battery cartridge can explode in a re.
8. Be careful not to drop or strike battery.
9. Do not use a damaged battery.
10.
The contained lithium-ion batteries are subject to
the Dangerous Goods Legislation requirements.
For commercial transports e.g. by third parties,
forwarding agents, special requirement on pack-
aging and labeling must be observed.
For preparation of the item being shipped, consult-
ing an expert for hazardous material is required.
Please also observe possibly more detailed
national regulations.
Tape or mask off open contacts and pack up the
battery in such a manner that it cannot move
around in the packaging.
11. Follow your local regulations relating to dis-
posal of battery.
12. Use the batteries only with the products
specied by Makita. Installing the batteries to
non-compliantproductsmayresultinare,exces-
sive heat, explosion, or leak of electrolyte.
SAVE THESE INSTRUCTIONS.
CAUTION: Only use genuine Makita batteries.
Use of non-genuine Makita batteries, or batteries that
have been altered, may result in the battery bursting
causingres,personalinjuryanddamage.Itwill
also void the Makita warranty for the Makita tool and
charger.
Tips for maintaining maximum
battery life
1. Charge the battery cartridge before completely
discharged. Always stop tool operation and
charge the battery cartridge when you notice
less tool power.
2. Never recharge a fully charged battery car-
tridge. Overcharging shortens the battery
service life.
3.
Charge the battery cartridge with room tempera-
ture at 10 °C - 40 °C (50 °F - 104 °F). Let a hot
battery cartridge cool down before charging it.
4. Charge the battery cartridge if you do not use
it for a long period (more than six months).

11 ENGLISH
FUNCTIONAL
DESCRIPTION
CAUTION: Always be sure that the tool is
switched off and the battery cartridge is removed
before adjusting or checking function on the tool.
Installing or removing battery
cartridge
CAUTION: Always switch off the tool before
installing or removing of the battery cartridge.
CAUTION: Hold the tool and the battery car-
tridge rmly when installing or removing battery
cartridge. Failure to hold the tool and the battery
cartridgermlymaycausethemtoslipoffyourhands
and result in damage to the tool and battery cartridge
andapersonalinjury.
►Fig.1: 1. Red indicator 2. Button 3. Battery cartridge
To remove the battery cartridge, slide it from the tool
while sliding the button on the front of the cartridge.
To install the battery cartridge, align the tongue on the
battery cartridge with the groove in the housing and slip
it into place. Insert it all the way until it locks in place
with a little click. If you can see the red indicator on the
upper side of the button, it is not locked completely.
CAUTION: Always install the battery cartridge
fully until the red indicator cannot be seen. If not,
itmayaccidentallyfalloutofthetool,causinginjuryto
you or someone around you.
CAUTION: Do not install the battery cartridge
forcibly. If the cartridge does not slide in easily, it is
not being inserted correctly.
Tool / battery protection system
The tool is equipped with a tool/battery protection sys-
tem. This system automatically cuts off power to the
motor to extend tool and battery life. The tool will auto-
matically stop during operation if the tool or battery is
placed under one of the following conditions.
Overload protection
When the tool is operated in a manner that causes it to
draw an abnormally high current, the tool automatically
stops without any indication. In this situation, turn the
tool off and stop the application that caused the tool to
become overloaded. Then turn the tool on to restart.
Overheat protection
When the tool is overheated, the tool stops automatically.
Let the tool cool down before turning the tool on again.
Overdischarge protection
When the battery capacity becomes low, the tool stops
automatically. If the product does not operate even
when the switches are operated, remove the batteries
from the tool and charge the batteries.
Indicating the remaining battery
capacity
Only for battery cartridges with the indicator
►Fig.2: 1. Indicator lamps 2. Check button
Press the check button on the battery cartridge to indi-
cate the remaining battery capacity. The indicator lamps
light up for a few seconds.
Indicator lamps Remaining
capacity
Lighted Off Blinking
75% to 100%
50% to 75%
25% to 50%
0% to 25%
Charge the
battery.
The battery
may have
malfunctioned.
NOTE: Depending on the conditions of use and the
ambient temperature, the indication may differ slightly
from the actual capacity.
Switch box position
The switch box can be hooked on either side of the
lower belt. Arrange the cord so that the switch box
comes to your desired side. To prevent the cord from
being damaged, pass the cord through the hook as
illustrated.
►Fig.3: 1. Hook 2. Cord
Adjusting belts
The tightness of the shoulder belts, upper and lower
beltscanbeadjusted.Putyourarmsthroughtheshoul-
derbeltsrstthenfastenthelowerandupperbelts.
To tighten, pull the end of the strap as illustrated. To
loosen, pull up the end of the fastener.
Lower belt
►Fig.4: 1. Strap 2. Fastener
Shoulder belts
►Fig.5: 1. Strap 2. Fastener
Upper belt
►Fig.6: 1. Strap 2. Fastener
Carrying hook
Always grab the carrying hook when handling the vac-
uum cleaner body.
►Fig.7: 1. Carrying hook

12 ENGLISH
Switch action
You can change the suction power in three steps: nor-
mal (1), high (2), and max (3).
To start vacuuming, press button once. When you
change the suction power, press the button while the
vacuum cleaner is running. The suction power switches
in order normal (1) , high (2) , and max (3).
To turn off the vacuum cleaner, press button.
►Fig.8
NOTE: When you start the vacuum cleaner again, it
will start in the same suction power as the previous
setting.
LED light
LED light is installed in the head of the switch box to
ease the operations in dark places. Press button to
turn the light on. To turn off, press button again.
►Fig.9
CAUTION: Do not look in the light or see the
source of light directly. Never aim the light to
other people's eyes.
NOTE:
The LED light is automatically turned off when the
vacuum cleaner is not operated for more than 10 minutes.
NOTE:
The vacuum cleaner will automatically switches
offandtheLEDlightasheswhenthevacuumcleaneris
overheatedduetothereducedair-owintothemachine
causedbycloggedhose,pipe,lterorotherreasons.
Hose band
Hose band can be used for holding the hose or free nozzle.
To secure the hose to the vacuum cleaner body, pass
the hose band through the slot on the body. You can
attach the hose band on either side.
►Fig.10: 1. Hose band 2. Slot 3. Hose
To hold the free nozzle on the lower belt, pass the hose
band through the loop on the lower belt.
►Fig.11: 1. Hose band 2. Free nozzle
Hose hook
When you suspend the operation, the hook on the bent pipe
assembly can be used for hanging the wand on the lower belt.
►Fig.12
ASSEMBLY
CAUTION: Always be sure that the tool is
switched off and the battery cartridge is removed
before carrying out any work on the tool.
Assembling hose
Insert the hose cuff into the vacuum cleaner body and
turn it clockwise.
►Fig.13: 1. Hose cuff 2. Vacuum cleaner body
Assembling nozzle and wand
Optional accessory
NOTE: The type of the nozzle and wand included in
the product varies depending on countries. In some
countries, the nozzle and wand are not included.
1. Twist and insert the nozzle to the extension wand.
►Fig.14: 1. Extension wand 2. Free nozzle
3. T-shape nozzle 4. T-shape nozzle (slim)
NOTE: By twisting the nozzle while inserting, the noz-
zle can be attached to the extension wand securely.
NOTE: For the model with ø38 mm hose and front
cuff 38, attach the supplied nozzle to the aluminum
bending pipe / aluminum straight pipe.
2. Follow the procedures below, depending on the
type of the extension wand :
NOTE: The slide-type extension wand and the ring-
type extension wand are not compatible with each
other. If you want to change the slide-type extension
wand to the ring-type extension wand or vice versa,
change the bent pipe assembly also.
NOTE: The free nozzle can be attached to the bent
pipe assembly directly.
For the slide-type extension wand
Shoulder the vacuum cleaner body then insert the
extension wand into the bent pipe assembly until it
clicks. To disconnect, extract the extension wand with
pressing the button.
►Fig.15: 1. Bent pipe assembly 2. Button 3. Slide-
type extension wand 4. Free nozzle
Thelengthofthewandcanbeadjusted.
Withpressingtheslidebutton,adjustthewandlength.
The length is locked when release the slide button.
►Fig.16: 1. Slide button
For the ring-type extension wand
Shoulder the vacuum cleaner body then twist and insert
the extension wand into the bent pipe assembly. To
disconnect, twist and extract it.
►Fig.17: 1. Bent pipe assembly 2. Ring-type exten-
sion wand 3. Free nozzle
Thelengthofthewandcanbeadjusted.
Loosentheringonthewandandadjustthewand
length. Tighten the ring at your desired length.
►Fig.18: 1. Ring
For the aluminum bending pipe / aluminum straight
pipe
(Only for the model with ø38 mm hose and front cuff 38)
Shoulder the vacuum cleaner body then twist and insert
the pipe into the front cuff. To disconnect, twist and
extract it.
►Fig.19: 1. Front cuff 38 2. Aluminum bending pipe
3. Aluminum straight pipe 4. Nozzle
For the two aluminum straight pipes
Shoulder the vacuum cleaner body then twist and insert
the pipes. To disconnect, twist and extract it.
►Fig.20: 1. Bent pipe assembly 2. Aluminum straight
pipe 1 3. Aluminum straight pipe 2

13 ENGLISH
Connecting the tool
NOTE: If the bent pipe assembly is attached to the
hose, remove it beforehand.
To connect a tool to the cleaner, the dedicated hose and/or addi-
tional parts are required. Depending on your cleaner model, you
need to replace the hose and/or prepare additional parts.
Refer to the following table for details.
Supplied
hose
diameter
Hose end type Action
ø28 mm
without part
Attach the front cuff.
with snap-on part
Replace the hose end
(snap-on part) with the front
cuff.
The hose end can be removed
by turning it counterclockwise.
ø32 mm
with snap-on part
Replace the hose with the one
for dust extraction (ø28 mm,
with front cuff).
ø38 mm
with snap-on part
Replace the hose with the one
for dust extraction (ø28 mm,
with front cuff).
with front cuff 38
Attachthejoint22-38orthe
front cuff 24.
NOTE:
Always use a suitable front cuff. When using the front
cuff 24, attach it to the front cuff 22 that is connected to the hose.
►Fig.21: 1. Front cuff 22 2. Front cuff 24
When using ø28 mm dust extraction hose
1. Attach the front cuff to the hose for dust extraction.
When connecting the front cuff, make sure that it is
securely screwed on the hose.
2.
Connect the front cuff to the tool's extraction outlet.
►Fig.22: 1. Front cuff 2. Extraction outlet 3. Hose
The front cuff can be detached by turning it counter-
clockwise while holding the hose.
When using ø38 mm hose with front
cuff 38
1. Twistandinsertthejointorthefrontcufftothe
inlet part on the hose, depending on the tool that you
are going to connect.
2.
Connect the front cuff to the tool's extraction outlet.
►Fig.23: 1. Joint 2. Front cuff 3. Extraction outlet
4. Hose
Toremovethejointandthefrontcuff,followtheinstalla-
tion procedures in reverse.
Attaching bent pipe assembly
Optional accessory
NOTE:
You don't need to perform this procedure if your model
comes with the bent pipe assembly attached to the hose.
NOTE:
There are two types of bent pipe assembly; the
one for slide-type extension wand and the one for ring-
type extension wand. If you prepare the bent pipe assem-
bly, choose the one for your desired extension wand type.
The bent pipe assembly is used for connecting the exten-
sion wand or nozzle for vacuum cleaning to this product.
If you want to use this product as the vacuum cleaner,
attach the bent pipe assembly to the hose.
To attach, unscrew the front cuff from the hose and
fasten the sleeve of bent pipe assembly onto the hose.
To remove, loosen the sleeve of bent pipe assembly
from the hose.
►Fig.24: 1. Hose 2. Bent pipe assembly 3. Sleeve
Installing lter bag / dust bag
Optional accessory
CAUTION:
Do not use a damaged lter bag.
Always use the vacuum cleaner with the lter bag
properly installed. Otherwise the vacuumed dust or
particles may be exhausted from the cleaner and
they may cause respiratory disease to the operator.
NOTICE:Whenthelterbagisalreadyfull,replace
with new one. When the dust bag is already full,
emptyit.Continuoususewiththelterbag/dustbag
full results in reduced suction power.
1. Unlock the latch by lifting the bottom side. Push
the grooved area to lift the front latching side. Pull the
latch to open the lid.
►Fig.25: 1. Hook 2. Lid
2. Insertthelterbagintotheslitontheuppersideof
the room as illustrated.
►Fig.26: 1. Slit 2. Filter bag
When using the dust bag, insert the brim of the dust bag
into the slit.
►Fig.27: 1. Slit 2. Brim 3. Dust bag
3.
Aligntheholeofthelterbagwiththehosecuffand
push the cardboard portion to the end. Make sure that the
rubberringonthelterbaggoesovertherimonthehosecuff.
►Fig.28: 1.Rubberringonthelterbag2. Rim on
the hose cuff 3. Cardboard portion of the
lterbag4. Hose cuff

14 ENGLISH
OPERATION
WARNING: Operators shall be adequately
instructed on the use of the vacuum cleaner.
WARNING: This vacuum cleaner is not suit-
able for picking up hazardous dust.
CAUTION: This cleaner is for dry use only.
CAUTION: This cleaner is for indoor use only.
CAUTION: Always insert the battery cartridge
all the way until it locks in place. If you can see the
red indicator on the upper side of the button, it is not
locked completely. Insert it fully until the red indicator
cannot be seen. If not, it may accidentally fall out of
thetool,causinginjurytoyouorsomeonearound
you.
CAUTION: During operation, be conscious
of the vacuum cleaner on your back. You may
lose your balance if the vacuum cleaner body bumps
against a wall or the hose is hooked by an obstacles.
1. Shoulder the vacuum cleaner body and fas-
tenupperandlowerbelts.Adjustthetightnessas
necessary.
►Fig.29
2. Press
button to start vacuuming. If you want
to change the suction power, press button until the
desired suction power is selected. Press button to
stop.
►Fig.30
During the operation, hook the switch box on the D-ring
or the lower belt. The hook can be slanted for lighting
forward when hooked on the lower belt.
►Fig.31: 1. D-ring 2. Lower belt
NOTE: The vacuum cleaner will automatically
switchesoffandtheLEDlightasheswhenthevac-
uum cleaner is overheated due to the reduced air-
owintothemachinecausedbycloggedhose,pipe,
lterorotherreasons.Inthiscase,removethecause
of the problem and cool the vacuum cleaner before
restarting.
3. Replacethelterbagwhenitbecomesfull.Open
thelidandtakeoutthelterbag.Pullthestriponthe
sideoftheopeningtoshutthelterbaganddisposeof
thelterbaginwhole.
►Fig.32: 1. Strip
When using a dust bag, take out the dust bag and dis-
pose of the dust by releasing the latch.
►Fig.33: 1. Latch
NOTICE: Periodically check the lter bag if it is
full.Continuoususewiththelterbagfullresultsin
reduced suction power.
NOTICE: Do not use an used lter bag.Thelter
bagisdesignedforsingleuse.Usinglterbagrepeat-
edlymaycausecloggingofthelterandresultsin
damage to the cleaner. If you want to use the bag
repeatedly, use a dust bag.
MAINTENANCE
CAUTION: Always be sure that the tool is
switched off and the battery cartridge is removed
before attempting to perform inspection or
maintenance.
NOTICE: Never use gasoline, benzine, thinner,
alcohol or the like. Discoloration, deformation or
cracks may result.
To maintain product SAFETY and RELIABILITY,
repairs,anyothermaintenanceoradjustmentshould
be performed by Makita Authorized or Factory Service
Centers, always using Makita replacement parts.
Cleaning the HEPA lter
CAUTION: Do not use the vacuum cleaner
without a lter or continue to use dirty or dam-
aged lter. Vacuumed dust or particles may be
exhausted from the cleaner and they may cause
respiratory disease to the operator.
NOTICE: To keep optimum suction power and
clean exhaust, clean the lter periodically. If
enough suction power is not obtained even after
the cleaning, replace the lter with new one.
NOTICE: To prevent the lter from being dam-
aged, do not use following tools and similar items
for cleaning :
— Air duster
— High pressure washer
— Tools made of hard materials such as a
metallic brush
1. Openthelidandtakeoutthelterbag.Release
thehookonthelterandremoveitfromthevacuum
cleaner body.
►Fig.34
2. Beatthedustofffromthelter.Theltercanbe
washed with water. Rinse away the dust and particles
onthelterevery1or2month.Afterthat,drythelter
completely in a shaded and well-ventilated place to
prevent unpleasant odor or malfunctions.
3. Toinstallthelter,insertthesidewithouttheap
intotheholderthenpushthelterdownwarduntilthe
apissecuredbytherib.
►Fig.35: 1. Holder 2.HEPAlter3. Rib 4. Flap
Cleaning the dust bag
Regularly clean the dust bag with soap and water. Turn
the dust bag inside out and remove the sticky dust.
Wash lightly by hand and rinse well with water. Dry
completely before installing to the vacuum cleaner.
►Fig.36
NOTICE: Wet dust bag lowers the vacuuming per-
formance as well as the life of the motor.

15 ENGLISH
Clearing the clog
When clearing the clog, remove the hose or the exten-
sion wand, or the bent pipe assembly to check inside.
Removing/attaching the snap-on type bent pipe
assembly
To remove, pull the bent pipe assembly while pressing
both of the tab on the hose end.
To attach, insert the hose end into the bent pipe assem-
bly. Make sure that the tabs on the hose end snap into
the holes on the bent pipe assembly.
►Fig.37: 1. Hose end 2. Tab 3. Hole 4. Bent pipe
assembly
Removing/attaching the screw-in type bent pipe
assembly
To remove, loosen the sleeve of bent pipe assembly
from the hose.
To attach, fasten the sleeve of bent pipe assembly onto
the hose.
►Fig.38: 1. Hose 2. Bent pipe assembly 3. Sleeve
OPTIONAL
ACCESSORIES
CAUTION: These accessories or attachments
are recommended for use with your Makita tool
specied in this manual. The use of any other
accessories or attachments might present a risk of
injurytopersons.Onlyuseaccessoryorattachment
for its stated purpose.
If you need any assistance for more details regard-
ing these accessories, ask your local Makita Service
Center.
• Hose (for vacuum cleaner type)
• Hose (for dust extraction type)
• Extension wand
• Free nozzle
• T-shape nozzle
• Seat nozzle
• Corner nozzle
• Shelf brush
• Round brush
• Bent pipe assembly
• Filter bag
• Dust bag
• Front cuff
• HEPAlter
• Pipe
• Makita genuine battery and charger
NOTE: Some items in the list may be included in the
tool package as standard accessories. They may
differ from country to country.

16 POLSKI
POLSKI (Instrukcja oryginalna)
DANE TECHNICZNE
Model: DVC261
Pojemność Worekltracyjny 2,0 l
Woreknapył 1,5 l
Maks.przepływpowietrza Zwężemø28mmx1,0m 2,0 m3/min
Zwężemø32mmx1,0m 2,2 m3/min
Zwężemø38mmx1,5m 2,3 m3/min
Podciśnienie 110 hPa
Wymiary(dług.xszer.xwys.)
(bezuprzęży)
230 mm x 152 mm x 373 mm
Napięcieznamionowe Prądstały36V
Masa netto 3,8–4,5 kg
• Wzwiązkuzestaleprowadzonymprzeznasząrmęprogramembadawczo-rozwojowymniniejszedanemogą
uleczmianombezwcześniejszegopowiadomienia.
• Danetechnicznemogąróżnićsięwzależnościodkraju.
• Waganieuwzględniaakcesoriów(opróczakumulatorów).Waginajlżejszychinajcięższychkombinacjiurzą-
dzenia z akumulatorami przedstawiono w tabeli.
• Długośćdostarczonegowężaróżnisięwzależnościodkraju.
Kompatybilne akumulatory i ładowarki
Akumulator BL1815N / BL1820 / BL1820B / BL1830 / BL1830B / BL1840 /
BL1840B / BL1850 / BL1850B / BL1860B
Ładowarka DC18RC / DC18RD / DC18RE / DC18SD / DC18SE / DC18SF
• Pewnezwymienionychpowyżejakumulatorówiładowarekmogąbyćniedostępnewregioniezamieszkania
użytkownika.
OSTRZEŻENIE: Należy używać wyłącznie akumulatorów i ładowarek wymienionych powyżej.
Używanieinnychakumulatorówiładowarekmożestwarzaćryzykowystąpieniaobrażeńciałalubpożaru.
Symbole
Poniżejpokazanosymbolezastosowanenaurządze-
niu.Przedrozpoczęciemużytkowanianależyzapoznać
sięzichznaczeniem.
Przeczytaćinstrukcjęobsługi.
Zachowaćszczególnąostrożność.
Ni-MH
Li-ion
DotyczytylkopaństwUE
Niewyrzucaćurządzeńelektrycznychani
akumulatorówwrazzodpadamizgospo-
darstwa domowego! Zgodnie z dyrekty-
wamieuropejskimiwsprawiezużytego
sprzętuelektrycznegoielektronicznego
orazbateriiiakumulatoróworazzużytych
bateriiiakumulatorów,atakżedostoso-
waniemichdoprawakrajowego,zużyte
urządzeniaelektryczne,baterieiakumu-
latorynależyskładowaćosobnoiprzeka-
zywaćdozakładurecyklingudziałającego
zgodniezprzepisamidotyczącymiochrony
środowiska.
Przeznaczenie
Tonarzędziejestprzeznaczonedoodsysaniasuchego
pyłu.Urządzeniejestprzeznaczonedoużytkukomer-
cyjnego,naprzykładwhotelach,szkołach,szpitalach,
fabrykach,sklepach,biurachorazprzezrmyświad-
cząceusługiwynajmunarzędzi.
Hałas
TypowyrównoważnypoziomdźwiękuAokreślonyw
oparciuonormęEN60335-2-69,EN60704-2-1:
Poziomciśnieniaakustycznego(LpA): 70 dB(A) lub
mniej
Niepewność(K):2,5dB(A)
Poziomhałasupodczaspracymożeprzekraczać80
dB (A).
WSKAZÓWKA:Deklarowanawartośćemisjihałasu
zostałazmierzonazgodniezestandardowąmetodą
testowąimożnająwykorzystaćdoporównywania
narzędzi.
WSKAZÓWKA:Deklarowanąwartośćemisjihałasu
możnatakżewykorzystaćwewstępnejocenie
narażenia.

17 POLSKI
OSTRZEŻENIE: Nosić ochronniki słuchu.
OSTRZEŻENIE:
Poziom hałasu wytwarzanego
podczas rzeczywistego użytkowania elektronarzę-
dzia może się różnić od wartości deklarowanej w
zależności od sposobu użytkowania narzędzia, a w
szczególności od rodzaju obrabianego elementu.
OSTRZEŻENIE:
W oparciu o szacowane narażenie
w rzeczywistych warunkach użytkowania należy określić
środki bezpieczeństwa w celu zapewnienia ochrony ope-
ratora (uwzględniając wszystkie elementy cyklu działania,
tj. czas, kiedy narzędzie jest wyłączone i kiedy pracuje na
biegu jałowym, a także czas, kiedy jest włączone).
Drgania
Całkowitawartośćpoziomudrgań(sumawektoróww3
osiach)określonazgodnieznormąEN60335-2-69:
Trybpracy:cięciepłyt
Emisjadrgań(ah): 2,5 m/s2lubmniej
Niepewność(K):1,5m/s2
WSKAZÓWKA:
Deklarowanawartośćpoziomudrgań
zostałazmierzonazgodniezestandardowąmetodątestową
imożnająwykorzystaćdoporównywanianarzędzi.
WSKAZÓWKA:
Deklarowanąwartośćpoziomudrgań
możnatakżewykorzystaćwewstępnejocenienarażenia.
OSTRZEŻENIE:
Drgania wytwarzane podczas
rzeczywistego użytkowania elektronarzędzia mogą
się różnić od wartości deklarowanej w zależności
od sposobu użytkowania narzędzia, a w szczegól-
ności od rodzaju obrabianego elementu.
OSTRZEŻENIE:
W oparciu o szacowane narażenie
w rzeczywistych warunkach użytkowania należy określić
środki bezpieczeństwa w celu zapewnienia ochrony ope-
ratora (uwzględniając wszystkie elementy cyklu działania,
tj. czas, kiedy narzędzie jest wyłączone i kiedy pracuje na
biegu jałowym, a także czas, kiedy jest włączone).
Deklaracja zgodności WE
Dotyczy tylko krajów europejskich
DeklaracjazgodnościWEjestdołączonajakozałącznik
Adoniniejszejinstrukcjiobsługi.
OSTRZEŻENIA DOTYCZĄCE
BEZPIECZEŃSTWA
Ostrzeżenia dotyczące
bezpieczeństwa dla odkurzacza
akumulatorowego
OSTRZEŻENIE: WAŻNE! UWAŻNIE
PRZECZYTAĆ wszystkie zasady bezpieczeństwa
i zalecenia PRZED UŻYCIEM.Niezastosowaniesię
dowspomnianychostrzeżeńiinstrukcjimożedopro-
wadzićdoporażeniaprądemelektrycznym,pożarui/
lubpoważnychobrażeńciała.
1. Odkurzacza mogą używać wyłącznie osoby
odpowiednio przeszkolone.
2. Odkurzacza nie wolno używać bez l-
tra. Uszkodzony ltr należy niezwłocznie
wymienić.
3. Nie próbować wciągać odkurzaczem materia-
łów łatwopalnych, fajerwerków, zapalonych
papierosów, gorącego popiołu, gorących
wiórów metalowych ani ostrych przedmiotów,
takich jak żyletki, igły czy zbite szkło.
4. NIGDY NIE UŻYWAĆ ODKURZACZA
W POBLIŻU ZBIORNIKÓW BENZYNY,
GAZU, LAKIERU, KLEJU ANI INNYCH
WYBUCHOWYCH SUBSTANCJI. Włączanie/
wyłączanieprzełącznikazasilaniapowoduje
iskrzenie.Iskrzeniepowodujetakżekomutator
silnika.Możetobyćprzyczynąwybuchu.
5. Nigdy nie wciągać odkurzaczem materiałów
toksycznych, rakotwórczych, łatwopalnych
ani innych materiałów niebezpiecznych, takich
jak azbest, arsen, bar, beryl, ołów, pestycydy i
inne materiały niebezpieczne dla zdrowia.
6. Nigdy nie używać odkurzacza na zewnątrz
podczas deszczu.
7.
Nie używać w pobliżu źródeł ciepła (pieców itp.).
8. Nie zasłaniać otworów wentylacyjnych.
Zapewniają one chłodzenie silnika. Otwory
wentylacyjne powinny być zawsze odsłonięte;
w przeciwnym razie może dojść do zapalenia
się silnika.
9. Zawsze stać na pewnym podłożu i utrzymywać
równowagę.
10. Nie zginać, nie szarpać ani nie stawać na wężu.
11. W przypadku zauważenia małej skuteczności
działania lub innych nietypowych objawów
natychmiast wyłączyć odkurzacz.
12. ODŁĄCZYĆ AKUMULATORY. Gdy odkurzacz
nie jest używany, podczas konserwacji oraz
wymiany akcesoriów.
13. Po każdym użyciu natychmiast wyczyścić i
wykonać konserwację w celu utrzymania urzą-
dzenia w idealnym stanie technicznym.
14.
STARANNIE WYKONYWAĆ CZYNNOŚCI
KONSERWACYJNE. Utrzymywać czystość
odkurzacza, aby zapewnić lepsze i bezpieczniej-
sze działanie. Przestrzegać instrukcji wymiany
akcesoriów. Utrzymywać rękojeści suche, czy-
ste i niezabrudzone olejem ani smarem.
15. SPRAWDZIĆ USZKODZONE CZĘŚCI.
Uszkodzoną osłonę lub inną część należy
dokładnie sprawdzić przed dalszym użyt-
kowaniem odkurzacza, aby mieć pewność,
że będzie ona poprawnie działać i spełniać
swoją funkcję. Należy sprawdzić narzędzie
pod kątem nieprawidłowego ustawienia lub
zablokowania elementów ruchomych, pęknięć
części, zamocowania oraz innych usterek,
które mogą mieć wpływ na jego działanie.
Osłona lub inne uszkodzone części powinny
zostać naprawione lub wymienione przez auto-
ryzowany punkt serwisowy, o ile w instrukcji
nie podano inaczej. Uszkodzone przełączniki
powinny zostać wymienione w autoryzowanym
punkcie serwisowym. Nie używać odkurzacza,
jeśli nie działają funkcje przełącznika.

18 POLSKI
16. CZĘŚCI ZAMIENNE. Do wymiany należy uży-
wać tylko identycznych części zamiennych.
17. PRZECHOWYWANIE ODKURZACZA. Gdy
odkurzacz nie jest używany, należy go prze-
chowywać w pomieszczeniu.
18. Z odkurzaczem należy obchodzić się delikat-
nie. Niedbałe i agresywne użytkowanie może
spowodować uszkodzenie nawet najbardziej
wytrzymałego odkurzacza.
19. Nie czyścić powierzchni zewnętrznych ani
wewnętrznych benzyną, rozpuszczalnikiem ani
chemicznymi środkami czyszczącymi. Mogą
powstać pęknięcia i odbarwienia.
20. Nie używać odkurzacza w pomieszczeniach
zamkniętych, w których występują łatwopalne,
wybuchowe lub toksyczne opary farb olejnych,
rozpuszczalników, benzyny, niektórych sub-
stancji przeciwmolowych itp. ani w miejscach,
w których występuje łatwopalny pył.
21. Odkurzacza nie wolno obsługiwać, będąc pod
wpływem narkotyków lub alkoholu.
22. W ramach podstawowej ochrony nosić gogle
lub okulary ochronne z osłonami bocznymi.
23. W miejscach silnie zapylonych używać maski.
24. Opisywane urządzenie nie jest przeznaczone
do użycia przez osoby (w tym dzieci) niebę-
dące w pełni władz zycznych, poznawczych
lub umysłowych, bądź nieposiadające odpo-
wiedniej wiedzy i doświadczenia.
25. Należy zwracać uwagę, aby dzieci nie bawiły
się odkurzaczem.
26. Nie wolno obsługiwać odkurzacza ani akumu-
latorów mokrymi rękami.
27. Zachować szczególną ostrożność podczas
sprzątania na schodach.
28. Nie używać odkurzacza jako stołka ani stołu
warsztatowego. Urządzenie może się przewró-
cić i spowodować obrażenia.
Użytkowanie narzędzi akumulatorowych i dbałość
o nie
1.
Akumulator należy ładować wyłącznie przy
użyciu określonej przez producenta ładowarki.
Ładowarkaprzeznaczonadojednegotypuaku-
mulatoramożestwarzaćzagrożeniepożarem,gdy
będzieużywanadoładowaniainnegoakumulatora.
2.
Do zasilania elektronarzędzi używać tylko spe-
cjalnie do tego celu przeznaczonych akumulato-
rów.Używanieinnychakumulatorówmożestwarzać
ryzykowystąpieniaobrażeńciałalubpożaru.
3. Gdy akumulator nie jest używany, należy
zabezpieczyć go przed kontaktem z metalo-
wymi przedmiotami, typu spinacze, monety,
klucze, gwoździe, wkręty lub innymi metalo-
wymi drobiazgami, które mogą powodować
zwarcie styków akumulatora.Zwarciestyków
akumulatoragrozipoparzeniamilubpożarem.
4. W niewłaściwych warunkach eksploatacji
może dojść do wycieku elektrolitu z akumu-
latora. Nie należy go dotykać. W razie przy-
padkowego kontaktu należy przemyć skażoną
skórę wodą. W przypadku dostania się elek-
trolitu do oczu należy dodatkowo skorzystać
z porady lekarza.Elektrolitzakumulatoramoże
powodowaćpodrażnienialubpoparzenia.
5. Nie używać uszkodzonego lub przerobionego
akumulatora ani narzędzia. Uszkodzone lub
przerobioneakumulatorymogądziałaćwnieprze-
widywalnysposóbispowodowaćpożar,wybuch
lubobrażeniaciała.
6. Nie wystawiać akumulatora ani narzędzia na
działanie ognia ani nadmiernej temperatury.
Narażenienaogieńlubtemperaturęwyższąniż
130°Cmożespowodowaćwybuch.
7. Przestrzegać wszystkich instrukcji ładowania
i nie ładować akumulatora ani narzędzia w
temperaturze wykraczającej poza zakres okre-
ślony w instrukcji.Nieprawidłoweładowanielub
temperaturywykraczającapozaokreślonyzakres
mogąspowodowaćuszkodzenieakumulatora
orazwzrostzagrożeniapożarem.
Serwis
1. Elektronarzędzie powinno być serwisowane
przez wykwalikowany personel, z użyciem
wyłącznie oryginalnych części zamiennych.
Zapewnitozachowaniebezpieczeństwapracyz
elektronarzędziem.
2. Przestrzegać instrukcji smarowania i wymiany
akcesoriów.
3. Utrzymywać rękojeści suche, czyste i nieza-
brudzone olejem ani smarem.
Ważne zasady bezpieczeństwa
dotyczące akumulatora
1. Przed użyciem akumulatora zapoznać się ze
wszystkimi instrukcjami i znakami ostrze-
gawczymi na (1) ładowarce, (2) akumulatorze
i (3) produkcie, w którym będzie używany
akumulator.
2. Akumulatora nie wolno rozbierać.
3. Jeśli czas działania uległ znacznemu skróce-
niu, należy natychmiast przerwać pracę. Może
bowiem dojść do przegrzania, ewentualnych
poparzeń, a nawet eksplozji.
4. W przypadku przedostania się elektrolitu do
oczu, przemyć je czystą wodą i niezwłocznie
uzyskać pomoc lekarską. Może on bowiem
spowodować utratę wzroku.
5. Nie doprowadzać do zwarcia akumulatora:
(1) Nie dotykać styków materiałami przewo-
dzącymi prąd.
(2) Unikać przechowywania akumulatora w
pojemniku z metalowymi przedmiotami,
takimi jak gwoździe, monety itp.
(3) Chronić akumulator przed deszczem lub
wodą.
Zwarcie prowadzi do przepływu prądu elek-
trycznego o dużym natężeniu i przegrzania
akumulatora, co w konsekwencji może grozić
poparzeniami a nawet awarią urządzenia.
6. Narzędzia i akumulatora nie wolno przecho-
wywać w miejscach, w których temperatura
osiąga bądź przekracza 50°C (122°F).
7. Akumulatorów nie wolno spalać, również tych
poważnie uszkodzonych lub całkowicie zuży-
tych. Akumulator może eksplodować w ogniu.

19 POLSKI
8. Chronić akumulator przed upadkiem i
uderzeniami.
9. Nie wolno używać uszkodzonego akumulatora.
10. Stanowiące wyposażenie akumulatory lito-
wo-jonowe podlegają przepisom dotyczącym
produktów niebezpiecznych.
Napotrzebytransportukomercyjnego,np.świad-
czonegoprzezrmytrzecieczyspedycyjne,
należyprzestrzegaćspecjalnychwymagańw
zakresie pakowania i oznaczania etykietami.
Przygotowanieproduktudowysyłkiwymaga
skonsultowaniasięzespecjalistąds.materiałów
niebezpiecznych.Należytakżeprzestrzegać
przepisówkrajowych,któremogąbyćbardziej
szczegółowe.
Zakleićtaśmąlubzaślepićotwartestykiakumula-
toraorazzabezpieczyćgo,abyniemógłsięprze-
suwaćwopakowaniu.
11. Postępować zgodnie z przepisami lokalnymi
dotyczącymi usuwania akumulatorów.
12. Używać akumulatorów tylko z produktami
określonymi przez rmę Makita. Zastosowanie
akumulatorówwniezgodnychproduktachmoże
spowodowaćpożar,przegrzanie,wybuchlub
wyciek elektrolitu.
ZACHOWAĆ NINIEJSZE
INSTRUKCJE.
PRZESTROGA: Używać wyłącznie oryginal-
nych akumulatorów rmy Makita.Używanienie-
oryginalnychakumulatorówrminnychniżMakitalub
akumulatorów,którezostałyzmodykowane,może
spowodowaćwybuchakumulatoraipożar,obrażenia
ciałaorazzniszczeniemienia.Stanowitorównież
naruszeniewarunkówgwarancjirmyMakitadoty-
czącychnarzędziaiładowarki.
Wskazówki dotyczące zacho-
wania maksymalnej trwałości
akumulatora
1. Akumulator należy naładować zanim zostanie
do końca rozładowany. Po zauważeniu spadek
mocy narzędzia należy przerwać pracę i nała-
dować akumulator.
2. Nie wolno ładować powtórnie w pełni nałado-
wanego akumulatora. Przeładowanie akumula-
tora skraca jego trwałość.
3. Akumulator należy ładować w temperaturze
pokojowej w przedziale 10–40°C (50–104°F). W
przypadku gorącego akumulatora przed przy-
stąpieniem do ładowania należy poczekać, aż
ostygnie.
4. Akumulatory niklowo-wodorkowe należy nała-
dować po okresie długiego nieużytkowania
(dłuższego niż sześć miesięcy).
OPIS DZIAŁANIA
PRZESTROGA: Przed przystąpieniem do regu-
lacji lub przeglądu narzędzia upewnić się, że jest
ono wyłączone, a akumulator został wyjęty.
Wkładanie i wyjmowanie akumulatora
PRZESTROGA: Przed włożeniem lub wyjęciem
akumulatora należy zawsze wyłączyć narzędzie.
PRZESTROGA: Podczas wkładania lub wyjmo-
wania akumulatora należy mocno trzymać narzę-
dzie i akumulator.Wprzeciwnymraziemogąsięone
wyślizgnąćzrąk,powodującuszkodzenienarzędzia
lubakumulatoraiobrażeniaciała.
►Rys.1: 1.Czerwonywskaźnik2. Przycisk
3. Akumulator
Abywyjąćakumulator,przesuńprzyciskznajdującysię
wprzedniejjegoczęściiwysuńakumulator.
Abywłożyćakumulator,wyrównajwystępnaakumulato-
rzezrowkiemwobudowieiwsuńgonaswojemiejsce.
Akumulatornależywsunąćdooporu,ażsięzatrzaśniena
miejscu,cojestsygnalizowanedelikatnymkliknięciem.
Jeśliwgórnejczęściprzyciskujestwidocznyczerwony
wskaźnik,akumulatorniezostałcałkowiciezatrzaśnięty.
PRZESTROGA: Akumulator należy włożyć
do końca, tak aby czerwony wskaźnik nie był
widoczny.Wprzeciwnymraziemożeprzypadkowo
wypaśćznarzędzia,powodującobrażeniaoperatora
lubosóbpostronnych.
PRZESTROGA: Nie wkładać akumulatora na
siłę.Jeśliakumulatorniedajesięswobodniewsunąć,
oznaczato,żezostałwłożonynieprawidłowo.
Układ zabezpieczenia narzędzia/
akumulatora
Narzędziejestwyposażonewukładzabezpieczenia
narzędzia/akumulatora.Układautomatycznieodcina
zasilaniesilnikawceluwydłużeniatrwałościnarzędzia
iakumulatora.Narzędziezostanieautomatycznie
zatrzymanepodczaspracywnastępującychsytuacjach
związanychznarzędziemlubakumulatorem.Niektóre
sytuacjezostanąwskazanepoprzezwłączeniesię
odpowiednichwskaźników.
Zabezpieczenie przed przeciążeniem
Wprzypadkuobsługinarzędziawsposóbpowodujący
pobórnadmierniewysokiegoprądunarzędziezostanie
automatyczniezatrzymanebezżadnejsygnalizacji.W
takiejsytuacjinależywyłączyćnarzędzieizaprzestać
wykonywaniaczynnościpowodującejprzeciążenie
narzędzia.Następnienależywłączyćnarzędziewcelu
jegoponownegouruchomienia.
Zabezpieczenie przed przegrzaniem
Wprzypadkuprzegrzanianarzędziewyłączysięauto-
matycznie.Przedponownymwłączeniemnależypocze-
kać,ażnarzędzieostygnie.

20 POLSKI
Zabezpieczenie przed nadmiernym
rozładowaniem
Gdypoziomnaładowaniaakumulatoraspadnie,narzę-
dziezostanieautomatyczniezatrzymane.Jeśliprodukt
niedziałapomimowłączeniaprzełączników,należy
wyjąćakumulatoryznarzędziainaładowaćje.
Wskazanie stanu naładowania akumulatora
Tylko w przypadku akumulatorów ze wskaźnikiem
►Rys.2: 1.Lampkiwskaźnika2. Przycisk kontrolny
Nacisnąćprzyciskkontrolnynaakumulatorzewcelu
wyświetleniastanunaładowaniaakumulatora.Lampki
wskaźnikazaświecąsięprzezkilkasekund.
Lampki wskaźnika Pozostała
energia
akumulatora
Świeci się Wyłączony Miga
75–100%
50–75%
25–50%
0–25%
Naładować
akumulator.
Akumulator
możenie
działać
poprawnie.
WSKAZÓWKA:
Zależnieodwarunkówużytkowaniaitem-
peraturyotoczenia,wskazywanypoziommożenieznacznie
sięróżnićodrzeczywistegostanunaładowaniaakumulatora.
Położenie moduły wyłącznika
Modułwyłącznikamożnazaczepićpoobustronach
dolnegopaska.Ułożyćprzewódwtakisposób,aby
modułwyłącznikaznalazłsiępopasującejstronie.Aby
niedopuścićdouszkodzeniaprzewodu,przeciągnąć
przewódprzezzaczepwsposóbpokazanynarysunku.
►Rys.3: 1. Zaczep 2.Przewód
Paski regulacyjne
Możnaregulowaćściśnięciepaskównaramiennychoraz
górnegoidolnegopaska.Najpierwprzełożyćramionaprzez
paskinaramienne,anastępniezapiąćdolnyigórnypasek.W
celuściągnięciapociągnąćzakoniecpaska,jakpokazanona
rysunku.Wcelupoluzowaniapociągnąćwgórękonieczapięcia.
Dolny pasek
►Rys.4: 1. Pasek 2.Zapięcie
Paski naramienne
►Rys.5: 1. Pasek 2.Zapięcie
Górny pasek
►Rys.6: 1. Pasek 2.Zapięcie
Rączka do przenoszenia
Korpusodkurzaczanależyprzenosić,trzymającgoza
rączkędoprzenoszenia.
►Rys.7: 1.Rączkadoprzenoszenia
Działanie przełącznika
Dostępnesątrzystopnieustawieniasiłyssania:nor-
malna (1), wysoka (2) i maksymalna (3).
Abyrozpocząćodkurzanie,nacisnąćrazprzycisk .
Abyzmienićsiłęssania,nacisnąćprzyciskpodczas
pracyodkurzacza.Siłassaniazmieniasięwkolejności:
normalna (1), wysoka (2) i maksymalna (3).
Abywyłączyćodkurzacz,nacisnąćprzycisk .
►Rys.8
WSKAZÓWKA:Przyponownymwłączeniuodkurza-
cza zostanie on uruchomiony w ostatnim wybranym
trybiesiłyssania.
Lampka LED
LampkaLEDznajdujesięnaczolemodułuwyłącznika;
ułatwiaonapracęwciemnychmiejscach.Nacisnąć
przycisk ,abywłączyćlampkę.Abywyłączyć,naci-
snąćprzycisk ponownie.
►Rys.9
PRZESTROGA: Nie patrzeć na światło ani bez-
pośrednio na źródło światła. Nie wolno kierować
światła na oczy innych osób.
WSKAZÓWKA:LampkaLEDautomatyczniewyłącza
siępo10minnieużywaniaodkurzacza.
WSKAZÓWKA:Powystąpieniuprzegrzaniaw
wynikuzmniejszeniaprzepływupowietrzawpływają-
cegodoodkurzaczazpowoduzatkaniawęża,rury,
ltralubinnegopowoduodkurzaczwyłączasięauto-
matycznie i miga lampka LED.
Opaska węża
Opaskiwężamożnaużywaćdozamocowaniawężalub
swobodnejkońcówki.
Wceluzamocowaniawężanakorpusieodkurzacza
należyprzewlecopaskęwężaprzezotwórwkorpusie.
Opaskęwężamożnazamocowaćpoobustronach.
►Rys.10: 1.Opaskawęża2.Otwór3.Wąż
Wceluzamocowaniaswobodnejkońcówkinadolnym
paskunależyprzewlecopaskęwężaprzezpętlęna
dolnym pasku.
►Rys.11: 1.Opaskawęża2.Swobodnakońcówka
Zaczep węża
Podczasprzerwywdziałaniuzaczepnawygiętejrurze
możnawykorzystaćdozaczepieniarurynadolnym
pasku.
►Rys.12
This manual suits for next models
1
Table of contents
Languages:
Other Makita Vacuum Cleaner manuals

Makita
Makita CL107FD User manual

Makita
Makita VC006GM User manual

Makita
Makita DCL282F User manual

Makita
Makita CL121DWA User manual

Makita
Makita DVC152L User manual

Makita
Makita DVC864LZX1 User manual

Makita
Makita DCL142 User manual

Makita
Makita DCL282F User manual

Makita
Makita DCL181F User manual

Makita
Makita CL106FD User manual

Makita
Makita DVC861LPTX User manual

Makita
Makita CL070D Series User manual

Makita
Makita LXLC01 User manual

Makita
Makita DRC300 User manual

Makita
Makita DVC860L User manual

Makita
Makita DVC860L User manual

Makita
Makita VC001GL User manual

Makita
Makita DRC200RT User manual

Makita
Makita DCL142 User manual

Makita
Makita 447 M User manual