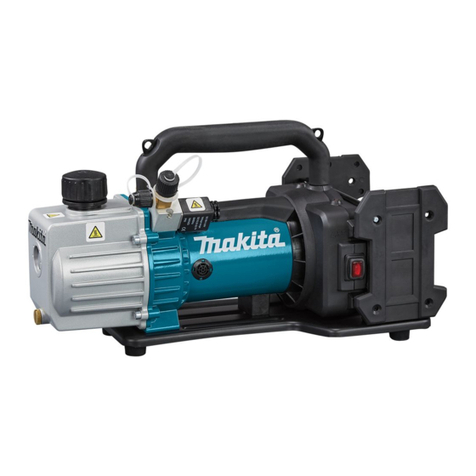
Makita DVP180 User manual

GB Cordless Vacuum Pump Instruction Manual 4
CS 充电式真空泵 使用说明书(保留备用) 10
CT 充電式真空幫浦 使用說明書 16
KR 충전식 진공 펌프 사용 설명서 21
ID Pompa Vakum Nirkabel Buku Petunjuk 26
VI
Máy Bơm Chân Không Dùng Pin
Hướng dẫn sử dụng 32
TH 38
ES Bomba de Vacío Inalámbrica Manual de instrucciones 43
BZ Bomba de Vácuo a Bateria Manual de instruções 50
DVP180

2
11
12
7
8
9
10
3
1
4
5
6
2
Fig.1
1
3
2
Fig.2
1
Fig.3
1
2
Fig.4
3
2
1
4
Fig.5
1
2
43
Fig.6

3
9
3
5 7
8 10
4
1
2
6
Fig.7
2
1
Fig.8
2
1
Fig.9

4 ENGLISH
ENGLISH (Original instructions)
SPECIFICATIONS
Model: DVP180
Battery cartridge (capacity) BL1860B (6.0 Ah)
BL1850 / BL1850B (5.0 Ah)
BL1840 / BL1840B (4.0 Ah)
BL1830 / BL1830B (3.0 Ah)
Rated voltage D.C. 18 V
Pump Single stage rotary pump
Free air displacement 50 L/min
Ultimate vacuum 20 Pa
Oil capacity 100 – 115 ml
Intake 5/16" are male
Dimensions 263 mm (L) × 93 mm (W) × 172 mm (H)
Net weight (with the BL1850 battery) 3.5 kg
• Due to our continuing program of research and development, the specications herein are subject to change
without notice.
• Specications and battery cartridge may differ from country to country.
• Weight, with battery cartridge, according to EPTA-Procedure 01/2003
Symbols
The following show the symbols used for the equipment.
Be sure that you understand their meaning before use.
• Read instruction manual.
• Warning: hot surface!
Do not touch around this symbol.
Touching the surface may cause burns
or injuries.
Cd
Ni-MH
Li-ion
• Only for EU countries
Do not dispose of electric equipment or
battery pack together with household
waste material!
In observance of the European
Directives, on Waste Electric and
Electronic Equipment and Batteries and
Accumulators and Waste Batteries and
Accumulators and their implementation
in accordance with national laws, electric
equipment and batteries and battery
pack(s) that have reached the end of
their life must be collected separately
and returned to an environmentally
compatible recycling facility.
General power tool safety warnings
WARNING: Read all safety warnings and
all instructions. Failure to follow the warnings and
instructions may result in electric shock, re and/or
serious injury.
Save all warnings and instructions
for future reference.
The term “power tool” in the warnings refers to your
mains-operated (corded) power tool or battery-operated
(cordless) power tool.
Work area safety
1. Keep work area clean and well lit. Cluttered or
dark areas invite accidents.
2. Do not operate power tools in explosive
atmospheres, such as in the presence of
ammable liquids, gases or dust. Power tools
create sparks which may ignite the dust or fumes.
3. Keep children and bystanders away while
operating a power tool. Distractions can cause
you to lose control.
Electrical safety
4. Power tool plugs must match the outlet. Never
modify the plug in any way. Do not use any
adapter plugs with earthed (grounded) power
tools. Unmodied plugs and matching outlets will
reduce risk of electric shock.
5. Avoid body contact with earthed or grounded
surfaces such as pipes, radiators, ranges and
refrigerators. There is an increased risk of electric
shock if your body is earthed or grounded.
6. Do not expose power tools to rain or wet
conditions. Water entering a power tool will
increase the risk of electric shock.
7. Do not abuse the cord. Never use the cord for
carrying, pulling or unplugging the power tool.
Keep cord away from heat, oil, sharp edges
or moving parts. Damaged or entangled cords
increase the risk of electric shock.
8. When operating a power tool outdoors, use an
extension cord suitable for outdoor use. Use of
a cord suitable for outdoor use reduces the risk of
electric shock.

5 ENGLISH
9. If operating a power tool in a damp location
is unavoidable, use a ground fault circuit
interrupter (GFCI) protected supply. Use of an
GFCI reduces the risk of electric shock.
Personal safety
10. Stay alert, watch what you are doing and use
common sense when operating a power tool. Do
not use a power tool while you are tired or under
the inuence of drugs, alcohol or medication. A
moment of inattention while operating power tools
may result in serious personal injury.
11. Use personal protective equipment. Always
wear eye protection. Protective equipment such
as dust mask, non-skid safety shoes, hard hat, or
hearing protection used for appropriate conditions
will reduce personal injuries.
12. Prevent unintentional starting. Ensure the
switch is in the off-position before connecting
to power source and/or battery pack, picking up
or carrying the tool. Carrying power tools with your
nger on the switch or energising power tools that
have the switch on invites accidents.
13. Remove any adjusting key or wrench before
turning the power tool on. A wrench or a key left
attached to a rotating part of the power tool may
result in personal injury.
14. Do not overreach. Keep proper footing and
balance at all times. This enables better control of
the power tool in unexpected situations.
15. Dress properly. Do not wear loose clothing or
jewellery. Keep your hair, clothing, and gloves
away from moving parts. Loose clothes, jewellery
or long hair can be caught in moving parts.
16. If devices are provided for the connection of
dust extraction and collection facilities, ensure
these are connected and properly used. Use of
dust collection can reduce dust-related hazards.
Power tool use and care
17. Do not force the power tool. Use the correct
power tool for your application. The correct
power tool will do the job better and safer at the rate
for which it was designed.
18. Do not use the power tool if the switch does not
turn it on and off. Any power tool that cannot be
controlled with the switch is dangerous and must be
repaired.
19. Disconnect the plug from the power source and/
or the battery pack from the power tool before
making any adjustments, changing accessories,
or storing power tools. Such preventive safety
measures reduce the risk of starting the power tool
accidentally.
20. Store idle power tools out of the reach of children
and do not allow persons unfamiliar with the
power tool or these instructions to operate
the power tool. Power tools are dangerous in the
hands of untrained users.
21. Maintain power tools. Check for misalignment
or binding of moving parts, breakage of parts
and any other condition that may affect the
power tool’s operation. If damaged, have the
power tool repaired before use. Many accidents
are caused by poorly maintained power tools.
22. Keep cutting tools sharp and clean. Properly
maintained cutting tools with sharp cutting edges
are less likely to bind and are easier to control.
23. Use the power tool, accessories and tool bits
etc. in accordance with these instructions,
taking into account the working conditions and
the work to be performed. Use of the power tool
for operations different from those intended could
result in a hazardous situation.
Battery tool use and care
24. Recharge only with the charger specied by the
manufacturer. A charger that is suitable for one
type of battery pack may create a risk of re when
used with another battery pack.
25. Use power tools only with specically
designated battery packs. Use of any other
battery packs may create a risk of injury and re.
26. When battery pack is not in use, keep it away
from other metal objects, like paper clips, coins,
keys, nails, screws or other small metal objects,
that can make a connection from one terminal
to another. Shorting the battery terminals together
may cause burns or a re.
27. Under abusive conditions, liquid may be ejected
from the battery; avoid contact. If contact
accidentally occurs, ush with water. If liquid
contacts eyes, additionally seek medical help.
Liquid ejected from the battery may cause irritation
or burns.
Service
28. Have your power tool serviced by a qualied
repair person using only identical replacement
parts. This will ensure that the safety of the power
tool is maintained.
29. Follow instruction for lubricating and changing
accessories.
30. Keep handles dry, clean and free from oil and
grease.
Cordless vacuum pump safety
warnings
1. The power tool is a machine used to evacuate
refrigeration and air conditioning equipment
and recovery vessels. Do not use it for other
applications. Doing so may result in accidents.
2. Always inspect the power tool for oil leaks
before use. Failure to do so may result in re.
3. Check the oil level and condition (deterioration,
etc.) to enable safe and efcient work.
4. Adequate performance may not be obtained in
extremely hot or cold environments.
SAVE THESE INSTRUCTIONS.
WARNING: DO NOT let comfort or familiarity
with product (gained from repeated use) replace
strict adherence to safety rules for the subject
product.
MISUSE or failure to follow the safety rules stated
in this instruction manual may cause serious
personal injury.
6 ENGLISH
Important safety instructions for
battery cartridge
1. Before using battery cartridge, read all
instructions and cautionary markings on (1)
battery charger, (2) battery, and (3) product
using battery.
2. Do not disassemble battery cartridge.
3. If operating time has become excessively
shorter, stop operating immediately. It may
result in a risk of overheating, possible burns
and even an explosion.
4. If electrolyte gets into your eyes, rinse them out
with clear water and seek medical attention right
away. It may result in loss of your eyesight.
5. Do not short the battery cartridge:
(1) Do not touch the terminals with any
conductive material.
(2) Avoid storing battery cartridge in a
container with other metal objects such as
nails, coins, etc.
(3) Do not expose battery cartridge to water or
rain.
A battery short can cause a large current
ow, overheating, possible burns and even a
breakdown.
6. Do not store the tool and battery cartridge in
locations where the temperature may reach or
exceed 50°C (122°F).
7. Do not incinerate the battery cartridge even if it
is severely damaged or is completely worn out.
The battery cartridge can explode in a re.
8. Be careful not to drop or strike battery.
9. Do not use a damaged battery.
10. Follow your local regulations relating to
disposal of battery.
SAVE THESE INSTRUCTIONS.
CAUTION: Only use genuine Makita batteries.
Use of non-genuine Makita batteries, or batteries that
have been altered, may result in the battery bursting
causing res, personal injury and damage. It will also
void the Makita warranty for the Makita tool and charger.
Tips for maintaining maximum
battery life
1. Charge the battery cartridge before completely
discharged. Always stop tool operation and
charge the battery cartridge when you notice
less tool power.
2. Never recharge a fully charged battery cartridge.
Overcharging shortens the battery service life.
3. Charge the battery cartridge with room
temperature at 10°C - 40°C (50°F - 104°F). Let a
hot battery cartridge cool down before charging
it.
4. Charge the battery cartridge if you do not use it
for a long period (more than six months).
PARTS DESCRIPTION
► Fig.1:
1. Sight glass
2. Oil ll/Exhaust cap
3. Intake shut-off valve
4. Handle
5. Battery holder
6. Battery
7. Power switch
8. LED lamp
9. Motor
10. Base
11. Oil tank
12. Drain plug
FUNCTIONAL
DESCRIPTION
CAUTION: Always be sure that the pump is
switched off and the battery cartridge is removed
before adjusting or checking function on the pump.
Installing or removing battery
cartridge
CAUTION: Always switch off the pump before
installing or removing of the battery cartridge.
CAUTION: Hold the pump and the battery
cartridge rmly when installing or removing battery
cartridge. Failure to hold the pump and the battery
cartridge rmly may cause them to slip off your hands
and result in damage to the pump and battery cartridge
and a personal injury.
► Fig.2:
1. Red indicator
2. Button
3. Battery cartridge
To remove the battery cartridge, slide it from the pump
while sliding the button on the front of the cartridge.
To install the battery cartridge, align the tongue on the
battery cartridge with the groove in the housing and slip
it into place. Insert it all the way until it locks in place with
a little click. If you can see the red indicator on the upper
side of the button, it is not locked completely.
CAUTION: Always install the battery cartridge
fully until the red indicator cannot be seen. If not, it
may accidentally fall out of the pump, causing injury to
you or someone around you.
CAUTION: Do not install the battery cartridge
forcibly. If the cartridge does not slide in easily, it is not
being inserted correctly.

7 ENGLISH
Battery protection system
► Fig.3:
1. Star marking
The pump is equipped with a battery protection system.
This system automatically cuts off power to the motor to
extend battery life.
The pump will automatically stop during operation if the
pump and/or battery are placed under one of the following
conditions:
Overloaded:
The pump is operated in a manner that causes it to draw
an abnormally high current.
In this situation, turn the pump off and stop the application
that caused the pump to become overloaded. Then turn
the pump on to restart.
If the pump does not start, the battery is overheated.
In this situation, let the battery cool before turning the
pump on again.
Low battery voltage:
The remaining battery capacity is too low and the pump
will not operate. In this situation, remove and recharge
the battery.
NOTE: The overheat protection works only with a
battery cartridge with a star marking.
Indicating the remaining battery
capacity
Only for battery cartridges with “B” at the end of the
model number
► Fig.4:
1. Indicator lamps 2. Check button
Press the check button on the battery cartridge to indicate
the remaining battery capacity. The indicator lamps light
up for few seconds.
Indicator lamps Remaining
capacity
Lighted Off Blinking
75% to 100%
50% to 75%
25% to 50%
0% to 25%
Charge the
battery.
The battery
may have
malfunctioned.
NOTE: Depending on the conditions of use and the
ambient temperature, the indication may differ slightly
from the actual capacity.
OPERATION
The pump does not contain oil when newly purchased.
Refer to “Adding oil” and add oil.
WARNING: Operating the pump in the
condition without oil added will damage the pump.
In addition, the oil tank will become hot and may result
in burns or other accidents.
Adding oil
► Fig.5:
1. Oil ll/Exhaust cap
2. Level line
3. Sight glass
4. Oil tank
1. Remove the oil ll/exhaust cap and add the supplied
oil via the ller port.
NOTICE: Always use Makita genuine oil in order to
maintain pump performance.
2. Add oil until the oil level is between the upper and
lower level lines of the sight glass.
NOTICE: The oil level is important. Operating the
pump in the condition with the oil level not between the
upper and lower level lines may result in malfunction.
Checking performance
► Fig.6:
1. Intake
2. Low side valve
3. Vacuum pump
4. Manifold
1. Connect the low side valve of the manifold and the
intake port of the pump with a charging hose.
2. Close the low side valve of the manifold.
3. Open the intake shut-off valve.
4. Open the inlet valve.
5. Turn the pump on. If the pressure of the manifold
indicates a vacuum of -0.09 to -0.1 MPa within 30
seconds, the pump is operating properly.
6. Turn the pump off.
Operation
► Fig.7:
1. Vacuum pump
2. Intake shut-off valve
3. Charging hose
(yellow)
4. Manifold
5. Low side valve
6. Low pressure gauge
7. High side valve
8. Charging hose (blue)
9. Service port
(Low pressure side)
10. Outdoor unit
1. Connect the pump, manifold and outdoor unit with
hoses.
NOTE: When the size of the service port on the unit is
1/4", use the supplied different diameter adapter.
2. Check that the high side and low side valves of the
manifold are closed.
3. Install the battery to the pump. (See “Installing
or removing battery cartridge” for the installation
method.)

8 ENGLISH
4. Turn the pump on. The LED lamp (green) lights up.
5. Open the intake shut-off valve of the pump and the
low side valve of the manifold.
WARNING: The pump becomes hot during
operation and immediately after stopping. Do not
touch the pump while it is hot. Doing so may result in
burns or other accidents.
NOTE: The motor may not operate when it is cold (5°C
or less). In these cases, bring the pump indoors and
allow it to warm up.
6. When the specied vacuum (refer to the manual
provided by the air conditioner manufacturer) is
reached, close the low side valve of the manifold.
7. Close the intake shut-off valve and turn the pump
off.
Airtightness test
There are no leaks if the pressure of the manifold does
not rise for 5 minutes or more after leaving the pump and
manifold.
NOTE: When the battery remaining capacity becomes
low, LED lamp goes out and at the same time a long
alarm beep start sounding. About two minutes later
the motor stops. And then alarm beep changes into a
repeated short-time interval beeping which noties the
motor stop and 30 seconds later the beeping stops.
However, do not wait until the motor stops (or alarm
beep changes to a short-time beeping), and instead
close the inlet valve of the tool and the low pressure
side valve of manifold.
Check that the pump is turned off, remove the battery,
and charge it or replace it with a spare battery.
• Refer to the following table for the battery operation
times.
Operation times (guideline)
Battery Operation times
BL1860B 60 min
BL1850 / BL1850B 50 min
BL1840 / BL1840B 40 min
BL1830 / BL1830B 30 min
• After nishing work, remove the battery and attach
the supplied cover.
NOTICE: When transporting, operating and
storing the tool, never place it on its side or upside
down. This may cause oil leakage from the oil ller/
vent cap.
MAINTENANCE
CAUTION: Always be sure that the pump is
switched off and the battery cartridge is removed
before attempting to perform inspection or
maintenance.
NOTICE: Never use gasoline, benzine, thinner,
alcohol or the like. Discoloration, deformation or
cracks may result.
To maintain product SAFETY and RELIABILITY,
repairs, any other maintenance or adjustment should
be performed by Makita Authorized or Factory Service
Centers, always using Makita replacement parts.
Checking the oil
► Fig.8:
1. Level line 2. Sight glass
• Always check the oil level and condition
(deterioration, etc.) before using the pump.
NOTE: Add oil until the oil level is between the upper
and lower level lines of the sight glass.
Replacing the oil
► Fig.9:
1. Intake shut-off valve 2. Drain plug
1. Open the intake shut-off valve.
2. Operate the pump for 1 or 2 minutes to warm up the
oil.
3. Turn the pump off.
4. Remove the drain plug and drain the oil.
5. Refer to “Adding oil” and add new oil.
• Dispose of the old oil in accordance with local
regulations.
NOTE: It is recommended to change the oil after 20
hours of usage to protect pump components from
contaminants pulled into the pump.
When vacuuming on old refrigeration systems, change
the oil after every usage.
Cleaning the pump
1. When the oil is extremely dirty, replace the oil and
then operate the pump for 3 to 5 minutes.
2. Drain the oil and add new oil.
If the drained oil is still dirty, repeat this cleaning
process two or three times.
OPTIONAL
ACCESSORIES
CAUTION: These accessories or attachments
are recommended for use with your Makita tool
specied in this manual. The use of any other
accessories or attachments might present a risk of
injury to persons. Only use accessory or attachment for
its stated purpose.

9 ENGLISH
If you need any assistance for more details regarding
these accessories, ask your local Makita Service Center.
• Makita genuine batteries and chargers
• Vacuum pump oil 150 ml
• Vacuum pump aluminum case
• Vacuum pump hose
• Vacuum pump valve with gauge
NOTE: Some items in the list may be included in the
tool package as standard accessories. They may differ
from country to country.

10
简体中文
简体中文(使用说明书)
目录 页码
规格.................................................... 10
一般电动工具安全性警告.................................. 11
充电式真空泵安全警告.................................... 12
关于电池的重要安全说明.................................. 12
部件描述................................................ 12
功能描述................................................ 13
操作.................................................... 14
维护.................................................... 15
选购附件................................................ 15
规格
机型 : DVP180
电池(容量) BL1860B (6.0 Ah)
BL1850 / BL1850B(5.0 Ah)
BL1840 / BL1840B(4.0 Ah)
BL1830 / BL1830B(3.0 Ah)
额定电压 D.C. 18 V
泵 单阶段旋转泵
自由排气能力 50 L/min
最高真空压 20 Pa
油容量 100 - 115 ml
进气口 5/16" 扩口公
尺寸 263 mm(长)×93 mm(宽)×172 mm(高)
净重(带BL1850电池) 3.5 kg
• 由于我们的持续研发计划,这里的规格如有变更,恕不另行通知。
• 规格和电池可能因国家而异。
• 按EPTA-Procedure 01/2003,带电池的重量
符号
以下显示用于该装置的符号。
使用之前,确保您理解它们的含义。
• 阅读使用说明书。
• 警告:表面烫!
不要接触此符号周围。
接触表面可能造成烫伤或
受伤。
Cd
Ni-MH
Li-ion
• 仅对于欧盟国家
请勿与家庭废弃物一起废弃电
气设备或电池!
根据欧洲关于废电气和电子设
备和电池、蓄电池、废电池及
废蓄电池及其按照国家法律实
施的指令,必须将达到使用寿
命的电气设备和电池和电池组
分开收集并返还到环保的回收
设施。

11
简体中文
一般电动工具安全性警告
警告:
请阅读所有安全性警告和所有
指南。不遵从这些警告和指南可能导致触
电、火灾和/或严重人身伤害。
请保管所有警告和指南以备日后
参照。
警告中的术语“电动工具”是指使用市电
(带电线)的电动工具或使用电池(不带电
线)的电动工具。
作业区域安全
1. 保持作业区域干净明亮。零乱或黑暗区
域易发生事故。
2. 不要在会引起爆炸的环境中使用电动工
具,例如在有易燃液体、气体或粉尘的
环境中。电动工具会产生火花,从而可
能点燃粉尘或气体。
3. 使用电动工具中,不要让小孩和旁观者
靠近。分散注意力会让您失去控制。
电气安全
4. 电动工具插头必须与插座匹配。切勿以
任何方式修改插头。请勿使用任何适配
器插头于接地的电动工具。未经改造的
插头和匹配的插座可减少触电危险。
5. 避免身体接触接地的表面,例如管道、
热交换器、电炉灶和电冰箱等。如果您
的身体接地,会增加触电的危险。
6. 请勿让电动工具暴露于雨水或潮湿的
环境下。电动工具进水会增加触电的
危险。
7. 不要拉扯电线。切勿抓住电线携带、牵
引或拔掉电动工具。不要让电线靠近发
热、有油、有尖锐边缘或移动的部件。
电线受损或缠绕会增加触电的危险。
8. 当在户外使用电动工具时,请使用适合
户外使用的延长电线。使用适合户外使
用的电线会减少触电的危险。
9. 如果不能避免在潮湿的地方使用电动工
具,请使用有接地故障断路器(GFCI)
保护的电源。使用GFCI可减少触电的
危险。
人身安全
10.使用电动工具时,请保持警觉,留意您
的所做并使用常识。在您劳累或受药
物、酒精影响之时,请勿使用电动工
具。使用电动工具中一不留神就可能造
成严重的人身伤害。
11.请使用个人保护装备。始终戴上护目
镜。适当地使用防尘罩、防滑安全靴、
硬帽或护耳等保护装备可减少人身
伤害。
12.防止意外启动。在连接电源和/或电
池、拿起或携带工具时,确保开关处在
关的位置。将手指放在开关上携带电动
工具或将开关开着的电动工具上电会引
发事故。
13.在启动电动工具之前,请移除任何调节
钥匙或扳手。让扳手或钥匙留在电动工
具旋转部件上可能导致人身伤害。
14.不要过度伸出。任何时候都要保持站稳
和平衡。这样可在意外的情况下更好地
控制电动工具。
15.合适着装。不要穿松大的衣服或戴首
饰。不要让您的头发、衣服和手套接近
活动部件。松大的衣服、首饰或长发会
挂上活动部件。
16.如果装置配有吸尘和收集设施,确保连
接它们并正确使用。使用集尘器可减少
与灰尘相关的危害。
电动工具的使用和保养
17.不要对电动工具施压过度。使用适合您
用途的正确电动工具。正确的电动工
具可以按其设计的功率更好更安全地
工作。
18.如果开关不能开启和关闭,请勿使用电
动工具。任何不能用开关控制的电动工
具都很危险,必须修理。
19.在进行任何调节、更换附件或存放电动
工具之前,请拔下电动工具电源插头
和/或取出电池。这种预防性安全措施
可减少意外启动电动工具的危险。
20.将不用的电动工具存放在小孩不能拿到
的地方,并且不能让不熟悉电动工具或
这些指南的人操作电动工具。未经训练
的用户使用电动工具很危险。
21.保养电动工具。检查活动部件是否对正
或咬合,活动部件是否损坏或有任何其
他情况,它们可能影响电动工具运转。
如果损坏,使用之前请修理电动工具。
许多事故是因电动工具保养不当而造
成的。
22.保持切割工具锋利和干净。正确保养的
带锋利边缘的切割工具较少会粘合,并
且较容易控制。
23.请按照这些指南,考虑作业条件和要进
行的作业来使用电动工具、附件和工具
批头等。将电动工具用于意图之外的作
业可能会构成隐患。

12
简体中文
电池工具的使用和保养
24.请务必用厂商规定的充电器充电。适用
某种电池的充电器在用于另一种电池时
可能会产生火灾的危险。
25.电动工具要使用专用的电池。使用任何
其他电池可能造成受伤和火灾危险。
26.不使用电池时,将其远离会连接两个端
子的其他金属物件,例如回形针、硬
币、钥匙、铁钉、螺丝或其他小金属
物件。电池端子短路可能造成烫伤或
火灾。
27.在滥用的情况下,电池可能会冒出液
体;请避免接触。如果发生意外接触,
请用水冲洗。如果液体接触眼睛,还需
就医。从电池冒出的液体可能会造成过
敏或烫伤。
维修
28.请让有资格的维修人员仅使用相同的更
换部件来维修您的电动工具。这可确保
电动工具的安全性得到维护。
29.请遵循指南进行润滑和更换附件。
30.保持手柄干净、没有油脂。
充电式真空泵安全警告
1. 此电动工具是用于排空冰箱和空调及回
收器的机器。请勿将其用于其他用途。
这样做可能导致故障。
2. 使用之前务必检查电动工具是否漏油。
否则可能造成火灾。
3. 检查油位和状况(变质等)以便安全有
效地工作。
4. 在极端冷热的环境中可能无法获得充分
性能。
保管好这些指南。
警告:
不要让舒适或熟悉产品(重复
使用中获得)代替严格遵守该产品的安全
规定。
误用或不遵守本使用说明书中的安全规定
可能会导致严重人身伤害。
关于电池的重要安全说明
1. 在使用电池之前,请阅读(1)电池充
电器、(2)电池和(3)使用电池的产
品上的所有指南和注意标记。
2. 不要拆解电池。
3. 如果使用时间变得过分短,请立即停止
使用。这可能产生过热、燃烧甚至爆炸
的危险。
4. 如果电解液进入眼睛,请用清水冲洗
掉,并立即就医。这可能导致失明。
5. 不要使电池短路:
(1)不要用任何导电材料接触端子。
(2)避免将电池与铁钉、硬币等其他金
属物件放在一个容器中。
(3)不要让电池暴露在雨水中。
电池短路会产生大电流、过热、可能导
致燃烧甚至毁坏。
6. 不要将工具和电池存放在温度会达到或
超过50℃的地方。
7. 即使电池严重损坏或完全报废,也不要
焚烧电池。电池在火中会爆炸。
8. 小心不要掉落或敲击电池。
9. 不要使用损坏的电池。
10.遵循与电池废弃有关的本地规定。
保管好这些指南。
注意:
请只使用正宗Makita电池。使
用非正宗Makita电池或改造过的电池可能
导致电池爆炸,造成火灾、人身伤害和损
坏。它还将使Makita工具和充电器的保修
失效。
保持最长电池寿命的要诀
1. 在电池完全放电之前充电。当您注意到
工具电力不足时,务必停止工具运转并
给电池充电。
2. 切勿给完全充电的电池再充电。充电过
度会缩短电池使用寿命。
3. 在10℃-40℃室温下给电池充电。在给
发烫的电池充电之前,先让其冷却。
4. 如果您长期不使用电池(超过六个
月),请给电池充电。
部件描述
► 图1:
1. 观察窗
2. 加/排油盖
3. 进气关闭阀
4. 手柄
5. 电池架
6. 电池
7. 电源开关
8. LED灯
9. 马达
10. 基座
11. 油箱
12. 排油塞

13
简体中文
功能描述
注意:
在调节或检查泵功能时,确保关
闭泵并且卸下电池。
安装或卸载电池
注意:
在安装或卸下电池之前,务必关
闭泵。
注意:
当安装或卸下电池时,请抓紧泵
和电池。不抓紧泵和电池可能导致其从手
中脱落,造成泵和电池损坏和人身伤害。
► 图2:
1. 红色指示
2. 按钮
3. 电池
要卸下电池,请在滑动电池前面按钮的同时
从泵滑动电池。
要安装电池,将电池上的舌与壳体中的沟对
齐并将其滑入到位。请将其插入到底,直至
听到轻微咔嚓声。如果您可以看到按钮上方
的红色指示,则没有完全锁定。
注意:
务必完全装入电池直到红色指示
看不到。否则,它可能意外从泵脱落,造
成您或您周围的人受伤。
注意:
不要用力安装电池。如果不能轻
易地滑入电池,则插入方式不正确。
电池保护系统
► 图3:
1. 星号
泵配置了电池保护系统。此系统会自动切断
到马达的电源以延长电池使用寿命。
如果泵和/或电池置于是以下情形之一,则
泵在操作中将自动停止。
过负荷:
泵的运转方式导致其抽取异常大的电流。
在此情形下,关闭泵并且停止造成泵过负荷
的应用。然后开启泵以重启。
如果泵不能启动,则电池过热。
在此情况下,请先让电池冷却再重新开
启泵。
电池电压低:
剩余电池容量太低,泵不能运转。在此情况
下,请卸下电池并给其充电。
注解:过热保护仅对于有星号的电池起
作用。
指示电池剩余电量
仅对于型号末尾带“B”的电池
► 图4:
1. 指示灯 2. 检查按钮
按下电池上的检查按钮以显示电池剩余容
量。指示灯点亮几秒钟。
指示灯 剩余电量
点亮 熄灭 闪烁
75% 至 100%
50% 至 75%
25% 至 50%
0% 至 25%
给电池
充电。
电池可能有
故障。
注解:取决于使用情况和环境温度,指示
可能与实际电量稍有不同。

14
简体中文
操作
新买时,泵不含油。
请参见“加油”并加油。
警告:
在没有加油的情况下运转泵会损
坏泵。此外,油箱也会变烫,可能导致烫
伤或其他事故。
加油
► 图5:
1. 加/排油盖
2. 水平线
3. 观察窗
4. 油箱
1. 卸下加/排油盖并通过加油口加油。
注意:
为保持泵的性能,请始终使用
Makita正宗油。
2. 加油直到油位处在观察窗的上下水平线
之间。
注意:
油位很重要。油位不在上下水平线
之间的情况下运转泵可能导致故障。
检查性能
► 图6:
1. 进气口
2. 低侧阀
3. 真空泵
4. 歧管
1. 用充气软管连接歧管的低侧阀与泵的进
气口。
2. 关闭歧管的低侧阀。
3. 打开进气关闭阀。
4. 打开进气阀。
5. 开启泵。如果在30秒内歧管的压力指
示-0.09至-0.1 MPa的空压,则泵运转
正常。
6. 关闭泵。
操作
► 图7:
1. 真空泵
2. 进气关闭阀
3. 充气软管
(黄色)
4. 歧管
5. 低侧阀
6. 低压量具
7. 高侧阀
8. 充气软管
(蓝色)
9. 服务口
(低压侧)
10. 室外机
1. 用软管连接泵、歧管和室外机。
注解:当室外机上服务口的尺寸是1/4"
时,请使用附带的不同直径适配器。
2. 确认歧管的高侧和低侧阀已关闭。
3. 将电池装到泵上。(安装方法参见“安
装或卸载电池”。)
4. 开启泵。LED灯(绿色)亮起。
5. 打开泵的进气关闭阀和歧管的低侧阀。
警告:
运转中和在刚停止时泵会很烫。
在泵烫时请不要接触它。否则可能造成烫
伤或其他事故。
注解:在寒冷时(5℃以下)马达可能不
运转。在此情况下,将泵带到室内让其
变暖。
6. 当达到指定的空压时(参见空调厂商提
供的手册),关闭歧管的低侧阀。
7. 关闭进气关闭阀并且关闭泵。
气密性检测
如果在留置泵和歧管之后歧管的压力在5分
钟以上不会上升,则没有漏气。
注解:当电池剩余容量变低时,LED灯熄
灭,同时开始发出长警报哔音。大约2分钟
之后,马达停止。然后警报哔音变为重复
的短间隔哔音,它通知马达停止,30秒钟
之后哔音停止。但是,不要等到马达停止
(或警报哔音变为短哔音),应即刻关闭
工具的进气阀和歧管的低压侧阀。
确认泵已关闭,卸下电池,并给其充电或
换上备用电池。
• 有关电池工作时间,请参见下表。
工作时间(指导)
电池 工作时间
BL1860B 60 min
BL1850 / BL1850B 50 min
BL1840 / BL1840B 40 min
BL1830 / BL1830B 30 min
•完成作业之后,请卸下电池并安上附带
的盖子。
注意:
在运输、操作和存储工具时,切勿
侧着或倒着放置它。否则可能从加/排油盖
漏油。

15
简体中文
维护
注意:
在尝试进行检查或维护之前,确
保关闭泵并且卸下电池。
注意:
切勿使用汽油、挥发油、稀释剂、
酒精或类似品。否则可能导致变色、变形
或开裂。
为维持产品安全和可靠性,维修、任何其他
维护或调整都应由Makita授权或工厂维修中
心进行,始终使用Makita更换部件。
检查油
► 图8:
1. 水平线 2. 观察窗
•在使用泵之前,始终检查油量和状况
(变质等)。
注解:加油直到油位处在观察窗的上下水
平线之间。
更换油
► 图9:
1. 进气关闭阀 2. 排油塞
1. 打开进气关闭阀。
2. 运转泵1或2分钟以使油变热。
3. 关闭泵。
4. 卸下排油塞并排掉油。
5. 参见“加油”并添加新油。
• 请按照地方规定处置废油。
注解:在使用20小时之后建议换油,以保
护泵组件免受吸入泵中污染物的危害。
当抽空旧制冷系统时,每次使用之后
换油。
清洁泵
1. 当油很脏时,请换油然后运转泵3至5
分钟。
2. 排掉油并添加新油。
如果排掉的油仍然脏,请重复此清洁过
程二或三次。
选购附件
注意:
建议将这些配件或附件用于本说
明书中指定的Makita工具。使用任何其他
配件或附件可能会构成人身伤害危险。仅
将配件或附件用于其规定的用途。
如果您对这些附件需要更多信息帮助,请咨
询您本地Makita维修中心。
•Makita正宗电池和充电器
•真空泵油 150 ml
•真空泵铝壳
•真空泵软管
•带量具的真空泵阀
注解:清单中的某些东西可能作为标准
配件包含在工具包中。它们可能因国家
而异。

16
繁體中文(原始使用說明)
規格
型號 : DVP180
•
•
•
符號
•
•
Cd
Ni-MH
Li-ion
•
通用的電動工具安全警告
警告:
請閱讀所有安全警告與所有說明。
請保留所有警告與說明以便將來
參考。
工作區域的安全
工作區域要保持整潔與明亮。
請勿在有易燃液體、氣體或灰塵之類的爆炸性環境
中操作電動工具。
操作電動工具時,要讓孩子與旁觀者保持距離。
電氣的安全
電動工具插頭必須與電源插座相合。切勿以任何方
式修改插頭。請勿將任何轉接插頭用於有接地的電
動工具。
身體要避免接觸有接地的表面,例如管道、散熱
器、爐灶以及冰箱。
請勿讓電動工具暴露於雨中或潮濕的環境中。
請不要濫用電纜線。切勿以拉扯電纜線的方式攜帶
電動工具或者為其拔掉插頭。電纜線要遠離熱、
油、尖銳的邊緣或移動中的零組件。
在戶外操作電動工具時,要使用適合用於戶外的延
長線。
如果無法避免在潮濕的場所操作電動工具,請使用
接地故障電路斷路器(GFCI)保護電源。

17
人員的安全
操作電動工具時要保持警覺,注意您正在做的事
情,並運用常識。不要在疲倦或者在毒品、酒精或
藥物的影響下使用電動工具。
使用個人防護設備。務必要配戴護眼設備。
防止意外的啟動。連接電源和/或電池之前、拿起
或攜帶工具之前要確認開關是在關閉的位置。
打開電動工具的開關之前,要取下所有調整鍵或扳
手。
不要勉強接近搆不著的地方。要隨時保持腳步的穩
定與平衡。
衣著要適當。不要穿著寬鬆的衣物或珠寶。頭髮、
衣物及手套都要遠離移動中的零組件。
如果有提供除塵與集塵的連接裝置,務必要連接與
正確地使用這些裝置。
電動工具的使用與保養
不要勉強使用電動工具。請針對您的用途使用正確
的電動工具。
如果開關無法開啟或關閉,請勿使用電動工具。
進行任何調整、更換配件或存放電動工具之前,都
要將插頭從電源拔掉與/或從電動工具取出電池。
暫時不用的電動工具不要讓孩童接觸到,而且不要
讓不熟悉電動工具或這些使用說明的人操作電動工
具。
保養電動工具。檢查轉動的零組件是否有沒對齊或
卡住的情形、零組件有沒有破損以及是否有任何其
他可能會影響電動工具操作的情況。如果有損壞,
要在使用之前修復電動工具。
切割工具要保持銳利與乾淨。
請按照這些使用說明使用電動工具、配件以及刀頭
等等,同時也要考慮到工作條件以及要執行的工
作。
電池工具的使用與保養
只能用廠商指定的充電器充電。
電動工具只能以專門指定的電池盒使用。
電池盒沒在使用時,要遠離其他金屬物體,例如迴
紋針、硬幣、鑰匙、釘子、螺絲釘或其他可能會接
通兩個端子的小型金屬物體。
在濫用的情況下,可能會有液體從電池噴出來,請
避免接觸。如果發生意外接觸的情況,請用清水沖
洗。如果液體接觸到眼睛,還要尋求醫療協助。
維修
請讓合格的修護人員修理您的電動工具,而且只能
使用一樣的更換零組件。
請按照指示潤滑與更換配件。
把手要保持乾燥、乾淨而且沒有油脂。
充電式真空幫浦安全警告
此電動工具是一種用來排空冷藏與空調設備並恢復
船舶的機器。請勿將其用於其他用途。
使用之前務必要檢查電動工具是否有漏油。
請檢查機油液面與狀態(劣化等等),以便安全而
且有效率的工作。
在極端炎熱或寒冷的環境中,可能無法達到適當的
效能。
請保存這些使用說明。
警告:
切勿讓對於產品的運用自如與熟悉(得自重
複的使用)取代對於該產品安全規則的嚴格遵守。
誤用或未能遵守本使用說明書中陳述的安全規則可能
會造成嚴重的人員傷害。
重要的電池盒安全警告
使用電池盒之前,請閱讀關於(1)電池充電器(2)
電池以及(3)使用電池的產品的所有說明與警告
標示。
請勿拆解電池盒。
如果使用時間變短非常多,請立即停止使用。這種
情況可能會造成過熱、燙傷甚至爆炸。
如果電解液跑進眼睛裡,請用清水將其沖洗出來,
並立即就醫。這種情況可能會造成失明。
請勿讓電池盒短路:
(1) 請勿以任何導電材料接觸端子。
(2) 避免將電池盒存放在有其他金屬物體如釘
子、硬幣等的容器中。
(3) 請勿讓電池盒暴露於水中或雨中。
電池短路可能會造成大電流、過熱、燙傷甚至
故障。
請勿將工具與電池盒存放在溫度可能達到或超過
50℃的地方。
即使電池盒已經嚴重損壞或者完全損耗了,也不要
加以焚燒。電池盒可能會在火中爆炸。
小心不要掉落或撞擊電池。
請勿使用受損的電池。
請遵守您當地關於廢棄電池的規定。
請保存這些使用說明。

18
注意:
只能使用Makita的原廠電池。
讓電池維持最長壽命的秘訣
在完全放完電之前就為電池盒充電。注意到工具比
較沒力時,一定要停止使用工具並為電池盒充電。
切勿為已經充滿電的電池盒充電。過度充電會縮短
電池的使用壽命。
請在室溫為10℃—40℃時為電池盒充電。溫熱的電
池盒要冷卻之後才可以充電。
如果很長時間不使用電池盒(超過六個月),要為
電池盒充電。
零件說明
►圖1:
1.
2.
3.
4.
5.
6.
7.
8.
9.
10.
11.
12.
功能說明
注意:
調整或檢查幫浦的功能之前,務必確認幫浦
的開關已經關閉,而且電池盒已經取下來。
安裝或卸除電池盒
注意:
安裝或卸除電池盒之前,務必要關閉幫浦的
開關。
注意:
安裝或卸除電池盒時,要緊握住幫浦與電池
盒。
►圖2:
1.
2.
3.
注意:
請將電池盒完全裝入到看不到紅色指示器為
止。
注意:
請勿勉強安裝電池盒。
電池保護系統
►圖3:
1.
過載:
電池電量低:
附註:
顯示電池剩餘電量
僅限於型號末端有“B”的電池盒
►圖4:
1. 2.
指示燈 剩餘電量
點亮 熄滅 閃爍
附註:

19
操作
警告:
在沒有加油的情況下操作幫浦會損壞幫浦。
加油
►圖5:
1.
2.
3.
4.
注意:
注意:
檢查效能
►圖6:
1.
2.
3.
4.
操作
►圖7:
1.
2.
3.
4.
5.
6.
7.
8.
9.
10.
附註:
警告:
幫浦在操作中以及剛停止後會變得很燙。請
勿在幫浦很熱時觸摸它。
附註:
氣密測試
附註:
•
操作時間(原則上)
•
注意:
運送、操作或存放工具時,切勿將其側放或者
上下顛倒。這樣可能會使得機油從加油口/通風口蓋洩
漏出來。
保養
注意:
進行檢查或保養之前,務必要確認幫浦已經
關閉而且電池盒已經取出來。
注意:
切勿使用汽油、揮發油、稀釋劑或者酒精之類的
東西。可能會造成褪色、變形或皸裂。

20
檢查機油
►圖8:
1. 2.
•
附註:
更換機油
►圖9:
1. 2.
•
附註:
清潔幫浦
選購附件
注意:
建議將這些附件或配件用於本說明書中指
定的Makita工具。
•
•
•
•
•
附註:
Other manuals for DVP180
5
Table of contents
Languages:
Other Makita Water Pump manuals

Makita
Makita EW120R User manual

Makita
Makita Pump EW200R User manual

Makita
Makita DVP181 User manual

Makita
Makita DVP180Z User manual

Makita
Makita EW300R User manual

Makita
Makita EW2050H User manual

Makita
Makita EW200TR User manual

Makita
Makita DVP181 User manual

Makita
Makita DOLMAR EP-84 User manual

Makita
Makita EPH1000 User guide

Makita
Makita Pump EW200R User manual

Makita
Makita EW100R User manual

Makita
Makita EPH1000 User guide

Makita
Makita EW1050H User manual

Makita
Makita DVP181 User manual

Makita
Makita DVP181 User manual

Makita
Makita PF 0410 User manual

Makita
Makita DOLMAR EP1500-DS User manual

Makita
Makita MP001G User manual

Makita
Makita EPH1000 User manual