Malloca MOV-65T5 User manual

BUILT-IN OVEN
USER MANUAL
MODEL: MOV-65T5

ϭ
CONTENTS
SAFETY PRECAUTIONS..................................................................................... ϭ
WARNINGS FOR PROPER TRANSPORTATION.................................................. ϰ
TECHNICAL SPECIFICATIONS
.............................................................................. ϱ
INSTALLATION INSTRUCTIONS........................................................................ ϲ
PRODUCT SPECIFICATIONS AND USAGE ......................................................... ϳ
CLEANING AND MAINTENANCE ..................................................................... ϭϮ
TROUBLESHOOTING ....................................................................................... ϭϰ
Dear Customer,
We would like to thank you and congratulate you on your
choice.
This new product has been carefully designed and built using top
quality materials,
and
meticulously tested to ensure that it meets all
your culinary
r
equirements.
GB Please read and observe these simple instructions, which will enable
you to
achieve
excellent results from the very first time you use
it.
READ CAREFULLY AND KEEP FOR FUTURE USE
This product is designed for domestic use. The manufacturer declines all
responsibility for personal injury or property damage deriving from incorrect
installation or improper, erroneous or unsuitable use.
The appliance must not be used by people (including children) wıth physical,
sensorial or mental impairments, or by people wıthout the necessary experience
or knowledge, unless they are supervised or instructed in the use of the
appliance by a person responsible for their safety.
Chıldren must be supervısed to ensure that they do not play wıth the applıance.
Do not place aluminium foil, pots or similar objects in contact with the base
inside the oven for cooking.
WARNING
The appliance gets very hot during use.
WARNING
Don’t touch the heating elements inside the appliance.

2
SAFETY PRECAUTIONS
This Built-in electrical oven is manufactured for use in the preparation of
normal home meals. Please do not use for other purposes.
Installation:
This appliance must be installed by qualified personnel, according to
the manufacturer’s instructions and the relevant Safety Standards.
This appliance is heavy. Take care when moving it.
Remove all packaging, protective films and oils from the appliance
before using for the first time.
Ensure that the electrical supply complies with the type stated on the
rating plate.
Do not attempt to modify the appliance in any way.
The voltage of your oven is 2Ϯ0ͲϮϰϬ Volt –50-60 Hz.
This appliance has been constructed and distributed in compliance
with the regulations of AS/NZS 3350-1 and AS/NZS 3350-2-6.
This appliance must be correctly installed by a suitably qualified
person in conjunction with Australian Wiring rules AS3000.
Warning: This appliance must be earthed.
Do not use a steam cleaning device with this appliance.
WARNING : ensure the appliance is switched off before replacing the
lamp to avoid the possibility of electric shock.
When you have finished cooking check that all controls are in the OFF
position.
Please check your electrical installation is earthed. This appliance
must be installed by a qualified engineer.
This appliance must be fitted with a min 16 A Fuse.
Please ensure that plug of your oven is not accidentally pulled or
stretched beyond the extent of the power cord. If this appliance is
installed without proper earthing the manufacturer doesnot accept
any reasonability for any damage caused. Commissioning of this
appliance should only be attempted by an Authorised Service or an
expert authorised by customer relations. Connection of this
appliance must be via a cable that is 3 x 2.5 mm2
For isolation safety the length of the power cord must not exceed 2
meters.

ϯ
Connection diagram can be found on the rear of the appliance
Please reset the timer when in the event of a power failure. The oven
will not operate until the timer is properly set.
The oven door must always close properly. Keep the door seal areas
clean.
Pressing on open cover of oven with heavy matters can cause
damage on cover hinges. So please do not sit or load heavy matters
on open cover of oven.
Do not use aluminium foil to cover the grill pan, or put items
wrapped in foil under the grill as this creates a fire hazard. The high
reflectivity can also damage the elements.
Do not use the oven with the door inner glass panel removed.
Do not use the drop down door as a step to reach above cabinets
After using oven please wipe vapour drops with a cloth that can be
formed on oven cover by high temperature.
Do not block the oven vent in anyway, as this creates a fire hazard.
When opening the appliance door, take care to avoid skin contact
with any steam that may escape from the oven.
Perishable food, plastic items and aerosols may be affected by heat
and should not be stored above or around the appliance.
Service:
Cables routed too near to oven may become damaged and short, if
they come in to contact with hot parts of oven. The cables of other
appliances must be routed a safe distance from oven. If power cord is
damaged then contact your authorised repairer.
This appliance should only be repaired or serviced by an Authorised
Service Engineer and only genuine approved spare parts should be
used.

ϰ
WARNINGS FOR PROPER TRANSPORTATION
Keep the original package of the appliance.
To move the appliance properly, use the original package with
consideration to the markings on the package.
In cases where the original package could not be kept;
oCare for any possible measures to prevent any impact to the
appliance.
oDo not place heavy objects on the appliance.
oDuring transportation carry the appliance by holding the
door side on the top.
Protect the Environment:
The documentation for this appliance is printed on paper
bleached without chlorine or recycled paper to contribute to
protecting the environment. The packaging was designed to
prevent damage to the environment; they are ecological products
that can be recovered or recycled.
Recycling the packing saves raw materials and reduces the
volume of industrial and domestic waste.
THE PACKING MATERIAL is 100% recyclable and marked
with the recycling symbol. Dispose of in conformity with
local law. The packing material (plastic bags, polystyrene
parts, etc.) must be kept out of the reach of children
because it is potentially dangerous. THIS APPLIANCE is
marked in conformity with European Directive
2012/19/EU, Waste Electrical and Electronic Equipment
(WEEE). By making sure that this product is disposed of
correctly, the user contributes to preventing potential
negative consequences for the environment and health.
THE SYMBOL on the product or accompanying documentation indicates that
this product must not be treated as domestic waste but must be delivered to
ϱ
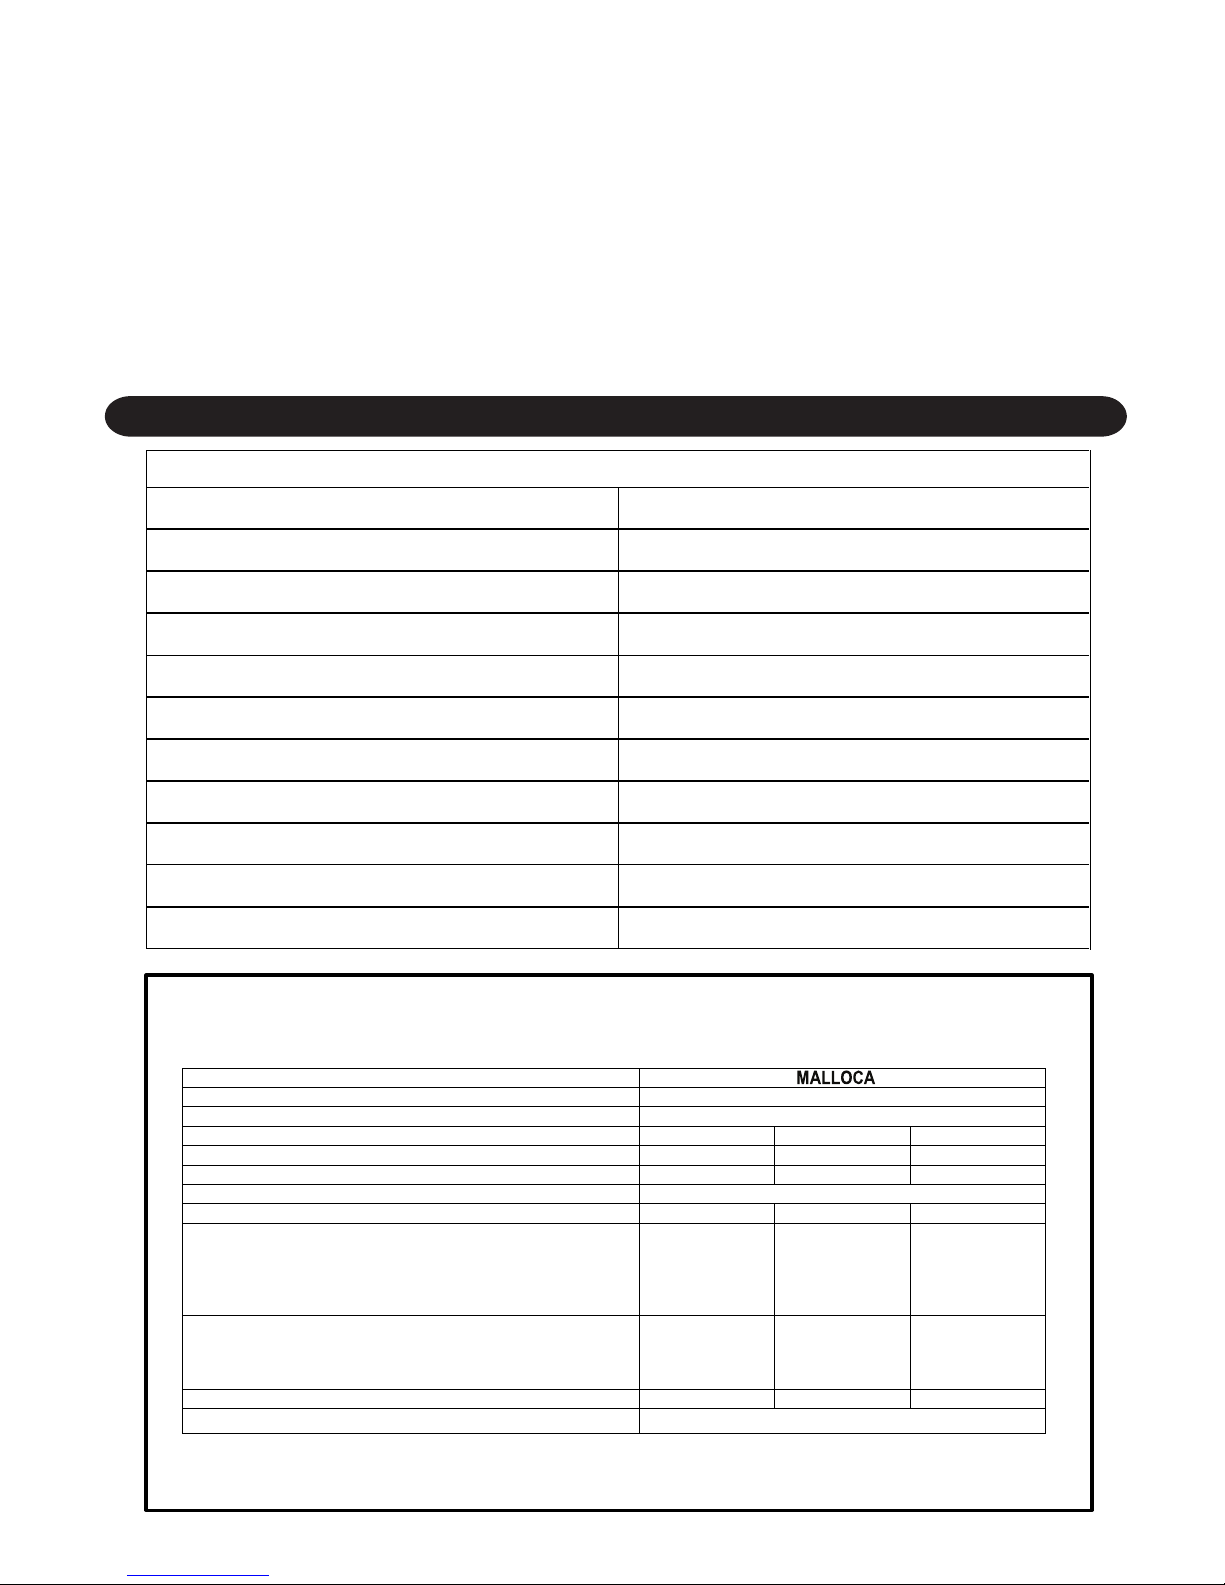
MOV-65T5 TECHNICAL SPECIFICATIONS
Function 4functions
Maximum Power 2500 W
Grill 2000 W
Temperature Range 0-285 C
Safety Thermostat 160 C
Oven Dimensions (WxDxH)
Capacity 65 lt.
Energy Class A
Energy Consumption 0,83Kwh
Voltage
Frequency 50-60 Hz.
a suitable collection point for the recycling of electrical and electronic
equipment
DISPOSAL MUST BE MADE in conformity with local laws on waste disposal.
FOR ADDITIONAL INFORMATION about the treatment, recovery and recycling
of this product, contact the local office of competence, the domestic waste
collection service or the store where the product was purchased.
BEFORE SCRAPPING, make it unusable by cutting the electrical cord.
TECHNICAL SPECIFICATIONS
Brand
Model identification
Oven type BUILT IN OVEN
Symbol Value
Unit
Appliance weight
M
kg
Number of cavities
Source of heat for each cavity (electricity or gas) Electricity
Volume of each cavity
V
L
Energy consumption (electricity) required to heat a
standardised load in a cavity of an electric heated
oven during a cycle in conventional mode per cavity
(electric final energy)during a cycle in conventional
mode per cavity (electric final energy)
EC kWh/cycle
Energy consumption required to heat a stan-
dardised load in a cavity of an electric heated oven
during a cycle in fan-forced mode per cavity
(electric final energy)
EC kWh/cycle
Energy Efficiency Index per cavity EEIcavity
Energy Efficiency Class
The information in the product data sheet is given in accordance with the Commission
delegated Regulation (EU) No 65/2014 supplementing Directive of the European Parliament
and of the Council 2010/30/EU and (EU) No 66/2014 supplementing Directive of the
European Parliament and of the Council 2009/125/EC
electric
cavity
electric
cavity
In order to determine compliance with the eco-design requirements, the measurement
methods and calculations of the following standards were applied:
EN 60350-1
A
MOV-65T5
38,55
1
65
0,83
100,4
[[PP
9

ϲ
INSTALLATION INSTRUCTIONS
Installation must be completed by an authorised technician
Dimensions and materials of
cabinet must be suitable and
capable of withstanding heat
radiation from oven.
Correctly Installation - Cabinet
should not come into contact
with any of the ovens electrical
parts.
Isolation materials or parts that
used for isolation must affix
strongly to prevent taking out by
any tool.
It is not recommend you to
install your appliance near
refrigerator or freezer.
If a hob is installed with your
oven, all electrical cables of
cooker and oven must be
Separate.
Install your appliance in a position
that allows access to power cable.
Do not place power cable to close
or in contact with hot surfaces. Do
not attach the cable to the oven door.

ϳ
PRODUCT SPECIFICATIONS AND USAGE
Thermostatic Control of Oven
The indicator lamp will switch on together with the thermostat. When the
heat inside the oven reaches the set value, the thermostat cuts the circuit
and the lamp will go off. When the heat falls below set value,the thermostat
will switch on again and indicator lamp will be lit.
The Knobs control power and setting of each heating element. Turn Knobs
clockwise to activate oven and set at required cooking temperature. Turn
Knob anti-clockwise to decrease cooking temperature and to deactivate
oven.
ϴ
Usage of Oven
For initial operation of your oven, a smell arising from insulation materials
and heating elements will be generated. To help avoid it, operate your oven
at 250 C for 45 minutes without putting any trays in oven.
Suggested Settings
1. Meals that may be cooked
2. Oven Control Position
3. Thermostat position
4. Recommended cooking times are given in cooking table.
5. Turn the “oven heating control” switch clockwise to adjust cooking time
for the meal you desire to cook, refer to cooking table.
6. Before cooking, pre-heat the oven for 10 minutes. The door of the oven
should be open. Put the dish in the oven after pre-heating.
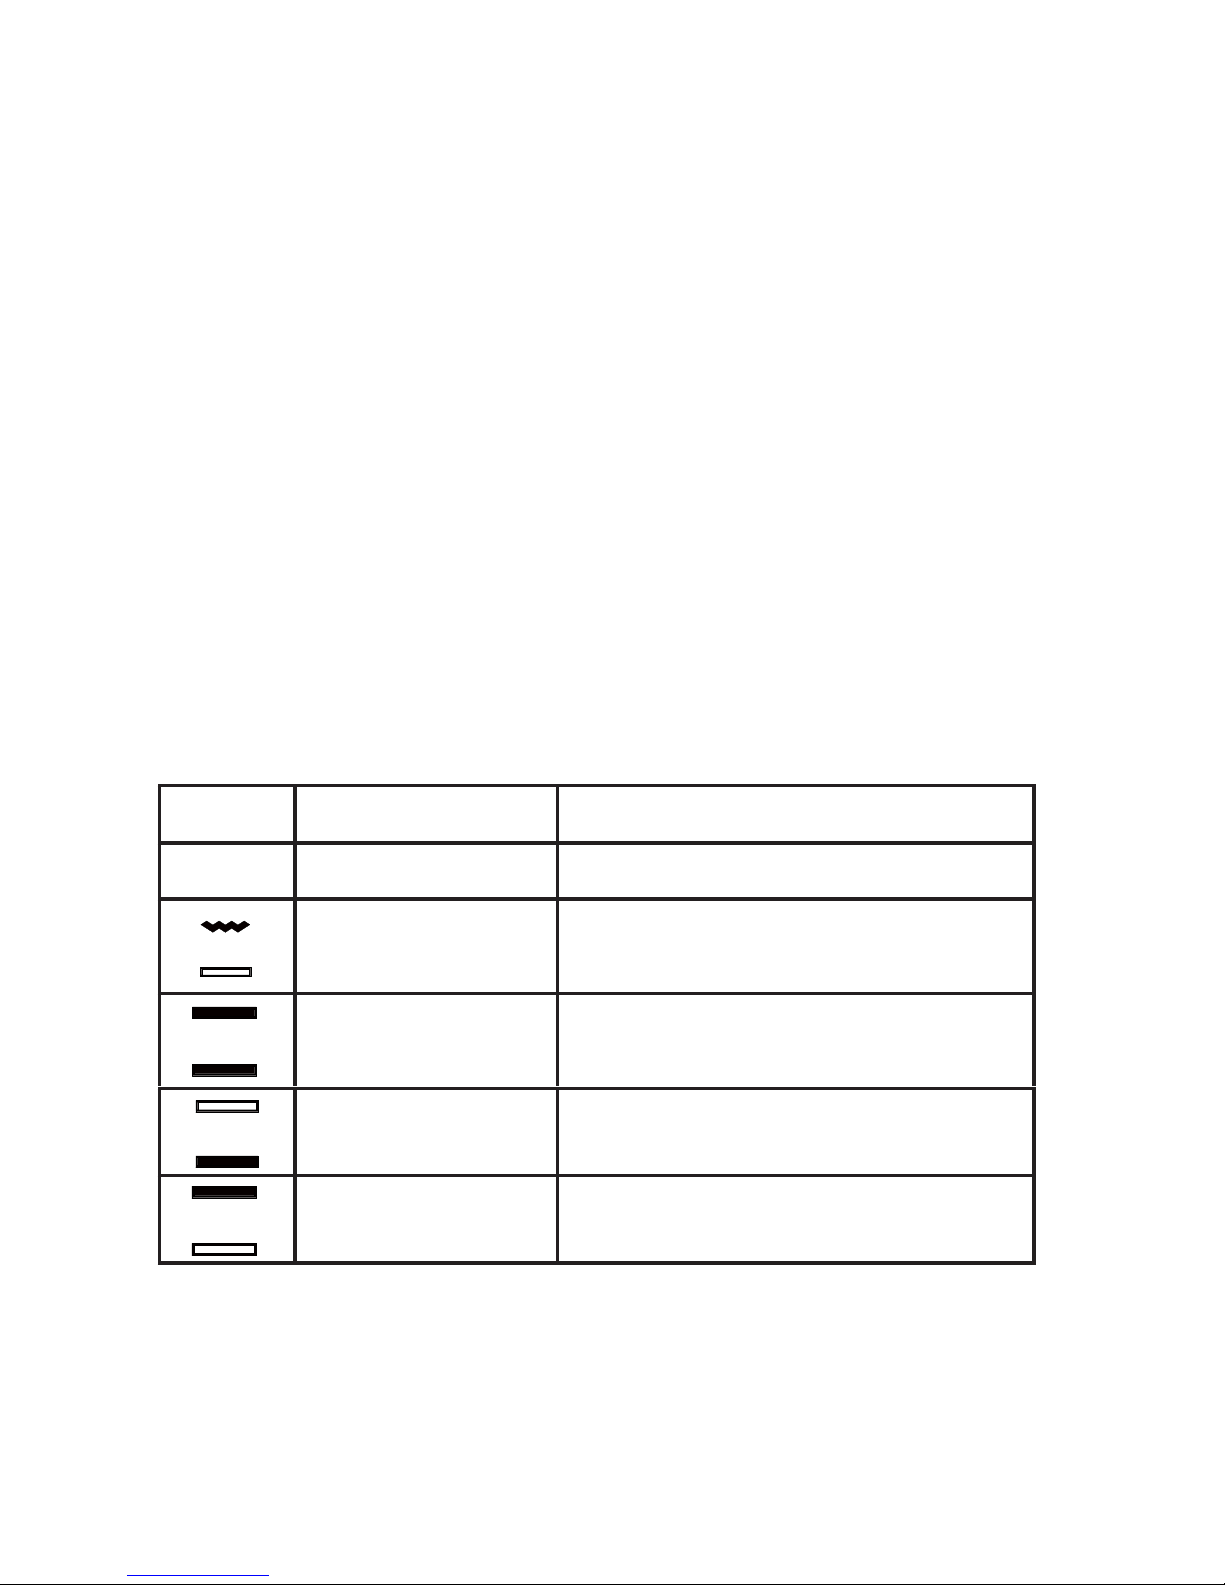
OVEN FUNCTIONS
LEVEL FUNCTION DESCRIPTION
O Close Oven is not working
Oven Lamp
Grill Heating Element
Oven Lamp and Grill heater works.
Recommend to use for frying.Thermostat must
be at maximum position.
Oven Lamp
Top&Bottom Heating
Elements
Hot air comes from up and down heats the
tray from both sides. Top and both sides of
meals cooked equally.
Bottom
Heating Element
Bottom heating element,
Recommend to use cake and
bread.
Top
Heating Element
Top Heating Element for keeping cooked food
warm or gently reheating.
ϵ
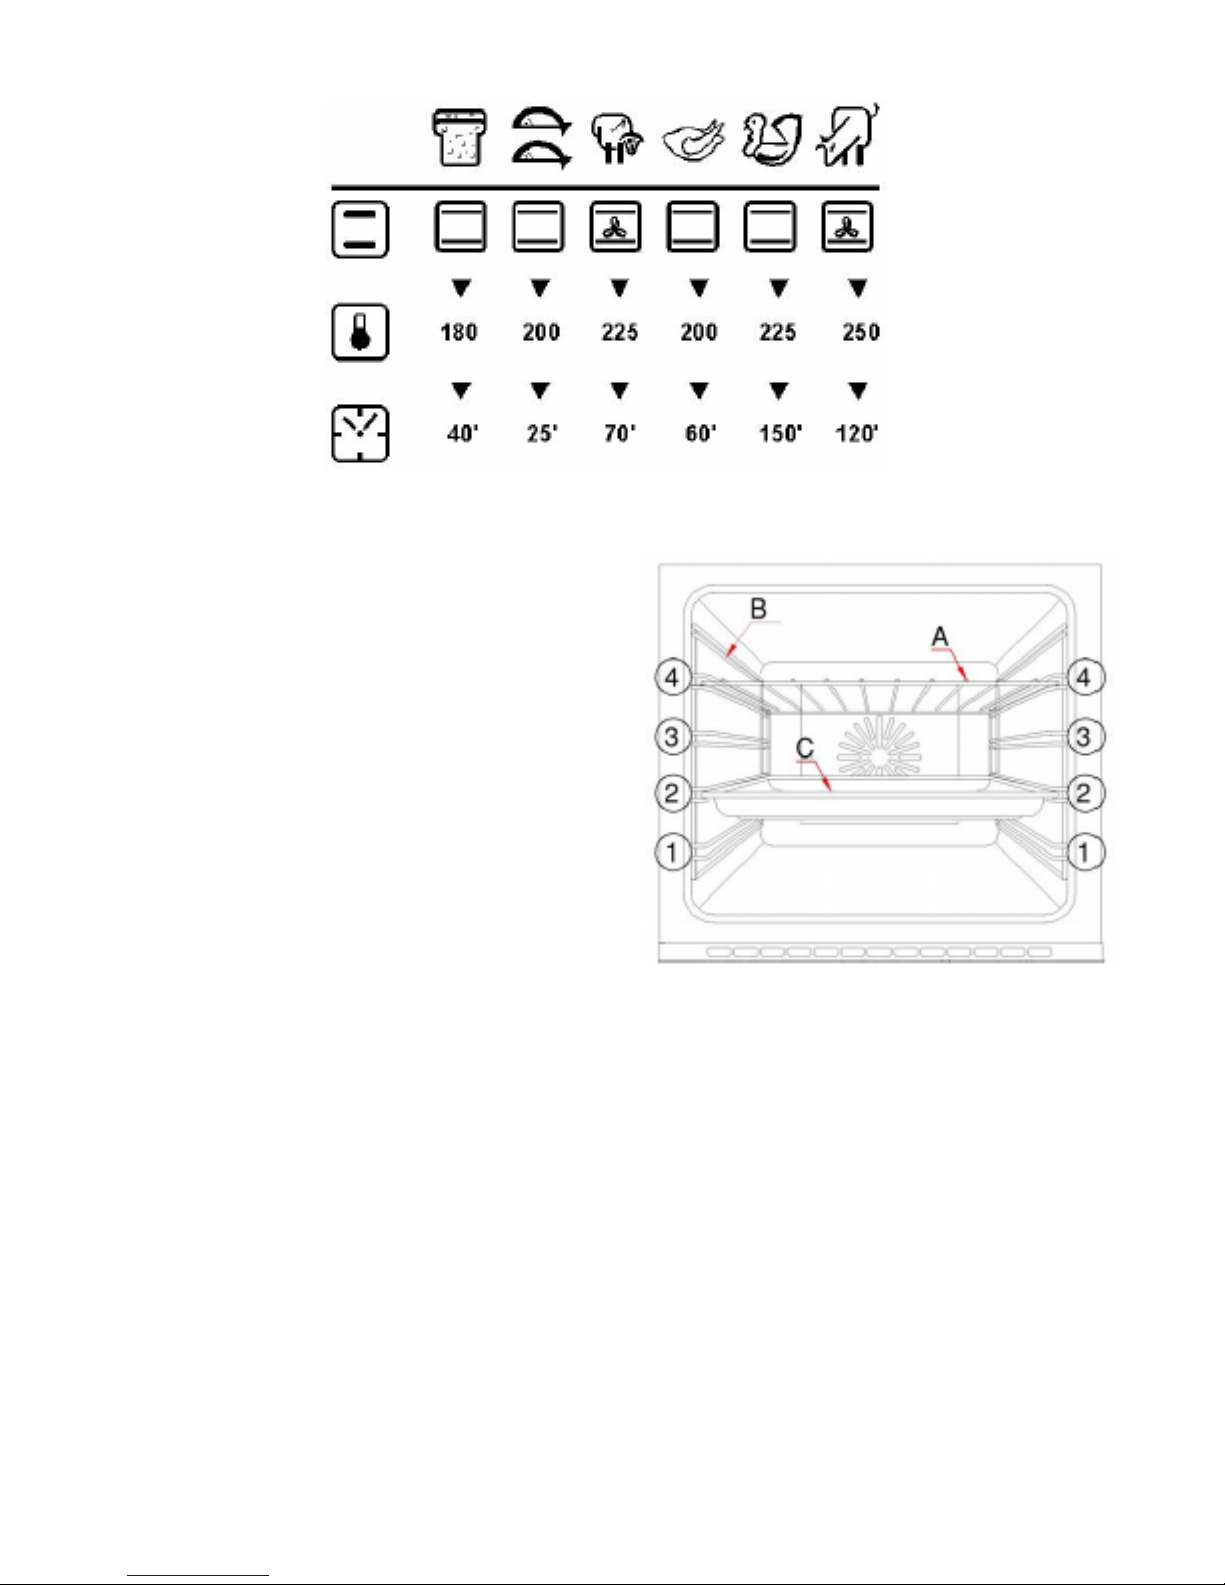
WARNING
To ensure the oven shelves operate
safely, correct placement of the
shelves between the side rails (figure 1,
2, 3, 4) is imperative.
This will ensure that during careful
removal of the shelf or tray, hot food
items should not slide out.
ϭϬ
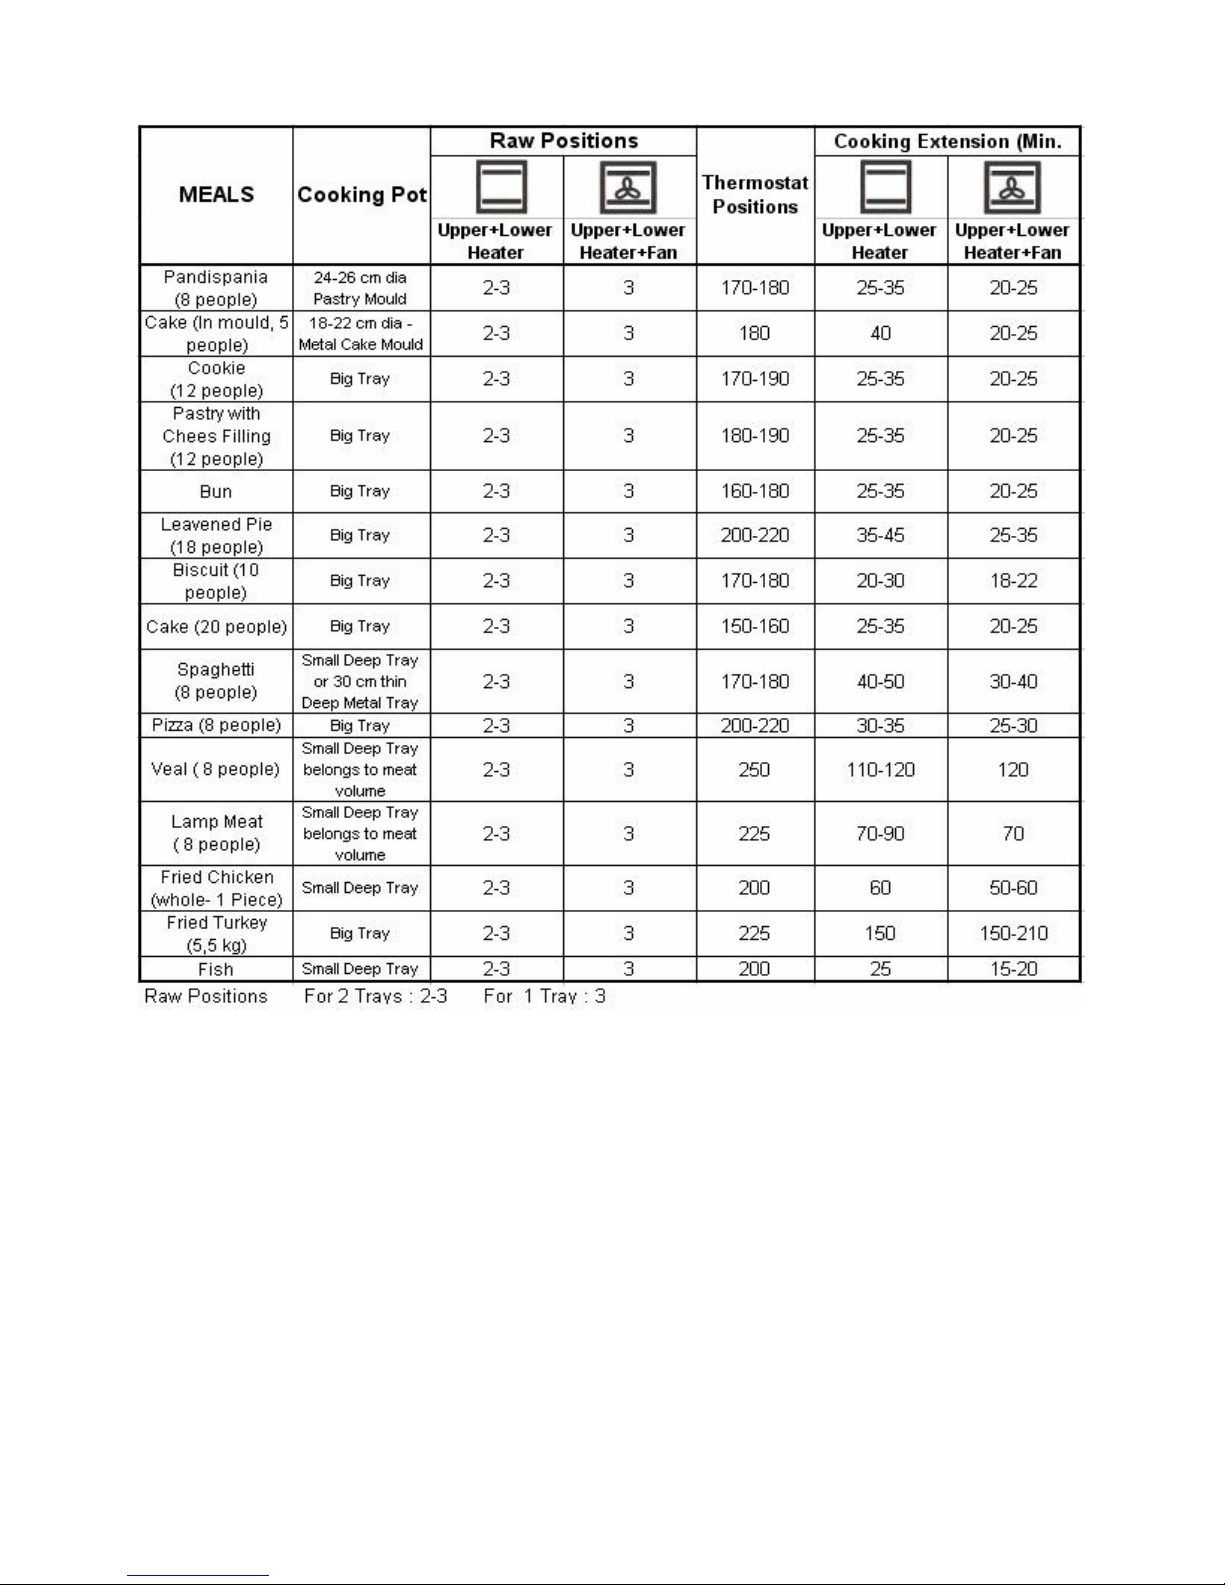
NOTE: The values given in cooking table are the values obtained in our
laboratories. You can obtain various results to satisfying your tastes
depending on your cooking and use habits. Cooking times depend on
quantity of ingredients. Using cake forms gives better results for making
cakes.
ϭϭ
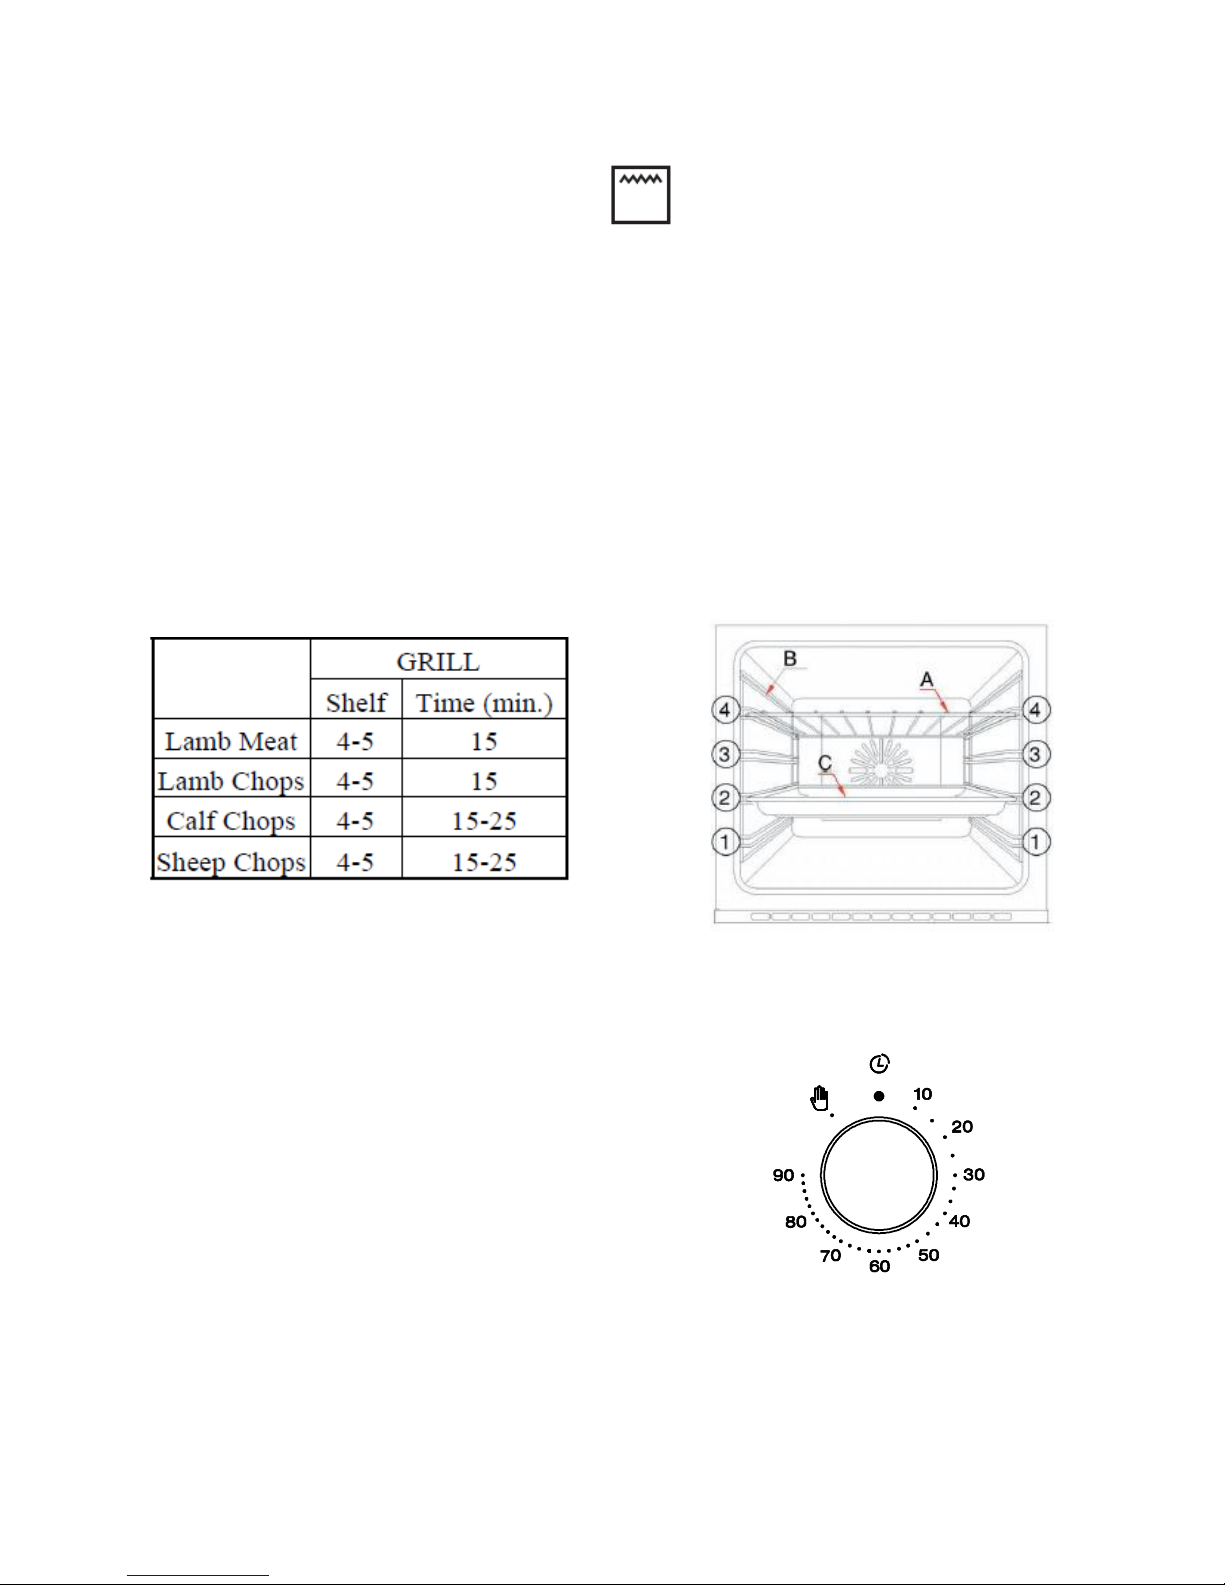
Grill Function of Oven - Closed Door Grilling
Turn the oven control knob to position
• We advise you to use trivet shelf placed into grill tray when you are grilling.
This will help avoid spills and help keep your oven clean
• If you decide use grill wire on shelf rather than placing in tray, position a
tray below to collect oils. For easy cleaning, put some water in tray.
• Preheat grill with door closed position for 5-10 minutes before use.
• Always pre-heat grill before use and grill with door closed.
ATTENTION:
It is recommended that you always grill with the Panel Protection Sheet in
place. Our company is not responsible for damage made by not using this
sheet.
ADJUSTMENT of TIMER
Adjustment of Mechanical Timer :
Mechanical Timer can be adjusted by its button
on front panel. Timer must be adjusted to start
the oven cooking. Cooking time can be adjusted
between 5 to 90 minutes with mechanical timer.
You should position the button to ‘ON’ manually
if cooking time will exceed 90 minutes.

ϭϮ
CLEANING AND MAINTENANCE
Cleaning your Oven
1. Before you start cleaning, switch off power-supply at the socket. If the
oven is hot, wait it to cool off.
2. Do not use the abrasive cleaning agents on enamel, ceramic or painted
surfaces. Use only creams or liquid cleaning agents that do not contain
abrasive agents.
3. Any liquid spilling on the cooker may cause damage to enamel surfaces
when they burn. Promptly clean spilt liquids.
4. Do not use corrosive cleaning agents when cleaning control panel.
5. Never drip water on and touch the glass when the oven is hot.
6. Remove covers of the oven. Wash and rinse with soapy water.
Cleaning the Interior of Your Oven
● Switch off power supply before starting to clean oven. Remove trays and
grill. Wipe the interior parts with soap soaked cloth. Clean it with dampened
cloth again and wipe dry.
● Do not use dry or powder cleaning agents. Clean the glass surfaces with
specialised glass cleaning agents.
● Do not use hard brushes, steel wood or sharp instruments such as a knife
when cleaning the interior part of the oven.
● Remove the glass front door by unscrewing the fixings using a screwdriver,
remove the inside glass, clean and rinse it. After drying it place the seal
properly and re-install the glass.
Removal oven door for easy cleaning
Before cleaning the oven door, we advise you to follow below steps to
separate oven door from the oven body;
1. Open the door completely. Dismount the locking part on hinge by
lifting with screwdriver.
2. Push the locking part in the direction of the glass door to the hinge
body.

ϭ3
3. Open the glass door to the back slightly and insert the locking part to
its place on hinge. Make sure that this is done on both for left and
right hinges.
4. Lift the door slightly and pull the door with your two hands to
separate from the oven.
Inserting the oven door
After cleaning, for inserting oven door to oven body it is recommended
to apply below steps:
1. Hold the door in open position and insert the hinge to hinge
counterpart.
2. Open the glass door to the back slightly for getting the locking part
and then push ahead and lock with screwdriver.
3. Open and close the door to make sure that it has been fitted
correctly.
Oven Gasket
Please check this gasket at regular periods. If it requires cleaning, clean it
without using abrasive materials.
If gasket is damaged, immediately contact with closest authorised service.
Do not use oven till gasket repaired or replaced.
Changing Oven Lamp
1. Pull the plug out of socket.
2. Turn the lamp fixing glass counter-clockwise direction to separate it.
3. To separate lamp from body turn it to counter-clockwise direction.
4. Fix new lamp that you gain from authorised service in place of old
lamp.

ϭϰ
5. Ensure the appliance is switched off before replacing the lamp to
avoid the possibility of electric shock.
TROUBLESHOOTING

BACH HOP KITCHEN APPLIANCES CO.; LTD
Showroom:
279 Nguyen Van Troi St., Ward 10, Phu Nhuan Dist., HCM City
Tel: (+84) 8 39975 893 / 94 –(+84) 8 39975 294 / 95
Fax: (+84) 8 38447 102 –(+84) 8 39974 633
2016-1.Rev.
Other Malloca Oven manuals

Malloca
Malloca MOV-LX12 User manual

Malloca
Malloca MOV-615EST User manual

Malloca
Malloca MDO-80BL User manual

Malloca
Malloca MOV-575 ECO User manual

Malloca
Malloca MOV-LX74 User manual

Malloca
Malloca MOV-726 MC User manual

Malloca
Malloca MST-LX12 User manual

Malloca
Malloca MOV35-IX03 User manual

Malloca
Malloca MOV-575 AMG User manual

Malloca
Malloca MOV-65DE User manual


