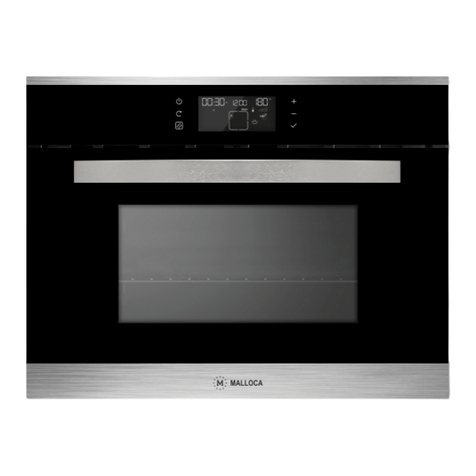
Malloca MOV-LX12 User manual

USER MANUAL
HƯỚNG DẪN SỬDỤNG
MODEL: MOV -LX12

TABLE OF CONTENTS page
USER GUIDE
▪
General warnings 5
GUIDE TO USING THE OVEN
▪
Control panel 6
▪
Selectable cooking functions 8
▪
Description of the oven and accessories 9
TURNING THE OVEN ON
▪
First start-up / Reset after power outage 10
▪
Setting the time 11
▪
ON/OFF Function 11
▪
Oven on : awaiting commands 12
COOKING FUNCTIONS MENU
▪
Traditional cooking functions 13
DISPLAY TEMPERATURE
▪
Displays 14
▪
HOT residual heat 14
▪
Setting/changing temperature 15
▪
Oven pre-heating 15
SPECIAL FUNCTIONS
▪
Start / Pause 16
▪
Oven light 17
▪
Key Function – child safety 17
▪
Food Warmer Function 18
▪
Defrost Function 18
TIME PROGRAMMING FUNCTIONS
▪
Setting the timer 19
▪
Setting the alarm 20
▪
Setting the timer and alarm 21
▪
Programming the cooking time 22
▪
Cooking duration 23
▪
End cooking time 24
▪
Automatic Cooking 24
▪
Delete / Edit programming time and timer 26

COOKING INSTRUCTIONS
▪
Position ofinternal grills 27
▪
Use of the grill 28
▪
Tangential fan 28
AUTOMATIC COOKING RECIPES
▪
Automatic cooking recipes 28
▪
Automatic recipes 29
▪
Customized recipes 31
▪
References table programs 32
MAINTENANCE AND CLEANING
▪
Periodic maintenance 33
▪
Cleaning the surfaces 34
▪
Removing the oven door 35
▪
Re-insertion of the oven door 35
▪
Removing inner glass 36
▪
Removing / remountinglateral guides 37
▪
Removing/Mounting the sliding guides(if any) 38
▪
Replacing the light bulb inthe oven 39
INSTALLATION INSTRUCTIONS
▪
Technical data 40
▪
Dimensions of thesingle oven 40
▪
Dimensions of the oven withfood warmer 41
▪
Single built-in cabinet measurements 41
▪
Built-in cabinet with foodwarmer measurements 42
▪
Inserting the oven into the cabinet 42
▪
Features of the cabinet 43
OVEN ELECTRICAL CONNECTION
▪
Electric connection of the oven 43
▪
Assembly/replacement of the powersupplycable 44
▪
Earth connection 44
TECHNICAL AFTER-SALES ASSISTANCE AND SPARE PARTS
▪
Touch errors 45
▪
Software parameters that can be changed bythe user 45
▪
Spare parts 46
▪
Technical assistance 46
TABLES OF REFERENCE 47

NỘI DUNG page
HƯỚNG DẪN SỬ DỤNG
▪
Cảnh báo chung 48
HƯỚNG DẪN SỬ DỤNG LÒ NƯỚNG
▪
Vận hành 51
▪
Lựa chọn chức năng nướng 53
▪
Mô tả lò nướng và phụ kiện54
MỞ LÒ NƯỚNG
▪
Khởi động lần đầu/thiết lập sau khi mất điện55
▪
Cài đặt giờ địa phương 56
▪
Chức năng TẮT/MỞ 56
▪
Mở lò nướng: lệnh chờ 57
CHỨC NĂNG NƯỚNG
▪
Chức năng nướng truyền thống 58
MÀN HÌNH NHIỆT ĐỘ
▪
Màn hình hiển thị59
▪
Dư nhiệt HOT 59
▪
Cài đặt/thay đổi nhiệt độ 60
▪
Làm nóng lò 60
CHỨC NĂNG ĐẶC BIỆT
▪
Bắt đầu / Dừng 61
▪
Đèn lò 62
▪
Chức năng khóa – an toàn trẻ em 62
▪
Chức năng hâm nóng thức ăn63
▪
Chức năng rã đông 63
CHỨC NĂNG THIẾT LẬP THỜI GIAN
▪
Thiết lập hẹn giờ 64
▪
Thiết lập báo thức 65
▪
Thiết lập hẹn giờ và báo thức 66
▪
Thiết lập thời gian nướng 67
▪
Thời gian nướng 68
▪
Kết thúc thời gian nướng 69
▪
Nướng tự động69
▪
Xóa/Chỉnh sửa thiết lập thời gian và hẹn giờ 71

CHỨC NĂNG NẤU NƯỚNG
▪
Nướng vị trí bên trong 72
▪
Sử dụng nướng vỉ 73
▪
Quạt tản nhiệt73
CHỨC NĂNG NẤU NƯỚNG TỰ ĐỘNG
▪
Công thức nướng tự động 73
▪
Công thức tự động74
▪
Công thức tự chọn76
▪
Các chương trình bảng tham khảo 77
BẢO TRÌ VÀ VỆ SINH
▪
Bảo dưỡng định kỳ 78
▪
Vệ sinh bề mặt 79
▪
Tháo cửa lò 80
▪
Lắp lại cửa lò 80
▪
Thay thế kính bên trong 81
▪
That thế/lắp đặt kệ inox 82
▪
Thay thế/lắp đặt ray trượt (nếu có)83
▪
Thay thế bóng đèn bên trong lò nướng 84
HƯỚNG DẪN LẮP ĐẶT
▪
Thông số kỹ thuật85
▪
Kích thước lò đơn85
▪
Kích thước lò khi gắn thêm ngăn giữ ấm thức ăn86
▪
Kích thước khoang âm đơn 86
▪
Kích thước khoang âm đơn khi gắn thêm ngăn giữ ấm thức ăn 87
▪
Lắp đặt lò vào khoang chứa 87
▪
Đặc điểm khoang lò 88
KẾT NỐI ĐIỆN LÒ NƯỚNG
▪
Lắp ráp điện lò nướng 88
▪
Lắp ráp/thay thế dây cáp nguồn 89
▪
Kết nối đất89
HỖ TRỢ KỸ THUẬT VÀ LINH KIỆN
▪
Lỗi cảm ứng90
▪
Thông số phần mềm có thể được thay đổi bởi người dùng 90
▪
Linh kiện 91
▪
Hỗ trợ kỹ thuật91
BẢNG THAM KHẢO 92

➢
GENERAL WARNINGS
This product is in compliance with the EU 2002/96/EEC Directive.
The crossed out "wheeled bin" symbol on the appliance indicates that at the end of its
life-span, the product, as it has to be separately treated from domestic waste, must be
conferred to a differential collection centre for electric and electronic appliances or
redelivered to the dealer at the time of purchasing a new equivalent appliance.
The user is responsible, at the time of disposal, for taking the device to the appropriate
collection point. Failure to do so shall result in punishment in accordance with the
current legislation on waste disposal.
Proper differentiated collection is necessary so that the obsolete device can be sent on
for environmentally friendly recycling, treatment and dismantling, in order to avoid any
possible negative environmental impact or health risk and to permit re-use of the
constituent materials.
More detailed information about available systems for collection may be obtained from
the local waste disposal services, or from the shop where the device was purchased.
The manufacturer declines all civil or criminal liability in the event ofpoor or
improper installation of the device.
The manufacturer also reserves the right tomany anynecessary and useful amendments
to its products without prior notice.
Dispose of the various packaging materials incompliance with the applicable local
Standards.
Carefully read this instruction manual prior to installing or using this device, in order to
have all the necessary information for correct installation, maintenance and use of the
same.
It is essential for this instruction manual tobe kept together with the device for its entire
life-span, also in case of transfer to other persons.
This appliance hasbeen designed for domestic useand only for the cooking and heating
of food. Any other use, different to that indicated in this manual must be considered
improper and consequently dangerous.
The product isin compliance with the 89/109/EEC European Directive asitisdestined
to come into contact with food products.
This household appliance is compliant with the provisions of the European
Community Directives
-
LOW VOLTAGE DIRECTIVE – 2006/95/EC
-
ELECTROMAGNETIC COMPATIBILITY DIRECTIVE – 2004/108/EC
The product identification data is stated on the relevant plate applied on the front of the
oven. The plate must never be removed.
Installation must only be carried out by qualified staff in compliance with the local
regulations in force and following the indications in thismanual.
Important: do not lift or pull the oven by the handle.
5

In case of malfunctioning, disconnect the appliance from the electric mains (do not pull
the power supply cable to disconnect the plug) and contact the authorised original spare
parts technical after-sales centre.
Do not, in any case, attempt to repair the device.
Correct use of the oven
-
The device is only meant to be used by adults. Keep childrenaway.
-
The appliance produces heat both in the functioning phase and due to inertia, even
when just turned off. Do not touch parts inside the oven during these phases and limit
contact with the external parts. Keep children away from the unit when it is in
operation.
-
The accessible parts may become very hot.
-
To insert or extract containers or accessories from the oven, alwayswear suitable
protective gloves.
-
Use only containers able to resist to hightemperatures
-
Do not leave the appliance unattended during cooking operations that mayrelease
greases or oils that may catch fire.
-
Never cover or lean on the walls or lower part of the oven with sheets of aluminium
or other objects such as pans or trays that could damage the product.
-
Do not use the oven to store objects when it is not in use, otherwise damage could be
caused to both the oven and the objects when the appliance is switched on.
-
Do not sit on or place weight on the open door and do not hang weights on the
handle as to do so could damage the product and cause malfunctions.
-
Before maintenance or cleaning, unplug the oven and, if just used, wait for it to cool.
-
Pay attention to the flow of air that leaves the oven when the door is opened when
the same is hot.
-
Do not use jets of steam for cleaning, which could reach and damage electrical parts.
-
If the supply cord is damage, immediately contact Technical Assistance which will
replace it.
Attention, this appliance must be earthed in compliance with the standards in
force.
For installation of the oven see the “installation instructions” chapter.
6

Correct use of the oven
-
Pre-heat the oven for the strictly necessary timeonly;
-
Open the door only when necessary to avoid unnecessary heatlosses;
-
Keep the gaskets clean and efficient to avoid heat dispersion which can cause damage;
-
Always turn off the oven when no longer in use;
-
To reduce the formation of condensate owing to the humidity in food, it is always
necessary to pre-heat the oven before introducing the foodstuffs. In any case formation
of condensate on the door glass or on the walls of the oven does not compromise its
operation and with continued cooking it tends to disappear.
First time using the oven, what to do?
Unplug the device.
Remove all internal packaging and accessories from the oven. Clean the internal
surfaces with hot water or neutral detergent (see “maintenance and cleaning”
paragraph). Rinse thoroughly with a damp cloth. Wash all oven accessories in the
same way and dry everythingthoroughly.
Make it function, empty and for a maximum of about 1 hour, with a ventilated cooking
function. Ventilate the premises well, possibly by opening the windows. This will allow
the evacuation of the combustion fumes of production residue such as grease, oil and
resin from processing.
Attention:
-
Never use this device to warm the premises
-
Do not obstruct the passage of cooling air by blocking the ventilation holes of the
room and ducts on the appliance.
-
Before installation, check that the local power supply is compatible with the data
indicated on the product label.
-
During use, do not touch the heating elements inside the oven.
- The accessible parts can become very hot during use, it is recommendedto keep
children out of reach.
7

■GUIDE TO USING THE OVEN ■
➢
STANDARD CONTROL PANEL
KEY 1: on/off/wake KEY 4: + / temperature
KEY 2: menu selection KEY 5: -
KEY 3: start/pause KEY 6: confirm/reset
oven light / systemtime
Whenever a button is pushed you will hear a Beep.
DISPLAY AREA DETAIL
Display area/setting the system clock.
(position on the display: upper centre)
4
5
6
Graphic display
1
2
3
6

Area for programming time and display the progressive
cooking time.
(position on the display: upper left)
timer
alarm
progressive manual cooking time
cooking duration
end cooking time
automatic cooking
Cooking method display area
(position on the display: centre)
-
AUTO = AUTOMATIC programming
-
MAN = MANUAL programming
Display area/central chamber temperature setting and temperature graph.
(position on the display: upper right)
BLOCK KEYS (special safety function)
temperature selection indicator
increase/decrease temperature
interior temperaturegraph
(position on the display: right ofcentre)
cooking delay mode indicator / cookingnot active
active cooking mode indicator
7

IMPORTANT NOTE: All of the functions are accompanied by the activation
of the internal light . The light remains on for 3 min and then goes off
automatically.
SPECIAL FUNCTIONS INDICATORS
"OVEN LIGHT" mode indicator (position on the display: centre)
“PAUSE” mode indicator (position on the display: lower left)
"DEFROST" function indicator (position on the display: lowerleft)
“FOOD WARMER” mode indicator (position on the display: lower right)
"FOOD PROBE" mode indicated, in applicable models
(position on the display: left of centre)
➢
SELECTABLE COOKING FUNCTIONS:
POSSIBLE TEMPERATURE RANGE: FROM 50 TO 250 °C.
Except for:
-
From 50 to 160° C (Base heatingelement);
-
From 50 to 150° C (Base heating element + RadialFan);
8

4
3
2
5
6
1
1)
Control panel;
2)
Completely extracting guides (where applicable);
3)
Support rack;
4)
Drip tray;
5)
Ventilated cooking fan cover;
6)
Grill cooking heating element;
➢
DESCRIPTION OF THE OVEN AND ACCESSORIES
9

■TURNING THE OVEN ON ■
➢
FIRST STARTUP / RESET AFTER POWER OUTAGE
All of the icons stay on for 2 sec to verify oven operation.
Whether it is the first electrical hookup or a reset after a power outage, the system time
appears as in the figure, with the hour digits flashing.
To proceed, the system time must be set (see relevant paragraph).
If the cooking mode was interrupted due to a power outage, the oven maintains all of the
information (blackout mode).
In fact, when power is restored an intermittent audible signal indicates that the oven was
locked and the following appears:
Once the time is reset on the oven, the audible signal stops and it goesinto PAUSE mode
(see relevant paragraph).
10

NOTE: when the oven is turned off, it cancels all of the set cooking programs and times.
If the oven is turned off in low consumption mode (display dimmed), the first time a key
is touched it has a WAKE function (the display light becomes brighter). Low
consumption mode is automatically re-enabled after 1 min.
➢
ADJUSTING THE SYSTEM TIME
The system time (clock) is based on the type of power supply (50 Hz or 60 Hz). The
time is adjusted with the oven OFF:
1)
Hold down the key for at least 3 sec. The hour digits on the displaywill
flash. Use the 4 and 5 keys to set thevalue.
2)
To acquire the set hour, confirm with the 6 key .
3)
Perform the same procedure to set the minutes.
If the oven is on OFF: the control displays only the system time, dimming the brightness
after 1 min.
If the oven is in blackout mode due to a power outage, the hour digits flash. Usethe4
and 5 keys to set the hour as indicated above.
➢
ON/OFF Function
The oven is activated by holding down the 1 ON/OFF for at least 2 secondsand is
turned off with a single touch of the same key.
If no key is pressed after the oven is turned on, it is disabled automatically after 1 min
(accidental startup control).
Oven ON: single audible signal.
Oven OFF: double audible signal.
ACCIDENTAL STARTUP CONTROL
This function automatically turns off the oven.
It occurs after the oven is turned on with the 1 ON/OFF and after 1 min of
command inactivity. In other words, if no function is selected and activated. After 1
min, a double audible signal notifies the user that the oven will shut off.
11

ATTENTION:
-
when scrolling through the functions, the icons flash. If the function is not
confirmed or changed within 7 sec, the selection isde-activated.
-
from oven "on awaiting commands", if there is command inactivity for more than 5
min, the oven will automatically shut off.
➢
OVEN ON awaiting commands
Pressing the 1 ON/OFF key turns the oven on, awaiting settings on the desired
cooking function.
The default function is ventilated cooking (Circular heating element + Radial fan) with
pre-set temperature of 180° C.
The display is as shown in the figure:
The menu 2 key scrolls through the functions in the following order:
1- cooking functions menu;
2- oventemperature;
3- programming cookingtime;
4- timer;
5- alarm;
NOTE: the oven can switch from "in cooking mode" to "on awaiting commands" by
pressing the 1 ON/OFF key . When the key is pressed again, the oven shutsoff.
12

■COOKING FUNCTIONS MENU ■
➢
TRADITIONAL COOKING FUNCTIONS
After the oven is turned on using the 1 ON/OFF , it is possible to directlyaccess
the cooking function selection by immediately pressing the 2 menu key .
The central icon and the interior cooking functions start to flash.
Using the 4 and 5 keys you can also scroll through the available cooking functions
(see "SELECTABLE TRADITIONAL COOKING FUNCTIONS"): therelated
segments are activated.
Once the desired function is highlighted, confirm using the 6 key .
In any case, after 7 seconds of command inactivity, the function chosen is automatically
confirmed (auto-confirm).
The oven starts the pre-heating phase. The internal oven light comes . The cooking
pan icon comes on and starts to flash. Based on the cooking function selected the
default temperature appears and the temperature increase icon starts to flash. The
progressive manual cooking time is displayed. The icon starts to flash (see figure).
At the end of cooking, press the 1 ON/OFF key and the oven stays in "on awaiting
commands" mode. When the key is pressed again, the oven shuts off.
At this point, to start cooking, confirm everything with the 3 START key
(see the reference paragraph).
13

■DISPLAY TEMPERATURE ■
➢
DISPLAYS
After the oven is turned on, the 1 ON/OFF is activated along with the default
"ventilated cooking" function.
If cooking is started, the display shows the following information:
-
pre-set temperature (default);
-
icon: thermometer, arrow rising and progressive temperaturegraph;
-
"cooking pan" lights up;
NOTE: the control has time limits for continuous operation, with the following safety
limits:
- 250°C max 3h - 120-195°C max 8h
- 200-245°C max 5h - up to 120°C max 11h
➢
RESIDUALHEAT
If HOT appears in the upper right part of the temperature display, be careful not to touch
the inside parts of the even, even if it is turned off.
HOT is displayed after the oven is turned off and remains active until the chamber
temperature goes below 50° C.
14

.
.
➢
SETTINGS AND TEMPERATURE CHANGES
The temperature can be changed at any time after choosing a cooking function by
simply pressing the 4 key .
On the display, the temperature and corresponding flash.
Use the 4 and 5 keys to set the desired temperature and confirm with the 6 key
In any case, after 7 seconds of command inactivity, the temperature chosen is
automatically confirmed (auto-confirm).
You can also access the temperature change using the 2menu key
Set it on the temperature function: the switch is highlighted by the temperature icon
flashing .
To select the desired temperature, use the 4 and 5 keys
6 key or after 7 sec it will be auto-confirmed.
PRESET TEMPERATURE
and then confirm with the
The preset temperature assigned to each function can be changed.
Using the 4 key (or the 2 menu key ), go to temperature change mode and set the
new preset temperature.
While the display is flashing (and thus within 7 sec), confirm the value by holding down
the 6 key for at least 3 sec. The next time the oven is turned on the new preset
temperature will be active.
➢
OVEN PRE-HEATING
Once the cooking function and temperature has been chosen, the 3START key
enters cooking mode and the oven starts the pre-heatingphase.
The rising temperature icon startsto flash and the status
shows the
temperature reached inside the oven. Once all the bars on the graph are full, a long
audible signal indicates that the set temperature has been reached inside the oven and the
rising temperature icon no longer flashes.
The stabilised temperature icon appears in its place
At this point the oven maintains the set temperature inside the cavity. If oven
temperature changes are made, the rising temperature and falling temperature
icons are activated.
15

■SPECIAL FUNCTIONS ■
➢
START/PAUSEFUNCTIONS
The 3 START KEY , as already described, is active after having selected a cooking
function and lets you confirm all of the cooking settings and automatic programs.
Basically, it starts cooking (START function).
The PAUSE function, represented by the icon, is always activated with the 3
START key and can be done with the oven in cooking mode.
The icon is steady and the loads are turned off but the other settings are notreset.
After having confirmed any changes made to the cooking parameters and/or the cooking
status is displayed, in order to proceed the pause must be disabled.
Then press the 3 START key again to exitpause.
The is disabled, returning to cooking and all of the automatic programs, the
progressive cooking time and displays are activated.
NOTE: The PAUSE function does not hinder the TIMER and ALARM
functions while it blocks automatic programming of the time (AUTO functions).
The pause function activates automatically in the following cases:
-
the previously confirmed cooking function ischanged;
-
power is reset with the oven in cooking mode;
16

to fla
➢
OVEN LIGHT CONTROL
The oven light is considered a special function. It is not selected among the cooking
functions.
The light can be turned off and on at any time, even with the oven off, using the 6 key
(except when in programming and/or function change mode).
The oven light is also controlled by a microswitch on the door that detects when it is
opened or closed. When the door is open, appears on the clock display and
the light comes on. This also occurs with the oven OFF.
If the oven is in cooking mode, when the door is open it disables the Radial Fan and
the Circular Heating Element where required, thus preventing the steam produced form
directly touching the user and that there is a notable heat dispersion.
➢
KEY FUNCTION (childsafety)
The key function inhibits/freezes the functionality of the touch keys. This prevents
unintended changes to the cooking program and/or accidental startups (child safety).
The key function can be enabled or disabled at any time by pressing the 5 and 6
keys together for at least 3 seconds.
When activated, the icon sshtafrotsr3 seconds and then remains on. At this
point the function is confirmed.
At each action after the function is activated, the icon flashes for 3 seconds to
indicate the safety status. To continue, disable the keyfunction.
The key function can also be enabled/disabled with the oven off.
In any case, the light goes off automatically after 3 min. of operation.
17
Table of contents
Languages:
Other Malloca Oven manuals
Malloca
Malloca MST 35-IX03 User manual

Malloca
Malloca MW-944TF User manual

Malloca
Malloca MOV-615EST User manual
Malloca
Malloca MOV-726 MC User manual
Malloca
Malloca MOV-65T5 User manual

Malloca
Malloca MOV35-IX03 User manual

Malloca
Malloca MW34TS User manual
Malloca
Malloca MST-35CP User manual
Malloca
Malloca MST-48CP User manual

Malloca
Malloca MOV-659TC User manual
Popular Oven manuals by other brands

DèLonghi
DèLonghi EOS160 User operating instructions
Bosch
Bosch CMG836N 1 Series User manual and installation instructiions
Zanussi
Zanussi ZOU 481 User information
Fisher & Paykel
Fisher & Paykel BI453 installation instructions

Electrolux
Electrolux EOC5400AOX user manual
Frigidaire
Frigidaire GLEB30S8C Factory parts catalog


