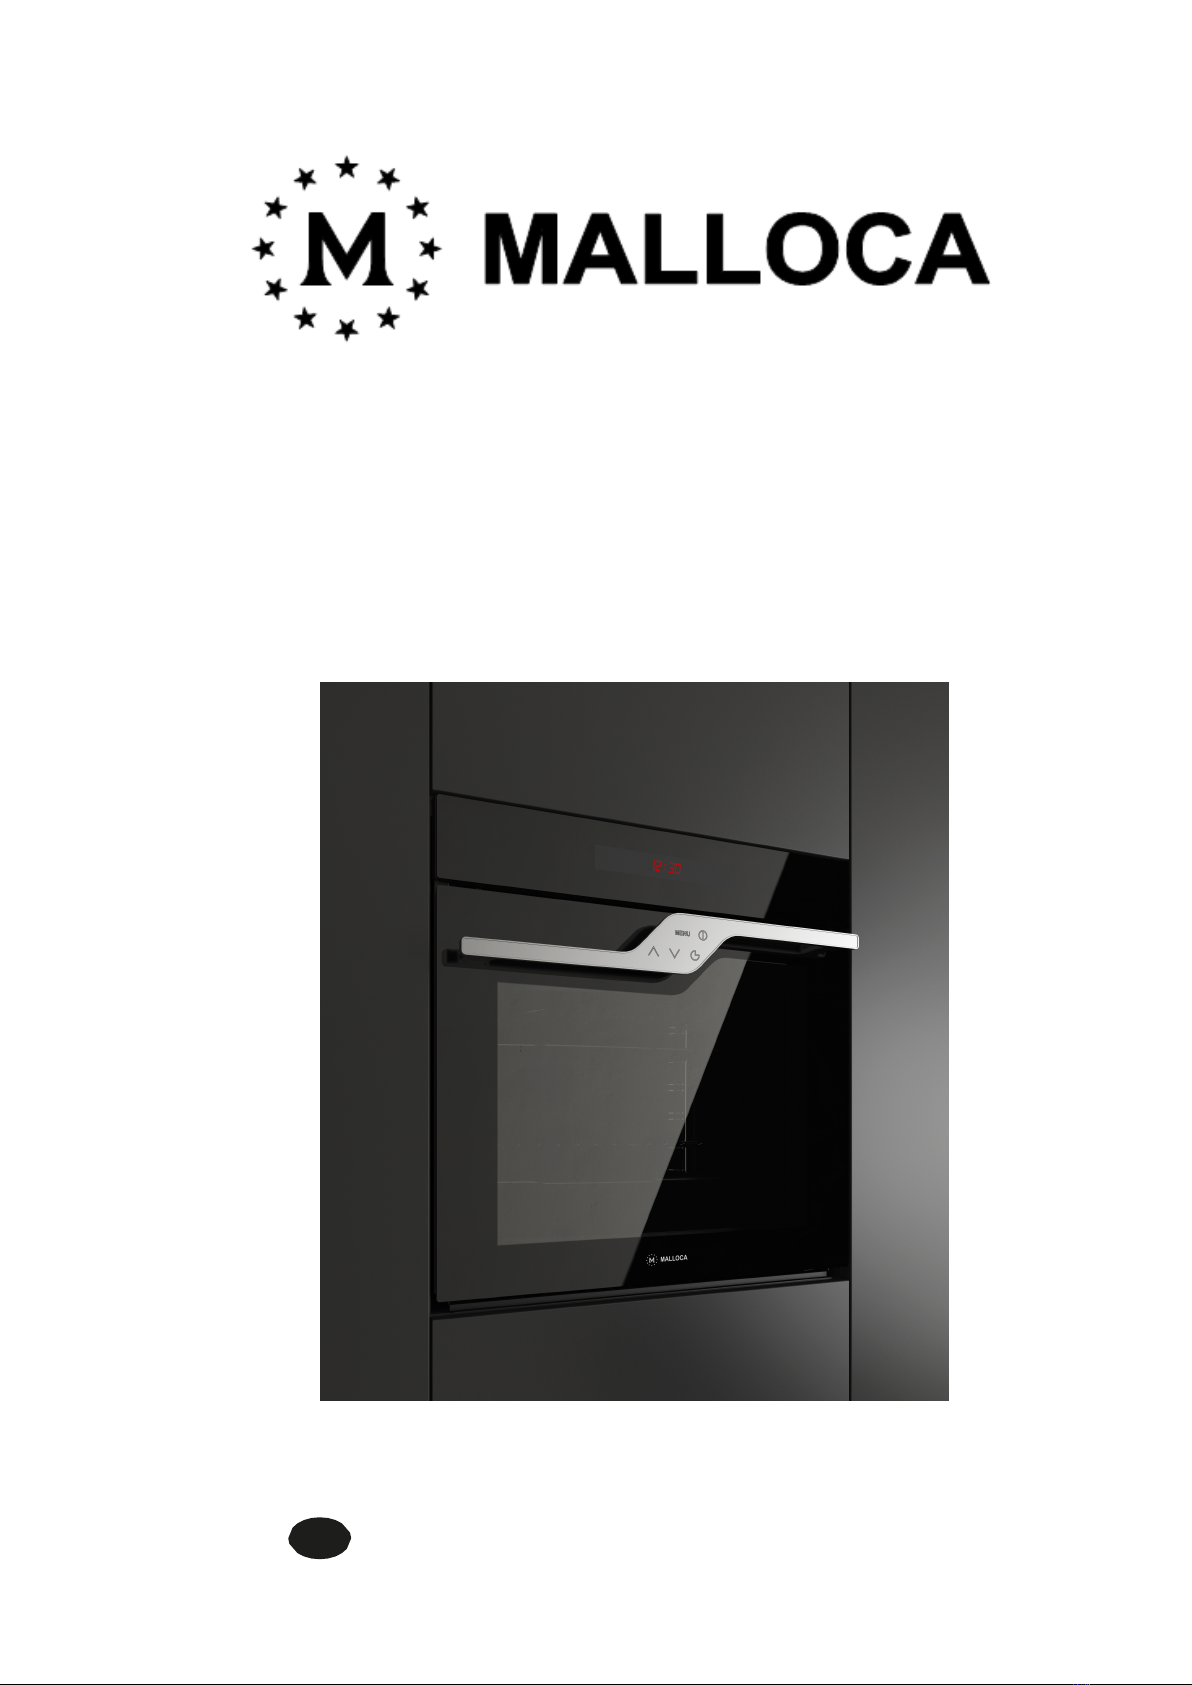
Malloca MOV-LX74 User manual
USER MANUAL
HƯỚNG DẪN SỬ DỤNG
MODEL: MOV-LX74
L
Ò
N
ƯỚ
NG
Đ
I
Ệ
N
Â
M T
Ủ
HƯỚNG DẪN LẮP ĐẶT, SỬ DỤNG VÀ BẢO DƯỠNG
VN

1
General warnings 2
Description ofthe product 4
Control panel 5
Oven user guide 6
Noalia electronicprogrammer instructions 7
Oven functions 8
Maintenance andcleaning 10
Removing/mounting oven door 10
Removing/mounting interior glasses 11
Removing/mounting lateral guides 12
Removing/mounting sliding guides 12
Replacing the ovenlight bulb 13
Instructions for installation 13
Introduction intothe cabinet 13
Oven electrical connection 14
Assembly/replacement ofthe power supplycable 14
Earth connection 15
Technicalafter-salesassistanceandspareparts 15
MODELMOV-LX74
(MTLN)
(MTN) Noalia electronic programmer
PAGE

2
GENERAL WARNINGS
Warnings
This appliance is marked in compliance with the European Directive 2012/19/EU.
Thecrossedbinsymbolindicatesthatthewasteproductmustbedisposedofseparatelyfromhousehold
waste. Take the product toa separate collection centre for electric or electronicappliances or face the
penalties provided for by current waste management legislation, or take it back to the dealer when
purchasinganewequivalentappliance.Formoredetailedinformation,contactthelocalwastedisposal
service or thedealer.
Dispose of the various packaging materials in compliance with the applicable local Standards.
Installation must only be carried out by qualified staff in compliance with the local regulations in force
and following the indications in this manual.
The manufacturerdeclinesall civil and criminal liabilityinthecase ofdeficient or improper installationof
the appliance.
The manufacturer also reserves the right to make modifications to its products that are deemed
necessary and useful, without forewarning.
ThishouseholdapplianceiscompliantwiththeprovisionsoftheEuropeanCommunityDirectives
Low voltage Directive 2014/35/EU
Electromagneticcompatibility Directive2014/30/EU
Regulation (EC) n. 1935/2004
EU Regulation-66/2014
ATTENTION: donotremovetheplateappliedontheinternalface.Itisvisiblewhentheovendooris
openedand states theproduct identification data.
ATTENTION: Thisappliancemustbeearthedincompliancewiththelocalstandardsinforce.
Failure to comply with that written can compromise the safety of the appliance.
Faultscausedbyinstallationorimproperusearenotcoveredbywarranty.
Before installation and use of this appliance this instruction manualmust be readthoroughly for correct
installation,maintenanceanduseofthesame.Keepitcarefullyforfutureconsultation.
Thisappliancehasbeendesignedfordomesticuseonlyforcookingandheatingfoodstuffs.Allotheruseis
consideredhazardous.Themanufacturerisnotliableforanydamagecausedbyimproperuseofthe
appliance.In the event ofmalfunctioning, disconnect the appliance from the mains electricity and contact
theAfter-salesassistance.Neverattempttorepairthe applianceyourself.
Warnings regarding correct use of the oven
Do not lift or pull the ovenwith your hands.
Theappliancecanalso beinstalledandruninventilatedroomsaccordingtothelocalregulationsin
force.
Useoftheapplianceisonlyintendedforadults. Ensureitremainsoutofreachofchildren.
Theappliancemaynotbeusedbychildrenunder8yearsofageorbypersonswithreducedphysical,
sensory or mental capabilities, or without the experience or knowledge required unless this is
performedunderdirectsupervisionoraftertheyhavebeengiveninstructionsconcerningthesafeuse
of theappliance.
Children mustnot play with the appliance.
Cleaningandmaintenancemustnotbeperformedbychildrenwithoutadequatesupervision.
Theaccessiblepartsbecomeveryhotduringoperationandduetoinertiawhenoff.Donottouchit.
Toinsertorextract containers,always usesuitableprotective gloves.
3
Donotplaceinflammablematerialinsidetheoven.Ifforgotten,itcouldcatchfireafterswitch-on.
Donotsitonorplaceweightontheopendooranddonothangweightsonthehandleastodoso
could damage theproduct
Make suretheventilation slots are not obstructed.
During use, do not touchthe heating elements.
Donot touch theappliance with wet or damp handsand feet.
Donot pull the cable, grip the plug toremoveit from the socket.
Beforemaintenanceorcleaning,switchtheovenoffand,if just used,waitforittocool.
Topreventanyelectricshocks,theappliancemustbeoff beforethebulbisreplaced.
Donot cleanthe applianceusing steam cleaners.
Abrasivematerialsormetalscrapersmustnotbeusedtocleantheovendoor,astheycandamagethe
surfaces.Donotuseacidproducts(lime-scaleproducts)becausetheycandamagetheenamelledparts.
Ifthepowersupplycableis damaged,itmustbe replacedbythemanufacture,byitsafter-sales
assistanceserviceor byqualified staff.
Payattentionnottotrappowersupplycablesfromotherhouseholdappliancesinthedoorwhen
closing.
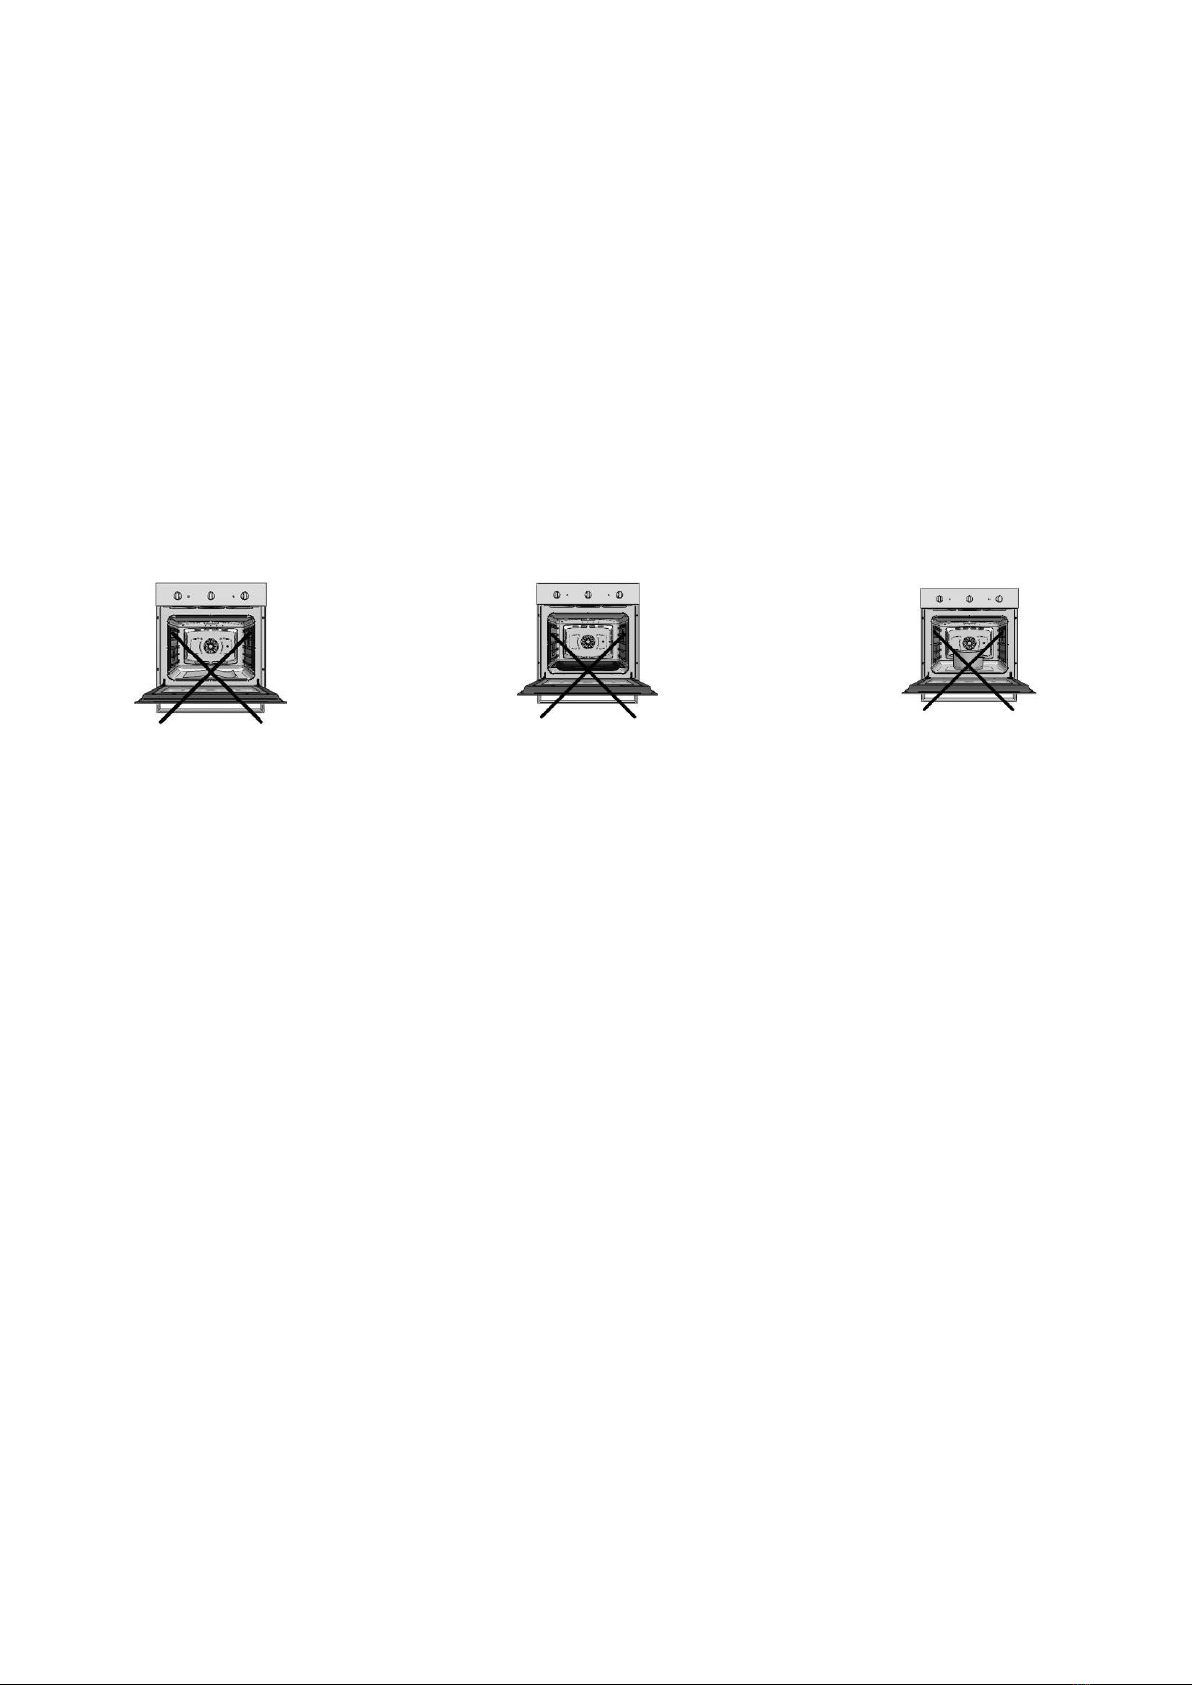
ATTENTION:NEVERPLACESHEETSOFALUMINIUM,TRAYSOROTHERCONTAINERSONTHEWALLSOR
BOTTOMOFTHEOVEN.THEMANUFACTURERISNOTLIABLEFORANYDAMAGECAUSEDBYIMPROPER
US OF THE APPLIANCE.
4
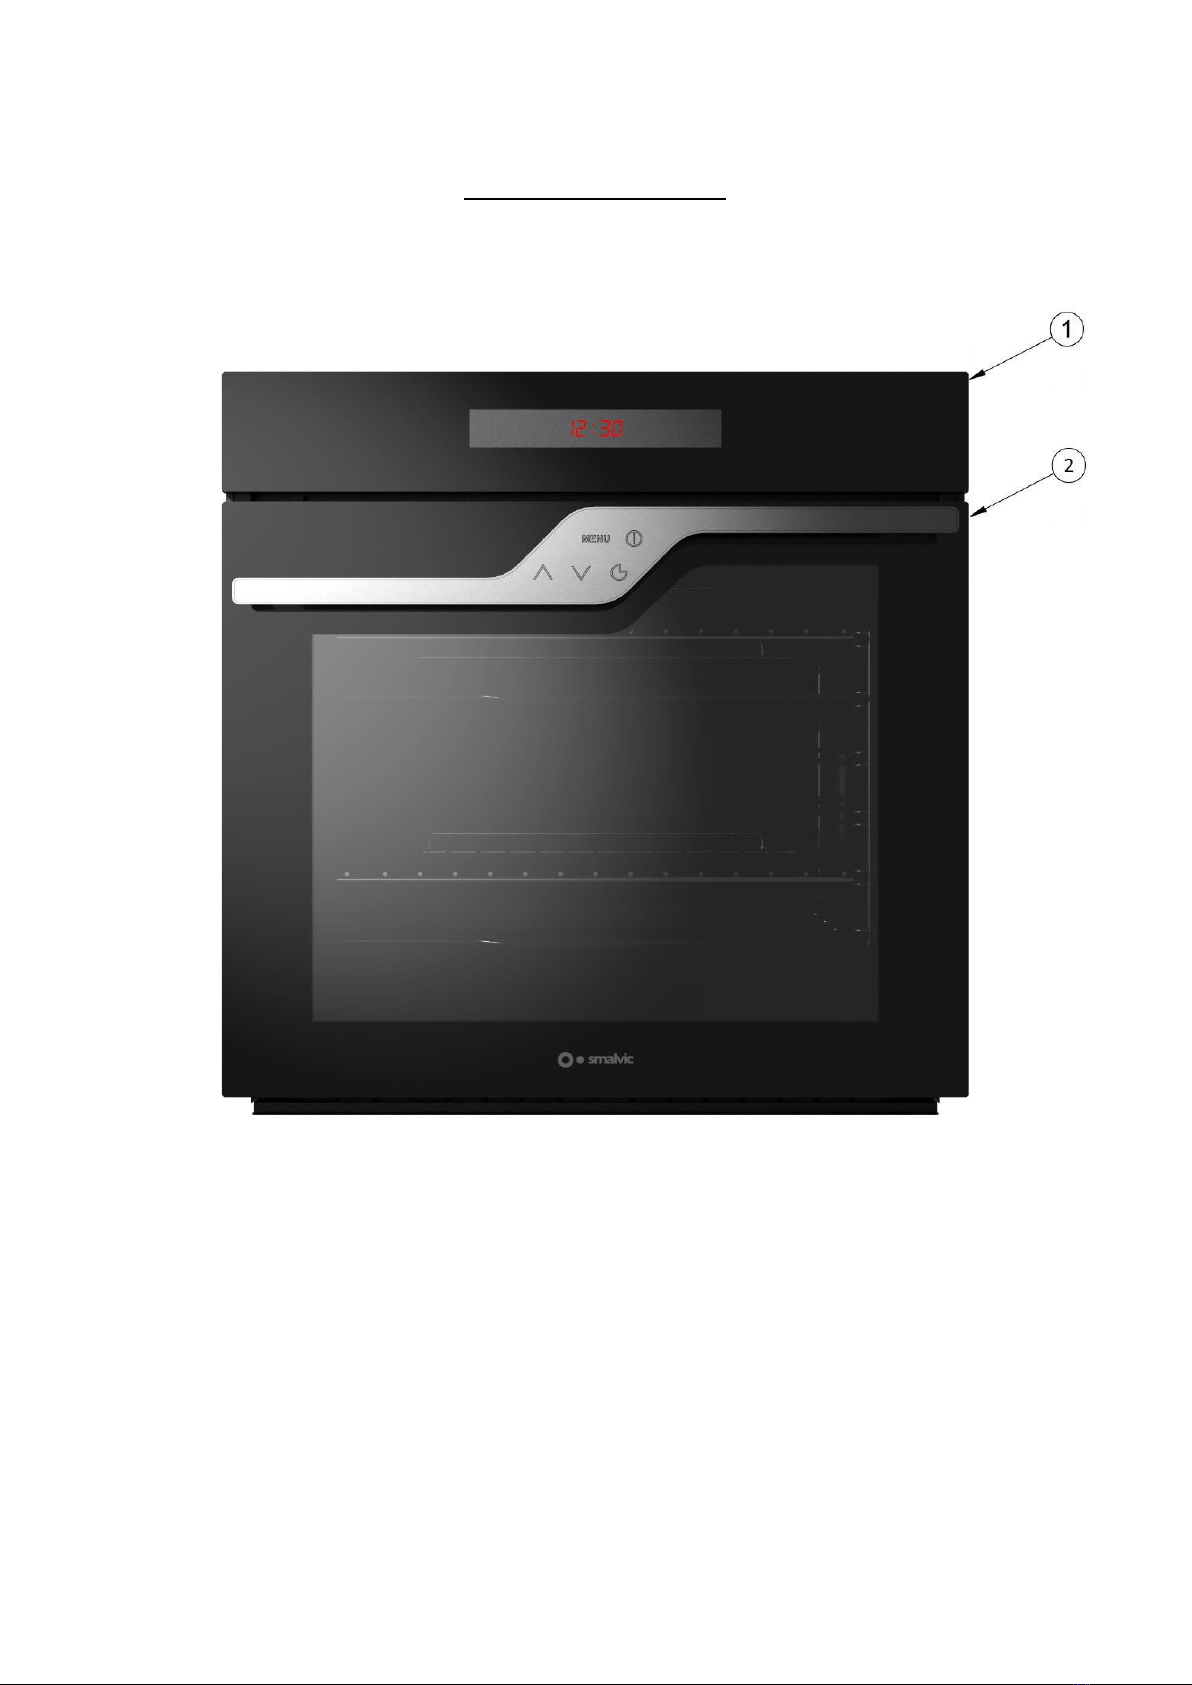
DESCRIPTION OF THE PRODUCT
1)
CONTROL PANEL
2)
CONTROLS/HANDLE

5
TEMPERATURE DISPLAY CLOCK DISPLAY COOKING MODES DISPLAY
ON/OFF
MENU
INCREASE
DECREASE
CONFIRMATION

6
OVEN USER GUIDE
Disconnecttheappliancefromthepowersupplyandremovealltheaccessoriesfromtheappliance.Clean
themthoroughlywithwarmwateranddetergentandputthembackintheinitialposition.Beforeusingit
forthefirsttime,allowittorunonemptyandatmaximumforabout2hourswhileventilatingtheroom
well. The combustion fumesof the production residueswill be evacuated. Ventilate the environment well
during heating.
NOALIA PROGRAMMER INSTRUCTIONS (ATHENA)
Next oven programmer consists of three displays:
Clock display(central)
•
Cookingmodedisplay(right)
Temperaturedisplay(left)
Clock display
Inthisdisplaywe canreadthetimeofday,the durationofthe selectedfunctionsandwarningmessages.
You canthenview 3 icons:
Illuminatestoindicatethatacooking functionis active, eveninmanualmode.
Theovenlightanddefrostfunctionarenotconsideredascookingfunctions,sotheiconisturnedoff
whentheseareactive.Thesymbolflashestosignaltheendofacookingandshutsoffwhenthetime
is over setto.
Normallyit isturnedoffhoweveritremainslitwhenanautomaticcookingisselected(theovenis
not working inmanual mode)
Normally it is off. When turned on indicates that the contaminants have been set. It stays on
Throughoutdurationtodistinguishthistimefromthatof acookingfunction.
Cooking modes display
In this display we can see the following icon that shows the active elements ofthe oven for a
function:
Thesquarelightsymbolisnormallylitandindicatesthattheovenisinoperation.Itshutsoffwhenthe
delayedcookingmode is activated.
The symbol of the rotating fan is lit when the selected function involves the use of the oven fan.
Temperature display
Show all temperatures in both manual and automatic mode.

7
Oven Functions
Atthefirstpoweron,thedisplayshowsthe12:00hoursflashing.Atthistimeyoucanonlysettheoven
timeandthenactivatetheoven.Tosettheoventime(ifitwasnotdoneatfirstpoweron),pressandhold
theMENUsymbolforatleast4seconds.ToturnontheovenjustpressthepowerbuttonON
/
OFF,the
displayshowsONandafter2secondstheovenlightisturnedon.Ifnoactionistakeninthenext5minutes,
theovenwillautomaticallyturnoff.Toturntheovenoff,presstheON
/
OFFsymbol.Thedisplayshows
OFFandaftertwosecondstheovenswitchesoff.Ifthecavitytemperatureishigherthan50°C,HOT
appearswhenthetemperaturedropsbelow50°C.HOTisreplacedbythetimeofday.
Timer
Thetimerdonotinteractwiththeovenfunctions,asitisalwaysusableirrespectiveoftheactivefunction.
PresstheMENUbuttonandusethearrowstosetthedesiredvalueupto180minutes.After4seconds
from the last action, theproposed value is set.
At the end of the time, a beep sounds and the bell icon is turned off.
Manual cooking
Tostartcooking,switchontheovenandselectthefunction.Theovenoffersadefaulttemperaturethat
canbeadjusted.Afteraboutfoursecondsoftheselection,theovenstartscooking.
Cooking time
TurnontheovenandpressMENUthreetimes,thedisplaywillshow"dur".Thensetthedesiredtimevalue
upto720m.Afterapproximatelyfourseconds thevalue is accepted.
Delayed cooking start
Youcansettheendofacookingimmediatelyaftersettingtheduration.Setthedesiredlengthoftimeand
presstheMENUsymbolonce,thedisplayshowsEND,thensetthetimebypressingthesymbolstoincrease
ordecreaseavalue.Afterfoursecondsthesetvalueisacceptedandtheovenpreparesforthedelayed
cookingstart.Theovenwillturnoffimmediatelyandwillturnonagainatthetimethecookingstartwas
set.
At this stage, the selected function and temperature can be displayed (can be changed at a later time)
End ofcooking
Whenacookingisfinished,abeepisheard,theiconoftheselectedfunctionandthetemperatureswitch
offandthedisplayshowsthetimeofdayasthesymbolsflash.Pressanysymboltoreturntomanual
cookingmode.
After 7 minutes without any action, the beep is interrupted and the display goes into standby mode.
Select a function
Theclockdisplayshowstheselectedcookingfunction,theprogramorPr01ifnoprogramshavebeen
selected.
The cooking mode displays the cavity edges flash to indicate that a program has been selected.
Child safety
To activate the child safety function, press the ON
/
OFF button for 3 seconds.
Thedisplayshows"n-00"followedbyON.Whenyouactivatecooking functionsandtemperaturescannot
bechanged. Toturnoff the function, pressthe powerbuttonfor 3seconds.
Light oven
Theovenlightisonwhenafunctionisactivewhentheovenreachesthesettemperatureandwhenthe
oven door isopened.

8
OVEN FUNCTIONS
Oven light
The oven light can be turned on independently at any time with this symbol.
Ventilated cooking (Pr-01)
This type of cooking is recommended for dishes placed on several levels even differing one from
another without mixing their smell. Even hot air circulation allows baking slowly and homogeneously.
Intensive lower cooking (Pr-02)
It has a prevailing downward temperature suitable for quick cooking.
Intensive upper cooking (Pr-03)
There is a prevalence of upwards temperature,which makes this kind of cooking ideal for fast
cooking and needing slight surface browning.
Ventilated electric grill
(Pr-04)
This function permits grilling ina softer manner thanks to the use of forced air.
Gentle cooking (Pr-05)
Suitable for cooking delicate foods, e.g. leavened desserts.
Intensive cooking (Pr-06)
The activation of the top and bottom heatelements together with the fan ensures even distribution of
the intense heat.
Traditional static cooking (Pr-07)
The heat coming from above and below allows food that requires slow cooking with the constant
addition of liquids to be cooked.
Lower cooking (Pr-08)
Unlike cooking with the upper cooking method, this function is recommended for perfecting the
cooking of dishes that are already
Electric grill (Pr-09)
The feature of the Grill tosend out intense heat makes itpossible to use the oven for both grilling
and roasting.
Spit (Pr-10)
With this function, in models where arranged, itispossible to use the spit. Use the Grill always with the
oven door closed.

9
Double electric grill
(Pr-11)
The double grill supply intense heat,allows the oven to be used to grill and roast very quickly.
Upper cooking (Pr-13)
The intense heat diffused from above is excellent for finishing offthe baking of food that iscooked on
the inside but not entirely on the surface.
Defrost (Pr-14)
This permits the defrosting of dishes without altering their taste or appearance.
Drying (Pr-15)
Thisfunctionallowstograduallyremovefromtheproductpartofthewater
contained therein through theheat.
Food warmer function (Pr-16)
Byinsertingthisfunction,itispossibletomaintaintheconstanttemperatureoffoods,
which isveryusefulfor heatingorkeepcookedfoodatthetemperature.
Spit (MOV-LX74)
Thespitispositionedtransversallywiththeconnectiononthebackoftheovenanditsfunctioningis
automaticinallfunctions,evenifthesymbolisnotpresent.Introducethedishfixedwiththeforkhooksin
thespitrodandplaceeverythinginthespitstandpreviouslyarrangedinitshousingonthedriptray.Insert
thetrayfullyhomeinthecavity,movethespitholderframetotherightuntiltherodisinsertedcompletely
in the spit outlet, onthe right side of the cavity.
Double electric grill with Spit (Pr-12)
The double grill supply intense heat, allows the oven to be used to grill and roast very quickly.
It is possible to use the spit
10
MAINTENANCE AND CLEANING
Attention: disconnect theelectric power supply before performing any type of maintenanceon the
product
Donot cleanthe applianceusing steam cleaners.
Do not use rough, abrasive materials or sharp metal scrapers to clean the oven door, as they can
damage the surfaces and cause the glass to break. Do not use acid products (like anti-scaling
agents) as they can damage the enamelled parts.
Turnofftheheatingelements,waitfortheinternalpartsoftheoventocooldownbeforetouchingor
cleaning them. When cleaning with a wet sponge or soft cloth, take all due care if the surface is
hot as it will produce steam and you will risk scalding yourself. Moreover, some detergents
create noxious fumes on contact with the heat.
The enamelled or stainless steel parts must be treated with caution. Use water or specific products,
accuratelydryingwithasoftcloth.Incaseofheavydepositsintheenamelledparts,useasponge(non-
abrasive) dampened with warm water and vinegar. Residual foods and dirt must be removed immediately.
Itwillmakeremovingthemeasieriftheinternalpartsoftheovenarecleanedwhiletheyarestillwarm.
ATTENTION: Thesymbolsstampedontheappliance(e.g.aroundtheknobs)canbedamagedifdirt
remains for an excessively long period onthem.
Dirtresiduemustberemovedimmediatelybutuseproductsspecificallyforsteelasotheroverlyabrasive
onescould cause the symbols tofade.
Regularlycheckthestateoftherubbergasketlocatedaroundtheovenopening.Ifgasketdamageisnoted,
contact thenearest technical after-sales centre.
Removing/mounting the oven door
MOV-LX74
Thisovendoormodelhassoft-closinghingesthatamortizetheclosureofthe door.
Itispossibletoremovetheovendoorbyfollowingtheseinstructions:
-open the oven door completely.
-with the help of the pliers, pull the zipper hook towards its fixing seat.
-close the door slightly to secure the hook in the seat.
-at this point you can lift the door slightly to remove it.

11
Carry out the same steps in reverse order to remount the oven door. Place the oven door in seat, move the zipper hook
and bring it back its original position.
Removing/mounting the oven door
FI-95
To remove and reinsert the port, follow the instructions below:
Open the doorcompletely.
Insertametalrodwithadiameterofabout3mmintotheholeshowninthefigure.Thezipperis
lockedin the openposition.
At this point you can lift the doorto removethe hingesfrom theirseats.
Tore-inserttheovendoor,actinthereversemode.Insertthehingesintotheopeningsofthefrontframe
of theoven.
With the door completely open, remove the two metal hinges of the hinge.
ATTENTION! Do not remove the two metal tabs that hold the hinges locked with a hooked door.
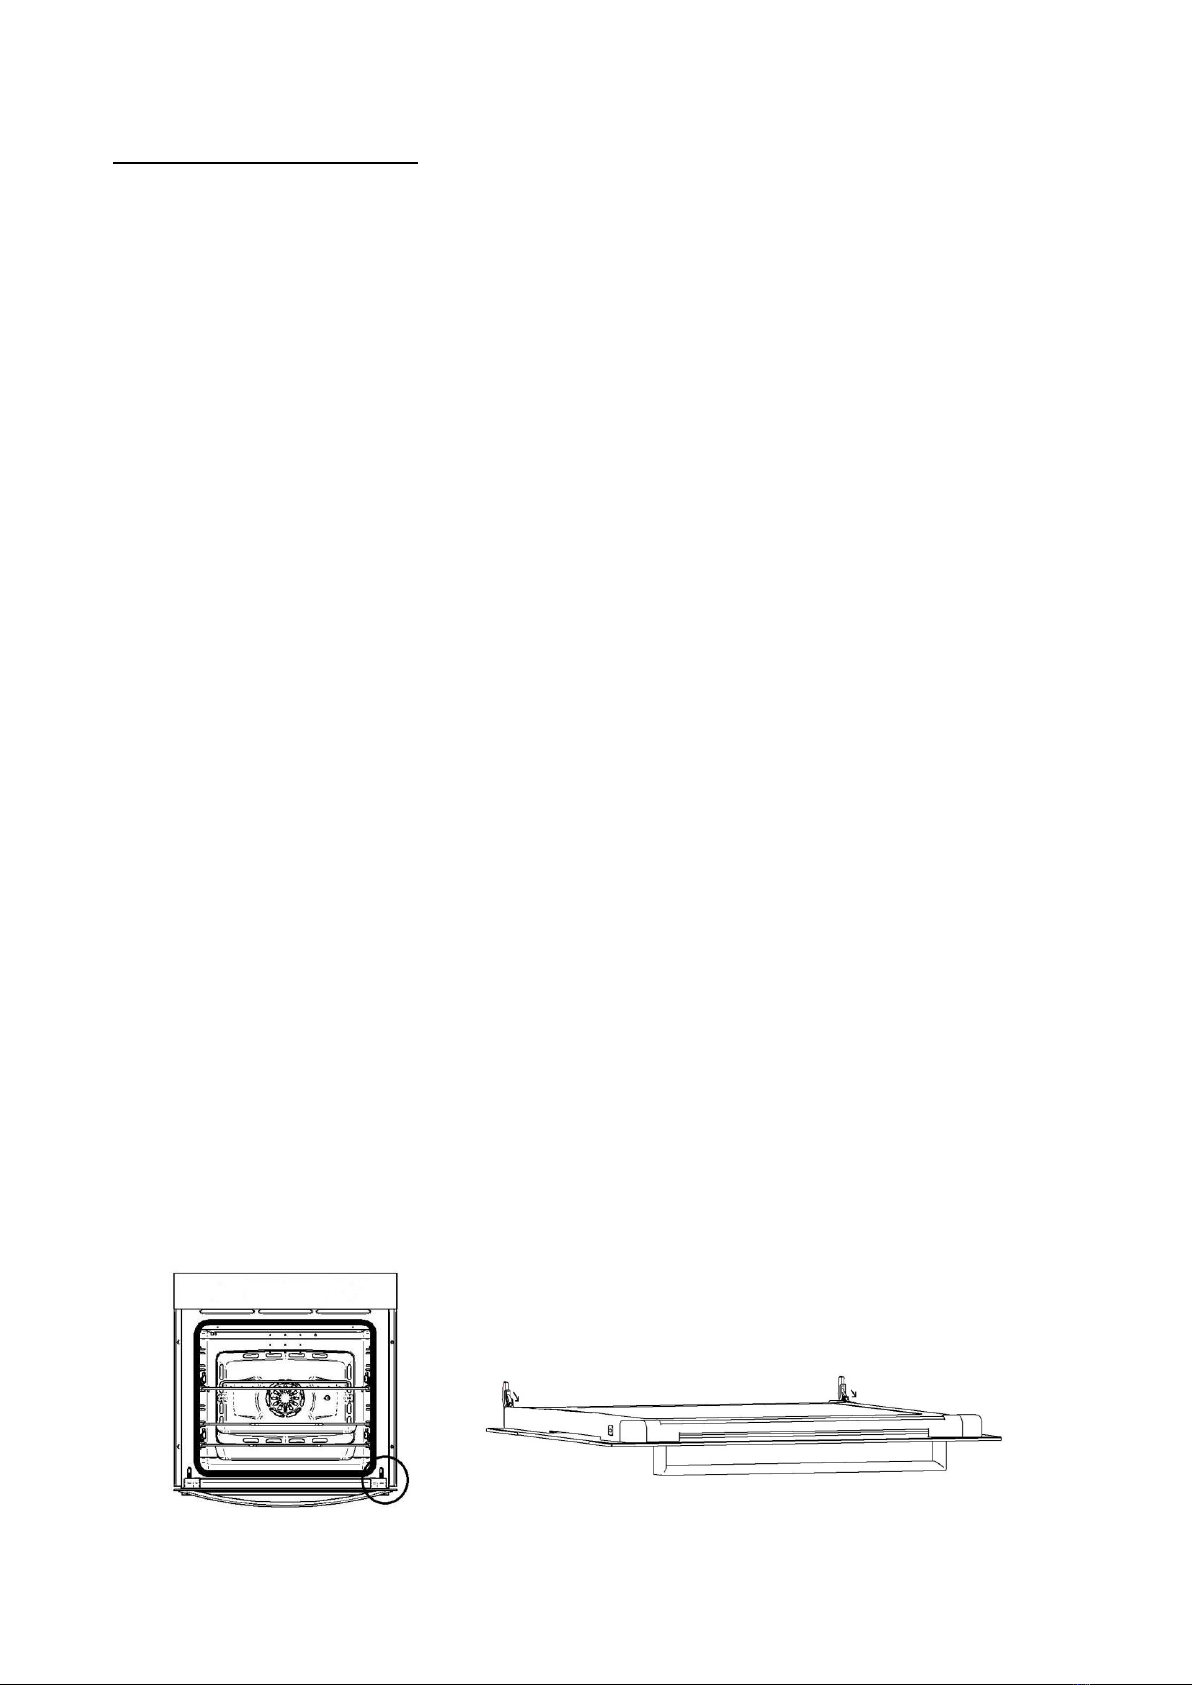
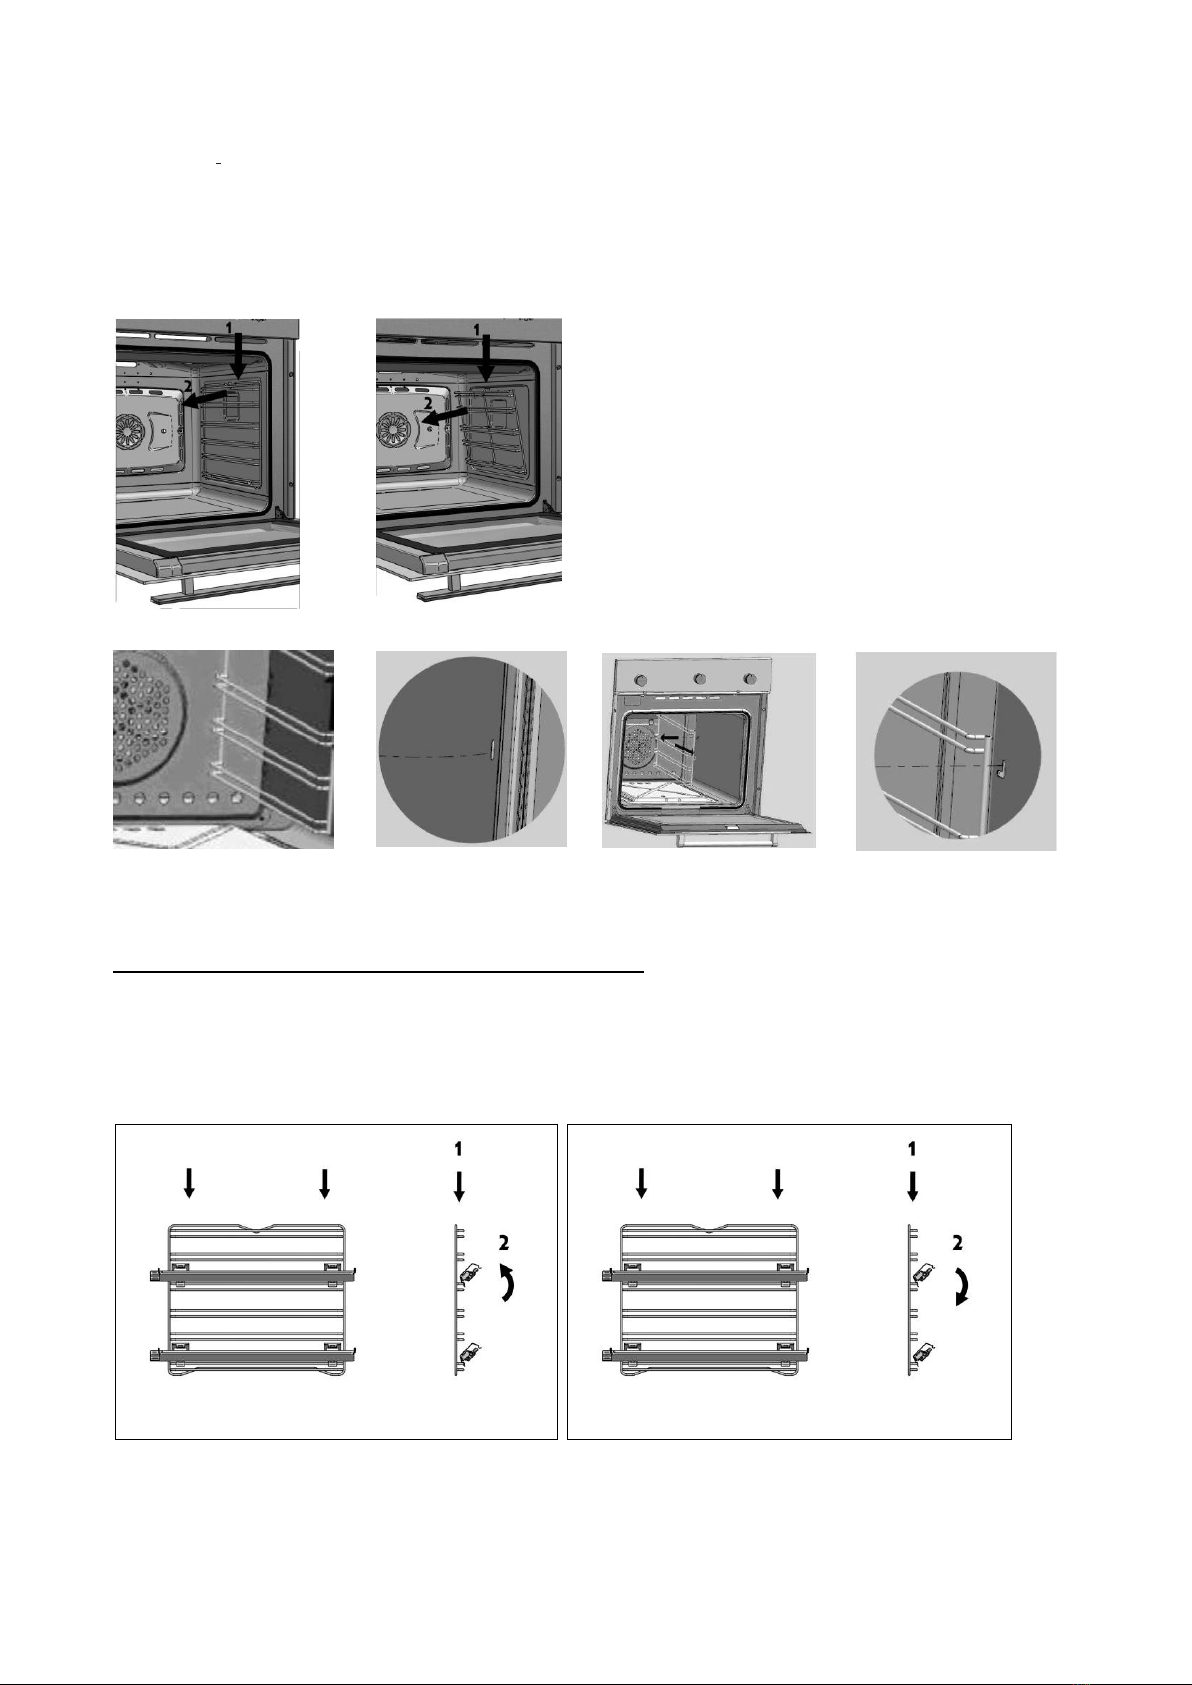
Removing/ cleaning interior glasses Thisdoormodelallowsforextractionandcleaningofinterior
glasswithouthavingtoremovetheoven door. Followthe steps below toextract the internalcrystals:
Opentheoven door andimmediately lock the hinges.
Therearetwo buttonsontheleftandright sidesofthedoor,locatedonthesideprofiles.
Pressinordertoreleasethepaintedtopofthedoorandthetwoheadsplacedontheprofiles.
At this point it is possible to extract theinteriorglasses.
ATTENTION!
Alwaysremembertolockthehingesbeforepullingtheglasses.
Thispreventsthedoorfromclosingitself duringtheprocedure.
Carryoutthesamestepsinreverseordertorefitthecrystals.Taketheutmostcaretoensurethattheyare
intherightorderandintheexactdirection(theclearglass,ifpresent,mustbeinsidetheothertwo)
and the position of the writing on the glass surfaces should be as in (Fig. 2).
Becarefulthattheprotectivegasketsarepositionedcorrectly.Beforerefittingthedoor,makesurethatthe
glass is securelyfastened in place.
WARNING!Removaland installationmust becarried out properly and with theutmostcare inorderto
avoid breaking theglass.
12
REMOVAL/ ASSEMBLY OF THE LATERAL GUIDES
Before proceeding, make sure that the oven is cool
Tightlygriptheguideatthefront,liftituntilitblocksandpullthefrontparttowardstheinsideoftheoven
(fig.1)inawaythatitcanreleaseitselffromitsfrontseat.Now,pullingtowardsyourself,theguidewill
slideforapprox.1centimetre.Liftitandreleaseitfromitsseatbypullingitinsidetheovencavity.(fig.2).
Fig.1 Fig. 2
Fig.1 (FI-95)
Fig.2(FI-95) Fig.3(FI-95)
Fig.4(FI-95
)
To re-mount the guides, perform the steps in reverse order ( Fig.1-Fig.2-Fig.3-Fig.4)
REMOVING/MOUNTING THE SLIDING GUIDES (IF ANY)
Ifsupplied,youwillfindrunningguidesinstalled. Toremove them,releasethelateralsupportguidesas
describedinthe"REMOVALANDMOUNTINGTHELATERALGUIDES"paragraph.
Holdingthelateralguidesverticallyonaflatsurface,releasethelowerpartoftherunner,makingitturnas
indicatedinfigure1. Atthis point,therunnercanberemovedcompletelyfromitshousing.
Fig.1 Fig.2

13
Torepositiontherunningguideagainontherelevantsupports,positiontheupperattachmentsontherod
ofthelateralguide,presstherunnerdownwardsinawaythatitistightlycoupledandexertpressureas
demonstrated infigure 2untilthe runner istightlyfastened tothesupport.
REPLACING THE OVEN LIGHT BULB
Topreventelectricshocksand/ordamagetopersons,readandfollowtheproceduregivenbelow:
ATTENTION: before replacing the bulb make sure that theappliance is off and the mains electricity has
been disconnected.
Ensurethattheovenandthelightbulbarecoldandthenremovetheprotectioncover.
Donot touch thehot bulbwith adampcloth,thebulb maybreak.
Replacethelightbulbwithanothersuitableoneof25Wfor220-230VwithattachmenttypeE14,
suitable for hightemperatures.
Incasetheprotectioncapisdamagedorbroken,donotusetheovenuntilthecaphasbeenreplacedorre-
inserted correctly andsafely.
INSTRUCTIONS FOR INSTALLATION
Thepurchaserisresponsibleforinstallation.Assistanceprovidedbythemanufacturingcompanyduetoan
incorrect installation will not beincluded in the warranty.
Theinstallationandtechnicalassistancemustonlybeperformedbyqualifiedstaff,followingthe
instructions.Incorrectinstallation,maintenance,assistanceandusecancauseseriousdamage/injuryto
persons orobjects
INSERTING THE OVEN INTO THE CABINET
thecabinet and its components must becapable of withstanding a temperature of 90°C without presenting
any deformation and/or surface defects. The cabinet must enable the free passage of the oven
connections. All householdkitchen unitsmust be protected withfire-resistant material in accordance with
the standards inforce.
Itisimportantthatalloperationsrelatingtoinstallationofthedevicearecarriedoutbyqualifiedstaff.The
ovencanbe installed in acolumnor belowthe worktopof akitchencabinet.
INSTALLATION CLASS - 3
Attention: respect minimum ventilation apertures of the cabinets, as given in the drawings
ATTENTION!inordertoguaranteegoodventilation,theapertureof 80mmisalsorecalledtowardsthe
outsideofthecabinetandnotonlyintherearpart,otherwiseapplicationisnotcompliant.
Fig.1
Fig.2(MOV-LX74)
14
Built-in measurements
Thedimensionsoftheopeningtobemadeinthecabinetforfittingtheovenareindicatedinfigures.Make
surethatthecabinetwheretheovenisinstalledcansupporttheweightof30kg.Fortheapertureinthe
cabinet,followtherespectivedimensionsindicatedinfig.01,fig.02for MOV-LX74.Inthebottomofthe
cabinetorintheovensupportshelf,toallowsufficientairtocirculateforthecoolingoftheovenduring
functioning.
Use screws A for fixing the oven.
OVEN ELECTRICAL CONNECTION
Ensuretheelectriccurrenthasbeendisconnectedbeforeconnectingtheoventotheelectricmains.
Attention:Iftheflexiblecableisnotintact,toavoidanyrisk,itmustbecompletelyreplacedwithacable
havingthe same characteristicsand onlybyqualified staff.
Theovenrequiressingle-phasealternatecurrent220-230-240V~50-60Hz,usingflexiblecable.Ensurethe
householdpowersupplycansupporttheelectricloadofthedevice.(seeserialplate).Theelectricsafetyof
this appliance is only assured if the same is correctly connected to a system having efficient earth
connection, according tothe legal standards in force.
Incaseofdirectconnectiontothemains(withouttheuseoftheplug)includeadevicethatensures
disconnectionfromthenetwork,withadistanceenablingfulldisconnectionintheconditionsof
overvoltagecategoryIII,inaccordancewiththerelevantinstallationregulations.
Inmodels wherepresent,theflexiblecableissuppliedwithoutplug.Theplugtobe usedmust besuitable
forthe electricloadoftheproduct andmust complywith thecurrentregulations.
Theinstallermustensurethatthesocketissuitableforthepowerabsorbedbytheovenasindicatedonthe
serial plate.
Theconnectionsocketmustbeeasilyaccessible.Disconnectionoftheappliancefromtheelectricalsupply
must also be possible after the completion of installation.
ASSEMBLY/REPLACEMENT OF THEPOWER SUPPLY CABLE
If the power supply cable is damaged, it must be replaced by the manufacturer, its after-sales assistance
orbyother qualifiedstaff in order topreventallpossiblerisks.
Theelectriccablemustbekeptsecuredtotheterminalblockbymeansofacablefixsothatitcannotcome
out.ConnectthelinecabletoterminalL,theneutralcabletoterminalNandtheyellow/greencabletothe
earthterminal .Theyellow/greencablemustbelongerthantheothertwobyatleast20mm.
Ensure
theelectriccabledoesnotpassnearorcomeintocontactwiththesurfacesreachingatemperature
above
75°C.

15
EARTH CONNECTION
Installation,connection andearthing oftheelectricsystemmust comply withtheEuropeanstandard
requisites andmeet theprovisionsof thelocal Standardsinforce.
Thishousehold appliancerequires anearthingconnectionfor protectionagainstshort-circuitsorelectric
dispersions. It must therefore be connected to an appropriate electrical outlet. The earthing wire must not
be interruptedby the switch.
ATTENTION: DISCONNECT THE ELECTRIC POWER SUPPLY BEFORE PERFORMING TECHNICAL ASSISTANCE
OR MAINTENANCE ON THE PRODUCT.
Incaseof replacementoftheelectriccable,ensuretheuseofanelectriccablecertifiedaccordingtothe
standards inforce andsuitable tothetechnicalfeatures of theproduct.
Only use flexible cables: cable type H05RR-F 3 x 1.5mm²
TECHNICAL AFTER-SALES ASSISTANCE AND SPARE PARTS
Spare parts
Only authorisedcomponents canbeusedfor appliance support. Do notrepairor replace any oven
component not recommended by this manual. All interventions and repairs must be carried out by
authorised technicalstaff.
To request a spare part, indicate the following data:
1)
Modelofovencode(MOD.)andproductionnumber(N.L.),foundontheproductlabelpositionedonthe
lower front part of theoven and onthe first page of the booklet.
2)
Description and number of the spare part, technical information available only to the authorised
assistanceservice.
3)
Last,indicatethedetailsofthedistributorthatsoldtheovenandthedetailsofyournearestafter-sales
assistancecentre.
Technical assistance
Incaseyourovenrequirestechnicalassistanceand/orspareparts,contactthedealerortheauthorised
technical assistancecentre nearest toyou.
Inthiscasealsoitisnecessarytostatealltheappliancedataonthealuminiumproductlabel,suchas:
model(MOD.)batchnumber(N.L.),etc.labelplacedonthelowerpartoftheovenfacadeoronthefirst
page of the instructionsbooklet.

Hướng dẫn an toàn
Mô tảsản phẩm
Vận hành
Hướng dẫn sửdụng
Hướng dẫn lập trình điện tửNoalia
Chức năng
Bảo trì vàvệsinh
Tháo gỡ/Lắp đặt cửa lò nướng
Tháo gỡLắp đặtkính bên trong lò nướng
Tháo gỡ/Lắp đặt hệthống bên
Tháo gỡ/Lắp đặt ray trượt
Thay thếđèn lò nướng
Hướng dẫn lắp đặt
Giới thiệu bên trong lònướng
Lắp đặt điện cho lònướng
Lắp đặtvà thay thếcáp nguồn
Kết nối tiếp đất
Hỗtrợkỹthuậtvà linh kiện
MODEL MOV-LX74
(MTLN)
(MTN) Hướng dẫn lập trình điện tửNoalia
TRANG
17
19
20
21
21
22
25
26
26
27
27
28
28
28
29
29
30
30

17
CẢNH BÁO CHUNG
Cảnh báo
Thiết bịnày được sản xuấtdưới sựchỉđạo củaEuropean 2012/19/EU.
Biểu tượng thùng rác gạch chéo là chỉra chất thải phải được xửlýriêng rẽvới chất thải củagia
đình. Đưa sản phẩm đến trung tâm thu hồiriêng cho các thiết bịđiện hoặc điện tửhoặcphải chịu
những hình phạttheo bộluật xửlý chất thải, hoặc đem lại cho đạilý khi mua thiết bịtương tự. Để
biếtthêm thông tin chi tiết, liênhệvới dịch vụxửlý chất thải địa phương hoặc đại lý. Khi hủy bỏ
các vậtliệu bao gói khác nhau phảiphù hợp vớicác áp dụng tại địa phương.
Việc lắp đặtphải đượcthựchiện bởi nhân viên kỹthuật phù hợp với các quy định có hiệu lực của
địa phương và theo các chỉdẫn trong hướng dẫn sửdụng này.
Nhà sảnxuấttừchốimọitrách nhiệm nhân sựvàhình sựtrong trường hợplắp đặt không đầy đủ
hoặc không đúng cách.
Nhà sảnxuất có quyền thay đổisảnphẩm củamình khi cầnthiếtvàhữuích mà không cầnbáo trước.
Thiết bị này phù hợp với điều khoản của the European Community Directives
Chỉthịhiệu suất thấp 2014/35/EU
Chỉthịtương thích điện2014/30/EU
Quy định(EC) n.1935/2004
EU Quy định-66/2014
CHÚ Ý: Không di chuyển khay nướng bên trong lò. Có thểnhìn thấy khi cửalò mởvà ghi chú
dữliệu nhận dạng sản phẩm.
CHÚ Ý:Thiết bịnày phải được nối đấtphù hợp vớicác tiêu chuẩn hiện hành địa phương.
Việc không tuân thủcác văn bản đó có thểảnh hưởng đến sựan toàn của thiết bị.
Các lỗi do cài đặt hoặc sửdụng không đúng cách sẽkhông được bảo hành.
Trước khi lắp đặt và sửdụng thiết bị, phải đọc kỹhướng dẫn sửdụng này để lắp đặt, bảo dưỡng và sử
dụng đúng cách. Lưu giữ cẩn thận để thamkhảoý kiến trong tương lai.
Thiếtbịnày được thiết kếđể sửdụng trong gia đình chỉ để nấu ăn và làm nóng thực phẩm. Tất cả
những việc sửdụng khác đều được xem là nguy hiểm. Nhà sảnxuất không chịu trách nhiệm vềbất kỳ
thiệt hại nào gây ra do sửdụng thiết bịkhông đúng cách. Trong trường hợp hư hỏng, ngắt kết nối thiết
bịkhỏi nguồn điệnvà liênhệvới dịch vụhậu mãi. Không cốgắng tựsửachữa thiết bị.
Cảnh báo sửdụng lò nướng
Không nâng hoặc kéo lò bằng tay nắm.
Thiết bịcó thểđược lắp đặt và vận hành ởnơi thông thoáng theo quy định cho phép.
Chỉsửdụng thiết bịcho người lớn. Đảm bảo tránh xa tầm tay trẻem.
Thiết bịkhông được sửdụng cho trẻdưới 8tuổi hoặc bởi người khuyết tật, mấtnhận thức
về cảm giác và tinh thần, hoặc thiếu kinh nghiệm và kiến thức nếu không thiết bị phải được
hoạt động dưới sự giám sát trực tiếp hoặc phải được cung cấp đầy đủ hướng dẫn an toàn sử
dụng thiết bị.
Trẻem không được chơi với thiết bị.
Vệsinh và bảo dưỡng không được thựchiện bởi trẻem nếu không cósựgiám sát của người
lớn.
Các bộphậnsẽrất nóngkhi thiếtbịvận hành cho tớikhi thiếtbịdừng hoạt động. Không nên
chạm vào thiết bị.
Để thêm vào hoặc lấy các vật chứa thức ăn,hãyluôn luôn sửdụng găng tay bảo vệphù
hợp.

18
Không đặt thiết bịdễcháy bên trong lò.Nếu quên,nó có thểphát nổkhi công tắc mở.
Không ngồi hoặc đặt vật nặng khi cửa lò đang mởvà không treo vật nặng lên tay nắm, điều
đó có thể gây hư hại cho sản phẩm.
Chắc chắn rằng lỗthông gió không bịtắc nghẽn.
Trong khi sửdụng, không chạm vào bộphận đang nóng.
Không chạm vào thiết bịkhi tay chân đang ẩm ướt.
Không kéo dây cáp, nắm đầu cắm đểngắt điện từổcắm.
Trướckhi bảo dưỡng hoặc vệsinh, ngắt điện lò nướng,nếu vừa sửdụng, phải đợi cho đến
khi lò nguội.
Để tránh bịgiật điện, thiết bịphải được tắt trước khi bóng đèn được thay thế.
Không vệsinh thiết bịbằng thiết bịvệsinh hơi nước.
Không sửdụng thiết bịmài mòn hoặc vật dụng chà nhám kim loại để vệsinh cửa lò, vì nó
có thểgây hư hỏng bềmặt. Không sửdụng sản phẩm có chứa acid (sản phẩm có vôi) vì nó
có thểgây hư hỏng các bộphận tráng men.
Nếu cáp nguồn bịhỏng, thì phải được thay thếbởi nhân viên bảo dưỡng hoặc bộphận bảo hành
sản phẩm.
Chú ý không đểdây nguồn từthiết bịgia dụng khác bên trong cửa khi cửa đóng.
CHÚ Ý: KHÔNG ĐẶT TẤM NHÔM, KHAY HOẶC THÙNG LÊN TƯỜNG HOẶC PHÍA TRÊN LÒ
NƯỚNG. BỘPHẬN BẢO DƯỠNG KHÔNG CHỊU TRÁCH NHIỆM HƯ HỎNG KHI KHÔNG PHẢI
DO THIẾT BỊ

19
MÔTẢSẢN PHẨM
1)
BẢNG HIỂN THỊ
2)
PHÍM ĐIỀU KHIỂN
Table of contents
Languages:
Other Malloca Oven manuals

Malloca
Malloca MOV-659TC User manual

Malloca
Malloca MOV-726 MC User manual

Malloca
Malloca MOV-615EST User manual

Malloca
Malloca MOV-575 AMG User manual

Malloca
Malloca MW-944TF User manual

Malloca
Malloca MOV-65T5 User manual

Malloca
Malloca MOV-65DA User manual

Malloca
Malloca MOV-LX12 User manual

Malloca
Malloca MDO-80BL User manual

Malloca
Malloca MOV-575 ECO User manual


