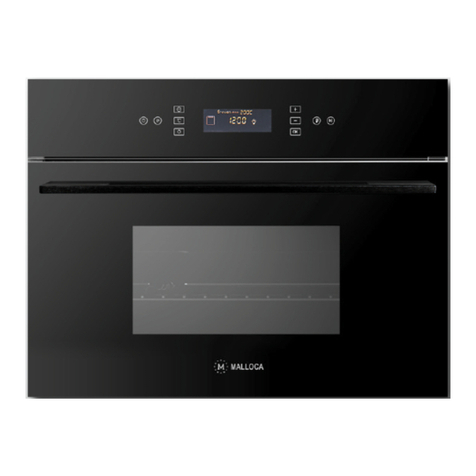
Malloca MST-35CP User manual

INSTRUCTION MANUAL
HƯỚNG DẪN SỬ DỤNG
BUILT-IN STEAM OVEN
LÒ HẤP ÂM TỦ
MODEL: MST-35CP

Please read these instructions carefully before attempting to
install or use this appliance.
It is advisable to keep these instructions in a safe place for
future reference.
Introduction
Thank you for choosing this appliance.
It has been designed to give years of trouble-free use
provided it is installed and maintained correctly.
Please read these instructions carefully before installing or
using your appliance. It is advisable to keep your purchase
and installation receipts with these instructions in a safe
place for future reference. Included is some important safety
information in addition to guidelines and recommendations
that will enable you to take full advantage of all the functions
available.
This quality appliance has been tested and certified to meet
all applicable electrical and safety standards.
This appliance must be installed and connected in
accordance with current regulations.
After unpacking the appliance ensure that there is no visible
damage. If the appliance has been damaged during transit,
do not install or use it, contact your retailer immediately.

Content
1. Content……………………………………………………………………………………………………1
2. General warnings …………………………………………………………………………………..…...2
3. Replacing oven lamp…………………………………………………………………………….………3
4. Fitting Oven Shelves ………………………………………………………………......................……4
5. Environmental effect report ………………………………………………………………………….…5
6. Safety precautions………………………………………………………………..…………….……..…5
7. Accessories…………………………………………………………………………………………….…6
8. Product overview ……………………………………………………………………………………..…7
9. Product Dimension ……………………………………………………………………………….…..…7
10. Product specification ………………………………………………………………………………..…..8
11. Installation precaution………………………………………………………………………………..….8
12. Fitting the appliance ……………………………………………………………………………........….9
13. Important notes ………………………………………………………………………….………...........9
14. Control panel…………………………………………………………………………….………………10
15. Quick start……………………………………………………………………………………………..…11
16. How to use ………………………………………………………………………………………………12
17. Selection of food container ………………………………………………………………………….…14
18. Suggested steaming time………………………………………………………………………………14
19. Daily Maintenance…………………………………………………………………………...........……15
20. Troubleshooting…………………………………………………………………………………….……16
1

General warnings
1. This appliance shall not be used by children aged from 8 years and above
and persons with reduced physical, sensory or mental capabilities, or lack
of experience and knowledge, unless they have been given supervision or
instruction on how to use the appliance in a safe way and understand the
hazards involved. Children shall not play with the appliance. Cleaning and
user maintenance shall not be made by children without supervision.
2. If the power supply cord is damaged, it must be replaced by the
manufacturer, it’s service agent or similarly qualified persons in order to
avoid a hazard.
3. Please make sure that the power is well connected after installation.
4. The product will become hot when its in use, do not put any flammable
products inside the oven.
5. Caution: the accessories or parts of the oven will become very hot when it
is in use. Please keep away from children.
6. Do not use other abrasive cleaners and/or wire wool or metal tools with
sharp edge to clean the oven door glass, as this may scratch the surface
which may lead to damage of the oven door
7. Do not use steam clearer to clean the oven.
8. Please make sure that the power is disconnected before replacing the
oven lamp to avoid electric shock.
9. Disposal must be carried out in accordance with local environmental
regulations for waste disposal.
10.For more detailed information about treatment, recovery and recycling of
this product, please contact your local authority, your household waste
disposal service or the retailer where you purchased the product.
2

Replacing of oven lamp
•Disconnect with power supply
•Unscrew the glass cover attached to the lamp holder
•Unscrew the lamp and replace it with another high-temperature lamp
(300°C) with the following characteristics:
•Remount the glass cover and reconnect the appliance to the power supply
WARNING: Ensure that the appliance is unplugged before replacing the lamp to
avoid the possibility of electric shock.
Warning: Do not operate appliance with damaged cord or plug or after the
appliance malfunctions, or has been damaged in any manner, return appliance to
the nearest Authorized Service Center for examination, repair, or adjustment.
Voltage: AC220V-240V
Wattage: 15W
Socket: E14
3

Fitting Oven Shelves
The deep pan and wired shelf have a side edge, there edges can match with the
sliding rack on the sides of the cavity. It can prevent the rack or tray from slipping
out from the oven.
Deep pan and wired shelf in the position 1-4 marked
4

Environmental effect report
Please protect the environment, avoid pollution.
Please dispose the product as below:
Packing box, plastic material and other recyclable material should be disposed to
recycle center. Battery or other dangerous material may lead to pollution and
need to be disposed in environmental friendly and healthy way.
Safety precautions
1. Please use power cable with 10Aor above, and please ensure that it is
earthed. Do not use any cable with loose connection to avoid electric
shock or even fire hazard. Do not share the power supply with other
appliance to avoid overheating.
2. When disconnecting the power, please make sure that it is fully unplugged.
Do not leave the power cable on the socket. Or it may cause electric
shock or short circuit.
3. Do not place the product in water or make it wet, or it may cause electric
shock or short circuit.
4. Do not use power with voltage of AC 187-242V,or it may cause electric
shock or short circuit.
5. Please keep your children away from this product and do not let them play
with the product, or it may cause electric shock or short circuit.
6. The product can only be repaired by technician from designated service
agent. Do not try to open or repair the unit on your own.
7. If the product will not be used for a period of time, please disconnect with
power supply.
8. If the power socket is damaged, please contact qualified technician to
repair or replace.
5

Accessories
Main Unit
1 unit
Steam tray
1 piece
Grill rack
1 piece
Water absorbing accessory
1 piece
Cleaning foam
1 piece
Detergents
2 packs
Instruction manual
1 piece
6

Product overview
1. Control panel
2. Sliding rack
3. Grill rack
4. Steam tray
5. Oil collecting plate
6. Door hinge
7. Water collection tray
8. Oven door
9. Water tank
Product Dimension
7

Product Specification
Model
BSS455X
Voltage
220V
-
240V
~
50HZ
Rated power
2060W
Product dimension
(
W X H X D
)
595 X 455 X 435 mm
Aperture dimension
(
W X H X D
)
564 X 450 X 550 mm
Packing dimension
(
W X H X D
)
660 X 572 X 558 mm
Installation precaution
1. The steam oven should be installed in a position which is convenience for
operation, maintenance, and suitable for repair.
2. Do not install the steam oven or power cord in a humid place or place with
water.
3. Please make sure that the power cable is well earthed.
4. Please do not hold the handle if you need to lift up the unit.
5. Please reserve enough space around the oven.
6. When the steam oven is in use, do not touch the steam from the oven to
avoid scald.
7. If you fit the steam oven in the cabinet, please make sure that sufficient
space is reserved for ventilation, or it may affect the normal operation of
the unit. The rear panel of the cabinet must be removed so that air can
circulate freely.
8

Fitting the appliance
1. For the most efficient air circulation, the oven should be fitted according to
the dimension as below:
Aperture dimension
(
W X H X D
)
560 X 450 X 550 mm
2. After fitting the steam oven in the cabinet, it must be fixed with screw.
Important notes
1. If you want to take out the food from the oven immediately after cooking
finish, please use cooking gloves or other tools to avoid scald.
2. There will be water drop from the unit when it is in use, please clean them.
3. Do not open the oven door immediately after cooking end to avoid scald
by the steam.
4. Do not use water to clean the oven, and do not let any petrol oil or other
oil material to be in contact with the body of the oven.
5. Always clean or descale the cavity and food tray or racks.
6. If the power socket is damaged, to avoid hazard, please contact qualified
technician to replace.
7. All the sockets must be earthed.
8. If the product will not be used for a long period of time, please clean up
the water in the oven, and disconnect with power supply.
9. Do not put excess food in the oven, to avoid uneven steam circulation in
the cavity.
10.It is recommended to use distilled water or bottled water to steaming.
9

Control panel
1 ON/OFF 2 Descaling 3 Oven lamp
4 Temperature 5 Timer 6 Display
7 “+”increase 8 “-”decrease 9 OK
10 Children Lock 11 Start/stop
10

Quick start
1. Activate the steam function
Step 1 :Press “ON/OFF” button, the control panel will lights up, the oven is in
standby mode
Step 2 :Press the Timer key twice to enter the cooking time, cooking time will
blink at the left bottom of the panel.
Step 3:Press “+” and “-“ to adjust the cooking time.
Press “OK”to confirm
11

Step 4:Lastly, press “Start/stop” to start cooking
How to use
1. Date/Cooking time/finish time setting. The sequence of cooking tie modes
will be displayed in the screen as below:
2.
2.1Clock: Press “ Timer” for 2 seconds, then press “+” or “-“ key to adjust
the time, press OK to confirm
2.2Cooking time: Press “Timer” twice, then press “+” or “-“ key to adjust
the time, press OK to confirm
2.3Finish time: If you want to set up the finish cooking time, press “Timer”
three times to set it. The oven will end cooking when the time is
reached.
3. Descaling Function
Take out the water tank, pour in the descaling pack add water until it is half full.
Put the water tank in place again. Close the door and press “ ” to select to
start working.” ”will appear on the display. Descale until the “ ” sign
appear with beep sound.
12

When “ “ sign appear, take out the water tank again, pour in water until it is
half full, put it back. Close the door and press “ “ again to start the second
part of cleaning.
Do the same as the above for third time cleaning. When it finish, the
descaling is completed.
4. Child Lock Function
Press the “ ” key for 2 seconds, the oven will be locked. Press it again for
two seconds, it will be unlocked.
5. Temperature Setting. In standby mode, press , then press “+”or “-”to
set desired temperature, press OK to confirm.
13

Select the right food container:
Please select the correct container for different kind of food. All the tray and rack included in the
oven are heat resistant. Below you can find our suggestion:
1. For food such as sweet potatoes, corn, tomato and egg, please place on the steam tray,
do not put it directly on the metal rack.
2. Food such as seafood, chicken wings, chicken steak or pumpkin, which can be cooked
with sauces, you can use steam tray.
3. For food such as fish, ribs, whole chicken or beef, which you do not want to keep the
juice or oil, then you can use grill rack.
Suggested steaming time
Species
Weight
Time
Fish
650g
15 minutes
Crab
500g
25minutes
Shrimp
500g
12minutes
Chicken leg
5pcs around 650g
30minutes
Chicken
1100g
35minutes
Beef
350g
40minutes
Pork
400g
20minutes
Soup
450g
15minutes
Egg
10pcs around 650g
15minutes
Pumpkin
850g
20minutes
Tomato
550g
30minutes
Corn
550g
30minutes
Bread
10
18minutes
Rice
400g
30minutes
14

Daily maintenance
Note: It has been designed to give years of trouble-free use provided it is
installed and maintained correctly. Please disconnect with power supply before
maintenance.
1. Do not pull the cable to disconnect power.
2. When cleaning the cavity, please remove everything in the cavity include
the shelves and use clean cloth to clean it.
3. Do not use water to spray on the unit directly. Do not use abrasive
material.
4. Cavity must be clean every time after use, wait until the cavity is fully cool
down, use dry cloth to clean the cavity, or keep the oven door oven to let
the cavity dry out.
5. It is recommended to descale the steam oven once every three months.
For details you can refer to the descaling function section.
6. Please clear the water tank regularly. When you clean the water tank.
Please remove the cover and use dry cloth to wipe it.
15

Troubleshooting
If you found the unit operating abnormally, please stop using it. Unplug the power
and follow the following instruction. Please contact our service center for
checking.
Status
Possible reasons
Solution
Lack of water “ “ sign
No water in water tank
Bad pumps
Fill water into the tank
Replacement of pump, please
contact service agent
Control panel is not working
Child Lock is on
Defective control panel
Unlock the unit
Please contact service agent
Food are not cooked after
steaming
The food is sealing with cover
No steam is generated
Remove the cover
Contact service agent
E2 appear on display
Interior sensor error
Contact service agent
E3 appear on display
Interior sensor overheat
Contact service agent
E4 appear on display
Steam heating plate sensor
error
Contact service agent
E5 appear on display
Steam heating plate overheat
Contact service agent
E1 appear on display
No water tank or water tank
not in place
Contact service agent
16

Vui lòng đọc kỹ hướng dẫn này trước khi cài đặt hoặc sử
dụng thiết bị này.
Bạn nên giữ hướng dẫn này ở nơi an toàn để tham khảo
trong tương lai.
Giới thiệu
Cám ơn bạn đã chọn thiết bị này.
Thiết bị này được thiết kế để sử dụng trong vòng nhiều năm
mà không gặp bất kỳ rắc rối nào nếu cài đặt và bảo trì đúng
cách.
Vui lòng đọc kỹ hướng dẫn này trước khi lắp đặt và sử dụng
thiết bị. Bạn nên lưu giữ lại hướng dẫn này để tham khảo
trong tương lai. Bao gồm một số thông tin an toàn quan trọng
ngoài các hướng dẫn và các khuyến nghị sẽ cho phép bạn
tận dụng tối đa các chức năng có sẵn.
Chất lượng của thiết bị này đã được kiểm tra và chứng nhận
để đáp ứng tất cả các tiêu chuẩn về điện và an toàn điện hiện
hành.
Thiết bị này phải được lắp đặt và kết nối theo các quy định
hiện hành.
Sau khi tháo bao gói đảm bảo rằng thiết bị không bị hư hỏng.
Nếu thiết bị hư hỏng trong quá trình vận chuyển, không lắp
đặt hoặc sử dụng thiết bị, liên hệ với trung tâm chăm sóc
khách hàng ngay lập tức.
17

Mục lục
1. Mục lục………………………………………………………………………………………………........……18
2. Cảnh báo chung …………………………………………………………………………………..................19
3. Thay thế đèn lò…………………………………………………………………………….…................…... 20
4. Lắp đặt phụ kiện......................................…………………………………………………………………… 21
5. Báo cáo hiệu quả môi trường…………………………………………………....……………………….… 22
6. Cảnh báo an toàn …………………………………………………………………………………..……..… 22
7. Phụ kiện…………………………………………………………………………………………............….… 23
8. Tổng quan sản phẩm ……………………………………………………………………………………...… 24
9. Kích thước sản phẩm……………………………………………………………………………….…......… 24
10. Đặc điểm sản phẩm ………………………………………………………………………………............… 25
11. Cảnh báo trước khi lắp đặt………………………………………………………………………………..… 25
12. Lắp đặt thiết bị ………………………………..…………………………………………………………….… 26
13. Ghi chú quan trọng………………………………………………………………………….………............. 26
14. Bảng điều khiển…………………………………………………………………………….……………...… 27
15. Khởi động nhanh…………………………………………………………………………………………..… 28
16. Cách sử dụng ……………………………………………………………………………………………...... 29
17. Lựa chọn vật chứa thức ăn………………………………………………………………………..........…. 31
18. Thời gian hấp khuyến nghị………………………………………………………………………….....…… 31
19. Bảo trì hằng ngày…………………………………………………………………………...................…… 32
20. Xử lý sự cố……………………………………………………………………………………...............…… 33
18
This manual suits for next models
1
Table of contents
Languages:
Other Malloca Oven manuals

Malloca
Malloca MOV-655EST User manual

Malloca
Malloca MOV-LX74 User manual

Malloca
Malloca MST 35-IX03 User manual

Malloca
Malloca MOV-65DA User manual

Malloca
Malloca MOV-615EST User manual

Malloca
Malloca MST-LX12 User manual

Malloca
Malloca MW-944TF User manual

Malloca
Malloca MOV-659TC User manual

Malloca
Malloca MOV-575 ECO User manual

Malloca
Malloca MOV-65DE User manual