Malloca MST-48CP User manual

INSTRUCTION MANUAL
BUILT-IN STEAM OVEN
MODEL: MST-48CP


Thank you for using our products
Please read this user manual carefully before installing and using this product, and use
the product according to this user manual. The operating instructions of this manual
are of great importance for keeping this product under good working conditions.
Thank you for using our products

Contents
1. Contents ···························································································· 1
2. User Notice on Environmental Impacts ························································· 2
3. Safety Instructions ················································································ 2
4. Packing List ························································································· 3
5. Components ······················································································· 4
6. Product Dimension and Specifications ························································ 4
7. Technical Product Parameters ··································································· 4
8. Electrical Schematic Diagram ·································································· 5
9. Assembly Notes/Product Assembly Method ·················································· 6
10. User Instructions and Application Methods ················································· 7
11. Application Methods ············································································ 8
12. Application Methods ············································································· 9
13. Common Failures and Solutions ······························································· 8
14. Name and Content of Hazardous Substances in Products ································· 9
15. Steaming Requirements for Utensils ··························································· 10
16. Suggestions on Cooking Time for Common Food ········································· 11
17. Routine Product Maintenance/Common Failures and Solutions ························· 12
18. Common Failures and Solutions ······························································ 13
Signs used in the manual and meanings:
Important information on personal safety and how to avoid damaging machines
Main notes
Contents 1

User Notice on Environmental Impacts
Protect environment and avoid pollution. Environmental impacts might be caused
during use of our products. Please be informed as follows:
Recyclable wastes such as cartons and plastics shall be thrown into designated sortable
garbage bins after use. Hazardous wastes such as waste and used cells will cause
serious environmental pollution if littered. They shall be thrown into corresponding
dustbins for recycling wastes.
Safety Instructions
1. Due to their special processes, tempered glass is inherently characterized by
spontaneous breakage, which ranges from 3‰ to 5‰ in the industry, but strictly
controlled by us below 3‰.
2. Please separately use sockets with a rated current above 10A. The product must be
reliably grounded. Please don’t use loose sockets or those with poor contact, or else
electric shock, short circuit and fire will be easily caused. Sharing a socket with other
electrical appliances might make the product abnormally hot and thereby cause fire.
3. To pull the plug out of the socket, do hold its end. Please don’t hold the power cord for
unplugging, or else dangers such as electric shock, short circuit and fire will be caused.
4. Please don’t soak the product in water or spray the product with water, or else dangers
such as short circuit and electric shock will be caused.
5. Please don’t use alternating current other than 187-242V, or else fire and electric shock
will be caused.
6. Please educate children not to use or play the product alone, or else scald, electric
shock and other accidents will be easily caused.
7. Except for professional repair technicians, other people shall not independently
disassemble, repair or change the product.
8. If the product is unused for a long period, please pull the power plug out or switch off
the power supply of the product.
9. When the power cord is damaged, the product must be delivered to a repair outlet for
replacement.
10. Warning: Don’t clean the glass of the door of the assembled steam oven using coarse
abrasive cleaner or sharp metal scraper. If the glass surface of the assembled steam over
is scratched, the glass will be crushed.
2 User Notice on Environmental Impacts/Safety Instructions

Packing List
SN Packed Articles Quantity
1 Host 1
2 Water Absorbing
Ball
1
3 Cleaning Sponge 1
4 Steaming Plate 1
5 Oil Drip Pan 1
6 Scale Remover 2 bags
7 Host Packaging
Polybag
1
8 Manual 1
9 Warranty Card -
10 Steaming Rack 1
11 Mounting Screw 1 set
12 Packing Case 1
13 Packing Foam 1 set
14 Grill Turner -
15 Damp-proof Bead 1 bag
Packing List 3

Components/Product Dimension and Specifications
Control Panel Tank Door control switch Steaming rack
Steaming plate Door hinge Water catcher Door
Technical Product Parameters
Product Description Electrical Steamer
Type MST-48CP
Rated Voltage 220V~
Rated Frequency 50Hz
Rated Power 2,060W
Volume 48L
Mounting Method Pre-burying
Product Dimension 595*455*532 (W*H*D)
Package Dimension 660*512*610 (W*H*D)
Pre-burying Dimension 564*450*550 (button for 10mm on the upper part and
0mm on the lower part (W*H*D)
Net Weight 22.7kg
Gross Weight 25.7kg
Standards GB 4706.1-2005 GB 4706.22-2008
4 Components/Product Dimension and Specifications/Technical Product Parameters

Electrical Schematic Diagram
MST-48CP
Electrical Schematic Diagram 5
Temperature
controller for
overheating
protection at 200°C
Switch display Black
Control circuit board
Red line
panel
Probe on Heating Plate
4-terminal
Black Terminal
Liner probe
Float switch
Door control switch
Switch of tank motor
Tank switch
Red Red
Temperature controller for overheating
protection at 200°C
Blue line Blue line
Yellow terminal
Yellow terminal
White terminal
Red terminal
White terminal
White line
Green line
Black line
Black line
Blue line
Blue line
Brown line
White terminal
White line
Black line Inner
thermotube
Outer
thermotube
Light
Temperature controller for
overheating protection at 115°C
Steaming plate
Temperature controller for
overheating protection at 115°C
Tank motor
Pump
Cooling fan
Drain valve

Assembly Notes
1. The electrical steamer shall be steadily mounted in a secure place easy for operation and maintenance
(the steamer must not be obliquely placed).
2. Don’t mount the electrical steamer and power socket in any place that might become damp or get wet
with water.
3. Do confirm if the earth electrode of the power socket is effective.
4. To move the product to another place, lift it up from the handle hole or the bottom. Handle the product
with care.
5. The facilities and objects next to the electrical steamer must be insulated.
6. It is better to mount a switch in front of the socket of the electrical
steamer, to make it easy to disconnect the power supply when the
electrical steamer is not used.
7. While the electrical steamer is working, please don’t directly touch the
inside of the steamer, in order not to be scalded.
8. Mount the pre-buried electrical steamer inside the cupboard, which shall
have space for heat radiation, or else normal use of the steamer will be
affected. The cupboard shall not have a back plate. The heat radiation is
shown on the right picture:
Product Assembly Method
1. Put the machine near the mounting groove. Then, insert the power plug into the socket.
2. Lift the machine up from the bottom or the left and right clasp positions. Then, gently put the machine
down in the preleft holes in the cupboard. Next, push the machine so that it will be close to the front
panel of the cupboard in parallel, and completely embedded into the cupboard.
3. When the front door of the machine is opened, four screw holes can be seen on the rim. Fix the
machine in the cupboard with mounting screws. The machine can be fastened on the lower part of the
cupboard foundation or the upper part of the corner cabinet according to actual needs.
4. As to the detailed parameters for burying the machine in the cupboard, refer to the schematic
assembly drawing and the attached form.
Product Assembly Dimension
Type
(Electrical
Steamer)
Hole Size
MST-48CP
W564*H450*D550
(button for 5mm on
the upper part,
without buttoning on
the lower part)
6 Assembly Notes/Product Assembly Method
Please ensure certain
ventilation distance
No back plate on the back

User Instructions
1. To take the food out right after steaming, you must use a special tool or wear
high-temperature resistant gloves, in order not to be scalded.
2. During use, the product will accumulate some water. Please promptly clear the
accumulated water away from the drainage trough and liner, in order to avoid spillover.
3. After cooking, please don’t open the steamer right away, in order not to be scalded by
the erupted steam.
4. Don’t flush the machine body with water, or wipe it with organic solvent such as petrol.
5. Please regularly clear the scale away using the scale removal function, and regularly
wash the tank.
6. If the soft power cord is damaged, it must be replaced by a professional of the
manufacturer, its maintenance department or similar department, in order to avoid
dangers.
7. All power sockets must be reliably grounded.
8. If the electrical steamer is unused for a long period, please turn off its power supply,
and clear the water away from the tank.
9. During steaming, please don’t additionally cover the food, or else steam cannot
penetrate into food that food cannot be well cooked.
10. It’s better to use filtered purified water or barreled water.
Application Methods
Control Panel
Power switch Function key Light key Temperature regulating key
Time setting key Display screen Up key Down key
Appointment key/tank opening key Child lock Start/pause key
User Instructions/Application Methods 7

Rapid application
1. Start the heating function
Step 1: Press the power switch “ ”, and
the display screen will be on. Then, the
machine will enter the standby state.
Step 2: Press the “ ” key to select the
steaming function. Then, the icon “ ”
will be displayed on the upper left corner
of the display screen.
Step 3: Press the “ ” key. Then, press
“ ” and “ ” keys to regulate working
time. Next, press the “ ” key. Then,
press “ ” and “ ” keys to regulate the
working temperature.
Step 4: Press the “ ” key. Then, the
baking function of the steamer will be
immediately started.
Detailed operating instructions
Standard time setting (clock function)
When the product is powered on for the first time, or when the “ ” key is long pressed
under the standby state, the clock will flicker on the display screen. At this moment, press
the “ ” and “ ” keys to regulate the time on the clock. After time adjustment, it is
unnecessary to press any key. 10s later, the adjusted time will be automatically confirmed.
8 Application Methods

Detailed Operating Instructions
Press the “ ” key one time while the steamer is working. Then, the steamer will stop heating.
Auto heating shut-off mode over set time
Set the working time first. The method for the steamer to automatically stop heating after working for the
set time is as follows:
1. Press the “ ” key, and the machine will enter the standby state;
2. Press the “ ” key for mode selection, switch the function whenever the key is pressed;
3. Press the “ ” key. Then, the displayed temperature will start flickering. Then, press the “ ” and
“ ” keys to set the steaming temperature. For high-temperature steaming, “ ” is non-adjustable.
4. Press the “ ” key, and the minutes will start flickering. At this moment, press the “ ” and “ ”
keys to set the steaming time. Press the “ ” or “ ” key each time for 1 min. The value will be
increased or decreased continuously when the key is long pressed.
5. Press the “ ” key, and the steamer will immediately start steaming;
Appointment function:
Operate the machine as follows under the standby state:
1. Press the “” key once, and the machine will enter the standby state;
2. Press the “ ” key for mode selection. The function will be switched whenever the key is pressed;
3. Press the “ ” key, and the displayed temperature will start flickering. Then, set the steaming
temperature through the “ ” and “ ” keys. For high-temperature heating, “ ” is non-adjustable.
4. Press the “ ” key, and the minutes will start flickering. Then, press the “ ” and “ ” keys to set
the steaming time. Press the “ ” or “ ” key each time for 1 min. The value will be increased or
decreased continuously when the key is long pressed.
5. Press the “ ” key to set the expected end time of steaming through the “ ” and “ ” keys.
6. Press the “ ” key to confirm the setting, and the steamer will start heating at the end time;
Scale removal function: Press the “ ” key to take the tank out first. Pour one bag of scale remover
into the tank. Then, fill up half of the tank with water and mount it into the tank holder of the electrical
steamer. Press the “ ” key under the standby state to select the scale removing gear, and the scale removal
function will be enabled. At this moment, the icon “ ” will be displayed in the middle of the display
screen. Press the “ ” key to enter the scale removal function. When the steamer alarms, the water
shortage icon “ ” will be displayed on the right of the screen.
When the electrical steamer alarms for water shortage, the tank will pop out by itself. Then, refill up half of
the tank with clear water. Next, remount the tank into the tank holder. Press the “ ” key until the
steamer stops working.
Lighting function/child lock;
1. Operate as follows under the standby mode;
Press the light key “ ”, and the light will be on. Then, press the “ ” key again, and the light will be off.
2. Operate as follows when the steamer has been powered on;
Long press the child lock “ ” for 1.5s, and the child lock will be enabled, while other keys will be locked
and non-operable. The child lock icon “ ” will be displayed on the right of the display screen. Long press
the child lock key “ ” for 1.5s to disable the child lock;
Application Methods 9

Steaming Requirements for Utensils
Steaming requirements for utensils:
Select suitable utensils for different food. In using the electrical steamer, please use the
special food utensils without toxin volatilization at high temperature. No utensil used in the
electrical steamer shall have any cover. For special needs, it is better to use the accessories
such as steaming plate supplied together with the product. The particular suggestions for
utensil selection are as follows:
1. Relatively bulky food such as sweet potatoes, corns, tomatoes, eggs, steamed stuffed
buns and steamed rolls without oil drip can be directly put on the steaming rack.
2. Food such as fish, spare ribs, whole chicken and pumpkins can be put on the steaming
plate if it is unnecessary to retain the juice infiltrated out of the food after they are
cooked.
3. Oil drip pan can be used for food such as fish, spare ribs, whole chicken and beef when
the juice infiltrated out of the food has to be retained after cooking.
10 Steaming Requirements for Utensils

Suggestions on Cooking Time for Common Food
Category Weight Time
Fish ~650 g 15 min
Sea Crab ~500 g 25 min
Shrimp ~500 g 12 min
Drumstick 5 drumsticks with a weight
of about 650 g 30 min
Chick 1 chick with a weight of
about 1,100 g 35 min
Beef ~350 g 40 min
Pork ~400 g 20 min
Soup ~450 g 15 min
Egg 10 eggs with a weight of
about 650 g 15 min
Pumpkin ~850 g 20 min
Potato ~550 g 30 min
Corn ~ 550 g 30 min
Steamed Stuffed Bun 10 buns 18 min
Rice ~400 g 30 min
Suggestions on Cooking Time for Common Food 11

Daily Product Maintenance
Notes: To give the performances of the machine into full play and prolong its service life,
the machine shall be regularly maintained. Prior to maintenance, unplug the power plug and
press the power switch to confirm if the power supply has been disconnected.
1. Don’t unplug the power plug out of the power socket of the steamer by pulling the
cable.
2. To clean the liner, the accessories shall be taken out first. Then, tidy the liner up with
wiping rag.
3. Don’t directly spray the machine with water; avoid using strong acidic or alkaline
detergent.
4. Maintain the inner chamber after each use. When the inner chamber is cooled down,
wipe the whole inner chamber with a piece of dry cloth, or open the steamer until the
inner chamber is completely dry.
5. Maintain the steam generator every 3 months. Enable the dirt removal function on the
product, and clean the machine with scale remover.
6. Please promptly clear the water away from the drain trough using a water absorbing
ball.
7. Please regularly clean the tank. To clean the tank, remove the cover first, and then,
scrub the inner side of the tank with wet cloth and detergent.
12 Routine Product Maintenance/Common Failures and Solutions

Common Failures and Solutions
In case of any anomaly during use, please stop using the machine, unplug the power
plug, check and confirm the following content. When necessary, please contact our
after-sales service center.
Failures Causes Solutions
Water shortage alarm
No water in the tank Fill up the tank with water
The tank is not mounted in
place
Push the tank inside again,
to horizontally align it with
the plane of the inner
chamber
The pump is damaged Replace the pump or notify
the manufacturer of repair
The control panel cannot
be operated
The child lock has been
enabled Disable the child lock
The switch panel is
damaged
Notify the manufacturer of
repair
The food cannot be fully
cooked by steaming
The food has been covered Remove the cover from the
food
No steam is generated Notify the manufacturer of
repair
E2 is displayed on the
display screen
The temperature sensor of
the inner liner is damaged
Notify the manufacturer of
repair
E4 is displayed on the
display screen
The temperature sensor of
the heating plate is
damaged
Notify the manufacturer of
repair
E5 is displayed on the
display screen
The temperature controller
of the heating plate protects
against over high
temperature
Power off the machine for
automatic cooling or notify
the manufacturer of repair
E8 is displayed on the
display screen The tank motor fails Notify the manufacturer of
repair
Common Failures and Solutions 13

Cảm ơn bạn đã sử dụng sản phẩm của chúng tôi
Vui lòng đọc kỹ hướng dẫn sử dụng này trước khi lắp đặt và sử dụng sản phẩm này,
và sử dụng sản phẩm theo hướng dẫn sử dụng này. Các hướng dẫn vận hành của sách
hướng dẫn này có ý nghĩa rất quan trọng để giữ sản phẩm này trong điều kiện hoạt
động tốt.
Cảm ơn bạn đã sử dụng sản phẩm của chúng tôi

Nội Dung
1. Nội dung · ··························································································· 1
2. Thông báo của Người dùng về Tác động Môi trường · ······································· 2
3. Hướng dẫn an toàn · ··············································································· 2
4. Bảng kê sản phẩm · ················································································ 3
5. Các thành phần ···················································································· 4
6. Kích thước và thông số kỹ thuật của sản phẩm ··············································· 4
7. Thông số kỹ thuật sản phẩm · ···································································· 4
8. Sơ đồ mạch điện ···················································································· 5
9. Ghi chú lắp ráp / Phương pháp lắp ráp sản phẩm ············································· 6
10. Hướng dẫn sử dụng và Phương pháp ứng dụng ············································· 7
11. Phương pháp ứng dụng · ······································································· 8
12. Phương pháp ứng dụng··········································································· 9
13. Các lỗi thường gặp và giải pháp ································································ 8
14. Tên và Nội dung của các Chất Nguy hiểm trong Sản phẩm · ····························· 9
15. Yêu cầu hấp đối với đồ dùng···································································· 10
16. Gợi ý về thời gian nấu thức ăn thông thường ··············································· 11
17. Bảo trì sản phẩm định kỳ / Các lỗi thường gặp và giải pháp · ···························12
18. Các lỗi thường gặp và giải pháp ······························································ 13
Các dấu hiệu sử dụng trong sổ tay và ý nghĩa:
Thông tin quan trọng về an toàn cá nhân và cách tránh làm hỏng lò
Ghi chú chính
Nội dung 1

Thông báo của Người dùng về Tác động Môi trường
Bảo vệ môi trường và tránh ô nhiễm. Các tác động môi trường có thể gây ra trong quá
trình sử dụng sản phẩm của chúng tôi. Xin được thông báo như sau:
Các chất thải có thể tái chế như thùng carton và đồ nhựa phải được loại bỏ vào các
thùng rác có thể phân loại được chỉ định sau khi sử dụng. Các chất thải nguy hại như
rác thải, tế bào đã qua sử dụng sẽ gây ô nhiễm môi trường nghiêm trọng nếu vứt rác
bừa bãi. Chúng sẽ được ném vào thùng rác tương ứng để tái chế chất thải.
Hướng dẫn an toàn
1. Do các quy trình đặc biệt của chúng, kính cường lực vốn có đặc điểm là vỡ tự phát, dao
động từ 3‰ đến 5‰ trong ngành, nhưng được chúng tôi kiểm soát chặt chẽ dưới 3‰.
2. Vui lòng sử dụng riêng các ổ cắm có dòng định mức trên 10A. Sản phẩm phải được nối
đất đáng tin cậy. Vui lòng không sử dụng ổ cắm lỏng lẻo hoặc ổ cắm có tiếp xúc kém,
nếu không sẽ dễ gây ra điện giật, đoản mạch và hỏa hoạn. Dùng chung ổ cắm với các
thiết bị điện khác có thể làm cho sản phẩm nóng bất thường và do đó gây ra hỏa hoạn.
3. Để rút phích cắm ra khỏi ổ cắm, hãy giữ đầu của nó. Vui lòng không cầm dây nguồn để
rút phích cắm, nếu không sẽ gây ra các nguy hiểm như điện giật, đoản mạch và hỏa
hoạn.
4. Vui lòng không ngâm sản phẩm trong nước hoặc phun nước vào sản phẩm, nếu không
sẽ gây ra các nguy hiểm như đoản mạch và điện giật.
5. Vui lòng không sử dụng điện áp xoay chiều ngoài 187-242V, nếu không sẽ gây ra
hỏa hoạn và điện giật.
6. Vui lòng hướng dẫn trẻ em không sử dụng một mình, nếu không sẽ dễ gây bỏng, điện
giật và các tai nạn khác.
7. Ngoại trừ các nhân viên kỹ thuật, những người khác không được tháo rời, sửa chữa
hoặc thay đổi sản phẩm một cách độc lập.
8. Nếu sản phẩm không được sử dụng trong thời gian dài, vui lòng rút phích cắm ra khỏi
nguồn hoặc tắt nguồn điện của sản phẩm.
9. Khi dây nguồn bị hỏng, sản phẩm phải được chuyển đến ổ cắm sửa chữa để thay thế.
10. Cảnh báo: Không làm sạch kính cửa của lò hơi đã lắp ráp bằng chất tẩy mài mòn thô
hoặc dao cạo kim loại sắc nhọn. Nếu bề mặt kính cửa lò hấp bị trầy xước, kính sẽ bị
nghiền nát.
2 Thông báo của Người dùng về Tác động Môi trường / Hướng dẫn An toàn

Bảng kê sản phẩm
STT Danh mục Số lượng
1 Lò hấp 1
2 Bóng hút
nước
1
3 Bọt biển vệ sinh 1
4 Khay hấp 1
5 Khay hứng dầu 1
6 Tẩy cặn 2 túi
7 Bao bì lò hấp 1
8 Hướng dẫn 1
9 Thẻ bảo hành -
10 Vỉ hấp 1
11 Vít 1 bộ
12 Thùng carton 1
13 Mút xốp 1 bộ
14 Giá quay nướng -
15 Hạt chống ẩm 1 túi
Bảng kê sản phẩm 3
Table of contents
Other Malloca Oven manuals

Malloca
Malloca MOV-65DA User manual

Malloca
Malloca MOV-LX74 User manual

Malloca
Malloca MDO-80BL User manual

Malloca
Malloca MW34TS User manual

Malloca
Malloca MOV-65DE User manual

Malloca
Malloca MW-944TF User manual
Malloca
Malloca MOV-65T5 User manual
Malloca
Malloca MST 35-IX03 User manual
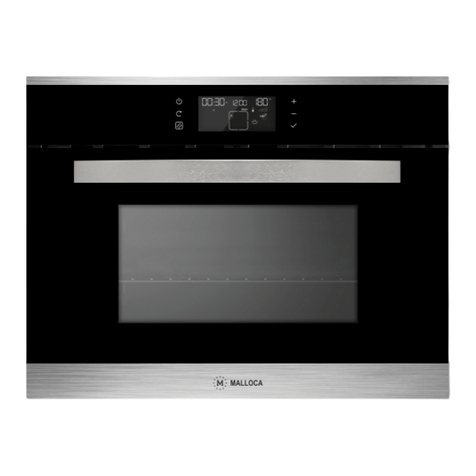
Malloca
Malloca MST-LX12 User manual

Malloca
Malloca MOV-655EST User manual
Popular Oven manuals by other brands
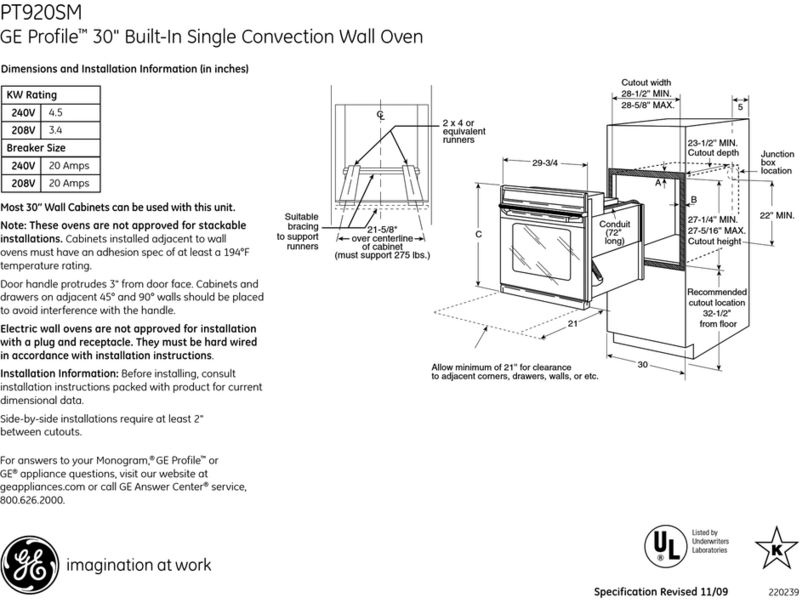
GE
GE Profile PT920SMSS Dimensions and installation information

AEG
AEG DCK431110M user manual
Rommelsbacher
Rommelsbacher BG 1055/E instruction manual
Roller Grill
Roller Grill SEM 600 Instructions for use and installation
Atag
Atag ZX66 C Series Instructions for use
GE
GE JVM1600 Series installation instructions
