manuals.online logo
Brands
  1. Home
  2. •
  3. Brands
  4. •
  5. mammotome
  6. •
  7. Medical Equipment
  8. •
  9. mammotome Elite MEH1 User manual

mammotome Elite MEH1 User manual

Quick Reference Guide
After cleaning and disinfecting, place the holster into the
charging base. The holster will emit a two-tone beep to indicate
correct placement into the base.
When charging, set the holster on top
of this guide for quick, easy reference.
Holster Inside Charger
SOLID = Battery is fully charged.
FLASH = Battery is charging.
FLASH = Battery is charging. Holster must remain on charging base.
Holster Outside Charger
SOLID = Adequate charge available.
FLASH = Sufcient charge to complete one procedure.
SOLID = Insufcient charge. Return holster to charging base.
• Ensure the probe is outside the patient.
• Disassemble and reassemble the probe and holster.
• If the problem persists, replace with a new probe.
• Press any biopsy button and re-check the indicator
lights.
• If the problem persists, remove probe and return
holster to charging base (ensuring proper seating).
If the battery indicator light is not illuminated:
If the fault indicator light is illuminated:
Troubleshooting
Charging the Holster
Step 1
Please read the full “Instructions For Use” before using
this product. Grasp the probe body and align the tab
with the holster notch. Push the probe base into the
holster while maintaining the alignment.
Push the active biopsy button only once to initiate the
biopsy cycle. To interrupt the biopsy cycle, push the biopsy
button again when the cutter is retracting from position
1 to 3 (see image below) or when the cutter is advancing
from position 3 to 2. The cutter will retract to position 3,
and the biopsy indicator light will ash orange. Complete
the cycle by pushing the biopsy button.
Push the active biopsy button on the holster to acquire
a sample. The biopsy cycle proceeds: a vacuum is
created, the inner cutter of the probe is retracted,
tissue is drawn into the aperture and the cutter rotates
and translates forward, cutting tissue.
When the cutter reaches the distal end of the aperture,
the vacuum will transport the sample to the specimen
collection cup.
Step 2
Rotate to desired position and release.
Step 1
Push the needle rotation knob in the direction shown
below to rotate.
Disconnect the integrated coaxial cannula and
remove the probe by pressing the coaxial release
button, leaving the cannula in place.
Interrupt a biopsy cycle (as previously described)
leaving the aperture open. Inject 1cc of sterile saline
into the needle aperture. Complete the biopsy cycle by
pushing the biopsy button. The system is now primed
and ready to sample.
Needle Rotation
Biopsy Cycle Interrupt
Biopsy Tissue
Removing the Coaxial Cannula
Priming the System
Step 1
Ensure the probe is attached. Press and hold the two
inactive biopsy buttons simultaneously for three seconds.
There will be an audible indicator and all three indicator
lights will ash.
Step 2
Press and release the desired active biopsy button. The
active biopsy button is stored in the device for future use.
Step 2
Push the probe rmly into the holster until a click is
heard, indicating the locking tabs have engaged the
holster.
Note: Automatic initialization will begin.
Assembly Biopsy Button Selection
Attribute MEP10 MEP13
Needle Length (w/o cannula) 136mm 136mm
Needle Length (w/ cannula) 122mm 122mm
Needle Diameter 3.5mm 2.6mm
Aperture Length 19.1mm 18.4mm
Dead Space 10mm 10.4mm
Tip to Center 19.6mm 19.6mm
Capital Equipment
Code Description Qty
MEH1 Mammotome®Elite Holster 1
MEP10 10G Mammotome®Elite Ultrasound Probe 5
MEP13 13G Mammotome®Elite Ultrasound Probe 5
MEI10 10G Mammotome®Elite Introducer Stylet 5
MEI13 13G Mammotome®Elite Introducer Stylet 5
For complete product details, see Instructions for Use.
Product may not be approved or available in your region. Please check with your local Mammotome representative.
© 2021 Devicor Medical Products, Inc. All rights reserved. Devicor, Mammotome and Mammotome Elite are registered trademarks of Devicor Medical Products, Inc., in the USA and
optionally in other countries. Other logos, product and/or company names might be trademarks of their respective owners. MDM# 12-0041 Rev 11/21
mammotome.com
1-877-926-2666
Removing Tissue from Device Disassembly
Step 1
Rotate the specimen collection cap counter clockwise
1/4 turn.
Step 3
Press and release the tissue basket release button
to remove the tissue basket for ease of transport to
pathology.
Pull the probe out of the holster while pressing down
on the probe’s locking tab.
Step 2
Remove the cap and tissue basket together.
Product Attributes

This manual suits for next models

4

Other mammotome Medical Equipment manuals

mammotome REVOLVE Operation and maintenance manual

mammotome

mammotome REVOLVE Operation and maintenance manual

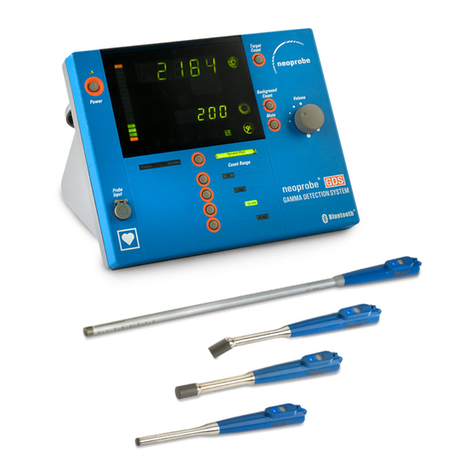
mammotome Neoprobe GDS System User manual

mammotome

mammotome Neoprobe GDS System User manual

Popular Medical Equipment manuals by other brands

Global Halotherapy Solutions HaloFX Mobile manual

Global Halotherapy Solutions

Global Halotherapy Solutions HaloFX Mobile manual

Arjo Parker Quick reference guide

Arjo

Arjo Parker Quick reference guide

Innova OBD2 owner's manual

Innova

Innova OBD2 owner's manual

Essilor CORNEA 550 user manual

Essilor

Essilor CORNEA 550 user manual

Motion Concepts MATRX LIBRA CUSHION user manual

Motion Concepts

Motion Concepts MATRX LIBRA CUSHION user manual

Ossur AIRFORM Inflatable Instructions for use

Ossur

Ossur AIRFORM Inflatable Instructions for use

Mindray Trio Service manual

Mindray

Mindray Trio Service manual

Animas 2020 user guide

Animas

Animas 2020 user guide

Mindray A3 Service manual

Mindray

Mindray A3 Service manual

Direct Healthcare Services Dyna-Form Mercury Safety 7 user manual

Direct Healthcare Services

Direct Healthcare Services Dyna-Form Mercury Safety 7 user manual

otometrics Madsen Zodiac Quick checkup

otometrics

otometrics Madsen Zodiac Quick checkup

Tecno-gaz TECNOHEART plus user manual

Tecno-gaz

Tecno-gaz TECNOHEART plus user manual

Vicair Vector Quick installation guide

Vicair

Vicair Vector Quick installation guide

Biosan MPS-1 operating instructions

Biosan

Biosan MPS-1 operating instructions

XXL-Rehab Stok user manual

XXL-Rehab

XXL-Rehab Stok user manual

NSE EV Series user manual

NSE

NSE EV Series user manual

Repatha Pushtronex Instructions for use

Repatha

Repatha Pushtronex Instructions for use

Orliman ALTTEX EST-091 INSTRUCTIONS FOR USE AND PRESERVATION

Orliman

Orliman ALTTEX EST-091 INSTRUCTIONS FOR USE AND PRESERVATION

manuals.online logo
manuals.online logoBrands
  • About & Mission
  • Contact us
  • Privacy Policy
  • Terms and Conditions

Copyright 2025 Manuals.Online. All Rights Reserved.