manuals.online logo
Brands
  1. Home
  2. •
  3. Brands
  4. •
  5. Manhattan
  6. •
  7. PCI Card
  8. •
  9. Manhattan 176767 User manual

Manhattan 176767 User manual

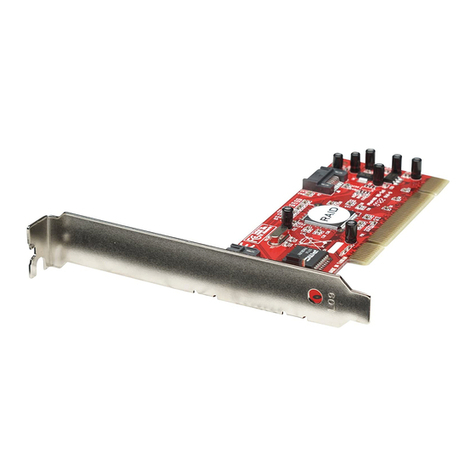
SATA 1.5 Gb/sRAID CONTROLLER PCI CARD
QUICK INSTALL GUIDE
MODEL 176767
All trademarks and trade names are the property of their respective owners.
Alle Marken und Markennamen sind Eigentum Ihrer jeweiligen Inhaber.
Todas las marcas y nombres comerciales son propiedad de sus respectivos dueños.
Toutes les marques et noms commerciaux sont la propriété de leurs propriétaires respectifs.
Wszystkie znaki towarowe i nazwy handlowe należą do ich właścicieli.
Tutti i marchi registrati e le dominazioni commerciali sono di proprietà dei loro rispettivi proprietari.
WARRANTY INFORMATION
English: For warranty information, go to www.manhattan-products.com/warranty.
Deutsch: Garantieinformationen finden Sie unter www.manhattan-products.com/warranty.
Español: Si desea obtener información sobre la garantía, visite www.manhattan-products.com/warranty.
Français: Pour consulter les informations sur la garantie, visitez www.manhattan-products.com/warranty.
Polski: Informacje dotyczące gwarancji znajdują się na stronie www.manhattan-products.com/warranty.
Italiano: Per informazioni sulla garanzia, accedere a www.manhattan-products.com/warranty.
En México: Póliza de Garantía MANHATTAN — Datos del importador y responsable ante el consumidor IC Intracom México, S.A. de C.V. • Av.
Interceptor Poniente # 73, Col. Parque Industrial La Joya, Cuautitlán Izcalli, Estado de México, C.P. 54730, México. • Tel. (55)1500-4500
La presente garantía cubre los siguientes productos contra cualquier defecto de fabricación en sus materiales y mano de obra.
A. Garantizamos los productos de limpieza, aire comprimido y consumibles, por 60 dias a partir de la fecha de entrega, o por el tiempo en que
se agote totalmente su contenido por su propia función de uso, lo que suceda primero.
B. Garantizamos los productos con partes móviles por 3 años.
C. Garantizamos los demás productos por 5 años (productos sin partes móviles), bajo las siguientes condiciones:
1. Todos los productos a que se reere esta garantía, ampara su cambio físico, sin ningún cargo para el consumidor.
2. El comercializador no tiene talleres de servicio, debido a que los productos que se garantizan no cuentan con reparaciones, ni refacciones,
ya que su garantía es de cambio físico.
3. La garantía cubre exclusivamente aquellas partes, equipos o sub-ensambles que hayan sido instaladas de fábrica y no incluye en ningún
caso el equipo adicional o cualesquiera que hayan sido adicionados al mismo por el usuario o distribuidor. Para hacer efectiva esta
garantía bastará con presentar el producto al distribuidor en el domicilio donde fue adquirido o en el domicilio de IC Intracom México,
S.A. de C.V., junto con los accesorios contenidos en su empaque, acompañado de su póliza debidamente llenada y sellada por la casa
vendedora (indispensable el sello y fecha de compra) donde lo adquirió, o bien, la factura o ticket de compra original donde se mencione
claramente el modelo, número de serie (cuando aplique) y fecha de adquisición. Esta garantía no es válida en los siguientes casos: Si el
producto se hubiese utilizado en condiciones distintas a las normales; si el producto no ha sido operado conforme a los instructivos de
uso; o si el producto ha sido alterado o tratado de ser reparado por el consumidor o terceras personas.
© IC INTRACOM. All rights reserved.
MANHATTAN is a trademark of IC INTRACOM, registered in the U.S. and other countries.
www.manhattan-products.com
REGULATORY STATEMENTS
FCC Class B
This equipment has been tested and found to comply with the limits for a Class B digital device, pursuant to Part 15 of Federal Communications
Commission (FCC) Rules. These limits are designed to provide reasonable protection against harmful interference in a residential installation.
This equipment generates, uses and can radiate radio frequency energy, and if not installed and used in accordance with the instructions may
cause harmful interference to radio communications. However, there is no guarantee that interference will not occur in a particular installa-
tion. If this equipment does cause harmful interference to radio or television reception, which can be determined by turning the equipment off
and on, the user is encouraged to try to correct the interference by one or more of the following measures: reorient or relocate the receiving
antenna; increase the separation between the equipment and the receiver; connect the equipment to an outlet on a circuit different from the
receiver; or consult the dealer or an experienced radio/TV technician for help.
CE / R&TTE
English: This device complies with the requirements of the R&TTE Directive 1999/5/EC.
Deutsch: Dieses Gerät enspricht der Direktive R&TTE Direktive 1999/5/EC.
Español: Este dispositivo cumple con los requerimientos de la Directiva R&TTE 1999/5/EC.
Français: Cet appareil satisfait aux exigences de la directive R&TTE 1999/5/CE.
Polski: Urządzenie spełnia wymagania dyrektywy R&TTE 1999/5/EC.
Italiano: Questo dispositivo è conforme alla Direttiva 1999/5/EC R&TTE.
1 Schalten Sie Ihren PC aus, stecken Sie die Karte in
einen PCI-Slot und schalten Sie den PC wieder ein.
2 Wenn der Hardwareinstallationsassistent
eingeblendet wird, klicken Sie auf “Weiter”.
3 Markieren Sie “Software von einer Liste oder
bestimmten Quelle installieren (für fortgeschrittene
Benutzer)” und klicken Sie auf “Weiter”.
4 Legen Sie die beiliegende Treiber-CD ein. Markieren
Sie “Ein bestimmtes Verzeichnis angeben” und
entfernen Sie bei den anderen Optionen die
Markierung. Klicken Sie auf “Weiter”.
5Wählen Sie den Laufwerksbuchstaben Ihres DVD-
Laufwerks aus und klicken Sie auf “Durchsuchen”.
6 Wählen Sie ein Verzeichnis (z. B.: “E:\SATA Express_
2Port\Sil3132\” — “E” ent spricht Ihrem DVD-
Laufwerk), dann wählen Sie das Unterverzeichnis
mit dem passenden Betriebssystem. Klicken Sie auf
“Öffnen”, dann auf “OK.”
7Sobald das Betriebssystem anzeigt, dass es einen
Treiber für die Karte gefunden hat, klicken Sie auf
“Weiter”.
8Folgen Sie den weiteren Installationsanweisungen.
9Windows kopiert die benötigten Dateien in Ihr
Betriebsystemverzeichnis und startet den Treiber.
Sobald die Vollständigkeit der Installation angezeigt
wird, klicken Sie auf “Beenden”.
10 Starten Sie Ihren PC neu, falls Sie von Ihrem
Betriebssystem dazu aufgefordert werden.
Spezifikationen, Details zur Installation oder
Installationsüberprüfung sowie zu den RAID-
Einstellungen finden Sie im Handbuch auf
www.manhattan-products.com.
1 With the PC turned off, insert the card into a PCI
slot, then turn the PC on.
2When the Found New Hardware Wizard displays,
click “Next.”
3Select “Install from a list or specific location
(Advanced)” and click “Next.”
4Load the included driver CD. Select “Specify a
location” and uncheck the other boxes. Click “Next.”
5Select or enter the letter that corresponds to your
CD/DVD drive, then click “Browse.”
6Select a location (for example: “E:\SATA Express_
2Port\Sil3132\” — where “E” represents the CD/DVD
drive), then select the folder with the appropriate
operating system. Click “Open,” then “OK.”
7When the operating system indicates that it has
found a driver for the card, click “Next.”
8Follow whatever prompts display as the
installation continues.
9Windows will copy the required files to the
operating system and start the driver. When the
Installation Complete screen displays, click “Finish.”
10 Re-start your computer if your operating system
displays a prompt to do so.
For specifications or for details about performing a
fresh installation, verification or RAID setup, refer to
the user manual at www.manhattan-products.com.
Deutsch:SATA 1,5 GBit/s RAID Controller PCI Karte
ENGLISH
This symbol on the product or its packaging indicates that this product
shall not be treated as household waste. Instead, it should be
taken to an applicable collection point for the recycling of
electrical and electronic equipment. By ensuring this product
is disposed of correctly, you will help prevent potential nega-
tive consequences to the environment and human health, which could
otherwise be caused by inappropriate waste handling of this product.
If your equipment contains easily removable batteries or accumulators,
dispose of these separately according to your local requirements. The
recycling of materials will help to conserve natural resources. For more
detailed information about recycling of this product, contact your local
city office, your household waste disposal service or the shop where you
purchased this product. In countries outside of the EU: If you wish to dis-
card this product, contact your local authorities and ask for the correct
manner of disposal.
DEUTSCH
Dieses auf dem Produkt oder der Verpackung angebrachte Symbol zeigt
an, dass dieses Produkt nicht mit dem Hausmüll entsorgtwerden darf. In
Übereinstimmung mit der Richtlinie 2002/96/EG des Europäischen Parla-
ments und des Rates über Elektro- und Elektronik-Altgeräte (WEEE) darf
dieses Elektrogerät nicht im normalen Hausmüll oder dem Gelben Sack
entsorgt werden. Wenn Sie dieses Produkt entsorgen möchten, bringen
Sie es bitte zur Verkaufsstelle zurück oder zum Recycling-Sammelpunkt
Ihrer Gemeinde.
ESPAÑOL
Este símbolo en el producto o su embalaje indica que el producto no
debe tratarse como residuo doméstico. De conformidad con la Directiva
2002/96/CE de la UE sobre residuos de aparatos eléctricos y electrónicos
(RAEE), este producto eléctrico no puede desecharse se con el resto de
residuos no clasificados. Deshágase de este producto devolviéndolo a su
punto de venta o a un punto de recolección municipal para su reciclaje.
FRANÇAIS
Ce symbole sur Ie produit ou son emballage signifie que ce produit ne
doit pas être traité comme un déchet ménager. Conformément à la Direc-
tive 2002/96/EC sur les déchets d’équipements électriques et électron-
iques (DEEE), ce produit électrique ne doit en aucun cas être mis au rebut
sous forme de déchet municipal non trié. Veuillez vous débarrasser de ce
produit en Ie renvoyant à son point de vente ou au point de ramassage
local dans votre municipalité, à des fins de recyclage.
ITALIANO
Questo simbolo sui prodotto o sulla relativa confezione indica che il
prodotto non va trattato come un rifiuto domestico. In ottemperanza
alla Direttiva UE 2002/96/EC sui riuti di apparecchiature elettriche ed
elettroniche (RAEE), questa prodotto elettrico non deve essere smaltito
come rifiuto municipale misto. Si prega di smaltire il prodotto riportan-
dolo al punto vendita o al punto di raccolta municipale locale per un
opportuno riciclaggio.
POLSKI
Jeśli na produkcie lub jego opakowaniu umieszczono ten symbol, wów-
czas w czasie utylizacji nie wolno wyrzucać tego produktu wraz z od-
padami komunalnymi. Zgodnie z Dyrektywą Nr 2002/96/WE w sprawie
zużytego sprzętu elektrycznego i elektronicznego (WEEE), niniejszego
produktu elektrycznego nie wolno usuwać jako nie posortowanego od-
padu komunalnego. Prosimy o usuniecie niniejszego produktu poprzez
jego zwrot do punktu zakupu lub oddanie do miejscowego komunal-
nego punktu zbiórki odpadów przeznaczonych do recyklingu.
WASTE ELECTRICAL & ELECTRONIC EQUIPMENT
Disposal of Electric and Electronic Equipment (applicable in the European Union and other European countries with separate collection systems)
Polski:Kontroler PCI SATA 1,5 Gb/s RAID
1 Gdy komputer jest wyłączony, umieść kartę w wolnym slocie PCI, następnie włącz komputer.
2 Po pojawieniu się systemowego „Kreatora znajdowania nowego sprzętu” zaznacz opcję „Nie, nie tym razem” i
wciśnij „Dalej”.
3 Zaznacz opcję „Zainstaluj z listy lub określonej lokalizacji (zaawansowane)” i wciśnij „Dalej”.
4 Umieść dołączoną płytę w napędzie CD/DVD komputera.
5 W oknie kreatora zaznacz opcję „Uwzględnij tę lokalizację w wyszukiwaniu”, odznacz pozostałe możliwości.
6 Wciśnij „Przeglądaj” i wybierz lokalizację (przykładowo „E:\SATA Express_2Port\Sil3132\” – gdzie „E” oznacza
literę przypisaną do napędu CD/DVD). W zależności od systemu operacyjnego wybierz odpowiedni folder,
następnie wciśnij kolejno „OK” oraz „Dalej”.
7 Gdy system operacyjny poinformuje o odnalezieniu sterownika do karty, wciśnij „Dalej”.
8 Postępuj zgodnie w wyświetlanymi instrukcjami oraz komunikatami.
9 Windows rozpocznie kopiowanie wymaganych plików do systemu operacyjnego. Po pojawianiu się komunikatu
o zakończeniu instalacji, wciśnij “Zakończ”.
10 Zrestartuj komputer jeśli system poinformuje o takiej konieczności.
Aby uzyskać specyfikację techniczną produktu, szczegółowe informacje instalacyjne oraz informacje o konfiguracji
RAID zapoznaj się z instrukcję użytkownika dostępną na stronie www.manhattan-products.com.
Italiano:Scheda Controller PCI SATA 1.5 Gb/s RAID
1 Con il PC spento, inserire la scheda in uno slot PCI, quindi accendere il PC.
2 Quando viene visualizzato il messaggio di rilevamento di un nuovo hardware, cliccare su “Next” (Avanti).
3 Selezionare “Install from a list or specific location (Advanced)” (installare da una lista o posizione specifica) e
cliccare “Next” (Avanti).
4 Caricare il CD incluso contenente i driver. Selezionare “Specify a location” (specificare una locazione) e
deselezionare le altre caselle. Cliccare “Next” (Avanti).
5 Selezionare o inserire la lettera che corrisponde al vostro disco CD/DVD, quindi cliccare “Browse”.
6 Selezionare una posizione (per esempio: “E:\SATA Express_2Port\Sil3132\” — dove “E” rappresenta il disco CD/
DVD), quindi selezionare la cartella con il sistema operativo adeguato. Cliccare “Open” (Aprire), quindi “OK.”
7 Quando il sistema operative indica che ha rilevato un driver per la scheda, cliccare “Next” (Avanti).
8 Seguire qualsiasi prompt che appare per continuare l’installazione.
9 Windows copierà i file richiesti dal sistema operativo e avvierà i driver. Quando compare il messaggio che
l’installazione è completa, cliccare “Finish” (Termina).
10 Riavviare il computer se il sistema operativo invia un messaggio che richiede di procedere in questo senso.
Per specifiche o ulteriori dettagli in merito alla realizzazione di una nuova installazione, per la verifica o il settaggio
RAID, fare riferimento al manuale d’istruzione in www.manhattan-products.com.
Français:Carte PCI contrôleur RAID SATA 1,5 Gbits/s
1 Éteignez votre PC, insérez la carte dans un emplacement PCI, puis démarrez le PC.
2 Quand l’assistant d’installation est affiché, cliquez sur “Suivant”.
3 Sélectionnez “Installer à partir d’une liste ou un emplacement spécifique (Avancé)” et cliquez sur “Suivant”.
4 Insérez le CD de pilote inclus. Sélectionnez “Spécifier un emplacement” et démarquez les autres champs. Cliquez
sur “Suivant”.
5 Sélectionnez ou entrez la lettre qui correspond à votre lecteur CD/DVD, puis cliquez sur “Parcourir”.
6 Sélectionnez un emplacement (par exemple: “E:\SATA Express_2Port\Sil3132\” — “E” représente le lecteur CD/
DVD), puis sélectionnez la répertoire avec le système d’exploitation correcte. Cliquez sur “Ouvrir” puis sur “OK.”
7 Quand le système d’exploitation affiche la détection du pilote pour la carte, cliquez sur “Suivant”.
8 Suivez les étapes d’installation.
9 Windows copie les fichiers requis dans la répertoire du système d’exploitation et lance le pilote. Quand
l’installation est complète, cliquez sur “Terminer”.
10 Redémarrez votre PC si votre système d’exploitation le demande.
Vous trouvez les spécifications, des détails sur une nouvelle installation, sa vérification et la configuration RAID
dans le manuel utilisateur sur www.manhattan-products.com.
Español: Tarjeta Controladora PCI SATA 1.5 Gb/s RAID
1 Con la PC apagada, inserte la tarjeta en una ranura PCI, después encienda la computadora.
2 Cuando inicie el Asistente para nuevo hardware, haga clic en “Siguiente”.
3 Seleccione “Instalar desde una ubicación especifica (Avanzado)” y haga clic en “Siguiente”.
4 Inserte el CD incluido. Elija la opción “Especificar una ubicación” y desmarque las otras opciones. Haga clic en
“Siguiente”.
5 Seleccione o ingrese la letra correspondiente a la unidad CD/DVD, luego haga clic en “Examinar”.
6 Elija una ubicación (por ejemplo: “E:\SATA Express_2Port\Sil3132\” — donde “E” representa la unidad CD/DVD),
luego elija la carpeta con el sistema operativo apropiado. Haga clic en “Abrir,” después en “Aceptar”.
7 Cuando el sistema operativo indique que ha encontrado un controlador para la tarjeta, haga clic en “Siguiente”.
8 Para que la instalación continúe acepte los mensajes siguientes.
9 Windows copiará los archivos requeridos al sistema e iniciará el controlador. Cuando la instalación se complete,
haga clic en “Finalizar”.
10 Reinicie su computadora si el sistema operativo lo requiere.
Para más especificaciones o detalles acerca de una instalación nueva, verificación o ajustes RAID, refiérase al manual
de usuario en www.manhattan-products.com.
North & South America
IC INTRACOM AMERICAS
550 Commerce Blvd.
Oldsmar, FL 34677
USA
Asia & Africa
IC INTRACOM ASIA
Far Eastern Technology Center
7-F No. 125, Section 2, Da Tong Rd.
Shijr, Taipei
Taiwan, ROC
Europe
IC INTRACOM EUROPE
Löhbacher Str. 7
D-58553 Halver
Germany
MAN-176767-QIG-ML1-1111-02-0
Other manuals for 176767

1

Other Manhattan PCI Card manuals

Manhattan 151757 User manual

Manhattan

Manhattan 151757 User manual

Manhattan 150491 User manual

Manhattan

Manhattan 150491 User manual

Manhattan 175586 User manual

Manhattan

Manhattan 175586 User manual

Manhattan 160476 User manual

Manhattan

Manhattan 160476 User manual

Manhattan 152082 User manual

Manhattan

Manhattan 152082 User manual

Manhattan 158206 User manual

Manhattan

Manhattan 158206 User manual

Manhattan 160414 User manual

Manhattan

Manhattan 160414 User manual

Manhattan 158206 User manual

Manhattan

Manhattan 158206 User manual

Manhattan 150040 User manual
Manhattan

Manhattan 150040 User manual

Manhattan 158220 User manual

Manhattan

Manhattan 158220 User manual

Manhattan 150965 User manual

Manhattan

Manhattan 150965 User manual

Manhattan 151009 User manual

Manhattan

Manhattan 151009 User manual

Manhattan 171557 User manual

Manhattan

Manhattan 171557 User manual

Manhattan 158220 User manual

Manhattan

Manhattan 158220 User manual

Manhattan 158299 User manual

Manhattan

Manhattan 158299 User manual

Manhattan 150965 User manual

Manhattan

Manhattan 150965 User manual

Manhattan 162579 User manual

Manhattan

Manhattan 162579 User manual

Manhattan 150682 User manual

Manhattan

Manhattan 150682 User manual

Manhattan 525473 User manual

Manhattan

Manhattan 525473 User manual

Manhattan 160353 User manual

Manhattan

Manhattan 160353 User manual

Manhattan 160537 User manual

Manhattan

Manhattan 160537 User manual

Manhattan 158176 User manual

Manhattan

Manhattan 158176 User manual

Manhattan 158237 User manual

Manhattan

Manhattan 158237 User manual

Manhattan 169011 User manual

Manhattan

Manhattan 169011 User manual

Popular PCI Card manuals by other brands

Tripp Lite PCI-D9-02 owner's manual

Tripp Lite

Tripp Lite PCI-D9-02 owner's manual

Belkin FIREWIRE F5U503 instruction manual

Belkin

Belkin FIREWIRE F5U503 instruction manual

CyberResearch COMHP 7404 user manual

CyberResearch

CyberResearch COMHP 7404 user manual

HP Xw4600 - Workstation - 2 GB RAM installation guide

HP

HP Xw4600 - Workstation - 2 GB RAM installation guide

Edimax EN-9235TX-32 user manual

Edimax

Edimax EN-9235TX-32 user manual

Stratus U918 T1 installation guide

Stratus

Stratus U918 T1 installation guide

Supero AOC-STGN-i1S user guide

Supero

Supero AOC-STGN-i1S user guide

Sonnet PRESTO quick start guide

Sonnet

Sonnet PRESTO quick start guide

D-Link AirPlus Xtreme G DWA-520 manual

D-Link

D-Link AirPlus Xtreme G DWA-520 manual

Apogee Symphony Mobile user guide

Apogee

Apogee Symphony Mobile user guide

HOLT ADK-2130mPCIe quick start guide

HOLT

HOLT ADK-2130mPCIe quick start guide

Digitus Gigabit Ethernet PCI Express Card user manual

Digitus

Digitus Gigabit Ethernet PCI Express Card user manual

Transition Networks N-FXE-ST-02 user guide

Transition Networks

Transition Networks N-FXE-ST-02 user guide

StarTech.com PCI2MPCIB instruction manual

StarTech.com

StarTech.com PCI2MPCIB instruction manual

Dialogic Brooktrout TR1034 BRI installation guide

Dialogic

Dialogic Brooktrout TR1034 BRI installation guide

3Com WL-464 installation guide

3Com

3Com WL-464 installation guide

AOpen AON-325 user guide

AOpen

AOpen AON-325 user guide

Billion 7025 quick start guide

Billion

Billion 7025 quick start guide

manuals.online logo
manuals.online logoBrands
  • About & Mission
  • Contact us
  • Privacy Policy
  • Terms and Conditions

Copyright 2025 Manuals.Online. All Rights Reserved.