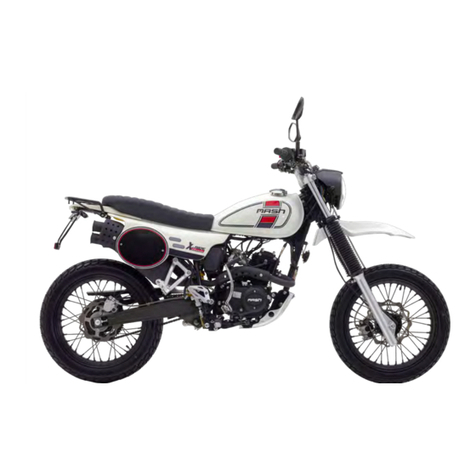
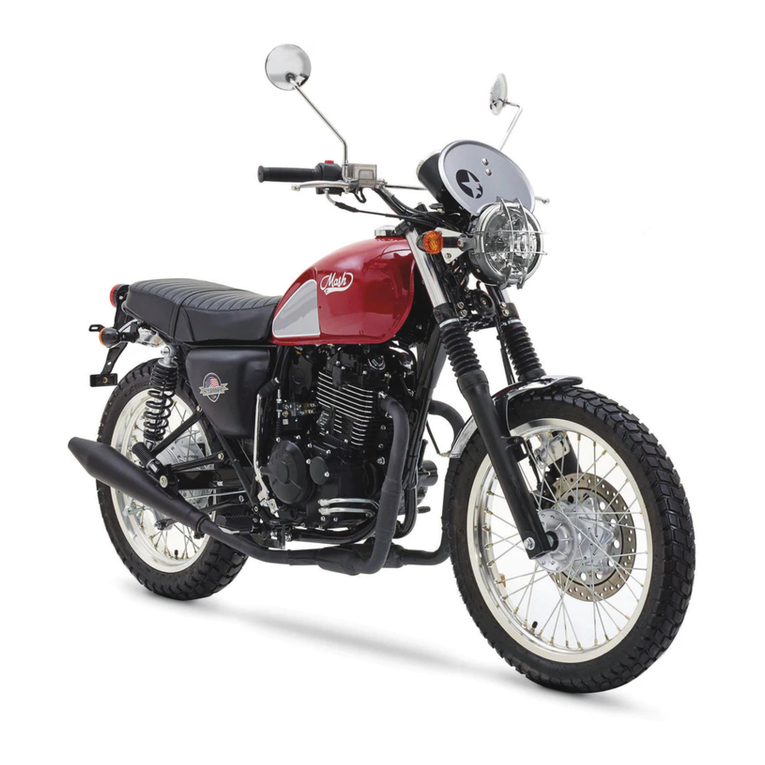
Mash 650cc X-RIDE User manual

X-RIDEX-RIDE
650650
cccc
USER MANUAL

4 5 Back to summary
About running-in of a motorcycle
The rst 1000 km operaon is very important in the enre service life of a
motorcycle. A correct running-in can guarantee both the longest service life and the
best performance of the vehicle. Running-in can polish machined surfaces and form
smooth engagement.
Careful and paent running-in can make the motorcycle stable in driving and give a
full play to its excellent performance. It is important not to do any operaon that may
cause overheat to engine components.
For specic running-in method, please refer to «Running-in of a new vehicle».
Please carefully read the manual and strictly observe all instrucons or
descripons.
Special Cauon shall be paid to the contents emphasized with the terms of
«warning» «cauon» and «note»,
Warning : It concerns with personal safety. Ignoring it may result in
accident.
Cauon : It refers to operaonal methods that must be followed or
measures that should be taken, so as to prevent damage.
Note:Itreferstospecialexplanaonstomakemaintenanceorimportant
descriponsmoreexplicit
The operaon manual shall be deemed as a permanent document of the
motorcycle. When transfer the vehicle to others, the instrucon manual shall also be
transferred to the new owner
Slight variaons can however be observed between the models, composing the
range. If this manual menons details that are dierent from the actual model, do not
consider them.
Important Cauons

6 7 Back to summary
Foreword
Confratulaons on your choice!
If riding a motorcycle is one of the most excing hobbies. This vehicle is also
an ideal means of transport, which guarantees you unlimited driving pleasure.
Before driving, you are encouraged to familiarize yourself with the instrucons and
specicaons in this instrucon manual, which describes in parcular the rules for
using and maintaining the vehicle.
Observing the following recommendaons will ensure the reliability of your
motorcycle and prolong its life.
The sta of MASH authorized dealers (list available by consulng the website
www.mash-motors.fr) have the skills and technical qualicaons required to carry out
maintenance and provide quality service.
DISTRIBUTEUR
ENGINE NUMBER
CHASSIS NUMBER
Chassis number (or VIN code) and engine number is necessary for registraon of
your motorcycle. Such numbers are needed with order components or service, to
allow the distributor to provide you with beer service.
Chassis number (or VIN code) is on the riser pipe of chassis. Engine number
is on the le side of crankcase. Metal nameplate is on the riser pipe of chassis,
showing the main technical parameters, manufacturer and date of producon
of the motorcycle.
Write the numbers in the spaces below, for future reference.
Contents
I
Main technical data........................................................................................8
II
User Instrucon .............................................................................................10
III
Installaon posion of parts...........................................................................12
IV
Ignion switch.................................................................................................14
V
Control system.................................................................................................16
VI
Essenals of driving.........................................................................................18
VII
Controls and seng........................................................................................23
VIII
Inspecon and maintenance...........................................................................29

8 9 Back to summary
MOTEUR
Engine Type 4T single cylinder, air-cooled
Engine Capacity 644cc
Compression Rao 8.3:1
Idle speed 1500±100RPM
Power max 39.3 hp/6000 rpm (29kW)
Torque max. 49.2N.m/4500 rpm
Ignion ECU
Transmission Chain
Gearbox 5 speeds
AUTRES
Spark plug DPR8EA-9
Baery 12V 14Ah
Oil Engine SAE10W-40
Oil Engine quanty 2500ml
CHÂSSIS
Front tyre 120/70-17
Rear Tyre 150/60-17
Front Brake Ø 320 mm disc, 4-piston radial caliper
Rear Brake Ø 240 mm disc, single piston caliper
Brake Switchable ABS
DIMENSIONS
Length /Width /Height 2080 x 870 x 1200mm
Saddle Height 780mm
Wheelbase 1470mm
Ground clearance 300mm
Weight in running order 177kg
Weight max 315kg
Fuel tank capacity 11 liters
CONSOMMATION
Speed max. 150 km/h
Fuel SP95 or SP98
Consumpon 4.2L/100km
Co2 emission index* 95g/km
Norme EURO 5
Mash X-Ride 650cc Euro 5
I - Main Technical Data
This list is for informaon only. Modicaons can be made by the manufacturer wit-
hout nofying customers. Non-contractual photo.
*Thefuelconsumponvaluesaretakenunderspecictestcondionsandareprovidedforcomparisonpurposesonly.
Theymaynotmatchthevaluesinactualdrivinguse.

10 11 Back to summary
This user’s manual describes the standard and safety method as well as basic
maintenance. Read it carefully.
The images and illustraons in this manual may dier from those of your vehicle, if
it is not the same model. The vehicle is designed for 2 people (driver included).
Cauon
Do not use poor quality fuel.
Using poor quality fuel can cause deposits in the tank, which could block the
fuel line and cause engine start-up failures or even serious engine damage.
Do not use inferior or poor quality motor oil. Always use a good quality engine
oil to ensure engine performance and longevity. Any problem that appears due to
the improper use of oil or gasoline cannot be covered by the warranty.
Protecve Clothing
•
Appropriate regulatory protecve clothing, such as an approved helmet with
a protecve mask, approved gloves, high boots, must be worn while driving to
ensure your personal safety.
•
Loose clothing is not suitable for riding a motorcycle as it can get caught in the
control levers, kickstarter, footrest or wheel.
•
Always wear an approved helmet, approved gloves, high boots, a jacket.
•
Drive carefully while always respecng the highway code
•
Beware of the silencer which can be hot while driving.
•
Always wear clothing that covers the whole body.
•
The above instrucons are also intended for the passenger.
Preparaon before use
•
Read the user manual carefully
•
Maintain and check the vehicle before using it
•
It is necessary to have the driving license corresponding to your vehicle and that
it is insured
•
Keep the engine o and away from any source of heat
•
There are harmful substances such as carbon dioxide in the exhaust gases,
always start the engine in a venlated area
•
Always wear an approved helmet, approved gloves, high boots, a jacket.
•
Many trac accidents between cars and motorcycles happen because the
drivers do not see the bikers: always be vigilant!
•
Make sure you are always visible to avoid accidents caused by others
•
Wear bright or reecve clothing
•
Always drive in the line of sight of other road users. Do not stay in the blind
spot
•
Be parcularly careful when approaching intersecons. Always ancipate the
reacons of other road users.
Cauon
• Not wearing a helmet increases the probability of fatal hurts in an accident
• Make sure the passenger always wears a full face helmet and protecve
clothing.
• Not to be in an abnormal state, anxious or excited. The driver’s acons are
very important for safe driving. Always sit in the middle of the saddle and
especially not sit on the back of the saddle, this will lighten the weight in the
front and cause the handles to shake.
• The passenger must hold the pilot and put his feet on the rear footrests.
• To turn, point your body to the side where you turn, otherwise it can be
dangerous.
• Driving on a winding and uneven road means that you absolutely must
respect the safety instrucons.
•Driving on a winding and uneven road involves halving the speed, relaxing
the shoulders and waist and squeezing the handles.
• To drive, you must squeeze the handles with both hands, do not try to li the
front wheel, this facilitates overturning and causes serious accidents.
II - User Instrucon
12 13
2
1
3
4
5
7
8
9
6
Back to summary
Use and reading of the meter
1. Speedometer : Indicates the speed of the motorcycle (Km/h). Do not exceed the maximum
allowed speed.
The passage from Miles to Km/h is done aer 2 quick acvaons of the key switch:
ON→OFF→ON→OFF. Then wait 10 seconds
2. Turn signal indicator : Flashes when a turn signal is acvated
3. High beam indicator lamp
When the head light is in high beam, the indicator is lit.
4. Tachometer : Indicates engine speed (tachometer)
5. Fuel level indicator : Indicates fuel level
6. Total odometer
Indicates total mileage (ODO)
The passage from Miles to Km is done aer 2 quick acvaons of the key switch:
ON→OFF→ON→OFF. Then wait 10 seconds
7. ABS warning light
When the ABS system is acvated, the warning light is o. Comes on when there is an engine
malfuncon. If this warning light comes on on the speedometer, it is necessary to go to a
retailer.
8. Engine Light
Comes on when there is an engine malfuncon. If this warning light comes on on the
speedometer, you must go to an authorized Mash dealer in order to carry out a diagnosis.
9.Neutral light: Comes on in neutral
III - Installaon posion of parts
Rearview
mirror
Left
handlebar
switch
Right
handlebar
switch
Accelerator
Front
brake
grip
Speedometer
Ignition
switch
Clutch grip
Handle bar instrument
Left side
Right side
Front
wheel Rear
wheel
Rear
footrest
Gear lever
Air lter
Fuel tank
switch
Front Footrests Drain plug
Brake pedal
Battery and
fuse box

14 15 Back to summary
The ignion switch controls the ignion and lighng circuits and allows the steering
to be locked. Its various posions are described below.
IV - Ignion switch
Cauon
Do not change the posion of the key while driving.
The engine and motorcycle must be stopped before removing the key.
Posion Foncon
Posion (OFF) All circuits are o: the key can there-
fore be removed.
Posion (ON) All electrical circuits are live: the en-
gine can therefore be started. The key, however,
cannot be removed.
To lock the steering, turn the handlebars to the le,
insert the key, push and turn it to the le unl the
steering lock logo
Headlights - Posion indicator
Turn the main ignion key to posion , the headlights come on automacally.

16 17
E
D
A
B
G
I
J
H
C
F
Back to summary
V - Control system
Le handlebar control system
Cauon
When you are nished turning, the turn signals do not turn o automacally.
You have to press this buon to stop them.
Dimmer switch A
Press the buon, using the switch allows
you to choose the distance of the headlights :
high or low.
High beam
Low beam
Horn Buon D
Turn the key switch to the ON posion, press
the horn buon and it will emit a sound
Headlight asher switch E
The asher can be used to signal its presence.
Clutch grip F
Allows the motor to be disengaged in order to
change gears.
Turn signal switch B
Use the turn signals to turn le or right.
Operate the buon to the le or to the right, the indicator will ash. Press the
switch again to stop the turn signal.
(R) Turn right
(L) Turn le
ABS buon C
A switch on the le stalk switch disconnects the ABS system. By default, ABS is
always on. However, it is possible to deacvate it if you wish. The ABS warning light
will ash connuously on the dashboard.
ABS deacvaon:
Ignion on or engine running, press the ABS buon, as soon as the ABS warning
light comes on, switch the switch to «ABS». The ABS light now ashes to let you
know that is disconnected. The ABS reacvates aer an engine cut.
Right handlebar control system
Electric starter buon G
Press this buon to start the engine.
Cauon
Make sure that the vehicle is always in
neutral posion (N or 0) and always operate
the clutch grip before starng the engine
Engine shutdown switch H
It is used to manually stop the motorcycle in
an emergency situaon.
Posion it on to be able to start the
engine.
Front brake grip I
To apply the front brake, gradually press the brake grip located on the right
handlebar. Since the motorcycle is equipped with hydraulic braking, the brake lever
should not be manipulated either sharply or roughly. Pressing the lever automacally
turns on the brake light.
Accelerator grip J
It makes it possible to vary the speed of rotaon of the motor. The acceleraon is
done by making it turn towards you; deceleraon, by releasing the handle.
Cauon
Only use the emergency stop switch in an emergency situaon.

18 19
12
Back to summary
Warning
Do not overll the reservoir. Never spray fuel on a hot engine. Fill the tank to
the lower level of the ller tube, otherwise fuel may overow and expand with
increased temperature.
Turn o the engine and turn the key to the OFF posion when lling the tank.
It is strictly forbidden to smoke or light a re during this operaon.
Starng the engine
Turn the key switch to the ON posion. Make sure the emergency stop switch is in
the ON posion.
Make sure the gearbox is in neutral (N or 0) by checking that the neutral indicator
light is on.
Make sure there is gasoline in the tank.
Fuel
Gas up
The fuel tank capacity is 11L. To ll your vehicle’s fuel tank, put it on the main
stand, open the fuel cap with the key and ll with fuel through the opening, then close
the cap and remove the key.
1
Fuel level
2
Filing tube
Cauon
The motorcycle is equipped with a fuel
vapor recirculaon system, do not overll
the tank.
VI - Essenals of driving
Fuel tank cap
To open the tank cap, insert the key and turn it
clockwise. The cap can then be removed with the
key. To replace the cap, exert pressure on the cap
and remove the key.
Cauon
Make sure that the vehicle is always in neutral posion (N or 0) and always
operate the clutch lever before starng the engine
To start the engine
Make sure that the key switch and the emergency stop switch are in the « »
posion, that the gearbox is in neutral (neutral) and always operate the clutch grip.
To start, press the electric starter buon. Never turn the throle at the same me.
If the engine does not start, stop pressing the start buon aer 5 seconds and wait
more than 5 seconds before restarng.
Twist the throle slightly about 1/8 of a turn, but never more than 1/4 of a turn to
increase the air intake and start the engine.
If the engine starts, but stalls while idling when it is cold, run the engine at a slight
throle, for 10 seconds or more, to warm it up.
Note:Aerstarngtheengine,immediatelyreleasethestarterbuontoavoid
damagingtheengine.
Warning
Get in the habit of engaging neutral and pressing down rmly on the clutch
lever before starng the engine: this helps prevent being thrown forward if the
wrong gear is engaged.
Never start the engine in a poorly venlated or poorly venlated room: carbon
monoxide emissions are indeed toxic. Never leave the motorcycle with the engine
running unaended.
Cauon
Do not let the engine run for an extended period without driving: the
overheang which could result will damage the mechanical parts and the chrome
coang of the exhaust.
Gear change
1. When stopped, with the engine at idle speed, disengage and press the selector
with your le foot to shi from neutral to rst.
2. When the motorcycle stabilizes, bring the throle back and disengage the clutch
again, then raise the selector to go into second.
3. Proceed in the same way to go from the 3rd, 4th & 5th
Cauon
Do not depress the gear selector instead of raising it while driving, you risk
downshiing and causing the engine to over-speed.

20 21
5
4
3
2
N
1
Back to summary
Cauon
When you shi into neutral, the neutral indicator light (N or 0) comes on on
the instrument cluster (if equipped). Even if the light is on, gradually release the
clutch lever to make sure the transmission is in neutral.
Funconing
• Before starng the engine, make sure that the sidestand is fully folded up.
• If you cannot easily move the sidestand, check that the kickstand is lubricated.
• Change gear appropriately in relaon to engine speed.
• To consume lile fuel and ensure the longevity of your machine, do not drive at
high speed and favor low and medium speeds.
Break-in
Running 1000 km of break-in at a speed not exceeding 6000 rpm will improve
engine life.
Cauon
• Always start the vehicle rst and start as gently and carefully as possible.
• If you hear any abnormal noise while driving, contact a MASH dealer to have
it checked.
• Never exceed the authorized speed.
Monter les rapports
Descendre les rapports
Brake
Use the front brake and the rear brake simultaneously.
Avoid braking suddenly if it is not necessary.
Cauon
If you only use the front or rear brake, the motorcycle could slip.
If you are riding in rainy weather or on a wet road, braking suddenly can
cause accidents, adjust your speed according to the condions and use the
brakes appropriately.
Braking repeatedly causes the brakes to overheat and reduce their
eecveness.
Engine brake
The motor can act as a brake during deceleraon. If you want to brake harder, we
suggest you downshi, being careful not to over speed the engine. However, if you
need to bring the motorcycle to a quick stop, you can use the brake and engine brake
at the same me.
Cauon
When the motorcycle is being driven at high speed, do not downshi
immediately, it may suddenly reduce the speed and damage the engine and
transmission system, and even block the rear wheel of the vehicle.
Parking
Posion the gearbox in neutral (N or 0) and turn o the engine.
Use the side stand to keep the motorcycle stable and park it on level ground,
otherwise it will fall. The vehicle is ed with a side stand. To immobilize the
vehicle using the side stand: press the end of it with your foot to fully unfold it.
Cauon
Park the motorcycle in a safe place where there is no trac.
Always park the motorcycle on a level and stable surface.
The silencer can be very hot, do not park your motorcycle in a place where
there are trac, there is a risk of burns.
If you park the motorcycle on a slope, stop it uphill to prevent it from
descending.
To drive in complete safety, check before resuming the road that the stand
side is fully raised and remains perfectly in place.
Downshi
If you want to accelerate sharply, for example to overtake, downshiing can cause
faster acceleraon, but if the rpm gets too high it can damage the engine.
At high speeds, downshiing can cause the engine to over-rev. Before engaging a
lower gear, it is necessary to slow down to avoid any engine damage.

22 23 Back to summary
Parking and using the steering lock
Place the motorcycle on level ground and put on the side stand.
Then turn the handlebars to the stop on the le side and posion the key switch in
the steering lock posion (padlock logo).
Remove the key from the switch, the handlebars are now locked in the parking
posion.
Cauon
• If the handlebars are turned to the right or if the motorcycle’s side stand is
incorrectly posioned, the vehicle may fall.
• In unavoidable situaons, adequate measures must be taken to ensure
stability.
Mirrors
Before driving, always adjust your mirrors.
Warning
Do not put anything in the rear seat so as not to obstruct visibility in the
mirrors.
Do not adjust your mirrors while driving.
Cauon
To clean your mirrors, use a so cloth. Use a suitable cleaning product without
pung it directly in contact with the mirrors.
Shock absorbers
Rear Shock Spring Preload
The spring preload of the rear shock absorber 1 can be adjusted; to make the
seng, do the following:
Remove any residue that could damage
the threads of the shock body.
Loosen lock nut 2 using a suitable
spanner.
Turn the adjusng ring nut 3 if
necessary.
When the adjustment operaon is
complete (depending on your weight and
riding style), ghten the lock nut.
VII - Controls and seng
Running-in
The importance of a good running-in of the new vehicle has been stressed in the
Foreword and presupposes compliance with the rules set out below.
Maximum speed
The maximum speed during the various running-in stages is given in the following
table.
During the rst 1000 kilometers, the throle grip should be turned to a maximum
of 70%.
Change of engine speed
Do not ride for too long at a constant speed. Vary the engine speed to complete
the running-in. It is essenal to change speed from me to me so that the moving
parts of the engine undergo dierent stresses which will guarantee their correct
adjustment: in fact, when the pressure exerted on them falls, they cool down and
acquire the desired posion. For the same reason, it is also strongly recommended to
pracce gentle revs during running-in, while taking care not to subject the engine to
excessive stress.
Avoid driving too low or too high
Driving at low revs for long periods of me can cause engine and transmission
jerkiness. The owner of the motorcycle is therefore encouraged to ride at the most
varied speeds while refraining from accelerang too sharply and from cranking the
engine to very high revs. However, it is strongly recommended not to accelerate fully
during the rst 1000 kilometers.
Let the oil circulate before riding
Aer starng the engine (hot and cold) and before seng o, let the engine idle
for a period of me suitable for it to warm up properly. This allows the oil to spread
over every part of the engine and do its part in reducing wear and improving its life,
while bringing the engine to a suitable operang temperature.
First maintenance check
Maintenance is of crical importance during the rst 1,000 kilometers. During
the running-in, the engine parts, but also those of other parts of the vehicle, adjust
gradually: once the break-in is complete, it is therefore necessary to check all the
ghtening and replace the old engine oil. and the oil lter.
Carrying out a maintenance check aer the rst 1000 kilometers helps to ensure
engine longevity and best performance.
Lubricant
By using a high quality lubricant suitable for a four stroke engine, you will extend
the life of your engine. Please select the type of high quality IPONE SAE10W40
lubricant.

24 25 Back to summary
Engine oil
Replacing the engine oil.
Engine oil plays an important role in the normal operaon of the engine and for
this reason it is necessary to check the engine oil periodically and to renew it aer the
rst 1000 km and then every 3000 km according to the procedures. following.
Note:Whendraining,cleanthegauge(ifequipped)andreplacetheoillter.
Engine oil change
Replacing the engine oil should be done while the engine is sll warm to allow the
uid to drain completely.
To do this, proceed as follows:
1. Immobilize the motorcycle by placing it in a vercal posion
2. Remove the oil ller cap
3. Unscrew the drain screw and let out the used oil
4. Replace the oil lter
Cauon
Check carefully for leaks around the oil lter cover.
5. Tighten the drain screw and ll with new oil
The total engine oil capacity is 2500mL (engine dismantling)
Drain screw ghtening torque: 20-30 Nm
6. Check the oil level using the gauge (if equipped) or the oil level sight glass.
Checking the oil level
Before each use of the vehicle, always check the oil level with the gauge or the oil
level sight glass to make sure that the amount of oil is correct.
Cauon
The use of inferior quality oil can permanently damage the engine and
seriously shorten its life.
Pre-ride inspecon
Before road, remember to check the following points. Never underesmate the
importance of inspecon.
Element Control to be carried out
Handlebar Ensure that direcon is:
- so
- free
- no hard point in rotaon
Lighng Operate all lights (front light, rear light, front and rear brake light,
instrument cluster lighng, turn signals)
Engine oil Check the oil level
Brakes - Adjust the «play free» of the rear brake pedal and the front brake
lever
- Ensure eecve braking
- Check for leaks
Indicator lights Engine light, gear engaged, oil level, turn signals, high beam
Accelerator grip - Check the tension of the accelerator cable
- Check that there is no hard point or resistance in the rotaon of
the handle and that it returns to the inial posion.
Tires Check the re pressure
Check the depth of the tread paerns (wear)
Check for nicks or cracks
Audible warning device
(horn)
Ensure proper operaon
Clutch Check the tension of the clutch cable.
Check its proper funconing and the eecveness of the clutch
Fuel Fill the tank with the correct fuel.
Do not overll the reservoir.
Transmission Check the tension.
Check lubricaon
Rules of conduct
Warning
If this is your rst me riding this type of motorcycle, we recommend that you
familiarize yourself with its controls and operaon on a low-trac road unl you
have mastered it.
Before seng o, check that the sidestand is correctly raised.
Do not accelerate sharply or downshi in a turn or change of direcon.
Slow down enough when braking before entering a turn.
It is dangerous to operate a motorcycle with one hand. When riding, always hold
the handlebars rmly with both hands and keep your feet on the footrests. Never take
both hands o the handlebars at the same me.
On wet roads, the fricon force being low, the braking distance increases and it is
more dicult to change direcon: so remember to decelerate in advance.
Always respect trac rules and speed limits

26 27 Back to summary
First turns of the wheel with the motorcycle
Cauon
Start the engine with the transmission in neutral, the clutch engaged and the
rider in the normal driving posion.
Pass a gear report
Press down rmly on the clutch grip, wait a brief moment, lower the selector to
engage rst gear, gently turn the throle toward you and slowly and smoothly release
the clutch lever. The motorcycle begins to move when the clutch is gradually released.
To upshi, rst accelerate slightly, then, releasing the throle, pull the clutch
lever, move the selector up with your le foot and release the clutch lever, before
accelerang. again. Proceed in the same way unl the maximum gear.
Downshi to slow down
Before downshiing, it is necessary to start reducing speed by braking. As soon as
the engine speed is suciently reduced, you can pull your clutch lever and then with
your le foot depress the gear selector in order to downshi a gear. Then release your
clutch lever gradually to use the lower gear engine brake.
Proceed in the same way unl the minimum rao.
Warning
Never downshi 2 gears at the same me, you risk damaging the engine if you
over-speed.
Never release the clutch grip abruptly, as this may jerk or block the rear wheel
momentarily.
Driving on a down hill
On a descent, you can pick up more speed than normal without accelerang. Use
engine braking to stabilize your speed and brake to slow down when needed.
Before downshiing, slow down enough to avoid a sudden increase in engine
speed, which could damage the transmission, increase wear on parts, and even
unbalance the motorcycle while riding.
Warning
Remember never to go down a hill at too high a speed!
Driving uphill
When going up a steep hill, the motorcycle may decelerate. In this case, downshi
immediately to bring the engine speed within the normal operang range. Be sure to
change gear quickly to maintain its pace.
Warning
Never put excessive stress on the engine for an extended period of me.

28 29 Back to summary
Braking
Riders with lile experience are usually content to use only the rear brake, which
causes premature brake wear and increases the stopping distance. In addion, this
would promote locking of the rear wheel and loss of control of the vehicle.
Therefore, it is strongly recommended that you do not use only one of the two
brakes.
On wet roads or any other smooth surface, use extreme cauon in gradually
applying the brakes simultaneously. Abrupt braking on slippery, bumpy or smooth
road surfaces is extremely dangerous. Always ancipate your braking in advance.
Warning
The greater the braking distance the faster the vehicle speed is. Be sure to
correctly assess the distance to the vehicle or object in front of you to brake
accordingly.
VIII - Inspecon and maintenance
The following table species the periodic maintenance intervals expressed in
distance traveled or number of months. At the end of each period, remember to
perform the inspecon, lubricaon and maintenance. If the motorcycle is rounely
operated at a high load (for example, heavy engine load in dusty areas), perform
maintenance at regular intervals. Your dealer will give you addional maintenance
advice. The components of the steering, shocks, bearings and wheels are essenal
to the operaon of the vehicle and should only be maintained and repaired by
qualied professionals. To ensure your safety, it is recommended that inspecon and
maintenance be performed by your authorized MASH dealer.
Cauon
During periodic maintenance, it may be necessary to change one or more
parts: these must be replaced by original parts. Regardless of your vehicle
maintenance experience, items marked with the * symbol should be supported
by your dealer and qualied service personnel. You can perform maintenance on
items not marked with this symbol, provided you follow the instrucons.
Warning
Once the vehicle has been broken in, maintenance is mandatory to ensure its
safety and to fully exploit its performance.
Perform periodic maintenance in strict accordance with the recommendaons
given in this manual.
Please note that the maintenance interval is 3000kms.
Do not forget to have your periodic maintenance cered by your dealer in the
maintenance sheets of your warranty booklet

30 31 Back to summary
PERIODIC MAINTENANCE CHART
Interval: According to the rst deadline
in Kilometers or number of months.
KM 1000 4000 7000 10 000
Number of months 6 12 24 36
Baery
I I I I
* Throle valve, accelerator cable
I I I I
* Spark plug
I R R R
* Clutch
I I I I
* Air lter
N
R R R
* Oil lter
N
N
N N
* Fuel hoses
I I I I
To be replaced every 4 years
* Engine oil and oil lter
R R R R
* Oil lter strainer
N N N N
* Valve clearance
I I I I
* Distribuon chain
I I I I
* Chassis screws and bolts
S S S S
* Braking, front / rear brake pads, linings
I I I I
* Brake uid
I I I I
To be replaced every 2 years
* Brake hoses
I I I I
To be replaced every 4 years
* Front fork
-
I I I
* Rear suspensions
-
I I I
Wheels and res
I I I I
Transmission channel
I I I I
Check the voltage every 1000 kms
* Steering, bearings
I I I I
* Exhaust and top engine mounng screws
S S S S
Legend:
I: Carry out an inspecon, cleaning, adjustment, ghtening, lubricaon or replacement.
N: Cleaning.
R: Replacement.
S: Tightening
* This item should be serviced by a MASH dealer
LUBRICATION CHART
Interval
Element
Every 3,000 km or 12
months
Every 6,000 km or 24
months
Throle grip cable Engine oil or (1) Engine oil or (1)
Clutch cable Engine oil or (1) Engine oil or (1)
Tachometer cable
-
Grease (2)
Transmission channel Lubricate every 1000 km (3)
Axle, brake caliper piston
-
Grease (2)
Throle grip
-
Grease (2)
Brake cable Engine oil or (1) Engine oil or (1)
Tachometer gearbox and wheel bearings
-
Grease (2)
Brake pedal, various axles, pivots Grease or (1) (2) Grease or (1) (2)
*Direcon To be lubricated every two years or every
6000 kms
Reference IPONE : (1) Full Protect / (2) Waterproof Grease / (3) X-Trem Chain
Road
Oullage
To facilitate regular maintenance of the motorcycle, a set of tools is available in the
kit placed with the vehicle.
Baery
The baery is normally placed under the right rear fairing of the vehicle. Two
models are available for this model: maintenance free or SLA (factory acvated).

32 33 Back to summary
Respect the polarity of the baery by connecng the red wire to the posive (+)
terminal and the black wire to the negave (-) terminal. Improper connecon will
damage the charging system and the baery.
Note:Aertherst1000km,thenevery3000kmorevery6months,havethe
capacityofyourbaerycheckedbyyourdealer.
Cauon
Never damage, block or change the baery breather hose. Make sure that the
breather hose is connected to the corresponding port on the baery and that its
other end is not blocked or pinched. The breather hose and the baery must be
installed correctly.
Spark plug
Aer driving the rst 1000 km, then every 3000 km, clean the carbon deposits from
the spark plug using a small wire brush or spark plug cleaner. Using a feeler gauge,
adjust the gap between the electrodes, keeping a value between 0.6 and 0.8 mm.
Replace the spark plug every 3000 km.
The carbon deposits having been removed, observe the color of the candle
to see if it is suitable for its use. A wet or very dark standard candle means poor
combuson with an overly rich mixture. A light gray or coon yellow colored spark
plug indicates good combuson and normal condions of use. An extremely white
spark plug, on the other hand, reects poor combuson and overheang of the
engine.
Cauon
Do not overghten the spark plug to avoid damaging the cylinder head threads.
When removing it, prevent dirt from falling into the engine through the spark plug
hole.
The original spark plug ed to the motorcycle has been carefully selected to suit
various operang condions. If the color of the candle does not comply with normal
condions of use, we recommend that you contact your dealer.
As the choice of an unsuitable spark plug (for example from another manufacturer)
is likely to seriously damage the engine, we therefore invite you to contact your dealer
before choosing a product sold under another brand.

34 35
Jauge à huile X-Ride
Bouchon de vidange X-Ride
B
A
Back to summary
Note:Whendraining,cleanthedipsckandreplacetheoillter.
Engine oil change
Engine oil replacement should be done while the engine is sll warm to allow the
uid to drain completely.
To do this proceed as follows:
1. Immobilize the motorcycle by placing it in a vercal posion
2. Remove the oil ller cap
3. Unscrew the drain screw and drain the used oil
4. Replace oil lter
Cauon
Carefully check for leaks around the oil lter cover.
5. Tighten the drain screw and ll with 2.5 liters of oil
The total engine oil capacity is 2.9L (engine disassembly)
Drain screw ghtening torque: 20-30 Nm
6. Check oil level
Checking the oil level
Before each use, always check the oil level to ensure that the amount of oil is
correct.
- Warm up the engine to operang temperature
- Immobilize the motorcycle by placing it in a vercal posion
- Stop the engine
- Check the oil level within a minute
Note:screw-inlevelcontroldipsck
Warning
When the engine is at operang temperature, the oil can be very hot, be
careful not to burn yourself. Place the motorcycle on a at surface, remove the
cap, then ll the oil tank. Thoroughly clean the cap.
The dipsck must be replaced correctly otherwise it may not work properly and
cause engine damage.
Oil lter replacement Remove the oil lter cover. Remove the used oil lter. Clean
dirty oil before replacing new lter.
Idle speed
Warning
The engine of your Mash is ed with a petrol
injecon system. It is therefore not possible to
adjust the idle speed of this engine.
2-6mm throle cable play.
Accelerator handle
First, check that the throle control grip is not bent, twisted or damaged.
Then, measure the throle cable free play. Turn the handle in order to press it
on one side and measure the play between the 2 free movements of the handle
If the play is insucient or too great, make an adjustment.
Tuning methods:
Fine Tuning:
Remove the protecve rubber, unscrew the xing nut A, and turn the
adjustment nut B to obtain a sasfactory clearance. Then reghten the xing nut A
and put the protecve rubber back in place.
Then check that the travel of the throle grip is linear and sasfactory.
Cauon
When the throle cable free play has been adjusted, check for proper throle
grip operaon. The seng will have no eect on the engine idle speed, and the
handle will automacally return to the closed posion.

36 37
5 -10 mm
Back to summary
Fork: funconal checks
To check for proper front fork operaon, do the following:
- Get on your motorbike.
- Pull the front brake lever and push the handlebar down several mes to check
that the fork extends and compresses correctly.
- If you noce oil leaks and blockages, contact your Mash dealer for service.
Side stand
Fold the stand, the motorcycle well
posioned. Check the correct operaon
of the spring and that it is not damaged,
lubricate it if necessary.
Cauon
Disc brakes are part of a high pressure system. For your safety, the hydraulic
oil replacement interval should not exceed the interval specied in the periodic
maintenance table in the manual.
Brakes
ABS:
Your motorcycle is ed with a system which limits the locking of the front wheel
during periods of intense braking (ABS).
If the ABS warning light comes on on the speedometer, it is necessary to go to an
authorized Mash dealer in order to carry out a precise diagnosis.
The front brake is equipped with a disc. Check the brakes aer the rst 1000 km,
then every 3000 km. The proper funconing of the brakes is essenal for driving
safety. Have the brake system inspected periodically by the authorized distributor
Warning
Braking eciency determines user safety and must be guaranteed at all
mes. The repair of the braking system or the replacement of the linings should
preferably be entrusted to your dealer. The laer has in fact complete tools and
proven techniques to carry out these operaons in a way that is both economical
and secure..
Front brake
If the motorcycle is equipped with a front disc brake, the play of the brake lever
must be between 5 and 10 mm (measured at the level of the hood).
The hydraulic brake system should be checked daily, proceeding as follows:
1. Check for leaks in the front wheel brake circuit.
2.Check brake hose for leaks.
3.Check whether the front brake lever gives resistance when operated.
4. Check the state of wear of the front wheel brake linings

38 39
10 -20 mm
33
Back to summary
Brake pads
Checking the pad linings is mainly limited to checking their state of wear. The pads
must be replaced if they are worn to the boom of the groove (if equipped), which
acts as a mark.
Warning
Do not ride immediately aer changing pads. Press the brake lever several
mes to posion the pads against the disc.
Rear brake
Adjusng the rear wheel brake
The rear brake is a disc brake. To adjust the rear wheel brake pedal, bring the
pedal to the most comfortable driving posion by turning the clamping nut (1).
Once the posion has been adjusted, lock it using the lock nut (2). Please maintain
a clearance of between 10 and 20 mm (3).
Degrease the rear brake disc at regular intervals
to guarantee opmum braking quality at all mes.
In the event of a brake uid leak, contact your
MASH dealer.
In the event of a braking problem, contact your
MASH dealer.
Brake uid type: DOT4
Regularly check the condion of the brake pads. The thickness of the lling
must be greater than 2 mm. If the laer is less than 2mm, the brake pads must be
replaced.
Niveau maxi
Niveau maxi
Niveau mini
Niveau mini
Maître-cylindre avant
Maître-cylindre arrière
Cauon
Ipone reference: brake dot 4
Brake uid should not be mixed with impuries, otherwise braking
performance will be reduced due to change in chemical properes.
Brake uid level
Place the motorcycle on a at surface, acvate the front brake lever and check
that the level is well placed between the two lines.
If the brake uid level drops rapidly, a leak may be the cause and your
authorized Mash repairer should be repaired quickly.
The proper funconing of the brakes is essenal for driving safety. Have the
brake system periodically inspected by your authorized MASH dealer.
Cauon
• Brake uid should not exceed the upper
level mark to avoid overow.
• Do not allow dust or water to enter the
master cylinder.
• Preferably use the same supplier for
the brake uid in order to avoid chemical
reacons between the types of uid. Take
care that the brake uid does not come into
contact with the parts of the vehicle, this
would damage the painted parts.
Topping up brake uid
• Ensure that the master cylinder is in a
horizontal posion.
• Wipe dust and any foreign parcles
from the master cylinder. Unscrew the
master cylinder cover screw and remove the
diaphragm.
• Add the recommended quanty of brake
uid up to the upper limit, then reghten the
master cylinder cover securely, taking care to
replace the diaphragm correctly to prevent
any foreign bodies from entering the master
cylinder.
Table of contents
Other Mash Motorcycle manuals

Mash
Mash Six Hundred 650cc User manual

Mash
Mash Adventure 400cc User manual

Mash
Mash TT40 Cafe Racer User manual

Mash
Mash 50cc X-RIDE User manual

Mash
Mash Fifty 50cc Euro 5 User manual

Mash
Mash Two Fifty 250 cc User manual

Mash
Mash 125cc X-RIDE User manual

Mash
Mash Black Seven 250 User manual

Mash
Mash Fifty 50CC User manual

Mash
Mash Seventy Five User manual