Masterpro BGMP-9053 User manual

Disposal of Old Electrical & Electronic Equipment ( Applicable
in the European Union and other European countries
with separate collection systems )
This symbol on the product or on its packaging indicates that this
product shall not be treated as household waste. Instead it shall be
handed over to the applicable collection point for the recycling of
electrical and electronic equipment. By ensuring this product is
disposed of correctly, you will help prevent potential negative
consequences for the environment and human health, which could
otherwise be caused by inappropriate waste handling of this
product. The recycling of materials will help to conserve natural
resources. For more detailed information about recycling of this
product, please cantact your local city office, your household waste
disposal service or the shop where you purchased the product.
IM Size: 148.5W x 210H mm (folded) Date: 20181024
SAVE THIS MANUAL FOR FUTURE REFERENCE
Leggere attentamente le istruzioni prima dell'uso.
Please carefully read the instructions before using.
Lea con atención las instrucciones antes de usar el aparato.
Bitte lesen Sie vor dem Gebrauch diese Anleitungen sorgfältig durch.
Veuillez lire attentivement les instructions avant d'utiliser le produit.
Leia com atenção as instruções antes da utilização.
BGMP-9053
MANUALE DI ISTRUZIONI • INSTRUCTION MANUAL
MANUAL DE INSTRUCCIONES • BEDIENUNGSANLEITUNG
MANUEL D'INSTRUCTIONS • MANUAL DE INSTRUÇÕES
IM(English/Spanish/French/German/Portuguee/Ttalian)
Meat thermometer • Termómetro para carne • Thermomètre à viande •
Fleischthermometer • Termómetro de carne • Termometro per carne

IM Size: 148.5W x 210H mm (folded) Date: 20181024
ENEN
01 02
TECHNICAL DATA
MONITOR
�Remove the battery compartment cover on the back of the monitor
�Place 2 fresh AAA size ( UM-4) batteries in the compartment as indicated by the polarity
symbols(+and-)
�Replace the cover
�Switch the “POWER” switch on the back to turn the power on/power off
OPERATION
Plug the probe connector into the transmitter socket. Insert the tip of the probe into the center of
the meat, taking care not to pierce through it. Do not expose any part of the probe to open
flames.
TO SELECT MEAT TYPE AND TASTE LEVEL
�Press “MEAT” button to navigate and select the desired meat types.
�Each press will change the display in the following sequence:
TRANSMITTER
�Slide off the battery compartment cover
�Place 2 fresh AAA size ( UM-4) batteries in the compartment as indicated by the polarity
symbols(+and-)
�Replace the battery compartment cover
�Switch the “POWER” switch on the bottom to control the power on/power off
�After turning on the transmitter, the red LED light in the center will flash three(3) times signaling
that it’s transmitting to the monitor. Turn the monitor on to begin receiving the probe
temperature.
�Important information:
- LED INDICATOR
The red LED in the center of the transmitter flashes to indicate that it is on and transmitting.
- TRANSMITTER TRANSMIT RULES
If the temperature of the probe remains unchanged, the transmitter will signal the receiver every
30 seconds to confirm the temperature.
If the temperature of the probe changes more than 1℃/1 ℉, the transmitter will transmit the
new temperature to the receiver.
- CONNECTING THE PROBE
Locate the probe socket on the right side of the transmitter.
Insert the meat probe connector-plug into the socket.
MANUALLY SET TARGET TEMPERATURE
�Insert the probe into the meat as shown above.
�Press and hold down “MODE” button for 3 seconds to switch to manually set the temperature
patterns.
�Press “ MIN” and “ SEC” to select your desired temperature.
�Press “ MODE” button to confirm your setting
�Your target temperature will appear on the LCD screen. Begin cooking.
�The cooking alerts will sound as described above.
AFTER COOKING
�Once cooking is finished, remove the probe using an oven mitt.
�Clean the probe with water and a mild detergent.
To clean the main unit and sensor, wipe with a damp cloth.
℃/℉ TEMPERATURE DISPLAY
The temperature is displayed either in ℃ or ℉. To select Fahrenheit or Celsius, briefly press the
“MODE” button to switch between settings.
COUNT-UP/ COUNTDOWN TIMER
The count-up and countdown timers operate independently of the temperature sensor.
To set a count-up timer:
If no countdown timer is set the timer will act as a count up timer.
To set a countdown timer:
USE MIN and SEC to set the countdown time.
To start timer:
1. Press Button to begin.
2. Press Button again to pause.
3. Once paused, press “ CLEAR” Button to reset to zero.
4. Once a countdown has finished, the unit will beep, to silence the alert press any button.
NOTE The countdown timer will count up to 99:59.
BACKLIGHT
Press any button to illuminate the screen for 5 seconds.
� Food and cooking temperature of the wireless transmission functions.
� Food and temperature, TIMER display.
�Temperature gauge alarm functions
�Timer alarm functions.
�Meat type and Taste level selection.
� ℃/℉ temperature display selected
�Backlight function
� Temperature range: 0℃-250℃/32℉-500℉
� RF transmission range: 30 meters/100 feet
�Press “ TASTE” button to select the doneness level ( Rare, Medium Rare, Medium, Medium
Well or Well Done).
The target temperature appears on the LCD screen.
�Begin cooking.
�The cooking alerts will sound when the meat has reached the target temperature.
START
STOP
“ ”
START
STOP
“ ”

IM Size: 148.5W x 210H mm (folded) Date: 20181024
ESES
03 04
ESPECIFICACIONES TÉCNICAS
MONITOR
�Retire la tapa del compartimento de las pilas ubicado en la parte posterior del monitor.
�Coloque 2 pilas nuevas de tipo AAA (UM-4) en el compartimiento con los símbolos de
polaridad (+ y -) tal y como se indica.
�Vuelva a colocar la tapa.
�Use el interruptor de "ENCENDIDO" ubicado en su parte posterior para encender/apagar el
dispositivo.
FUNCIONAMIENTO
Enchufe el conector de la sonda a la toma del transmisor. Inserte la punta de la sonda
en el centro de la carne, con cuidado para no atravesarla. No exponga ninguna de las partes de
la sonda a llamas descubiertas.
SELECCIÓN DEL TIPO DE CARNE Y PUNTO DE COCCIÓN
�Presione el botón "MEAT" (carne) para desplazarse y seleccionar el tipo de carne deseado.
�Cada presión cambiará la pantalla en la siguiente secuencia:
BASE TRANSMISORA
�Deslice la tapa del compartimento de las pilas
�Coloque 2 pilas nuevas de tipo AAA (UM-4) en el compartimento con los símbolos de polaridad
(+ y -) tal y como se indica
�Vuelva a cerrar la tapa del compartimento de las pilas
�Use el interruptor de "ENCENDIDO" ubicado en su parte inferior para controlar el dispositivo
�Después de encender el transmisor, el LED rojo del centro parpadeará tres (3) veces para
indicar que está transmitiendo al monitor. Encienda el monitor para empezar a recibir la señal
de la sonda de temperatura.
�Información importante:
- INDICADOR LED
El LED rojo del centro del transmisor parpadea para indicar que está encendido y
transmitiendo.
- TRANSMISIÓN DE SEÑAL
Si la temperatura de la sonda permanece estable, el transmisor enviará una señal cada 30
segundos para confirmar la temperatura
Si la temperatura de la sonda cambia más de 1℃/1 ℉, el transmisor enviará la nueva
temperatura al receptor
- CÓMO CONECTAR SONDA
Ubique la toma de la sonda en el lateral derecho del transmisor.
Inserte el conector/enchufe de la sonda de carne a la toma.
CONFIGURACIÓN DE LA TEMPERATURA
DESEADA MANUALMENTE
�Inserte la sonda en la carne como se ha ilustrado anteriormente.
�Mantenga presionado el botón "MODE" (modo) durante 3 segundos para configurar
manualmente los patrones de temperatura.
�Presione “MIN” (minutos) y “SEC” (segundos) para seleccionar la temperatura deseada.
�Presione el botón “MODE” para confirmar la configuración
�La temperatura seleccionada aparece en la pantalla LCD. Empiece a cocinar.
�Las alertas de cocción sonarán como se ha descrito anteriormente.
DESPUÉS DE LA COCCIÓN
�Una vez finalizada la cocción, retire la sonda usando una manopla para horno.
�Limpie la sonda con agua y un detergente suave.
Para limpiar la unidad principal y el sensor, use un paño húmedo
�Transmisión inalámbrica.
�TEMPORIZADOR en pantalla.
� Funciones de alarma de tiempo y temperatura.
�Selcción del tipo de carne y punto de cocción.
� Selección de temperatura en grados ℃/℉.
� Función de retroiluminación.
� Rango de temperatura: 0℃-250℃/32℉-500℉.
� Gama de frecuencia de transmisión RF: 30 metros/100 pies.
�Presione el botón "TASTE" (punto de cocción) para seleccionar el punto de cocción ( muy
poco hecha, poco hecha, al punto, hecha, muy hecha ).
La temperatura seleccionada aparece en la pantalla LCD.
�Empiece a cocinar.
�Las alertas de cocción sonarán cuando la carne haya alcanzado la temperatura
seleccionada.
PANTALLA DE TEMPERATURA EN ℃/℉
La temperatura aparece en grados ℃ o ℉. Para seleccionar los grados Fahrenheit o Celsius,
presione brevemente el botón “MODE” para cambiar entre ellos.
TEMPORIZADOR DE CUENTA ADELANTE/CUENTA ATRÁS
Los temporizadores de cuenta adelante y cuenta atrás funcionan de modo independiente del
sensor de temperatura.
Para configurar el temporizador de cuenta adelante:
Si el temporizador de cuenta atrás no está activado, funcionará como temporizador de cuenta
adelante.
Para configurar el temporizador de cuenta atrás:
Use MIN y SEC para configurar el tiempo de cuenta atrás.
Para activar el temporizador:
1. Presione el botón para empezar.
2. Presione el botón de nuevo para pausar.
3. Una vez pausado, presione el botón "CLEAR" (borrar) para reiniciar a cero.
4. Una vez ha finalizado la cuenta atrás, el aparato emitirá un pitido. Para silenciar la alerta,
presione cualquier botón.
NOTA El temporizador de cuenta atrás contará hasta 99:59.
RETROILUMINACIÓN
Presione cualquier botón para iluminar la pantalla durante 5 segundos.
START
STOP
“ ”
START
STOP
“ ”
VACA CORDERO TENERA HAMBURGUESA CERDO PAVO POLLO PESCADO

IM Size: 148.5W x 210H mm (folded) Date: 20181024
FRFR
05 06
DONNÉES TECHNIQUES
ÉCRAN
�Retirez le couvercle du compartiment des piles au dos de l'écran
�Placez 2 piles neuves de type AAA (UM-4) dans le compartiment comme indiqué par les
symboles de polarité (+ et -)
�Replacez le couvercle.
�Mettez l'interrupteur “POWER” situé à l'arrière pour mettre en marche ou éteindre l'appareil.
FONCTIONNEMENT
Branchez le connecteur de la sonde dans la prise de l'émetteur. Insérez la pointe de la sonde au
centre de la viande, en prenant soin de ne pas traverser le morceau de viande. N'exposez
aucune partie de la sonde aux flammes.
POUR SÉLECTIONNER LE TYPE DE VIANDE ET LE NIVEAU DE GOÛT
�Appuyez sur le bouton “MEAT” (VIANDE) pour naviguer et sélectionner les types de viande
souhaités.
�Chaque pression modifiera l’affichage dans l’ordre suivant :
ÉMETTEUR
�Ouvrez le couvercle du compartiment des piles.
�Placez 2 piles neuves de type AAA (UM-4) dans le compartiment comme indiqué par les
symboles de polarité (+ et -)
�Refermez le couvercle du compartiment des piles.
�Mettez l'interrupteur “POWER” situé en bas pour mettre en marche ou éteindre l'appareil.
�Après avoir mis l’émetteur en marche, le voyant rouge LED au centre clignotera trois (3) fois
pour indiquer qu’il transmet vers l'écran. Mettez l'écran en marche pour commencer à recevoir
la température de la sonde.
�Informations importantes :
- VOYANT LED
Le voyant rouge LED au centre de l'émetteur clignote pour indiquer qu'il est en marche et en
cours de transmission.
- RÈGLES DE TRANSMISSION DE L'ÉMETTEUR
Si la température de la sonde reste inchangée, l’émetteur envoie un signal au récepteur toutes
les 30 secondes pour confirmer la température.
Si la température de la sonde change de plus de 1°C / 1°F, l'émetteur transmettra la nouvelle
température au récepteur.
- CONNEXION DE LA SONDE
Localisez la prise de la sonde sur le côté droit de l'émetteur.
Insérez le connecteur de la sonde à viande dans la prise.
REGLAGE MANUEL DE LA TEMPÉRATURE CIBLE
�Insérez la sonde dans la viande comme indiqué ci-dessus.
�Appuyez et maintenez enfoncé le bouton « MODE » pendant 3 secondes pour passer au
réglage manuel de la température.
�Appuyez sur “MIN” et “SEC” pour sélectionner la température désirée.
�Appuyez sur le bouton "MODE" pour confirmer votre réglage.
�Votre température cible apparaîtra sur l'écran LCD. Démarrez la cuisson.
�Les alertes de cuisson sonneront comme décrit ci-dessus.
APRÈS LA CUISSON
�Une fois la cuisson terminée, retirez la sonde à l'aide d'un gant de cuisine.
�Nettoyez la sonde avec de l’eau et un détergent doux.
Pour nettoyer l'unité principale et la sonde, essuyez-les avec un chiffon humide.
AFFICHAGE DE LA TEMPÉRATURE EN ℃/℉
L’affichage indique la température en Celsius (°C) ou en Fahrenheit (°F). Pour sélectionner
Fahrenheit ou Celsius, appuyez brièvement sur le bouton “MODE” pour basculer entre les deux
modes.
CHRONOMÈTRE / MINUTEUR
Le chronomètre et le minuteur fonctionnent indépendamment de la sonde de température.
Pour sélectionner le chronomètre :
Si aucun temps spécifique n'est défini, le minuteur fonctionnera comme un chronomètre.
Pour sélectionner le minuteur :
Utilisez les boutons MIN et SEC pour régler la durée du minuteur.
Pour démarrer le minuteur :
1. Appuyez sur le bouton pour démarrer.
2. Appuyez sur le bouton pour mettre en pause.
3. Une fois en pause, appuyez sur le bouton “ CLEAR” pour réinitialiser le minuteur à zéro.
4. Une fois que le compte à rebours est terminé, le thermomètre sonnera. Pour l'éteindre,
appuyez sur n'importe quel bouton.
REMARQUE : Le minuteur peut être réglé jusqu'à 99:59
RÉTRO-ÉCLAIRAGE
Appuyez sur n’importe quel bouton pour allumer l’écran pendant 5 secondes.
�Aliment et température de cuisson des fonctions de transmission sans fil
�Aliment et température, affichage du MINUTEUR
� Fonctions d'alarme de la jauge de température
� Fonctions d'alarme du minuteur
�Type de viande et sélection du niveau de goût
� Sélection de la température °C / °F
� Fonction de rétro-éclairage
� Échelle de température : 0°C -250°C / 32°F -500°F
� Échelle de transmission RF : 30 mètres / 100 pieds
�Appuyez sur le bouton “TASTE” (GOÛT) pour sélectionner le niveau de cuisson (saignant,
mi-saignant, à point ou bien cuit).
La température cible apparaît sur l'écran LCD.
�Démarrez la cuisson.
�Les alertes de cuisson sonnent lorsque la viande a atteint la température cible.
START
STOP
“ ”
START
STOP
“ ”
BOEUF AGNEAU VEAU HAMBURGER PORC DINDE POULET POISSON

IM Size: 148.5W x 210H mm (folded) Date: 20181024
DEDE
07 08
TECHNISCHE DATEN
MONITOR
�Entfernen Sie das Batteriefach an der Rückseite des Monitors.
�Legen Sie 2 neue AAA-Batterien (UM-4) richtig herum, wie von den Symbolen (+ und -)
angezeigt, in das Batteriefach ein.
�Schließen Sie das Batteriefach wieder mit der Abdeckung.
�Drücken Sie den „POWER“-Schalter an der Rückseite, um das Thermometer
ein-/auszuschalten.
BETRIEB
Verbinden Sie den Messkopf-Stecker mit der Buchse am Sender. Stecken Sie die Spitze des
Messkopfes
in die Mitte des Fleischstücks, aber achten Sie darauf, dass die Spitze nicht an der Unterseite
des Fleischstücks austritt. Schützen Sie den Messkopf vor offenen Flammen.
AUSWAHL DER FEISCHSORTE UND GARSTUFE
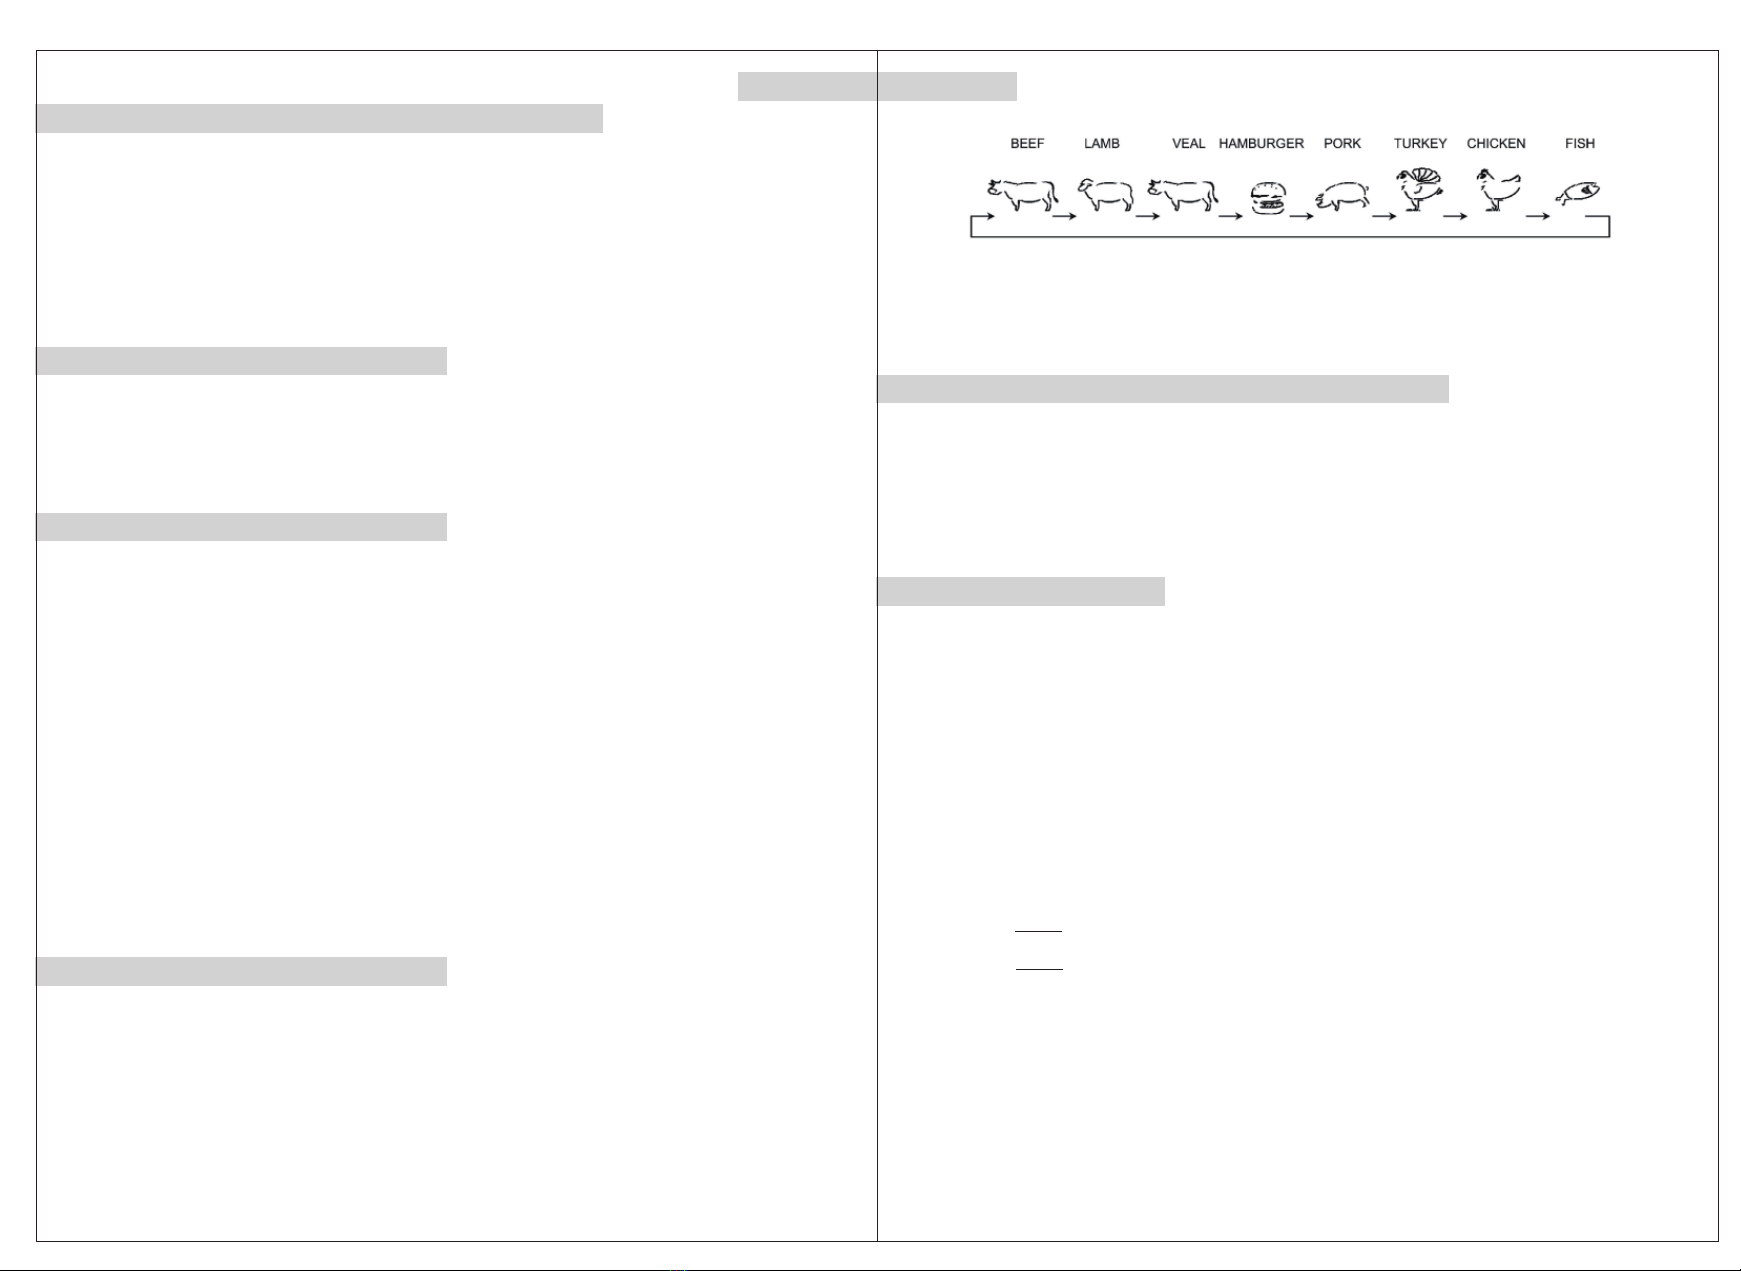
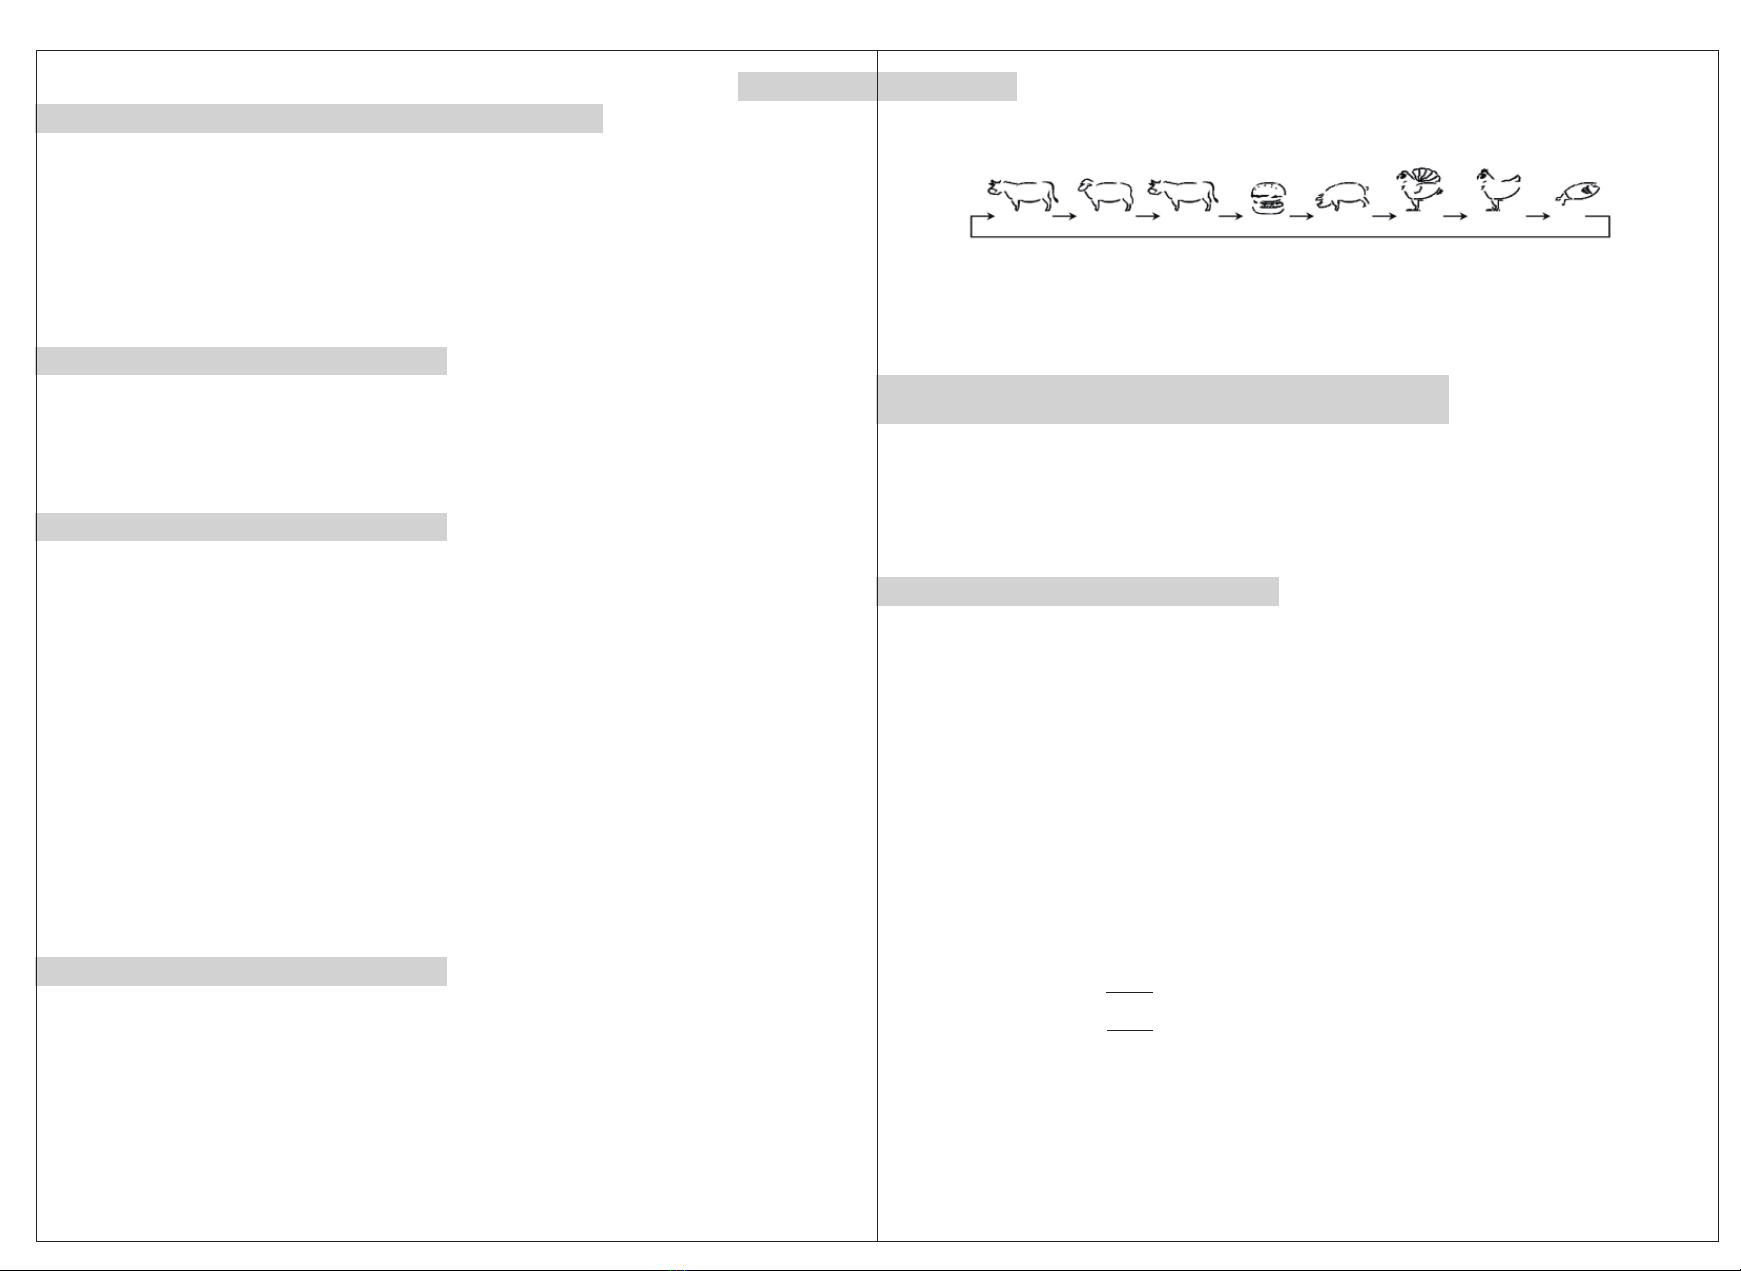
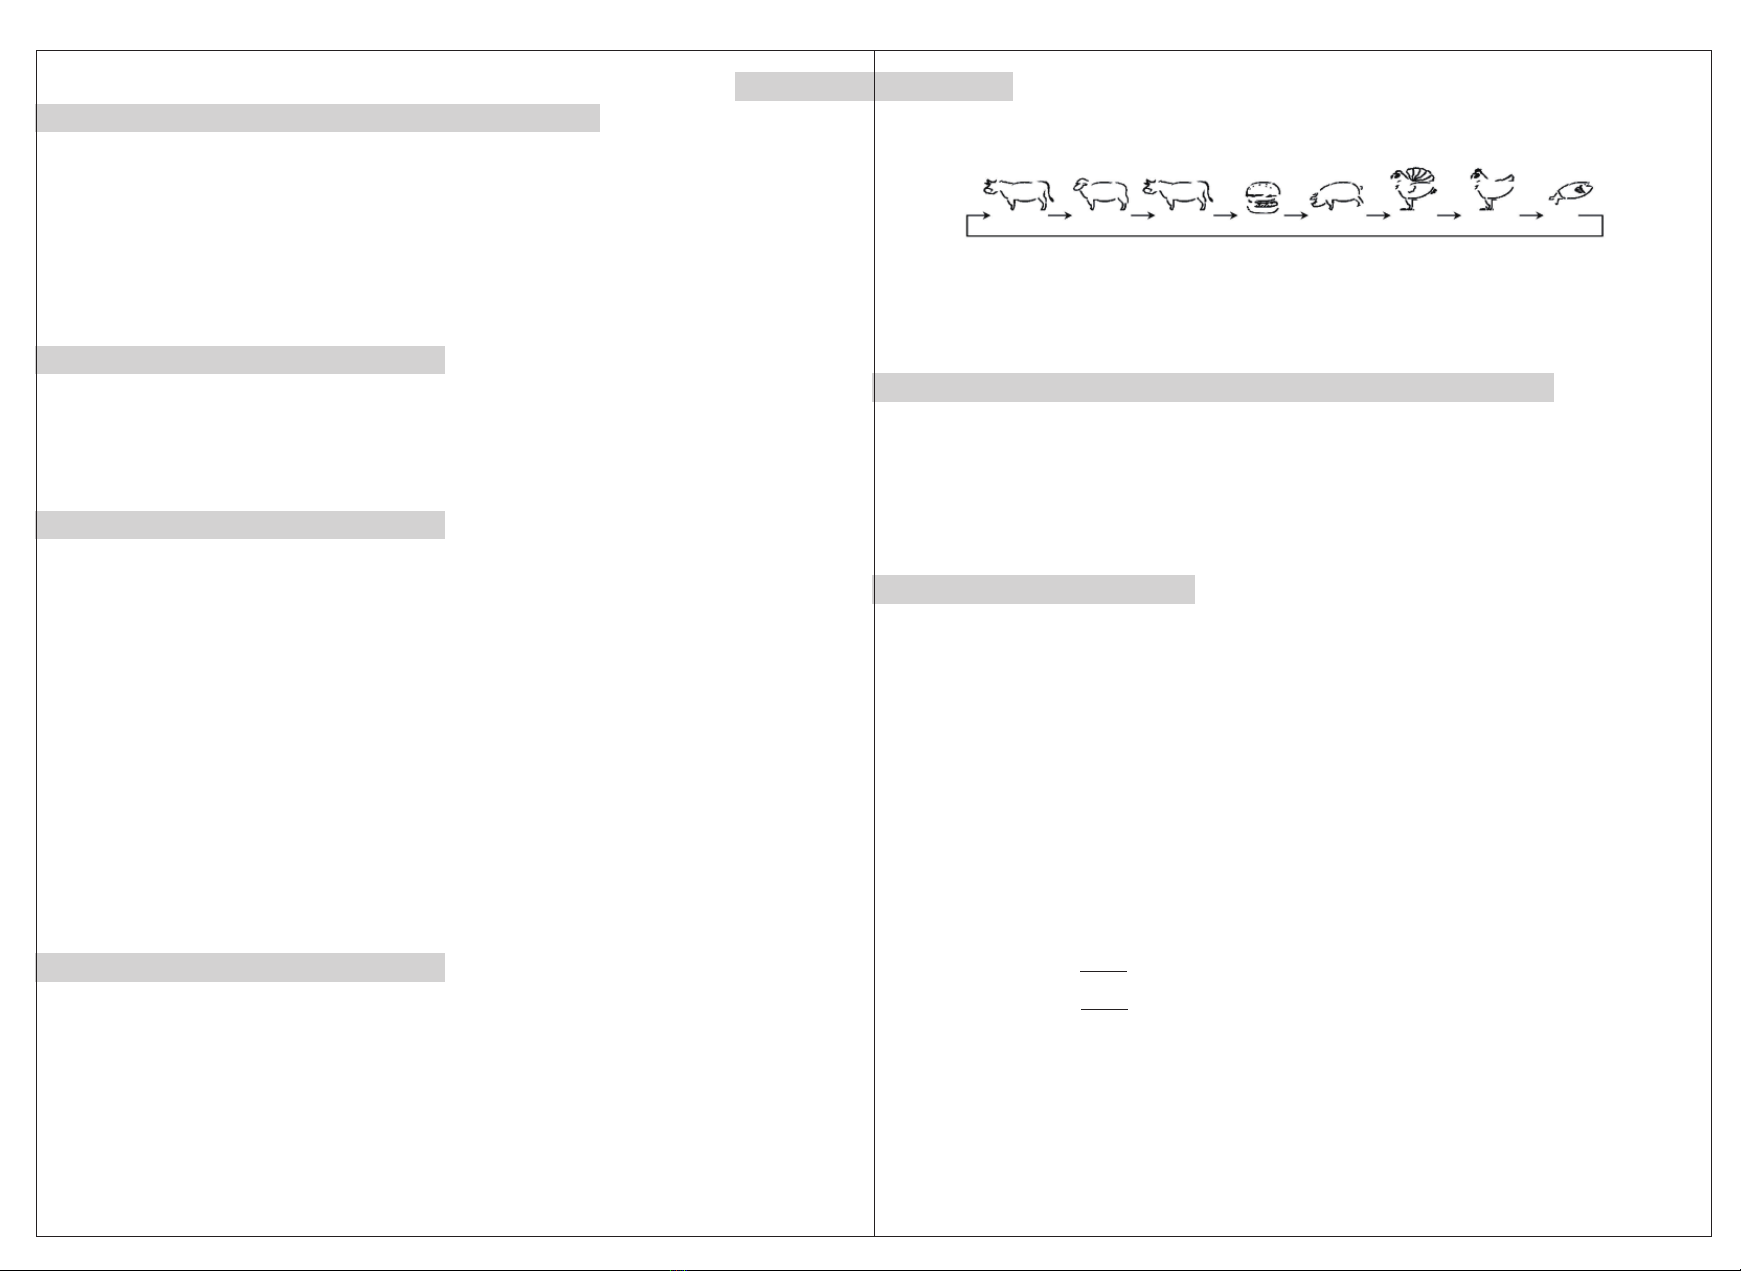
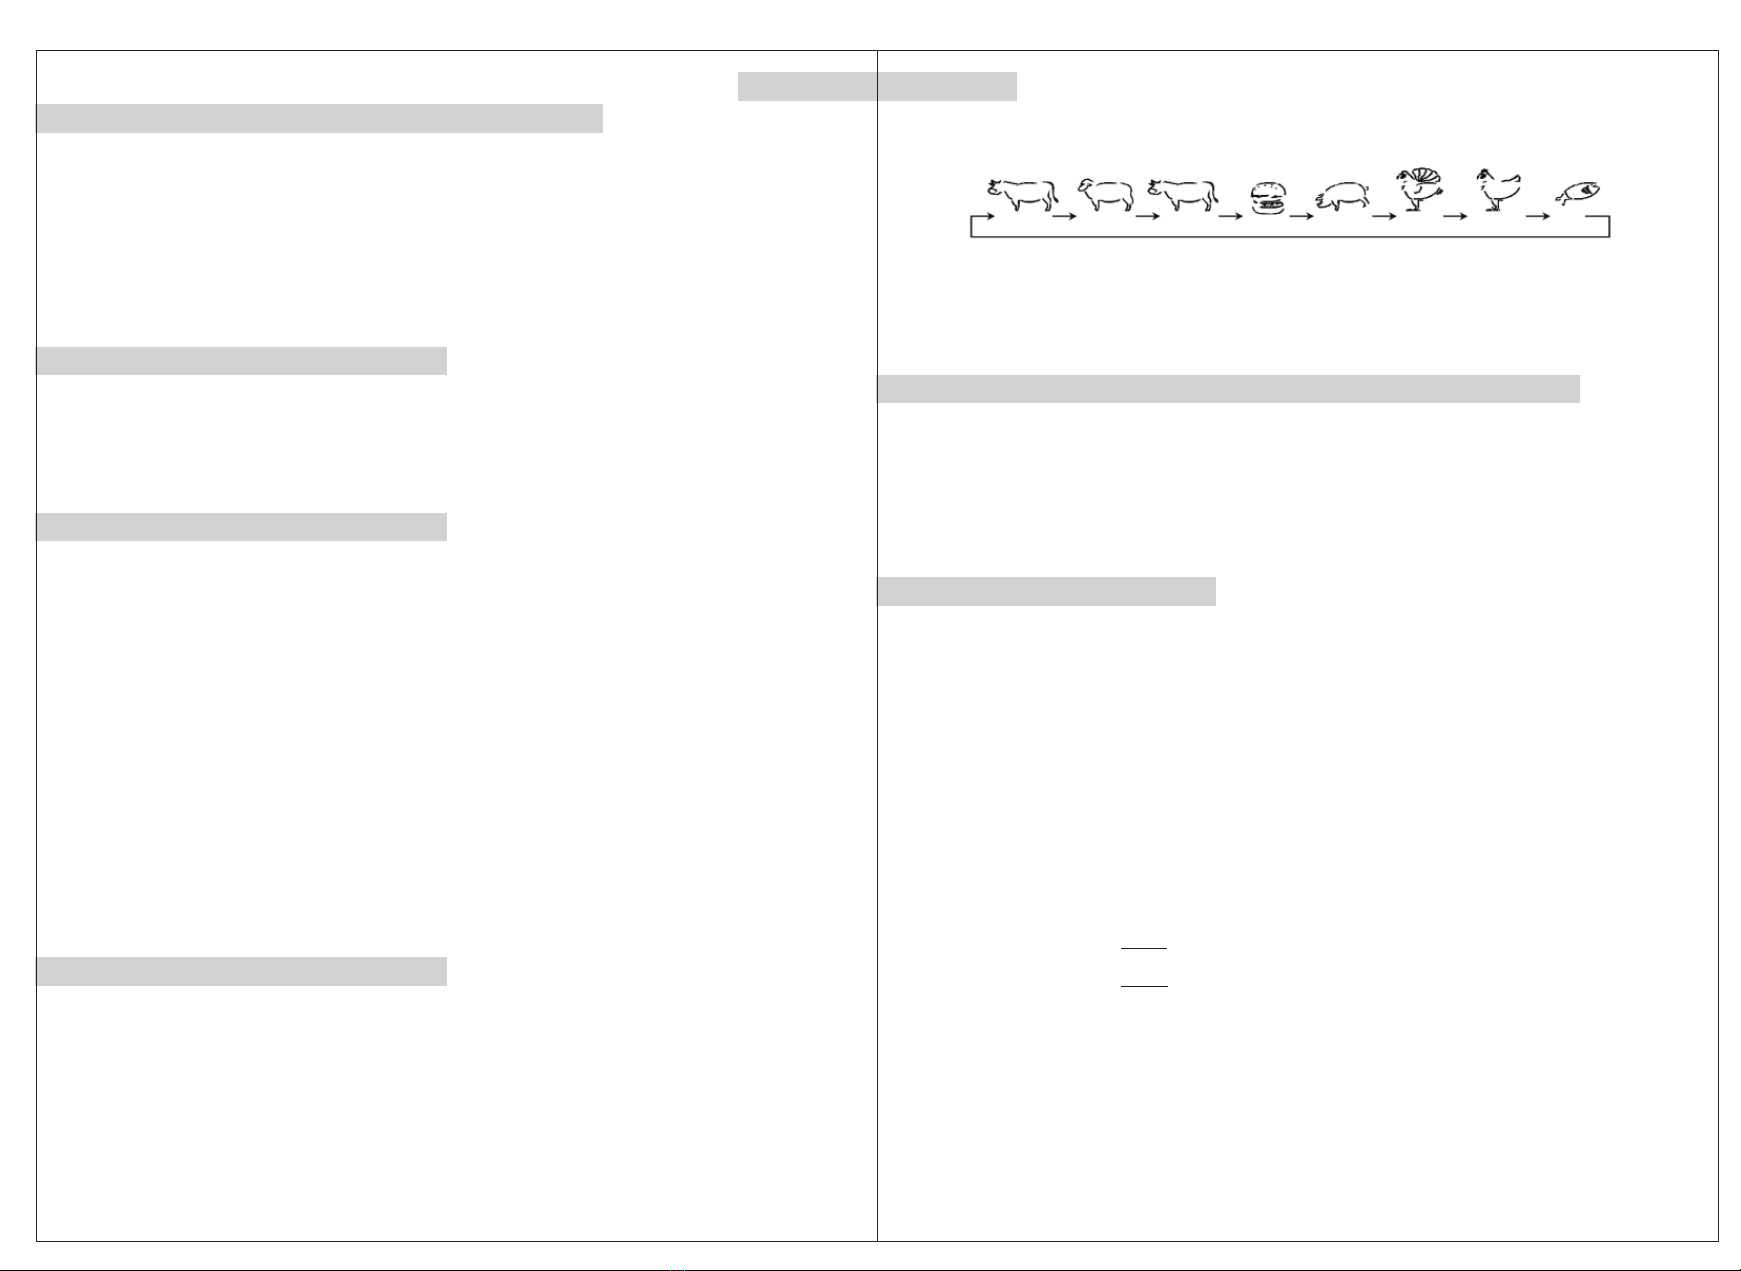
�Drücken Sie die Taste „MEAT“, um durch das Menü zu navigieren und die gewünschte
Fleischsorte auszuwählen.
�Jeder Tastendruck ändert die Anzeige in der folgenden Reihenfolge:
SENDER
�Schieben Sie die Abdeckung des Batteriefachs auf.
�Legen Sie 2 neue AAA-Batterien (UM-4) richtig herum, wie von den Symbolen (+ und -)
angezeigt, in das Batteriefach ein.
�Schließen Sie die Abdeckung des Batteriefachs wieder.
�Drücken Sie den „POWER“-Schalter an der Unterseite des Senders, um ihn ein-/auszuschalten.
�Nach dem Einschalten blinkt die rote LED in der Mitte des Senders dreimal (3), um anzuzeigen,
dass der Sender Daten an den Monitor überträgt. Schalten Sie den Monitor ein, um die
gemessene Temperatur zu empfangen.
�Wichtige Informationen:
- LED-ANZEIGE
Die rote LED in der Mitte des Senders blinkt, um zu signalisieren, dass der Sender
eingeschaltet ist und Daten sendet.
- FUNKTIONSWEISE DES SENDERS
Wenn die Temperatur des Messkopfes gleich bleibt, überträgt der Sender alle 30 Sekunden an
den Empfänger, um die Temperatur zu bestätigen.
Wenn die Temperatur des Messkopfes sich um mehr als 1℃/1 ℉ ändert, überträgt der Sender
die neue Temperatur an den Empfänger.
- VERBINDEN DES MESSKOPFES
Die Messkopf-Anschlussbuchse befindet sich auf der rechten Seite des Senders.
Verbinden Sie den Stecker des Fleisch-Messkopfes mit der Buchse.
MANUELLES EINSTELLEN DER ZIELTEMPERATUR
�Stecken Sie den Messkopf in das Fleisch, wie oben stehend gezeigt.
�Halten Sie die Taste „MODE“ für 3 Sekunden gedrückt, um in den manuellen Einstellmodus der
Temperatur zu wechseln.
�Drücken Sie „MIN“ und „SEC“, um die gewünschte Temperatur auszuwählen.
�Drücken Sie die Taste „MODE“, um Ihre Einstellung zu bestätigen.
�Ihre Zieltemperatur wird auf dem LC-Display angezeigt. Beginnen Sie, das Fleisch zu grillen.
�Der Garalarm ertönt, wie oben stehend beschrieben.
NACH DEM GRILLEN
�Wenn das Grillen beendet ist, entfernen Sie den Messkopf mit einem Grillhandschuh.
�Reinigen Sie den Messkopf mit Wasser und einem milden Reinigungsmittel.
Wischen Sie die Haupteinheit und den Sensor mit einem feuchten Tuch ab.
℃/℉ TEMPERATURANZEIGE
Die Temperatur wird entweder in ℃ oder ℉ angezeigt. Um Fahrenheit oder Celsius auszuwählen,
drücken Sie einmal kurz die Taste „MODE“, um zwischen den Einstellungen umzuschalten.
COUNTUP/COUNTDOWN-TIMER
Die Countup- und Countdown-Timer funktionieren unabhängig vom Temperatursensor.
Um den Countup-Timer zu stellen:
Wenn der Countdown-Timer nicht eingestellt ist, fungiert der Timer als Countup-Timer.
Einstellen des Countdown-Timers:
Stellen Sie mithilfe von MIN und SEC die Countdown-Zeit ein.
Starten des Timers:
1. Drücken Sie die Taste, um den Timer zu starten.
2. Drücken Sie die Taste noch einmal, um den Timer zu unterbrechen.
3. Wenn der Timer unterbrochen wurde, drücken Sie die Taste „CLEAR“, um den Timer auf null
zurückzusetzen.
4. Sobald ein Countdown beendet ist, erzeugt das Gerät ein akustisches Signal. Drücken Sie eine
beliebige Taste, um das Signal auszuschalten.
HINWEIS: Der Countdown-Timer zählt bis zu 99:59.
HINTERGRUNDBELEUCHTUNG
Drücken Sie eine beliebige Taste, um das Display für 5 Sekunden zu erleuchten.
�Grillgut und Gartemperatur der kabellosen Übertragungsfunktionen
�Grillgut und Temperatur, TIMER-Anzeige
�Temperaturanzeige-Alarmfunktionen
�Timer-Alarmfunktionen
�Auswahl der Fleischsorte und Garstufe
�℃/℉ Temperaturanzeige ausgewählt
�Hintergrundbeleuchtung
�Temperaturbereich: 0 ℃ - 250 ℃/32 ℉ - 500 ℉
�RF-Übertragungsreichweite: 30 Meter/100 Fuß
�Drücken Sie die Taste „TASTE“, um die Garstufe auszuwählen (blutig, fast blutig, rosa,
halbrosa oder durchgebraten).
Die Zieltemperatur wird auf dem LC-Display angezeigt.
�Beginnen Sie, das Fleisch zu grillen.
�Der Grill-Alarm ertönt, wenn das Fleisch die Zieltemperatur erreicht hat.
START
STOP
“ ”
START
STOP
“ ”
RINDFLEISCH LAMM KALBSF-
LEISCH
HAMBURGER SCHWEINEF-
LEISCH
TRUTHAHN HUHN FISCH

IM Size: 148.5W x 210H mm (folded) Date: 20181024
PTPT
09 10
CARACTERÍSTICAS TÉCNICAS
MONITOR
�Retire a tampa do compartimento das pilhas na parte traseira do monitor.
�Coloque 2 pilhas AAA novas (UM-4) no compartimento, conforme indicado pelos símbolos da
polaridade (+ e -).
�Volte a colocar a tampa.
�Use o interruptor “POWER” na parte traseira para ligar ou desligar a energia.
FUNCIONAMENTO
Ligue o conetor da sonda na entrada do transmissor. Insira a ponta da sonda
no centro da carne, tendo o cuidado de não a perfurar. Não exponha qualquer parte da sonda a
chamas sem proteção.
SELECIONAR O TIPO DE CARNE E NÍVEL DE SABOR
�Prima o botão “MEAT” para navegar e selecionar os tipos de carne desejadas.
�Sempre que premir, altera o ecrã na seguinte sequência:
TRANSMISSOR
� Faça deslizar a tampa do compartimento das pilhas para fora.
�Coloque 2 pilhas AAA novas (UM-4) no compartimento, conforme indicado pelos símbolos da
polaridade (+ e -).
�Volte a colocar a tampa do compartimento das pilhas.
�Use o interruptor “POWER” na parte inferior para ligar ou desligar a energia.
�Após ligar o transmissor, o LED vermelho no centro pisca três (3) vezes, indicando que está a
transmitir para o monitor. Ligue o monitor para começar a receber a temperatura da sonda.
�Informação Importante:
- INDICADOR LED
O LED vermelho no centro do transmissor pisca para indicar que está ligado e a transmitir.
- REGRAS DE TRANSMISSÃO DO TRANSMISSOR
Se a temperatura da sonda permanecer inalterada, o transmissor pede ao recetor a cada 30
segundos que confirme a temperatura.
Se a temperatura da sonda mudar mais de 1 ºC/1 ºF, o transmissor transmite a nova
temperatura para o recetor.
- LIGAR A SONDA
Encontre a entrada da sonda na parte lateral do transmissor.
Insira a ficha do conetor da sonda da carne na entrada.
DEFINIR MANUALMENTE A TEMPERATURA ALVO
�Insira a sonda na carne conforme apresentado anteriormente.
�Prima e mantenha premido o botão “MODE” durante 3 segundos para passar para a definição
manual dos padrões da temperatura.
�Prima “MIN” e “SEC” para selecionar a temperatura desejada.
�Prima o botão “MODE” para confirmar a definição.
�A temperatura alvo aparece no ecrã LCD. Comece a cozinhar.
�Os alertas de confeção emitem um som, conforme descrito anteriormente.
APÓS A CONFEÇÃO
�Quando a confeção terminar, retire a sonda usando uma luva para o forno.
�Limpe a sonda utilizando água e um detergente suave.
Para limpar a unidade principal e o sensor, passe com um pano ligeiramente embebido em
água.
APRESENTAÇÃO DA TEMPERATURA EM ºC/ºF
A temperatura é apresentada em ºC ou ºF. Para selecionar Fahrenheit ou Celsius, prima o botão
“MODE” para alternar entre definições.
TEMPORIZADOR COM CONTAGEM CRESCENTE OU DECRESCENTE
Os temporizadores com contagem crescente ou decrescente funcionam de modo independente
do sensor da temperatura.
Para escolher o temporizador com contagem crescente:
Se não tiver escolhido qualquer temporizador com contagem decrescente, o temporizador
funciona em contagem crescente.
Selecionar um temporizador com contagem decrescente:
Use MIN e SEC para definir o tempo da contagem decrescente.
Iniciar o temporizador:
1. Prima o botão para começar.
2. Prima o botão para fazer uma pausa.
3. Na pausa, prima o botão “CLEAR” para reiniciar em zero.
4. Quando a contagem decrescente terminar, a unidade emite um som. Para desligar o som,
prima qualquer botão.
NOTA: O temporizador da contagem decrescente pode ser iniciado em até 99:59.
LUZ DE FUNDO
Prima qualquer botão para ligar o ecrã durante 5 segundos.
�Temperatura dos alimentos e da confeção das funções de transmissão sem fios.
�Alimentos e temperatura, visor do TEMPORIZADOR.
�Funções de alarme do manómetro da temperatura.
�Funções de alarme do temporizador.
�Seleção do tipo de carne e nível de sabor.
�Seleção da apresentação da temperatura em ºC/ºC.
�Função de luz de fundo.
�Alcance da temperatura: 0 ºC - 250 ºC / 32 ºF - 500 ºC
�Alcance de transmissão de RF 30 metros
�Prima o botão “TASTE” para selecionar o nível de confeção (mal passado, médio,
médio-bem passado, bem passado).
A temperatura alvo aparece no ecrã LCD.
�Comece a cozinhar.
�Os alertas de confeção emitem um som quando a carne atingir a temperatura desejada.
START
STOP
“ ”
START
STOP
“ ”
VACA BORREGO VITELA HAMBÚRGUER PORCO PERÚ FRANGO PEIXE

IM Size: 148.5W x 210H mm (folded) Date: 20181024
ITIT
11 12
SPECIFICHE TECNICHE
MONITOR
�Rimuovere il coperchio del vano batterie sul retro del monitor.
�Inserire 2 batterie AAA ( UM-4) nel vano batterie rispettando i simboli di polarità (+ e -).
�Riposizionare il coperchio.
�Usare l'interruttore "POWER" sul retro per accendere/spegnere il dispositivo.
FUNZIONAMENTO
Collegare il connettore della sonda nella presa del trasmettitore. Inserire la punta della sonda
nel centro della carne, facendo attenzione a non attraversarla. Non esporre alcuna parte della
sonda alle fiamme.
SELEZIONE DEL TIPO DI CARNE E DEL LIVELLO DI COTTURA
�Premere il pulsante "MEAT" per selezionare il tipo di carne desiderato.
�Ogni pressione modificherà il tipo di carne nella seguente sequenza:
TRASMETTITORE
�Rimuovere il coperchio del vano batterie.
�Inserire 2 batterie AAA ( UM-4) nel vano batterie rispettando i simboli di polarità (+ e -).
�Riposizionare il coperchio del vano batterie.
�Usare l'interruttore "POWER" sulla parte inferiore per accendere/spegnere il trasmettitore.
�Dopo aver acceso il trasmettitore, la spia rossa al centro lampeggerà tre (3) volte, a indicare
che è collegato al monitor. Accendere il monitor per iniziare la trasmissione della temperatura
della sonda.
�Informazioni importanti:
- SPIA LUMINOSA
La spia rossa al centro del trasmettitore lampeggia a indicare che è acceso e collegato.
- FUNZIONAMENTO DEL TRASMETTITORE
Se la temperatura della sonda rimane invariata, il trasmettitore si collegherà al ricevitore ogni
30 secondi per confermare la temperatura.
Se la temperatura della sonda varia di almeno 1℃/1 ℉, il trasmettitore invierà la nuova
temperatura al ricevitore
- COLLEGAMENTO DELLA SONDA
Individuare la presa della sonda sul lato destro del trasmettitore.
Inserire il connettore della sonda nella presa.
IMPOSTAZIONE MANUALE DELLA TEMPERATURA
�Inserire la sonda nella carne come descritto in precedenza.
�Tenere premuto il pulsante "MODE" per 3 secondi per inserire manualmente la temperatura.
�Premere "MIN" e "SEC" per selezionare la temperatura desiderata.
�Premere il pulsante "MODE" per confermare l'impostazione.
�La temperatura desiderata apparirà sul display. Iniziare la cottura.
�Quando la carne ha raggiunto la temperatura selezionata, verrà emesso un segnale acustico.
DOPO LA COTTURA
�Al termine della cottura, rimuovere la sonda con un guanto da forno.
�Pulire la sonda con acqua e detergente neutro.
Pulire l'unità principale e il sensore con un panno umido.
Selezione dell'unità di misura ℃/℉
È possibile visualizzare la temperatura in ℃ o ℉. Per selezionare i gradi Fahrenheit o Celsius,
premere brevemente il pulsante "MODE".
CRONOMETRO E CONTO ALLA ROVESCIA
Il timer funziona in modo indipendente rispetto al sensore della temperatura.
Per selezionare la modalità cronometro:
Per impostazione predefinita, il timer si avvierà in modalità cronometro.
Per selezionare la modalità conto alla rovescia:
Premere "MIN" e "SEC" impostare la modalità conto alla rovescia.
Per avviare il timer:
1. Premere il pulsante per avviare il timer
2. Premere il pulsante per metterlo in pausa.
3. Quando il timer è in pausa, premere il pulsante "CLEAR" per azzerarlo.
4. Al termine del conto alla rovescia l'unità emetterà un segnale acustico; premere qualsiasi
pulsante per arrestarlo.
NOTA: il limite del timer è 99:59.
RETROILLUMINAZIONE
Premere qualsiasi pulsante per illuminare lo schermo per 5 secondi.
�Trasmissione wireless della temperatura di cottura e degli alimenti.
�Display di TIMER, alimenti e temperatura.
�Termometro con segnale acustico.
�Timer con segnale acustico.
�Selezione del tipo di carne e del livello di cottura.
� Selezione dell'unità di misura ℃/℉
�Retroilluminazione
� Intervallo di temperature: 0℃-250℃/32℉-500℉
� Portata di trasmissione RF: 30 metri/100 piedi
�Premere il pulsante "TASTE" per selezionare il livello di cottura (Al sangue, Poco cotta,
Cottura intermedia, Cotta, Ben cotta).
La temperatura desiderata apparirà sul display.
�Iniziare la cottura.
�Quando la carne ha raggiunto la temperatura selezionata, verrà emesso un segnale acustico.
START
STOP
“ ”
START
STOP
“ ”
MANZO AGNELLO VITELLO HAMBURGER MAIALE TACCHINO POLLO PESCE
Table of contents
Languages: