10| Version 1 | September 2021
Table of Contents
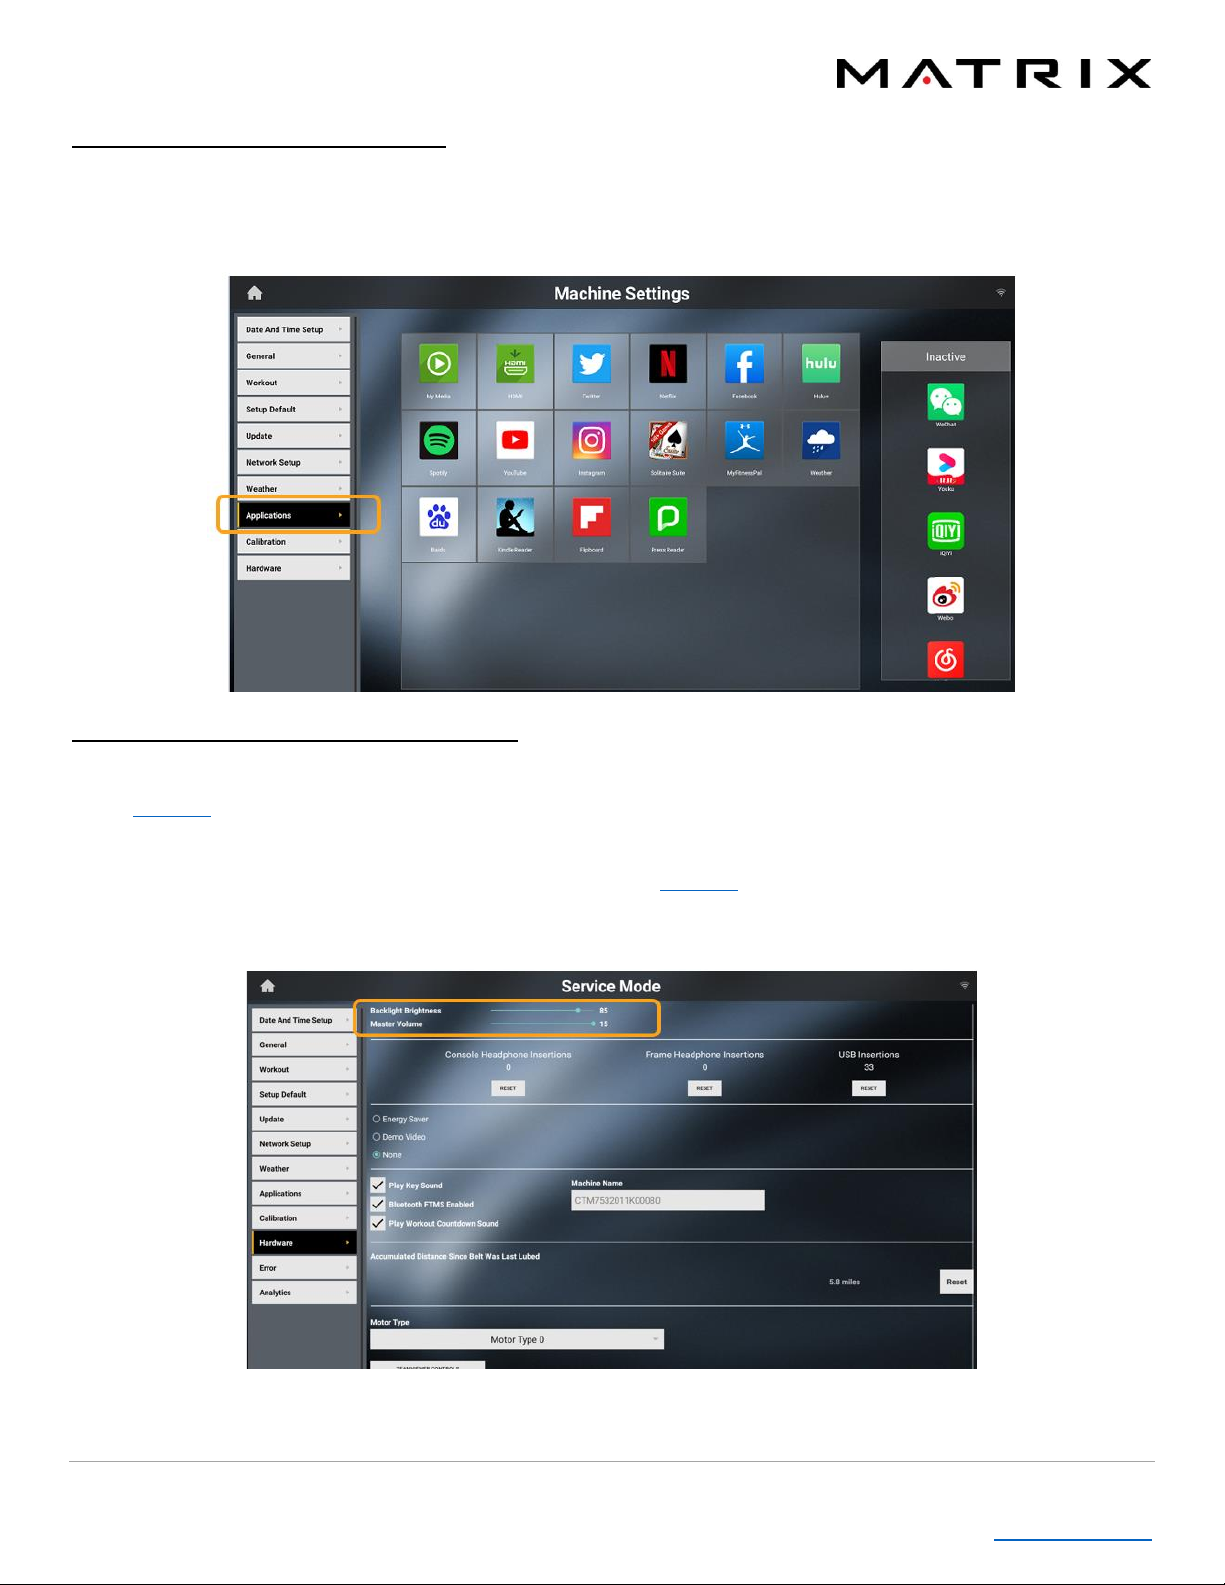
Hiding or Rearranging App Icons
You can hide or rearrange apps as they display on your console screen. To do this, follow Option 2 to enter Machine
Settings. Select the Applications menu from the left side of the screen. Touch and hold an app that you want to move,
then drag it to Inactive to remove the app, or drag to a new spot on the screen to rearrange where the app is located.
Volume Control and Screen Brightness
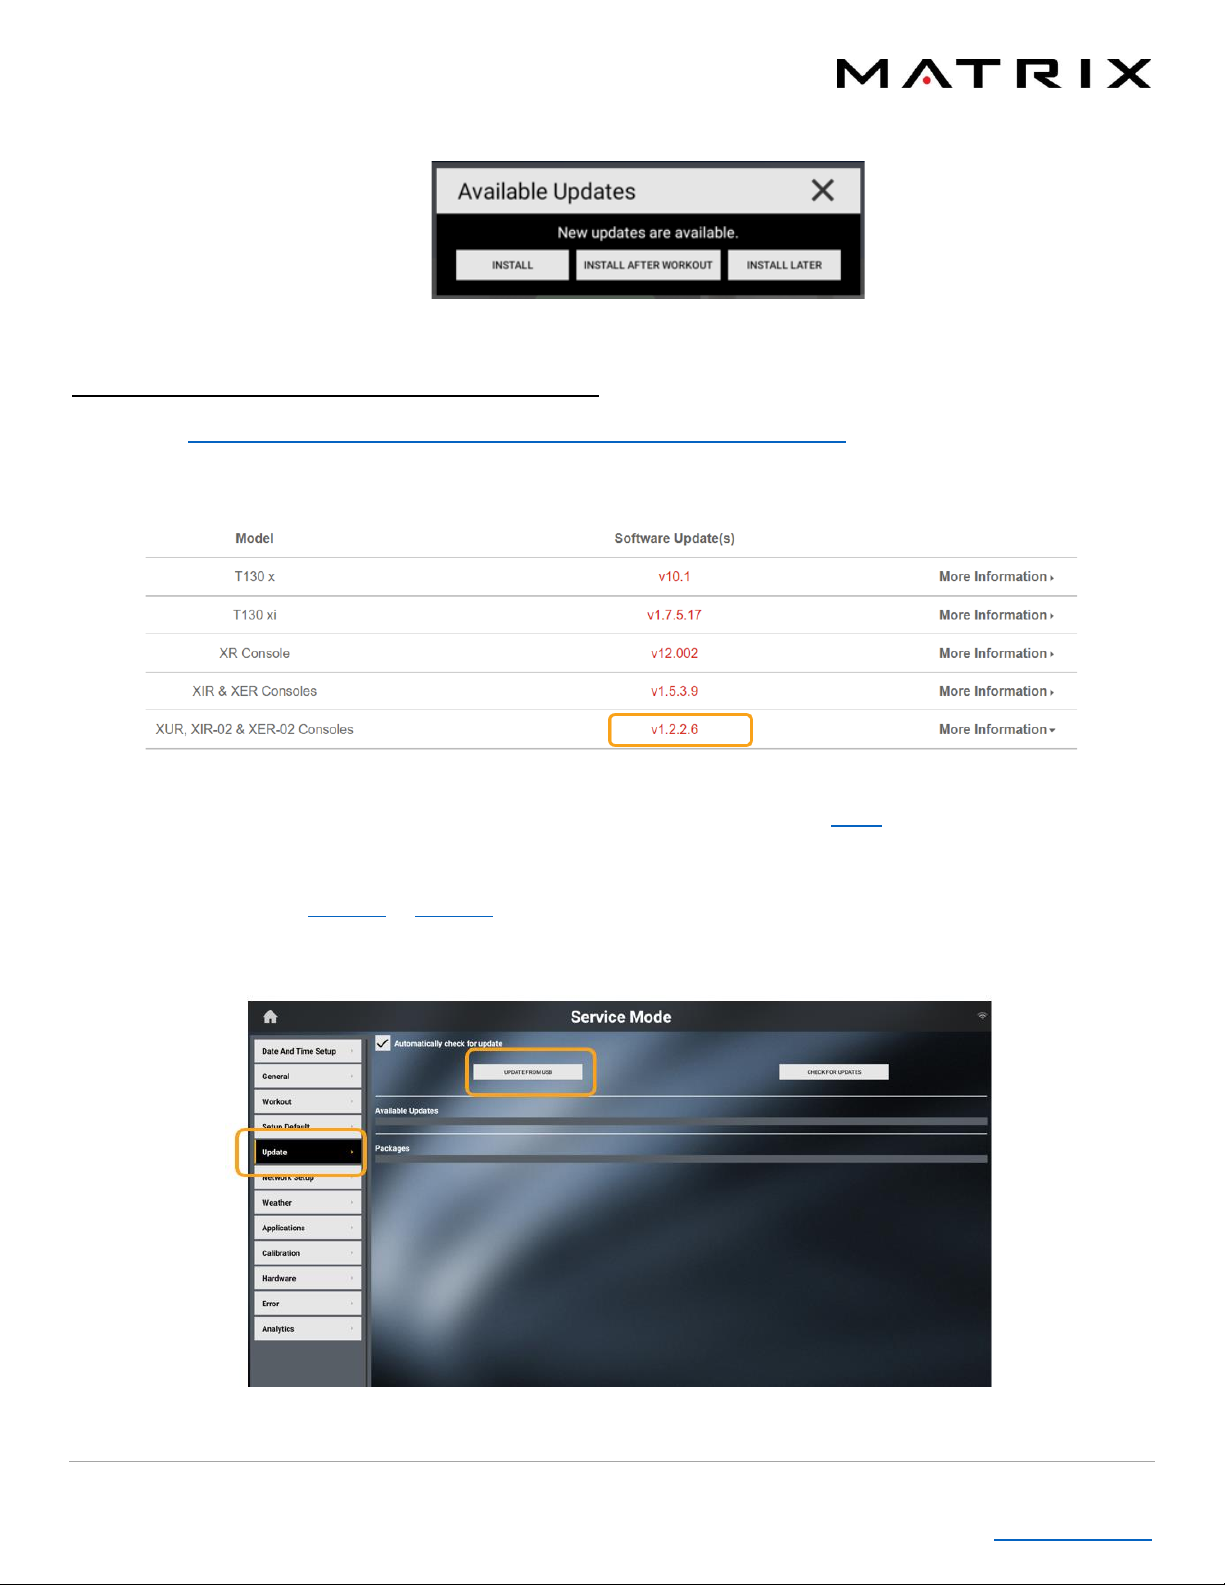
Volume Control - If you begin using an app, TV (optional), or a BT device and the volume is either really high or low,
follow Option 1 to enter the Service Mode (3001) and adjust the volume. Press the Hardware menu from the list on the
left side of the screen. Find Master Volume and slide bar to increase or decrease volume.
Screen Brightness –If your screen is too bright or too dim, follow Option 1 to enter the Service Mode (3001) and adjust
brightness. Press the Hardware menu from the list on the left side of the screen. Find Backlight Brightness and slide the
bar to increase or decrease brightness.