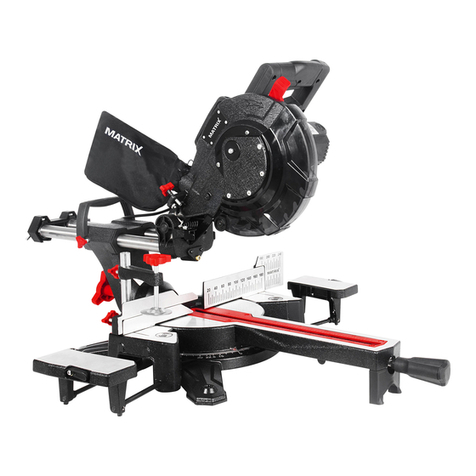
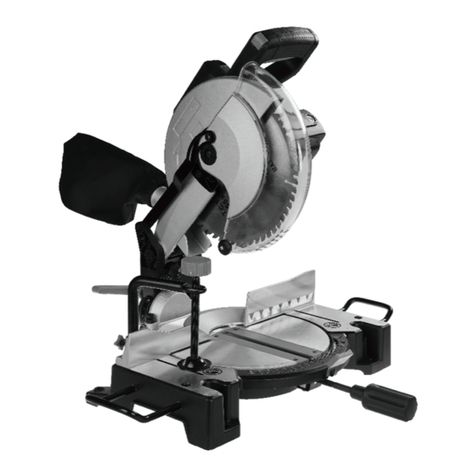
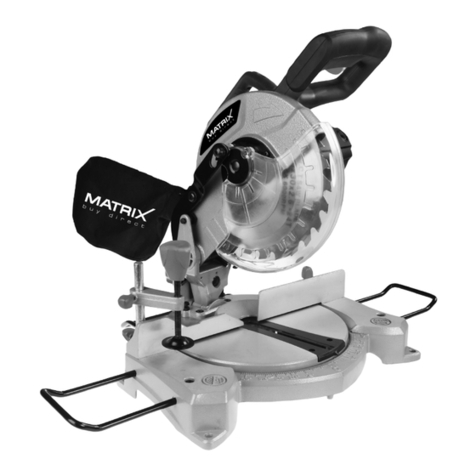
Matrix JS-1205C1 User manual

JS-1205C1 Art.-Nr.: 59695041
Guide de l'utilisateur
Scie à onglets
F
User's manual
Mitre Saw
GB
Customer Service / Service à la clientèle: 1-866-206-0888
Notre personnel du service à la clientèle est disponible
pour vous aider. Pour obtenir de l’aide pour le montage de
votre produit, pour signaler des pièces endommagées ou
manquantes, ou pour toute autre information à propos de ce
produit, veuillez composer notre numéro sans frais.
CONSERVEZ CE GUIDE
Vous aurez besoin de ce guide pour les règles de sécurité, les
procédures d’utilisation et la garantie. Conservez-le avec la
facture d'origine dans un endroit sûr et sec pour référence
future.
Our Customer service staff is available to help you. For help
with product assembly, to report damaged or missing parts,
or for any other information about this product, please call our
toll-free number.
SAVE THIS MANUAL
You will need this manual for safety measures, operating
instructions et warranty information.. Keep this manual and
the original sales invoice in a safe, dry place for future
reference.

2
1
23
2 1
6
7
10
3
14
8
16
15
5
12
14
11
18
4
1
17
13
17
20
19
9

3
45
67
89
1
2
13
10
7
bcd
a
15 16
18
17

4
Read the entire text of the
operating instructions prior to the
assembly and operation of the
device.
These operating instructions are intended
to make it easier for you to get familiar with
your tool and maximize its use.
The operating instructions contain important
notes on how to work safely, properly and
economically with your machine and how
to avoid dangers, save repair costs, reduce
downtime, and increase the reliability and
working life of the machine.
In addition to the safety regulations
contained herein, you must in any case
comply with the applicable regulations of
your country with respect to the operation
of the machine.
Put the operating instructions in a clear
plastic folder to protect them from dirt and
humidity, and store them near the machine.
The instructions must be read and carefully
observed by each operator prior to starting
the work. Only persons who have been
trained in the use of the machine and have
been informed on the related dangers and
risks are allowed to use the machine. The
required minimum age must be met.
In addition to the safety notes contained in
the present operating instructions and the
special regulations of your country, the
generally recognized technical rules for the
operation of wood working machines must
be observed.
Attention!
Read and understand all instruct-
ions before using this tool.
Technical data
Size of saw blade: 305 mm/12"
No load speed: 5000 RPM
Number of teeth: 40T
Mitre stops 45°, 30°, 22,5°, 15°, 0°,
15°, 22,5°, 30°, 45°
Weight 39 lbs
Motor V/Hz 120 V ~ 60 Hz
Rated Current: 15 A
Subject to technical modications!
The height of the work piece must be at
least 3 mm.
Make sure that the work piece is always
secured with the clamping device.
General notes
• After unpacking, check all parts for any
transport damage. Inform the supplier
immediately of any faults. Make sure the
delivery is complete.
• Before putting into operation, familiarize
yourself with the machine by carefully
reading these instructions.
• Use only original accessories, wearing or
replacement parts.
• When ordering, include our item number
and the type and year of construction of the
machine.
Wear hearing protection.
Wear eye protection.
Wear breathing protection.

5
GB
General Safety Notes
• Provide adequate lighting in the
workplace.
• Use the clamping device to secure the
work piece.
• Follow the instructions for changing
cutting accessories.
• Keep handles dry and free from oil and
grease.
• Distribute the safety instructions to all
persons working on the machine.
• Keep all safety and hazard warnings
on the machine in complete and legible
condition at all times.
• Check power cords. Do not use the tool if
the power cord is damaged.
• Make sure that the machine is stable and
on solid ground.
• Take care when working: there is risk of
injury to ngers, hands and eyes.
• Keep children away from the machine
when it is plugged in.
• When the machine is being operated, all
guards and covers must be properly tted.
• The operator must be at least 18 years
old. Apprentices must be at least 16 years
old and should be supervised when using
the machine.
• Persons working on the machine should
not be distracted.
• Keep the machine work station clear of
chips and woodwaste.
• Wear tight-tting clothing. Take off jewelry,
rings and watches.
• Wear a cap or hairnet to protect long hair.
• The safety devices on the machine must
not be dismantled or destroyed.
• Perform retting, adjustment,
measurement and cleaning work only when
the engine is turned off. Unplug and wait for
the rotating parts of the tool to come to a
complete standstill.
• Switch off the machine when
troubleshooting. Unplug the machine.
• Installation, repair and maintenance work
on the electrical installation may only be
carried out by qualied professionals.
• All protective and safety equipment must
be immediately re-installed after repairs
and maintenance are completed.
• Do not expose the machine to moisture
and do not use near ammable liquids or
gases.
• Take care during machine operation.
Use common sense when working. Do not
use the power tool when you are tired or
distracted.
• Never use outdoors when the general
weather and environmental conditions do
not allow it (e.g. charged atmospheres,
during a lightning storm or when it is
raining).
• Wear appropriate clothing: Do not wear
wide sleeves, scarves, neckties, necklaces,
or bracelets, which could get caught in the
moving machine parts.
• Always use personal safety devices:
appropriate regulation goggles, well-tting
gloves, outer or inner ear protection and a
hood that covers the hair if necessary.
• Pay attention to the power cable: it must
never catch on the machine or cause the
machine to become unplugged.
Protect it from sharp edges, oil and
overheating.
• If an extension cord is needed, use only
approved products.
• Guard against electric shock: avoid
contact with grounded objects such as
pipes, radiators and refrigerators.

6
• Keep your work area clean.
• Do not overload the power tool - you will
work more safely within an appropriate
output range.
• Wear safety glasses and a dust mask
when carrying out work that generates dust.
• Always connect the dust collection device
every time you work.
• Do not use the cable for purposes for
which it was not intended. Do not use it
to pull the plug from the socket. Keep the
cable away from heat, oil and sharp edges.
• Avoid inappropriate body posture. Keep
proper footing and keep your balance at all
times.
• Do not leave any wrenches or key tools in
the machine.
Before turning the machine on, make sure
that adjusting keys and wrenches have
been removed.
• Store unused power tools safely. They
should be stored in a dry place, locked or
placed up high so that they are out of reach
of children.
• Use the correct power tool for the task at
hand.
• Do not use low output machines for heavy
work.
• Do not use the power tool for purposes for
which it was not intended.
• When working outdoors, non-skid
footwear is recommended.
• Take good care of tools. Keep cutting
tools sharp and clean for better and safer
working conditions.
• Regularly check the power tool‘s power
cord and have it replaced by a certied
technician if damaged.
• Inspect extension cords regularly and
replace them if they are damaged.
• Avoid accidental starting of the machine.
• Make sure that the switch is off when
plugging it into the mains.
• Check the power tool for damage.
• Before further use of the power tool,
safety devices or slightly damaged parts
should be carefully inspected for proper
and intended function.
• Verify that the moving parts work properly
and do not jam and check that there are no
damaged parts. All parts must be installed
correctly and meet all requirements to
ensure the proper operation of the power
tool.
• Damaged safety devices or other
parts must be repaired by an authorized
dealer in accordance with regulations or
replaced, unless otherwise specied in the
instructions.
• Damaged switches must be replaced at a
service station.
• Do not use electric tools with switches that
cannot be turned on and off.
IMPORTANT:
• The use of other service tools and other
accessories can mean a risk of personal
injury.
• Your power tool should be repaired by a
qualied electrician.
• This power tool complies with the relevant
safety regulations.
Repairs may only be performed by
a qualied electrician, using original
replacement parts, otherwise injury to the
user may occur.
Additional safety notes for mitre saws
• Do not use deformed or damaged blades.
• Do not operate the saw without guards in
place.
• Replace the table insert when worn.

7
• The saw should only be used to cut wood,
wood-like materials and plastics.
• Use only the manufacturer‘s
recommended saw blades that meet the
EN847-1 standard.
• Attach a dust collector to your mitre saw
during operation.
• Select the blades according to the
material to be cut.
• Check the maximum depth of cut.
• When cutting longer pieces always use
extension rails and insert clamps or other
clamping devices for better grip.
• Wear ear protection.
• The operator must stand in front of the
machine.
• Use the clamping device to secure the
workpiece.
• Turn off the power tool if the blade gets
stuck in the workpiece or the workpiece
gets wedged.
• Warning: Do not use blades made of high
speed steel.
• Keep the oor area free of loose particles
such as wood chips and cutoffs.
• Make sure that the blade speed indicated
on its label is at least as high as that of the
saw speed.
• Use gloves when handling saw blades
and rough materials.
• Be sure to use only shims and spindle
rings that are suitable for the purpose
specied by the manufacturer.
• Warning: Do not remove cuttings or other
parts of the work piece from the cutting
area while the machine is running and the
saw has not yet come to a complete stop.
• Always clamp the work piece to the saw
table.
• Make sure that the machine is sitting
securely before beginning to saw.
WARNING! Noise can be harmful to your
health. If a sound level of 85dB (A) is
exceeded, ear protection must be worn.
Before each use, all guards and other
parts should be carefully inspected to see
whether they still fulll their functions.
Check for alignment, smooth operation,
breakage or other damage that could impair
function. A damaged part should either be
immediately and professionally repaired or
replaced.
Hazard from blocking work pieces or parts!
If blockage occurs, please proceed as
follows:
1. Switch the device off
2. Unplug it
3. Wear gloves
4. Fix blockage with appropriate tools.
Parts list
Parts list refers to gures on pages 2 and 3.
1 Handle
2 Start switch
3 Base
4 Joint for casing / base
5 Rotary table
6 Motor
7 Saw blade
8 Table insert
9 Saw blade guard, xed
10 Saw blade guard, moveable
11 Chip bag
12 Clamping jaw
13 Locking button
14 Work piece support
15 Latched position lever
16 Locking grip
17 Locking screw
18 Locking screw for Drag guide
19 Scale
20 Indicator

8
Operating instructions
Proper use
• The machine must only be used in
technically perfect condition in accordance
with its designated use and the instructions
set out in the operating manual, and
only by safety-conscious persons who are
fully aware of the risks involved in operating
the machine. Any functional disorders,
especially those affecting the safety of
the machine, should therefore be rectied
immediately.
• Any other use exceeds authorization. The
manufacturer is not responsible for any
damages resulting from unauthorized
use; risk is the sole responsibility of the
operator.
• The safety, work and maintenance
instructions of the manufacturer as well as
the technical data given in the calibrations
and dimensions must be adhered to.
• Relevant accident prevention regulations
and other, generally recognized safety-
technical rules must also be adhered to.
• The machine may only be used,
maintained, and operated by persons
familiar with it and instructed in its operation
and procedures. Arbitrary alterations to the
machine release the manufacturer from all
responsibility for any resulting damages.
• The machine may only be used with
original accessories and tools made by the
manufacturer.
Remaining Hazards
The machine has been built using
modern technology in accordance with
recognized safety rules. Some remaining
hazards, however, may still exist.
• Only process selected woods without
defects such as: Branch knots, edge
cracks, surface cracks. Wood with such
defects is prone to splintering and can be
hazardous.
• Wood which is not correctly glued can
explode when being processed due to
centrifugal force.
• Trim work piece to a rectangular shape,
center and correctly secure before
processing. Unbalanced work pieces can
be hazardous.
• Long hair and loose clothing can be
hazardous when the work piece is rotating.
Wear personal protective gear such as a
hair net and tight tting work clothes.
• Saw dust and wood chips can be
hazardous. Wear personal protective gear
such as safety goggles and a dust mask.
• The use of incorrect or damaged power
cables can lead to injuries caused by
electricity.
• Even when all safety measures are taken,
some remaining hazards which are not yet
evident may still be present.
• Remaining hazards can be minimized by
following the instructions in "Safety
Precautions", "Proper Use" and in the entire
operating manual.
• Do not force the machine unnecessarily:
excessive cutting pressure may lead to
rapid deterioration of the blade and a
decrease in performance in terms of nish
and cutting precision.
• When cutting aluminum and plastics
always use the appropriate clamps: all work
pieces must be clamped down rmly.
• Avoid accidental starts: do not press the
start button while inserting the plug into the
socket.
• Always use the tools recommended in this
manual to obtain the best results from your
mitre saw.
• Always keep hands away from the work
area when the machine is running; before
performing tasks of any kind release the
main switch button located on the handgrip,
thus disconnecting the machine.
9
Assembly
WARNING! For your own safety, only
insert the mains plug in a socket after
you have completed all assembly steps,
and read and understood the safety and
operating instructions.
Take the saw out of its packing and position
it on the work bench.
Remove the saw from the packaging and
place it on a workbench. (Positioning of
the saw on the workbench - see next page
under "POSITIONING / WORKSPACE")
Assembling the Saw Dust Bag
• Press the aps of the metal ring together
and attach it to the discharge opening in the
engine area.
Appropriate Usage
Intended Usage
The machine cuts:
• Wood and wood-like materials
• Plastic
Inappropriate Usage
The machine is not suitable for:
• Ferrous materials, steel and cast iron, as
well as all other types of materials that are
not listed, especially food.
• Compound cuts without protection.
• Materials which are larger than the
indicated cutting capacities:
0°x0° 3 1/2 x 11 3/4 IN (90X300 mm)
45°x0° 3 1/2 x 7 7/8 IN (90X200 mm)
0°x45° 1 3/4 x 11 3/4 IN (45X300 mm)
45°x45° 1 3/4 x 7 7/8 IN (45X200 mm)
Start-up
Observe the safety notes in the
operating instructions before operating
the machine.
REMOVAL OF PACKAGING
Remove the box used to protect the
machine during transportation and keep it
intact for future transportation and storage.
TRANSPORT
In case the machine needs to be
transported put it in the original packing in
which it was delivered. See to it that
it is placed in the correct position (follow
signs on box).
If possible secure the box with straps to
avoid unintended movement or loss of parts
of the machine.
POSITION/WORK STATION
Place the machine on a work bench or on a
sufciently at base/pedestal to ensure the
best possible stability.
Bearing in mind ergonomic criteria, the
ideal height of the bench or of the base
should be such that the base surface or the
upper work surface is between 90 and 95
cm. from the ground.
Always ensure that there is at least 80
cm. of manoeuvring space in all directions
around the machine in order to perform
all necessary cleaning, maintenance
and adjustment operations safely with
a sufcient amount of space available.
WARNING: Ensure the machine is placed
in a suitable position both in terms of
ambient conditions and lighting. Always
bear in mind that overall ambient conditions
are of fundamental importance to prevent
accidents.
ELECTRICAL CONNECTIONS
Check that the electrical system to which
the machine is connected is grounded in
compliance with voltage safety regulations
and that the socket is in perfect condition.
The electrical system must be tted with a
GFCI device to safeguard all conductors
from short circuits and overload.
The selection of this device should be in line
with the following electrical specications of

10
the machine stated on the motor.
NOTE: Your mitre saw’s electrical system
is equipped with an undervoltage relay
which automatically opens the circuit
when the voltage falls below a minimum
pre-established limit and which prevents
the self-reset of machine functions when
voltage returns to normal levels.
If the machine stops involuntarily, do not be
alarmed.
Make sure that there has not been a
voltage failure in the electrical system.
ADJUSTMENTS
ATTENTION: All the adjustment procedures
illustrated below must be performed when
the machine‘s engine is off.
Rotary table 0°- 45° (Fig. 7).
By turning the table, the mitre saw can be
moved to the left- and right- hand side. The
rotary table can be quickly and precisely
set. For swinging the table, loosen the
locking grip (16) by approx. 2 turns and
press the latched position lever (15) to the
desired angle. Then secure with release the
latched position lever (15).
Tilting the Saw Unit (Fig. 3)
The saw unit can be tilted up to an angle of
45º.
Loosen the locking screw (17) on the back
of the machine and, using the scale, tilt the
unit to the desired angular position.
The angle can be determined using the
indicator (20) on the scale (19). Finally, the
locking screw (17) must be securely re-
tightened.
Cutting length adjustment (Fig. 9)
For cutting widths up to approx. 100 mm
it is possible to x the saw’s drag function
with the locking screw for drag guide (18)
in rear position. If the cutting width exceeds
100 mm you must ensure that the locking
screw for drag guide (18) is slackened and
that the motor (6) can be moved.
Operations
After having performed all the above
procedures and operations, you may begin
cutting.
Warning: Always keep hands away from
the cutting area and do not try to approach
it when the machine is running.
Cross-cutting Operation (Fig. 4)
• Release the locking button (13)
• Raise the saw unit using the handle
(1) until the unit locks into the uppermost
position.
• Press the work piece uniformly against
your left side, while ensuring that your hand
is outside the cutting zone of the saw blade.
• With the right hand on the handle (1), so
that the unit can be swiveled downward.
• After pressing of the start switch (2) the
engine starts running.
• Apply the saw blade slowly to the work
piece and cut through it by applying slight
pressure.
• Swing the unit back into the starting
position until it locks into place.
• Release the handle (1), so that the motor
shuts off.
Changing the Saw Blade (Fig. 5)
• Turn the saw off and unplug it from its
power source.
• Put the sawing unit in the upper position.
• Release the movable saw blade guard (10)
and lifting the saw blade guard at the same
time to free the saw blade.
• Release the saw blade xing screw
(Attention: left-handed thread).
• After remove bolt (a,b) and screw (c)
loose the saw blade ange (d).
• Take off the saw blade with caution (risk of
injury through saw blade teeth).
• Place the new saw blade onto the inner

11
saw blade ange, observing the turning
direction of the saw blade.
• Put the outer saw blade ange in place
and rmly tighten the screw.
• Return the saw blade guard to the correct
position.
Electrical Connection
The mitre saw's electric motor is
completely wired ready for operation.
The customer’s connection to the power
supply system, and any extension
cables that may be used, must comply
with local regulations.
Important:
The motor is automatically switched off in
the event of an overload. The motor can
be switched on again after a cooling down
period that can vary.
Defective Electrical Connection Cables
Electrical connection cables often suffer
insulation damage.
Possible causes are:
• Pinch points when connection cables are
run through window or door gaps.
• Kinks resulting from incorrect attachment
or laying of the connection cable.
• Cuts resulting from running over the
connecting cable.
• Insulation damage resulting from forcefully
pulling out of the wall socket.
• Cracks through aging of insulation.
Such defective electrical connection cables
must not be used as the insulation damage
makes them extremely hazardous.
Check electrical connection cables regularly
for damage.
Make sure the cable is disconnected from
the mains when checking.
Electrical connection cables must comply
with the regulations applicable in your
country.
Single-phase Motor
• The mains voltage must match the voltage
specied on the motor’s rating plate.
• Extension cables up to a length of 25 m
must have a cross-section of 1.5 mm2, and
beyond 25 m at least 2.5 mm2.
• The connection to the mains must be
protected with a 16 A slow-acting fuse.
Only a qualied electrician is permitted to
connect the machine and complete repairs
on its electrical equipment.
In the event of enquiries please specify the
following data:
• Motor manufacturer
• Type of motor voltage
• Data recorded on the machine’s rating
plate
• Data recorded on the switch’s rating plate
If a motor has to be returned, it must always
be dispatched with the complete driving unit
and switch.
Accessories
SAWDUST SUCTION REMOVAL SYSTEM
The mitre saw is equipped with a suction
connector, so that it can be connected to a
suction system. Optionally, a dust bag can
also be installed.
The hose of the suction system is fastened
to the suction connector with a hose clamp.
We recommend that you empty the bag or
the container of the suction assembly
from time to time and clean the lter.
The air ow rate of the suction system must
be at least 30 m per second.
Maintenance
If service personnel must be brought in
for exceptional service or repairs during
the warranty period and thereafter,
please contact a service provider
recommended by us or contact the
manufacturer directly.
• Overhauls, maintenance work,
cleaning, as well as the elimination of any
malfunctions must only be undertaken after

12
turning off the motor.
• All protective and safety equipment must
be reinstalled immediately upon completion
of any repair or maintenance work.
REGULAR MAINTENANCE
The regular maintenance described above
and in the paragraph below can be carried
out by unskilled personnel.
• Do not oil the mitre saw because
cutting must be always be carried out
in dry conditions (including the cutting
of aluminum and aluminum alloys); all
rotating parts are self-lubricating.
• During maintenance, wear protective gear
if possible (accident-prevention goggles
and gloves).
• Remove cuttings when necessary both
from the cutting area, work surfaces and
support bases.
Use of a vacuum cleaner or brush is
recommended.
WARNING: Do not use compressed air
jets!
• Regularly check blade conditions: if
difculties should arise during cutting, have
it sharpened by skilled personnel or replace
it if necessary.
ASSISTANCE
When in need of skilled personnel for
special maintenance, or for repairs, both
during and following the guarantee period,
always apply to authorized centres for
assistance or directly to the manufacturer if
there is no authorized centre in your area.
Disposal of the machine
Once its operating activity is nished, the
disposal of the machine must take place
through a standard Collection and Disposal
Centre for industrial waste.
Please contact your municipality for
available services in your area.

13
Troubleshooting
Problem Possible Cause Help
The motor does not
run.
Faulty motor, power supply cable
or plug.
Burned out fuses.
Have the machine checked by
skilled personnel. Do not try to
repair the machine yourselves
as it may be dangerous. Check
the fuses and replace them if
necessary.
The motor starts
slowly and does not
reach running speed.
Low-power supply voltage.
Damaged windings. Burned out
capacitor.
Ask the Electricity Distributor
to check the voltage available.
Have the machine motor
checked by skilled personnel.
Have the capacitor replaced by
skilled personnel.
Excessive motor
noise.
Damaged windings. Faulty motor. Have the motor checked by
skilled personnel.
The motor does not
reach full power.
Overloaded circuit due to lighting,
utilities or other motors.
Do not use other utilities or
motors on the circuit to which the
cutting-off machine is connected.
Motor overheats
easily
Overload of the motor; inadequate
cooling of the motor.
Prevent overloading the motor
when cutting; remove dust from
the motor to ensure an optimum
cooling of the motor.
Decrease in cutting
power when
The saw blade is too small
(sharpened too often).
Re-adjust the end stop of the
saw unit.
The saw cut is rough
or wavy.
The saw blade is dull; the
tooth shape is not suited to the
thickness of the material.
Re-sharpen the saw blade or use
an appropriate saw blade.
The work piece rips
or splinters.
The cutting pressure is excessive
or the saw blade is not suited to
the application.
Use the correct saw blade.
TROUBLESHOOTING

14
No. Description Qty
1Bolt M8X30 1
2Nut 2
3 Slide lock knob 1
4 Spring 1
5Washer 1
6Arm 1
7 Flange 2
8 Pole 2
9 back stand 1
10 Bolt 1
11 Line button 2
12 Bolt 4
13 Bolt 4
14 Washer 2
15 Bevel lock knob 1
16 Nut 2
17 Washer 2
18 Washer 1
19 Pointer 1
20 Washer 5
21 Washer 4
22 Bolt 1
23 Pole 1
24 Knob 1
25 Wing bolt 2
26 Clamp 1
27 Clamp slice 1
28 Block circle 1
29 Bolt 2
30 Washer 8
31 Wing bolt 2
32 Right sliding Fence 1
33 Fence 1
34 left sliding fence 1
35 Support arm 2
36 Base 1
37 Bolt 1
38 Knob 3
39 Rubber foot 4
40 locking bar 1
41 Washer 1
42 Spring 2
43 Mitre release handle 1
44 Mitre lock knob 1
45 Bolt 1
46 Table 1
47 Nut 1
48 Nut 7
49 Spring card 1
50 Pointer 1
51 scale label 1
52 bolt 1
53 bolt 1
54 Change block 1
55 Washer 1
56 Nut 1
57 Table insert 1
58 Release knob 1
59 Spring 1
60 Pin 1
61 Pin 1
62 Bearing 3
63 Stand 1
64 Bolt 1
Parts list

15
70 Needle bearing 1
71 Block circle 1
72 Gear 1
73 Front cover 1
74 bearing 1
75 Bearing cover 1
76 Washer 2
77 Bolt 2
78 Output shaft 1
79 Half round key 1
80 Inner ange 1
81 Blade 1
82 Outer ange 1
83 Arbor bolt 1
84 Blade cover 1
85 Dust collection bag 1
86 Gear cover 1
87 Spindle lock button 1
88 Spring 1
89 Block circle 1
90 Bearing 1
91 Rotor 1
92 Bearing 1
93 Block circle 1
94 Bolt 2
95 Stator 1
96 Motor house 1
97 Brush holder cover 2
98 Carbon brush 2
99 Brush holder 2
100 Washer 4
101 Washer 4
102 Bolt 4
103 Bolt 2
104 Carry handle 1
105 Bolt 4
106 Up handle 1
107 switch button 1
108 Switch 1
109 handle 1
110 Down handle 1
111 Press line plank 1
112 Bolt 1
113 Cable shell 1
114 Power cord 1
115 Bolt 2
116 Nut 1
117 Small cover slice 1
118 Big cover slice 1
119 Bolt 1
120 Washer 1
121 Bolt 1
122 Coil spring 1
123 Blade guard 1
124 Plate 1
125 Bolt 1
65 Spring 1
66 Pin 1
67 Plastic cover 1
68 Guard retraction arm 1
69 Bolt 2

16
Schematic drawing

17
Warranty
Thank you for investing in a Matrix power
tool.These products have been made to
demanding, high-quality standards and
are guaranteed for domestic use against
manufacturing faults for a period of 36 months
from the date of purchase.This guarantee
does not affect your statutory rights. In case of
any malfunction of your tool (failure, missing
part, etc.), please contact one of our service
technicians by using our toll-free service line
at 1-866-206-0888 Ext. 2 from 8 AM to 6 PM,
Monday to Friday, Eastern time. RONA reserves
the right to repair or replace the defective tool,
at its discretion. The product is guaranteed for
36 months if used for normal trade purposes.
Any guarantee is invalid if the product has
been overloaded or subject to neglect,
improper use or an attempted repair other
than by an authorized agent. Heavy-duty, daily
professional or hire usage are not guaranteed.

18
Lire les instructions d’utilisation
au complet avant le montage et
l'utilisation de l'outil.
Ces instructions d’utilisation ont pour but
de vous familiariser avec l’appareil et
d’utiliser toutes les possibilités offertes.
Les instructions d’utilisation comprennent
d’importantes consignes pour un travail
sécuritaire, conforme et économique avec
l’appareil. Elles indiquent comment éviter
des dangers et des frais inutiles pour des
réparations, comment réduire le temps
d’arrêt et comment augmenter la abilité et
la durée de vie de l’appareil.
En plus des consignes de sécurité gurant
dans ces instructions d’utilisation, il faut
respecter, en tout temps, la réglementation
en vigueur dans votre pays en ce qui a trait
à l’utilisation de l’appareil.
Placez les instructions d’utilisation à
l’intérieur d’une pochette de plastique pour
les protéger contre la saleté et l’humidité,
doivent être gardées près de l’appareil.
Elles doivent être lues par chaque opérateur
avant qu‘il ne commence à travailler et elles
doivent être minutieusement respectées.
Seules des personnes ayant été instruites
sur l’utilisation de l’appareil et informées
des dangers possibles ont le droit d’utiliser
l’appareil. Il faut respecter l’âge minimum.
En plus des consignes de sécurité gurant
dans les présentes instructions d’utilisation
et des réglementations en vigueur dans
votre pays, il faut respecter les règles
techniques généralement reconnues pour
l’utilisation d’appareils pour le travail du
bois.
Spécications techniques
Taille de la lame de scie: 305 mm/12"
Vitesse à vide: 5000 tr/min
Nombre de dents: 40
Arrêts d'onglet:
45°, 30°, 22,5°, 15°, 0°,
15°, 22,5°, 30°, 45°
Poids: 39lbs
Moteur V/Hz 120 V ~ 60 Hz
Consommation de courant A 15 A
Sous réserve de modications
techniques!
La hauteur de la pièce à travailler doit
être d’au moins 3 mm.
Assurez-vous que la pièce à travailler
soit toujours bien maintenue avec le
dispositif de blocage.
Conseils généraux
• Vériez dès la livraison qu’aucune pièce
n’a été détériorée pendant le transport. En
cas de réclamation, informez aussitôt le
livreur. Nous ne pouvons tenir compte des
réclamations ultérieures.
• Vériez que la livraison est bien complète.
• Familiarisez-vous avec l’appareil avant
la mise en marche en lisant le guide
d’utilisation.
• Pour les accessoires et les pièces
standards, n’utilisez que des pièces
d’origine.
Avant la mise en marche, lire le
mode d’emploi !
Portez un protecteur auditif.
Portez des lunettes de protection.
Portez un équipement de
protection respiratoire.
Attention!

19
• Lors de commandes, vous devez fournir
les numéros d’article, ainsi que le type et
l’année de fabrication de l’appareil.
Mesures de sécurité
• Fournissez un éclairage sufsant sur le
lieu de travail.
• Utilisez le dispositif de blocage pour
maintenir la pièce à couper.
• Suivez les instructions pour changer les
accessoires de coupe.
• Gardez les poignées sèches et exemptes
d’huile et de graisse.
• Distribuez les instructions de sécurité à
toutes les personnes utilisant l’appareil.
• Gardez les mesures de sécurité et les
avertissements au complet et en bon état.
• Vériez les câbles électriques. N'utilisez
pas l'outil si les câbles sont endommagés
ou défectueux.
• Assurez-vous que l’appareil soit bien
stable et placé sur un sol ferme.
• Faites attention lorsque vous travaillez : il
y a un risque de blessure pour les doigts,
les mains et les yeux.
• Gardez l’appareil hors de portée des
enfants lorsqu’il est branché.
• Lorsque l’appareil est en marche, tous
les accessoires et dispositifs doivent être
correctement installés.
• L’utilisateur doit être âgé d’au moins 18
ans. Les apprentis doivent être âgés d’au
moins 16 ans et être supervisés lorsqu’ils
utilisent l’appareil.
• Les personnes travaillant avec l’appareil
ne doivent pas être distraites.
• Gardez la station de travail de l’appareil
exempte de copeaux et de débris de bois.
• Portez des vêtements ajustés. Retirez les
bijoux, les bagues et les montres.
• Portez un let à cheveux an de protéger
les cheveux longs.
• Les dispositifs de sécurité de l’appareil ne
doivent pas être démontés ou détruits.
• Effectuez les travaux de remontage,
d’ajustement, de mesure et de nettoyage
seulement lorsque le moteur est arrêté et le
câble débranché. Débranchez et attendez
que les parties en rotation de l’appareil
soient complètement immobiles.
• Éteignez l’appareil en cas de problèmes.
Débranchez l'appareil lorsqu'il n'est pas
utilisé.
• Les travaux d’installation, de réparation
et d’entretien concernant l’installation
électrique peuvent seulement être effectués
par des professionnels qualiés.
• Tous les équipements de protection et
de sécurité doivent être immédiatement
réinstallés à la n des travaux de réparation
ou d’entretien.
• N’exposez pas l’appareil à l’humidité et ne
l’utilisez pas à proximité de liquides ou gaz
inammables.
• Faites attention lors du fonctionnement de
l’appareil.
Faites preuve de bon sens lorsque vous
travaillez.
N’utilisez pas l’appareil électrique lorsque
vous êtes fatigué ou distrait.
• N’utilisez jamais l’appareil à l’extérieur
lorsque les conditions météorologiques
et environnementales générales ne le
permettent pas (p. ex. : en cas d’orage ou
lorsqu’il pleut).
• Portez des vêtements adéquats : ne
portez pas des manches larges, une
écharpe, une cravate, des colliers ou de
bracelets qui pourraient se coincer dans les
parties mobiles de l’appareil.
F

20
• Utilisez toujours des dispositifs de sécurité
personnelle : des lunettes de protection
selon la réglementation en vigueur, des
gants à la bonne taille, des protections
auditives internes et externes et un bonnet
qui couvre les cheveux si nécessaire.
• Faites attention au câble d’alimentation :
il ne doit jamais être coincé dans l’appareil
ou causer le débranchement de l’appareil.
Protégez-le des bords coupants, de l’huile
et de la surchauffe.
• Si une rallonge est nécessaire, utilisez
alors uniquement des produits homologués.
• Mise en garde contre les décharges
électriques : évitez le contact avec les
objets au sol comme les tuyaux, les
radiateurs et les réfrigérateurs.
• Gardez votre surface de travail propre.
• Ne surchargez pas l’appareil électrique –
vous travaillerez de manière plus sûre au
rythme pour lequel l'outil a été conçu.
• Portez des lunettes de protection et
un masque antipoussière lorsque vous
effectuez des travaux qui génèrent de la
poussière.
• Branchez toujours le dispositif de
récupération de la poussière lorsque vous
travaillez.
Règles de sécurité supplémentaires
pour les scies à onglets
• N’utilisez pas de lames déformées ou
endommagées.
• N‘utilisez pas la scie si les protections ne
sont pas en place.
• Remplacez la plaque d'insertion de la
lame lorsqu’elle est usée.
• La scie doit uniquement être utilisée pour
couper du bois, des matériaux semblables
au bois et du plastique.
• Utilisez uniquement les lames de scie
recommandées par le fabricant qui sont
conformes à la norme EN847-1.
• Raccordez un collecteur de poussière à
votre scie à onglets lors du fonctionnement.
• Sélectionnez les lames selon le matériau
à couper.
• Vériez la profondeur maximale de coupe.
• Utilisez des rails d’extension et des pinces
à insérer ou d’autres dispositifs de blocage
pour un meilleur maintien lorsque vous
coupez des pièces plus longues.
• Portez une protection auditive.
• L’utilisateur doit se placer en face de
l’appareil.
• Arrêtez l’appareil si la lame se coince
dans la pièce travaillée ou si la pièce
travaillée se retrouve coincée.
• Avertissement : n’utilisez pas de lames
fabriquées en acier rapide.
• Gardez le sol exempt de particules telles
que des copeaux et des débris de bois.
• Assurez-vous que la vitesse de la lame
de scie indiquée sur son étiquette soit au
moins aussi élevée que la vitesse de la
scie.
• Utilisez des gants lorsque vous manipulez
les lames de la scie et les matériaux bruts.
• Assurez-vous d’utiliser seulement des
cales et des accessoires qui sont adaptés
pour les travaux précisés par le fabricant.
• Avertissement : ne retirez pas des débris
ou d’autres parties de la pièce travaillée
de la zone de coupe tant que l’appareil
fonctionne et que la scie ne s’est pas
totalement arrêtée.
• Bloquez toujours la pièce travaillée sur la
table de travail.
• Assurez-vous que l’appareil soit bien
installé avant de commencer à scier.
This manual suits for next models
1
Table of contents
Languages:
Other Matrix Saw manuals

Matrix
Matrix TRS 1200-56 User manual

Matrix
Matrix 92552 User manual

Matrix
Matrix MS 800 User manual

Matrix
Matrix SMS 2200-340 LL-2 Quick start guide

Matrix
Matrix MTS 2050-216 Duo User manual

Matrix
Matrix HM1028R User manual

Matrix
Matrix CS 1200-185 User manual

Matrix
Matrix PS 1000-45 User manual

Matrix
Matrix JF72553B User manual

Matrix
Matrix MCS 500-1 User manual