TM
CONTENTS
CDC71-0970G2
1100424101_DOM
3+
®
INSTRUCTIONS:
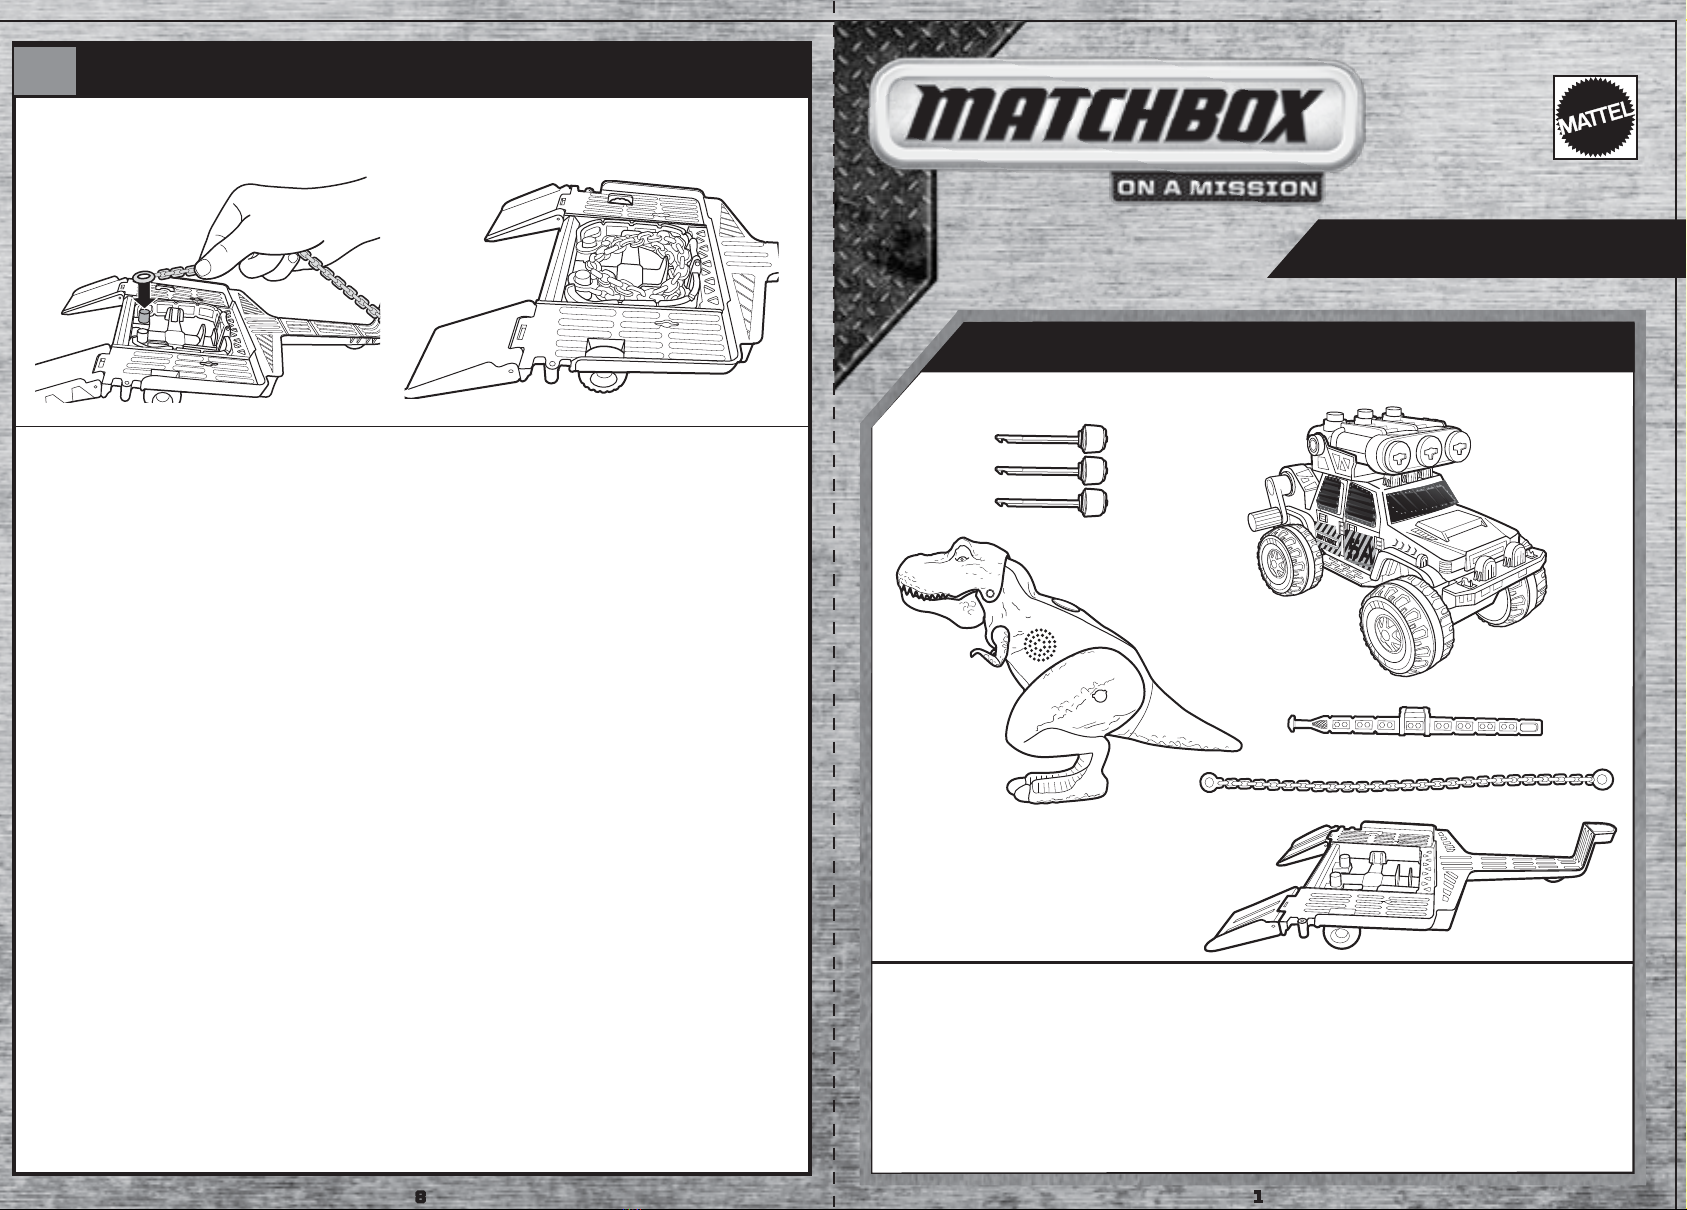
MISSION:™DINO TRAPPER TRAILER™
TO PLAY
2
TO PLAY (CONTD.)
2
STORAGE
3
BATTERY REPLACEMENT BATTERY SAFETY INFORMATION
1
Keep these instructions for future reference as they contain important information.
Z
Z
Z
Z
Z
Z
Z
X
O
I
X = TRY ME
O = OFF
I = ON
11. ATTACH CHAIN TO SECURE DINO.
10. CRANK THE WINCH AND PULL DINO ONTO TRAILER.
12. FOLD RAMPS UP AND TAKE DINO AWAY.
9. ATTACH COLLAR TO DINO.
8. ATTACH HOOK TO COLLAR.7. ATTACH TRAILER AND TRUCK TOGETHER. THEN PULL THE HOOK FROM
THE WINCH.
Includes 3 AG13 (LR44) button cell
batteries for demonstration purposes.
Dispose of batteries safely.
Warning: Do not aim at eyes or face.
Only use projectiles supplied with this
toy. Do not fire at point-blank range.
1. LIFT DINO INTO THE UPRIGHT POSITION AND POWER ON.
1. 2.
DETACH COLLAR AND CHAIN. THEN STORE THEM IN THE TRAILER AFTER PLAY.
5. HIT CHEST TARGET TO TAKE DOWN THE DINO!
2. PRESS BUTTON FOR ROARING SOUNDS AND LIGHT-UP EYES.
4. TRACK DOWN THE DINO. TAKE AIM AND FIRE!
6. DINO FALLS TO SLEEP.
3. LOAD TRANQUILIZER DARTS INTO LAUNCHER.
Protect the environment by not disposing of this product with
household waste (2002/96/EC). Check your local authority for recycling
advice and facilities.
In exceptional circumstances batteries may leak fluids that can cause
a chemical burn injury or ruin your product. To avoid battery leakage:
• Non-rechargeable batteries are not to be recharged.
• Rechargeable batteries are to be removed from the product before
being charged.
• Rechargeable batteries are only to be charged under adult
supervision.
• Do not mix alkaline, standard (carbon-zinc), or rechargeable
(nickel-cadmium) batteries.
• Do not mix old and new batteries.
• Only batteries of the same or equivalent type as recommended are
to be used.
• Batteries are to be inserted with the correct polarity.
• Exhausted batteries are to be removed from the product.
• The supply terminals are not to be short-circuited.
• Dispose of battery(ies) safely.
• Do not dispose of this product in a fire. The batteries inside may
explode or leak.
• Replace the batteries if sounds distort or lights dim.
• Unscrew the battery cover with a Phillips head screwdriver
(not included).
• Remove batteries included for demonstration purposes and dispose
of them safely.
• Install 3 new AG13 (LR44) button cell batteries in the orientation
(+/-) shown.
• Replace battery cover and tighten screw.
• For longer life, use alkaline batteries.
• When exposed to an electrostatic source, the product may
malfunction. To resume normal operation, remove and re-install
the batteries.
NOTE: Changes or modifications not expressly approved by the
manufacturer responsible for compliance could void the user’s authority to
operate the equipment.
This device complies with Part 15 of the FCC Rules.
Operation is subject to the following two conditions: (1) This device may not
cause harmful interference, and (2) this device must accept any interference
received, including interference that may cause undesired operation.
• This equipment has been tested and found to comply with the limits for a
Class B digital device, pursuant to part 15 of the FCC rules. These limits
are designed to provide reasonable protection against harmful interference
in a residential installation. This equipment generates, uses and can radiate
radio frequency energy and, if not installed and used in accordance with
the instructions, may cause harmful interference to radio communications.
However, there is no guarantee that interference will not occur in a
particular installation. If this equipment does cause harmful interference to
radio or television reception, which can be determined by turning the
equipment off and on, the user is encouraged to try to correct the
interference by one or more of the
following measures:
• Reorient or relocate the receiving antenna.
• Increase the separation between the equipment and receiver.
• Connect the equipment into an outlet on a circuit different from that to
which the receiver is connected.
• Consult the dealer or an experienced radio/TV technician for help.
©2015 Mattel. All Rights Reserved. Mattel, Inc., 636 Girard Avenue, East Aurora, NY 14052, U.S.A.
Consumer Services 1-800-524-8697. Mattel U.K. Ltd., Vanwall Business Park, Maidenhead SL6 4UB.
Helpline 01628 500303. Mattel Australia Pty., Ltd., Richmond, Victoria. 3121.Consumer Advisory
Service - 1300 135 312. Mattel East Asia Ltd., Room 503-09, North Tower, World Finance Centre,
Harbour City, Tsimshatsui, HK, China. Tel.: (852) 3185-6500. Diimport & Diedarkan Oleh: Mattel
Southeast Asia Pte. Ltd. , No 19-1, Tower 3 Avenue 7, Bangsar South City, No 8, Jalan Kerinchi, 59200
Kuala Lumpur, Malaysia. Tel: 03-78803817, Fax: 03-78803867.
18
SERVICE.MATTEL.COM
432
6 7
5
O
X I


