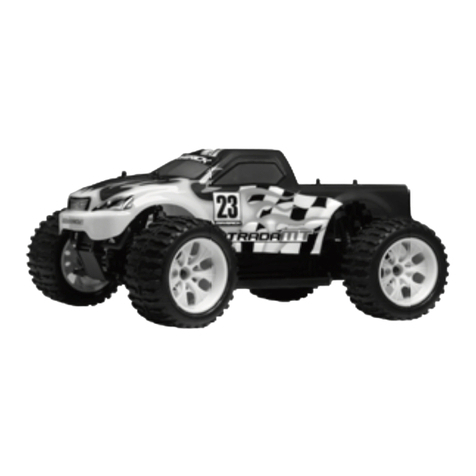
Maverick BlackoutMT User manual

INSTRUCTION MANUAL
MV24999
English: 1 - 9
Français: 10 - 18
Deutsch: 19 - 27
Español: 28 - 36
5050864 015752

Table of contents
Page
Warranty 1
Specifications 2
Recommended Tools 2
Safety Precautions 2
Items required for operation 2
Charging the battery pack 2
Transmitter 3
Installing the receiver battery pack 4
Turning on the R/C Unit 4
Turning off the R/C Unit 4
TrimSetup 4
Fail Safe Operation and Setup 4
Engine Starting 5
Engine Break In and Running 5
Driving 5
Engine Optional Tuning 6
Maintenance after driving 6
Trouble Shooting 7
PartsListing 8
Differential Internals 37
Gearbox Assemblies 38
Steering Assembly 38
Central Transmission Assembly 39
Exploded Diagram Blackout MT 40
Exploded Diagram ME-243 Engine 41
HAVE FUN! But please read this first !!
We know you will have great fun with your model, but to get the best from your purchase please read this information BEFORE you operate the
model.
1
90 Day Component Warranty
We want you to enjoy your purchase, but please read this first!
This product is covered by a 90 day component warranty from date of purchase. If any part of the product fails as a result of faulty manufacture
during this period then we will repair or replace that part at our discretion.
We do not operate a new for old warranty once the product has been used.
Please note this product is not a toy and it is recommended that children 14 and under are supervised by an adult. It is the responsibility of the
parent or guardian to ensure minors are given appropriate guidance and supervision.
If you suspect there is a problem with the product, for whatever reason, it is the user’s responsibility to investigate and take steps to rectify the
problem before further damage occurs.
Not Covered By Warranty
This is a sophisticated, high performance model and should be treated with care and respect. Every effort has been made to make this product as
strong and durable as possible, however due to the nature of this product, it is still possible to break or damage parts through crashing or extreme
use. Components damaged as a result of crash damage, improper use, lack of maintenance or abuse is not covered by the warranty.
How to Claim Against your Warranty
For warranty claims please first contact your supplying retailer. Do not return the product to your distributor without their prior approval. You may
not need to return the product in full, only the damaged component along with a copy of your purchase receipt. In many cases it is faster and more
cost effective for the user to fit the replacement part(s) to the product & therefore we reserve the right to supply parts only in these instances.
Any returned component that is inspected by your distributor and found to have an invalid warranty claim may be subject to an inspection and
handling fee before it can be returned. Any repairs required as a result of neglect or misuse will be charged before any work is carried out on the
product. If you decide not to have any work carried out the distributor reserves the right to charge a handling and a shipping fee.
Please attach your proof of purchase in the manual as you may need it again in the future.

Safety precautions
This product is an authentic radio controlled vehicle (RC vehicle) and it is not a toy. Read and understand this instruction manual thoroughly
before running the model. If you are not familiar with RC vehicles, we recommend that you ask someone familiar with RC vehicles for advice.
• This product uses a mixture of unleaded petrol and 2-stroke oil for fuel. Please use extreme caution when handling petrol.
• Do not run near open flames or smoke while running your model or while handling fuel
• Always store fuel in a well ventilated place, away from heating devices, open flames, direct sunlight or batteries.
• Keep fuel away from children.
• Petrol is flammable and poisonous. Petrol powered model engines emit poisonous vapours. These vapours irritate eyes and can be highly
dangerous to your health.
• You must only use a mixture of petrol and 2-stroke oil as fuel for this engine. Never use glow nitro fuel intended for RC Cars.
• After running, please empty the fuel tank before storing the car.
Never run RC models near people or animals, or on public streets or highways. This could cause serious accidents, personal injuries, and/or
property damage.
Recommended Tools
These tools are not included with the product but are recommended for use whilst working with this vehicle
Hexagonal Screwdrivers 1.5mm, 2.0mm, 2.5mm, 3.0mm, 4.0mm, 5.0mm, Side Cutters, Needle Nose Pliers, Flat Blade & Philips Screwdrivers,
24mm Wheel Wrench, Cross Wrench and Thread lock.
Charging the battery pack
Always use the included charger for the included battery pack. Do not use any other battery packs. Charging time for an empty battery pack is
about 6 hours. Do not charge the battery pack longer than 6 hours to avoid overheating and battery damage.
Cautions
• This charger can be used only for the battery pack included in this kit.
• Do not charge the battery pack for longer than 6 hours. Overcharging generates excessive heat and will damage the battery pack.
• Use the charger with adult supervision. Do not use the charger near water or when wet.
• Do not use the charger if the wire is frayed or worn. If the wire is frayed or worn a short circuit can cause a fire or burns.
• If you are not sure about the level of the battery pack before charging use it in the vehicle until the vehicle slows, leave to cool and then
recharge.
Specifications
2
Items required for operation
8 * AA Batteries for the Transmitter
Unleaded Petrol
2-Stroke Engine Oil
Use Ratio of 25:1 petrol to 2-stroke oil
Engine ME- 243 30CC Engine
Length 740mm
Width 600mm
Height 350mm
Wheel base 516mm
Drive System 4WD
Gear Ratio 12.6:1
Diameter of wheel 212mm
Width of wheel 140mm
Receiver Battery MBX - 24 6V 2500mAh Ni-MH
Fuel Tank Capacity 700CC
Transmitter MTX - 24 2.4 GHz 2Ch Transmitter
Receiver MRX - 24 2.4 GHz 3Ch Receiver
Steering Servo MS - 241 Steering Servo 20kg *2
Throttle/Brake Servo MS - 242 Throttle Servo 9kg

Transmitter
Your Transmitter is an advanced controller designed for the beginner to be easy to use and tune. You will need to follow the steps below to ensure
you prepare the controller correctly for use and understand the adjustment possibilities available.
8. Battery level
indicator
9. Steering reverse
switch
10. Throttle reverse
switch
11. Steering Throw dial
12. Steering End Point
dials (left/right lock)
13. Throttle End Point
dials (low/high points)
8
9
7
10
1112
13
2
1
Neutral
1. Push the trigger
forward to brake
2. Pull the trigger
backwards to go
forwards and speed up
L R
Turn the steering wheel to
the left or right to make the
vehicle turn left or right
1 2
1 2
Throttle Trim
1. Turn anti clockwise for more
brake
2. Turn clockwise for more
throttle
Steering Trim
1. Turn anti clockwise to trim to the
left
2. Turn clockwise to trim to the right
Throttle/Steering Trim
Insert 8 AA batteries into the
marked spaces. Please note the
correct direction of the batteries
Incorrect battery insertion could
lead to damage
Preparing the transmitter
Open the battery holding tray
to expose the empty battery
slots.
1. Aerial
2. Throttle Trim
3. Steering Trim
4. Binding Button
5. Throttle Trigger
6. Steering Control
(wheel)
7. Power Switch
Throttle Trigger
Steering Wheel
End Point Adjustment Dials
Both steering and throttle have high point adjustments which allows you to
adjust left and right steering lock & high and low throttle points. You can also
adjust the overall lock your vehicle has after adjusting your individual side
locks.
All of these adjustment dials require a clockwise movement for more and an
anti clockwise movement for less.
3
Binding the Transmitter and Receiver
You may need to setup your transmitter to ‘bind’ with the receiver if you change to a new receiver or for any reason lose signal.
• Press and hold the bind button and turn on the transmitter
• Release the bind button when the LED on the transmitter starts to flash
• Turn on the car and press the setup button on the receiver
• The LED on the receiver should turn to blue when it is bound to the transmitter
• If the LED on the receiver stays red or flashes you will need to repeat the process
4
1
3
5
2
6

4
Installing the receiver battery pack
Once you have fully charged your receiver battery you must insert it as follows.
Turning on the R/C Unit
Turn on the transmitter first followed by the receiver or speed control.
Always check you have control of the servos and electronic speed control if applicable. Check the range of operation before starting your engine
or running.
Turning off the R/C Unit
Only turn off the R/C Unit once you have stopped the car and stopped the engine if applicable.
Turn off receiver first and then turn off transmitter.
Always disconnect the battery connector from the receiver/speed control after driving.
Trim Setup
You need to check that your trims are correctly set before you start the engine or use the car. Once you have turned the R/C unit on adjust the
steering trim to make sure the front wheels are pointing straight.
You also need to check that you have correct settings on the throttle and brake linkage. The carburettor should be fully closed at neutral and the
brake should not be engaged. Check that the carburettor opens fully on acceleration and that the brake engages when you pull on the brake.
You should re-set the electronic speed control if you notice any lag in the throttle or brakes. This will set up the throttle and brakes on your electric
car.
Fail Safe Operation and Setup
The Receiver has a built in failsafe. The failsafe will automatically go to a pre set position if
• You lose radio signal/power runs out in transmitter
• If you suffer any interference
• If your receiver battery runs out of power
It is advised that you should set the failsafe so that in the event of any of the above situations the throttle servo should apply brakes to your car or
the throttle disengages on a speed control.
To set up your failsafe you must do the following.
• Turn on the transmitter and the receiver
• Apply the desired amount of brakes on the transmitter (brakes for engine, neutral for speed control)
• Press the binding button on the transmitter twice in quick succession
To check the failsafe is working you must turn on the R/C unit and then apply throttle with the transmitter. Whilst holding throttle turn off the
transmitter. The throttle servo should return to the pre-set position. This means the failsafe is working correctly. If your servo does not return to the
pre-set position then you must try to re-set your failsafe.
Remove the 4 screws and remove the
receiver tray lid
Insert and connect the battery pack. Replace
the lid and fasten the 4 screws.
Table of contents
Languages:
Other Maverick Motorized Toy Car manuals

Maverick
Maverick ion Series User manual

Maverick
Maverick ION User manual

Maverick
Maverick VADER XB User manual

Maverick
Maverick Strada TC User manual

Maverick
Maverick Quantum User manual

Maverick
Maverick MTX-249 User manual

Maverick
Maverick Phantom XB User manual

Maverick
Maverick MSC-30BR-WP User manual

Maverick
Maverick FLX10-3S80 User manual

Maverick
Maverick Strada EVO S User manual