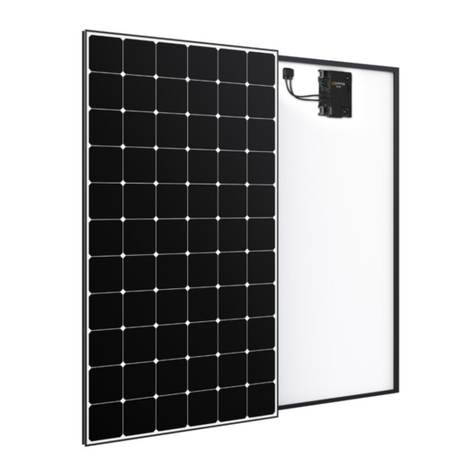
Maxeon SPR-P5-545-UPP User manual

Safety and Installation Instructions
United States and Canada
This document applies to Performance modules
listed in Table 1.
Contents of this manual are subject to change without notice.
For the latest version please refer to www.maxeon.com/us/PSeriesInstallGuide
Maxeon Solar Technologies, Ltd.
www.sunpower.maxeon.com
Document 539821 Rev.A
This document includes references to Performance Series modules. These
modules do not have grounding restrictions and all are compatible with high-
efficiency transformerless inverters.

MAXEON SOLAR TECHNOLOGIES, LTD.
Safety and Installation Instructions - Document 539821 Rev A
© 2021 Maxeon Solar Technologies, Ltd. All rights reserved. Specifications included in these instructions are subject to change without notice. Page | 2
Safety and Installation Instructions
(United States and Canada)
1.0 Introduction
These instructions provide safety and installation instructions for UL
Listed Maxeon photovoltaic (PV) modules that have the UL logo on the
product label:
1.1 Disclaimer of Liability
The installation techniques, handling, and use of this product are beyond
company control. Therefore, Maxeon assumes no responsibility for loss, damage
or expense resulting from improper installation, handling, or use.
1.2 Underwriters Laboratories (UL) Listing Information
This product meets or exceeds the requirements set forth by UL 1703, ULC/ORD-
C1703-01 for PV Modules and UL61730. These Standards cover flat-plate PV
modules and panels intended for installation on buildings or those intended to be
freestanding. To satisfy the Listing for this product the modules must be mounted
with a rack or standoff structure. The Listing does not include integration into a
building surface because additional requirements may apply. This product is not
intended for use where artificially concentrated sunlight is applied to the module.
1.3 Limited Warranty
Module limited warranties are described in full in the Maxeon warranty
certificates obtainable at www.sunpower.maxeon.com. In summary, the Limited
Warranties do not apply to any of the following:
PV Modules subjected to: (i) misuse, abuse, neglect or accident; (ii) alteration or
improper installation (improper installation includes, without limitation,
installation that does not comply with all Maxeon installation instructions and
operations and maintenance instructions of any type, as may be amended and
updated from time to time at Maxeon’s sole discretion, and all national, state,
and local laws, codes, ordinances, and regulations); (iii) repair or modification by
someone other than an approved service technician of Maxeon; (iv) conditions
exceeding the voltage, wind, snow load, and any other operational
specifications; (v) power failure or surges; (vi) indirect or direct damage from
lightning, flood, fire or other acts of nature; (vii) damage from persons, biological
activity, or industrial chemical exposure; or (viii) damage from impact or other
events outside Maxeon’s control..
2.0 Safety Precautions
Before installing this product, read all safety instructions in this document.
•All installations must be performed in compliance with the National Electrical
Code (NEC) and any applicable local codes.
•For Canadian jurisdictions, installations shall be in accordance with CSA C22.1,
Safety Standard for Electrical Installations, Canadian Electrical Code, Part 1
•Modules certified to UL 61730 are Safety Class 2 for protection against
electric shock
•There are no user-serviceable parts within the module. Do not attempt to
repair any part of the module.
•Installation should be performed only by qualified personnel.
•Do not stand on, drop, scratch, or allow objects to fall on modules as doing so
may damage them and void the warranty.
•Do not place anything on the modules, even for a moment because resulting
residue may damage or stain the glass surface.
•If the front glass is broken, or the backsheet is torn, contact with any module
surface or module frame can cause electric shock. Damaged modules should
be immediately disconnected from the electric system. The module should
be removed from array as soon as possible and contact the supplier for
disposal instructions.
•Broken J-boxes or connectors are electrical hazards as well as laceration
hazards. Installers should remove any such module from the array and
contact Maxeon for disposal instructions.
•Do not install or handle the modules when they are wet or during periods of
high wind.
•Do not block drain holes or allow water to pool in or near module frames.
•Maxeon recommends a conservative minimum cable bend radius of equal to
or greater than 40 mm (1.5”).
•Unconnected connectors must always be protected from pollution (e.g dust,
humidity, foreign particles, etc), prior to installation. Do not leave
unconnected (unprotected) connectors exposed to the environment. A clean
assembly environment is therefore essential to avoid performance
degradation.
•Do not allow the connectors to come in contact with chemicals such as
greases, oils and organic solvents which may cause stress cracking.
•Do not disconnect any modules when its inverter is feeding in to the grid.
Switch off the inverter before disconnecting, reinstalling or making any action
with the modules.
•For connectors, which are accessible to untrained people, it is imperative to
use the locking connectors and safety clips, if applicable, in order to defend
against untrained personnel disconnecting the modules once they have been
installed.
•Cover all modules in the PV array with an opaque cloth or material before
making or breaking electrical connections.
•Contact Maxeon if maintenance is necessary.
•Save these instructions!
2.1 Fire Rating
The module fire rating is Type 2 per UL1703, 2013 edition and Class C per
UL1703, 2002 edition. Fire rating classification for any PV system using
UL1703:2013 can only establish a fire rating in combination with the mounting
system ratings normally found in the mounting system installation instructions.
3.0 Electrical Characteristics
Electrical characteristics of the modules are described in Table 1 below. Rated
electrical characteristics are within 10 percent of measured values at Standard
Test Conditions of: 1000 W/m2, 25°C cell temperature and solar spectral
irradiance per IEC 60904-3 or irradiation of (air mass) AM 1.5 global (G) spectrum.
Each module contains three bypass diodes. The maximum series fuse rating is
25A.
Under normal conditions, a photovoltaic module may experience conditions that
produce more current and/or voltage than reported at Standard Test Conditions.
Accordingly, the values of ISC and VOC marked on UL Listed modules should
always be multiplied by a factor of 1.25 when determining component voltage
ratings, conductor capacities, fuse sizes and size of controls connected to the
module output. Refer to Section 690-8 of the NEC for an additional 1.25 Safety
factor which may be applicable.
DANGER! Module interconnection cables pass direct current (dc) and
are sources of voltage when the module is under load and when it is
exposed to light. Direct current can arc across gaps and may cause
injury or death if improper connection or disconnection is made; or
if contact is made with module leads that are frayed or torn. Do not
connect or disconnect modules when a current source is energizing
the conductors. Modules may contain high voltage when
interconnected with other modules.
IMPORTANT! Please read these instructions in their entirety before
installing, wiring, or using this product in any way. Failure to comply
with these instructions will invalidate the Maxeon Limited Warranty
for PV Modules.

MAXEON SOLAR TECHNOLOGIES, LTD.
Safety and Installation Instructions - Document 539821 Rev A
© 2021 Maxeon Solar Technologies, Ltd. All rights reserved. Specifications included in these instructions are subject to change without notice. Page | 3
Table 1: Electrical Characteristics1
Module Rated Power
(W)
Voltage at
Rated Power
Vmpp (V)
Current at
Rated Power,
Impp (A)
Open Circuit
Voltage Voc
(V)
Short Circuit
Current, Isc (A)
Maximum
System Voltage
UL Vmax (V)
SPR-P5-545-UPP 545 39.5 13.81 47.8 14.82 1500
SPR-P5-540-UPP 540 39.2 13.78 47.6 14.80 1500
SPR-P5-535-UPP 535 38.9 13.76 47.4 14.79 1500
SPR-P5-530-UPP 530 38.6 13.73 47.1 14.78 1500
SPR-P5-525-UPP 525 38.3 13.71 46.8 14.77 1500
SPR-P5-520-UPP 520 38 13.69 46.6 14.76 1500
4.0 Electrical Connections and System Monitoring
Modules may be connected in series or parallel to achieve the desired electrical
output provided certain conditions are met.
Even if allowed by local regulation, Plug and Socket connectors mated together in
a PV system must be of the same type (model, rating) from the same
manufacturer i.e. a plug connector from one manufacturer and a socket
connector from another manufacturer, or vice versa, shall not be used to make a
connection. Currently approved compatible connectors found on Performance
modules are: Multi-Contact MC4 (PVKBT4/6II, PVKST4/6II) and Staubli Electrical
Connectors (PVKST4/6II-UR, PVKBT4/6II-UR). Maxeon warrants the connectors
delivered on Maxeon supplied modules and harnesses as being compatible.
Maxeon recommends a conservative minimum bending radius (R) 5x cable
diameter must be maintained and must not be bent on the direct exit of the
connector or junction box. Avoid exposure of electrical connections to direct
sunlight and do not place the connector in a location where water could easily
accumulate. Installers must refer to connector manufacturer’s instruction for
further installation and connection requirements.
Connectors are factory assembled with intentional gaps between the cable nut
and the body of the connector. Do not retighten module connector nuts as this
may lead to stress cracking of the connector assembly and will void the warranty.
4.1 Equipment Grounding
To reduce the possibility of electrical shock, ground the frame of the module or
array per NEC before wiring the circuit. In order to install in accordance with their
UL Listing, Maxeon modules must be grounded using grounding hardware that
meets requirements for grounding systems in UL 467, UL 1703, or UL 1741; on
anodized aluminum frames. Maxeon recommends to refer to the applicable
regional and local codes and requirements on grounding PV arrays and mounting
frames in conjunction with your racking supplier.
In addition, to avoid corrosion due to the use of dissimilar metals Maxeon
recommends stainless steel between copper and aluminum.
4.2 System Grounding
Review Table 2 below for the proper grounding techniques for the installation of
your particular Maxeon modules.
4.3 Series Connection
The modules may be wired in series to produce the desired voltage output. Do
not exceed the maximum system voltage shown in module datasheets and
product label.
4.4 Parallel Connection
The modules may be combined in parallel to produce the desired current output.
Each series string or module may be required to be fused prior to combining with
other strings if the resulting maximum fuse size allowed (number of modules
which can be connected in parallel and protected by one fuse) exceeds the fuse
1For models not shown here, please contact Maxeon technical support or visit
www.sunpower.maxeon.com. Electrical parameters are measured at Standard Test
Conditions (STC). The series fuse must have an interrupting rating that is equal to or greater
than the maximum fault current that the fuse is required to interrupt, including contributions
from all connected sources of energy.
Refer to NEC Article 100, Part II as to what type of series fuse is acceptable for modules rated
at higher than 600 V dc system voltage.
rating as shown in the module datasheet and product label. Please refer to the
NEC Article 690 for additional fusing requirements.
Table 2: Module Grounding Key
Module Model Grounding Key
Maxeon P-Series modules have no grounding restrictions:
All model numbers starting with SPR-Py-xxx-UPP
IMPORTANT! P-Series can be grounded with either polarity. Failure to
comply with this requirement will reduce system performance and
invalidate Maxeon’s Limited Power Warranty for PV Modules.
5.0 Module Mounting
The Maxeon Limited Warranty for PV Modules is contingent upon modules being
mounted in accordance with the requirements described in this section.
5.1 Site Considerations
Maxeon modules should only be mounted in locations that meet the following
requirements:
Operating Temperature: All Maxeon modules must only be mounted in
environments that ensure they will operate within the following temperatures:
Operating Temperature range (ambient) -40°C to +85 °C
-40°F to +185 °F
Care should be taken to provide ventilation behind or underneath the modules,
especially in hot environments.
Shading: Modules should be installed so that permanent shading of cells is
avoided and partial shading that may occur during certain times of the day or
year is minimized. Permanent shading is defined as shade that is cast over the
same position (of constant area) of the solar module throughout the generation
hours of the day.
Shading may induce in certain cases strong energy production reduction, even in
case of small shading and should be avoid as much as possible, specially at mid-
day when the production is maximum.
Design Strength: Maxeon modules are designed to meet a maximum positive (or
up/down, e.g. wind) and negative (or downward, e.g. static or snow load) design
pressure described in the Table 1.
Excluded Operating Environments
Certain operating environments are not recommended for Maxeon modules, and
are excluded from the Maxeon Limited Warranty.
Modules are designed for a maximum altitude of 2000 m.
Performance Series Mounting Orientation
Commercial Performance Series (P-Series) modules are designed to be installed in
landscape orientation. In landscape orientation, P-series modules maintain higher
power in conditions of row-to-row shading and/or edge soiling.
5.2 Mounting Configurations
Modules integrated into or mounted over a roofing system must be mounted
over a fire-resistant roof covering rated for the application. Modules may be
mounted at any angle, from horizontal to vertical. To reduce soiling, modules
should be mounted at a minimum of 5 degrees.
Mechanical specifications for modules are shown in Table 4.
In order to prevent water from entering the junction box, which could present a
safety hazard, modules should be oriented with the junction box in the
uppermost position and not be mounted such that the cell faces downward (e.g.
on a tracking structure that positions the modules with the junction box facing
skyward during sleep mode).
For P- Series modules a minimum of 4″of clearance between the module frames
and the structure (or grade) is required; for all other modules a minimum of 1.5″
of clearance is required. The required minimum clearance between installed
modules is 1/4″.

MAXEON SOLAR TECHNOLOGIES, LTD.
Safety and Installation Instructions - Document 539821 Rev A
© 2021 Maxeon Solar Technologies, Ltd. All rights reserved. Specifications included in these instructions are subject to change without notice. Page | 4
The module is only UL Listed for use when its factory frame is fully intact. Do not
remove or alter the module frame, and do not create additional mounting holes
because doing so may compromise the integrity of the frame.
Modules may be mounted using the following methods only:
1) Frame Holes: Secure the module to the structure using the factory
mounting holes. Four 1/4″stainless steel bolts, with nuts, washers, and lock
washers are recommended per module; tightened to a min. torque of 10 in-
lb. This method has been certified by a third-party organization according to
UL 1703. For frame hole mounting, modules must be secured using the
holes shown in Table 4.
2) Clamps or Clips: Mount the module with the IFF clips on the longer sides of
the module. Ensure that the clamps are of sufficient strength to allow for
the maximum design pressure of the module. The IFF clip hardware must be
tightened to a torque of 35-45 in-lbs. Clamps that secure to the top of the
frame must not deform the top flange. Clamps must apply force collinear
with the ‘wall’ of the module
frame and not only to the top
flange. Clamps or installation
procedures that put excessive
force on the top flange will
deform the frame, void the
module warranty and risk glass
breakage. Figure 1a illustrates
locations for top frame clamp
force. Do not clamp within 50mm
of module corners to reduce risk of frame corner deflection and glass
breakage. When clamping to the module frame, torque should never
exceed 120 in-lbs to reduce chances of frame deformation. Maximum
allowable torque may be less than 120 in-lbs depending on clamp design.
Mounting systems should be evaluated for compatibility before installing.
3) End Mount: End mounting is the attachment of the shorter side of the
module frame to a supporting rail using IFF clips tightened to a torque of
35-45 in-lbs. The centerline of the clips must be 50-400mm from the corner
of the module. The end-mounting rail and clips or clamps must be of
sufficient strength to allow for the maximum design pressure of the
module. Verify this capacity before installation.
4) Maxeon-specified or Maxeon-supplied mounting systems: Mount modules
with strict adherence to Maxeon documentation, using hardware systems
supplied by or specified by Maxeon.
Figure 1: Mounting locations for Maxeon Modules shows where to mount to the
module frame. Table 3 defines mounting options, attachment locations and
resulting load rating achieved for each module configuration.
Figure 1: Mounting locations for Maxeon modules
Configurations 1 and 2 show mounting with rail support, 3 and 4 show mounting
without rail support. In “With Rail Support” the rails becomes conventional or
rails transverse while “Without Rail Support” becomes end mounted in long or
short side. In the case when the glass deflects it would not deflect in the rails for
additional support.
Table 3: Mounting Zone Load Ratings for Performance Modules (Pending
UL Certification)
Applicable
Products
Mounting
Zone
Distance
from
corner
(mm)
Wind (up &
down) /
Snow(down)
(units in Pa)3
Mounting
Method
P5 UPP
(2384 x 1092 x
35mm)
A 442-542 1600/3600
Clamp
B 592-692 1600/3600
D 967-1017 1160/1160
E 243-303 800/1600
C4540-640 1600/3600
G
Frame
Holes2
492 1600/3600
Bolt5642 1600/3600
992 1160/1160
2 Refer to Table 4 for mounting holes details
3 Safety Factor 1.5 included
4 IEC validated
5 Minimum washer size of 24mm in diameter is required.
5.3 Bifacial Gain
Various environmental and installation parameters affect bifacial gain. Albedo is a
measure of the amount of light reflected from the ground surface. A higher
albedo factor will increase irradiance on the backside and result in higher bifacial
gain of the module. The surface conditions, month of the year, time of day, GHI
and DNI both influence the amount of incident rearside irradiance.
Maxeon recommends to check with solar module mounting hardware supplier in
order to determine the Structure Shading factor of your particular installation.
The Structure Shading Factor varies with racking system design, irradiance,
albedo and height of module installation above ground and has an overall impact
on the rear side irradiance mismatch.
The Rearside mismatch losses are proportional to the albedo, height of the
modules above ground and structure shading factor. The irradiance non-
Force must not deform
top frame flange or
glass may break
Figure 1a: Clamp Force Locations
Force can
be applied
in line with
frame wall

MAXEON SOLAR TECHNOLOGIES, LTD.
Safety and Installation Instructions - Document 539821 Rev A
© 2021 Maxeon Solar Technologies, Ltd. All rights reserved. Specifications included in these instructions are subject to change without notice. Page | 5
uniformity on the rearside results in mismatch generally as the albedo increases
and installation height of the modules are lower to the ground.
5.4 Bifacial Electrical Considerations
The overall electrical bifacial gain is determined by the combination of albedo,
irradiance, shading losses from the rearside, rearside mismatch and height of
installation above ground. Please refer to the Maxeon datasheet for the electrical
outputs with respect to the overall bifacial gain. Please utilise a suitable
performance software package to simulate the overall bifacial gain
5.3 Module Handling
Use gloves when handling modules. The module glass is sensitive to oils and
abrasive surfaces, which may lead to scratches and irregular soiling. Do not place
modules such that the glass comes in contact with abrasive surfaces, and
minimize any contact with the glass in general. Do not place anything on the
modules, even for a moment. Never lift or move the module using the cables or
the junction box under any circumstances. Remove any fingerprints by washing
the module glass as described in Section 6.0 below.
6.0 Maintenance and Cleaning
Trained Maxeon dealer or trained Maxeon support personnel should inspect all
modules annually for safe electrical connections, sound mechanical connections,
and freedom from corrosion.
Periodic cleaning of module glass has resulted in improved performance levels,
especially in regions with low levels of annual precipitation; therefore Maxeon
recommends periodic cleaning of the modules.
To clean a module, wash its glass surface with potable, non-heated water.
Normal water pressure is adequate, but pressurized water (up to 1500 psi) may
be used. Some fingerprints, stains, or accumulations of dirt on the glass may be
removed with over-the-counter glass cleaners (such as Windex®or equivalent), or
with a 3% soap-and-water solution. For smaller systems, wet the module glass
with the solution, let it stand for five minutes, and then wet them again and use a
soft sponge or seamless cloth to wipe the glass surface in a circular motion. For
large systems, wet the modules with the cleaning solution, let them stand for five
minutes, and then rinse them with high-pressure water or a soft squeegee. Do
not use harsh industrial-strength cleaning materials such as scouring powder,
steel wool, scrapers, blades, or other sharp instruments to clean the module
glass. Use of such materials will void the product warranty.
Table 4: Module Frame Details
Platform Module mounting and ground hole detail Frame Profile
FOR P5 UPP GEN 4.3
Commercial
Modules
1092 mm [42.99in]
1043 mm [41.06in]
400 mm
[15.75in]
1100 mm [43.31in]
1400 mm[55.12in]
2384 mm [93.86in]
4X Ø4.2mm [0.17in]
Ground Holes
8X 14mm [0.55in] (L)
x 9mm [0.35in] (W)
R4.5mm [0.18in]
SLOTS
4X 10mm [0.39in] (L)
x 7mm [0.27in] (W)
R3.5mm [0.14in]
Mounting Holes
35 mm [1.38in]
SIDE FRAME PROFILE
35 mm
35 mm
END FRAME PROFILE
35 mm
16 mm
*See Product Rating Label for Maximum System Voltage.
This manual suits for next models
5
Table of contents
Other Maxeon Solar Panel manuals
Popular Solar Panel manuals by other brands

PulseTech
PulseTech SP-12-OBD-A installation manual

EGO
EGO POWER+ SP1000 Operator's manual

Panasonic
Panasonic HIT VBHN330SA17 General installation manual

Clenergy
Clenergy V-ezRack SolarRoof installation guide

Clas Ohlson
Clas Ohlson 30 W manual

Southwest Windpower
Southwest Windpower Skystream Hybrid 6 installation manual

HelioZenit
HelioZenit HELIOMOTION PV-6 Quick assembly guide

STIEBEL ELTRON
STIEBEL ELTRON TEGREON 255 P Operation and installation

DÖRR
DÖRR SP-1500 instruction manual

Heckert Solar
Heckert Solar NeMo P Standard Installation and operating instructions

EPS
EPS EPS-100W-KIT user manual

UNIRAC
UNIRAC RapidRac G10 installation manual