manuals.online logo
Brands
  1. Home
  2. •
  3. Brands
  4. •
  5. MayPole
  6. •
  7. Batteries Charger
  8. •
  9. MayPole MP7108 User manual

MayPole MP7108 User manual

UK's Leading Towing
&
Touring Company
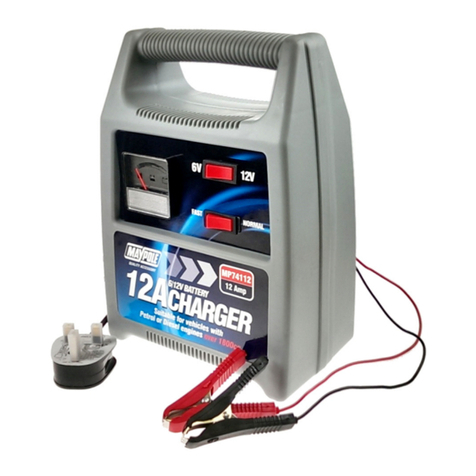
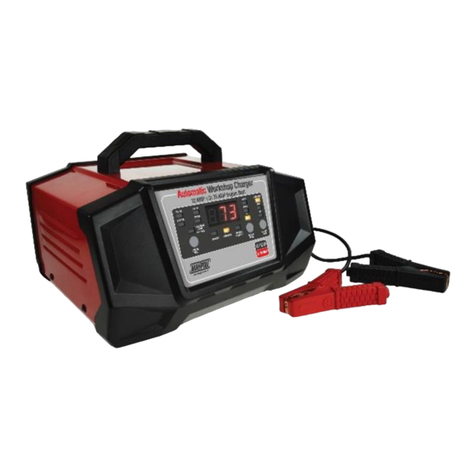
MP7108 (6V/12V 8A) MP7112 (12V/24V 12A)
INSTRUCTION
MANUAL
Keepthese instructions for future reference. Thisinstruction leaflet is also
available on our website: www.maypole.ltd.uk
Automatic Battery Chargers
SAFETY –Important Guidelines
www.maypole.ltd.uk
RISK OF FIRE OR EXPLOSION
•
Explosive gases may escape during charging. This is normal, but please follow the
following guidelines:
•
Do not charge near flames or sparks –do not smoke in the area.
•
Ensure adequate ventilation during charging.
•
Keep the charging area completely clear of combustible materials.
•
Do not leave charging batteries unattended for long periods or overnight.
•
Do not charge batteries in ambient temperatures exceeding 400C; battery may overheat.
•
Store and use indoors only, do not expose to rain or moisture.
•
These chargers are designed to charge 6v, 12v or 24v Lead-Acid & AGM batteries with
capacities as
detailed in the specification table below. Charge only one battery at a time.
Do not use with non-
rechargeable batteries.
•
WARNING –GENERAL SAFETY
•
NEVER attempt to charge a frozen battery.
•
This charger should not be used as a continuous DC power source or for any purposes other than those
listed –any other use will invalidate warranty.
•
Ensure that cables are regularly inspected and kept in good condition.
•
Never use the appliance if the charger, mains lead, plug, output leads or crocodile clips are worn or
damaged.
•
Replacement of the mains cable should only be carried out by the manufacturer. There are no user-
serviceable parts in this product other than the fuse in the mains
plug and the fuse in the output lead.
•
Locate the charger as far away from the battery being charged as the cables will permit.
•
Be sure to position the power cord to prevent it from being stepped on, tripped over or damaged.
•
NEVER place charger directly above battery being charged, gases from the battery will corrode and
damage the charger.
•
The use of an extension cord is NOT recommended. lf an extension cord must be used ensure that the
capacity of the cable is greater than the rating of the charger
•
Always disconnect mains supply before connecting and disconnecting the
battery leads.
•
Follow instructions for safe use –electrical discharge from batteries can be dangerous.
•
Battery electrolyte is acidic and likely to cause burns. The use of safety goggles and
gloves when
working with lead acid batteries is strongly advised.
•
Remove metal items such as rings, necklaces and watches while working with batteries.
•
This appliance is not for use by a person (including children) with reduced physical, sensory or medical
capabilities or lack of experience or knowledge.
•
NOTE:A marine battery installed in a boat must beremoved and charged on shore. Tocharge it on board
requires equipment specially designed formarine use.

1
2
INSTRUCTIONS FOR USE
PREPARATION OF THE BATTERY
Refer to the vehicle manufacturer’s handbook for battery maintenance and charging guidelines.
CONNECTION
Check the battery voltage and using the voltage selection switch select the correct output from the
charger; 6v or 12v for MP7108, 12v or 24v for MP7112
Always disconnect the mains supply before making or breaking battery connections. Connect the
battery clips to the battery in the following order:
1. Connect the positive charging lead (RED) to the positive post of the battery (marked +, +ve or P).
2. For vehicles with the battery still installed: connect the negative charging lead (BLACK)
to the
vehicle chassis (marked -, -ve or N), well away from the battery, fuel line, hot
or moving parts.
For batteries removed from the vehicle: Connect the negative charging lead (BLACK) to the
negative
post of the battery (marked -, -ve or N).
After connecting the clips, rotate them slightly so as to remove any dirt or oxidization, thus ensuring
a good contact.
CHARGING
WARNING! DO NOT ATTEMPT TO START THE VEHICLE WITH THE CHARGER CONNECTED
TO THE BATTERY. THIS MAY DAMAGE YOUR BATTERY CHARGER.
When connected to the mains power supply; the below table illustrates each charging status:
LED Status
Battery Voltage
6V
25% LED
illuminated
when
correctly
connected
& charging
50% LED
illuminated
when
voltage
reaches 6V
75% LED
illuminated
when
voltage
reaches
6.5V
FULL LED
illuminated
when voltage
reaches 7.2V
Once 7.4V is reached the
charger will enter float
mode, maintaining
optimum battery
condition. Charger will
revert to normal charging
mode if voltage falls below
6.6V
12V
25% LED
illuminated
when
correctly
connected
& charging
50% LED
illuminated
when
voltage
reaches 12V
75% LED
illuminated
when
voltage
reaches 13V
FULL LED
illuminated
when voltage
reaches
14.4V
Once 14.8V is reached the
charger will enter float
mode, maintaining
optimum battery
condition. Charger will
revert to normal charging
mode if voltage falls below
13.2V
24V
25% LED
illuminated
when
correctly
connected
& charging
50% LED
illuminated
when
voltage
reaches 24V
75% LED
illuminated
when
voltage
reaches 26V
FULL LED
illuminated
when voltage
reaches
28.8V
Once 29.8V is reached the
charger will enter float
mode, maintaining
optimum battery
condition. Charger will
revert to normal charging
mode if voltage falls below
26.4V
3
4
4
INSTRUCTIONS FOR USE
WHEN CHARGING IS COMPLETE
Switch off the mains supply, unplug the charger and disconnect the clips in the following order:
Remove thenegative (BLACK lead) first. Then disconnect the positive (RED lead) from the battery.
TROUBLE SHOOTING
Switch off the charger, check that the clips are correctly connected to the battery and making a good contact.
Check the output fuse situated on the positive output lead of the charger (reverse polarity connection will
cause this to blow). The only other user serviceable part is the mains fuse fitted inside the mains plug. The
battery must be in good condition and capable of accepting a charge. Check that the mains supply is
connected, switch “ON” the charger and check that the red “25%”led is illuminated.
TECHNICAL SPECIFICATIONS
Model
No.
Rated
Input
Voltage
EN Rated Output
Peak
Output
For Battery
Capacity
Fuse
Mains
Plug
Output
Fuses
MP7108
230V AC
50Hz
96W
6V DC
6V DC 5.1A
8 Amp
20Ah –100Ah
3A
7.5A
12V DC
12V DC 5.1A
8 Amp
20Ah –100Ah
3A
7.5A
MP7112
230V AC
50Hz
154W
12V DC
12V DC 8A
12 Amp
20Ah –160Ah
3A
10A
24V DC
24V DC 4.5A
6 Amp
20Ah –160Ah
3A
10A
We declare that this product conforms to the following standards EN60335-1,
EN60335-2-29, EN55014, EN61000, and the following Directives 73/23 CEE, 93/68 CEE,
2004/108/EC, 2002/95/EC (ROHS)
Technical Manager Maypole Ltd May 2017
email: sales@maypoleltd.co.uk
web: www.maypole.ltd.uk
5
6
7

This manual suits for next models

1

Other MayPole Batteries Charger manuals

MayPole MP716 Quick setup guide

MayPole

MayPole MP716 Quick setup guide

MayPole MP7428 Quick setup guide

MayPole

MayPole MP7428 Quick setup guide

MayPole MP7402 Quick setup guide

MayPole

MayPole MP7402 Quick setup guide

MayPole MP7423 User manual

MayPole

MayPole MP7423 User manual

MayPole MP7423 User manual

MayPole

MayPole MP7423 User manual

MayPole MP726 User manual

MayPole

MayPole MP726 User manual

MayPole MP7403 Quick setup guide

MayPole

MayPole MP7403 Quick setup guide

MayPole MP7212 User manual

MayPole

MayPole MP7212 User manual

MayPole MP7414 User manual

MayPole

MayPole MP7414 User manual

MayPole MP7418 User manual

MayPole

MayPole MP7418 User manual

MayPole MP7404 User manual

MayPole

MayPole MP7404 User manual

MayPole MP7104 User manual

MayPole

MayPole MP7104 User manual

MayPole MP713 Quick setup guide

MayPole

MayPole MP713 Quick setup guide

Popular Batteries Charger manuals by other brands

Wagner Electronics BC240-1210 operating instructions

Wagner Electronics

Wagner Electronics BC240-1210 operating instructions

Makita DC1822 instruction manual

Makita

Makita DC1822 instruction manual

KUSSMAUL 091-10 instruction manual

KUSSMAUL

KUSSMAUL 091-10 instruction manual

Guest 28003 owner's manual

Guest

Guest 28003 owner's manual

Mec AV4m operating instructions

Mec

Mec AV4m operating instructions

TAPFER 5000 S operating instructions

TAPFER

TAPFER 5000 S operating instructions

AEG BL 1218 Original instructions

AEG

AEG BL 1218 Original instructions

Luxor LLTS12 Assembly guide

Luxor

Luxor LLTS12 Assembly guide

Power Arc ArcPack PA1801 user manual

Power Arc

Power Arc ArcPack PA1801 user manual

GSL electronics MPPT30-1L operating instructions

GSL electronics

GSL electronics MPPT30-1L operating instructions

Widex WPT103 User instructions

Widex

Widex WPT103 User instructions

Duratrax Onyx 200 user manual

Duratrax

Duratrax Onyx 200 user manual

Zagg Power Amp 6 instructions

Zagg

Zagg Power Amp 6 instructions

BMW Flexible Fast Charger Instructions for use

BMW

BMW Flexible Fast Charger Instructions for use

Votronic Pb 1280 SMT 2B Installation and operating manual

Votronic

Votronic Pb 1280 SMT 2B Installation and operating manual

Tronic TUL 4.1 A1 User manual and service information

Tronic

Tronic TUL 4.1 A1 User manual and service information

Conceptronic ALTHEA06B manual

Conceptronic

Conceptronic ALTHEA06B manual

DeWalt DCB114 instruction manual

DeWalt

DeWalt DCB114 instruction manual

manuals.online logo
manuals.online logoBrands
  • About & Mission
  • Contact us
  • Privacy Policy
  • Terms and Conditions

Copyright 2025 Manuals.Online. All Rights Reserved.