P03 P04
FCC Interference Statement
This equipment has been tested and found to comply with the limits for a Class B
digital device, pursuant to Part 15 of the FCC Rules. These limits are designed to
provide reasonable protection against harmful interference in a residential
installation. This equipment generates, uses and can radiate radio frequency energy
and, if not installed and used in accordance with the instructions, may cause harmful
interference to radio communications. However, there is no guarantee that
interference will not occur in a particular installation. If this equipment does cause
harmful interference to radio or television reception, which can be determined by
turning the equipment o and on, the user is encouraged to try to correct the
interference by one or more of the following measures:
• Reorient or relocate the receiving antenna.
• Increase the separation between the equipment and receiver.
• Connect the equipment into an outlet on a circuit dierent from that to which the
receiver is connected.
• Consult the dealer or an experienced radio/TV technician for help.
FCC Caution: To assure continued compliance, any changes or modications not
expressly approved by the party responsible for compliance could void the user's
authority to operate this equipment. (Example - use only shielded interface cables
when connecting to computer or peripheral devices).
This device complies with Part 15 of the FCC Rules. Operation is subject to the
following two conditions: (1) This device may not cause harmful interference, and (2)
this device must accept any interference received, including interference that may
cause undesired operation.
FCC Radiation Exposure Statement
This equipment complies with FCC radiation exposure limits set forth for an
uncontrolled environment.
This equipment should be installed and operated with a minimum distance of 20
centimeters between the radiator and your body.
This transmitter must not be co-located or operating in conjunction with any other
antenna or transmitter.
IC
This device complies with Industry Canada licence-exempt RSS standard(s). Operation
is subject to the following two conditions: (1) this device may not cause interference,
and (2) this device must accept any interference, including interference that may
cause undesired operation of the device.
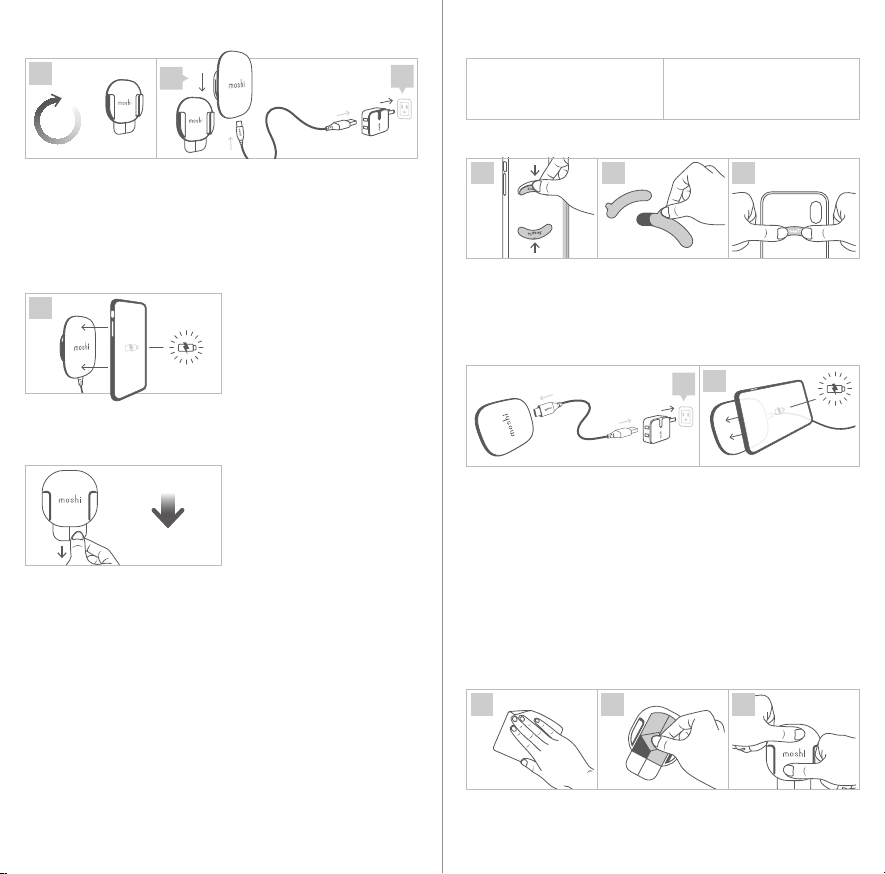
Installez les pastilles SnapTo
Contenu de l'emballage
1. Retirez les onglets en plastique de votre étui Moshi SnapTo.
2. Enlevez la pellicule adhésive de la pastille métallique SnapTo.
3. Placez la pastille dans votre étui et appuyez fermement pendant
30 secondes.
FR
• 1 x Chargeur SnapTo sans l
• 1 x câble USB-C vers USB-A
• 2 x pastilles SnapTo
• 1 x kit de montage mural
• 1 x Guide de démarrage rapide
30 seconds
1 2 3
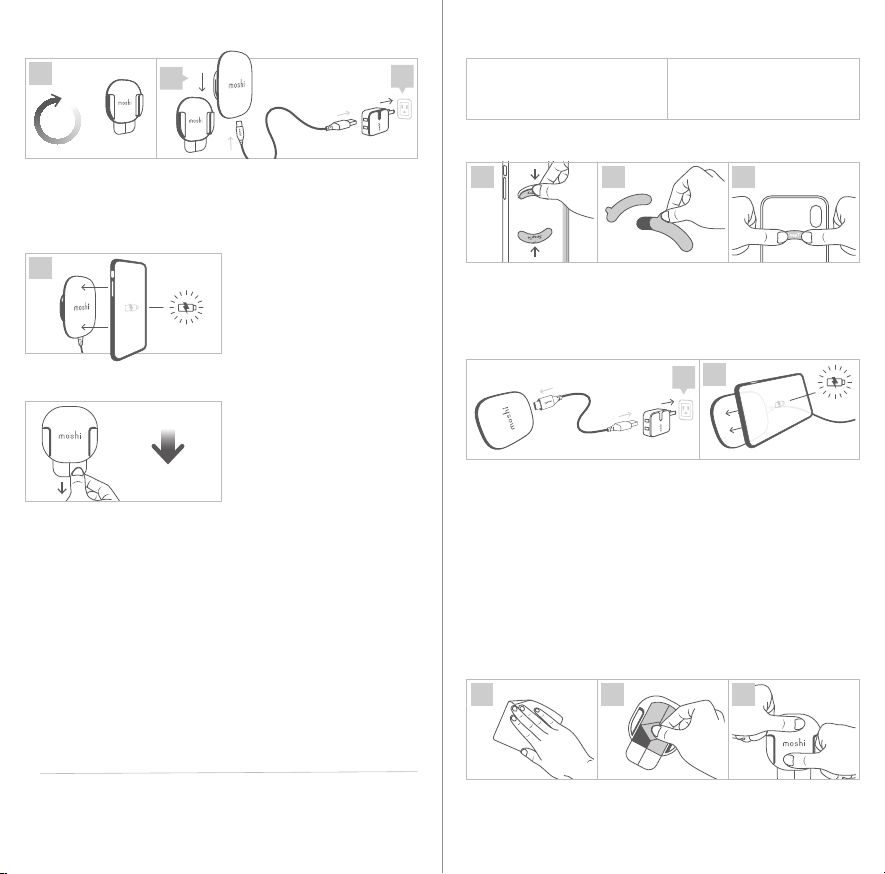
Comment charger sans l avec le Chargeur sans l SnapTo
1. Branchez le câble USB-C vers USB-A fourni dans l’emballage, puis
branchez-le à tout chargeur mural USB type A* (non fourni). Un
câble USB-C vers USB-C et un chargeur (comme le Rewind C de
Moshi) fonctionnent également.
2. La charge commence automatiquement après avoir monté votre
téléphone (installé dans une coque Moshi SnapTo) au Chargeur
sans l SnapTo.
* Remarque: Pour une performance optimale, utilisez un chargeur
mural à haut rendement de plus de 5 W (12 W recommandés) pour
une meilleure ecacité de charge.
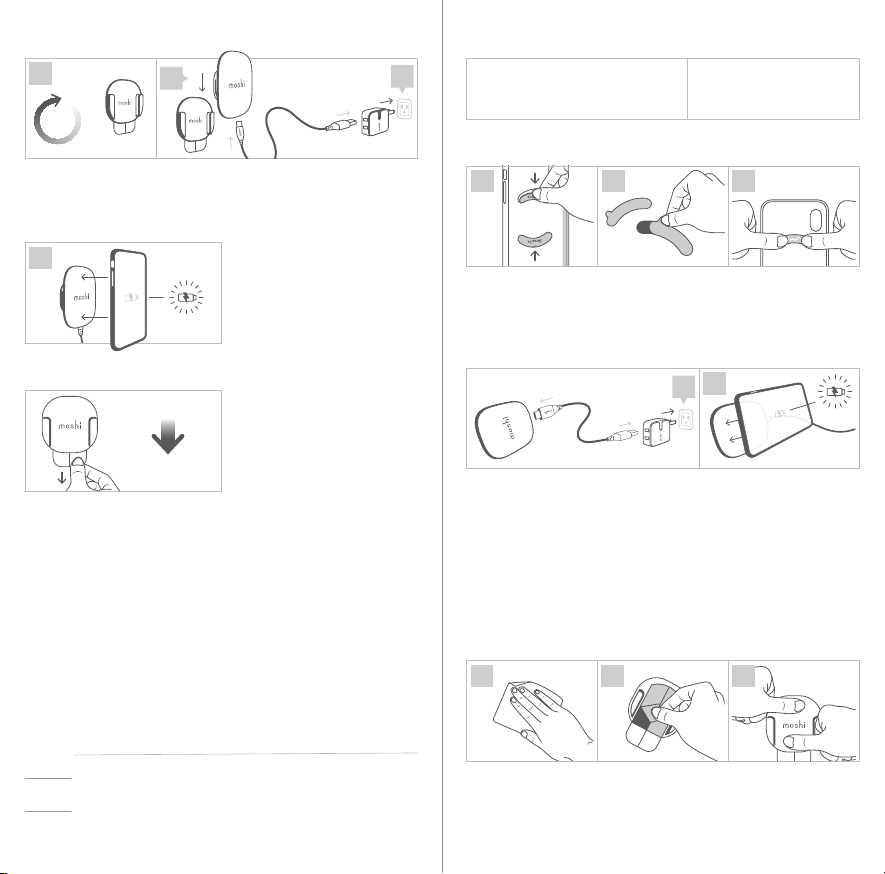
Comment installer le kit de montage mural
1. Assurez-vous que la surface de montage est propre et sèche.
2. Enlevez la pellicule adhésive du kit de montage mural.
3. Presser fermement le kit de montage mural sur la surface de montage
propre et sèche pendant 30 secondes.
12330 seconds
123
12