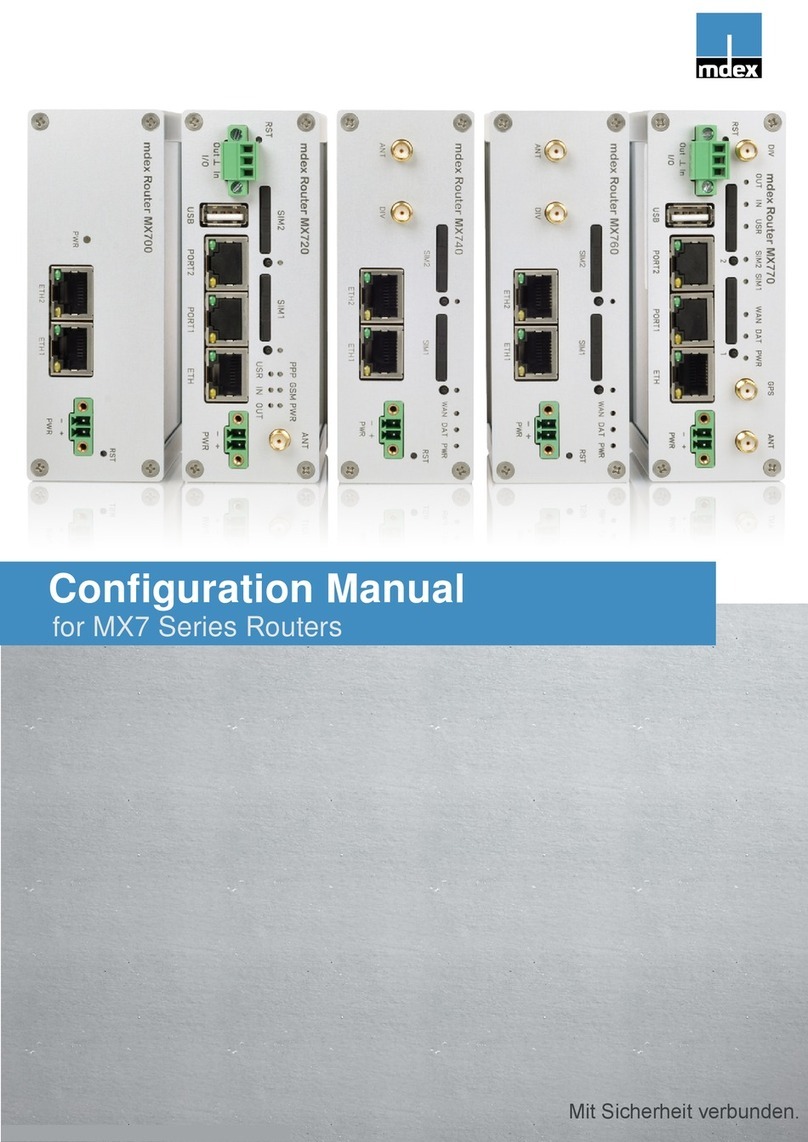
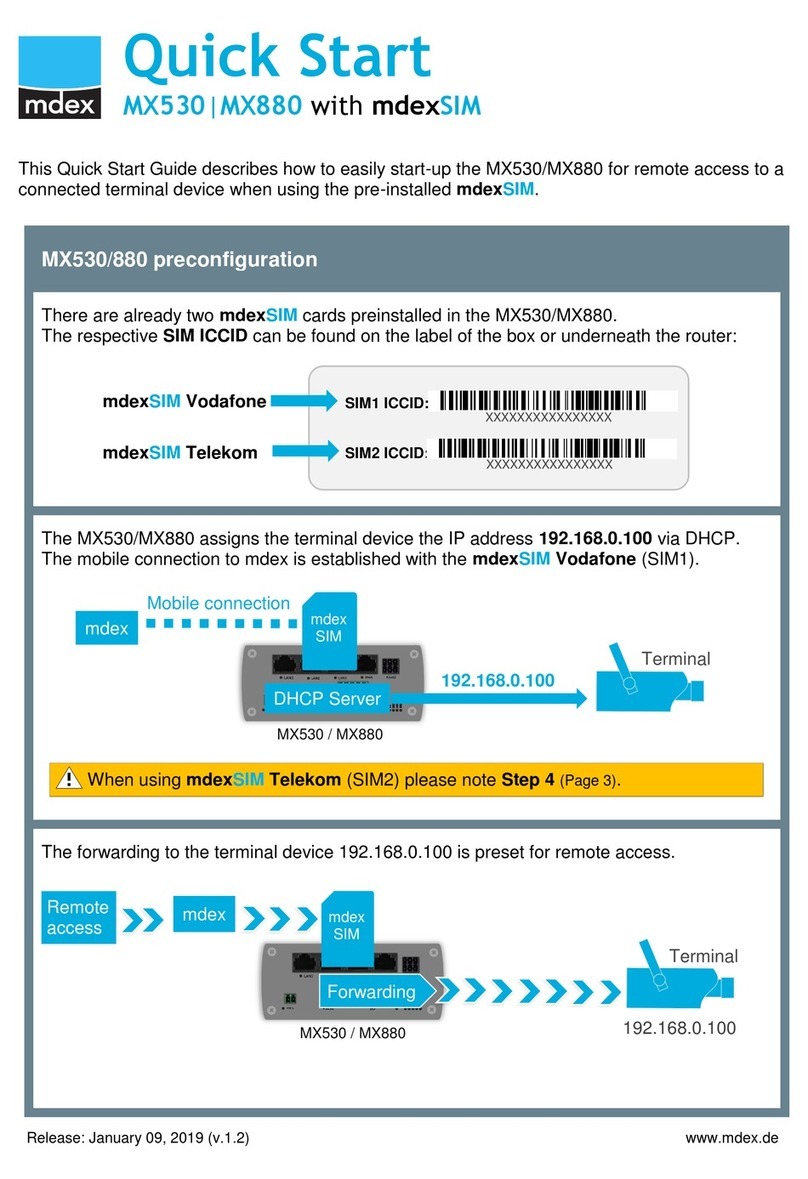
Mdex MX560 User manual

Setup Guide
mdex Router
MX560
Release: February 12, 2020 (v. 1.2)
This Setup Guide describes the commissioning of the
mdex Router MX560 with the commonly used functions.

Setup Guide - mdex Router MX560
Page 2
These setup instructions may differ on delivery of the MX560 with individual configuration, in the
project business or as an mdex package/bundle (e.g. with an mdex fixed.IP+/public.IP via OpenVPN
or an mdexSIM with public.IP). Please observe the enclosed supplementary instructions and/or the
additional Router labels.
All functions and settings described are only available if the software valid at the time of creation of this document is used.
All data without any guarantee.
The information and data contained in this document are subject to change without notice.
Copyright notice:
This document is copyrighted by mdex GmbH and may only be reproduced for internal use. All other reproductions,
including excerpts, are not permitted without the prior written permission of mdex GmbH.
© 2020 mdex GmbH. All Rights Reserved.
This Setup Guide, further information and descriptions about the mdex Router MX560
can be found at mdex Support Wiki: https://wiki.mdex.de.

Setup Guide - mdex Router MX560
Page 3
Table of Contents
1Specifications....................................................................................................................... 4
1.1 Scope of delivery.........................................................................................................4
1.2 Technical specifications ..............................................................................................5
1.3 Presets (factory default).............................................................................................. 6
1.4 Connectors and Interfaces ..........................................................................................7
2Installation............................................................................................................................ 8
2.1 Quick start...................................................................................................................8
2.2 Insert SIM card..........................................................................................................10
2.3 Connecting antennas ................................................................................................ 11
2.4 Powering of Router.................................................................................................... 12
2.5 Wall and DIN rail mounting........................................................................................13
2.6 Connection of terminal devices ................................................................................. 14
3Configuration ...................................................................................................................... 16
3.1 Connecting the PC.................................................................................................... 16
3.2 Login to WebUI.......................................................................................................... 17
3.3 Login Password......................................................................................................... 18
3.4 Setup Wizard............................................................................................................. 18
3.5 Mobile settings .......................................................................................................... 19
3.6 mdex OpenVPN Client ..............................................................................................21
3.7 Router LAN IP address .............................................................................................24
3.8 DHCP-Server ............................................................................................................ 25
3.9 Forwarding ................................................................................................................ 27
3.10 Configuration access / Remote access ..................................................................... 29
3.11 Ping Reboot............................................................................................................... 31
3.12 Periodic Reboot.........................................................................................................32
4Additional functions ........................................................................................................... 33
4.1 Configure WAN port as LAN...................................................................................... 33
4.2 WIFI (Wireless Access Point).................................................................................... 34
4.3 Connection status and signal strength ...................................................................... 35
4.4 NTP time server ........................................................................................................ 37
4.5 Backup & Restore configuration................................................................................ 37
4.6 Reboot....................................................................................................................... 38
4.7 Reset to factory default ............................................................................................. 38
4.8 Firmware update ....................................................................................................... 39
4.9 Expert Mode.............................................................................................................. 39
4.10 IPsec connection (to plugged VPN-Router)............................................................... 40
5Important Information......................................................................................................... 41

Setup Guide - mdex Router MX560
Page 4
1 Specifications
The mdex Router MX560 is an LTE mobile Router for 2G, 3G and 4G mobile networks.
For further details see chapter 1.2 Technical specifications (Page 5).
1.1 Scope of delivery
Quantity
mdex Router MX560
1
Power cable with Router connector plug
1
SIM slot needle (to pull out the SIM holder)
1
MX560 Setup Guide
1
LTE rod antenna
optional
LTE antenna - with cable and magnetic base
optional
WiFi rod antenna
optional
WiFi antenna - with cable and magnetic base
optional
EU plug Power supply unit (with Router connector plug)
(Input: 100-240 VAC / Output: 9 VDC)
optional
UK plug Power supply unit (with Router connector plug)
(Input: 100-240 VAC / Output: 9 VDC)
optional
DIN rail bracket 'Standard
optional
DIN rail bracket 'Compact'
optional
Wall bracket
optional
Network cable (Ethernet)
optional

Setup Guide - mdex Router MX560
Page 5
1.2 Technical specifications
Hardware:
Dimensions (L x W x H):
74 mm x 84 mm x 25 mm
(without DIN rail bracket)
Weight:
approx. 160g
(without DIN rail bracket)
CPU / RAM:
400 MHz MIPS CPU, 64 MB RAM
Input voltage:
9 - 30 VDC, max. 5W
2-port switch (configurable):
WAN/LAN: 10/100 Mbit/s BASE-T, Auto MDI/MDIX
Environmental conditions:
Temperature range (operation):
-40° to +70° C
Humidity (operation):
10% to 90%, non-condensing
Temperature range (storage):
-40° to +80° C
Humidity (storage):
5% to 95%, non-condensing
Mobile radio & WIFI:
4G LTE:
max. 150 Mbit/s Download / 50 Mbit/s Upload
3G HSPA+:
max. 42.2 Mbit/s Download / 5.76 Mbit/s Upload
3G HSPA:
max. 14.4 Mbit/s Download / 5.76 Mbit/s Upload
3G UMTS:
max. 384 kbit/s Download / 384 kbit/s Upload
2G GPRS/EDGE:
max. 236.8 kbit/s Download / 236.8 kbit/s Upload
WIFI:
IEEE 802.11 b/g/n (2.4 GHz), WEP/WPA/WPA2 encryption,
1T1R (150 Mbps max.)

Setup Guide - mdex Router MX560
Page 6
1.3 Presets (factory default)
The MX560 is pre-configured for the operation of an mdexSIM Vodafone and for accessing one
connected terminal device. Here you will find the factory default in detail.
Network settings
LAN IP address:
192.168.0.1
LAN Router access:
HTTP Port: 8080 | HTTPS Port: 443 | SSH Port: 22
Remote Router access:
HTTP port 8080: enabled (via WAN IP of SIM card)
HTTPS Port 443: disabled | SSH Port 22: disabled
Login:
Username: admin | Password: admin01
DHCP-server:
enabled (IP address 192.168.0.100 is assigned)
Port-Forwarding:
Host forwarding to 192.168.0.100
Wireless LAN (WIFI):
disabled
NTP (Time Server):
Time synchronization enabled (Time Server: time.mdex.de)
Mobile settings
The mobile settings are preconfigured for an mdexSIM Vodafone:
APN:
m2m.cda.vodafone.de
Username:
Password:
mdex
PIN:
none
Roaming:
allowed
Settings for stable connection
Daily restart
enabled (daily at 23:19)
Ping Reboot:
enabled (every 5 minutes)
Ping server:
ping.mdex.de
Roaming allows the use of external mobile networks (e.g. abroad
or in border regions), which can lead to high mobile costs
depending on the SIM card tariff!
The pre-configuration of the MX560 may vary accordingly for orders with individual
configuration, in the project business or as another mdex package/bundle.
The mdex server ping.mdex.de is only accessible from the mdex
network! See 3.2.1 Important notes about Ping Reboot (Page
17).

Setup Guide - mdex Router MX560
Page 7
1.4 Connectors and Interfaces
Front panel
LAN Ethernet socket with status LED for connection of a PC or terminal device
WAN Ethernet socket with status LED for special functions to connect the MX560 to
external networks or Routers. This port can be optionally reconfigured as LAN, see
Chapter 4.1 Configure WAN port as LAN (Page 33).
(If present, remove the dummy connector before using the WAN socket.)
Connection for power supply (9-30V DC, 5W) with Power LED
Signal strength →4.3 Connection status and signal strength (Page 4)
Display of the current mobile network (2G, 3G, 4G) →4.3 Connection status and
signal strength (Page 4)
SIM holder for SIM cards with form factor 2FF (25 mm × 15 mm)
Button to pull out the SIM holder (with the SIM slot needle)
Back panel
SMA connector for main LTE antenna (MAIN)
SMA connector for additional LTE antenna (AUX)
RP-SMA connector for WiFi antenna
RESET button for restart and reset to factory default
1
2
3
4
5
6
7
8
9
10
11
No PoE (Power over Ethernet) powered network cable may be connected to the LAN/WAN
sockets! The PoE voltage would destroy the MX560!
10
8
9
11
3
2
1
4
6
5
7

Setup Guide - mdex Router MX560
Page 8
2 Installation
Please observe the notes in chapter 5 Important Information (Page 41).
2.1 Quick start
Depending on the intended use of the MX560, you will find the necessary setup steps for quick
commissioning in the following descriptions.
2.1.1 Own SIM card without mdex IP service
Use of the MX560 as an Internet Router with its own SIM card, without mdex IP service (fixed.IP+ /
public.IP) for remote access to a connected terminal device.
1. Insert your own SIM card according to chapter 2.2 Insert SIM card (Page 10).
2. Connect LTE mobile antennas according to chapter 2.3 Connecting antennas (Page 11).
3. Connect the power supply according to chapter 2.4 Powering (Page 12).
4. Change the Login Password according to chapter 3.3 Login Password (Page 18).
5. Set mobile settings (APN, Username, password, PIN) for your SIM card according to chapter
3.5 Mobile settings (Page 19).
6. Extend the DHCP IP address range according to chapter 3.8 DHCP-Server (Page 25) for the
number of connected terminal devices.
7. Deactivate 'DMZ configuration' according to chapter 3.9 Forwarding (Page 27).
8. According to chapter 3.11 Ping Reboot (Page 31), a publicly accessible server must be set as
the ping server, e.g. 'public-ping.mdex.de' (185.39.176.22).
9. If remote access is not required, it should be deactivated for security reasons according to
chapter 3.10 Configuration access / Remote access (Page 29).
10.Connect terminal devices according to chapter 2.6 Connection of terminal devices (P. 14).
2.1.2 mdexSIM with fixed.IP+ / public.IP
Using the MX560 with mdexSIM, optionally with fixed.IP+ or public.IP.
1. The mdex SIM card must be unlocked in the Management Portal.
2. The mdexSIM must be located in the Router; if necessary, insert the SIM-card according to
Chapter 2.2 Insert SIM card (Page 10).
3. Connect LTE mobile antennas according to chapter 2.3 Connecting antennas (Page 11).
4. Connect the power supply according to chapter 2.4 Powering (Page 12).
5. Change the Login Password according to chapter 3.3 Login Password (Page 18).
6. If remote access is not required, it should be deactivated for security reasons according to
chapter 3.10 Configuration access / Remote access (Page 29).
7. Connect terminal device(s) according to chapter 2.6 Connection of terminal devices (P.14).
For further individual adaptations of the MX560, please refer to chapters 3 Configuration
and 4 Additional functions corresponding descriptions.

Setup Guide - mdex Router MX560
Page 9
2.1.3 mdex mobile device fixed.IP+ / public.IP (own SIM card)
Using the MX560 with own Vodafone/Telekom SIM card and a mdex IP service (fixed.IP+ / public.IP)
as network type 'Vodafone' or 'Telekom'.
1. Insert your SIM card according to chapter 2.2 Insert SIM card (Page 10).
2. Connect LTE mobile radio antennas according to 2.3 Connecting antennas (Page 11).
3. Connect the power supply according to chapter 2.4 Powering (Page 12).
4. Change the Login Password according to chapter 3.3 Login Password (Page 18).
5. If remote access is not required, it should be deactivated for security reasons as described in
chapter 3.10 Configuration access / Remote access (Page 29).
6. Set the mobile settings (APN, Username, password) according to the mdex mobile device. If
necessary, enter the PIN of your SIM card according to 3.5 Mobile settings (Page 19).
7. Connect terminal device(s) according to chapter 2.6 Connection of terminal devices (P.14).
2.1.4 mdex fixed.IP+ via OpenVPN
Using the MX560 with own SIM card and the mdex IP service 'fixed.IP+' as network type 'OpenVPN'.
1. Insert your SIM card as described in chapter 2.2 Insert SIM card (Page 10).
2. Connect LTE mobile radio antennas as described at 2.3 Connecting antennas (Page 11).
3. Connect the power supply according to chapter 2.4 Powering (Page 12).
4. Change the Login Password according to chapter 3.3 Login Password (Page 18).
5. Set mobile settings (APN, Username, password, PIN) for your SIM card according to chapter
3.5 Mobile settings (Page 19).
6. Set up the OpenVPN client according to chapter 3.6 mdex OpenVPN Client (Page 21) with
the "Role" mdex fixed.IP+ (default).
7. Change the 'Source zone' for forwarding to "VPN" according to chapter 3.6.2 Change
Forwarding to OpenVPN (Page 23).
8. Change the source zone for remote access to "VPN" according to chapter 3.6.3 (Page 23). If
no remote access to the MX560 is required, please deactivate it as described in chapter 3.10
Configuration access / Remote access (Page 29).
9. Connect terminal device(s) according to chapter 2.6 Connection of terminal devices (P.14).
2.1.5 mdex public.IP via OpenVPN
Using the MX560 with own SIM card and the mdex IP service 'public.IP' as network type 'OpenVPN'.
1. Install your SIM card according to chapter 2.2 Insert SIM card (Page 10).
2. Connect LTE mobile radio antennas according to 2.3 Connecting antennas (Page 11).
3. Connect the power supply according to chapter 2.4 Powering (Page 12).
4. Change the Login Password according to chapter 3.3 Login Password (Page 18).
5. Set mobile settings (APN, Username, password, PIN) for your SIM card according to chapter
3.5 Mobile settings (Page 19).
6. Set up the OpenVPN client according to chapter 3.6 mdex OpenVPN Client (Page 21) with
the "Role" mdex public.IP.
7. Change the 'Source zone' for forwarding to "VPN" according to chapter 3.6.2 Change
Forwarding to OpenVPN (Page 23).
8. Change the source zone for remote access to "VPN" as described in chapter 3.6.3 (Page 23).
If no remote access to the MX560 is required, please deactivate it as described in chapter 3.10
Configuration access / Remote access (Page 29).
9. Connect terminal device(s) according to chapter 2.6 Connection of terminal devices (P. 14).

Setup Guide - mdex Router MX560
Page 10
2.2 Insert SIM card
To insert a SIM card into the Router, follow the steps below.
1. Press the button on the right side of the SIM slot with the SIM slot needle (or another pointed
object) and pull out the SIM holder.
2. Insert the SIM card as marked in the SIM holder.
3. Push the SIM holder back into the Router and press it firmly.
4. The mobile settings of the MX560 must be adjusted to use the installed SIM card according to
chapter 3.5 Mobile settings (Page 19).
SIM cards with the
Shape size 2FF supported.
Length: 25 mm
width: 15 mm
thickness: 0,76 mm
A commercially available SIM adapter is required
for the use of a Nano/Micro SIM card.
25 mm
15 mm

Setup Guide - mdex Router MX560
Page 11
2.3 Connecting antennas
To operate the Router, the appropriate antennas must be connected.
Note: The scope of delivery does not include any antennas.
LTE
(MOBILE)
To use the MX560 as LTE Router, compatible LTE antennas with SMA connectors
must be connected.
To establish a mobile connection, an LTE antenna must be connected to the right
LTE MAIN socket.
If a second LTE antenna is connected to the left LTE AUX socket, the LTE
download rate can be increased.
WiFi
Only when using the WIFI access point of MX560, a WiFi antenna with RP-SMA
plug must be connected to the WiFi socket.
Antennas with magnetic base have the best possible reception strength when mounted
on a metal surface. Optional outdoor antennas can also be used to further improve
mobile reception.
WiFi antenna
RP-SMA
LTE antennas
SMA
SMA

Setup Guide - mdex Router MX560
Page 12
2.4 Powering of Router
The maximum power consumption of the MX560 is 5 Watt.
The MX560 is powered with 9-30 VDC either with the optional Power Supply unit or with a separate
power supply (e.g. a DIN rail power supply unit) by using the enclosed power cable.
Power cable with Router connector (included)
The 9-30 VDC power source must be connected to the red wire (+) and black wire (-).
(The green wire (input) and the white wire (output) are not required to power the MX560.)
EU power supply with Router plug (optional)
UK power supply with Router plug (optional)
MX560
9 VDC / 1A
100-240 VAC
MX560
9 VDC / 1A
100-240 VAC
red
9-30 VDC (+)
black
Ground (-)
green
Input
white
Output
MX560

Setup Guide - mdex Router MX560
Page 13
2.5 Wall and DIN rail mounting
The MX560 can be mounted on a DIN rail or on a wall.
Please note that the wall and DIN rail brackets are optional and not included with the Router.
DIN rail bracket 'Standard’
The DIN rail bracket 'Standard' (metal) is fastened with the enclosed screws either in the groove on
the left side, right side or bottom of the router.
DIN rail bracket 'Compact'
The DIN rail bracket 'Compact' (plastic) is fastened with the enclosed screws either in the groove on
the left side, right side or bottom of the router.
Wall bracket
The wall bracket consists of 2 plastic holders, which can be fastened with the enclosed screws either
in the groove on the left side, right side or bottom of the router.

Setup Guide - mdex Router MX560
Page 14
2.6 Connection of terminal devices
The terminal devices can be connected via a LAN socket (or optionally via WIFI).
2.6.1 Connection of one terminal device
The MX560 is already preconfigured for the connection of a terminal device.
Please observe the following instructions.
1. Connect the terminal device to the LAN port using a network cable.
(By default, the WAN port is not intended for connecting terminal devices! )
2. Perform the network setting of the connected terminal device:
The terminal device can be set to 'Obtain IP address automatically'. The MX560 is
preconfigured in the pre-configuration for a dynamic allocation of IP addresses (DHCP) and
then assigns the IP address 192.168.0.100.
Alternatively, the network settings can also be permanently set in the terminal device:
IP address: 192.168.0.100
Default gateway: 192.168.0.1 (LAN IP address of MX560)
DNS server: 192.168.0.1 (LAN IP address of MX560)
The IP address range of the DHCP-server should then be changed according to Chapter 3.8
DHCP-Server (Page 25) so that 192.168.0.100 is no longer assigned automatically.
3. All incoming data packets to the WAN IP address of the MX560 (SIM card) will be forwarded
to the IP address 192.168.0.100. This terminal device can thus be accessed remotely.
No PoE (Power over Ethernet) powered network cable may be connected to the LAN/WAN
sockets of the MX560! The PoE voltage would destroy the MX560!
The MX560 assigns only one IP address by default!
If you have connected a PC to the Router for configuration, the IP address
192.168.0.100 assigned to the PC will only be assigned to another connected terminal
after 5 minutes (timer preset Leasetime) after the PC has been removed. A Router
restart immediately releases the IP address again.
If a public.IP is used, unrestricted access via the Internet is possible. For security
reasons, the end device should therefore be protected against unauthorized access
with a firewall. Additional protection is provided if, instead of port forwarding is only set
up for the required ports as described in Chapter 3.9.2 Port-Forwarding (Page 28).
LAN

Setup Guide - mdex Router MX560
Page 15
2.6.2 Connection of several terminal devices
To connect several terminal devices to the MX560, please observe the following instructions:
1. Several terminal devices are connected using a standard Ethernet switch (e.g. mdex Ethernet
Switch), which is connected to the LAN port of the MX560. The terminal devices are then
connected to the Ethernet switch.
2. Network settings of the connected terminal devices:
If the terminal devices are set to obtain their IP addresses automatically from the MX560, you
must extend the DHCP-server to assign additional IP addresses as described in chapter 3.8
DHCP-Server (Page 25) and, if necessary, configure a fixed assignment as described in
chapter 3.8.1 Fixed assignment of IP addresses (Page 26).
Alternatively, you can also permanently set the IP addresses in the terminal devices.
IP address: 192,168.0.2 to 192,168.0.255
Default gateway: 192.168.0.1 (LAN IP address of MX560)
DNS server: 192.168.0.1 (LAN IP address of MX560)
3. If several connected terminals should be accessible remotely, a forwarding according to
chapter 3.9.2 Port-Forwarding (Page 28) must be configured in the MX560.
If remote access is not desired for a connected terminal device, the preset 'DMZ
Configuration' should be deactivated for security reasons according to chapter 3.9.1
Host-Forwarding (DMZ Configuration) (Page 27).
LAN
switch
For the connection of only two terminals it is possible to switch the WAN port to LAN
port as described in Chapter 4.1 Configure WAN port as LAN (Page 33).

Setup Guide - mdex Router MX560
Page 16
3 Configuration
3.1 Connecting the PC
The network card of the PC can be set to Obtain IP address automatically.
Plug the network cable of the PC into the LAN socket of the MX560.
(By default, the WAN socket is not intended for connecting devices!)
The MX560 is preconfigured for a dynamic assignment of IP addresses (DHCP) and automatically
assigns the IP address 192.168.0.100 to the connected PC.
The PC and the MX560 are now in the same IP address range so that the PC can access the MX560
web server with a web browser.
The MX560 DHCP-Server assigns only one IP address (192.168.0.100) to a connected PC or
terminal device!
•If another terminal device is already connected which has already obtained the IP
address 192.168.0.100 automatically, remove this device again.
•The IP address 192.168.0.100 is only released after 5 minutes and then assigned to
your connected PC. By restarting the MX560, the IP address is immediately released
and then assigned to your connected PC.
•Alternatively, you can set the PC network card to a fixed IP address from the IP
address range 192.168.0.2 to 192.168.0.255 (e.g. 192.168.0.20).
LAN

Setup Guide - mdex Router MX560
Page 17
3.2 Login to WebUI
Enter this URL in your web browser: http://192.168.0.1:8080
(Or the current IP address of the MX560, if this has been changed.)
Username: admin
Password: admin01 (or the current password if it has already been changed.)
3.2.1 Important notes about Ping Reboot
The automatic connection check to the ping server ping.mdex.de is activated by default. Please
observe the following instructions for the preset Ping Reboot.
Without connection to mdex, the MX560 is automatically rebooted every 15 minutes.
•During the MX560 configuration the "Ping-Reboot" should be deactivated temporarily to
prevent an unwanted restart of the Router.
Services →Auto reboot: Tab Ping Reboot_
The changed setting must be saved by clicking on _Save_.
•
The "Ping Reboot" should then be reactivated for operation.
•
The default server 'ping.mdex.de' can only be reached from the mdex network!
If you use the MX560 without mdex IP service (fixed.IP+ / public.IP) or without mdex
SIM, you must set a publicly accessible server at _Edito, e.g. public-ping.mdex.de
(185.39.176.22).
For detailed instructions about Ping Reboot please refer to chapter 3.11 Ping Reboot (P. 31).
Username: admin
Password: admin01
login
Disable

Setup Guide - mdex Router MX560
Page 18
3.3 Login Password
The Login Password is used to access the WebUI and SSH interface of the MX560.
If the default password admin01 has not yet been changed, you will first be prompted to change the
password after first login.
The new Login Password must consist of at least 8 characters and must contain at least one upper
case letter, one lower case letter and one number.
The Login Password can be changed again at System →Administration in Tab General_:
Current password requires you to enter the current Login Password of the MX560.
The new Login Password is entered for New password and Confirm new password.
Click on button _Saveoto apply the new Login Password.
3.4 Setup Wizard
After login to MX560 WebUI first time, the Setup Wizard is usually started for the following settings.
The setup wizard can be called later again at System →Setup Wizard.
Step 1 - General:
At 'Time Zone Settings' you can set the time zone. (For Germany:
Europe/Berlin). More details can be found in chapter 4.4 NTP time server
(Page 37).
Step 2 - Mobile:
Set the mobile settings for the operation of the SIM. More details can be found
in chapter 3.5 Mobile settings (Page 19).
Step 3 - LAN:
The network settings of the MX560 can be adjusted.
More details can be found in chapter 3.7 Router LAN IP address (Page 24).
Step 4 - WiFi:
The WIFI Access Point of MX560 is disabled by default.
More details to activate and setup the WIFI Access Point can be found in
chapter 4.2 WIFI (Wireless Access Point) (Page 34).
To set the mobile settings, the profile of the desired SIM card /
mdexSIM can be selected at operator profile.
Especially if the MX560 can be reached from the Internet via a public IP address, a secure
Login Password must be set for security reasons!
Click on to display the set
password in plain text.

Setup Guide - mdex Router MX560
Page 19
3.5 Mobile settings
If another SIM card is used, the mobile settings must be adjusted accordingly.
Network Mobile→: Tab General_
3.5.1 SIM card settings
APN:
Access point of your mobile network operator for the mobile connection.
For use with mdex, please refer to your mdex order confirmation e-mail or the
mdex Management Portal.
PIN number:
PIN of the SIM card. Since an mdex SIM usually does not have an active PIN,
please leave this field blank when using an mdexSIM.
We recommend that you do not PIN your SIM card. Otherwise, the SIM card
will be blocked immediately if the PIN is incorrect.
Authentication
method:
Method for authentication (PAP, CHAP or None).
PAP must be set for an authentication to mdex.
Username:
Username (Username/Device-Username) of the mobile network operator.
For use with mdex, please refer to your mdex order confirmation e-mail or the
mdex Management Portal.
The Router is preconfigured to operate an mdexSIM Vodafone.
The required (highlighted) mobile
settings are described in chapter
3.5.1 (Page19).
For information on the additional
options, refer to chapter 3.5.2
(Page 20).

Setup Guide - mdex Router MX560
Page 20
Password:
Enter the APN password of your mobile network operator here. For the use of
an mdex IP service, please refer to your mdex order confirmation e-mail or
the mdex Management Portal.
3.5.2 Other mobile settings
Connection type:
The type of mobile connection can be set here.
Recommended preset: QMI
The alternative setting "PPP" should only be set in special cases, e.g. if the
setting "QMI" causes problems or malfunctions.
Fashion:
Mode of the SIM card IP address.
NAT is the recommended default.
The alternative settings "Bridge" or "Passthrough" are only intended for special
cases, e.g. if the IP address of the SIM card is to be transparently passed
through to the LAN socket.
Dialing number:
*99# is the recommended default setting for most SIM cards used to connect.
MTU:
1500 is the recommended maximum packet size for most SIM cards. In case of
data transmission problems, the MTU value should be slightly reduced.
Service mode:
Here you can set the priority for the mobile connection.
Automatic:
Recommended preset for the best possible mobile connection
depending on availability.
2G only:
The connection is only established to the 2G mobile network
(GPRS/EDGE).
3G only:
The connection is only established to the 3G mobile network
(HSPA/UMTS).
4G (LTE)
only:
The connection is only established to the 4G mobile network
(LTE).
Deny data
roaming:
Disable Roaming to prevent a mobile connection to foreign mobile networks,
e.g. international networks in border areas.
Roaming is possible, if the SIM card is authorized. (default setting)
Roaming is not allowed. The SIM may only use its own mobile network.
By roaming, foreign mobile networks (e.g. abroad or border
regions) can be used, which can lead to high mobile costs
depending on the SIM card tariff!
Other manuals for MX560
2
Table of contents
Other Mdex Network Router manuals
Popular Network Router manuals by other brands

Dynamix
Dynamix UM-A quick start guide

ORiNG
ORiNG RGPS-92222GCP-NP-LP user manual

ZyXEL Communications
ZyXEL Communications P-2602R-D1A Support notes

SpeedStream
SpeedStream 4200 user guide

InHand
InHand InRouter900 Series user manual

Brocade Communications Systems
Brocade Communications Systems NetIron MLXe Series Hardware installation guide