DVD PLAYER/VCR – MD 80975 3
TABLE OF CONTENTS
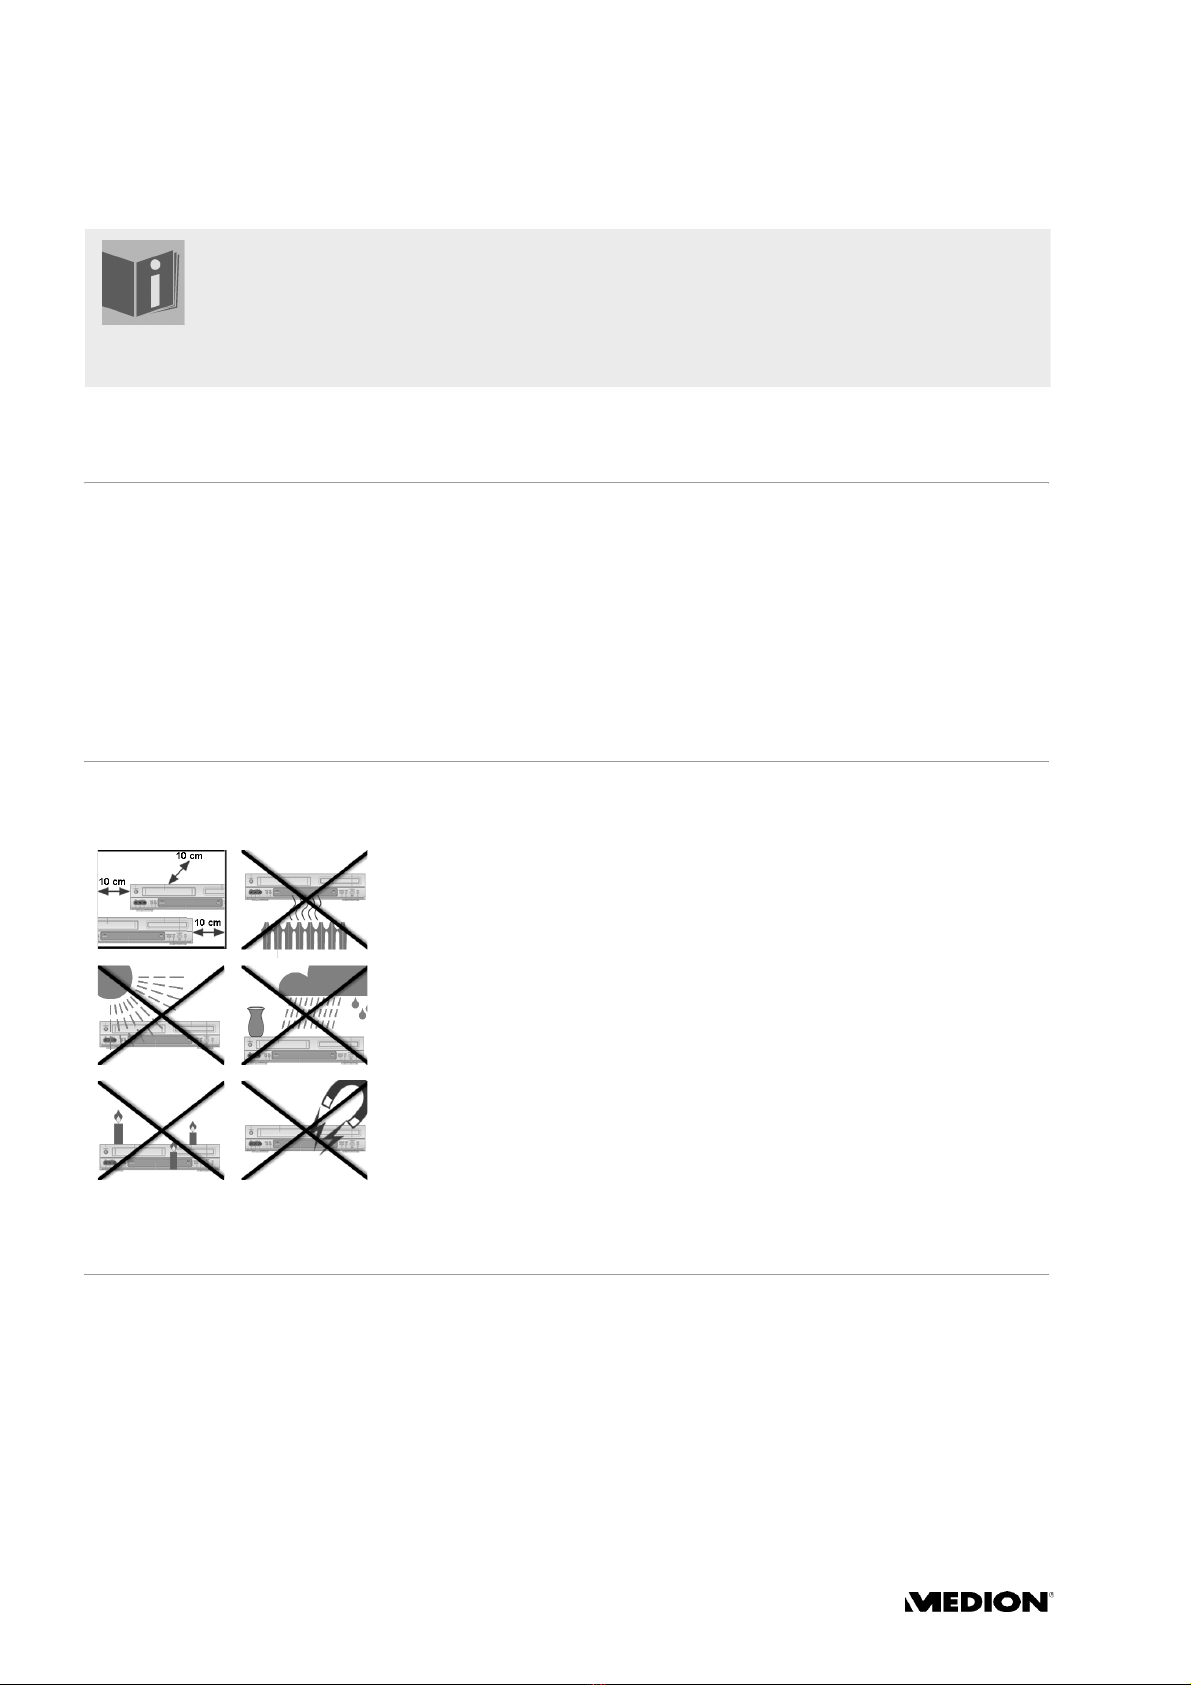
Safety instructions . . . . . . . . . . . . . . . 4
Preparation . . . . . . . . . . . . . . . . . . . . . . . 6
Unpacking the device . . . . . . . . . . . . . . . . . . . . 6
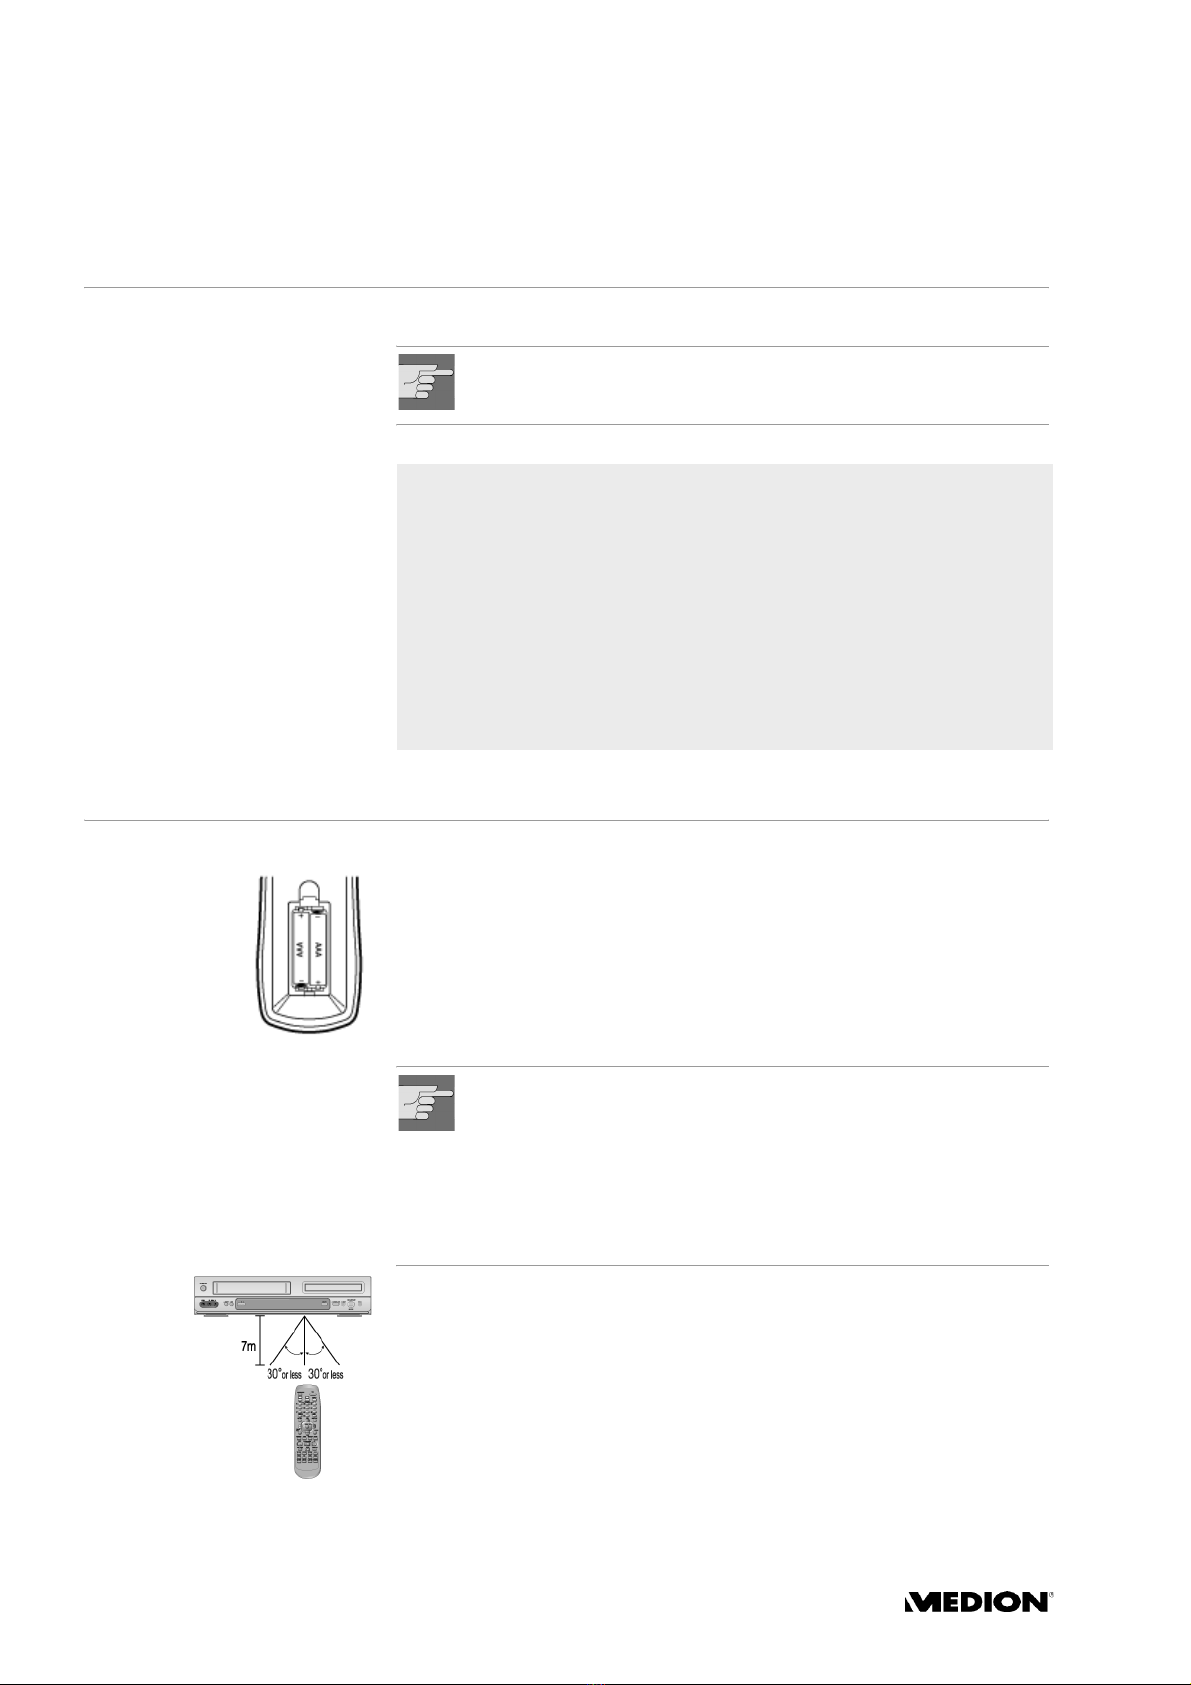
The remote control . . . . . . . . . . . . . . . . . . . . . . 6
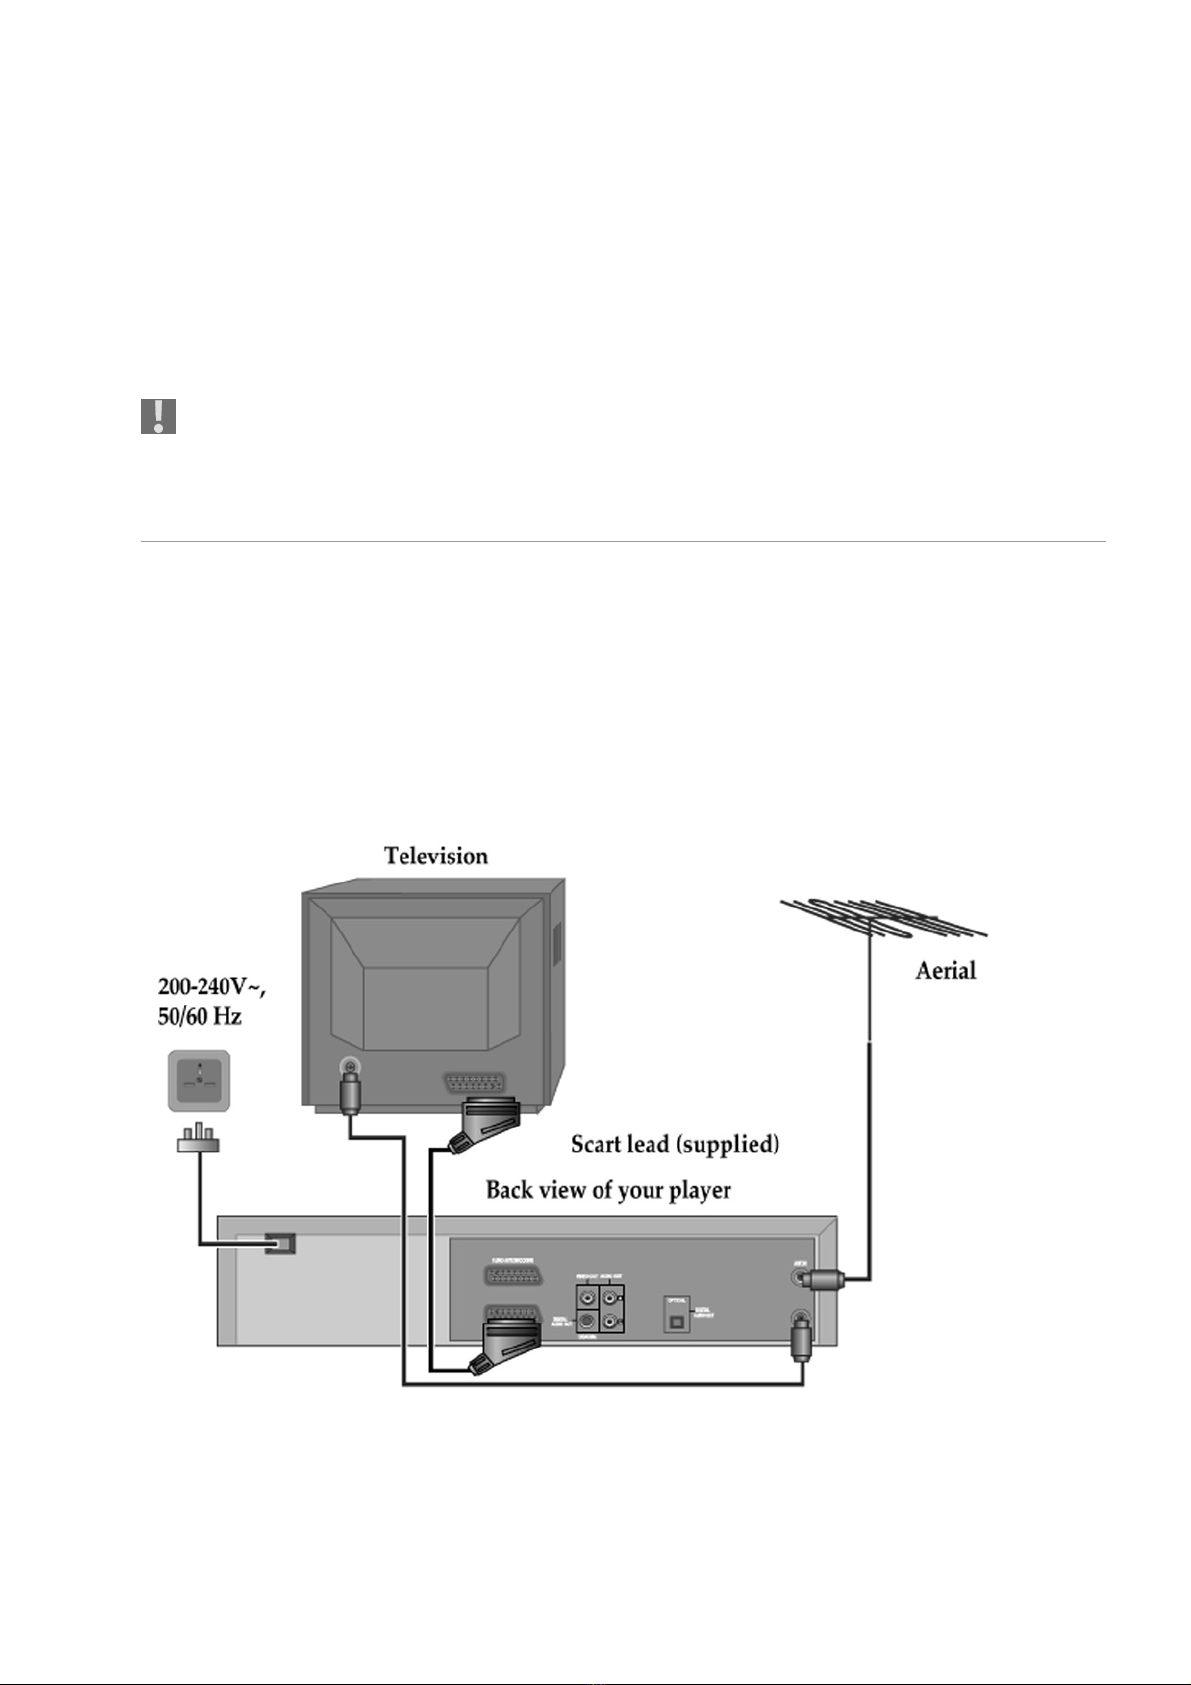
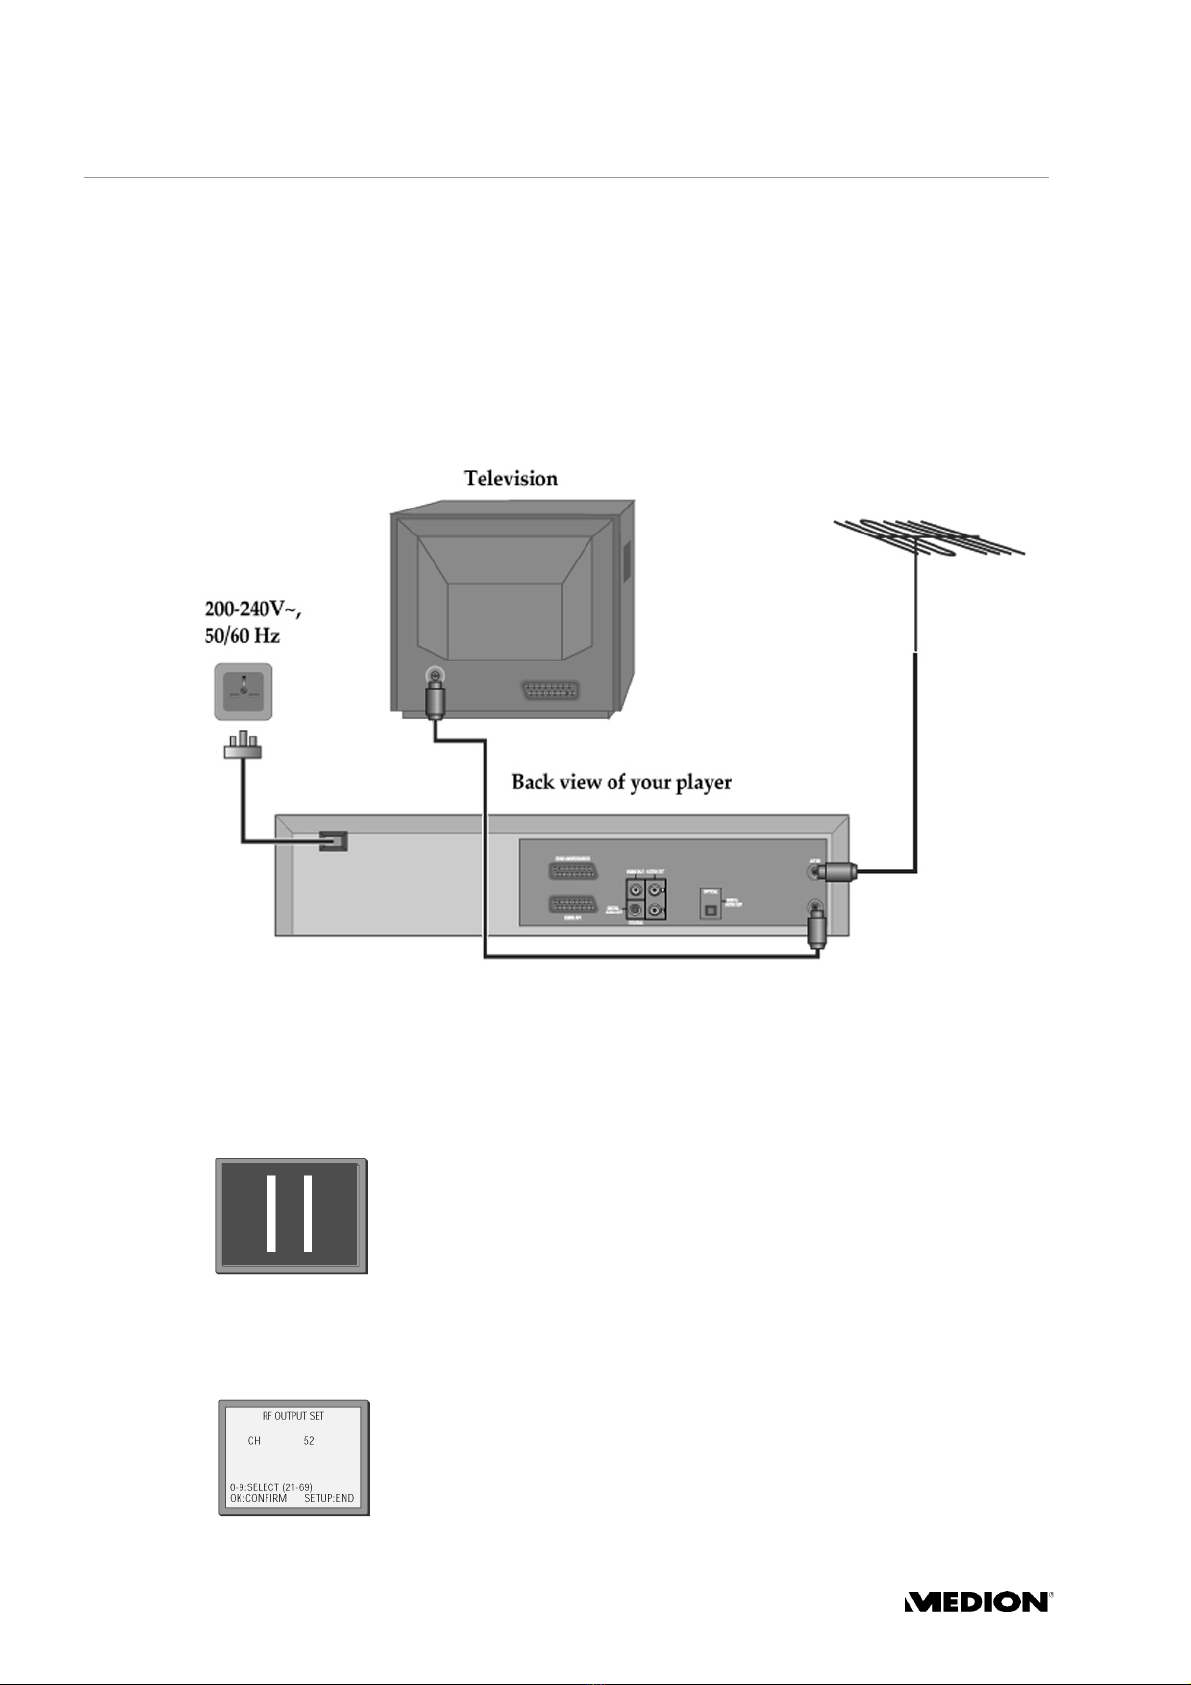
Connections and connection options 7
Connecting the television with a SCART cable . 7
Connecting the television with an antenna cable 8
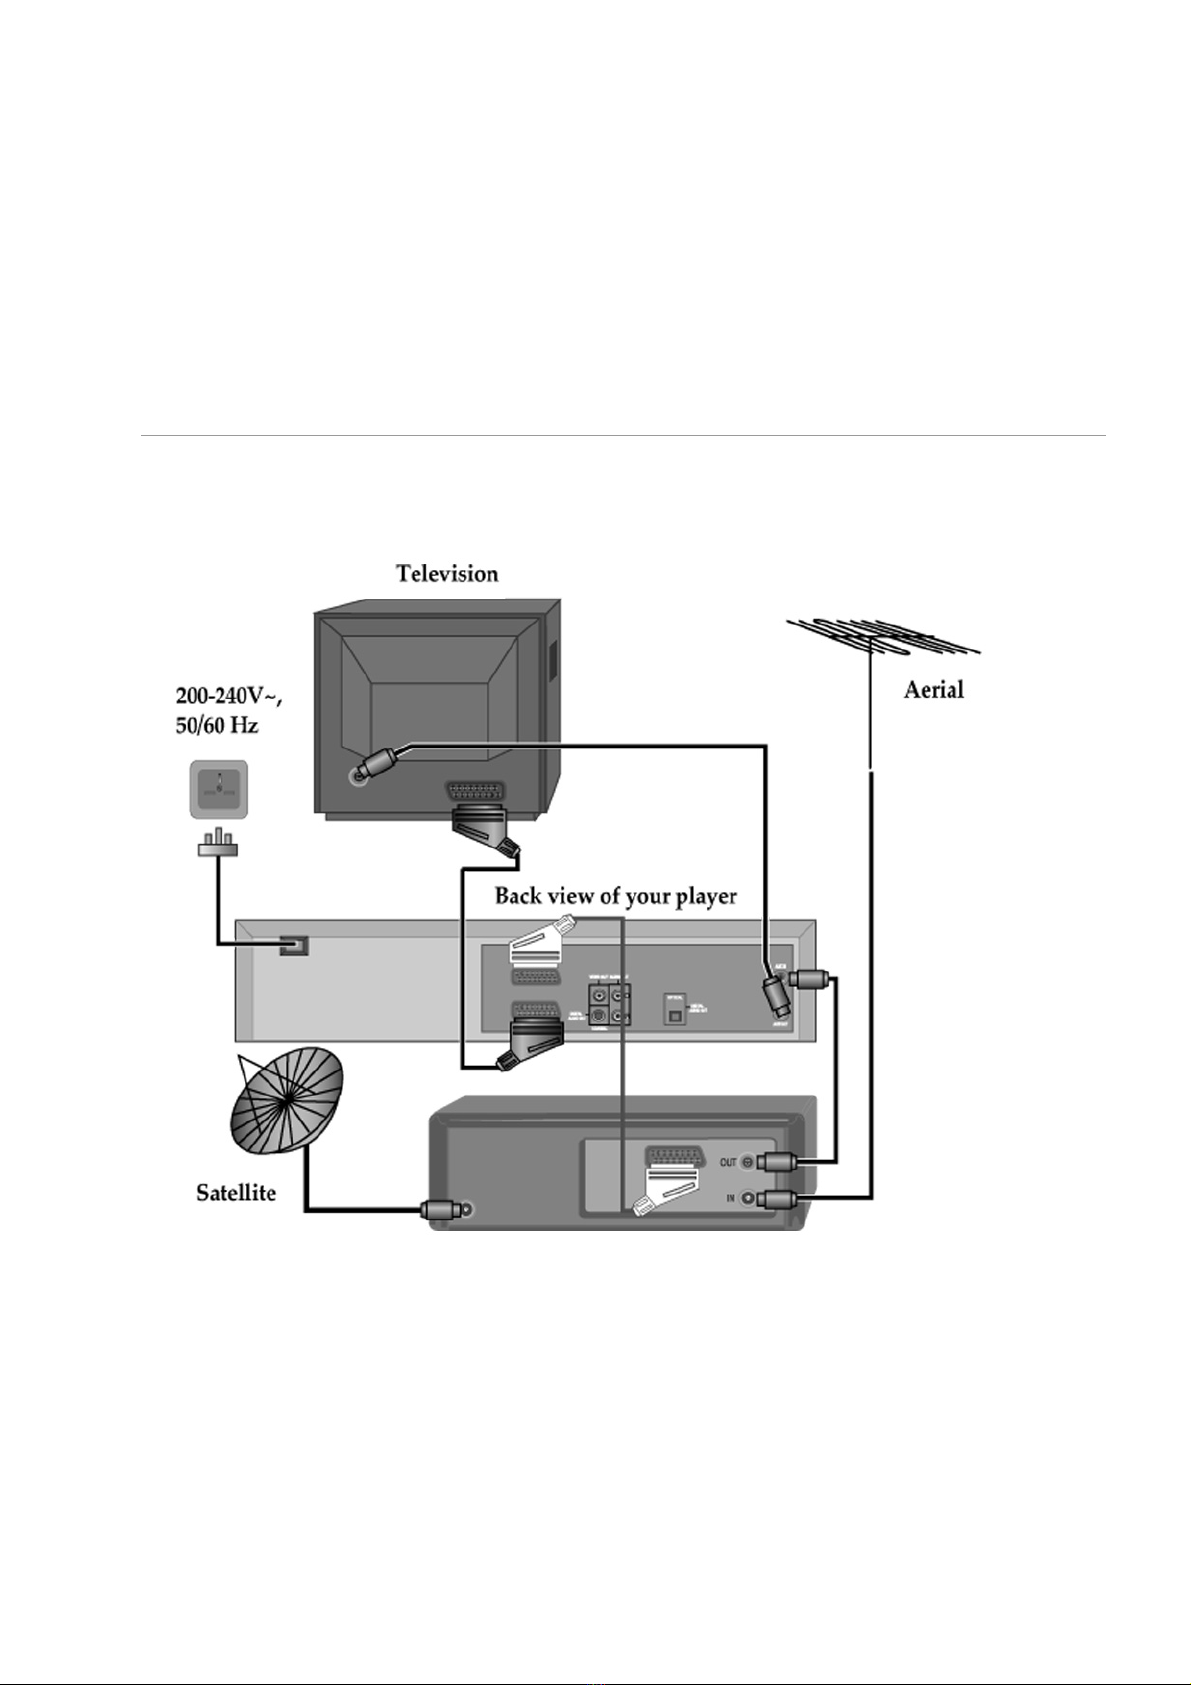
Connecting the DVD player/VCR
through a satellite receiver . . . . . . . . . . . . . . . . . 9
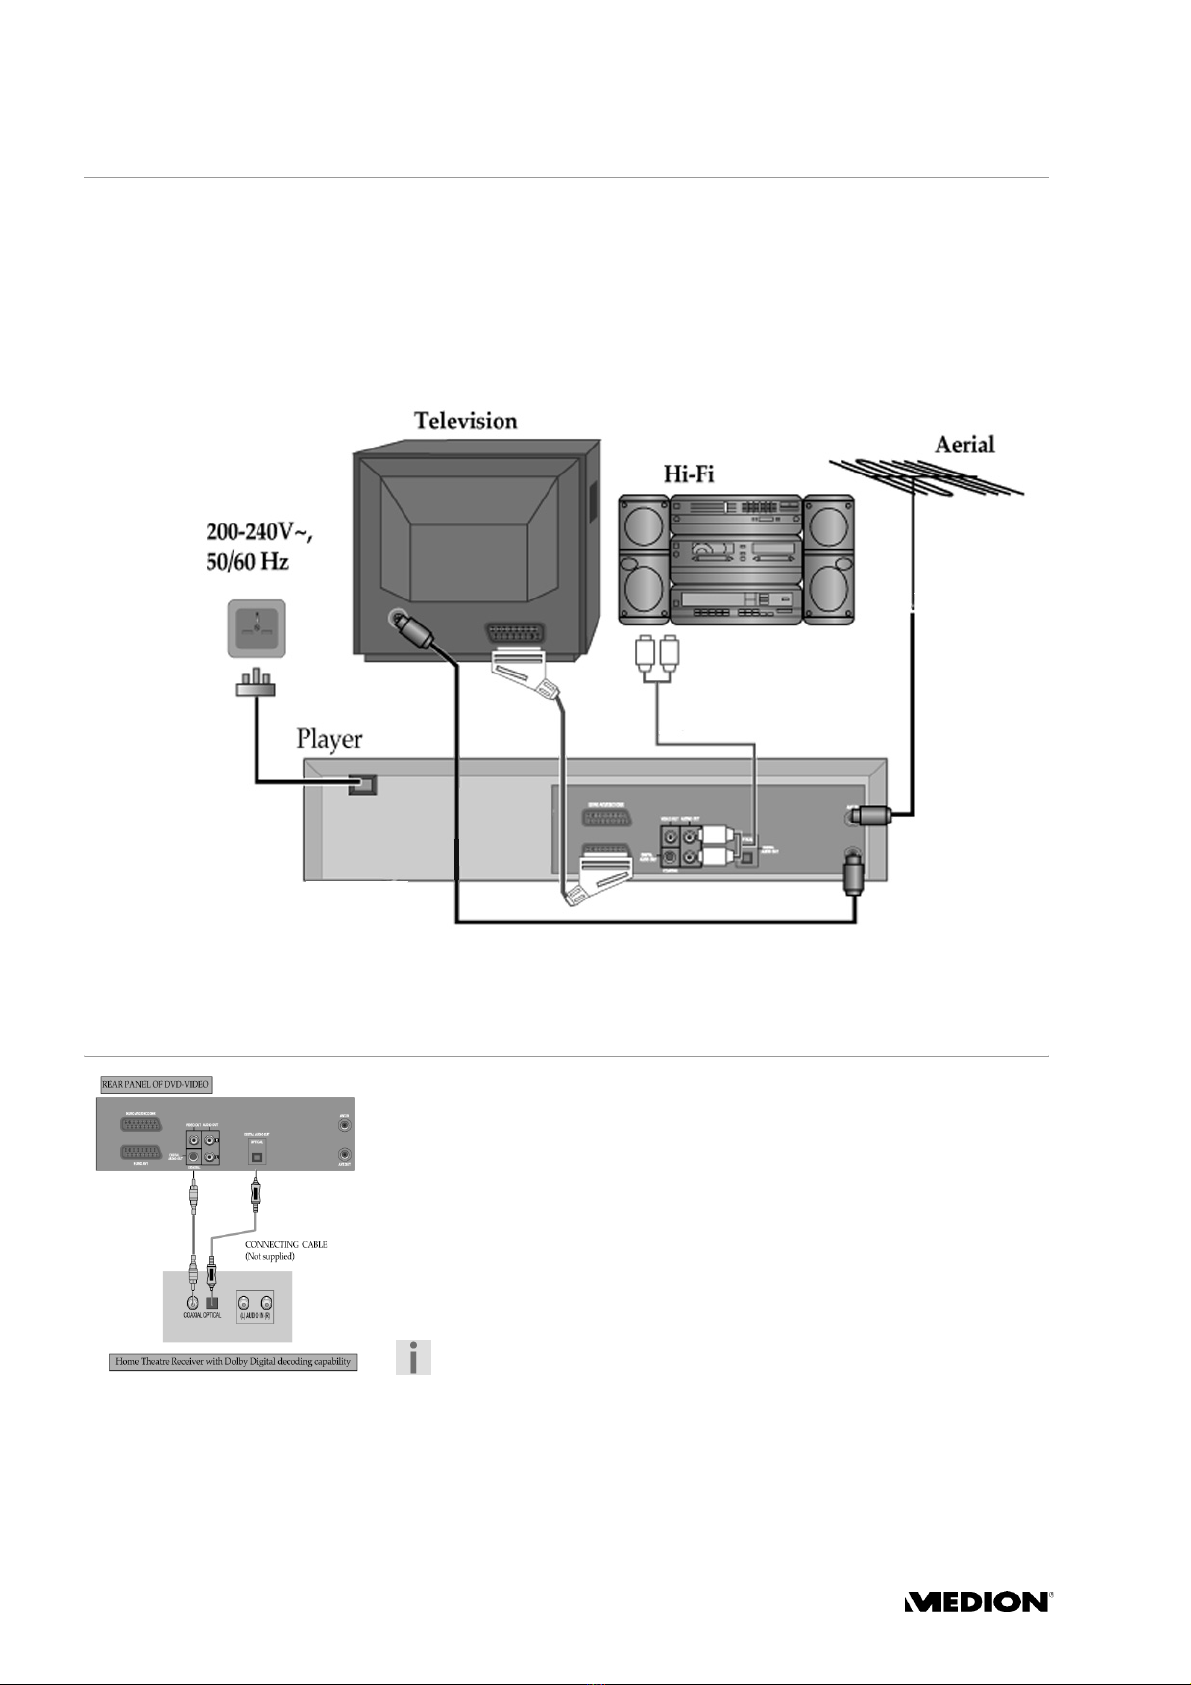
Connecting the DVD player/VCR
to a HI-FI system . . . . . . . . . . . . . . . . . . . . . . . . 10
Connecting a surround amplifier or receiver . . 10
Connecting another video device . . . . . . . . . . 11
Basic Operation . . . . . . . . . . . . . . . . . . 12
Turning the DVD player/VCR on and off . . . . . 12
Auto power off . . . . . . . . . . . . . . . . . . . . . . . . . 12
Child lock . . . . . . . . . . . . . . . . . . . . . . . . . . . . . 12
Output selection . . . . . . . . . . . . . . . . . . . . . . . 12
The DVD player/VCR’s operation display . . . . . 13
Initial Installation and VCR Mode . . 14
Autotuning . . . . . . . . . . . . . . . . . . . . . . . . . . . 14
Arranging programme locations . . . . . . . . . . 14
Manual tuning . . . . . . . . . . . . . . . . . . . . . . . . 15
Clearing programme locations . . . . . . . . . . . . 15
Creating station names . . . . . . . . . . . . . . . . . . 16
Setting time and date . . . . . . . . . . . . . . . . . . . . 16
OSD ON and OFF . . . . . . . . . . . . . . . . . . . . . . . 16
VCR Playback . . . . . . . . . . . . . . . . . . . . . 17
Playback functions . . . . . . . . . . . . . . . . . . . . . . 17
VCR Recording . . . . . . . . . . . . . . . . . . . 18
Manual recordings . . . . . . . . . . . . . . . . . . . . . 18
Preterming the picture format (4:3, 16:9) . . . . 18
Selecting the recording source . . . . . . . . . . . . 19
To watch a TV Channel or DVD during
recording . . . . . . . . . . . . . . . . . . . . . . . . . . . . . 19
Timer recording . . . . . . . . . . . . . . . . . . . . . . . . 20
More video cassette functions . . . . . . . . . . . . . 22
The menu TAPE CONTROL . . . . . . . . . . . . . . . . 22
The VCR Hi-Fi sound system . . . . . . . . . . . . . . 23
Disc Operation . . . . . . . . . . . . . . . . . . 25
About DVDs. . . . . . . . . . . . . . . . . . . . . . . . . . . . 25
Inserting a disc . . . . . . . . . . . . . . . . . . . . . . . . 26
Basic playback . . . . . . . . . . . . . . . . . . . . . . . . . 26
Searching options . . . . . . . . . . . . . . . . . . . . . . 26
Repeat functions . . . . . . . . . . . . . . . . . . . . . . . . 28
Picture adjustments . . . . . . . . . . . . . . . . . . . . . 29
Audio settings . . . . . . . . . . . . . . . . . . . . . . . . . . 29
Displaying and editing the current status . . . . 30
Other disc types . . . . . . . . . . . . . . . . . . 31
Playing CD or MP3 discs . . . . . . . . . . . . . . . . . 31
Playing JPEG pictures . . . . . . . . . . . . . . . . . . . . 32
Playing MPEG movies . . . . . . . . . . . . . . . . . . . . 33
Settings in the DVD SETUP menu . . . . 34
Navigating the menu . . . . . . . . . . . . . . . . . . . . 34
The menu “Language“ . . . . . . . . . . . . . . . . . . . 34
The menu “Video“ . . . . . . . . . . . . . . . . . . . . . . 35
The menu “Audio“ . . . . . . . . . . . . . . . . . . . . . . 35
The menu “Others“ . . . . . . . . . . . . . . . . . . . . . 35
Table of language codes . . . . . . . . . . . . . . . . . 37
Troubleshooting . . . . . . . . . . . . . . . . . 38
Disposal . . . . . . . . . . . . . . . . . . . . . . . . . . . . . . 39
Technical data . . . . . . . . . . . . . . . . . . . 40