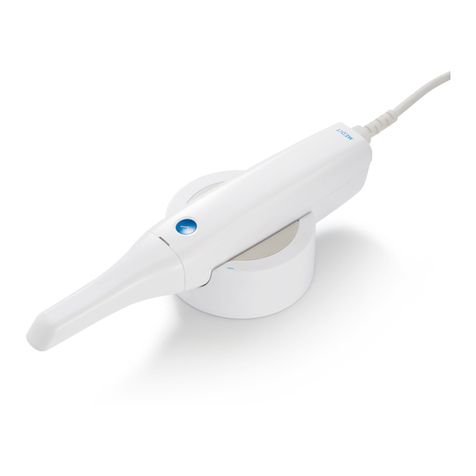
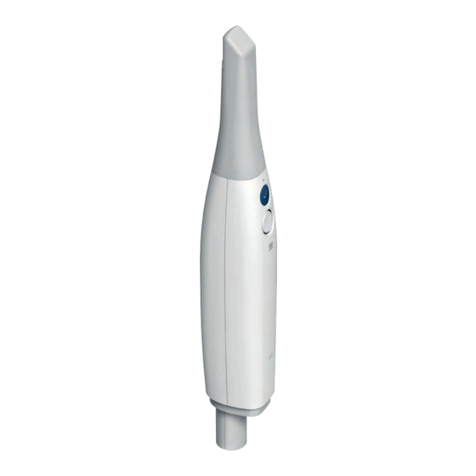
Medit i700 User manual

1
WELCOME!
i 700 Getting Started
Congratulations on the purchase of your new
Medit i700 Intraoral Scanner.
PLEASE REVIEW THESE DOCUMENTS ON “HOW TO GET STARTED”.
We have developed this process to follow in sequence before you schedule your
training. Once you complete the on-boarding process, please practice on a few
volunteers and get in touch with us to schedule your training:
Call Nasheel at (604)-637-1321

2
Unboxing
Medit i700
1. i700 package
Main package
Accessory package

3
2. i700 Component Overview

4
Component Descriptions
01 i700 Handpiece
This is the main body of the i700 scanner where you will be able to find the power button
as well as the start/stop button for scanning.
Power Hub
Connects the i700 body to the power source and PC.
02 i700 Handpiece Cover
It is important to prevent your scanner from being exposed to externalities for long periods
of time. Your i700 body is hence protected by the handpiece cover to prevent it from being
contaminated during transportation.
03 i700 Reusable Tips
Each i700 package comes with four reusable scanner tips. The tips should be sterilized
between patients!
04 i700 Calibration Tool
You can calibrate your i700 using the calibration tool. Calibration should be performed
before the first use, as well as periodically, to ensure optimal scanning performance.
05 Desktop Cradle
Make sure that your i700 is placed in a secure place to prevent damage. The desktop
cradle is an easy way to keep your i700 body safe on a flat surface when not in use.
06 Wall Mount Holder
Like the desktop cradle, the wall mount holder is meant to keep the i700 secure when not
in use. This requires additional assembly.

5
07 USB 3.0 Cable
To be connected to a USB 3.0 port on the PC as well as to the Power Hub.
08 i700 Medical Adapter and i700 Power Cord
The medical adapter to be connected to the Power Hub and Power Cord and to the power
source.
09 USB Memory Stick
The USB memory stick is pre-loaded with the image acquisition software, the Medit iScan.
10 User Guide
It is important to read the user manual before using the i700 to prevent any damage or
accidents. Besides teaching you how to set up the i700, the user manual also contains
important information about the proper usage of the scanner.

6
4. Setting up the i700
i) Connect the USB 3.0 Cable to the Power Hub.

7
ii) Connect the Power Cord to the Medical Adapter.
iii) Connect the Power Cord to a Power Outlet.

8
v) Connect the USB 3.0 Cable to the computer.
Turn on the i700 scanner.
Press the power button on i700 and wait until the USB connection indicator turns blue.
Turn off the i700 scanner.
Press and hold the power button of the i700 for 3 seconds.

9
Installing
Medit Link
Video Tutorial: How to create a Medit Link account as clinic administrator
Link: https://vimeo.com/432204545/3403cc67c8
1. Checklist before installing the Medit Link application
*Make sure to check the following before installing the Medit Link application.
i) Ensure that your Windows system as well as your device drivers are up-to-date.

10
ii) Disconnect the i700's USB 3.0 cable from the computer before installation.
As the iScan program is enclosed in Medit Link, the installation will not proceed if the
i700 device is connected to the computer.
2. Installation guide
i) Prepare the Medit Link installer file.
The Medit Link installer is enclosed in the USB flash drive
included in the i700 package. Alternatively, you can also download the installer file
from www.meditlink.com.Log in to the Medit Link website and click the Download
Medit Link button at the bottom left of the page.

11
ii) Run the Medit Link installer: Medit_Link_X.X.X.X.exe.
iii) Select your language preference.
iv) Specify the folder to install the Medit Link application to and tick the checkbox to agree to the
terms of use and license to proceed to the next step.
v) The installation is an automatic process that will take a few minutes. Please wait until the
installation is complete and do not turn off the computer during installation.
vi) After installation is complete, you need to restart the computer in order to use the iScan
installed together with Medit Link. There is no need to restart the computer if you are not using an
i700.

12
3. Power options for using the i700
i) Go to Control Panel > All Control Panel Items > Power Options > Change advanced power
settings > USB settings
Disable USB selective suspend setting
ii) Go to Control Panel > All Control Panel Items > Power Options > System Settings
Select Do nothing when the lid is
closed for both options - On battery
and Plugged in.

14
ii) Accessing via the Medit Link application from desktop
Launch the Medit Link application by clicking the desktop icon.
2. Signing into Medit Link
i) Click Sign up if you need to create an account and you will be automatically redirected to the
Medit Link account creation page.
ii) If you already have an account, click Log in at the bottom of the screen and you will be
redirected to the login page on the Medit Link website. If you do not have an account, click the
“Clinic” tab and begin setting up one up.

15
Calibrating the
Medit i700
Then follow the steps from the Calibration Wizard. Always turn the dial ANTICLOCKISE while
calibrating.
The calibration process is essential in order to produce precise 3D models. It is highly
recommended that you perform the calibration process periodically.
1. Calibration is required when:
The quality of the 3D model is not reliable or accurate as compared to previous results.
Environmental conditions such as temperature have changed.
Calibration period has expired:
You can set the calibration period in Menu > Settings > Calibration Period(Days).
The default calibration period is set to 14 days.
2. Precautions when performing calibration
The calibration panel is a delicate component and you should not touch it directly.
Should there be issues with the calibration process, check the panel first. If the
calibration panel has been contaminated, please contact your service provider.

16
3. How to calibrate the i700
Switch on the i700 and connect the device to the software.
i) If the scanner tip is attached, please remove it from the handpiece.
ii) Turn the dial of the calibration tool to position (1).
iii) Remove the cover from the calibration tool and put the i700 handpiece into the calibration tool.
iv) Click Next to start the calibration process.
v) When the handpiece is mounted in the correct position, the system will automatically acquire
the data at position (1).
vi) Repeat the same for position (2) to position (8) and the (LAST) position.
vii) When the data acquisition is complete at the (LAST) position, the system will automatically
calculate and show the results of the calibration.

17
Scanning Technique
Video Tutorial: Intra-oral scan strategy - Introduction
Link: https://vimeo.com/430187011/000b117d9b
1. Recommended Scan Path for Full Arch:
[1] Build up the main scan data by scanning the occlusal surface from the last molar to anterior
teeth. Hover 1-2 mm away from the teeth. The trick is to maintain a consistent distance from the
teeth while also moving at a consistent speed when scanning.
Maxillary Scan Path Mandibular Scan Path

18
When you scan anterior teeth, it is crucial to acquire scan data enough to ensure that the anterior
teeth turn green on the reliability map.
: Change the Model display mode to reliability map.
Scan the lingual side of the anterior teeth, tilt the tip to scan the incisal, and tilt it again
to scan the labial side.
Make sure to scan the anterior teeth from a sideward angle of attack.
❏Complete the anterior teeth and continue to scan the occlusal surface till you reach to the
opposite molar teeth.
[2] When you reach the opposite molar, tilt the tip toward the lingual side so that
the lingual side of the teeth, the lingual gingiva, and the occlusal surface appear as 1:1:1,
and proceed to scan the lingual side from the opposite molar back to the molar where you
began scanning.
If you tilt it too much toward the lingual side, the system may lose alignment.

19
[3]
When you're done with the lingual side, tilt the tip toward the buccal side so that the buccal
side of the teeth, the buccal gingiva, the occlusal surface appear as 1:1:1, and proceed to
scan the buccal side to the opposite molar.
Gingiva scan data should be sufficiently acquired for the occlusion stage. A few
millimetres of gingiva especially around the posteriors are essential.
2. Recommended Scan Path for Occlusion
[1]
[2] Start the occlusion scan using the rolling method: roll the tip up and down till you scan 3 to 4
teeth from the maxilla and the mandible respectively.

20
Acquire scan data from similar posterior teeth for both first and second occlusion.
[3] The initial alignment is completed for occlusion.
Through the automatic or manual alignment process, the maxilla and the mandible are
put into the initial position for further alignment, the occlusal accuracy of which is not
adequate for analysis.
If you wish to check the occlusal status before the Complete stage,
click Optimize or Occlusion Analysis in the command options.
Other manuals for i700
2
Table of contents
Other Medit Dental Equipment manuals
Popular Dental Equipment manuals by other brands
Den-Mat
Den-Mat Sapphire plus Instructions for use
Amanngirrbach
Amanngirrbach ceramill uv operating instructions
Amanngirrbach
Amanngirrbach ceramill motion DRS user manual

MITSUI
MITSUI Kulzer Dynamix speed Instructions for use

BEYES
BEYES Maxso X200 Instructions for use

Zubler
Zubler VARIO PRESS 300 instructions

