MEE AUDIO M6 VR User manual
MULTIPLATFORM IN-EAR
GAMING HEADPHONES
M6 VR
DESIGNED FOR VR HEADSETS
Scan QR code or visit:
MEEaudio.com/M6VRVid
M6 VR SETUP GUIDE

MULTIPLATFORM IN-EAR
GAMING HEADPHONES
M6 VR PACKAGE CONTENTS
R
L
x 2
PACKAGE CONTENTS
Earpieces
Protective Carrying Case
Silicone Cable Bracket with Velcro Strap
Velcro Cable Organizers
Silicone Eartips (6 pairs)
Short Cable for VR headsets
Extension Cable for VR headsets
Headset Cable for consoles and other devices
A
F G
H
B C
D
E
+
A.
B.
C.
D.
E.
F.
G.
H.
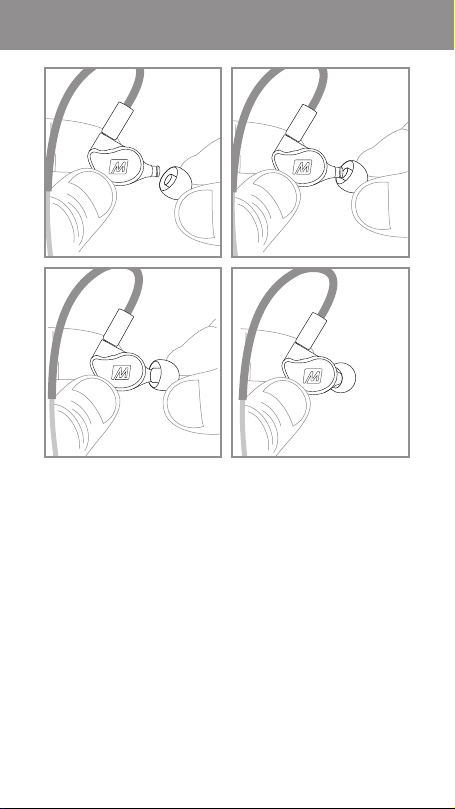
EARTIP SELECTION
INSTALLING EARTIPS
Multiple sets of eartips are included to ensure you
get the best fit with your headphones.
The correct eartips for your ear will allow the
earpieces to fit flush, reduce outside noise, and
provide good bass response.
Install eartips as shown. Make sure eartips are
installed securely before use.
If your music sounds tinny or lacks bass, try different
eartips.

EARTIP SELECTION
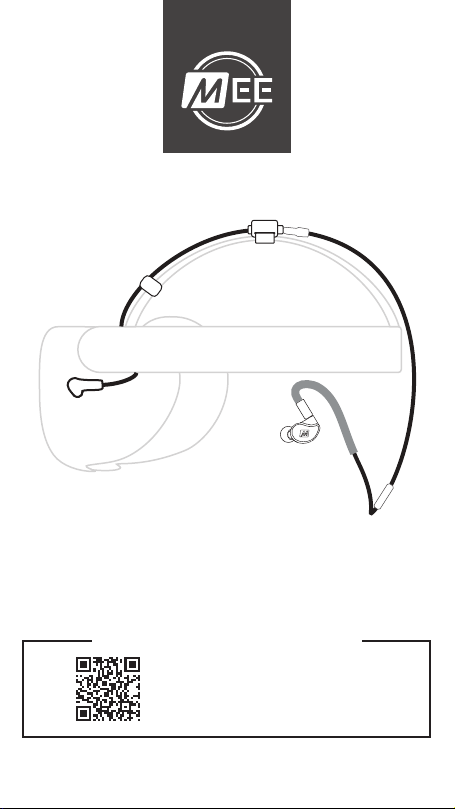
INSTALLATION FOR VR HEADSET:
OVERVIEW
The M6 VR can be used
with the Oculus Quest and
select other VR headsets.
Follow the instructions in
steps 1-5 to install and wear
your M6 VR with optimal
comfort and freedom of
movement.
The position of the Velcro
straps and extension cable
may need to be adjusted for
other VR headsets.
INSTALLATION FOR VR HEADSET
1
5
2
4
3
VIEW OUR VIDEO SETUP GUIDE AT MEEAUDIO.COM/M6VRVID
FOR MORE DETAILS ON VR HEADSET INSTALLATION

1
STEP 1: INSTALLING THE EXTENSION CABLE
Plug the Extension Cable (G) into the 3.5 mm jack
of your VR headset.
INSTALLATION - STEP 1

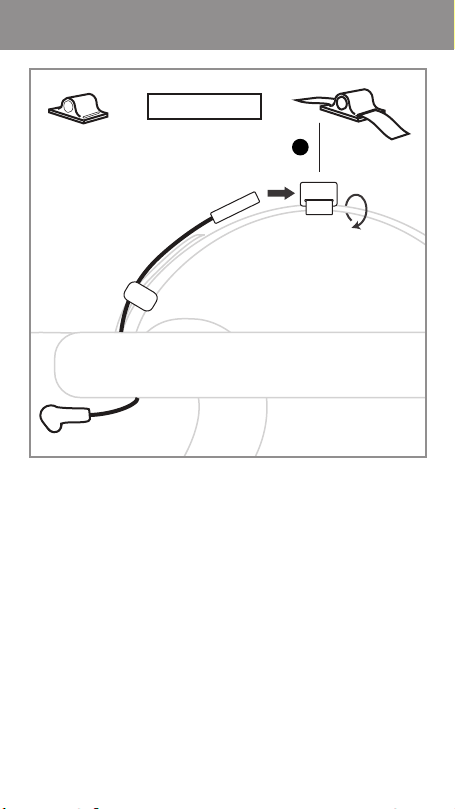
2
STEP 2: SECURING THE EXTENSION CABLE
Route the Extension Cable (G) over the front of the
headset and through the top strap.
Secure the Extension Cable (G) at the base of the
top-strap using a Velcro Cable Organizer (D)*.
*Tip: secure the tail end of the Velcro Cable
Organizer (D) around the cable first.
INSTALLATION - STEP 2
3
+=
STEP 3: MOUNTING THE CABLE BRACKET
Insert the jack of the Extension Cable (G) into the
Silicone Cable Bracket (C) and secure the
Silicone Cable Bracket (C) to the top strap of the
VR headset using the Velcro Strap.
Mount the Silicone Cable Bracket (C) as far back
as possible on the strap to eliminate cable slack.
INSTALLATION - STEP 3

INSTALLATION - STEP 3
4
STEP 4: WEARING THE M6 VR IN-EARS
Until you become familiar with the over-the-ear fit
of the earpieces, we recommend putting them on
first, and then putting on your VR headset.
Identify the left and right Earpieces (A). Place the
earhooks over your ears with the cable down your
back. Place each earpiece in the corresponding
ear, adjusting it until it fits flush in the ear and the
eartip seals the ear canal.
left right
INSTALLATION - STEP 4
Bend the memory wire around each ear and slide
the cable cinch up to tighten for the most secure fit.
cable cinch

5
STEP 5: CONNECTING THE SHORT CABLE TO THE INSTALLED
EXTENSION CABLE
Once the earpieces are in your ears, put on your VR
headset and plug the Short Cable (F) into the
previously installed Extension Cable (G).
You’re all set!
INSTALLATION - STEP 5

USE WITH OTHER DEVICES
The included Headset Cable (H) can be used with
PCs, laptops, gaming consoles/controllers, tablets,
smartphones, and other devices with a standard 3.5
mm headset jack.
REPLACING THE CABLE
To detach the cable, grasp the earpiece and cable
connector firmly, and pull straight apart without
twisting.
Table of contents
Other MEE AUDIO Headset manuals


