Megxon TX520 User manual
165mm+-2
122mm+-2
Table Of Contents
2
Safety Notes
Do not tryto open thecamera by yourselfwhich may causedamage to thecamera or electricshock.
Do not firethe flash ina close distance(less than 1meter) to humaneyes.
Keep the cameraaway from thereach of childrenor animals toprevent them fromswallowing the batteriesor small accessories.
Avoid using thecamera if anyform of liquidenters the camera.If it happens,switch off thecamera and contactthe company thatyou
bought this camerafrom for help.
Do not operatethis camera withwet hands whichmay cause electricshock.
Do not placeor store thecamera in ahigh temperature environmentwhich may cause damage to the camera.
Do not mixto use differenttypes of batteries or new and old batteries.
Takeout the batteriesto avoid electricityleakage which maydamage the camera when the camera is not in use for a long period.
Unplug the camerafrom the adapter(if used) toavoid damage tothe camera if the camera is not to be used in a long period.
It's normal thatthe temperature ofthe camera body rises after using for a long period.
3
Safety Notes ---------------------------------------------------------
Overall Introduction -----------------------------------------------
Accessories ---------------------------------------------------------
ExternalView -------------------------------------------------------
Mode Dial (Working Mode) ---------------------------------------
FocusRange --------------------------------------------------------
Icon Display ---------------------------------------------------------
Icon Index Table ----------------------------------------------------
Getting Ready -------------------------------------------------------
Switch On or Off the Camera -------------------------------------
Loading the Batteries ----------------------------------------------
Using anAC Adapter -----------------------------------------------
Inserting or Removingan SD Card ------------------------------
Attaching the Wrist Strap -----------------------------------------
Getting Started -----------------------------------------------------
Basic Photography ------------------------------------------------
Advanced Functionality Settings ------------------------------
Under Shooting Mode( ) ---------------------------------------
Setting Focus Range ---------------------------------------------
Turning On or Off the TFT LCD Monitor -----------------------
Setting Flash Mode -----------------------------------------------
Setting Self-timer -------------------------------------------------
Setting Digital Zoom ----------------------------------------------
Setting an Image Size (Resolution) ----------------------------
Setting Image Quality --------------------------------------------
Setting VoiceMemo ----------------------------------------------
Setting Photo Frame ---------------------------------------------
Setting Exposure --------------------------------------------------
Setting White Balance --------------------------------------------
Setting Power Frequency ----------------------------------------
Under Playback Mode ( ) --------------------------------------
Exploring an Image -----------------------------------------------
Displaying Image Information -----------------------------------
Playback of a Movie Clip -----------------------------------------
Thumbnail Images (Small Images) Display -------------------
Deleting Images ---------------------------------------------------
Formatting an SD Card -------------------------------------------
03
04
04
05
05
05
06
06
07
07
07
07
08
08
09
09
10
10
10
10
10
11
11
12
12
13
13
14
14
15
15
15
15
16
16
17
18
Formatting the Built-inFlash Memory ------------------------------
Setting Slide Show ----------------------------------------------------
Setting Image Protection ---------------------------------------------
Printing Out Imageswithout a PC -----------------------------------
Under Movie ClipMode ( ) ------------------------------------------
Setting the RecordingTime ofa Movie Clip -----------------------
Under Setup Mode( ) -----------------------------------------------
Setting Beep Sound ---------------------------------------------------
Setting Auto Power Off ------------------------------------------------
Setting Date Stamp ----------------------------------------------------
Setting Date Type ------------------------------------------------------
Setting Date ------------------------------------------------------------
Setting Quick View ----------------------------------------------------
Setting Language ------------------------------------------------------
Default Setting ---------------------------------------------------------
PC Connection -----------------------------------------------------------
Installingthe Camera'sDriver ---------------------------------------
UnderMicrosoft Windows98 /98SE -------------------------------
Under Microsoft Windows2000 -------------------------------------
Under Microsoft WindowsME / XP ----------------------------------
Under Mac 9.Xor later ------------------------------------------------
Installing Ulead Photo Explorer --------------------------------------
Under Windows Operation System(Windows 98/98SE/2000/ME/XP)
Under Macintosh OperatingSystem (Mac 9.Xor later) ---------
Downloading the Image(s) -------------------------------------------
Under Windows Operation System(Windows 98/98SE/2000/ME/XP)
Downloading Images fromRemovable Disk --------------------
Downloading Imagesthrough Ulead Photo Explorer ----------
Under Macintosh OperatingSystem (Mac 9.Xor later) ---------
Downloading Images fromRemovable Disk --------------------
Downloading Images throughUlead Photo Explorer ----------
Appendix ------------------------------------------------------------------
Error Message Table ---------------------------------------------------
Specifications -----------------------------------------------------------
About UleadPhoto Explorer -----------------------------------------
18
18
19
19
20
20
20
21
21
21
21
22
22
22
22
23
23
23
24
25
25
26
26
28
30
30
30
30
31
31
31
32
32
33
34

165mm+-2
122mm+-2
4
5
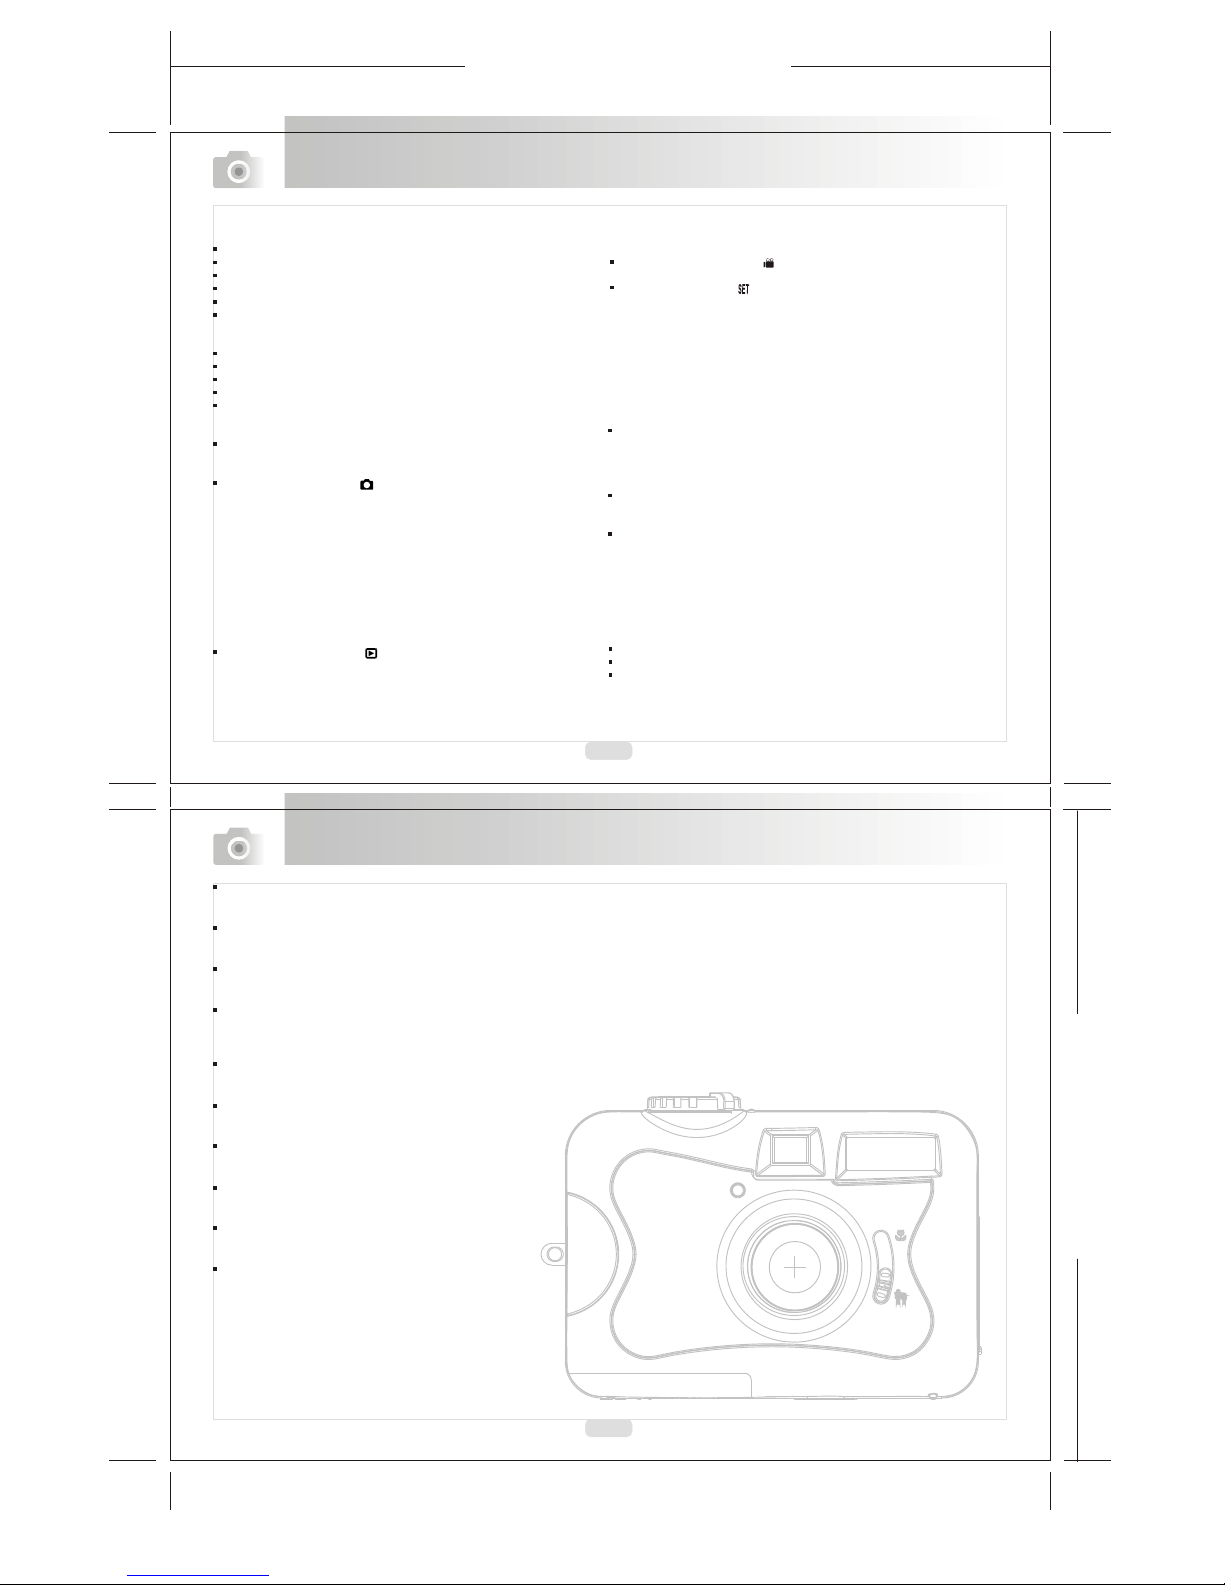
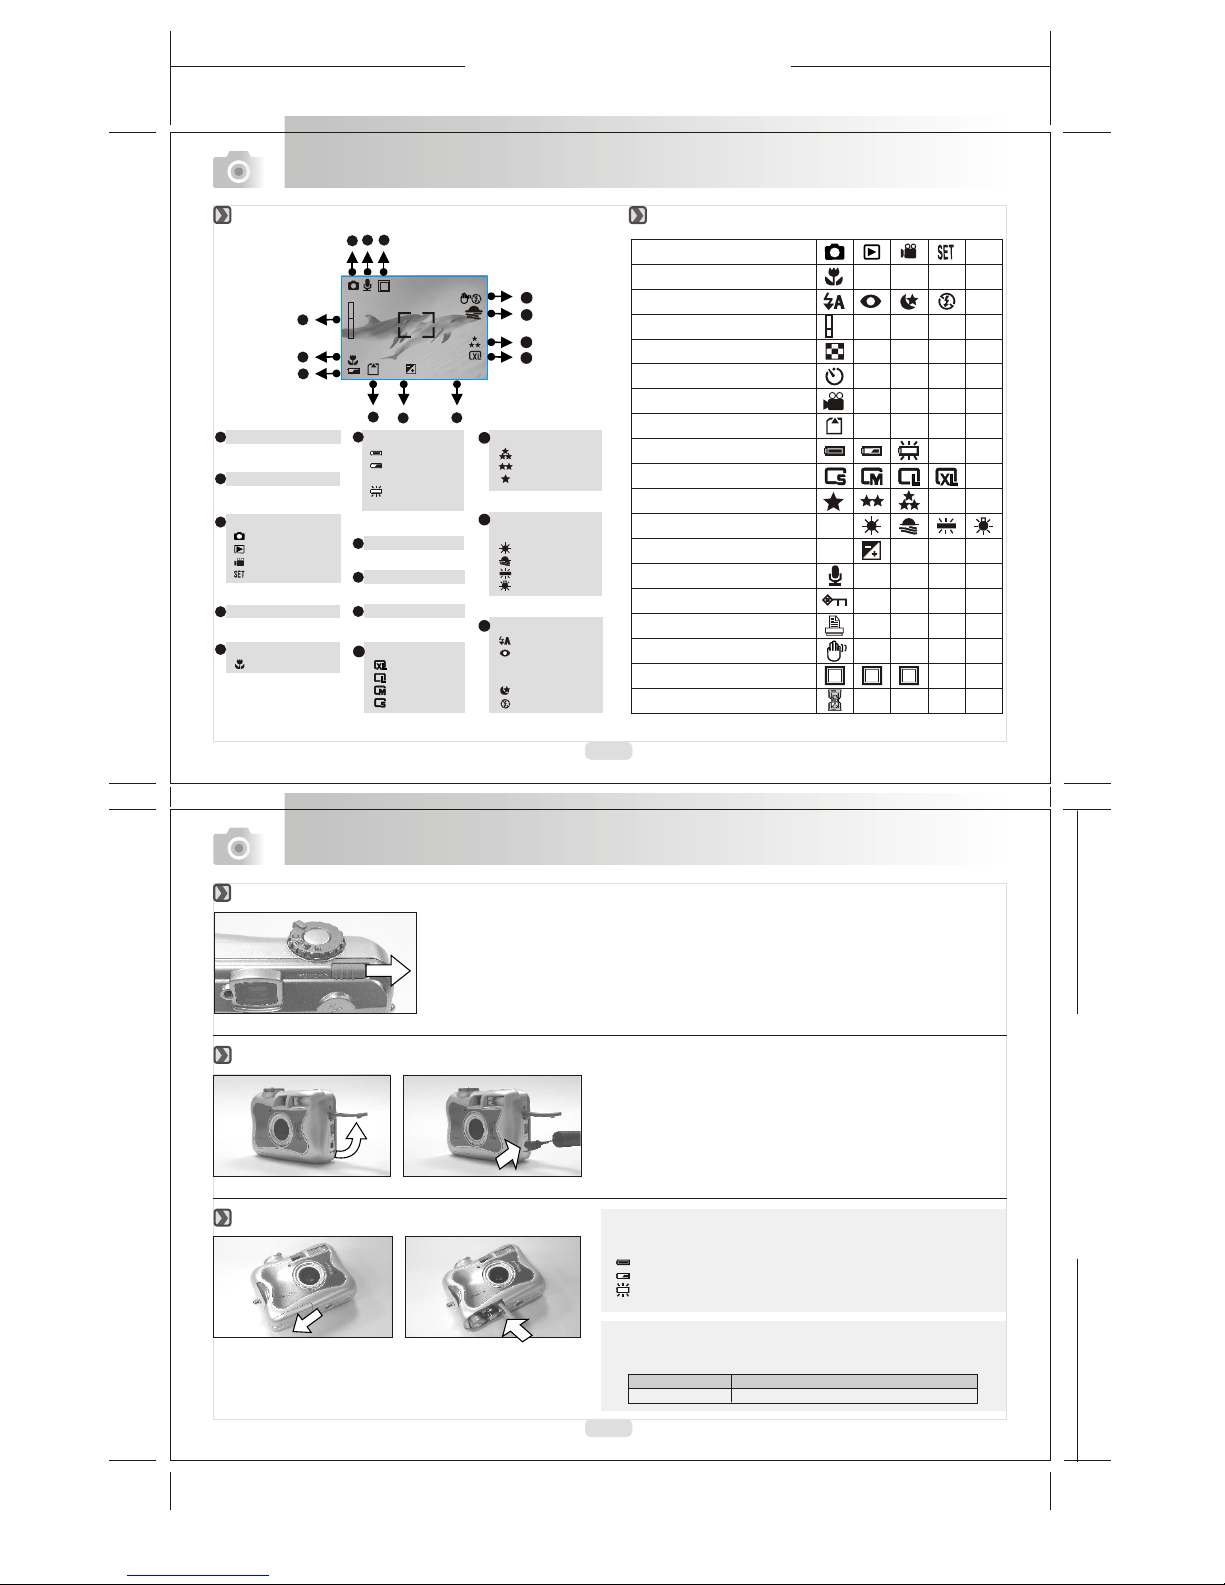
Overall Introduction
Shooting Mode
Playback Mode
Movie Clip Mode
Setup Mode
( )
( )
( )
( )
Menu Button
LED
Indicator
View Finder
Power Switch
TFT LCD
Monitor
Strap Eyelet
TFT LCD Button
Back
Up ( )Direction Button
Down ( )Direction Button
Left ( )Direction Button
Right ( )Direction Button
Mode Dial
Shutter Button
Tripod SocketBattery/Memory
Card Cover
Lens Focus Switch
USB Connector
DC-in Connector
Flash
Microphone
Viewfinder
Self-timer LED
Top
Front
Bottom
4X DIGITAL ZOOM
Overall Introduction
Digital Camera CameraDriver 2 xAABatteries Camera Pouch
& Ulead Software
User Manual QuickStart USB Cable Wrist Strap
Guide
External View
Mode Dial(Working Mode)
Focus Range
Accessories
Macro : 0.3m
Normal : 1.4m~infinity
( )
( )
User
Manual
Quick
Start
Guide
165mm+-2
122mm+-2
Photo Frame
Focus Range
( )Macro
Memory Card
Digital Zoom
Exposure
Date
Image Quality
( )Super fine
( )Fine
( )Normal
White Balance
( )Auto
( )Daylight
( )Sunset
( )Fluorescent
( )Tungsten
AUTO
Overall Introduction
Voice Memo
6
7
Battery Status
( )Battery full
( )Battery half
drained
( )Battery
drained
1
Working Mode
( )Shooting mode
( )Playback mode
( )Movie clip mode
( )Setup mode
2
3
5
6
7
8
Image Size
( )2048x1536
( )1600x1200
( )1280x960
( )2560x1920
9
Flash Mode
( )Auto flash
( )Auto flash with
red-eye
reduction
( )Slow Sync
( )Flash off
11
13
Getting Ready
Slide the "POWER"switch sideways andhold it awhileto switch onthe camera.
Repeat the actionabove to switchoff the camera.
1. Check ifthe camera isswitch off.
2. Make surethe ACadapter is 3.3V/2.0A.
3. Connect theAC adapterconnector with theDC-in socket onthe
camera.
4. Connect theadapter itself withthe power outlet.
5. Switch onthe camera.
Note
The below symbolson the TFTLCD Monitor arethe indication of
the battery status.
( ):Batterypower is full.
( ):Battery poweris half drained.Have new batteriesready.
( ):Battery poweris drained. Replacethe batteries youare using
now.
1. Check ifthe camera isswitched off.
2. Slide theBattery / MemoryCard Cover outto open it.
3. Load 2x AAbatteries into thebattery chamber, following the
polarity indication.
4. Close theBattery / MemoryCard Cover.
Brand Type
Duracell(Ultra) Alkaline
Note
Please refer tothe suggested batteryshown below toensure the
normal operation ofthe camera.
Icon Display Icon Index Table
Switch On or Off the Camera
Using an AC Adapter
Loading the Batteries
10
12
4
0006
2003/10/30
+
X4
X1
+0.5
1
2
3
4
5
6
789
11
12
13
1
10
Working Mode
Focus Range
Flash Modes
Digital Zoom
Thumbnails
Self-timer
Movie Clip
Memory Card Inside
Battery Status
Image Size (Resolution)
Image Quality
White Balance
Exposure
Protected Image
Print (DPOF)
Voice Memo
Darkness Warning
Photo Frame
Processing
AUTO
+
+
-0
X1
X4
123

165mm+-2
122mm+-2
8
9
1. Switch offthe camera.
2. Open theBattery / MemoryCard Cover.
3. Insert theSD card intothe card slotand press it down until a click sound happens.
4. Close theBattery / MemoryCard Cover.
1.Switch on thepower.
2.Set theMode Dial atShooting Mode ( ) for stillimage or MovieClip Mode ( ) for videorecording.
3.The settingof the focusrange for stillimage capture is required as follows
Macro ( ) : 0.3m
Normal ( ):1.4m~infinity
4.Refer tothe next section-- AdvancedFunctionality Settings (page10)toset up the features based on your needs.
5.Hold stilland press downthe Shutter Button.
6.The LEDIndicator starts blinkingright after theShutter Button is released.
7.Once theLED Indicator stopsblinking, you areready to take another shot.
Note
Amessage of "LowLight!" appearing onthe TFT LCDMonitor as awarning is toremind you thatthe image thatyou are goingto
capture is undera low lightenvironment. To compose agood quality image,it is stronglyrecommended to goto the FlashMode and
select AutoFlash to supplymore light sources.
Getting Ready
Getting Started
Note
If a newSD card isused, you arerequired to formatit first. Please
refer to page18 for thedetails.
Note
The image(s) can be stored either in built-in flash memory or in
memory card. Only if the memory card is inserted, the images
will be stored in the memory card rather than the built-in flash
memory.On the other hand, the images will be stored in the built-in
flash memory only if a memory card is not inserted.
Note
Batteries may losepower if keptinside the camerafor a longtime without using.Please remove thebatteries while thecamera is
not in use.
Do not usemanganese batteries sincethey cannot supplysufficient power tosupport the camera's operation.
Batteries may notwork normally under0 .
It's normal thatthe temperature ofthe camera bodygoes up afterbeing in usefor a longperiod.
Long time useis suggested touse anAC adapter.
In order toavoid any damagecaused by badquality ACadapters, please contactthe original company, selling you the camera.
If the batterypower is drained,please load twonew AAbatteries within 15minutes. Otherwise, the date and time will be changed.
Basic Photography
Attaching the Wrist Strap
Inserting or Removing an SD Card
33
1144
22
112233

165mm+-2
122mm+-2
Under Shooting Mode ( )
10
11
Advanced Functionality Settings
SET
You canchange the icon
display on theTFT LCD
Monitor, turnit off, andturn
it on againby pressing
the LCD buttonin order.
You canchange the flash mode shown below according to theenvironment.
Advanced Functionality Settings
9
SET
SET
The self-timer starts
with the countdown
10 seconds.
for
The self-timer will be
automatically
cancelled once the
shoot is done.
Note
Generally speaking, thedigital-zoom image quality, compared
with non-digital-zoom, always decreases sharpness.
The zoom bar, appearing
on the left on the TFT
LCD monitor, shows the
current digital zoom
position.
Setting Focus Range Turning Onor Off theTFT LCDMonitor (Default:On)
Setting Flash Mode(Default: AutoFlash)
Setting Self-timer (Default:OFF) Setting Digital Zoom( 4X continuous)
EXIT:MENU CHANGE:
STILL IMAGE 1/2
IMAGE SIZE
QUALITY
VOICE MEMO 10 SEC
PHOTO FRAME OFF
1122
For the followingsettings
from page 12to page 15,
please rotate themode
dial to theSHOOTING
MODE and pressthe
MENU key toenter the
advanced settings.
If you wouldlike to exitthe
setting, please press
the MENU keyagain.
Note
Macro : 0.3m
Normal : 1.4m~infinity
( )
( )
The flash fires automatically as required under shooting mode.
Toavoid the subject's eyes appear red in the picture, use this
mode can effectively minimize the likelihood of the red-eye
effect.
The mode will disable the flash to fire in any circumstances.
The flash will flash and the exposure time is set to 1/4 second
so that the subject in the foreground and background are
properly exposed.
Auto Flash
Auto Flash with
Red-eye Reduction
Flash Off
Slow Sync

165mm+-2
122mm+-2
12
13
Note
Four resolutions providedcan be selectedas follows:
( ) 2560x 1920 (XL)
( ) 2048x 1536 (L)
( ) 1600x 1200 (M)
( ) 1280x 960 (S)
Note
Youcan easily check whether the setting is changed or
not by the resolution icon display on the right side of the
LCD screen. If not, please repeat the above steps.
Advanced Functionality Settings
Advanced Functionality Settings
Setting Image Size(Default:2048x1536)
Setting Image Quality(Default: FINE)
Note
Three levels ofimage quality canbe selected asfollows:
( ) SuperFine
( ) Fine
( ) Normal
Note
The better theimage quality isset, the lessthe number
of images canbe stored inthe built-in flashmemory or
the memory card.
Note
With the Voice Memo, you can view the icon ( ) on the
TFT LCD Monitor.
Note
With the Voice Memo, the audio is stored in WAV file
format. So youcan download bothof the imagein JPG
and the Voice Memo in WAV on PC.
EXIT:MENU SET:
VOICE MEMO
10 SEC
STILL IMAGE 1/2
22
QUALITY
FINE
NORMAL
SUPER FINE
EXIT:MENU SET:
STILL IMAGE 1/2
22
11
STILL IMAGE 1/2
IMAGE SIZE
QUALITY
VOICE MEMO OFF
PHOTO FRAME OFF
EXIT:MENU CHANGE:
11
EXIT:MENU SET:
STILL IMAGE 1/2
IMAGE SIZE
2048X1536(L)
1600X1200(M)
1280X960(S)
2560X1920(XL)
22
Setting Voice Memo (Default:OFF)
STILL IMAGE 1/2
IMAGE SIZE
QUALITY
PHOTO FRAME OFF
VOICE MEMO OFF
EXIT:MENU CHANGE:
11
Setting Photo Frame(Default: OFF)
STILL IMAGE 1/2
IMAGE SIZE
QUALITY
VOICE MEMO 10 SEC
PHOTO FRAME OFF
EXIT:MENU CHANGE:
1122
Note
Photo Frame functionallows you toadd a designed
digital photo frameon the pictureyou shoot. Three
frame options areprovided as follows.
EXIT:MENU SET:
PHOTO FRAME
STILL IMAGE 1/2
2
112233
STILL IMAGE 1/2
IMAGE SIZE
VOICE MEMO OFF
PHOTO FRAME OFF
QUALITY
EXIT:MENU CHANGE:

165mm+-2
122mm+-2
14
15
Note
The higher thevalue is, thebrighter the imagewill be.
1122
EXIT:MENU SET:
EXPOSURE
+0.0
STILL IMAGE 2/2
Advanced Functionality Settings
Advanced Functionality Settings
Setting Exposure (Default:+ )
0
Auto Adjusting the white balanceautomatically
Daylight Under strong light environment
Sunset Under sunset light environment
Fluorescent Under fluorescent lighte nvironment
Tungsten Under tungsten light environment
AUTO
EXIT:MENU SET:
WHITE BALANCE
AUTO
STILL IMAGE 2/2
EXIT:MENU CHANGE:
WHITE BALANCE AUTO
EXPOSURE 0.0
POWER FREQUENCY OFF
STILL IMAGE 2/2
Note
Five White Balancemodes can beselected as follows:
Note
It is suggestedto stayAUTO mode forbeginners.
1122
Under Playback Mode( )
Setting White Balance(Default: AUTO)
EXIT:MENU CHANGE:
WHITE BALANCE AUTO
POWER FREQUENCY OFF
EXPOSURE 0.0
STILL IMAGE 2/2
1122
EXIT:MENU SET:
POWER FREQUENCY
60Hz
STILL IMAGE 2/2
Setting Power Frequency(Default : 60Hz
)
EXIT:MENU CHANGE:
WHITE BALANCE AUTO
EXPOSURE 0.0
POWER FREQUENCY 60Hz
STILL IMAGE 2/2
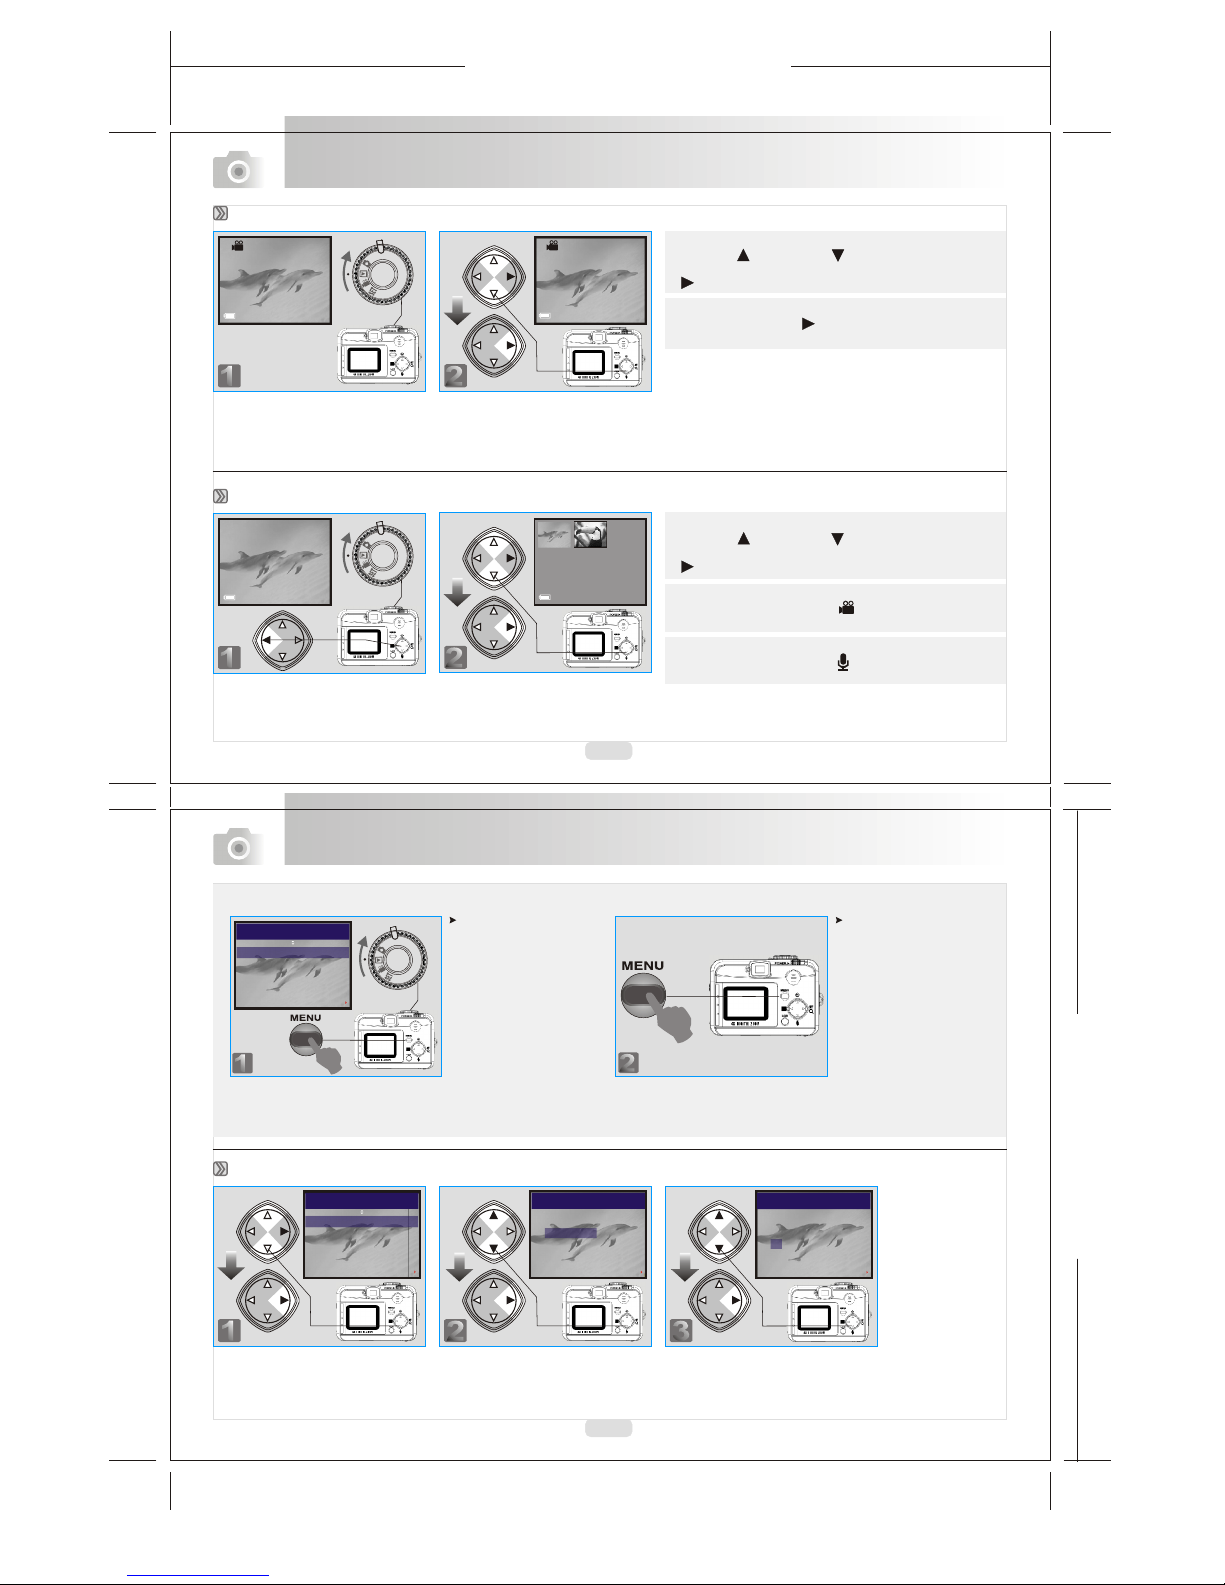
Displaying an ImageInformation
Exploring an Image
100-0002
EXIT:MENU
100-0002
x4
x1
EXIT:MENU SET:
11
100-0002
SIZE: 2048x1536
DATE: 2003/01/27
TIME: 17:16:56
FLASH: FIRED
1122
Note
The following s are for yourreference.
1.
2.
Due to theprovided power frequencyvaries by region,
please set upthe frequency inaccordance with your
regional standard.
uggestions
50 Hz: Europe,China
60 Hz: Taiwan, United States
3. OFF
22
165mm+-2
122mm+-2
16
17
Advanced Functionality Settings
Advanced Functionality Settings
Note
Press Up ( ) and Down( ) DirectionButton to
search for themovie clip yourecord and pressRight
( ) DirectionButton to playthe movie clip.
( )
Note
You canpress Right Direction Button to pause the
playback and repressto cancel it.
22
100-0002
22
100-0002
Playback of aMovie Clip
Thumbnail Images (SmallImages) Display
Note
Press Up ( ) and Down( ) DirectionButton to
search for theimages or movieclips and pressRight
( ) DirectionButton to seethe movie clip.
Note
The appearance of icon of ( ) represents a movie clip,
not a stillimage.
Note
The appearance oficon of ( ) represents astill image
with voice memo.
11
EXIT:MENU CHANGE:
DELETE
SLIDE SHOW 1 SEC
PROTECT LOCK
PLAY
22
PLAY
DELETE
DELETE ALL
FORMAT
DELETE IMAGE
EXIT:MENU SET:
33
PLAY
DELETE
DELETE IMAGE
YES
NO
EXIT:MENU SET:
Deleting Image(s)
22
For the followingsettings
from page 17to page 19,
please rotate themode
dial to thePlayback
MODE and pressthe
MENU key toenter the
advanced settings.
If you wouldlike to exitthe
setting, please press
the MENU keyagain.
Note
11
100-0002
11
100-0002
11
EXIT:MENU CHANGE:
DELETE
SLIDE SHOW 1 SEC
PROTECT LOCK
PLAY

165mm+-2
122mm+-2
18
19
Please inset anSD Card inadvance.
Refer to page17 and followthe steps, selecting"FORMAT" instep 3, "YES" in step 4.
Please make sureno memory cardis inserted.
Refer to page17 and followthe steps, selecting"FORMAT" instep 3 , "YES" in step 4.
11
EXIT:MENU CHANGE:
DELETE
PROTECT LOCK
SLIDE SHOW 1 SEC
PLAY
22
PLAY
EXIT:MENU SET:
SLIDE SHOW
1 SEC
Advanced Functionality Settings
Advanced Functionality Settings
Formatting an SDCard
Setting Slide Show(Default :1SEC)
Formatting the Built-inFlash Memory
11
EXIT:MENU CHANGE:
DELETE
SLIDE SHOW 1 SEC
PROTECT LOCK
PLAY
22
PLAY
EXIT:MENU SET:
PROTECT
UNLOCK
LOCK
Note
After the abovesteps are done,please check ifthe ( )
is shown onthe left sideof the TFTLCD screen. If it is
not shown pleaserepeat the abovesteps.
Note
For cancelling this"PROTECT" function, pleaserepeat
the steps aboveand select "UNLOCK"Instead.
Setting Image Protection
11
EXIT:MENU CHANGE:
DELETE
SLIDE SHOW 1 SEC
PROTECT LOCK
PRINT XO
PLAY
Note
You cannotsee the "PRINT" function on the TFT LCD
Monitor if amemory card isnot inserted.
Note
After the abovesteps are done,please check ifthe ( )
is shown onthe left downcorner. Ifit is notshown,
please repeat thesteps.
22
PLAY
EXIT:MENU SET:
PRINT
XO
Printing Out Imageswithout a PC(Default: X0)
165mm+-2
122mm+-2
20
21
Advanced Functionality Settings
Advanced Functionality Settings
11
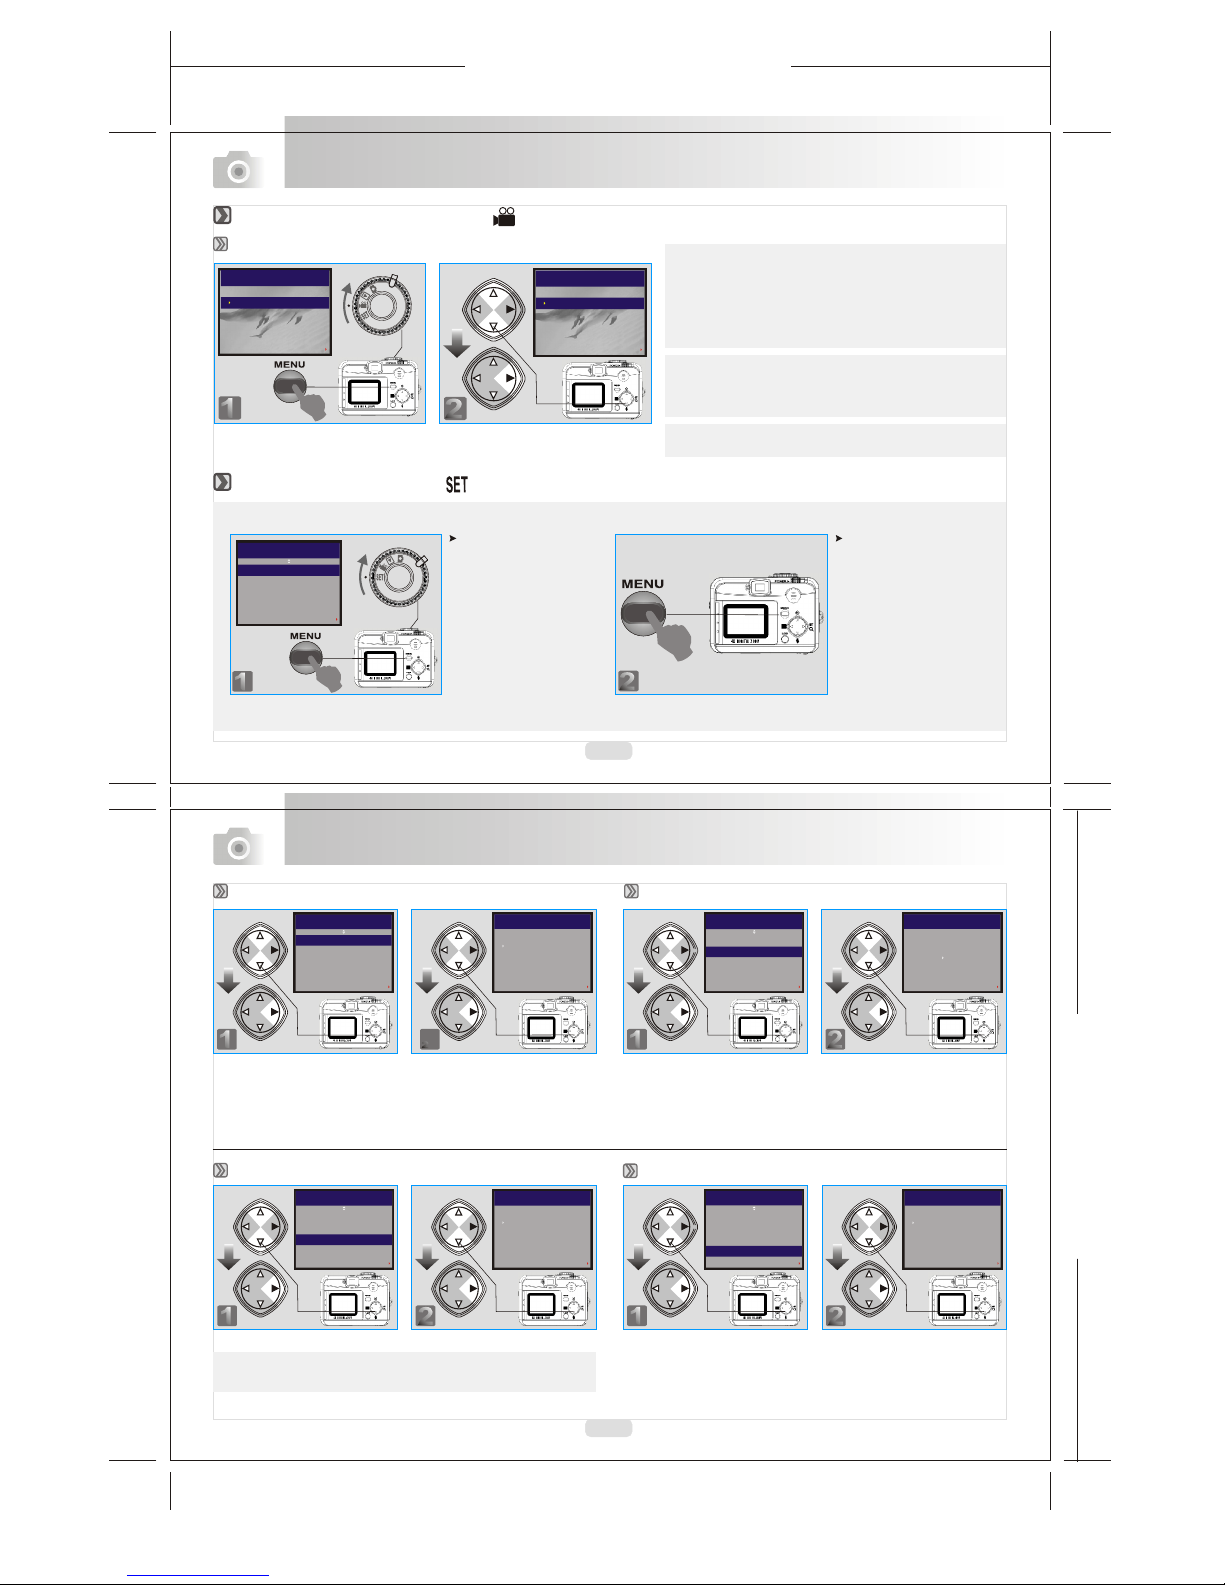
EXIT:MENU SET:
MOVIE CLIP
TIME
20 SEC
30 SEC
MANUAL
10 SEC
22
EXIT:MENU SET:
MOVIE CLIP
TIME
20 SEC
30 SEC
MANUAL
10 SEC
Setting the RecordingTime ofa Movie Clip(Default :10 SEC)
Under Movie Clip Mode( )
Under Setup Mode ( )
22
For the followingsettings
from page 21to page 22,
please rotate themode
dial to theSETUP MODE
and press theMENU key
to enter theadvanced
settings.
If you wouldlike to exitthe
setting, please press
the MENU keyagain.
Note
SETUP 1 / 2
BEEP ON
POWER OFF 2 MIN
DATE STAMP ON
DATE TYPE YMD
CHANGE:
1122
SETUP 1 / 2
BEEP
OFF
ON
SET:EXIT:MENU
22
SETUP 1 / 2
POWER OFF
1 MIN
SET:EXIT:MENU
11
SETUP 1 / 2
BEEP ON
DATE STAMP ON
DATE TYPE YMD
POWER OFF 2 MIN
CHANGE:
Setting Beep Sound(Default: ON) Setting AutoPower Off (Default: 2 MIN)
Note
If "ON", the date in this image can be printed out.
11
SETUP 1 / 2
BEEP ON
POWER OFF 2 MIN
DATE TYPE YMD
DATE STAMP ON
CHANGE:
22
SETUP 1 / 2
DATE STAMP
OFF
ON
SET:EXIT:MENU
Setting Date Stamp(Default : ON)
22
SETUP 1 / 2
DATE TYPE
MM / DD / YY
DD / MM / YY
YY / MM / DD
SET:EXIT:MENU
11
SETUP 1 / 2
BEEP ON
POWER OFF 2 MIN
DATE STAMP ON
DATE TYPE YMD
CHANGE:
Setting Date Type
Note
1. Once theShutter Button ispressed, the camerawill
start and endthe recording automaticallyaccording
to the timeyou select.
2. If "Manual" is selected, press the Shutter Button to
start the recordingor press theShutter Button again
to stop therecording.
Note
The TFT LCDMonitor will show "Low Light!" as a
warning to remindyou that thevideo that youare going
to record isin a lowlight environment.
Note
Please press MENUto exit thesetting.
11
SETUP 1 / 2
BEEP ON
POWER OFF 2 MIN
DATE STAMP ON
DATE TYPE YMD
CHANGE:
Other manuals for TX520
4
Table of contents
Other Megxon Digital Camera manuals


Megxon
Megxon TX520 User manual

Megxon
Megxon V5200I User manual

Megxon
Megxon S500 User manual

Megxon
Megxon S304 User manual

Megxon
Megxon X34 User manual

Megxon
Megxon MegaCam TX400 User manual

Megxon
Megxon TX5000 User manual

Megxon
Megxon S301 User manual

Megxon
Megxon X34 User manual

Megxon
Megxon TX6000 User manual


