165mm+-2
122mm+-2
165mm+-2 165mm+-2
4
3
6
12
5
122mm+-2
4
1
122mm+-2
122mm+-2
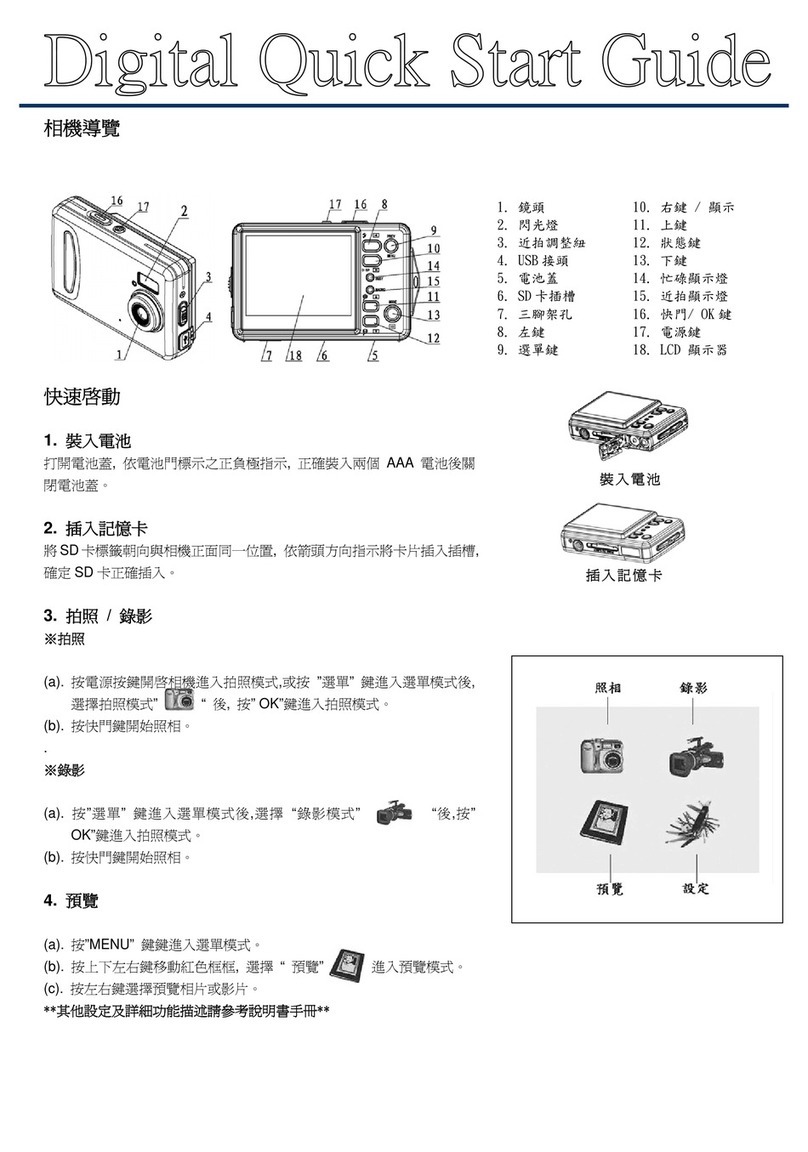
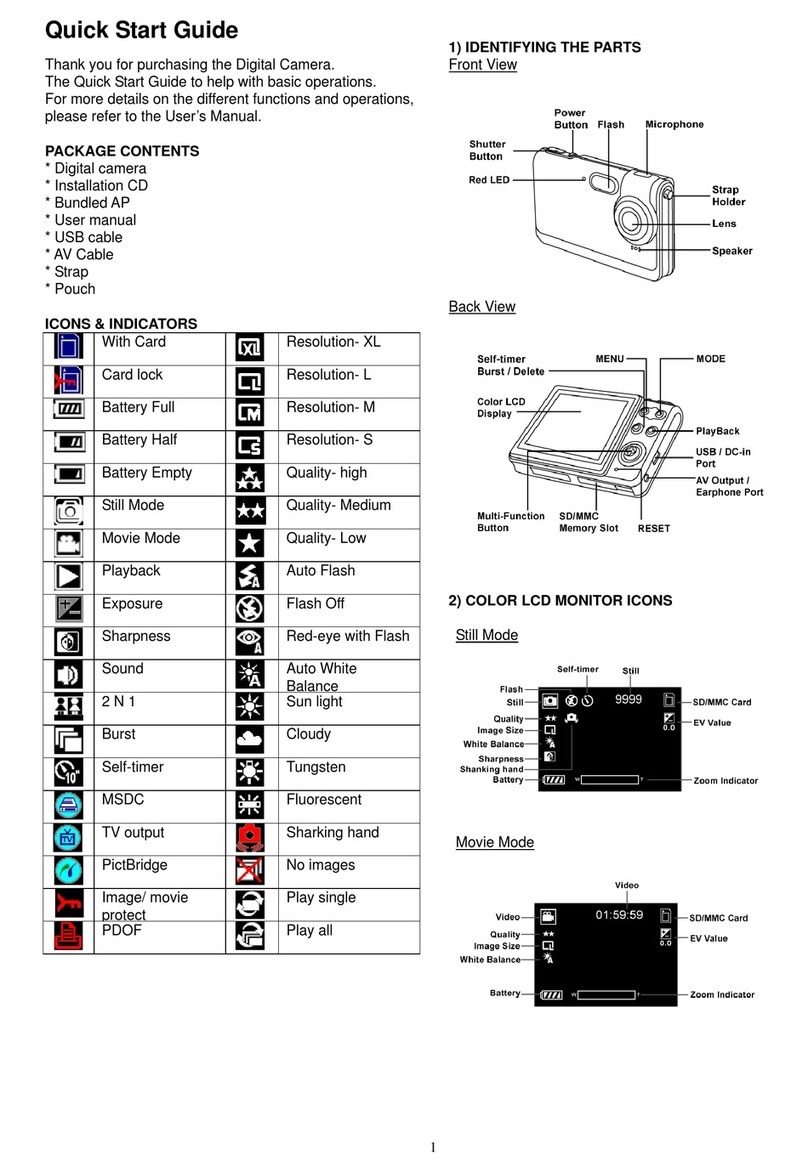
Quick Start Guide
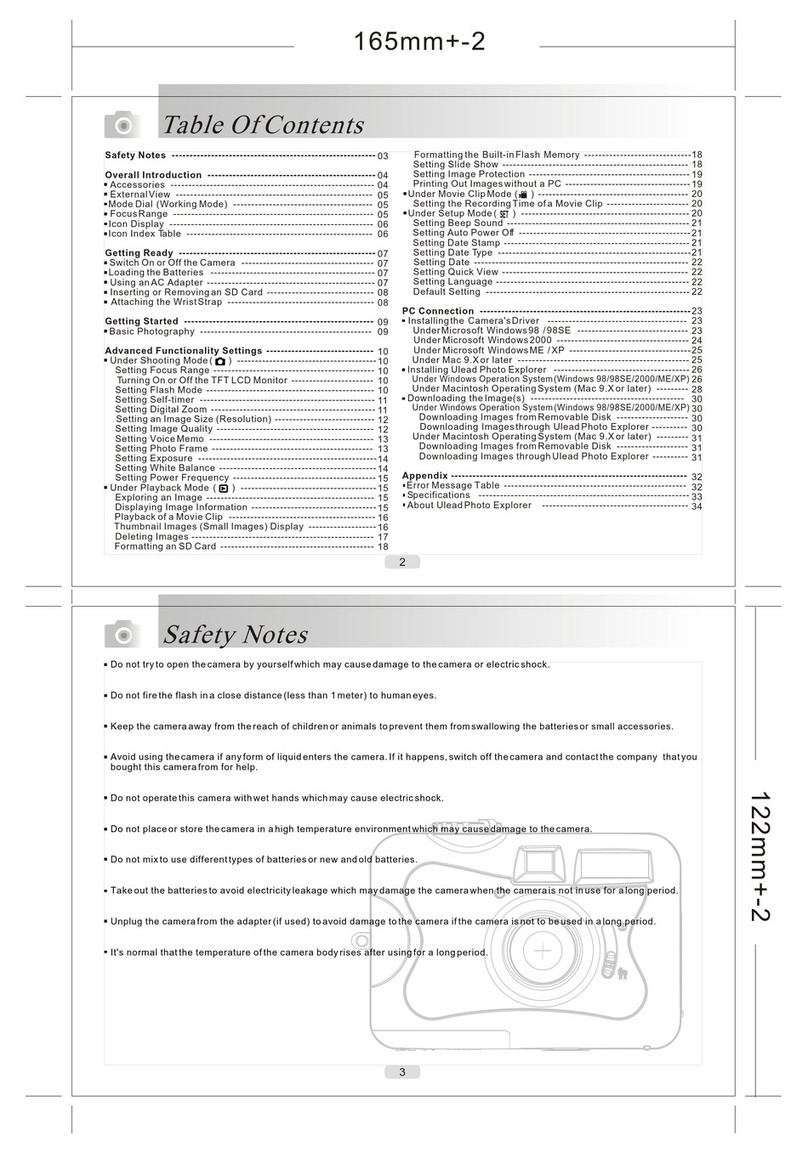
Do not tryto open the camera by yourselfwhich may cause damage to thecamera or electricshock.
Do not firethe flash in a close distance(less than 1 meter) to humaneyes.
Keep the cameraaway from the reach of childrenor animals to prevent them fromswallowing the batteriesor small accessories.
Avoid using thecamera if any form of liquidenters the camera. If it happens, switch off thecamera and contact the company thatyou
bought this camerafrom for help.
Do not operatethis camera with wet hands whichmay cause electric shock.
Do not placeor store the camera in ahigh temperature environment which may causedamage to thecamera.
Do not mixto use different types of batteriesor new and old batteries.
Takeout the batteries to avoid electricityleakage which may damage the camerawhen the camerais not in use for along period.
Unplug the camerafrom the adapter (if used) toavoid damage to the camera ifthe camera isnot to be used in along period.
It's normal thatthe temperature of the camera bodyrises after using for a longperiod.
Photo Frame
Focus Range
( )Macro
Memory Card
Digital Zoom
Exposure
Date
Image Quality
( )Super fine
( )Fine
( )Normal
White Balance
( )Auto
( )Daylight
( )Sunset
( )Fluorescent
( )Tungsten
AUTO
Voice Memo
4
Battery Status
( )Battery full
( )Battery half
drained
( )Battery
drained
1
Working Mode
( )Shooting mode
( )Playback mode
( )Movie clip mode
( )Setup mode
2
3
5
6
7
8
Image Size
( )2048x1536
( )1600x1200
( )1280x960
( )2560x1920
9
Flash Mode
( )Auto flash
( )Auto flash with
red-eye
reduction
( )Slow Sync
( )Flash off
11
13
Icon IntroductionIcon Introduction
10
12
4
0006
2003/10/30
+
X4
X1
+0.5
1
2
3
4
5
6
789
11
12
13
1
10
3
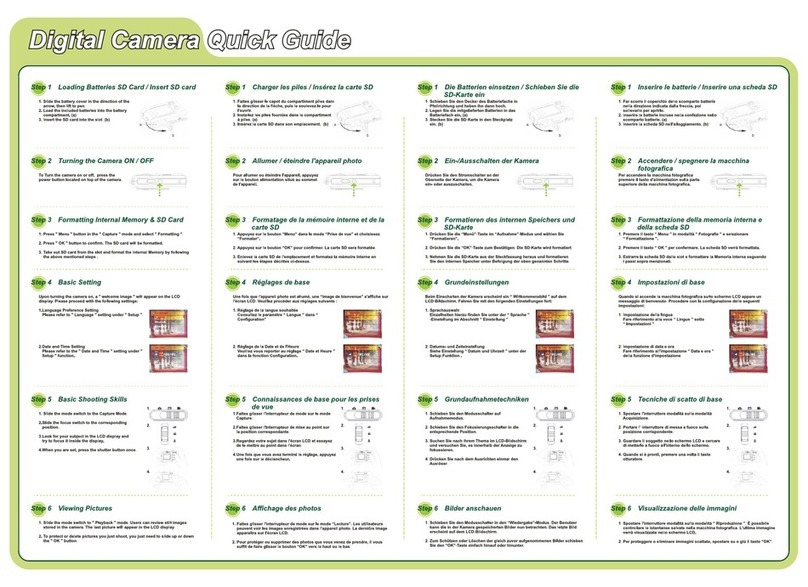
1.Switch on thepower.
2.Set theMode Dial at Shooting Mode ( ) for stillimage or Movie Clip Mode ( ) for videorecording.
3.The settingof the focus range for stillimage capture is required as follows
Macro ( ) : 0.3m
Normal ( ): 1.4m~infinity
4.Refer tothe User Manual -- AdvancedFunctionality Settings (page10)to set up thefeatures based on your needs.
5.Hold stilland press down the Shutter Button.
6.The LEDIndicator starts blinking right after theShutter Button is released.
7.Once theLED Indicator stops blinking, you areready to take another shot.
Note
A message of "LowLight!" appearing on the TFT LCDMonitor as a warning is toremind you that the image thatyou are going to
capture is under a low lightenvironment. To compose agood quality image, it is stronglyrecommended to go to the FlashMode and
select Auto Flash to supplymore light sources.
Basic Photography
Slide the "POWER"switch sideways and hold it awhileto switch on the camera.
Repeat the actionabove to switch off the camera.
1. Check ifthe camera is switched off.
2. Slide theBattery / Memory Card Cover outto open it.
3. Load 2x AA batteries into thebattery chamber,following the
polarity indication.
4. Close theBattery / Memory Card Cover.
Switch On or Off the Camera
Loading the Batteries
PC Connection
6
CARD FULL
MEMORY FULL
CARD LOCKED
(ICON BLINKING)
LOCK
NO IMAGE
FILE ERROR
MEMORY ERROR
CARD ERROR
LOW BATTERY !
(ICON BLINKING)
HAND SHAKE
ICON ( )
There is insufficientcard memory capacity
to store animage.
There is insufficientinternal memory
capacity to storean image.
The SD cardis under protection.
The Image can'tbe deleted under protection.
There is noimage stored in the memory card
or built-in flashmemory.
File format error.
Memory is damagedor failed.
Card is damagedor failed.
Battery power isdrained.
The environment istoo dark in "Flash Off"
mode.
Delete the storedimage(s) in the memory
card or inserta new memory card.
Delete the storedimage(s) in the flash
memory.
Set the cardprotection switch at non-
protection position.
Unlock the protectedimage.
Please take picturesor record movie
clips.
Insert a newSD/MMC card or
format the media.
Format the media.
Insert a newSD/MMC card
Insert new batteries.
Cancel the Flashoff mode.
Messages Causes Solutions
Safety Notes
1
Installing the Camera's Driver
Installing Ulead Photo Explorer
Downloading the image(s)
Please refer to the User Manual for the details.
Please refer to the User Manual for the details.
Please refer to the User Manual for the details.
1. Switch offthe camera.
2. Open theBattery / Memory Card Cover.
3. Insert theSD card into the card slotand press it down until aclick
sound happens.
4. Close theBattery / Memory Card Cover.
Getting Ready
Inserting or Removing an SD Card
2
5
Getting Started
Error Message TableError Message Table
R9000094
1. R9000094 2. Pantone 282C 3. 80P
Working Mode
Focus Range
Flash Modes
Digital Zoom
Thumbnails
Self-timer
Movie Clip
Memory Card Inside
Battery Status
Image Size (Resolution)
Image Quality
White Balance
Exposure
Protected Image
Print (DPOF)
Voice Memo
Darkness Warning
Photo Frame
Processing
AUTO
+
+
-0
X1
X4
123
1144
2233
