165mm+-2
122mm+-2122mm+-2 122mm+-2
4
12
5
3
6
4R9000066
Safety Notes
Do not try to open the camera by yourself which may cause
damage to the camera or electric shock.
Do not fire the flash in a close distance (less than 1 meter) to
human eyes.
Keep the camera away from the reach of children or animals to
prevent them from swallowing the batteries or small
accessories.
Avoid using the camera if any form of liquid enters the camera.
If it happens, switch off the camera and contact the company
that you bought this camera from for help.
Do not operate this camera with wet hands which may cause
electric shock.
Do not place or store the camera in a high temperature
environment which may cause damage to the camera.
Do not mix to use different types of batteries or new and old
batteries.
Take out the batteries to avoid electricity leakage which may
damage the camera when the camera is not in use for a long
period.
Unplug the camera from the adapter (if used) to avoid damage to
the camera if the camera is not to be used in a long period.
It's normal that the temperature of the camera body rises after
using for a long period.
Safety Notes
Icon Index Table Switch On Or Off The Camera
Installing The Camera Driver
Installing Ulead Photo Explorer
Downloading The Image(s)
Onto Your PC
Slide the "POWER"switch sideways and
hold it awhileto switch onthe camera.
Repeat the actionabove to switchoff the
camera.
1. Check if the camera is switched off.
2. Slide the Battery / Memory Card Cover out to open it.
3. Load 2 x AA batteries into the battery chamber, following the
polarity indications.
4. Close the Battery / Memory Card Cover.
1. Check ifthe camera isswitch off .
2. Make surethe AC adapteris 3.3V/2.0A.
3. Connect theAC adapter connectorwith the DCIn socket onthe camera.
4. Connect theadapter itself withthe power outlet
5. Switch onthe camera.
Loading the Batteries
Using An AC Adapter
For details please refer to the User Manual.
For details please refer to the User Manual.
For details please refer to the User Manual.
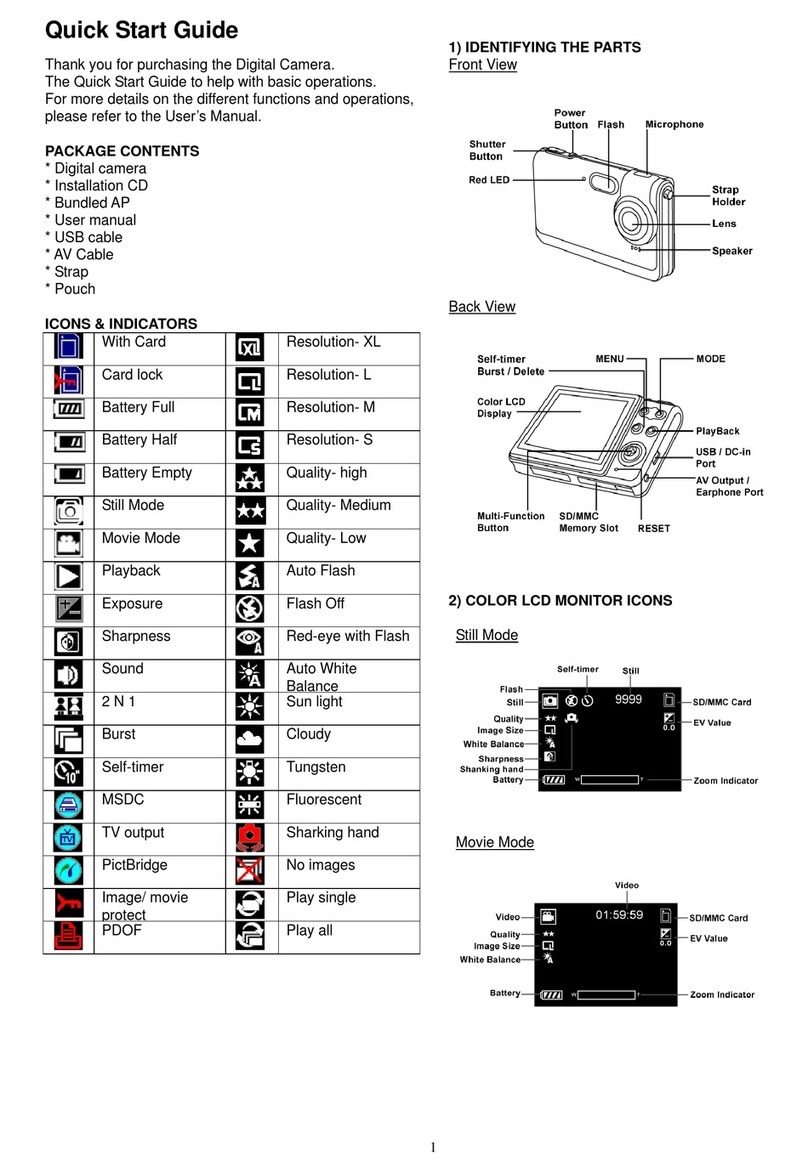
Working Mode
Focus Range
Flash Modes
Digital Zoom
Thumbnails
Self-timer
Movie Clip
Memory Card Inside
Battery Status
Image Size (Resolution)
Image Quality
White Balance
Exposure
Protected Image
Print (DPOF)
Voice Memo
Darkness Warning
X1
AUTO
+
+
-0
X4
Note
The below symbolsare the indicationof the batterystatus on theTFT LCD
Monitor.
( ):Batterypower is full.
( ):Battery poweris half drained.Have new batteriesready.
( ):Battery poweris drained. Replacethe batteries youare using now.
Note
Please refer tothe suggested batteryshown below toensure the normal
operation of thecamera.
Brand Type
Duracell(Ultra) Alkaline
Note
Batteries may losepower if keptinside the camerafor a longtime without
using. Please removethe batteries whilethe camera isnot in use.
Do not usemanganese batteries sincethey cannot supplysufficient power to
support the camera'soperation.
Batteries may notwork normally under0 .
It's normal thatthe temperature ofthe camera bodygoes up afterbeing in use
for a longperiod.
Long time useis suggested touse an ACadapter.
In order toavoid any damagecaused by badquality AC adapters,please
contact the originalcompany, sellingyou the camera.
1.Open the lenscover.
2.Switch on thepower.
3.Set theMode Dial atShooting Mode ( ) for still image or Movie Clip
Mode ( )for video recording.
4.The settingof the focusrange for stillimage capture isrequired as follows
Macro ( ) : 0.2m
Normal ( ):0.8m~infinity
5.Refer tothe next section-- Advanced FunctionalitySettings (page14)to set
up the featuresyou prefer.
6.Hold stilland press downthe Shutter Button.
7.The LEDIndicator starts blinkingright after theShutter Button isreleased.
8.Once theLED Indicator stopsblinking, you areready to takeanother shot.
Note
A message of"LENS COVER" blinkingon the TFTLCD Monitor asa
warning is toremind you ofopening the lenscover first.
Note
A message of"Low Light!" appearingon the TFTLCD Monitor asa warning
is to remindyou that theimage that youare going tocapture is undera low
light environment. To compose a good quality image, it is strongly
recommended to goto the FlashMode to selectAuto Flash orFill-in Flash to
supply more lightsources.
Basic Photography
