Memjet MACH 8 User manual

MACH 8
(HJ/AS-1180C)
HIGH CAPACITY
DIGITAL COLOR PRINTER
SERVICE MANUAL
Rev 05-27-14
PRELIMINARY

SAFETY PRECAUTIONS
THIS EQUIPMENT PRESENTS NO PROBLEM WHEN USED PROPERLY.
HOWEVER, CERTAIN SAFETY RULES SHOULD BE OBSERVED WHEN
OPERATING THE MACH 8 PRINTER.
BEFORE USING THE PRINTER, YOU SHOULD READ THIS MANUAL
CAREFULLY AND FOLLOW THE RECOMMENDED PROCEDURES, SAFETY
WARNINGS, AND INSTRUCTIONS:
Keep hands, hair, and clothing clear of rollers and other moving parts.
DO NOT place hands/feet or other body parts under the Feed Table or Receiving Tray.
Avoid touching moving parts or materials while the machine is in use. Before clearing a jam,
be sure machine mechanisms come to a stop.
Always turn off the machine before making adjustments, cleaning the machine, or performing
any maintenance/service covered in this manual.
The power cord and power supply supplied with the machine should be plugged into a
properly grounded, easily accessible wall outlet near the machine. Failure to properly ground
the machine can result in severe personal injury and/or fire.
The power cord and wall plug is the primary means of disconnecting the machine from the
power supply.
DO NOT use an adapter plug on the power cord or wall outlet.
DO NOT remove the ground pin from the power cord.
Do NOT use extension cords.
DO NOT route the power cord over sharp edges or trap it between furniture.
Avoid using wall outlets that are controlled by wall switches or shared with other equipment.
Make sure there is no strain on the power cord caused by jamming it between equipment,
walls or furniture.
DO NOT remove covers. Covers enclose hazardous parts that should only be accessed by a
qualified service representative. Report any cover damage to your service representative.
This machine requires periodic maintenance. Contact your authorized service representative
for required service schedules.
To prevent overheating, do not cover the vent openings.
Use this equipment only for its intended purpose.
In addition, follow any specific occupational safety and health standards for your workplace or area.
This manual is intended solely for the use and information of Neopost USA, its designated
agents, customers, and their employees. The information in this guide was obtained from several
different sources that are deemed reliable by all industry standards. To the best of our
knowledge, that information is accurate in all respects. However, neither Neopost USA, Inc. nor
any of its agents or employees shall be responsible for any inaccuracies contained herein.
Memjet®is a registered trademark.
All other trademarks are the property of their respective holders.
All rights reserved. No part of this book may be reproduced or transmitted in any form or by any means, electronic or mechanical,
including photocopying, recording, or any information storage and retrieval system, without permission in writing from the publisher

TABLE OF CONTENTS
i
Table of Contents
SECTION 1 – Before You Begin 4
Recommended Troubleshooting Supplies 4
Common Service Tools Needed: 4
Minimum Computer System Requirements 5
SECTION 2 – Troubleshooting 6
Print Quality Issues: 6
Examples of Print Quality Issues (including possible causes and solutions) 7
Air in Printhead Nozzle Area: 7
Clogged/Damaged/Dead Nozzles: 8
Color Mixing Issues: 9
Scuff Marks and Smudging Issues: 10
Fuzzy/Distorted Print 12
The Ink Tank(s) 13
The Printhead Cartridge 14
The Printer 16
Dots or Lines Printed on Media 16
Power (Power-Up) Problems 17
Service Station Problems 18
Interface Communication Problems 19
Feeding Problems 20
Feeding Problems (continued) 21
Errors and Warnings 22
Printer Alert Window Messages 22
Toolbox System Status Messages 23
Ink Accumulating in the Wrong Areas of the Printer 27
Jams in the Printer 28
Removing Jammed Media 28
SECTION 3 – Toolbox Service Features 30
Using the Printer Toolbox 30
Service Menu 32
SECTION 4 – Disassembly/Assembly Procedures 36
Printer Basic Disassembly 36
Service Disassembly Procedures 36
Left-hand Side (Operator Side) Covers 37
Right-hand Side (Non-Operator Side) Cover 38
Replacing the Feed Sensor 39
Adjusting the Feed Sensor 40
Replacing Feed Motor Drive Belt or Motor 41
Replacing the Clutch 41
Replacing the Feeder Encoder and/or Encoder Sensor 42
Replacing the Upper Limit Switch Assembly 43
Replacing the Feed Height Switch Assembly 45
Replacing the Hold Down Roller Assembly 47
Remove Media Table Lift Assembly Motor and Drive Belt 48
Replacing Media Table Lift Assembly Belt 49
Remove Media Table Lift Assembly 52
Replacing the Feed Rollers 57
Replacing Pull Out Rollers 59
Replacing Delivery Center Plate Assembly 62
Removing Delivery Rollers 65
Removing Separator Assembly 66
Replacing Interface PC Board 68
Replacing the Main PC Board (MPCA) 69
MPCA (Main Printed Circuit Assembly) Connections 89
Removing the Print Engine 90
Print Engine Basic Disassembly 95

TABLE OF CONTENTS
ii
Removing the Print Engine Base 95
Replacing Peristaltic Pump Assembly 96
Replacing Dual Pinch Valve Assembly 96
Cleaning Dual Pinch Valve Sensors 97
Replacing Dual Pinch Valve Sensor PC Board 98
Replacing DPCA Board 100
Replacing Buffer Boxes (3 per machine) 101
Replacing QA Chip Assembly (3 per machine) 101
Removing the Pen Driver Printed Circuit Assembly (PCA) 102
Removing the Starwheel Assemblies 102
Replacing the Ink Tank Latches 104
Replacing the Printhead Lever Latch 104
Replacing the Printhead Lever Latch Solenoid 107
Replacing Upper and Lower Clamshell Latch Pins 109
Replacing Upper Latch Pins 109
Replacing Lower Latch Pins 114
Replacing the Ink Revolvers 117
Replacing Lifter Motor Assembly or Lifter Gear 119
Replacing Stepper Motor 120
Accessing Items Behind the Main Printed Circuit Assembly (MPCA) 122
Creating Access 122
Replacing Encoder or Encoder Sensor 123
Replacing Service Station Lifter Arm Sensor 123
Replacing Paper Path Motor or Drive Belt 124
Replacing Belt Drive Gear Pulleys 125
Reinstall Main Printed Circuit Board Assembly 126
Accessing Items Under the Clamshell Assembly 127
Removing Clamshell Assembly 127
Replacing Exit Sensor 127
Replacing Label Web Sensor 128
Replacing Service Station Sled Printed Circuit Boards 129
Replacing Wiper Motor Flex Cable PCA 129
Replacing Service Station Lifting Arms 130
SECTION 5 - Maintenance 138
Maintenance Schedule 138
Replacing the Ink Tanks 139
Cleaning Ink Tank Contacts 140
Cleaning/Replacing the Printhead Cartridge 142
Replacing the Printhead Cartridge 143
Printhead Storage & Shelf Life 144
Printhead Service Life 144
Printhead Disposal 144
Cleaning Pen Driver Printed Circuit Board Contacts 145
Inspecting & Cleaning the Lip of the Capping Station 146
Inspecting the Wiper Roller 147
Cleaning/Replacing Service Station Items 148
Removing the Service Station 148
Cleaning the Service Station 150
Wiper Roller Removal and Cleaning or Replacement 150
Wiper Motor Assembly Removal and Cleaning 151
Printing Platen and Capping Station Removal and Cleaning 152
Cleaning the Service Station Tray 152
Suggestion for High Volume Users: 152
Installing the Service Station 153
Still Experiencing Print Quality Issues? 156
Inspecting/Replacing the Waste Ink Tray 157
Replacing the Sheet Separators 158
Cleaning the Printer Body 159
Cleaning the Feed Rollers and Forwarding Rollers 159
Cleaning the Feed Sensor 160

TABLE OF CONTENTS
iii
Cleaning Other Items inside the Print Engine 161
Grit Rollers (Media Transport Rollers) 161
Media (Paperpath) Sensors 161
Capping Station Lip 161
Paperpath Surfaces 161
Printing Platen Surface 161
Cleaning the Ink Revolver Couplings 163
Preparing Printer for Transport 164
Local relocation 164
Remote relocation or shipping 164
Lubricating the Service Station 166
Reinstalling or Replacing the Service Station 168
Lubricating the Media Table Lift Assembly 171
Appendix A – Ink Delivery System (IDS) 173
Theory of Operation 173
Index 175

SECTION 1
BEFORE YOU BEGIN
4
SECTION 1 – Before You Begin
The following troubleshooting guides are provided to assist you in solving any problems that might occur
with the Digital Color Printer. We have tried to make them as complete as possible, but this section will
always be evolving.
Recommended Troubleshooting Supplies
Items that a Technician should have available to them, when they visit a “Digital Color Printer” customer
(in addition to standard tools):
•A box or ream of “inkjet suitable” media.
•Known good set of Ink Tanks (Cyan M5C250-N, Magenta M5M250-N, Yellow M5Y250-N, Black
M5K250-N, Black M5K250-N);
•Known good Printhead Cartridge (M5PRINT-N)
•Known good Service Station (123-2483)
•Lint-free cloths
•Distilled or Deionized water
•Computer (Win XP, Vista, Win 7, with USB 2.0 port) and USB cable. It would be best if the computer
system has been previously interfaced and tested with a Digital Color Printer. That way they should
have documents or jobs already setup to test with printer, drivers loaded, toolbox loaded.
•Operations CD (contains printer software, drivers, operators guide, etc...)
•Service Manual
•Parts Manual
•Access to internet.
Note: Part numbers, shown above (with “-N”), are for Neopost.
Remove “-N” for Rena Systems. Add “-H” for Hasler.
Common Service Tools Needed:
This list is in addition to standard tools.
•Spring Hook
•Needle Nosed Pliers
•Side Cutters
•Voltage Meter
•SAE set of Alan wrenches
•#1 and #2 Philips Screwdriver
•T-8/10/15 Torx drivers
•Carpenters Level (9” or smaller)

SECTION 1
BEFORE YOU BEGIN
5
Minimum Computer System Requirements
•Windows XP, Windows Vista, Windows 7 & *Windows 8/8.1
Supports 32 & 64 bit systems.
You must have administrative privileges on the system.
•Pentium II, 2 GHz minimum (Pentium Dual Core, 2.5 GHz or better, is optimal)
•System memory – 2 GB minimum; or as recommended for your operating system.
•At least 10 GB free hard-disk space.
•Microsoft Internet Explorer 6.0 or higher.
•Java version 6. (If you have Java 7 or higher installed; you may need to load Java 6 also, or the
Toolbox may not open properly.)
•CD/DVD drive
•USB 2.0 port (ports will be identified as “USB2” or “Enhanced” in the Device Manager)
•Microsoft .Net Framework version 3.5 (for 32 bit systems) or Microsoft .Net Framework version 4 (for
64 bit systems) must be installed.
Note: Even if you have a higher .NET Framework version installed; version 3.5 or 4 must also be
installed, or the Toolbox will not open.
*Windows 8/8.1 is supported in “Desktop Mode” only. “Metro Apps” (applications for the Windows 8/8.1
environment only) are not supported.
How to check your system for the minimum system requirements, shown above:
Right click on "My Computer" and select Properties. The system information, including Operating System,
Processor Info and Memory info will be displayed under the "General" tab.
How to check your system for the versions of "Microsoft .NET Framework” installed.
From the Control Panel; open "Add or Remove Programs" and look for "Microsoft .NET Framework 3.5..."
or "Microsoft .NET Framework 4..."in the list.
You can obtain "Microsoft .Net Framework 3.5 or 4" via the Microsoft website. http://www.microsoft.com
How to check your system for the version of "Java" installed.
From the Control Panel; open "Add or Remove Programs". Look for "Java(TM) ..." in the list.
You can obtain Java from the following website: www.java.com
There are also tools on the Java site to help you detect if you have java installed and what version is
installed.

SECTION 2
TROUBLESHOOTING
6
SECTION 2 – Troubleshooting
The following troubleshooting guides are provided to assist you in solving any problems that might occur
with the Digital Color Printer. We have tried to make them as complete as possible. The best advice we can
offer is to make sure that the system is set up properly, plugged in, and that it has an adequate supply of ink
before attempting to troubleshoot any problem.
WARNING
DO NOT REMOVE THE SIDE COVERS OF THE PRINTER!
THERE ARE HIGH VOLTAGES PRESENT BEHIND THE COVERS!
Print Quality Issues:
Many things can contribute to print quality issues. Here is a list of things to check:
•To reduce print quality issues, the print engine should remain powered-on. Even in its standby state,
the printer will run routine maintenance cycles to help keep the printhead nozzles hydrated and clean.
•Verify that the media you are printing on is an “inkjet suitable” media. See Paper Types below.
•Verify that the “graphic” you are printing is of a high quality. See Graphic Types below.
•Check to be sure the printer has an adequate supply of ink (30% or more) in all five Ink Tanks.
•Check to be sure all five color tubes, at both sides of the printhead cartridge, have ink filling them.
If not, check for a pinched color tube (finger on Forwarding Roller Guide Assembly may be pinching
tube), check related Ink Tank, and or the system may need to be re-primed. Please refer to the
Troubleshooting section for information on correcting these issues.
•Try removing air bubbles from printhead and system using the Toolbox utility feature “Circulate Ink”;
while lightly tapping on the ink tubes and printhead cartridge.
Note: Do not run the Circulate Ink feature more than twice in a row.
•Try removing or inserting the “Head Media Guide”.
•Try “Cleaning the Lip of the Printhead Cap”.
•Try “Cleaning/Replacing Service Station Items”.
•If you are still experiencing print quality issues; try “Replacing the Printhead Cartridge”.
Compatible Paper Types:(look for inkjet suitable stocks)
•Inkjet Paper - all types (recommended for best color output).
•Copier Paper
•Card Stock
•Kromekote
•Coated Paper - Gloss finish
•Coated Paper - Satin finish
•Coated Paper - Matte finish
Incompatible Paper Types:
•Color Laser Gloss
•Digital Printer Gloss
•Any Post Print Coated Substrate (aqueous, gravure or UV)
Compatible Graphic Types:
•In general; scalable, vectorized art will produce the best images and color.
Note: Graphic types are not really printer dependent. They are dependent on the software program
being used to print the graphic, and what types of graphics that program can handle.
Incompatible Graphic Types:
•Low resolution and web images will not produce quality output and should not be used.

SECTION 2
TROUBLESHOOTING
7
Examples of Print Quality Issues (including possible causes and solutions)
The Memjet printhead cartridge contains 70,400 inkjet nozzles. These nozzles are divided into ten rows;
two rows of nozzles for each color channel. Due to the high number of nozzles; it is not uncommon for
some nozzles to become contaminated, dehydrated or clogged.
The following examples were produced using a Five Band Color Purge YKCKM. A similar purge pattern
can be performed using the “Print Ink Channels” button; located in the Toolbox, Diagnostics Menu.
Air in Printhead Nozzle Area:
Air in the printhead nozzles will show as jagged, irregular shaped lines of missing color. Lines are normally
wider than one nozzle.
Possible Solutions:
•Press the “Full Clean Printhead” button, located in the Toolbox, User Interface screen, and lightly
tap on the ink tubes and Printhead Cartridge as the system is circulating ink. This can help
dislodge air bubbles within the Printhead and Ink Tubes.
Note:It is not a problem if air bubbles accumulate in the ink hoses at the non-operator side of the
printhead; since this is the outgoing side.
•Deprime and Reprime the system. Release the Printhead, using the “Release Printhead” button.
Remove and re-install the Printhead Cartridge. Then close printhead latch to re-prime the system.
Lightly tap on the ink tubes and Printhead Cartridge as the system is priming; to help dislodge air
bubbles.
•Inspect the system for possible air leaks (damage to ink tubes or ink revolver couplings).
•Instead of powering the printer off, when not in use, leave the print engine powered-up; so it can
perform automatic maintenance routines.

SECTION 2
TROUBLESHOOTING
8
Clogged/Damaged/Dead Nozzles:
Clogged/damaged/dead/ nozzles will normally show as thin, crisp, vertical lines of missing color. Multiple
adjacent nozzles, with same issue, will show as wider, crisp, vertical lines of missing color.
Clogged nozzles are normally due to Printhead nozzle dehydration or partial contamination.
Damaged nozzles are normally due to improper cleaning or debris on wiper roller causing damage to head.
Dead nozzles are normally due to the nozzle reaching its “end of life” (~50,000,000 ejections).
Possible Solutions:
•Press the “Full Clean Printhead” button, located in the Toolbox, User Interface screen
•Manually clean the printhead nozzles using distilled water and a lint free cloth.
•Set the following Toolbox features to defaults to improve/increase head maintenance routines:
KWS Setting (Light) and Mid-Job Servicing (Default).
•Replace the printhead cartridge and wiper roller.
•Inspect/clean the service station and replace the wiper roller.
•Instead of powering the printer off, when not in use, leave the print engine powered-up; so it can
perform automatic maintenance routines.

SECTION 2
TROUBLESHOOTING
9
Color Mixing Issues:
Color mixing will show as muddy, mottled or distorted (grainy) colors.
Color mixing occurs when the ink from one color channel crosses over into another color channel. Since
the inkjet nozzle rows are located very close to one another (ten rows of 7,040 nozzles, located within a 0.8
mm space), it is easy for partials or fibers to create bridges across color channels. These bridges allow ink
to flow (wick) from one color channel to another; resulting in a “localized” color mixing event; as shown in
the examples below.
Color mixing can occur for a number of reasons (here are some common ones)
•Printhead Cartridge just installed. It is common to see some color mixing immediately after the
system is primed with ink.
•Ink wicking due to fibers bridging (crossing) inkjet nozzles. This can also occur if media is left in
contact with the printhead (after a paper misfeed or jam).
•Wiper roller saturation (too much ink on wiper roller). This can occur if the cleaning features
(Quick/Normal/Full Clean Printhead) are run too frequently. The printer needs time between
cleanings to desiderate the wiper roller.
•Ink flooding on the nozzle plate; due to printer not being level.
•Ink flooding on the nozzle plate; due to excessive back-pressure in the ink system.
•Wiper Roller is not being cleaned properly by the system. This can also occur if there is a
problem with the squeegee blade in the Wiper Motor Assembly. The squeegee blade and
squeegee roller are responsible for removing ink and debris from the wiper roller.
Tip: Muddy, mottled, distorted (grainy) colors can also be caused by the media you are printing onto.
Test the printer, using a compatible “inkjet suitable” media, to determine if this could be the cause.
Possible Solutions:
•Remove media from under printhead.
•Wipe printhead using a lint-free cloth, dampened with distilled water.
•Perform a “Printhead Cartridge Conditioning” routine.
•Allow the printer to sit, powered on, for 2-3 hours to give it time to clean/desaturate the wiper
roller.
•Make sure printer is on a sturdy/level floor surface and the Print Engine is level.
•Instead of powering the printer off, when not in use, leave the print engine powered-up; so it can
perform automatic maintenance routines. This also allows the pressures in the system to be
routinely equalized.
•Inspect/clean the service station. If necessary; they may need to replace the wiper roller, wiper
motor assembly or Service Station.

SECTION 2
TROUBLESHOOTING
10
Direction of transport
Scuff Marks and Smudging Issues:
Scuff Marks occur when the media makes contact with an area of the printhead that has ink on it.
Smudging occurs when the wet image, on the media, makes contact with something (most commonly the
printhead) before it is dry. This issue will also increase the chance for scuff marks.
Scuff Marks:
Here is an example of “scuff marks” that occurred when the media made contact with the printhead.
Possible Solutions for Reducing Scuff Marks:
•Make sure the “Head Media Guide” is properly installed.
•Make sure media is as flat as possible.
•Manually wipe the printhead surface, using a lint-free cloth dampened with distilled water to
remove excess ink.
•If possible; rotate the media and image 90, 270 or 180 degrees. Sometimes the direction of feed
and the mechanics of how the media is driven through the printer can have an effect.
•Allow the printer to sit, powered on, for 2-3 hours to give it time to remove excess ink from the
wiper roller or replace the wiper roller.
•Use a more suitable media (flat and uniform in thickness).
NOTICE! It is OK to run the “Quick Clean Printhead” routine once, to see if this has any effect on
improving this issue. However, if it doesn’t help, you shouldn’t repeat this process or use a higher level
cleaning routine. Over-use of the “…Clean Printhead” routines will normally increase this issue, because
the wiper roller will become more saturated with ink with each cleaning routine; if done too frequently. An
over-saturated wiper roller will leave more ink behind on the printhead.

SECTION 2
TROUBLESHOOTING
11
Smudging:
Here is an example of “smudging” that occurred when an area of this page, with a wet image, made contact
with the printhead.
Note: There are also scuff marks in this example. As mentioned previously; smudging will increase the
chance for scuff marks; by deposition ink onto other areas of the printhead.
Possible Solutions to Reduce Smudging:
•Check to be sure the “Head Media Guide” is properly installed and clean.
•Make sure media is as flat as possible.
•If possible; rotate the media and image 90, 270 or 180 degrees. Sometimes the direction of feed
and the mechanics of how the media is driven through the printer can have an effect.
•Reduce the amount of ink being sprayed onto the media by setting the print quality to “Normal”.
Spraying less ink will improve the drying time.
•Reduce the print speed to provide more drying time. If you are already printing in Normal Print
Quality, you can select (check) the “half speed” box; located under the Print Quality selection in
the M Series Driver.
•Use a more inkjet suitable media.
NOTICE! It is OK to run the “Quick Clean Printhead” routine once, to see if this has any effect on
improving this issue. However, if it doesn’t help, you shouldn’t repeat this process or use a higher level
cleaning routine. Over-use of the “…Clean Printhead” routines will normally increase this issue, because
the wiper roller will become more saturated with ink with each cleaning routine; if done too frequently. An
over-saturated wiper roller will leave more ink behind on the printhead.
Direction of transport

SECTION 2
TROUBLESHOOTING
12
Fuzzy/Distorted Print
Fuzzy/distorted print can occur for a number of reasons; listed/shown below.
Problem: Poor original image quality (less than 300 dpi).
Solution: Use high quality images.
Problem: Choosing to print image in low resolution from software application.
Solution: Set image to highest resolution possible from software application.
Problem: Paper is buckling or bowing during the time of printing.
Solution: Try printing on a thicker piece of media (i.e. 40lb paper ) If problem does not occur on heavier
material the media you are feeding may be too flimsy.
Problem: Damaged Printhead nozzle surface; scratched from improper manual cleaning, or dirty/damaged
wiper roller.
Solution: Only use distilled water and a non-abrasive, lint free cloth to manually clean the printhead.
Replace the wiper roller at the same time the printhead is replaced. Cover the printer, when not in use, to
keep dust/debris (plaster dust) from entering the printer.
Fuzz/Distorted Print Example:
Good Print Example:
Fuzzy/Distorted
Print Example
Good Print
Example

SECTION 2
TROUBLESHOOTING
13
The Ink Tank(s)
CONDITION PROBLEM SOLUTION
Installed New Ink Tank and
shortly after the related Ink
Channel (color) stopped
printing and or the related
color tube went empty.
CAUTION! Do NOT
continue printing in this
condition. Damage to the
Printhead will result.
One or more of the “septum
needles” didn’t fully puncture the
septum seal on the new Ink Tank.
Forwarding Roller Guide Assembly
was not installed properly.
Defective Ink Tank. Septum seal is
not being punctured by needle.
Try removing and re-
installing the Tank. See
“Installing The Ink Tanks”.
Is the Forwarding Roller
Guide Assembly pinching
tubes?
Puncture seal with sharp
object or replace defective
Ink Tank.
Ink Level status is
displayed as “Out”,
but there is still ink in
the Tank.
Toolbox System Status
is displaying “Ink_Out_X”
(X = color or multiple)
Visible ink level sensor does not see
the presence of ink in the Tank.
Printer is not on a stable surface or
Print Engine is not level; causing ink
level sensor to give a premature
“Out” condition.
QA Chip on Tank may have been
corrupted; due to improper
removal/install.
Inaccurate estimation
Clean prism on Tank. See
section titled “Cleaning Ink
Tank Contacts & Prism”.
Place printer on stable
surface and make sure Print
Engine is level.
Replace Ink Tank.
To avoid damaging
additional Ink Tanks, please
see section titled “Replacing
The Ink Tanks”.
To help improve Ink Level
estimation accuracy; make
sure the firmware is up-to-
date and try to minimize
manual cleaning printhead.
Ink Level status is
displayed as “0%”,
but there is still ink in
the Tank.
Toolbox System Status is
displaying “Ink_Out_X”
(X = color or multiple)
System has calculated that 250 ml of
ink has been used from this Tank.
Note: To avoid problems that can be
caused by an Ink Channel running
out of ink; the Tank should be
flagged as “Out” or “0%” before it is
totally dry. Ink Tanks are overfilled
by a small percentage to compensate
for this stranded ink.
QA Chip on Tank may have been
corrupted; due to improper
removal/install.
To help improve Ink Level
estimation accuracy; make
sure the firmware is up-to-
date and try to minimize de-
priming/re-priming system.
Replace Ink Tank.
Please see section titled
“Replacing The Ink Tanks”.
Ink Level status is
displayed as “?”.
Toolbox System Status
is displaying
“Tank_Missing_X”
(X = color or multiple)
Poor connection between QA Chip
contacts and printer.
Un-authorized Ink Tank installed.
QA Chip on Tank may have been
corrupted; due to improper
removal/install.
Clean contacts. See section
titled “Cleaning Ink Tank
Contacts & Prism”.
Purchase/install Authorized
Tank.
Replace Ink Tank.
To avoid damaging
additional Ink Tanks, please
see section titled “Replacing
The Ink Tanks”.

SECTION 2
TROUBLESHOOTING
14
The ink used in this system may be harmful if swallowed.
Keep new and used printhead cartridges and ink tanks out of reach of children.
Discard unwanted printhead cartridges and empty ink tanks immediately.
The Printhead Cartridge
The Memjet printhead cartridge contains over 70,000 inkjet nozzles. These nozzles are divided into ten
rows; two rows of nozzles for each color channel. Due to the very tiny size of each nozzle and the high
number of nozzles; it is not uncommon for some nozzles to become contaminated or clogged.
CONDITION PROBLEM SOLUTION
Mixed, mottled, muddy or
distorted colors.
Ink color channel mixing within the
printhead cartridge/nozzles.
Over-saturated wiper roller.
Incompatible media.
Print Engine is not level.
Printer was not powered-down
properly. Printhead may not have
been cleaned or capped. Ink system
may not have been stabilized.
Refer to “Printhead Cartridge
Conditioning”. If problem
persists; refer to section titled
“Color Mixing Issues”.
Use inkjet suitable media
Make sure the Print Engine
is level.
Make sure to power-down
the printer using the ON/OFF
button, before shutting off
the Main Power Switch.
Thin, crisp vertical line(s) of
missing color. Clogged printhead nozzle(s).
Electrical failure or poor electrical
connection at printhead.
Clean the Printhead
Reseat the Printhead.
Replace the Printhead &
wiper roller.
Irregular or Jagged vertical
line(s) of missing color. Air in the system. Air bubbles
blocking nozzle(s). Refer to “Printhead Cartridge
Conditioning”.
Black scuff marks on media
or image smudging occurs. Media is making contact with the
printhead surface. Install the Head Media
Guide.
Run the media in a different
orientation; if possible.
Use media that is not bent,
bowed or buckled.
Blurry/Grainy Images
Partially clogged nozzle(s).
Incompatible media.
Low quality image being sent to
printer.
Damaged/scratched nozzle surface.
Clean the Printhead
Use inkjet suitable media.
Use high quality graphics
that are compatible with your
software program.
Replace the Printhead &
wiper roller.

SECTION 2
TROUBLESHOOTING
15
The Printhead Cartridge (continued)
CONDITION PROBLEM SOLUTION
System will not prime the
printhead after installing
Printhead Cartridge
(During the priming process
one or more of the ink color
tubes are not filling with ink.)
Printhead nozzles dry (air pulled
through nozzles; not allowing
system to create vacuum)
Capping station not making good
seal against the printhead.
Pinched/kinked ink tube(s)
Ink Tanks may not have enough ink
in them to prime system..
Ink Tank Issue
Improper configuration .
Toolbox displays …Low_Ink or
Ink_Out… message.
Toolbox displays Ink_Error
Printhead ink channel(s) are clogged
Toolbox displays Ink Valve Error.
Damaged Ink Coupling (revolver)
Wet the Printhead nozzles
using distilled water and a
wet, lint-free cloth.
Check for obstruction. Is the
Head Media Guide in the
way? Try removing it.
Check ink tubes. Is the
Forwarding Roller Guide
Plate pinching tubes?
Replace Ink Tank(s).
See Service Menu,
Commands Help “nvm_hw”
settings. Check to be sure
Wiper_motor = E and
Pump_motor = B.
Replace the Printhead.
Check/clean Sensor board on
Dual Pinch Valve.
Replace Ink Valve
Ink leaking from the
printhead nozzles Printer not level.
Excessive back-pressure within ink
system; caused by print engine being
powered-down when not in use.
Wicking material, inside capping
station, is making contact with the
printhead nozzles.
Opening in ink system; allowing
loss of vacuum.
Make sure the Print Engine
is level.
Allow print engine to remain
powered-up, when not in use,
so it can routinely cycle the
pinch valve to equalize back-
pressure in the system.
Replace the capping station
or the entire service station.
Install missing Ink Tanks.
Verify that Ink Tank Latches
are fully closed and locked.
Clean Ink Couplings.
Verify that Printhead Latch
is fully closed and locked.
Check for cut in ink line(s)
or damage Ink Revolver.
SECTION 2
TROUBLESHOOTING
16
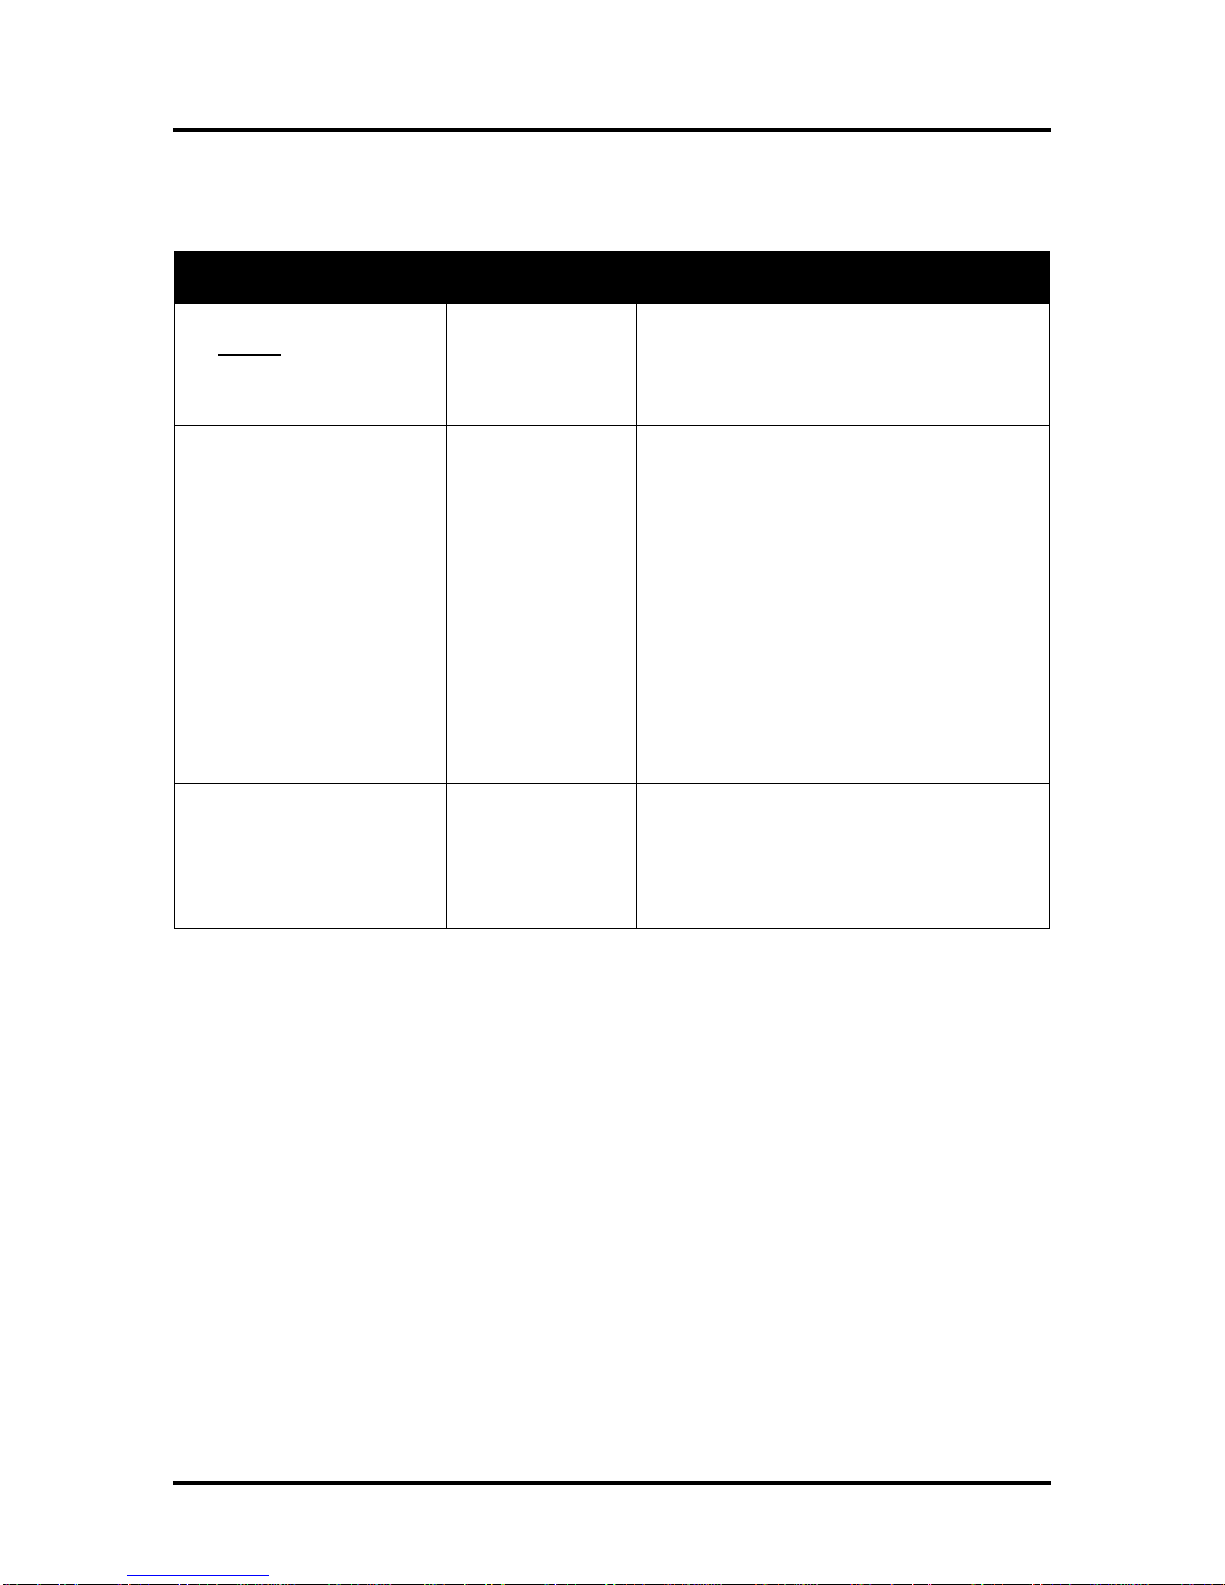
The Printer
NOTICE: The printer will not print if any of the five ink tanks are empty or missing.
Dots or Lines Printed on Media
CONDITION PROBLEM SOLUTION
Heavy, horizontal black lines
are printed down the length
of the media.
You have exceeded
the maximum print
width of 8.5”.
Reduce paper width to 8.5” to avoid exceeding
the max print width of printer.
NOTE: This symptom only occurs with older
firmware. Contact Tier 2 Support to update the
printer’s firmware.
A thick horizontal black line
is printed at or near the
trailing edge of the media.
Purge Bar is hitting
trailing edge of
media.
Media is hesitating
or skewing during
transport.
Hole in media is
passing over the
Paperpath Entry
sensor.
Media is oddly
shaped (running
media with open
flap at trailing edge).
To help keep nozzles from drying (clogging); all
nozzles of the printhead are purged, between
each page.
Check/adjust media feed setup.
Check for proper install of Forwarding Roller
Guide Assembly.
Check for obstruction within the Print Engine.
Rotate media and image so hole in media does
not travel over the Paperpath Sensors.
Adjust the “Purge Bar Position” value; located
in the User Interface Menu of the Toolbox.
Default = 3000. If you don’t see this feature in
the User Interface Menu; please contact Tier 2
support to update the printer’s firmware.
Use compatible media.
Very small dots (gray
overspray) are being printed
down length of media.
These dots are
formed by interpage
nozzle spitting.
Controlled by the
KWS (Keep Wet
System) setting.
Interpage (on the page) nozzle spitting is
normal. This feature is used to help keep nozzles
from drying/clogging.
With firmware version 110928_u and higher the
Toolbox provides a “KWS Setting” that can be
used to adjust the Level of spitting.

SECTION 2
TROUBLESHOOTING
17
Power (Power-Up) Problems
CONDITION PROBLEM SOLUTION
Main Power Switch is ON,
but the ON/OFF button does
not illuminate.
No power being
delivered to printer
or print engine not
powered-on.
Check that the power cord is plugged in.
Check that the wall power outlet is live.
Check that Main Power Switch is turned ON.
Press the ON/OFF button and wait 45 seconds.
ON/OFF button
pressed more than
once.
After pressing the ON/OFF button it takes about
45 seconds for the print engine to power-up and
the lights to illuminate.
Problem within
printer.
(ON/OFF Button,
Fuse, Receptacle,
Power Supply, Main
PCB)
Try powering-up engine using small red button,
located below power connection on Main PCB.
If it powers up then there is an issue with the
ON/OFF button.
Disconnect Power Cord and check Fuse in
Receptacle. Replace bad Fuse.
If Fuse is OK, reconnect power and check
output on Receptacle. Replace receptacle if bad.
If Receptacle is OK check input to Power
Supply. If Input to power supply is OK then
check Power Supply Output.
If output is bad, replace Power Supply.
If Power Supply is providing power (24VDC) to
Main PCB, replace Main PCB.
Wrong model
selection in Toolbox Check “set_model” in Toolbox, Service Menus,
Commands Help menu.
M1 = MACH 5. M2 = MACH 8.

SECTION 2
TROUBLESHOOTING
18
Service Station Problems
CONDITION PROBLEM SOLUTION
Service Station (SS) Drive
Motor stalls.
Service Station was not installed
properly.
Wiper roller securing latches are
not closed; preventing Service
Station sled from moving
properly.
Damaged Service Station
Jammed gear train due to broken
post or improperly seated gears.
Damaged Motor
Eject Service Station. Cycle print
engine off/on. If drive motor turns
without stalling then motor is OK.
Make sure SS is installed squarely.
Check for physical resistance to
movement.
Before re-installing Service
Station, make sure: wiper roller
latches are closed and not
damaged.
Replace Service Station.
Check for damaged gears/post.
Check/test motor. If power is
present but motor not running;
replace SS Drive Motor.
Wiper Motor doesn’t turn
or stalls
Cable not connected.
Squeegee blade wedged, not
seated properly.
Debris build-up on blade and
rollers, increasing friction.
Bad wiper roller motor
Verify ribbon cable and motor
cable are properly connected to
board on side of Service Station
and at back of SS slot.
Reseat squeegee blade.
Clean rollers and blade.
Replace Wiper Motor Assembly or
Service Station.
Color mixing occurs after
wiper roller performs a
cleaning
Wiper Roller is over-saturated.
Squeegee blade is not seated
properly, damaged or bowed.
Allow printer to sit, powered ON,
for 2-3 hours or replace wiper
roller.
Reseat wiper roller squeegee
blade. If squeegee blade is
damaged/bowed, replace
component or Service Station.
Service Station cannot be
removed from the Print
Engine
Wiper Roller Latches were not
completely closed when the
Station was installed. Latches
now hooked on bottom of paper
path.
Service Station was manually
installed too far with Lifting Arms
up.
Damaged Lifting Arms
Carefully unhook Latches from
bottom of paper path and secure
latches.
If wiper roller latches are
damaged; replace Wiper Motor
Assembly or Service Station.
This manual suits for next models
2
Table of contents
Other Memjet Printer manuals

Memjet
Memjet AFINIA LABEL L701 Series User manual

Memjet
Memjet AS-1180C User manual

Memjet
Memjet C6010 User manual

Memjet
Memjet AstroJet M1 User manual

Memjet
Memjet VIPColor VP750 User manual

Memjet
Memjet AstroJet M1 User manual

Memjet
Memjet OWN-X Speedstar 1000 Instruction manual

Memjet
Memjet MACH 5 User manual

Memjet
Memjet icube 1-3 Owner's manual

Memjet
Memjet SFP User manual


