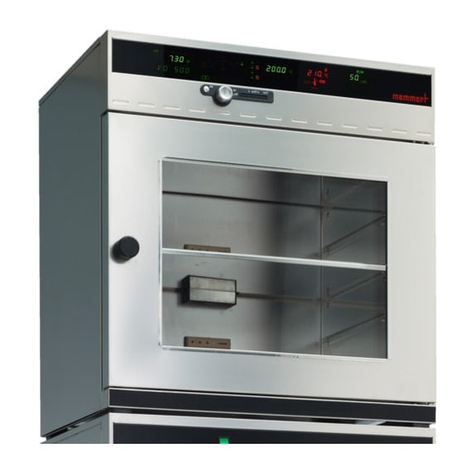
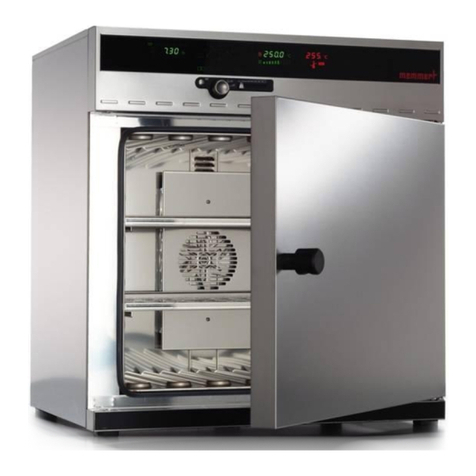
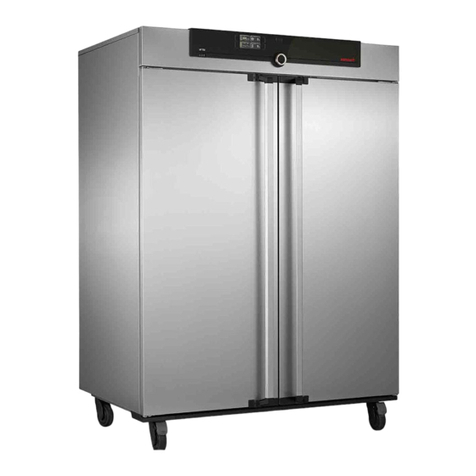
Memmert UE 800 User manual

OPERATING INSTRUCTIONS
Electronically controlled drying ovens
UE 200 - 800
ULE 400 – 800
Electronically controlled sterilisers
SE 200 - 400
SLE 400 – 800
Electronically controlled incubators
BE 200 – 800

set
°
Ctemp
hdelay
hho ld
0I
p
ower heat
freshair
0
1
2
3
4
5
6
alarmset
UE/BE 200-800, SE 200-400, ULE/SLE 400-800 1
TABLE OF CONTENTS
1Congratulations on your choice of a MEMMERT Oven!.........................................2
2The equipment of Memmert cabinets Series UE, BE, SE. ULE, SLE consists of:3
2.1 Electrical supply ..........................................................................................................4
2.2 Installation options (special equipment) ......................................................................5
2.3 Wall mounting (special equipment) ............................................................................5
2.4 Stacking device (special equipment) ...........................................................................6
3Putting into operation ...............................................................................................6
4Main switch module with fresh air control..............................................................7
5Working controller module.......................................................................................8
6Working controller module in main switch position I ............................................9
7The serial communication interface ......................................................................10
7.1 Communication protocol............................................................................................10
7.2 Computer connection ................................................................................................10
7.3 RS232C interface ......................................................................................................10
8Controller module with main switch in position ..............................................11
9Setting of continuous operation and programmes (offline operation)...............13
9.1 Programming of a switch-off delay ............................................................................13
9.2 Programming of a switch-off delay, dependent on set temperature ..........................13
9.3 Programming of a switch-on delay ............................................................................14
9.4 Programming of a switch-on delay and a hold time...................................................14
9.5 Switch-on delay and hold time dependent on set temperature..................................15
9.6 Programming of a switch-on delay and hold time with Loop-function........................15
9.7 Programming of a switch-on delay and hold time with Loop-function and set
temperature dependent operation .............................................................................16
10 Supervision of the program flow (offline operation) ............................................ 17
10.1 Further information during program operation: ..........................................................18
10.2 End of the program / Restart: ....................................................................................18
11 Safety devices .........................................................................................................19
11.1 Adjustable overheat controller (TWW), class 3.1 according to DIN 12880 ................19
11.2 Adjustable temperature limiter (TWB), class 2 according to DIN 12880....................20
12 Loading ....................................................................................................................21
13 Sterilisers.................................................................................................................22
13.1 Application.................................................................................................................22
13.2 Directives for sterilisation in MEMMERT- hot-air sterilisers.......................................22
13.3 Notes on the work with sterilising cassettes: .............................................................23
14 Sterilisation programme .........................................................................................24
14.1 Example – Steriliser SLE 600:...................................................................................24
15 Door interlock (option)............................................................................................ 25
16 Maintenance.............................................................................................................26
16.1 Readjusting the door .................................................................................................26
17 Cleaning ...................................................................................................................27
18 Check list for rectifying faults ................................................................................ 27
19 Our Address.............................................................................................................28
20 Index.........................................................................................................................32
21 Glossar:....................................................................................................................33
set
°
Ctemp
hdelay
hho ld
0I
p
ower heat
freshair
0
1
2
3
4
5
6
alarm s et
UE/BE 200-800, SE 200-400, ULE/SLE 400-800
2
The text of these Operating Instructions has been translated from the German. If
any part of the text is doubtful or the interpretation is unclear, and also in case of
errors, the German original is to be considered as valid.
1 Congratulations on your choice of a MEMMERT Oven!
Manufactured in Germany using the latest production techniques and finest materials
available, you now possess a technically superior and fully developed product. Your oven
has already been under extensive testing in our factory.
For correct operation of the equipment it is essential to observe the operating and
maintenance instructions below. This will ensure that your equipment will give many
years´ satisfactory service.
Explanation of symbols:
These symbols mark important indications in the operating instructions
The corresponding markings on the unit mean:
Note the Operating Instructions!
Attention, outside case temperature may be hot!
General safety instructions:
The physical and chemical properties of your load
(e.g. inflammation temp. etc.) have strictly to be observed, as
otherwise considerable damages (load, oven, surroundings of
apparatus) can appear.
Please note that the Memmert ovens described here are not
explosion-proof (they do not conform to Occupational Association
Regulation VBG 24). They are therefore unsuitable for drying,
evaporating or burning-in of enamels or similar substances whose
solvent may form an inflammable mixture together with air. There
must be no possibility for inflammable or explosive gas/air
mixtures to form either inside the cabinet or in the immediate
neighbourhood of the equipment.
Excessive dust or aggressive vapours in the interior and/or around
the oven may result in sediments within the oven and cause short
circuits or damage to the electronic parts. Therefore dust and
aggressive vapours should be kept from the unit.
Transport:
Always use gloves !
If the ovens have to be carried, at least 2 persons are required for this
mode of transportation depending on size for Models 200 to 500. At
least 4 persons are required for Models 600 and 700.
ATTENTION !
Take special care when oven is working at high temperature!
Outside case temperature may be hot!

set
°
Ctemp
hdelay
hho ld
0I
p
ower heat
freshair
0
1
2
3
4
5
6
alarmset
UE/BE 200-800, SE 200-400, ULE/SLE 400-800 3
2 The equipment of Memmert cabinets Series UE, BE, SE. ULE, SLE consists of:
electronic PID controllers with programmable start-up delay and hold time, set
temperature dependent operation and repeat function. The controller incorporates
permanent power matching and a time-saving self-diagnostic system for rapid fault
finding (see checklist)
a built-in timer for digital programme time selection up to 999 hours
RS232 interface according to DIN 12900-T1 for computer controlled and recorded
thermostating programmes with the MEMMERT software „CELSIUS for WINDOWS®“
(installation diskette and handbook)
The fan can be operated in two ways:
the fan can be switched on and off on the cabinet (in offline operation) or by the
programme
with PC control via the interface using the MEMMERT „CELSIUS for WINDOWS®“(online
operation) the fan speed can in addition be adjusted by the programme in 10% steps.
Technical data summary
A Pt 100 DIN A in 4-wire circuit measures the temperature in the working chamber.
The temperature-set-accuracy is 0,1ºC for BE types and 1ºC UE/SE and ULE/SLE types.
Ovens Series UE/SE/BE have natural air circulation.
Series ULE/SLE ovens have circulation assisted by a fan.
Ambient
conditions
Ambient temperature 5ºC - 40°C, rh max. 80%. Overvoltage Category II.
Contamination degree: 2 according to IEC 664
Setting tem-
perature range
20ºC to nominal temperature (See rating plate).
Min. working
temperature
range
A stable temperature control of ovens without fan resp. with fan
switched-off can be guaranteed from 5°C above ambient temperature.
When the fan of the models ULE / SLE is switched on, the working
temperature can be set from 10°C degrees above ambient up to the
nominal temperature = maximum temperature (according to rating
plate).
Max. working
temperature range
Nominal temperature = maximum temperature (see rating plate).
Overheat
safety device
Serial adjustable overheat control in compliance with DIN 12880 Class
3.1; Class 2 protection (adjustable temperature limiter) available on
request.
Class Aim of
protection
Scope of
protection
Safety
device
Safety
measures
2
No risk liable to
originate from the
oven in the event of
a fault
TWB
(adjustable temperaure limiter)
automatically shuts off the oven if
the user selected temperature
limit is exceeded.
3.1
Protection of the
oven, the
environment and
the
contents of the
oven
The contents of the
oven are protected
against overheating
TWW
(adjustable overheat controller)
takes over control of oven if
temperature is exceeded.
Special safety
measures required
depending on the
purpose for which the
oven is used

set
°
Ctemp
hdelay
hho ld
0I
p
ower heat
freshair
0
1
2
3
4
5
6
alarm s et
UE/BE 200-800, SE 200-400, ULE/SLE 400-800
4
2.1 Electrical supply
50 or 60 Hz. Adequate insulated supply which incorporates earth conductor according to
EN 61010, Protection IP 20, no humidity protection according to DIN 40 050. Interference
suppression Grade N according to VDE 0875, limiting values of the classe B, part one.
A fuse 250V/15A quick is used for unit protection (in units with 400V 3N~ power supply 3
fuses).
Before current-connection please compare label on the oven and instructions of
your local current supplier.
(e.g. in Germany, DIN VDE 0100 with FI - safety device).
model volume current
consum.
power voltage ±10% weight
UE/SE 200 32 l 4,8 A 1100 W 230 V~ 28 kg
UE/SE 300 39 l 5,2 A 1200 W 230 V~ 30 kg
UE/SE/ULE/SLE 400 53 l 6,1A 1400 W 230 V~ 35 kg
UE/ULE/SLE 500 108 l 8,7 A 2000 W 230 V~ 50 kg
UE/ULE/SLE 600 256 l 10,4 A 2400 W 230 V~ 87 kg
UE/ULE/SLE 700 416 l 5,8 A 4000 W 400 V 3N~ 121 kg
UE/ULE/SLE 800 749 l 7,0 A 4800 W 400 V 3N~ 164 kg
BE 200 32 l 1,9 A 440 W 230 V~ 28 kg
BE 300 39 l 2,2 A 500 W 230 V~ 30 kg
BE 400 53 l 3,5 A 800 W 230 V~ 35 kg
BE 500 108 l 3,9 A 900 W 230 V~ 50 kg
BE 600 256 l 7,0 A 1600 W 230 V~ 87 kg
BE 700 416 l 7,8 A 1800 W 230 V~ 121 kg
BE 800 749 l 8,7 A 2000 W 230 V~ 164 kg
This equipment is intended for operation on a supply system with a system impedance
Zmax at the transfer point (building connection) which does not exceed 0.12 Ohm. The user
has to ensure that the equipment is being operated on a supply system which meets this
requirement. If necessary, details of the system impedance can be obtained from the local
power supply authority.
Quality of material
Memmert is using stainless steel (Spec. 1.4301) for the external casing as well as
for the interior, an outstanding material because of its high stability, optimum
hygienic features and corrosion resistance against many (not all!) chemical
combinations (Attention e.g. at chlorine combinations!).
WARNING!
Before removing top cover – pull out plug !

set
°
Ctemp
hdelay
hho ld
0I
p
ower heat
freshair
0
1
2
3
4
5
6
alarmset
UE/BE 200-800, SE 200-400, ULE/SLE 400-800 5
2.2 Installation options (special equipment)
The cabinet can be set up on the floor or on a table
(bench), model 500 - 700 on a subframe. Ensure at least
150 mm clearance between back of oven and wall. The
distance between ceiling and oven should not be less than
200 mm and the minimum wall spacing to the sides is 80
mm.
Generally, a sufficient circulation of air around the unit is
required.
After the cabinet has been set up horizontally the door can
be adjusted if required (see chapter - MAINTENANCE).
The model 800 is movable. The front castors are lockable by means of a fixation. In order
to assure stability, the front castors must always be adjusted to the front side of the
oven for locking.
2.3 Wall mounting (special equipment)
Up to model 700 for all ovens metal mounting brackets
(see Fig. a) are available. A mounting bracket is delivered
with an incombustible plate. The dimensions of the fixing
screws are to be choosen depending on the total weight
(equipment and loading) of the charge and the quality of
the wall.
Pitches of holes for wall fixation (wall bracket)
A B C
model mm inch mm inch mm inch
200 489 19,25 770 30,32
300 569 22,40 770 30,32
400 489 19,25 850 33.47 - -
500 649 25,55 930 36,61 - -
600 889 35,00 1090 42,91 540 21,26
700 1129 44,45 1250 49,21 410 16,14
model 600
model 700
Do not place the steriliser on a readily inflammable support!

set
°
Ctemp
hdelay
hho ld
0I
p
ower heat
freshair
0
1
2
3
4
5
6
alarm s et
UE/BE 200-800, SE 200-400, ULE/SLE 400-800
6
2.4 Stacking device (special equipment)
Where the requirement is for two ovens of the same size to
be placed one on top of the other, the oven with the lower
working temperature should be placed on the bottom .
Mounting:
Remove the top of the bottom oven and turning it upside
down place the drilling jig into the back corner. Mark out
the hole position and drill a 4,2 mm diameter hole.
With the screws provided fix the centering cylinders into position. Re-fix top cover.
Model 700 can only be stacked with an intermediate frame.
3 Putting into operation
Attention !
Extremely strong shocks during transport can cause a displacement of
the temperature sensors in the holding clips inside the working space.
Take care before the first putting into operation that the temperature
sensors are checked on their correct position and if necessary are slided
cautiously backwards or forwards in the holding clip (see fig.).
Handling of the door
The door is opened by pulling the door knob, and is closed by pushing in the door knob.
Attention!
When the oven is started up for the first time it should be run under
supervision until steady conditions are reached.
ceiling of working
space
temperature sensor glass
temperature sensor metal
back panel of working space

set
°
Ctemp
hdelay
hho ld
0I
p
ower heat
freshair
0
1
2
3
4
5
6
alarmset
UE/BE 200-800, SE 200-400, ULE/SLE 400-800 7
4 Main switch module with fresh air control
The main switch module contains:
main switch to select the working mode
three signal lamps for display of the unit status
slide knob for fresh air control
power
0
alarm
I
power heat
fresh air
0
1
2
3
4
5
6
Main switch in position 0:
unit is shut down
Main switch in position I:
continuous operation
operation from PC with „CELSIUS fOR WINDOWS“
Main switch in position :
programmed operation (offline operation)
The previous setpoint is indicated briefly on the
Controller Display after switching on.
Green:
ready for operation
Red:
fault indicator
Yellow:
unit is heating
0
1
2
3
4
5
6
fresh air
Flap closed: virtually no through ventilation.
Intermediate positions: the air in the camber is renewed to a
limited extend.
Maximum fresh air ventilation, but no complete change of air
within the chamber (in units with an air turbine by max. rotation
speed).

set
°
Ctemp
hdelay
hho ld
0I
p
ower heat
freshair
0
1
2
3
4
5
6
alarm s et
UE/BE 200-800, SE 200-400, ULE/SLE 400-800
8
5 Working controller module
set
°C temp
hdelay
h hold
The controller is operated with the aid of the digital rotary
knob in conjunction with the set-button, as described in
the subsequent chapters.
The multifunction display provides information on
temperature and programme settings.
The functions for different settings of the main switch are
described below.
NOTES :
If the set-button is not operated, the controller display shows the actual temperature.
Changing the displayed setpoint is only possible, if the set-button is held down at the
same time. This helps to avoid unintentional changes.
Turning the rotary knob rapidly changes the setpoint in large steps; turning it slowly
changes the setpoint in single digits.
When the programming is finished the set values are stored, stay in the memory and
remain stored even if the cabinet is switched off.

set
°
Ctemp
hdelay
hho ld
0I
p
ower heat
freshair
0
1
2
3
4
5
6
alarmset
UE/BE 200-800, SE 200-400, ULE/SLE 400-800 9
6 Working controller module in main
switch position I
p
ower
0
alarm
I
p
ower heat
fresh air
0
1
2
3
4
5
6
°Ctemp
hdelay
h hold
°Ctemp
hdelay
h hold
°Ctemp
hdelay
h hold
°Ctemp
hdelay
h hold
set
°C temp
h delay
h hold
Rotation of the knob while pushing the set-button sets the required temperature. The
decimal point in the display is flashing.
After releasing the set-button the setpoint remains on the display for approx. 3 seconds
and is then stored. The decimal point in the display is flashing.
The decimal point stops flashing and the controller switches to display of the actual
temperature.
On cabinets with fan, the fan can be switched on to run continuously or switched off.
FA0
= fan continuously off -
FA.1
= fan continuously on.
The cabinets can be operated and programmed with the MEMMERT software
„CELSIUS for WINDOWS®”via the serial interface and using a PC In this operating mode
the fan speed can be adjusted in 10% steps on cabinets with fan.
Note !
If the cabinet is being operated from a PC via the serial interface and a thermostating
programme is started in the main programme window in the MEMMERT software
„CELSIUS for WINDOWS®“, the set parameters can only be viewed on the controller but
can no longer be altered.
On pushing the set-button the display
shows:
°Ctemp
hdelay
h hold ,°Ctemp
hdelay
h hold
For further information refer to the enclosed handbook „CELSIUS for WINDOWS®”

set
°
Ctemp
hdelay
hho ld
0I
p
ower heat
freshair
0
1
2
3
4
5
6
alarm s et
UE/BE 200-800, SE 200-400, ULE/SLE 400-800
10
7 The serial communication interface
7.1 Communication protocol
The communication protocol of the MEMMERT controllers has been defined in
accordance with the rules of the Standards Working Party for Measurement and Control in
the chemical industry (NAMUR).
7.2 Computer connection
9-pin
serial
back of oven
A serial interface located on the back panel of the
cabinet (see illustration) is provided to link your Type E
cabinet to the PC.
The cabinet can be connected to the PC using a
commercially-available standard connecting cable (3
m). It is important to use a shielded cable. The shield
must be connected to the plug case.
If the serial interface is not used, the connector must
be covered with the protection cap.
7.3 RS232C interface
The cabinet E is equipped as standard with a serial interface RS232C. Using this interface
it is possible to operate the cabinet from a PC. This is done with the software program
„CELSIUS for WINDOWS®“.
If several cabinets are connected to a PC via the RS232C interface, a suitable interface
on the PC and a separate cable are required for each cabinet.
The normal cable length is 15 m.
Example: Three cabinets are connected to one PC via RS232C.

set
°
Ctemp
hdelay
hho ld
0I
p
ower heat
freshair
0
1
2
3
4
5
6
alarmset
UE/BE 200-800, SE 200-400, ULE/SLE 400-800 11
8 Controller module with main switch in position
With the main switch in position it is possible to set programme sequences such as -
delayed switch-on delay delayed switch-off/hold time hold repeat function LP..., set
temperature dependent operation SP... (see examples) and on cabinets with fan the status
of the fan FA... .
Menu item
main switch in
position
p
owe
r
0
alarm
I
p
owe
r
heat
fresh air
0
1
2
3
4
5
6
°Ctemp
hdelay
h hold
°Ctemp
hdelay
h hold
°Ctemp
hdelay
h hold
°Ctemp
hdelay
h hold
°Ctemp
hdelay
h hold
°Ctemp
hdelay
h hold
°Ctemp
hdelay
h hold
°Ctemp
hdelay
h hold
°Ctemp
hdelay
h hold
°Ctemp
hdelay
h hold
°Ctemp
hdelay
h hold
°Ctemp
hdelay
h hold
set
°C temp
h delay
h hold
set-button rotary knob
Effect of turning the rotary knob:
= turn rotary knob clockwise.
= turn rotary knob anti-clockwise.
Set-button not
actuated
Set-button
actuated:
Selection of the
menue item
temp
delay
hold
LP
SP
and additionally
on cabinets with
fan
FA
press:
setpoint is
displayed
(temperature or
time, decimal
point is flashing).
hold down:
displayed value
can be changed
with the rotary
knob.
release:
value is stored in
memory

set
°
Ctemp
hdelay
hho ld
0I
p
ower heat
freshair
0
1
2
3
4
5
6
alarm s et
UE/BE 200-800, SE 200-400, ULE/SLE 400-800
12
°Ctemp
hdelay
h hold
The menu item temp is used for setting the desired temperature
°Ctemp
hdelay
h hold
°Ctemp
hdelay
h hold
delay is used for setting the switch-on delay.
From 1 minute to 9 hours 59 minutes the smallest setting step is 1
minute; from 10 to 999 hours the step is 1 hour.
hold is used to set the switch-off delay or hold time.
From 1 minute to 9 hours 59 minutes the smallest setting step is 1
minute; from 10 to 999 hours the step is 1 hour.
The repeat function LOOP ensures that a set programme sequence is repeated
continuously.
LP.0
= loop function de-activated -
LP.1
= loop function activated
A setting of the hold time hold in conjunction with the function SP ensures that on
reaching the set temperature this is held for the required time.
SP.0
= set temperature dependent hold time de-activated
SP.1
= set temperature dependent hold time activated
On cabinets with fan it is possible to switch the fan to be continuously off or on,
depending on the programme.
FA0
= fan continuously off -
FA.1
= fan continuously on.
If a programme with switch-on delay has been programmed, the fan only switches on
when the delay time has elapsed and the cabinet starts to heat up.
When the set hold time has elapsed, the fan continues to run for 30 minutes during the
cooling-down phase and is then switched off.

set
°
Ctemp
hdelay
hho ld
0I
p
ower heat
freshair
0
1
2
3
4
5
6
alarmset
UE/BE 200-800, SE 200-400, ULE/SLE 400-800 13
9 Setting of continuous operation and programmes (offline operation)
9.1 Programming of a switch-off delay
Example:
The cabinet has to shut down the heating
after 2 hours operation (including heat-up
time) with temperature setting at 150°C.
The fan should not run.
9.2 Programming of a switch-off
delay, dependent on set
temperature
Example:
The cabinet has to shut down the heating
2 hours after it has reached ist set
temperature of 150ºC.
The fan should run continuously.
p
ower
0
alarm
I
power heat
fresh air
0
1
2
3
4
5
6
ϑ
150°C
t
hold 2h
p
ower
0
alarm
I
power heat
fresh air
0
1
2
3
4
5
6
ϑ
150°C
t
hold 2h
30
min
Lt ein
°Ctemp
hdelay
h hold
°Ctemp
hdelay
h hold
°Ctemp
hdelay
h hold
°Ctemp
hdelay
h hold
°Ctemp
hdelay
h hold
°Ctemp
hdelay
h hold
°C temp
hdelay
h hold
°C temp
hdelay
h hold
°Ctemp
hdelay
h hold
°Ctemp
hdelay
h hold
°Ctemp
hdelay
h hold
°Ctemp
hdelay
h hold
°Ctemp
hdelay
h hold
°C temp
hdelay
h hold
°Ctemp
hdelay
h hold
°C temp
hdelay
h hold
°Ctemp
hdelay
h hold
°Ctemp
hdelay
h hold
°Ctemp
hdelay
h hold
°Ctemp
hdelay
h hold
FA..
only indicated on cabinets with fan.

set
°
Ctemp
hdelay
hho ld
0I
p
ower heat
freshair
0
1
2
3
4
5
6
alarm s et
UE/BE 200-800, SE 200-400, ULE/SLE 400-800
14
9.3 Programming of a switch-on delay
Example:
The cabinet has to start heating to 150ºC
after a 2 hour delay.
The fan should be switched on.
9.4 Programming of a switch-on delay
and a hold time
Example:
The cabinet has to start heating to 150°C
after a 2 hour delay and shut down after 3
hours operation (including heat-up time).
The fan should be switched off.
p
ower
0
alarm
I
power heat
fresh air
0
1
2
3
4
5
6
ϑ
150°C
t
delay 2h
LT ein
p
ower
0
alarm
I
power heat
fresh air
0
1
2
3
4
5
6
ϑ
150°C
t
delay 2h
hold 3h
°C temp
hdelay
h hold
°C temp
hdelay
h hold
°C temp
hdelay
h hold
°C temp
hdelay
h hold
°C temp
hdelay
h hold
°Ctemp
hdelay
h hold
°C temp
hdelay
h hold
°Ctemp
hdelay
h hold
°Ctemp
hdelay
h hold
°Ctemp
hdelay
h hold
°Ctemp
hdelay
h hold
°Ctemp
hdelay
h hold
°C temp
hdelay
h hold
°C temp
hdelay
h hold
°C temp
hdelay
h hold
°C temp
hdelay
h hold
°Ctemp
hdelay
h hold
°Ctemp
hdelay
h hold
°Ctemp
hdelay
h hold
FA..
only indicated on cabinets with fan.

set
°
Ctemp
hdelay
hho ld
0I
p
ower heat
freshair
0
1
2
3
4
5
6
alarmset
UE/BE 200-800, SE 200-400, ULE/SLE 400-800 15
9.5 Switch-on delay and hold time
dependent on set temperature
Example:
The cabinet has to start heating to 150°C
after a 2 hour delay and shut down after 3
hours of operation at the set temperature.
The fan should not run.
9.6 Programming of a switch-on delay
and hold time with Loop-function
Example:
The cabinet has to start heating to 150°C
after a 2 hour delay, cool down to room
temperature after 3 hours of operation
(including heat-up time) and repeat this
pattern over and over.
The fan should run continuously.
p
ower
0
alarm
I
power heat
fresh air
0
1
2
3
4
5
6
ϑ
150°C
t
delay 2h
hold 3h
p
ower
0
alarm
I
power heat
fresh air
0
1
2
3
4
5
6
ϑ
150°C
t
dela
y
2h
hold 3h
Lt ein
°C temp
hdelay
h hold
°C temp
hdelay
h hold
°C temp
hdelay
h hold
°C temp
hdelay
h hold
°C temp
hdelay
h hold
°Ctemp
hdelay
h hold
°C temp
hdelay
h hold
°Ctemp
hdelay
h hold
°Ctemp
hdelay
h hold
°Ctemp
hdelay
h hold
°Ctemp
hdelay
h hold
°Ctemp
hdelay
h hold
°C temp
hdelay
h hold
°C temp
hdelay
h hold
°Ctemp
hdelay
h hold
°C temp
hdelay
h hold
°Ctemp
hdelay
h hold
°C temp
hdelay
h hold
°Ctemp
hdelay
h hold
°Ctemp
hdelay
h hold
°Ctemp
hdelay
h hold
FA..
only indicated on cabinets with fan.

set
°
Ctemp
hdelay
hho ld
0I
p
ower heat
freshair
0
1
2
3
4
5
6
alarm s et
UE/BE 200-800, SE 200-400, ULE/SLE 400-800
16
9.7 Programming of a switch-on delay and hold time with Loop-function and set
temperature dependent operation
Example:
The cabinet has to start heating to 150°C after a 2 hour delay and shut down after 3 hours
operation at the set temperature, cool down to room temperature and repeat this pattern
over and over.
The fan should run continuously.
power
0
alarm
I
power heat
fresh air
0
1
2
3
4
5
6
ϑ
150°C
delay 2h
hold 3h
t
Lt ein
30 Minuten
°C temp
hdelay
h hold
°C temp
hdelay
h hold
°C temp
hdelay
h hold
°Ctemp
hdelay
h hold
°Ctemp
hdelay
h hold
°Ctemp
hdelay
h hold
°C temp
hdelay
h hold
°Ctemp
hdelay
h hold
°C temp
hdelay
h hold
°Ctemp
hdelay
h hold
°Ctemp
hdelay
h hold
°Ctemp
hdelay
h hold
FA..
only indicated on cabinets with fan.

set
°
Ctemp
hdelay
hho ld
0I
p
ower heat
freshair
0
1
2
3
4
5
6
alarmset
UE/BE 200-800, SE 200-400, ULE/SLE 400-800 17
10 Supervision of the program flow (offline operation)
The status-LEDs in the controller display give information about the program status at a
glance.
Example: Delayed switch-on and delayed switch-off with set temperature dependent
operation as described in example 9.5
hold
dela
y
t
150°C
ϑ
Oven is not heating
°Ctemp
hdelay
h hold
on
actual temperature is displayed
flashing
on-delay timer is running
on
hold timer is programmed
hold
delay t
150°C
ϑ
Oven is heating up to
setpoint
°Ctemp
hdelay
h hold
on
actual temperature is displayed
off
on-delay timer ran down
on
hold timer is programmed
hold
delay t
150°C
ϑ
Oven holds temperature at
set value
°Ctemp
hdelay
h hold
on
actual temperature is displayed
off:
on-delay timer ran down
flashing
hold timer is running

set
°
Ctemp
hdelay
hho ld
0I
p
ower heat
freshair
0
1
2
3
4
5
6
alarm s et
UE/BE 200-800, SE 200-400, ULE/SLE 400-800
18
hold
delay t
150°C
ϑ
heating is switched off
°Ctemp
hdelay
h hold
on
actual temperature is displayed
alternating with "End"
off
delay timer ran down
off
hold timer ran down
10.1 Further information during program operation:
°Ctemp
hdelay
h hold
All actual values can be accessed by turning
the rotary knob (selection of the menu items)
even through program operation.
°Ctemp
hdelay
h hold
The setpoint of each menu item can be
checked by pressing the set-button briefly.
set
10.2 End of the program / Restart:
°Ctemp
hdelay
h hold
A
fter the end of the program the actual temperature is
shown alternating with "End" in the display of the working
controller module. Restart by switching the unit off and on
or by checking or changing the timer settings.

set
°
Ctemp
hdelay
hho ld
0I
p
ower heat
freshair
0
1
2
3
4
5
6
alarmset
UE/BE 200-800, SE 200-400, ULE/SLE 400-800 19
11 Safety devices
Adjustable overheat controller (TWW), class 3.1 and adjustable temperature limiter
(TWB), class 2, work independently of the temperature control system according to
DIN 12880. By different adjustments, those safety devices can have two different
functions:
Protection of cabinet and environment and
Protection of the load from excessive temperature
The safety devices should be checked at regular intervals, e.g. once a month, once the
oven has stabilized at the desired temperature. To perform this safety check, reduce the
setting of the safety device until the red control light at the main switch module turns on.
After that, the safety device can be set again.
ϑ
t
Notice:
During programmed operation the
safety device has to be set
sufficiently higher than the maximum
working temperature or at the
maximum temperature of the oven.
11.1 Adjustable overheat controller (TWW), class 3.1 according to DIN 12880
alarm set
Protection of cabinet and environment:
Turn the adjustable overheat controller e.g. by
use of a coin to upper temperature limit.
Protection of load:
First turn adjustable overheat controller to uppe
r
limit.
After the cabinet has stabilized, the setting of the
overheat controller should be moved down until
it operates.
The red signal lamp in the main
switch module turns on.
power
0
alarm
I
power heat
fresh air
0
1
2
3
4
5
6
Upper
temperature
limit:
Protection of
unit and
environment
Set close to
the switching
point:
Protection of
the load
Now turn back the overheat controller to nearly
one digit higher.
Maximum temperature rating of
unit
70°C 220°C 300°C
one scale line means approx. 5°C 15°C 20°C
safet
y
tem
p
erature
working
temperature
This manual suits for next models
23
Table of contents
Other Memmert Oven manuals

Memmert
Memmert BASIC Operating instructions

Memmert
Memmert SN Series User manual

Memmert
Memmert UN PLUS Series User manual

Memmert
Memmert UN User manual

Memmert
Memmert SE 200 User manual

Memmert
Memmert UFTS User manual

Memmert
Memmert UNE 200 User manual

Memmert
Memmert UF450plus User manual

Memmert
Memmert UE 200 User manual

Memmert
Memmert UN PLUS User manual
Popular Oven manuals by other brands

Siemens
Siemens HB213AB 0 Series User manual and installation instructions

Fulgor Milano
Fulgor Milano F7SP24S1 Use & care manual

Grundig
Grundig GEBD19300DX user manual

Siemens
Siemens HB772G1 1 Series User manual and installation instructions

Zanussi
Zanussi ZOD35712B user manual

Bosch
Bosch HBC86P753B instruction manual