IMPORTANT CARE AND CLEANING INSTRUCTIONS
Memphis Shades Windshields and Lowers are made of
Lucite® acrylic, and will last for years with proper care.
Clean your windshield with plenty of soapy water — mild
dishwashing liquid is best — and a soft cotton cloth. Use your
bare hand to feel and dislodge bugs, or cover with a wet soapy
towel and let it soak. Don't use paper towels and don't scrape
with anything. Small scratches can be removed with NOVUS
# 2.
NEVER use any glass cleaning products, petroleum based
chemicals, or cleaning agents with ammonia, bleach or any
other harsh chemicals. This includes (but not limited to)
RainX, brake fluid, acetone, paint thinner, benzene and
gasoline. "If it hurts your nose, it will hurt the plastic."
Glass cleansing agents will cause severe damage
to your windshield, and will void your warranty.
NOTE: At certain times of the day the Sunlight can reflect
off the curvature of a windshield and cause extreme heat
build-up on motorcycle instruments and instrument panel.
Take care when parking. Park facing the sun, place an opaque
object over the instruments or adjust the windshield to avoid
reflections.
2321-0060 SPORTSHIELD MOUNTING KIT
HONDA VT 1100 SABRE/VT 750 ACE DLX
MOUNTING INSTRUCTIONS
4. (Continued) Now insert the Allen Screw into the Socket
Shoulder washer, insert them into the upper bracket then into
the lower bracket. Now install and loosely tighten the slot nut
to join the upper and lower bracket. (see figure 2, the head-
light is not shown for clarification.) Tighten these bolts after
the windshield has been installed. Repeat step 4 on the
clutch side.
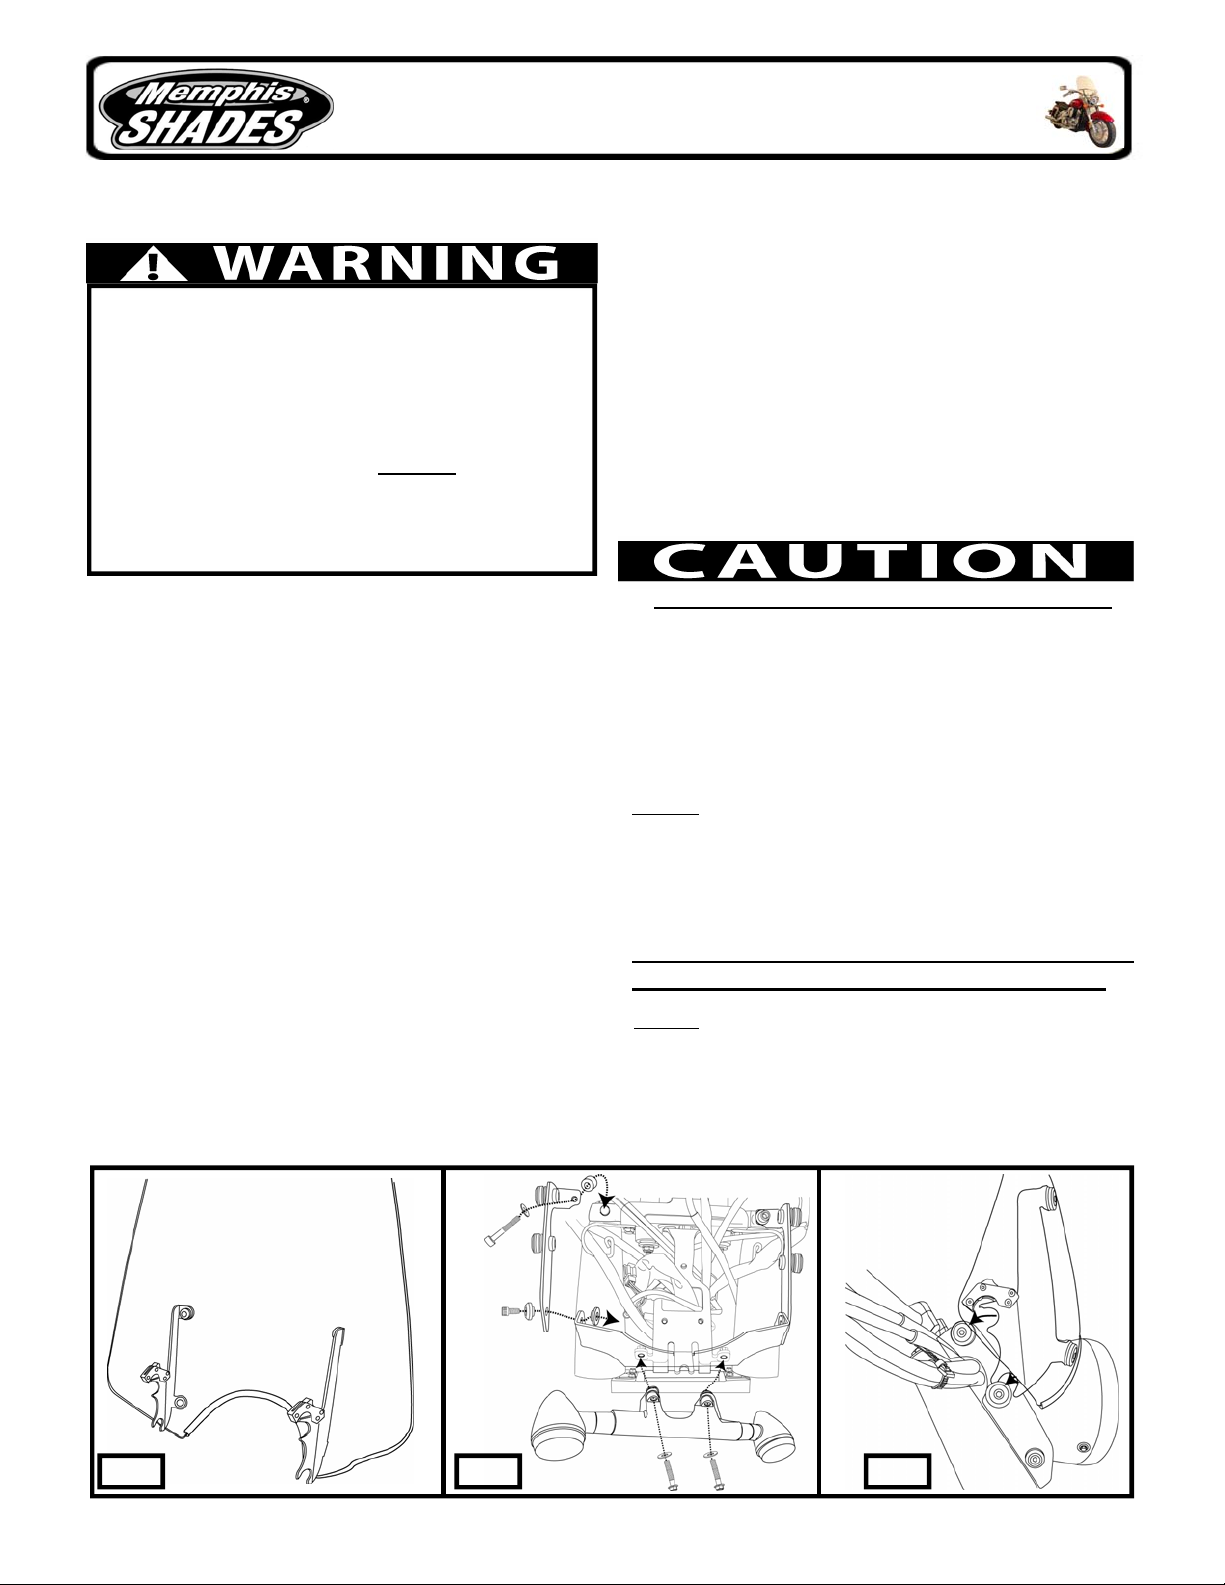
5. Slip the windshield mounting plates and windshield onto
the upper and lower bushing assemblies, (see figure 3) and
secure the left and right side locking mechanism.
6. Adjust the height, angle and alignment of the windshield
and tighten ALL bolts.
Fig. 1 Fig. 2
Headlight not
shown for
clarification.
Read and follow these directions carefully.
During installation, make sure that the windshield and hard-
ware do not interfere with any cables or wiring when the forks
are turned all the way in either direction. Also make sure,
through the full range of adjustment, that the windshield and
hardware do not hit the tank.
This is a detachable windshield, ALWAYS make sure the
Locking Mechanism is Fully Engaged after installing the
windshield!
The improper installation of this kit and related compo-
nents could result in serious injury or death.
Additional tools required that are not included in this kit.
7/16" or 11mm, 8mm Wrench, or 1/4 sockets and ratchet.
1.Cover gas tank and front fender with towels to avoid
damage during installation.
2. Install the two mounting plates onto the windshield, using
the bolts that are pre-assembled on the mounting plates. The
Santoprene Grommets should be inserted through the holes in
the windshield so that the flat round part of the Grommet lies
flat on each side of the windshield. Tabs point in towards the
headlight. (See Figure 1)
3. Remove the Allen Screw, Socket Shoulder Washer and slot
nut from both sides of the lower bracket. Set them off to the
side, they will be used later to join the upper bracket to the
lower bracket. Using an 8mm wrench, remove the two bolts
that hold the turn signal bar in place, slip the lower windshield
mounting bracket behind the turn signal bar (see figure 2, the
headlight is not shown for clarification.) and re-install the
bolts. The tabs on the lower windshield bracket should be
turned up and facing towards the forks.
4. Using the 6mm Allen wrench provided, remove the original
upper triple tree pinch bolt on the throttle side. Install the L-
shaped upper bracket assembly and loosely tighten it, use the
new longer bolts with spacers that are provided. (Continued)
MEM8924 11-08-07
Fig. 3


